The calendar says that it is almost the season or renewal and rebirth; spring. I just wish I could have seen a winter first, I think it skipped California again this year, however it still is a perfect time to welcome the bright colors, fresh ideas and clean lines. The Spring 2015 issue of Interweave Crochet highlights these; Okay I am a little biased, I have a design in this current issue. This is the first time I have had a design grace the pages of this publication, and it is a design I am a little amazed at how great it is.
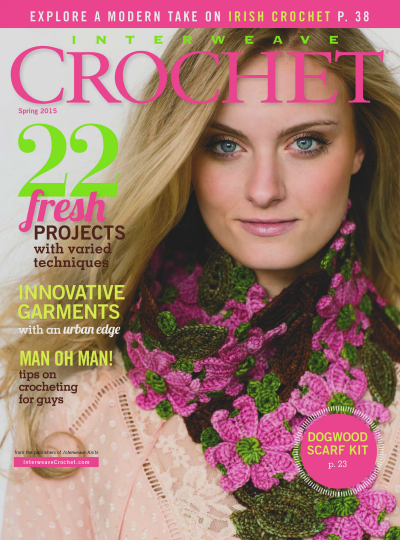
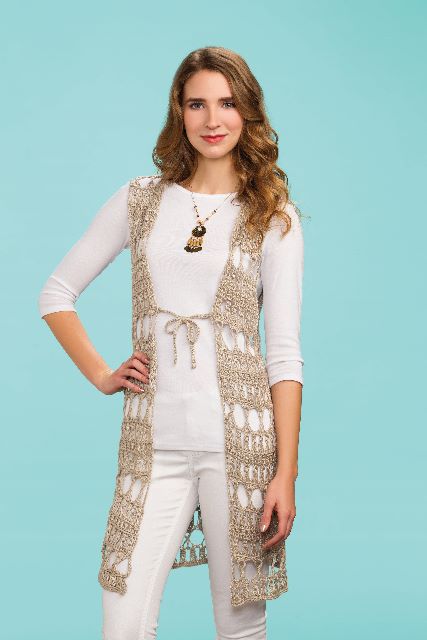
I used some different techniques in the Swirl Skirt, and they came together in a wondrous harmony. For one thing it utilizes an invisible increase, created by increases that seem almost random, but the locations are actually strategically placed to ensure a great curve over the hips while still ensuring a smooth drape to the fabric. The increases are not worked in the same stitch as ones worked in the pattern repeat, but in other parts of the stitch so that it does not create a large gather of stitches.
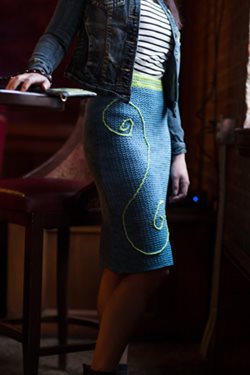
Swirl Skirt Photo courtesy of Interweave Crochet/ Harper Point Photography
The most noticeable element of this skirt is the doodle on the thigh. When taking notes or writing I often make scrolling doodles on a paper, and the inspiration for this skirt is no different. It actually was a sketch I was doodling while on the telephone and my hand simplified other scrolls down to this simple swirl. I feel it adds a little something extra while also lengthening the appearance of the leg. It is created by crocheting into chain spaces that are placed in the pattern of the skirt, making an easy to locate stitch location, as well as not having to crochet around parts of a stitch, but directly into a chain space.
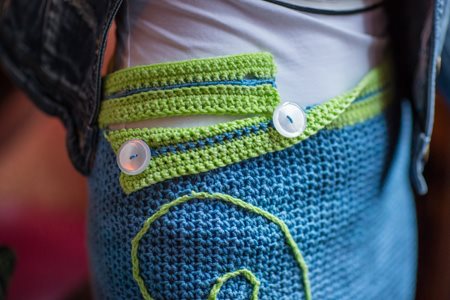
Dual Button Closure Photo courtesy of Interweave Crochet/Harper Point Photography
I was really please with how the closure worked for this skirt. The waistband has a dual button closure located on the inside of the band, resulting in a clean finish appearance. It also makes it rather easy to custom fit, as you can move the button location to receive the best fit. I also feel that the two-tone color contrast of the band brings a highlight to a slimming waist appearance.
Now I just have to create one for myself, and I’ll be all set for a night off my mountain and on the town.