Help me help local communities by creating blocks for Warm Up America, by making a block for yourself and one for a community project with this free pattern. I will be creating a new block every two weeks and sharing it with you, I just ask that make one for donation.
Warm Up America is a nation wide organization that encourages local donations, but will also except donations to be sent to their office so that blocks can be assembled and then blankets can be donated through the United States.
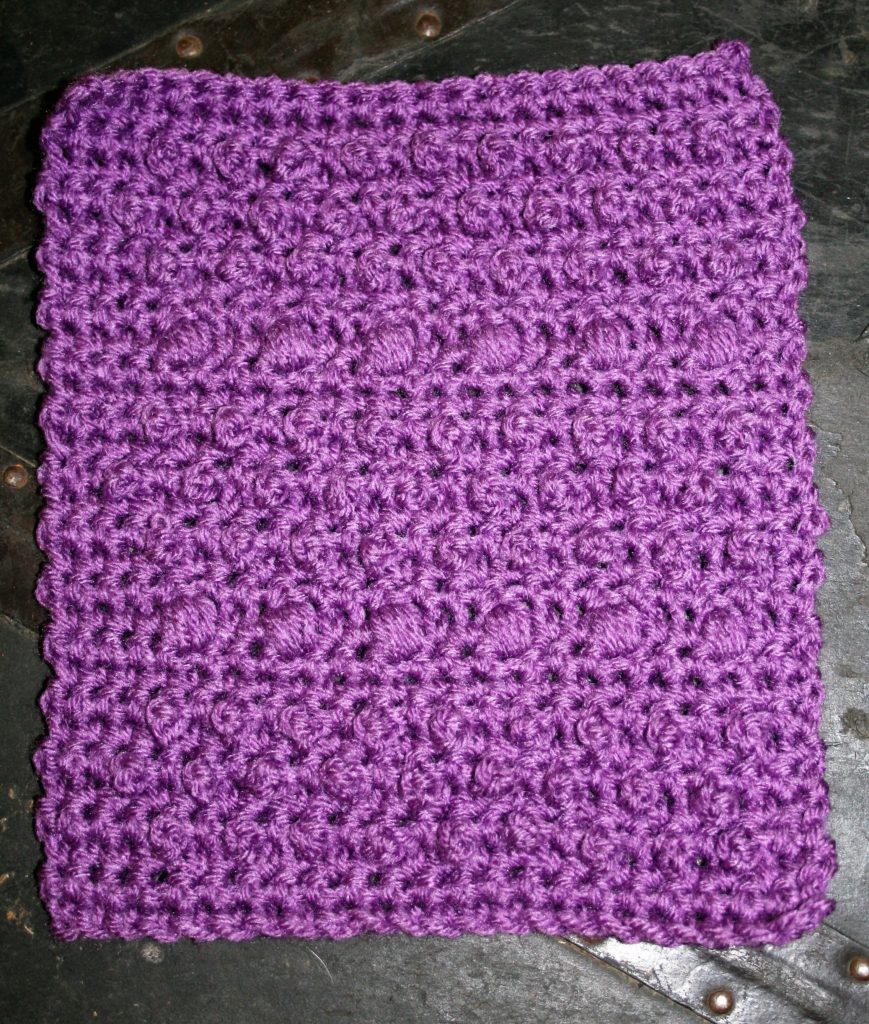
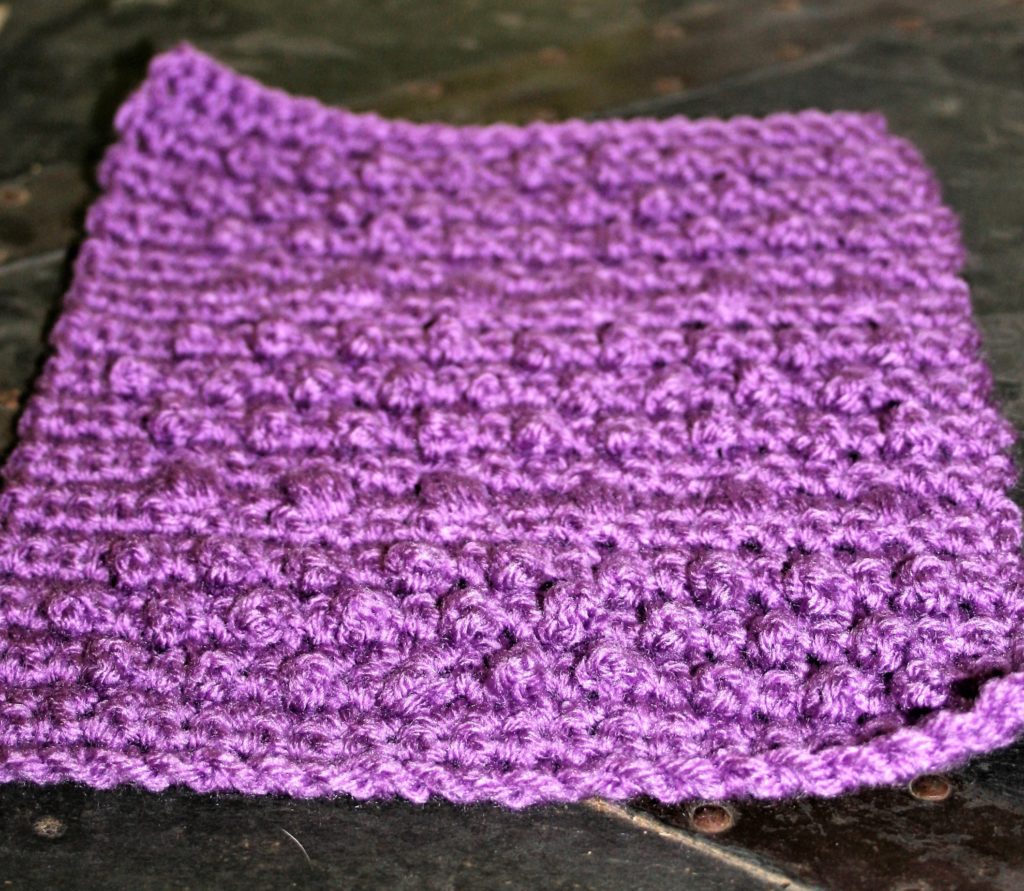
Berries and Bobbles Block
Even is you do not want to participate with Warm Up America, please consider creating blocks, or blankets for your local community. There are various places in every community that accept donations.
Berries and Bobbles Block
This block features some texture, by utilizing chain loops that create little “bumps” or “berries” while it is broken up by strips of bobbles.
Gauge: Square measures 7”x 9”
Materials
Medium weigh yarn
J/10/6.00mm crochet hook
Special Stitches
Bobble: [Yo, insert hook in stitch, yo, pull through a loop] rep 4 times, yo, pull through 8 loops.
Block Pattern
Ch 23
Row 1: Sc in second ch from hook, sc in each ch across, turn. -22sc
Row 2: Ch 1, sc in same st, sc in each st across, turn.
Row 3: Ch 1, sc in same st, sc in next st, [ch 3, sc in next 2 sts] 9 times, sc in last 2 sts, turn. -9 ch-3 loops
Row 4: Ch 1, sc in same st, sc in each sc across, pushing ch-3 loops to the back side of work, turn.
Row 5: Ch 1, sc in same st, sc in next 2 sts, [ch 3, sc in next 2 scs] 9 times, sc in last st, turn. -9 ch-3 loops
Row 6: Rep Row 4.
Rows 7-8: Rep Rows 3-4.
Row 9: Ch 1, sc in same st, sc in each st across.
Row 10: Ch 1, sc in same st, sc in next st, [Bobble in next st, ch 1, sc in next 2 sts] 6 times, sc in last 2 sts, turn. -6 bobbles
Row 11: Ch 1, sc in same st, sc in each sc and bobble skipping ch sts, turn. -23 sc
Row 12: Ch 1, sc in same st, sc in each st across, turn.
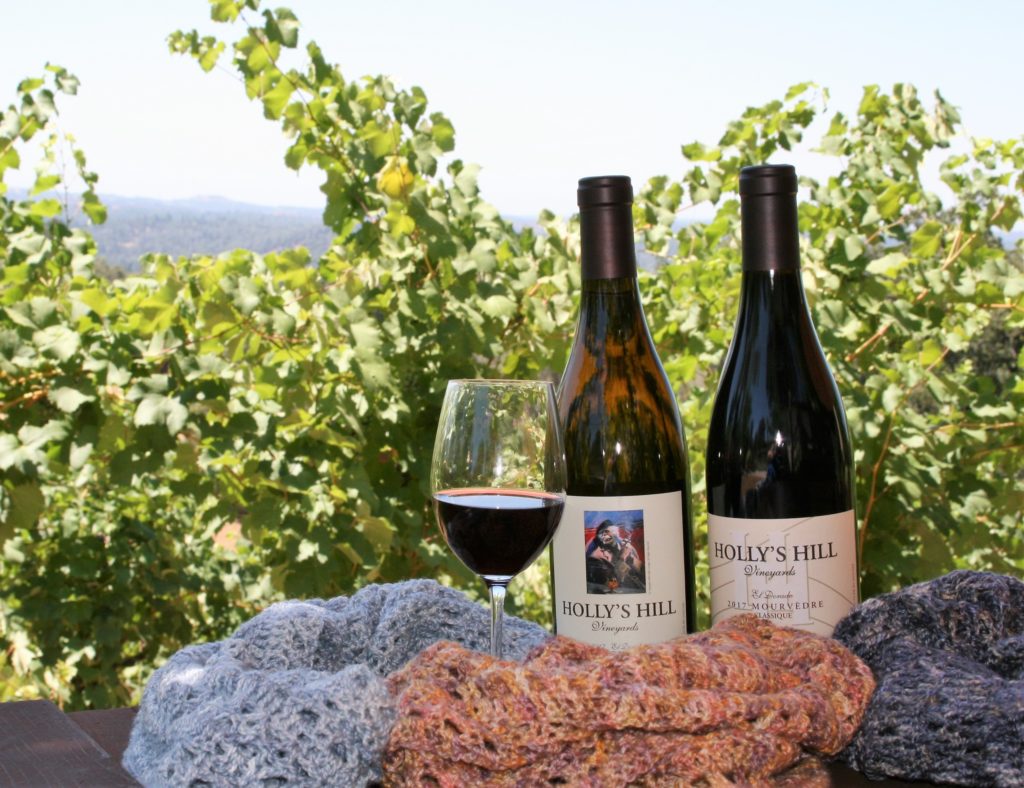
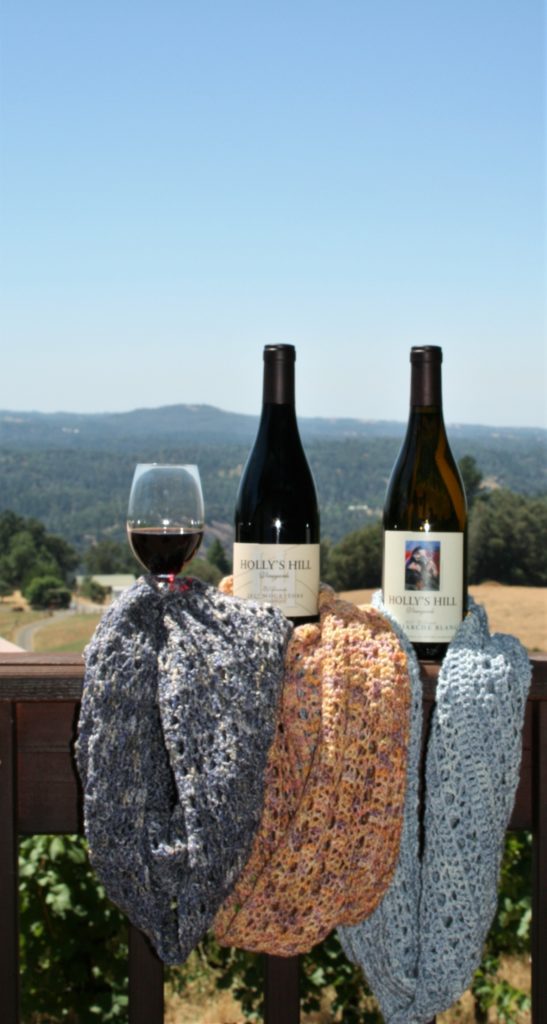
Crochet with Linda at the Winery, a new adventure. Just when I think life should be settling into a rhythm, a new idea spices things up! I have spent the beginning of 2019 traveling and teaching, and just as I set my schedule for teaching at my local yarn store I add in something new….retreats!
I am offering the first of several retreats Thursday, August 29, 2019 from 10:30-4, just south of Placerville, CA.
Crochet with Linda at the Winery, featuring Holly’s Hill Winery and Lisa Souza Dyeworks Yarn
I have been imagining these retreat events for quite a while now. An event that engages skill building with inspiration, in a great setting, with great materials. And maybe doing something that you have always meant to do. This one in just a few weeks, definitely fits that build!
The Skills and Project
Sometimes gaining skills at a Beginner, Intermediate and Advanced levels can be a challenge. This unique design and pattern has been created to do allow skills to be built and advance your skill. The same stitch pattern utilizes three different ways to create a cowl. Beginning level works the cowl flat, while intermediate works in the round, and still advanced works in the round moebius from center out. The cowls are wide enough to be hooded, and with just enough lace work to allow this cowl to be worn in many seasons.
The Location
A family owned and operated winery, in a beautiful setting. Holly’s Hill overlooks the north fork of the Consumnes River Valley, and features French style Rhone Wines. The Co-Winemakers, the husband and wife team of Josh and Carrie Bendick, have a hand in every aspect of the process. They use old fashion techniques to create these Rhone-style wines. We are fortunate enough to have an exclusive tour of the winery. While learning about the wine making process from the experts. In addition you will get to sample a variety of wines in a tasting, while relaxing and enjoying the beautiful view.
The Materials
We will let a fingering weight superwash merino and bamboo yarn flow through our fingers. Lisa SouzaTimaru Sport is a luscious yarn that has a coolness to the touch and a beautiful shimmer. Three hand dyed colors available to choose from, a warm, neutral and cool color, which offers a bit of something for everyone. Lisa is known for her gorgeous colorways of yarn, and these will not disappoint. Hooks will be provided (beautifully turned wood), but if you have a preferred hook in your set, please feel free to bring your size G/6/4.00mm.
Enjoy the view, the wine and definitely the crochet!
Enjoy gourmet box lunch, also included. No pepperoni pizza here. There are menus are being worked up with locally renowned restaurants to provide a day that allows everyone to feel pampered and valued.
Some say it is too hot to crochet, but I have always found
the summer months my most productive time of year. I should preface that I do
not have any air conditioning. I know that some might see this and think that I
must be in some Nordic part of the world, and while I live in a climate that
affords me cool nights and hot days, my summer temperatures can easily find a
month of temperatures over 100° Fahrenheit (38° Celsius). So, let me share
some of my tips.
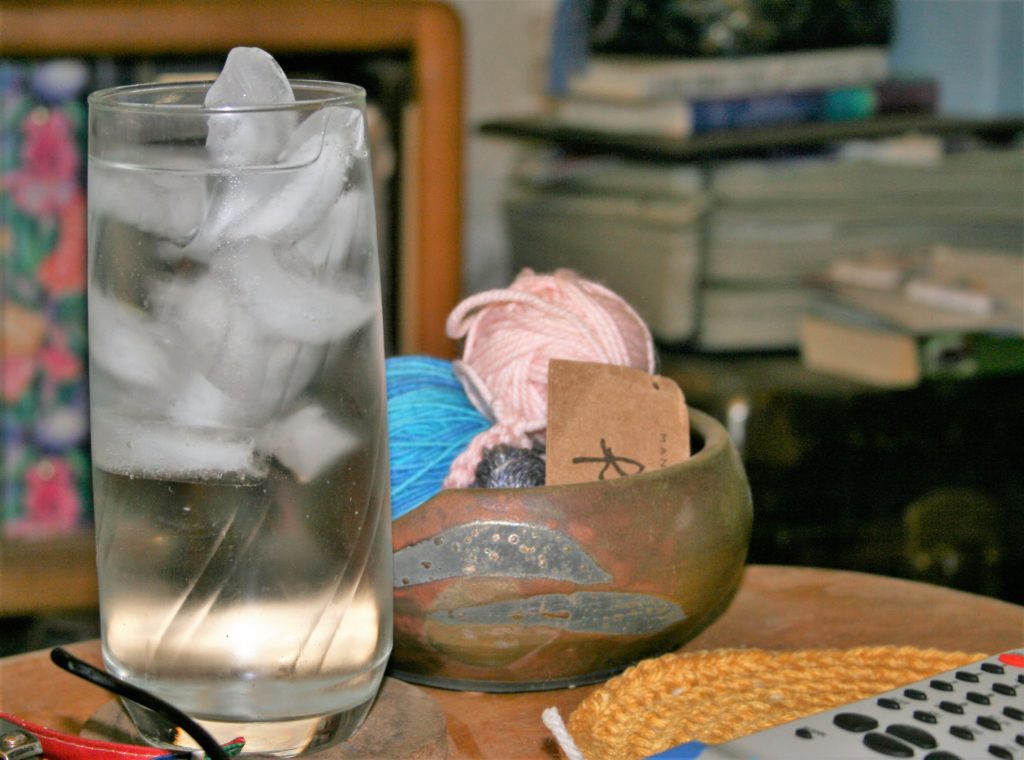
Stay Hydrated
I keep a glass of water or iced tea near me at all times. I
have a pretty bad habit of getting really involved in “just one more row” to
the point that I can miss meals, so having a beverage at the ready really helps
me have no excuse to not get a drink. It is pretty easy to hold the project and
get a sip.
A tall cold glass to keep hydrated
Lotion if Needed
Since I live in an area with very little humidity, I need a
good lotion to keep my hands smooth and feeling good. I have found that I like
some wax based lotions that are in a solid form, like lotion bars. However I
have also found success with thick medicated lotions. Basically anything that
absorbs into my skin and does not feel like it is just sitting atop my skin.
Find the Shade
Honestly, I probably am in doors with most of my stitching,
but venturing out in the heat of the day means that I am finding a nice piece
of shade. If the location has a bit of a breeze even better. In addition, I am
usually wearing a hat and sporting sunscreen.
If at all possible I make sure that I am out of the car.
Sitting in the car and crocheting might be a necessity for me in some
instances, but if I can get out of the car and get into fresh air it helps.
A Well Placed Fan
Putting a fan about 6-10 feet away and directed at me, is
all I really need. If it oscillates, it is even better. This air movement helps
to keep me comfortable, even while finishing a king sized afghan.
Check your Yarn
I tend to avoid using yarns with a lot of halo, or “fuzz” when the weather turns hot. I prefer a smooth yarn. Although this is probably more of a mental thought of what is cooler to work with than a reality. I just think that as the yarn slips smoother through my fingers, the easier it flows the cooler I feel.
I think that looking over my list I realize why I am so
productive during hot weather….I basically find a place and stay there, I stay
in a seat, with a fan blowing and a cold drink, in the shade while pampering my
hands a bit. This makes it easy to work on projects, and beat the heat.
The weather is changing and I want to crochet with cotton,
but not all cotton is created equally.
When going through the craft store aisle of yarn, finding a cotton yarn for you project can be a bit challenging. The mainstream market seems to only have room for cotton crochet thread and a medium weight cotton that is often associated with dish towels. (Need to know more about yarn weight? Here is some info)
As I venture into my small local yarn store I do find a
finer weight yarn of cotton, but it states “Mercerized”. It has a nice sheen,
but is this what I need for my project?
Knowing a bit about cotton, can really help you to avoid any
mistakes with projects in the future.
What is Cotton?
Cotton is a plant based fiber, well it is actually a cellulous
based fiber that protects a plants seeds in what is referred to as a boll. The
fiber has a short staple, meaning a short length. Due to the short nature of
the fiber it is spun together more times than might be necessary for a wool
yarn. This is strictly due to its length.
When long fibers are twisted together they have more points
of contact when lying next to each other, so just a few twists can hold them
together. With cotton being short, however, the fibers do not have as many
points of contact, and thus have to be twisted together more times to ensure that
they stay twisted together.
It is this high amount of twist that can cause cotton to shrink
on its first wash. When water finally makes contact with the spun cotton, the cotton
actually relaxes and while it softens up, it also can be less stretched and
thus “shrink”. Unlike wool this reaction will only occur once, and for any use
forward the cotton will remain completely stable.
What is Mercerized?
Many like to use cotton yarns for dish clothes, however this
is where you need to understand the term “mercerized”. Cotton when spun can
have a soft, fuzzy, halo around it. You find this in most medium weight cotton
yarns available on the market today. The term mercerized is a process in which
the cotton yarn is essentially singed and the fuzzy halo is removed, leaving in
its place a sleek shiny yarn.
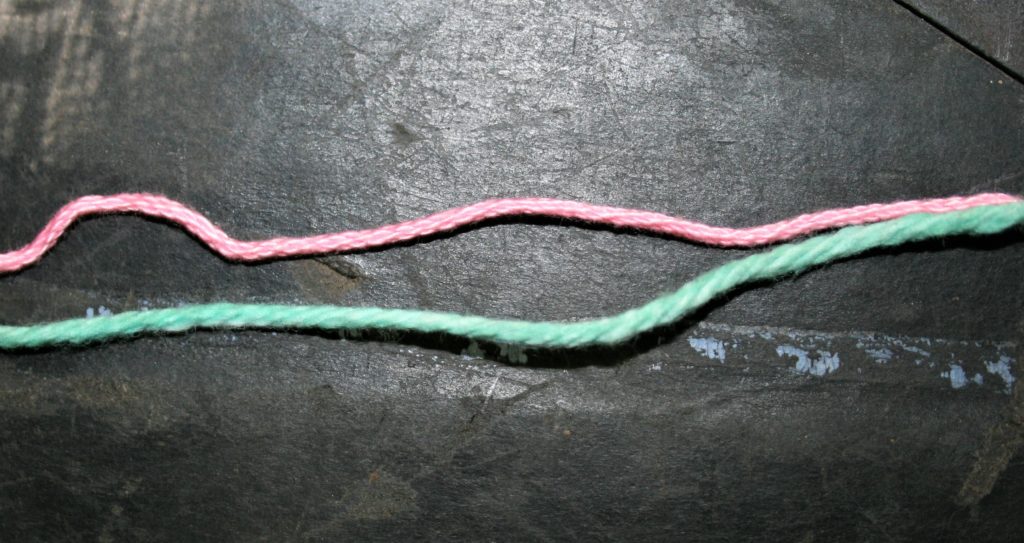
Note the top yarn (pink) has a shine, this yarn is mercerized. The bottom yarn (green) has a softer, slightly fuzzy look, it is not mercerized.
So why is it important to know about mercerized? Well, for
started mercerized cotton does not absorb water like un-mercerized yarn. Meaning
if you wanted to make a dish towel mercerized cotton will not behave in a
manner that you desire. This is a pretty important distinction, and one worth
repeating. If you want to make household items that will absorb liquids, do not
use mercerized cotton.
Mercerized cotton I find to be lovely in garments and
shawls. It has a nice sheen and feels like cotton, but unlike my T-shirt, if
you hit me with a water balloon it will not pull dramatically down with the
weight as it will not be absorbing the water.
Where Can I Find Cotton Yarn?
You might have to do a bit of looking to find cotton yarns for you project, but it is worth the trouble. Here are a few suggestions:
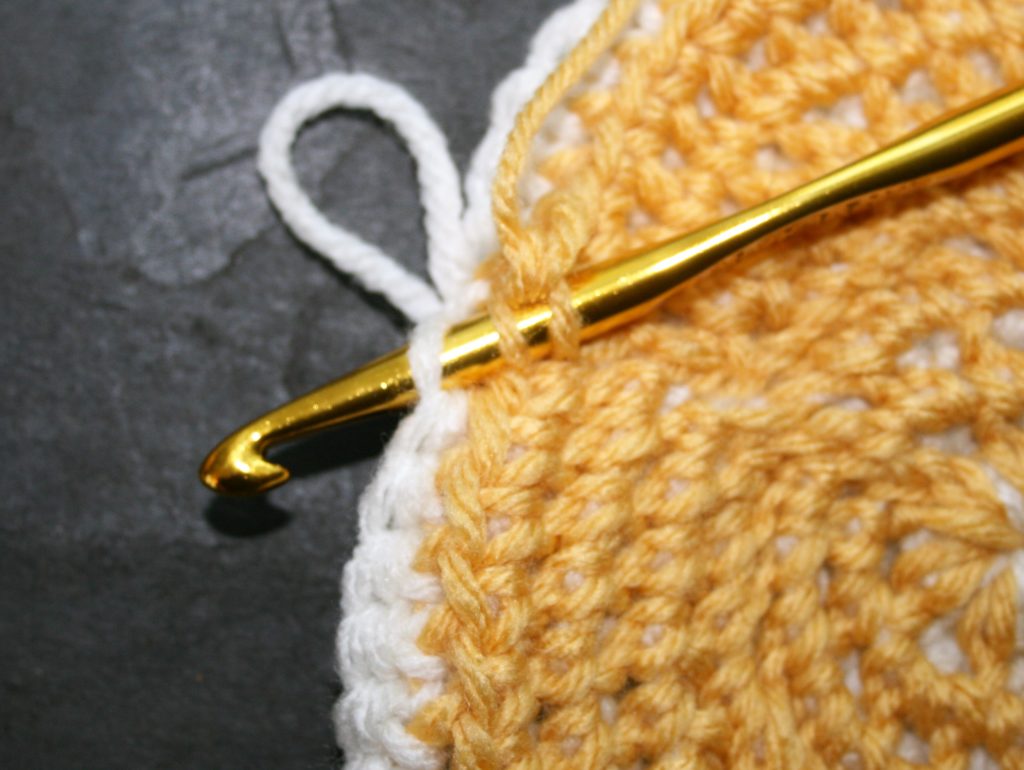
I pick up this stitch again recently and begun playing with
it in the round. This stitch is typically worked at only half the row height
increase of the single crochet stitch, working in both its on row stitch and
the one adjacent. As a result of this one, stitch stacked upon one stitch approach
it takes a bit of thinking to work the flat circular increases.
The first hurdle is to actually begin the round. You really
need to work 2 rows of fabric in the same beginning stitches to ensure an even
fabric consistency throughout. I have found two approaches to this in the
round.
Please note that I worked this fabric as a different color
on each side, as it really helped me to keep the process understandable. In
doing such I would drop the color, leaving the working loop for the color live
and pick up the new color, switching like this between every Round. In addition,
I worked the entire fabric in a spiral method, meaning I did not join the
rounds when completed, I simply began the next stitches in the next round. This
was also so ease of keeping track of my location in the work. I have to play a
bit more with the end of the Rounds, as even working in a spiral they appear to
easily as the stitches become a bit clustered and dense, but it does allow for
the thermal stitch to be created.
Beginning:
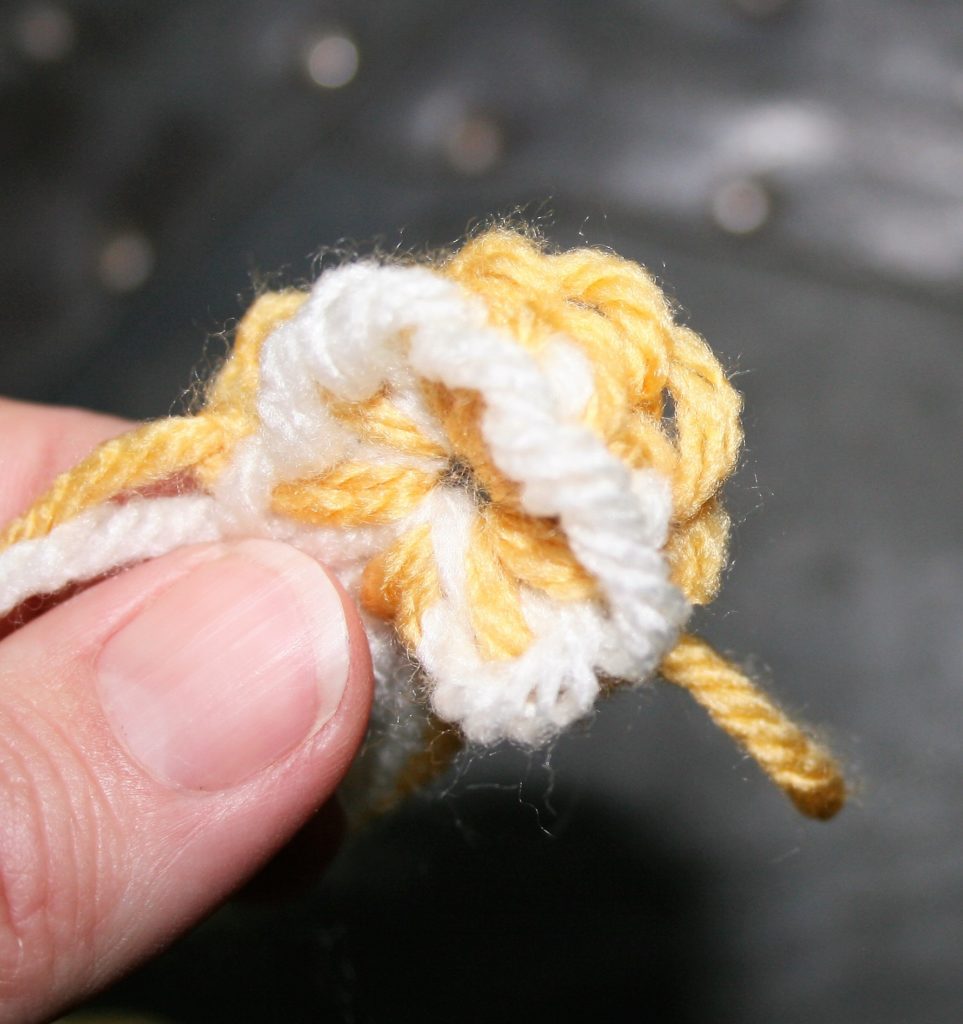
Method one: The magic loop/ring/circle. Essentially this technique involves making a loop of yarn and crocheting in this loop, like when crocheting over item (like the demonstration here making holiday wreaths).
Round 1: Work 8 single crochets into the loop (color cream),
turn.
Round 2: Drop color
from round one, join new color (color yellow). Working between stitches in between
the stitches of Round 1, [insert your from behind the magic ring, and through
the top loop closest to you in Round 1….this feels a bit awkward, but
essentially what you are doing is inserting your hook into the bottom ring and
the loop of the stitch in round 1, yo, pull through a loop, yo, pull through 2
loops] repeat 8 times, turn. -8 sts
Pull ring closed.
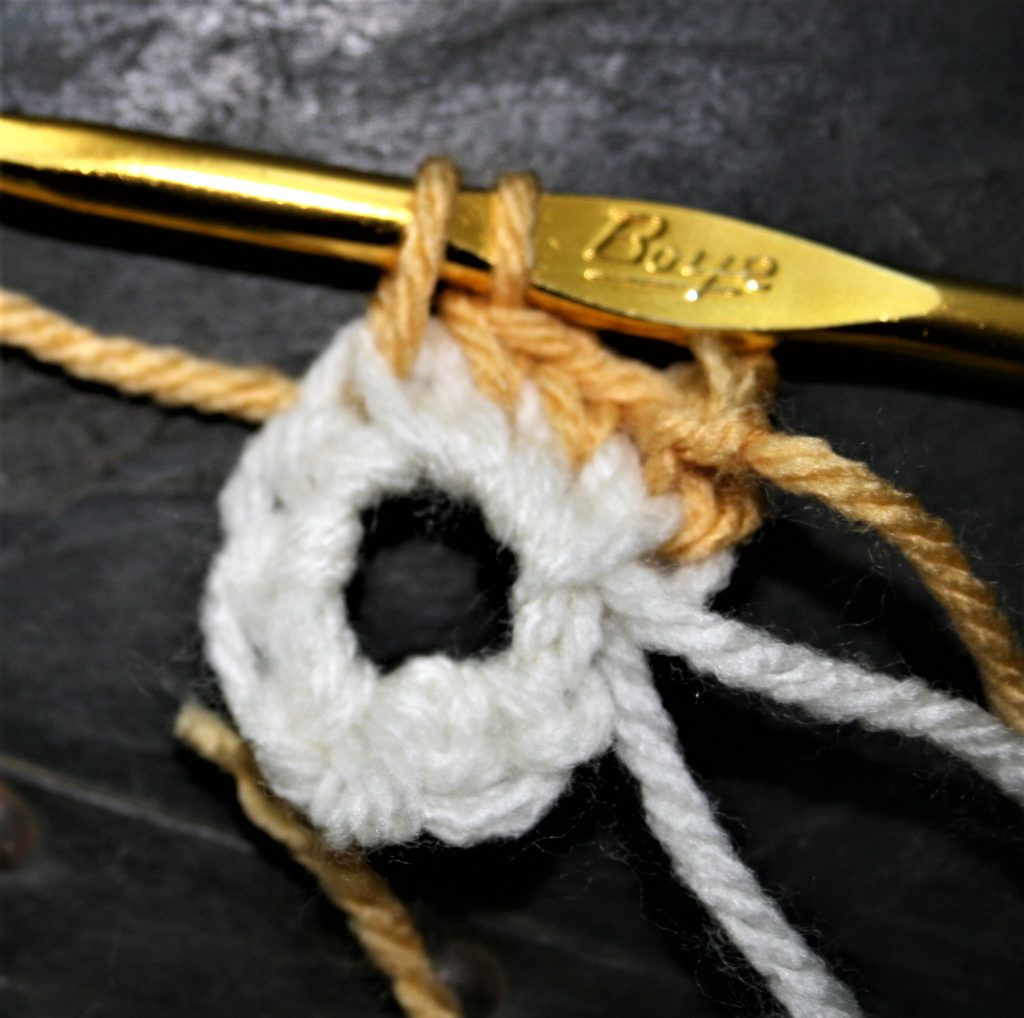
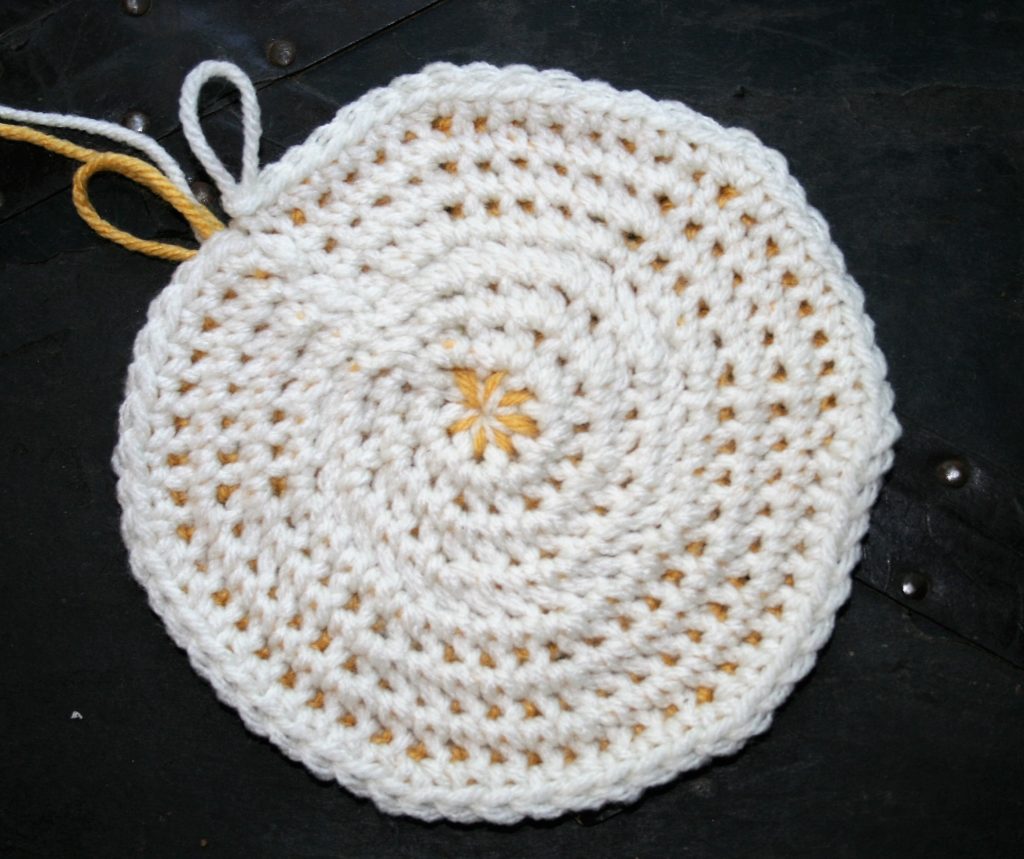
Working Round 2 of Magic Circle method, inserting hook behind ring and through top loop closest to you,Working Round 2 of Magic Circle Method as viewed from the Wrong SideThermal in the Round, Completed Round 1 & 2
Method two: Working into a ring. Chain 4, and slip stitching to the first chain to form a ring.
Round 1: Ch 1, 8 sc in ring (color white), turn. -8 sts
Round 2: Drop color from Round 1, join new color (color
yellow) to one “leg” of the single crochet stitch, insert hook through same
point as join and the top loop closes to you of Round 1, yo, pull through a
loop, yo, pull through 2 loops, [insert hook into one “leg” of next single crochet
and the top loop of next stitch, yo, pull through a loop, yo, pull through 2
loops] 7 times, turn. -8 sts
Thermal in the Round, Round 2 working in the “through the stitch leg” method. Insert hook through one “leg” of the stitch and the top loop closest to you.
All Subsequent Rounds….Working the Increases
Increases need to happen in each Round, but you are
essentially working the same increase for 2 rounds. Meaning that the stitch
count for Rounds 3 and 4 will be in same, the same number of stitches are
worked in the white, the same number in the yellow….like working two separate fabrics
at once. However the increases are slightly different in approach.
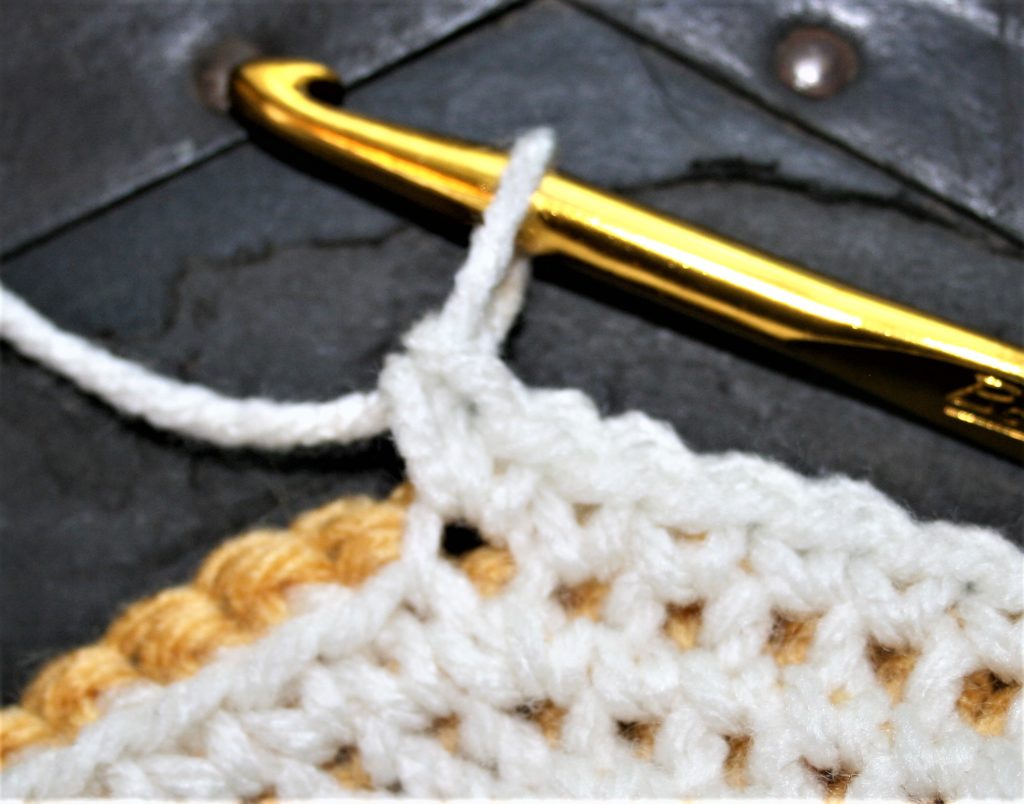
Round 3: Dropping yellow and picking up white, insert hook
through the front loop of Round 1, and the top loop closest to you in Round 2, yo,
pull through, yo, pull through 2 loops, insert hook into same location as
stitch just made and rework stitch, this is your increase. Work 2 thermal
stitches in each stitch around, turn. -16 sts
Thermal in the Round, Odd Round increase
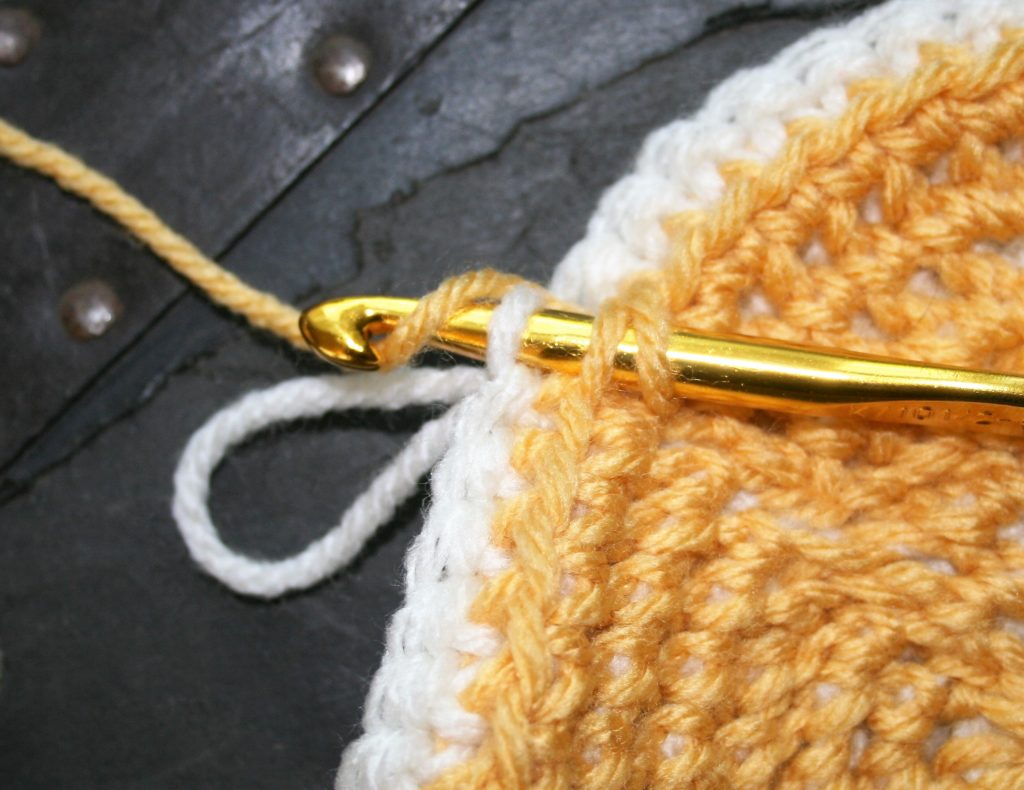
Round 4: Dropping white and picking up yellow, [insert hook
through the front loop of Round 2 and the top loop closest to you in Round 3,
yo, pull through, yo, pull through 2 loops, insert hook into the same front
loop of Round 2, and next top loop closest to you in Round 3 (note there are
already twice as many stitches in Round 3 as there are in Round 2…so there are
less front loops to work into then there are completed stitches, as a result
you need to increase Round 4 by working 2 stiches in the same Front loop, but
do not in the top loop closest to you)] repeat 7 times, turn. -16 sts
Thermal in the Round, Even Round Increase, first stitchThermal in the Round, Even Round Increase, second stitch
You work the same formula for a flat circle (you can find that here), in all the rounds going forward. I tend to think of the rounds in sets, a pair of one odd round and one even round (Round 1 & 2, Round 3 & 4, Round 5 & 6, etc.) Working all increases in Odd number rounds by working into the same front loop and the same top loop closest to you. Working all Even Round increases as the same front loop but different top loop closest to you. All non-increase stitches are worked as traditional Thermal Stitch (see tutorial for basic stitch)
This subtle difference in the increases between the rounds
is one reason the different colors helped me. I could remember that every time
I used the yellow yarn I was doing an even number Round increase.
Thermal in the Round view from Odd Rounds
This process takes a bit of practice, but the resulting
fabric has a nice textured look, and the dense nature lends itself nicely to
pot holders, trivets, wash scrubby, I could even see a nice warm hat in the
future.