Understanding your crochet can really help you enjoy your
craft and make your projects more exciting to work. One area that this is true
is creating a flat circle.
A flat circle is the base of top down hats, of baskets, and
even handbags. Stitch height can greatly affect how a pattern will work out in
these projects, as the height of the stitches make the circle either smaller or
bigger. Another factor is the number of stitches per round.
I have discussed the formula for a perfect fitting hat in previous posts (you can find more about them here), but what if your stitch heights create similar problems as too few or too many stitches? That problem of either cupping or rippling of the fabric.
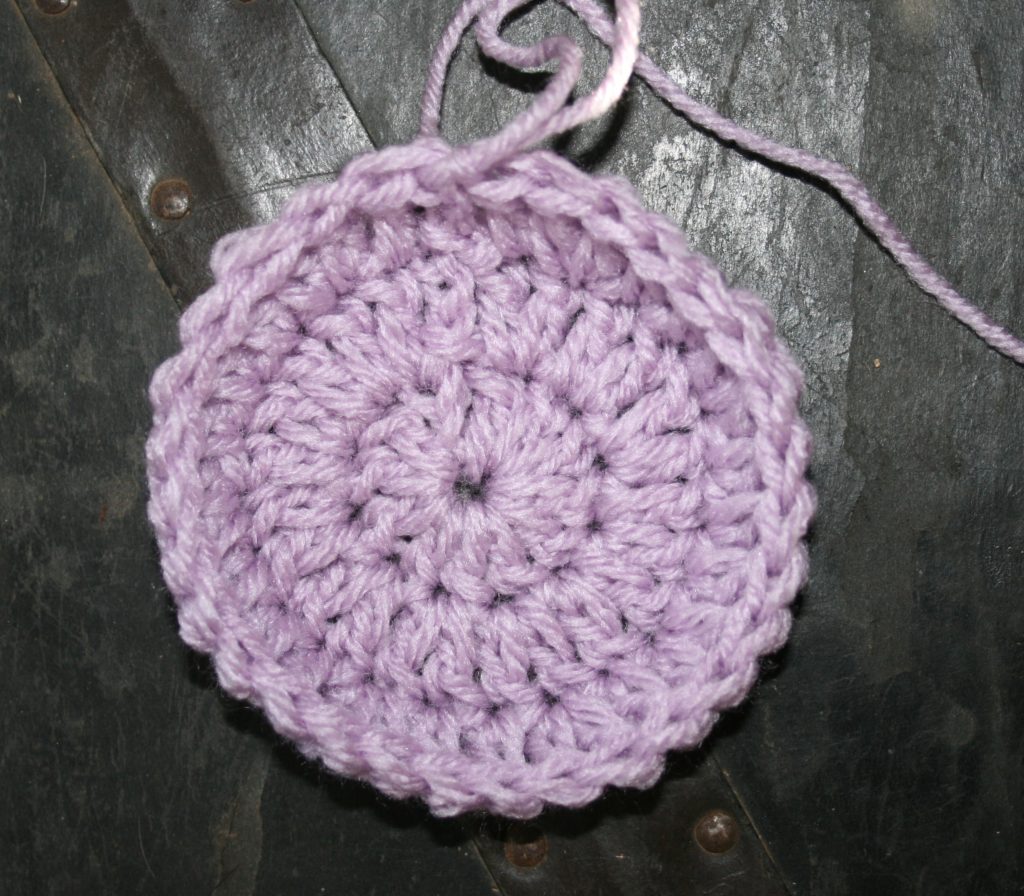
Cupping circle, needs to have more stitches added.
To determine the results of your fabric it cannot be done
within one round. It can be determined over a few rounds, so do not get too
hung up if the characteristics of cupping or rippling are slight. If it
increases in subsequent rounds you then need to address the issue.
It is Cupping
There are simple fixes. If your fabric is cupping, or
pulling upward, adding more stitches will encourage the fabric lay more flat.
Another option is to reduce your stitch height, if the stitches are long and
there are too few stitches the stitches will pull back on themselves.
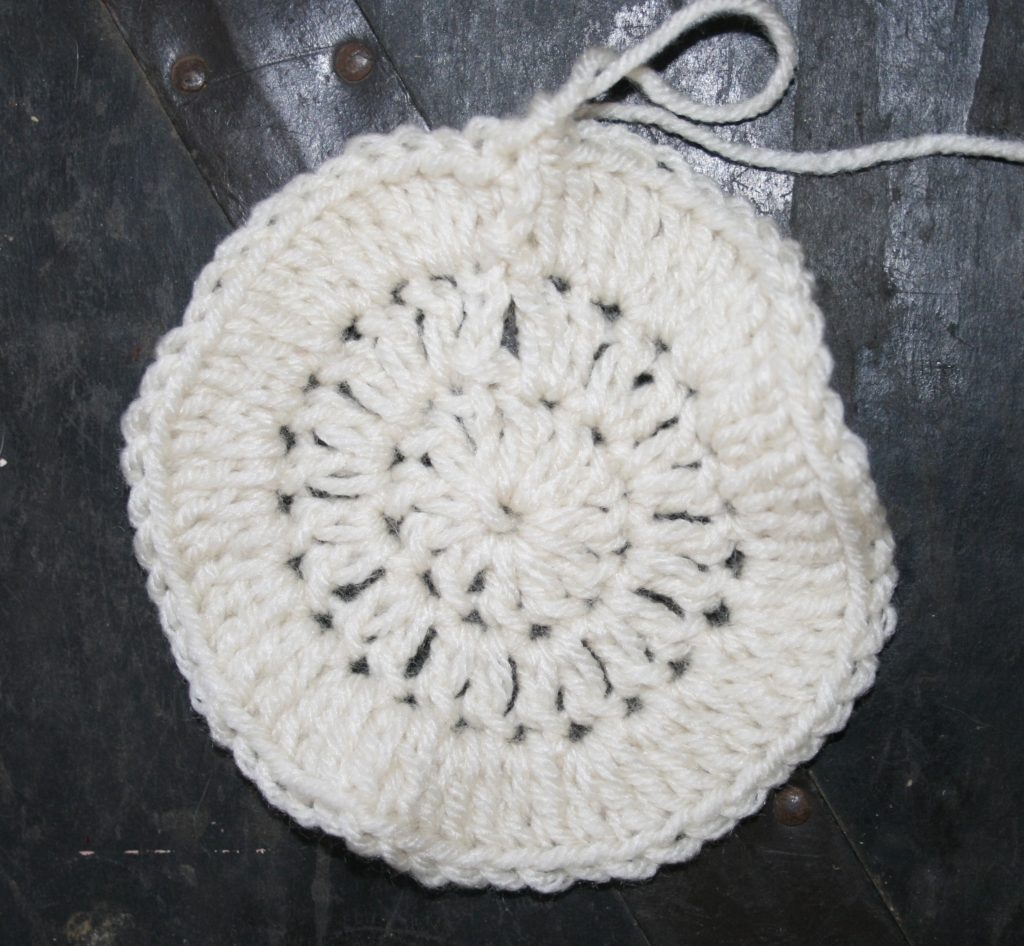
Rippling circle, needs to remove or adding less stitch increases
It is Wavy
In addition if the fabric is rippling, or wavy, removing
stitches or increasing your stitch height, will help create a flat fabric.
Short stitches with many grouped together does not create enough space for the
fibers of the fabric to have room to rest.
Crochet is a forgiving craft, the exact stitch count may not be vital. It really depends upon the pattern of the stitches created. However if it is a simple one stitch repeat you can usually add or subtract stitches without much concern. I suggest adding or subtracting stitches to resolve the issue, as it is easier to do.
There essentially are 3 ways to begin a circle in crochet,
and in most cases they can be used interchangeably. Each has its pros and cons,
and everyone has a method they prefer.
Creating A Ring Method
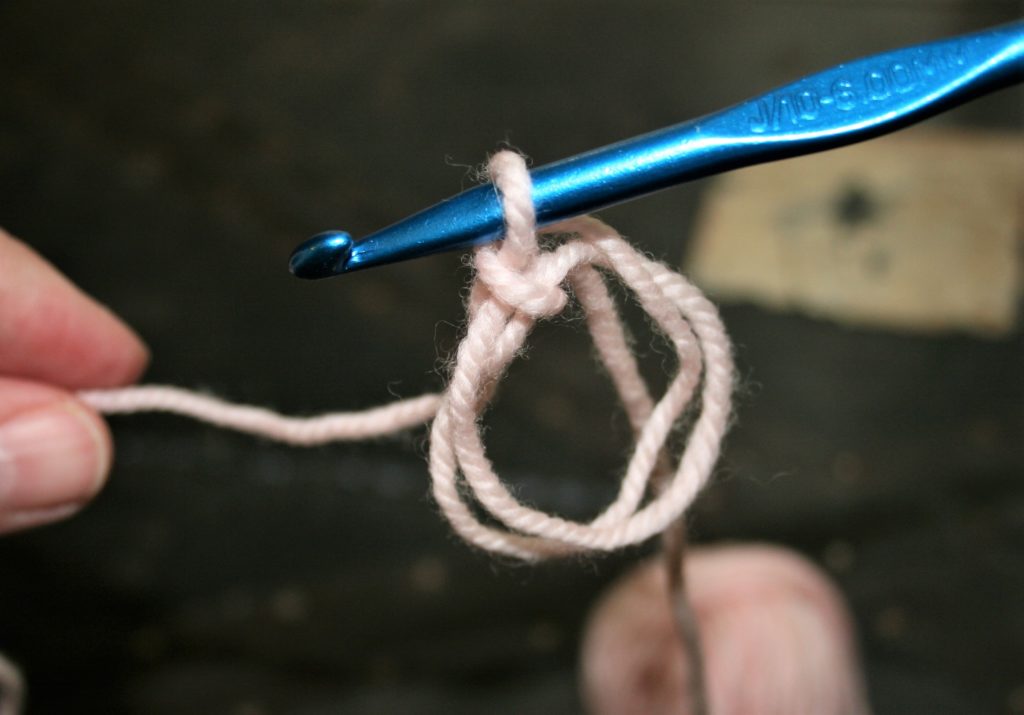
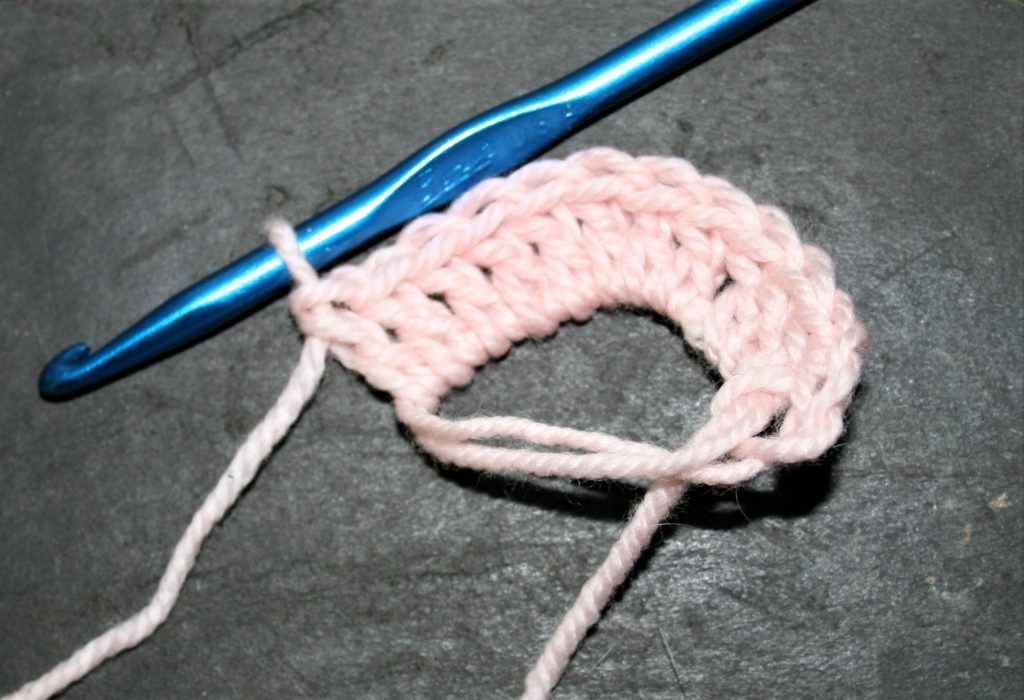
In this method you create a chain, usually I find that many chain 4, and then you slip stitch to the first change created to form a ring. Then all the stitches of the first round are worked into this newly created ring, working over the chain.
This method is pretty straight forward, creating a stable
base for the stitches to be worked. Yet, it can leave a pretty striking hole in
the center of the fabric. It can be tightened up a bit when the ends are woven
in, but it adds a bit of bulk, even more then the chain being worked over.
Forming a ring by slip stitching to the beginning of a length of chain.
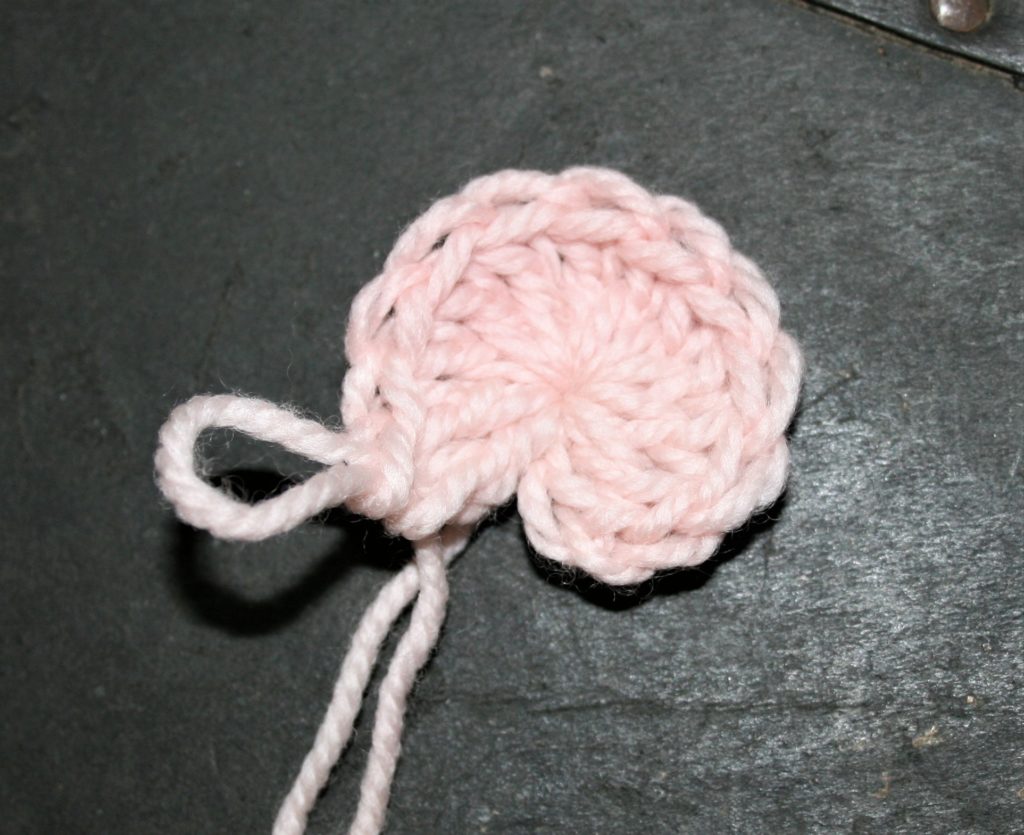
Working in the Beginning Chain
I admit this is my usual go to method. To begin this method you determine what the first stitch of the first round is, in most cases it is double crochets (UK-treble crochet). You then chain the number that is typically used when turning rows with this stitch, in double crochet’s case that is a chain 3. Then you add 1 more chain, now all the stitches are worked in the first chain created.
I find this method pretty easy and fast, with a minimal hole in the center, but in reality the base for the stitches is not as stable, because I am placing a lot of stitches into just one chain. It places a lot of pressure on the yarn that creates this one chain.
Work all the stitches of Round 1 in the first chain.
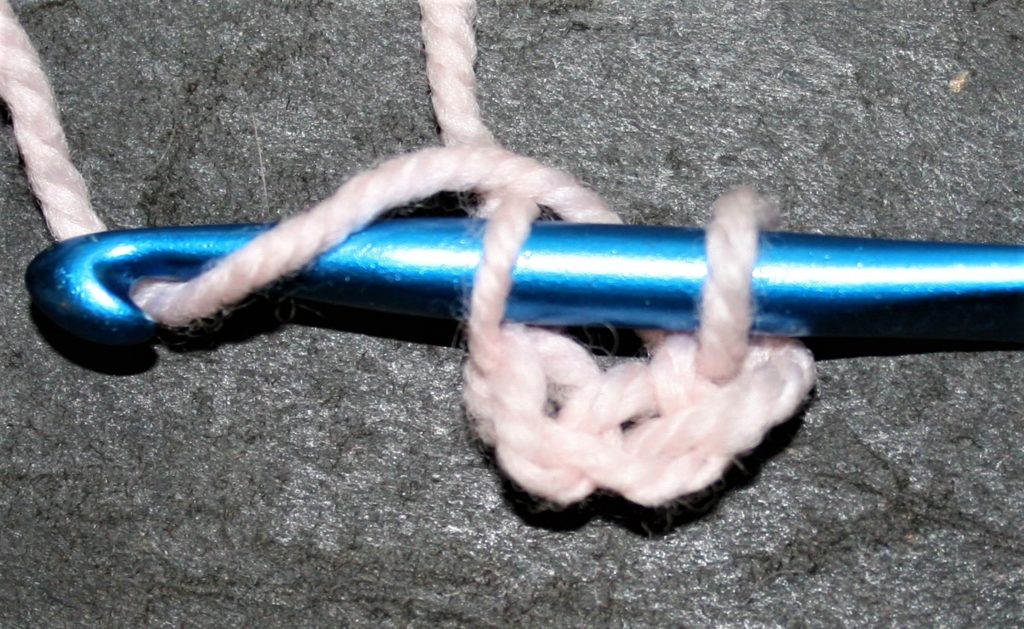
Magic Ring, Magic Circle, Magic Loop…Method
There tends to be many names to describe this technique that
creates a very tight closure. The best way to describe this approach to someone
new to it is “fiddly”. Granted it creates a very nice join point that does not
have, really any, hole at all in the center, but it takes a bit of practice to
feel comfortable with it.
To work this method there are couple of different approaches, yet the outcome is the same, you work over a loop of yarn. All stitches in the first round are worked over this loop of yarn, and then the end of the loop is pulled to close the loop bringing all the stitches to a tight closure.
Make the Loop
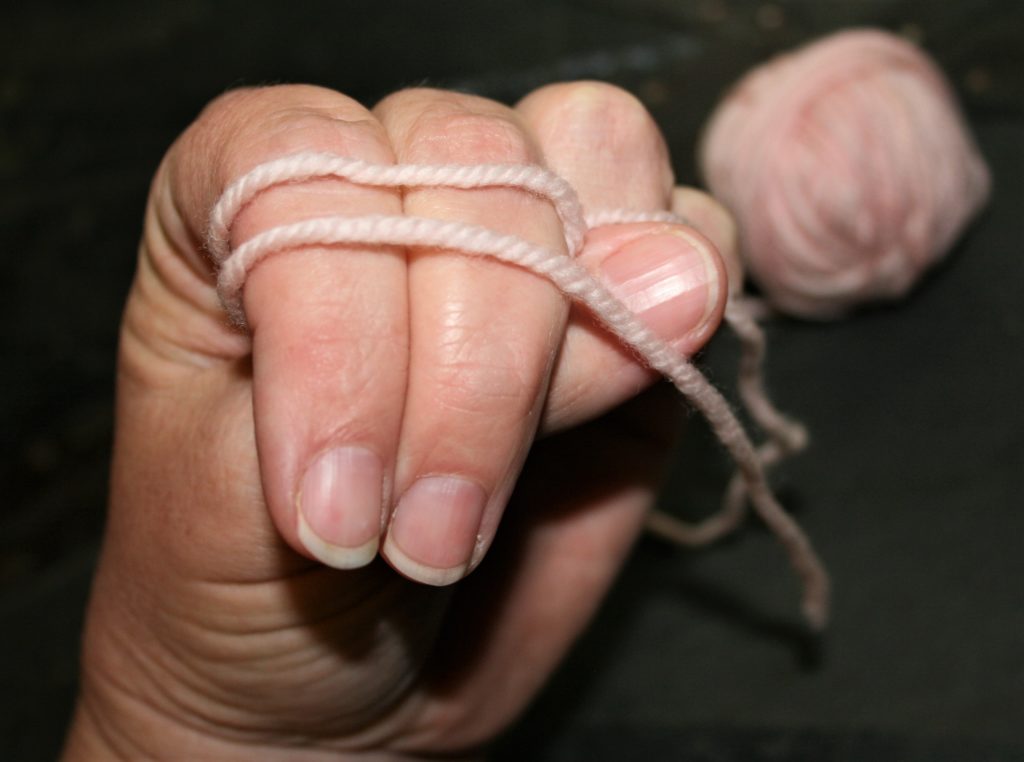
The approach that I find to be the easiest to do for this
method is to wrap yarn around my pointer and middle finger of my yarn tension
hand. When wrapping I ensure that the end of the yarn nearest the skein is
nearest my palm, with the tail of the yarn nearest my nails. I wrap at least
twice around my fingers.
Wrap yarn around fingers twice, with tail of yarn closest to the nails.
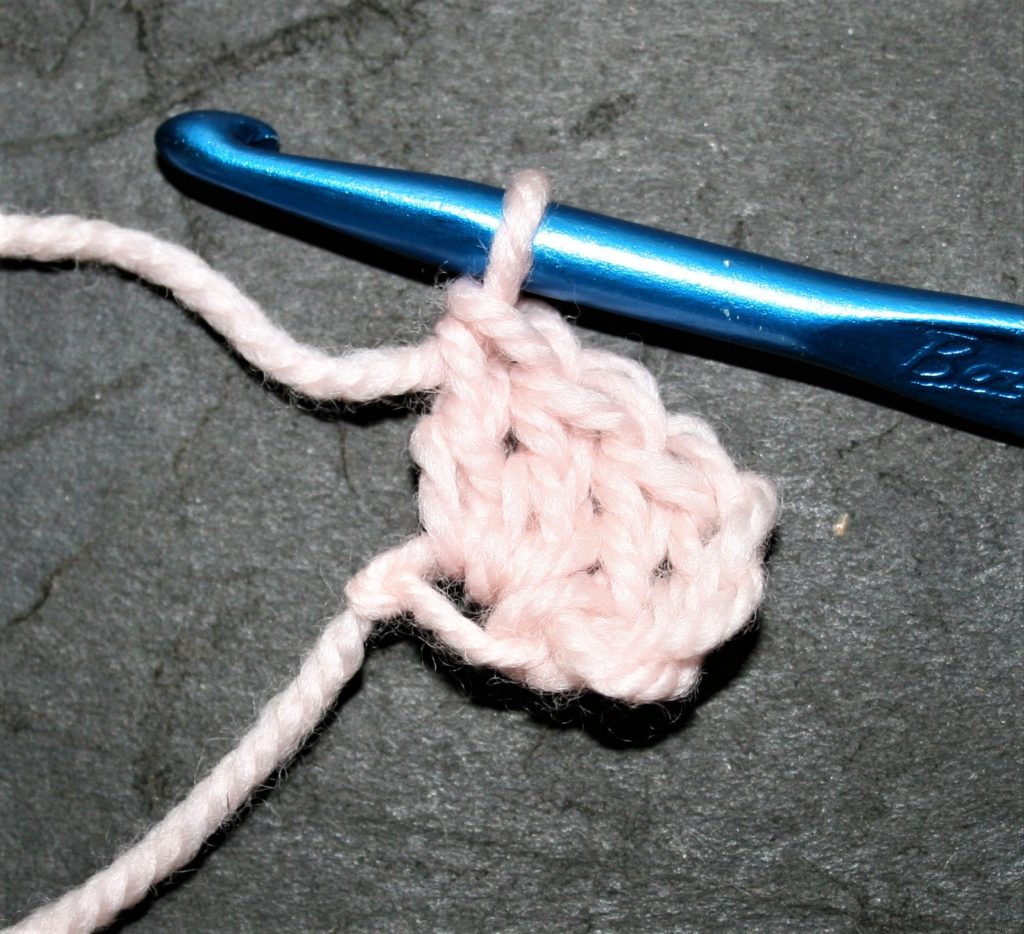
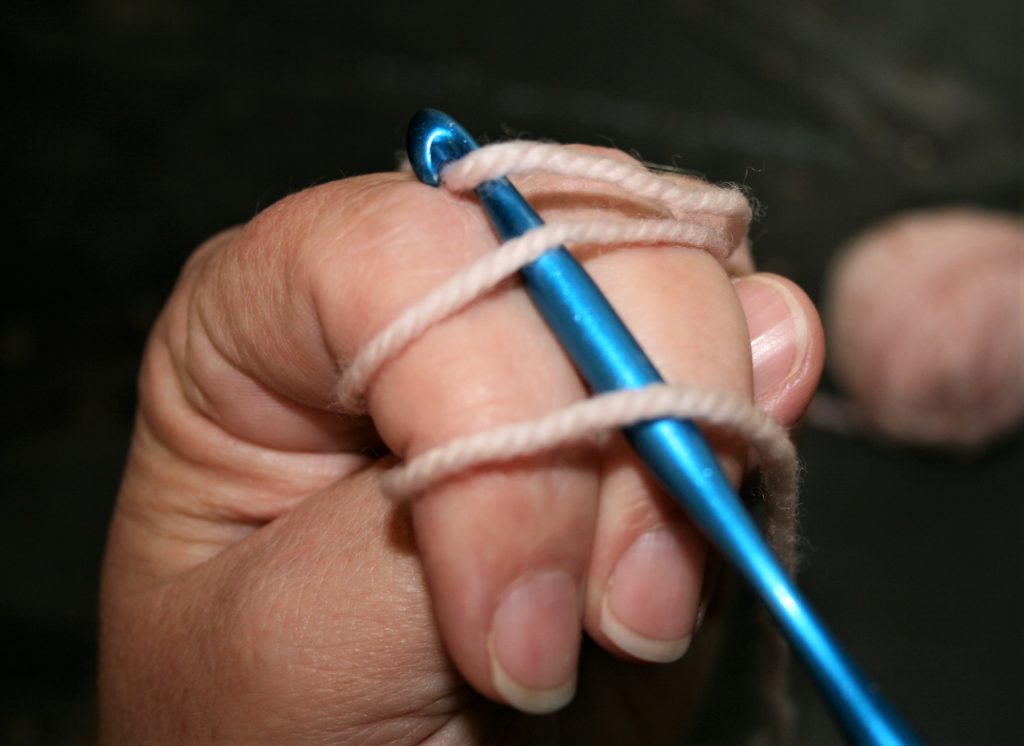
Work the Loop
Then I insert the hook over my fingers and under the yarn, yarn over the yarn from the skein and pull through the yarn on the fingers. At this point I usually remove my fingers, keeping the loop of yarn in at loop state, then chain 1. The chain secures the loop, so now you chain to the height of the stitches being worked in round one, and work all the stitches over loops of yarn.
Insert the hook, yarn over.Pull through a loopRemove from fingers and chain 1 to secure the loops
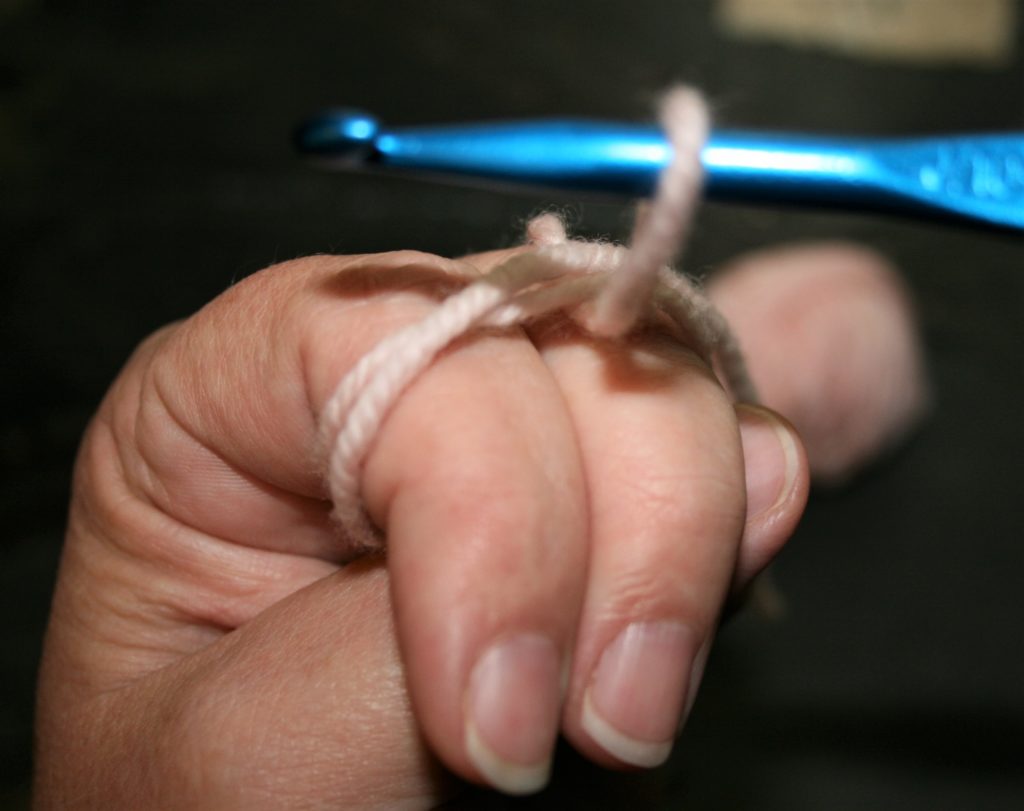
Close the Loop
When all the stitches of the round are worked, I then pull the tail of the yarn. Since I work over more than one loop, when pulling the tail it might leave a loop hanging out of the stitches. To remove this loop is simple, I simply begin pulling the hanging loop to tight. It is a bit of juggling to pull the yarn tight when it is wrapped more than once, but I find it gives a bit more of a secure base for the stitches to rest on. Since really, no one wants this loop to become unworked.
Work stitches around loops.Pull the tail of the yarn to close the loop
Check out some of my free patterns that begin in the round and practice using these techniques.
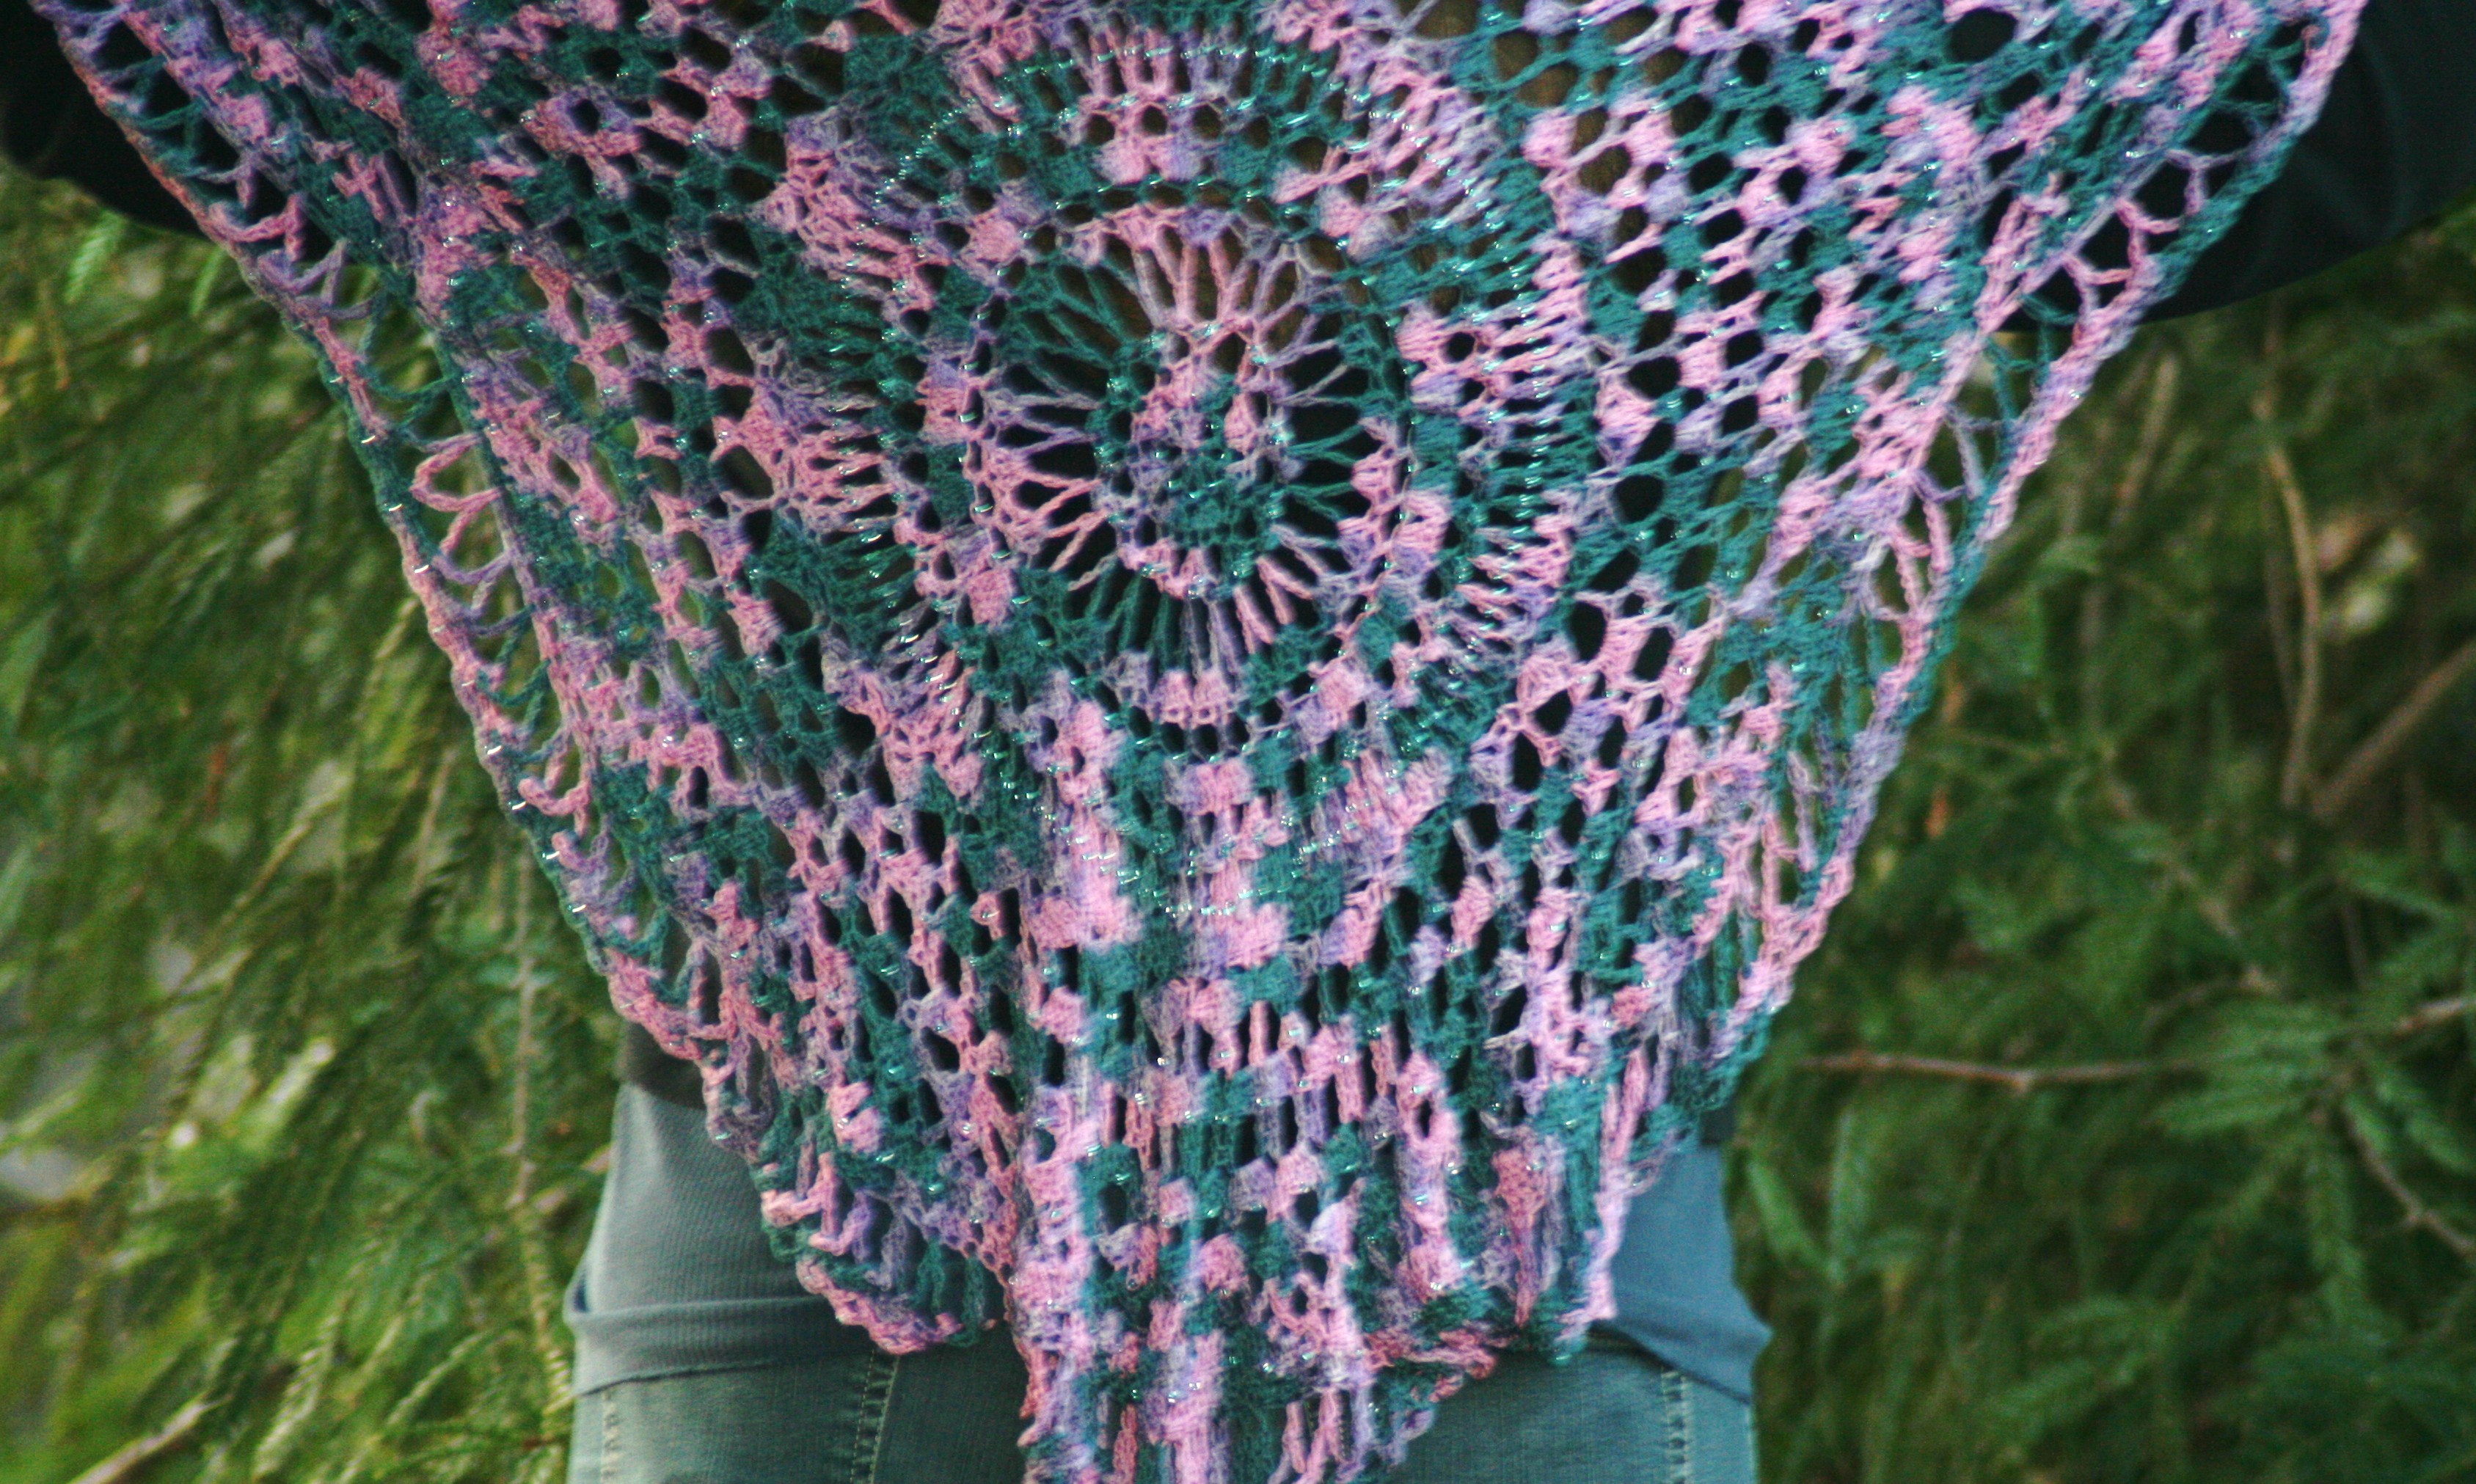
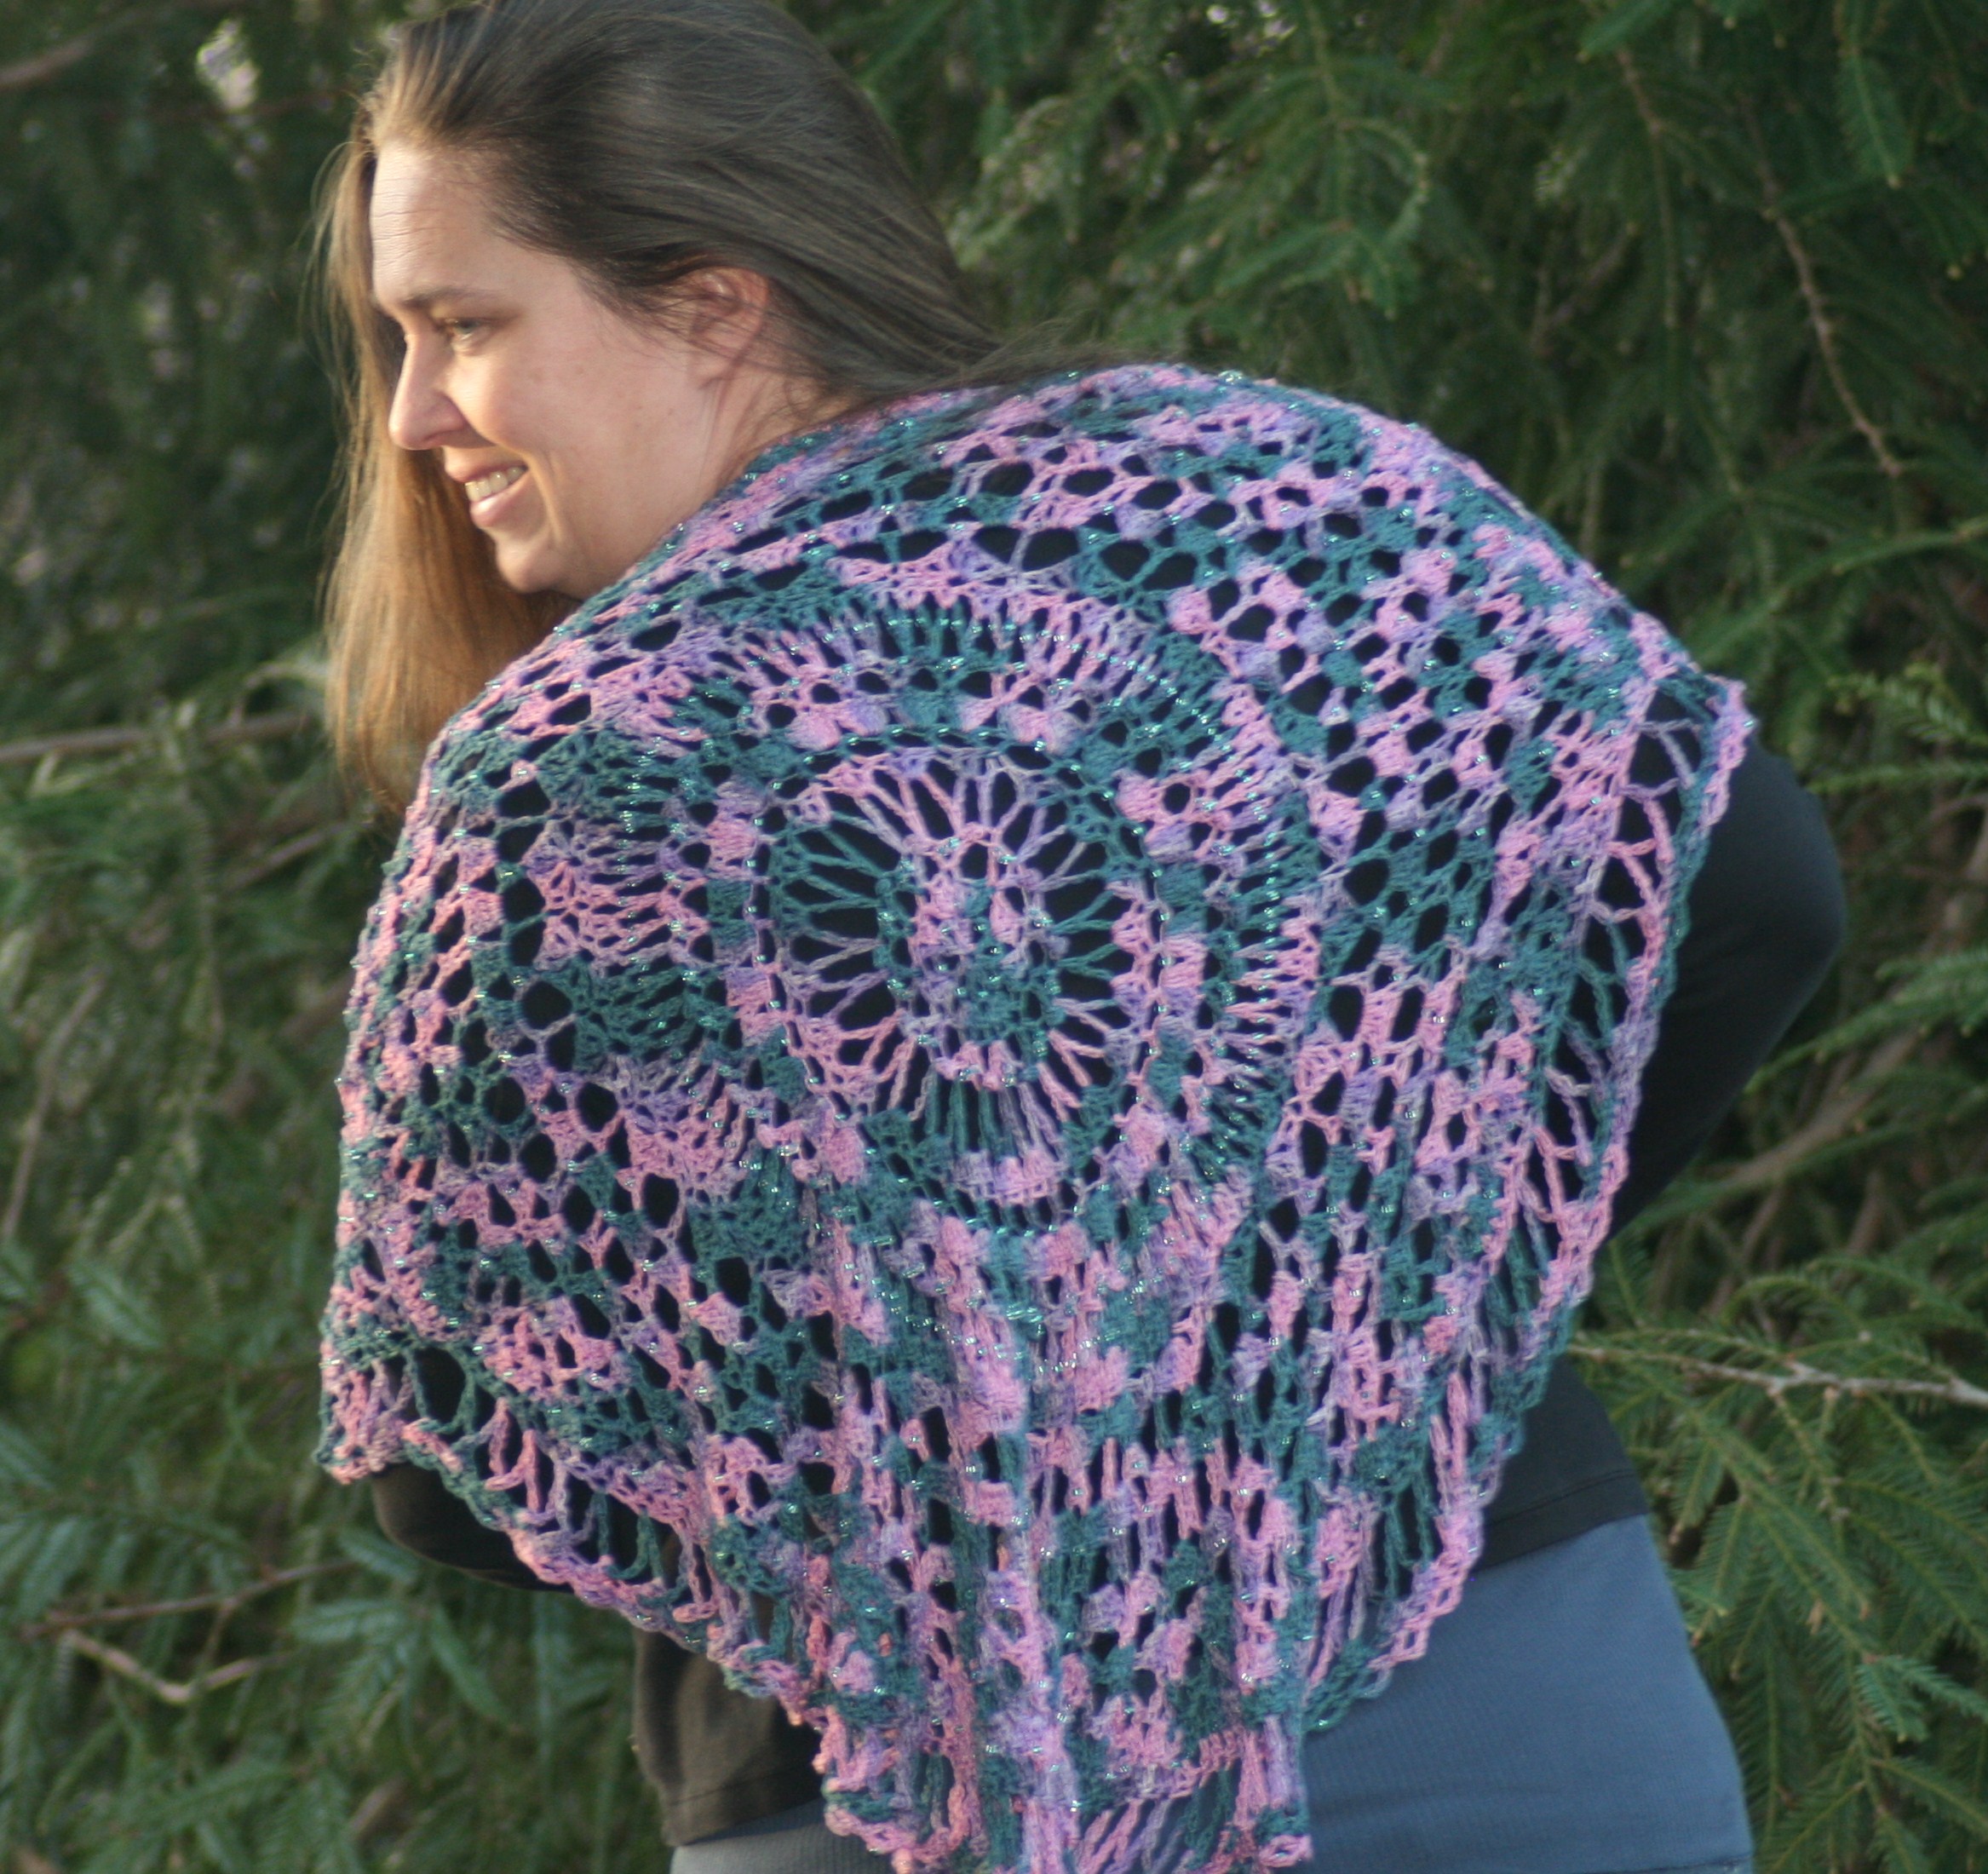
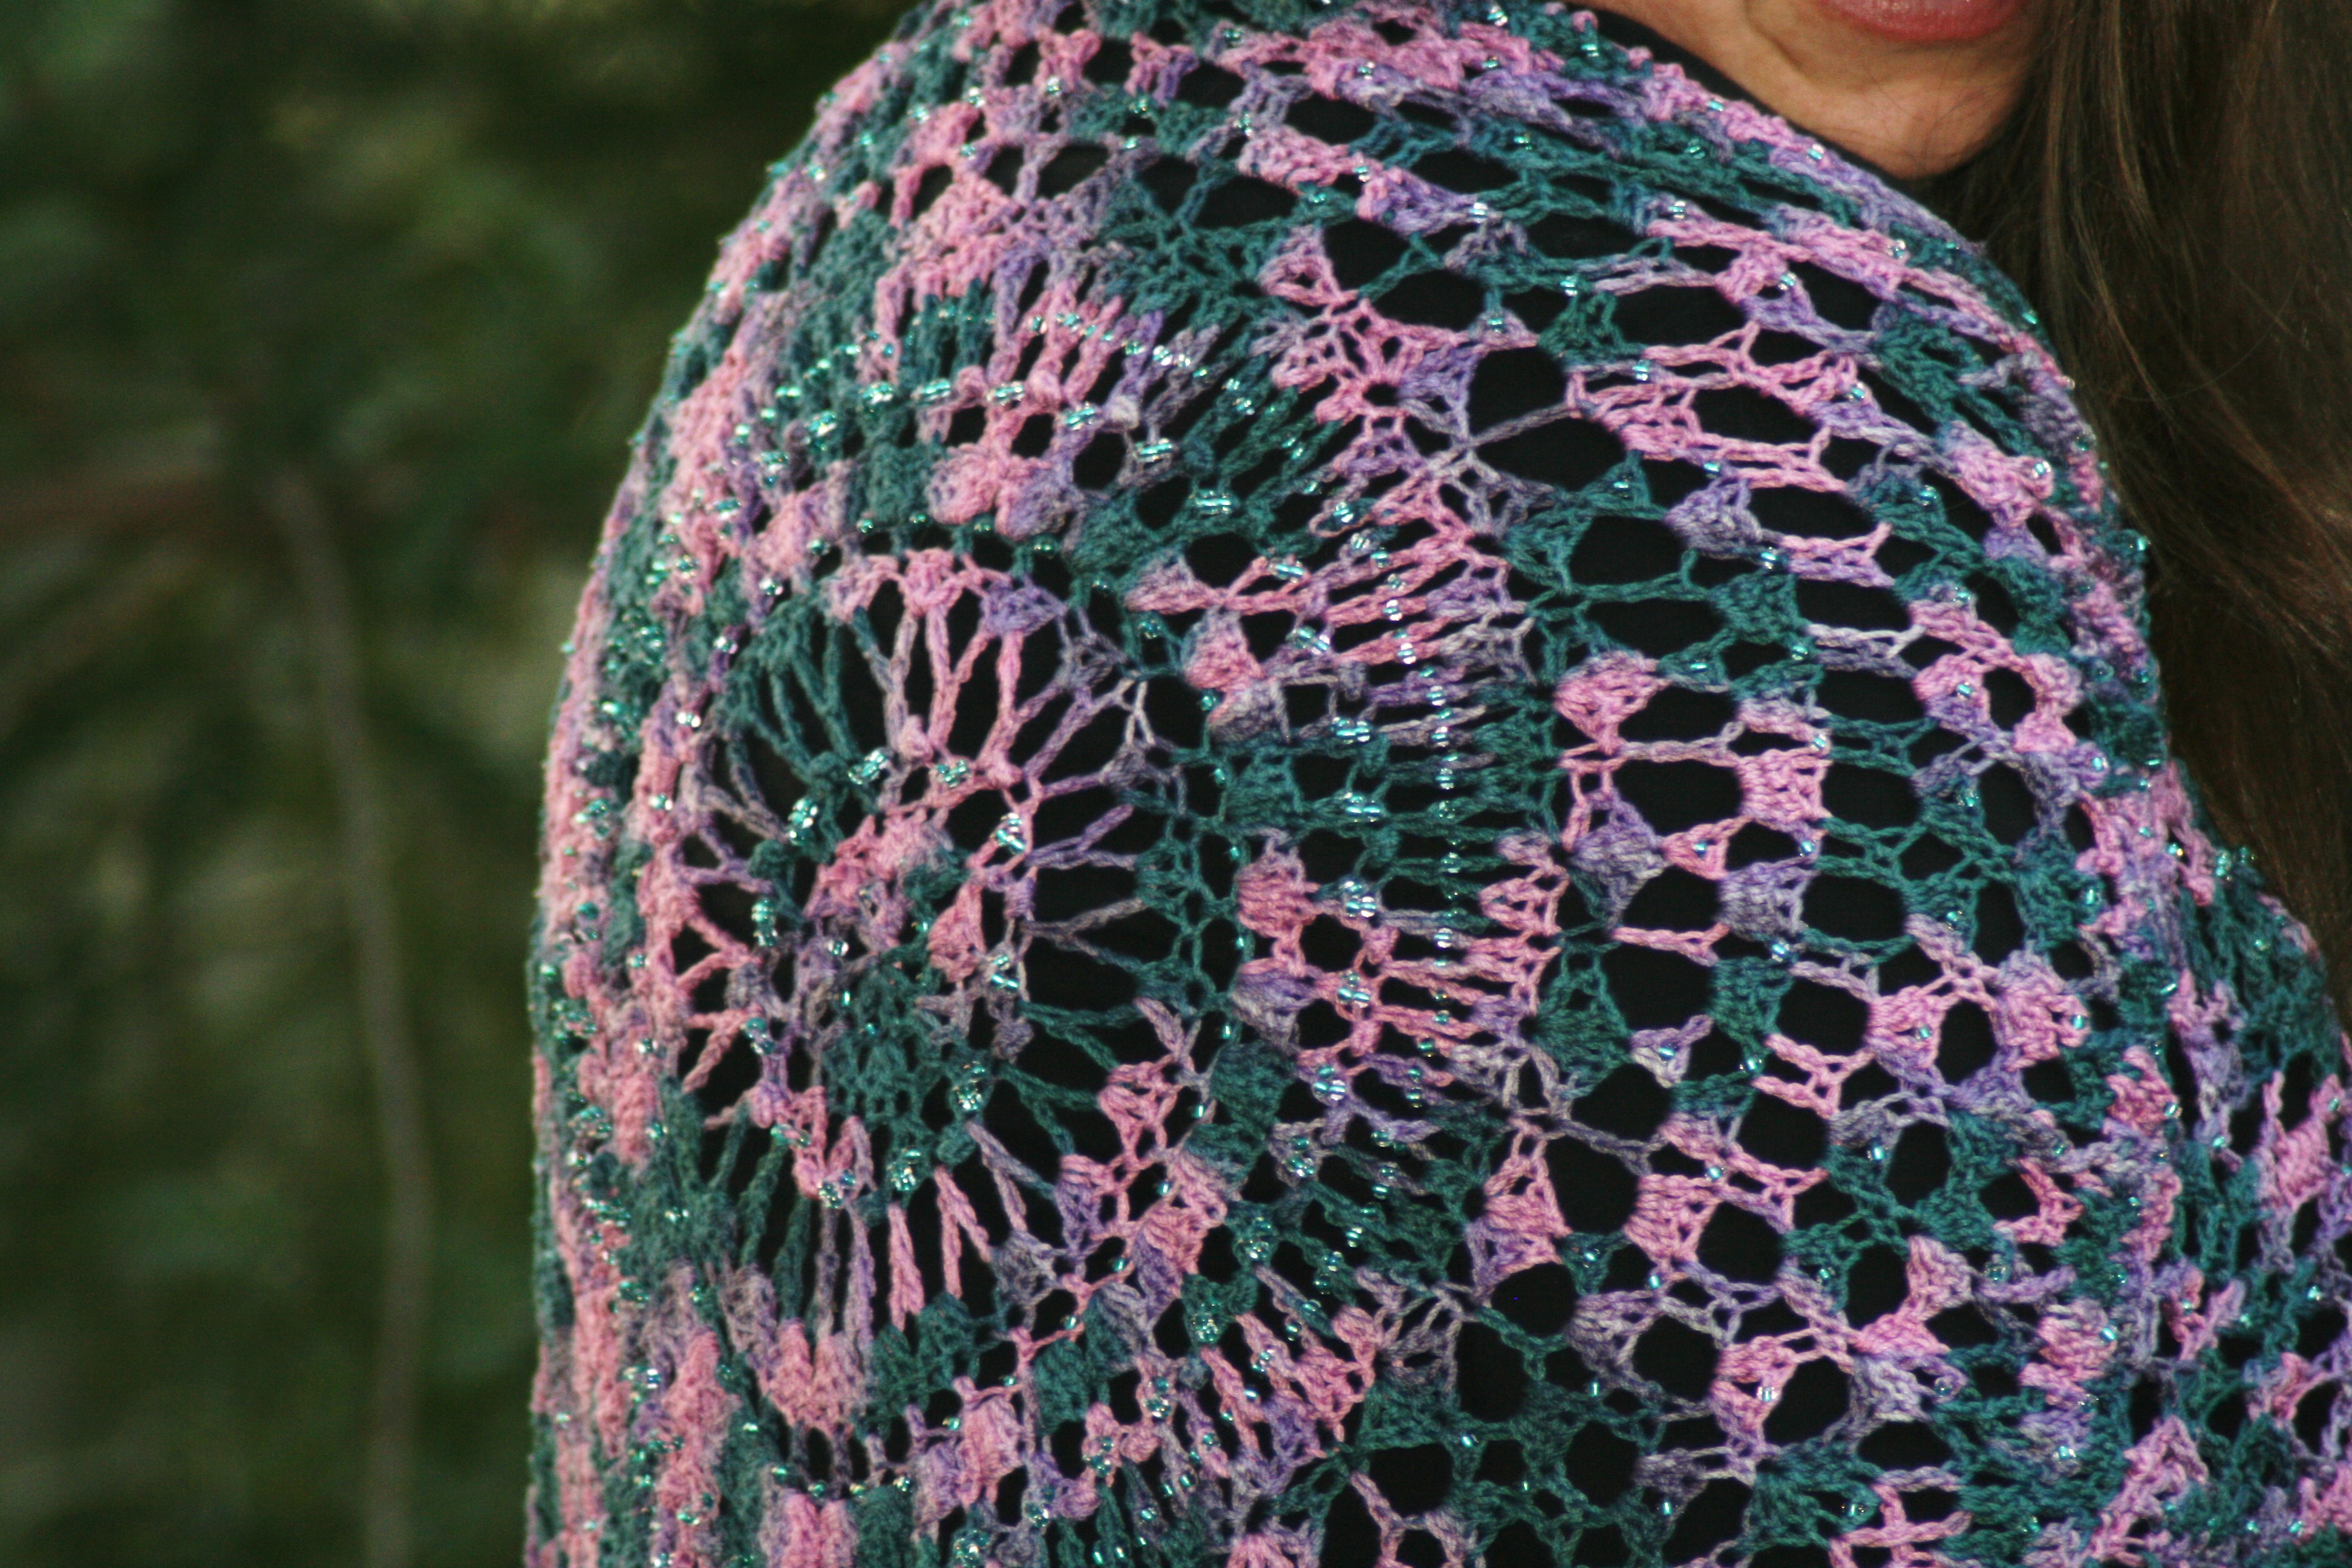
So this design took me a little longer then I was planning to reach out and enter the world, but I am very happy with its results. I am happy to introduce the Dream Weaver Circle Shawl.
“Dance in the wheel, and be enchanted be the dreams that are woven in this unique shawl comprised of a large circle, and shaped with the quarter of 2 other circles. The beads are worked throughout and add to the dream that the circles create.”
This is a design that highlights the beads. There is about 1200 beads adorning this circle shawl ( 6/0 Czech glass beads from Bead Biz), and to myself it definitely creates a dream like feel. The yarn (Newton’s Yarn Nevada Print, 100% Rayon) lends itself to some nice drape, and only takes 1 large skein (about 1100 yrds).
I had fun with this one, but I am not completely sure where the inspiration came from. This shawl just gradually grew into what it is today, it told me what it wanted to be.
The photography that helps bring this design to your eyes, was actually created by my 11 year old son (with some help from my 8 year old daughter). I don’t think he did to badly. They really enjoy helping in my creative en devour, and there is something special about keeping it in the family.
I have this pattern available at Ravelry and Craftsy, and if you happen to be at Vogue Knitting Live in New York this weekend (January 16, 2015) check it out in person at the Bead Biz booth.