Another Crochet Journey, New Projects, New Inspirations

ScannedImageOne of the things that I really enjoy about crochet is that it has so many possibilities. When I began crocheting I created scarves and Barbie dresses, then I worked afghans….many, many afghans. I really didn’t even begin to make hats for several years as I was a little intimidated with working in the round and the working it straight, I was fine with the flat circle, but the contours of a hat use to intimidate me. I think I may have made my first sweater before my first hat, not much before, but before. When I realized that I was just creating fabric garments became my new go to, (and I include shawls in my garment category, as it took me a long time to place a shawl in my personal wardrobe).

IMG_7000.1

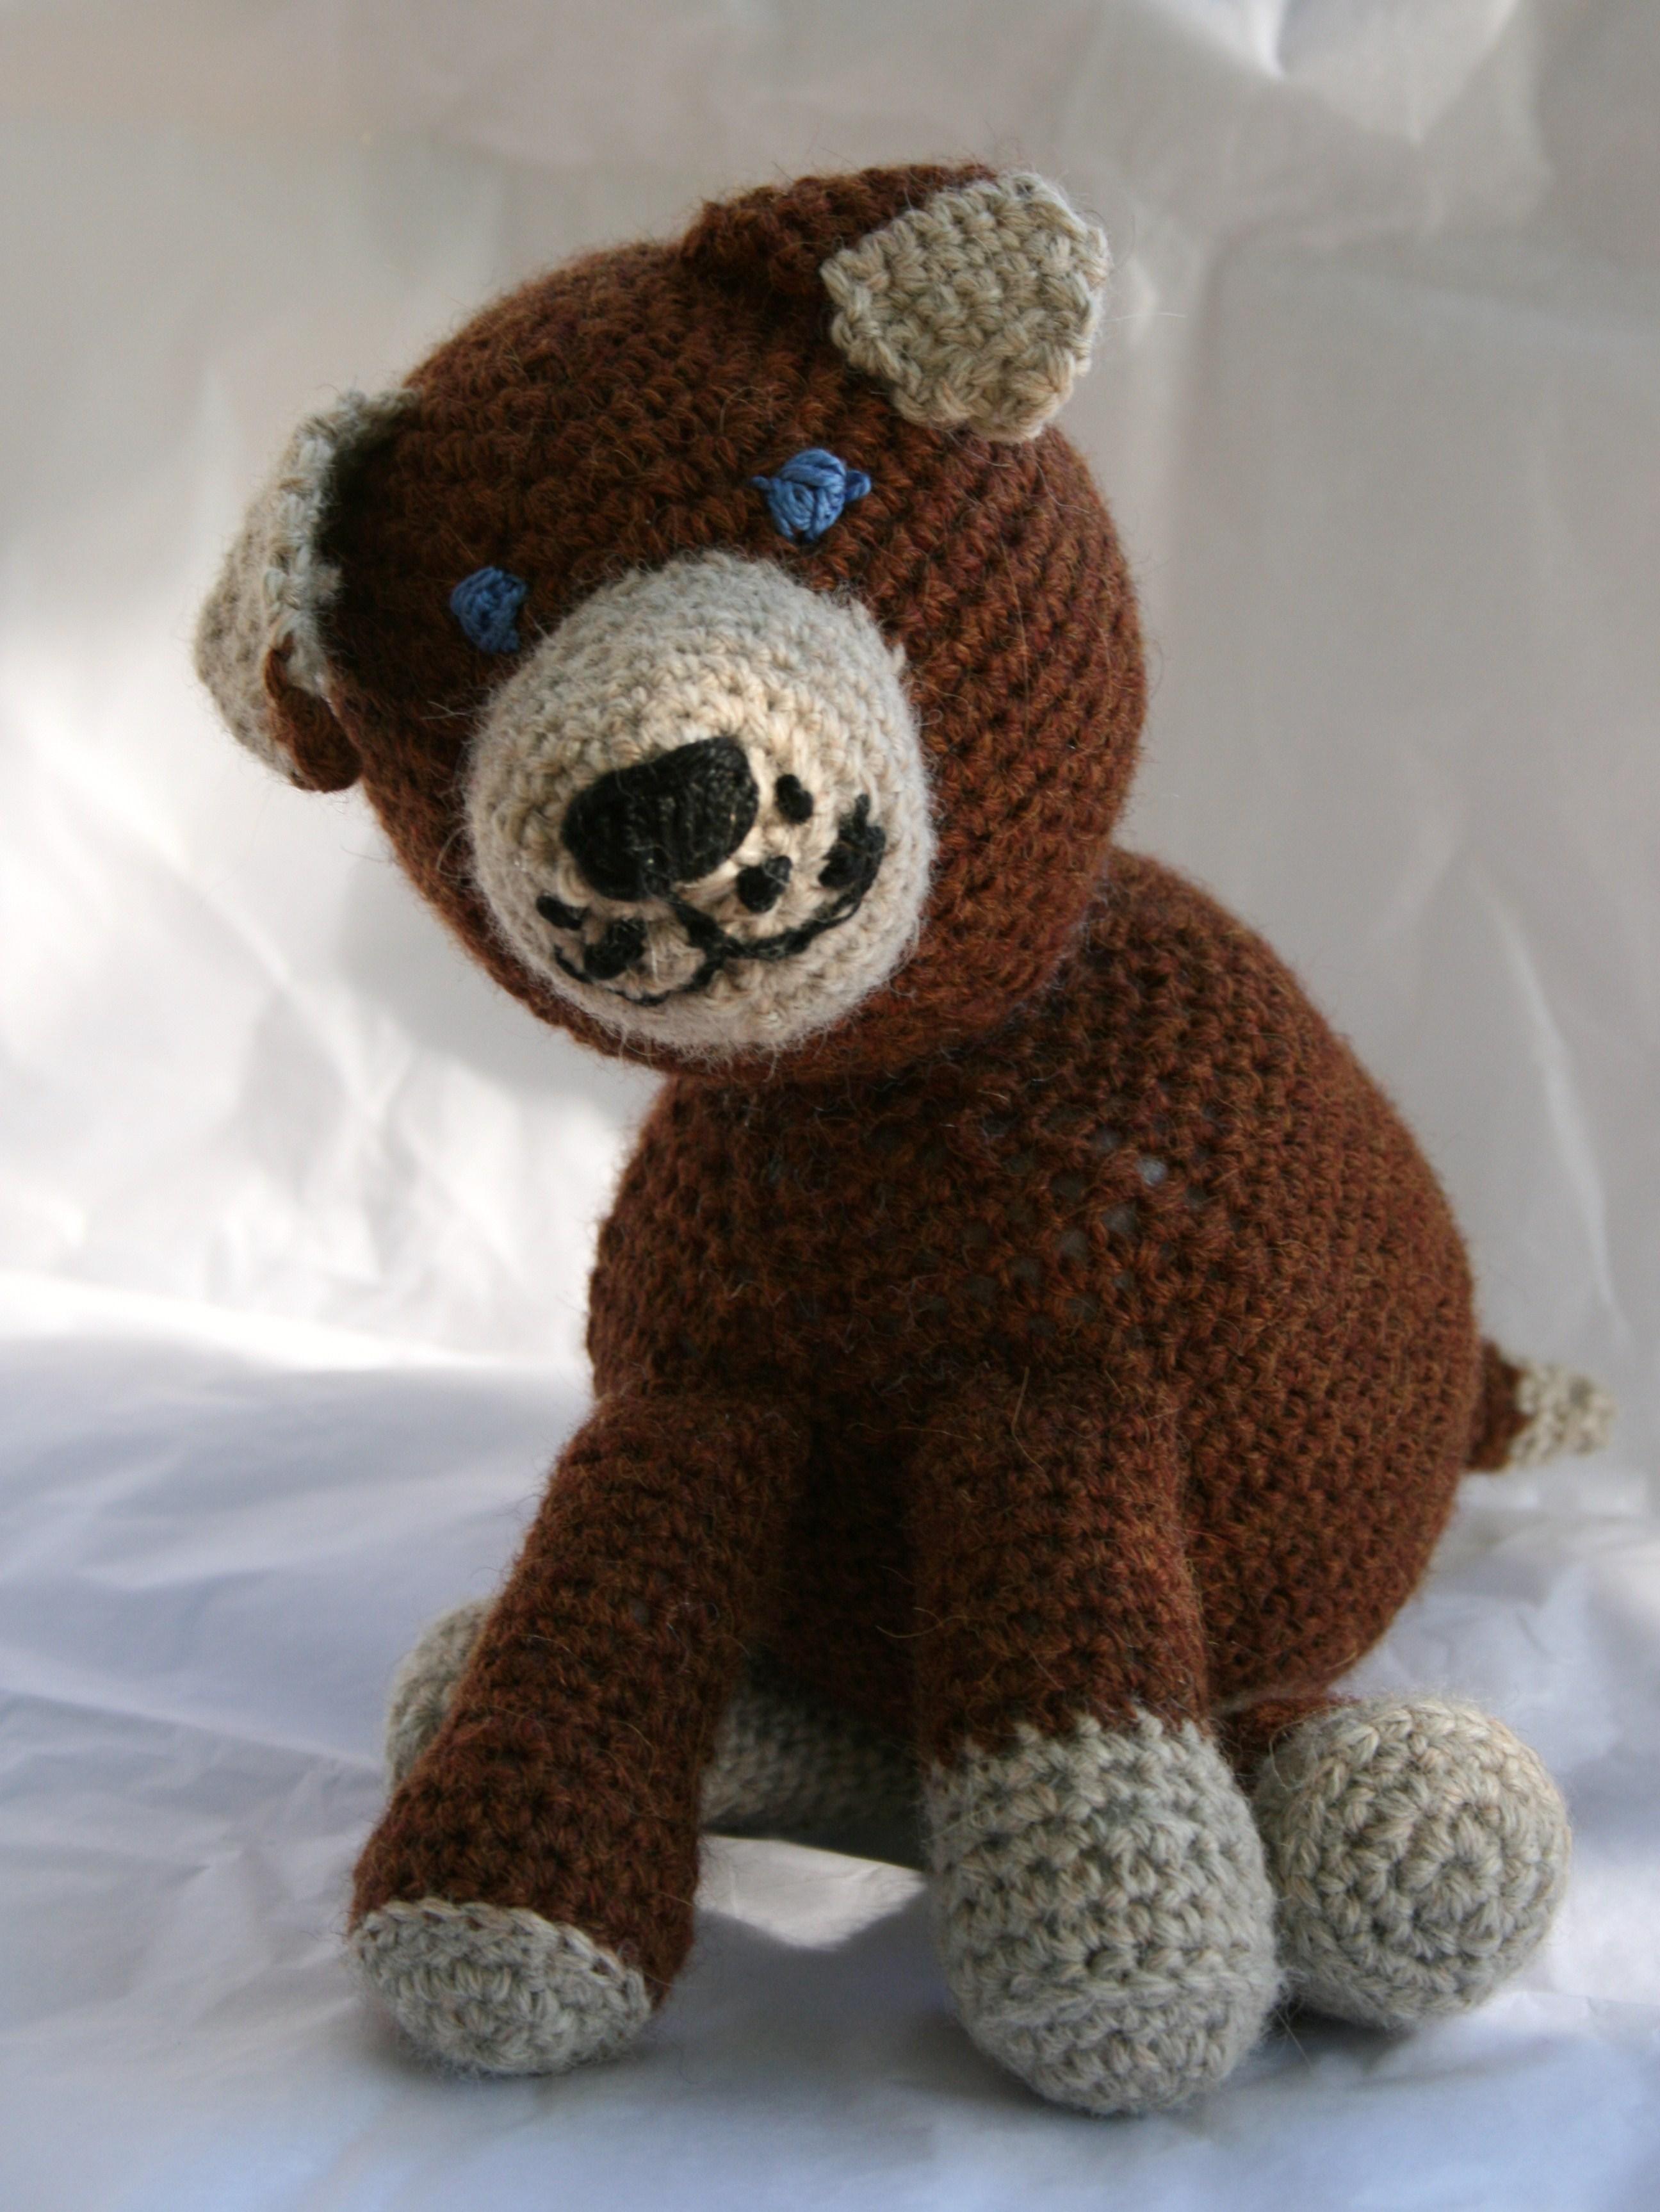
BBD (Baby Brown Dog)

Looking back on my time stitching I can see certain trends, however I never really got into the trend of doilies or toy making. However, I find myself taking inspiration from the work of classic thread doilies and applying it to some of my current designs and at the prompting for some of my crochet students I have been investigating some Amigurumi.

In playing with the techniques used to create toys, I have made up a little puppy. BBD (Baby Brown Dog as it is affectionately referred to in my home), is created with 2 skeins of Plymouth Baby Alpaca DK yarn, so it is really quite soft and cuddly. This stitches used are simply single crochet, with the only challenge being the Magic Loop beginning (that can be substituted if desired with alternative circle beginnings). Simple increases and decrease are worked for the overall shaping. The paws have a little special touch of having nickels added to give a little weight to the legs so that they always want to hang downward (so it can be recognized as a 20¢ puppy).

I may not be someone that creates things like this often, but I will admit, this little dog has gotten to me, and even I enjoy cuddling with it. Sometimes working on things outside your everyday comfort zone can inspire new ideas, BBD already has me things…I wonder where this journey might take me.

If you would like to take a journey with BBD you can find it on Ravelry and Craftsy for only $5.50 US.


There is More then One Way to Join a Motif Together

ScannedImageWhen the average non-crocheter thinks of crochet, often one of the first thoughts is the classic granny square. This motif has become a historic staple, however working any motifs worked in crochet can have a fun, stunning, and classic appeal. The draw back? Stitching them together.

IMG_7319.1

Remove hook from working loop, insert hook into stitch to be joined to and re-insert into working loop.

I have stated it before, but I am a crocheter, not a seamstress. So join-as-you-go has been a savior of sorts for me. It has allowed be to work various motifs without having to stitch them together, but simply work a stitch into the adjoining motif and they are now connected.

IMG_7320.1

Pull working loop through stitch

IMG_7323.1

Complete the stitch, and continue.

There are various applications that can be used in join-as-you-go, but one that I have been enjoying recently, has a finish that looks like I’ve spent time whip stitching the pieces together, without ever picking up a needle and thread (or yarn). To work this Joined Whip Stitch, or Braided Join, is actually pretty easy. When you are ready to join to the adjacent motif you simply remove your hook from your working loop, insert your hook through the stitch you wish to join to, re-insert into the working loop and pull it through the stitch, then begin and complete the stitch you wish on the motif you are working on. Essentially you are bringing the loop through another fabric and then completing your work, there is nothing fancy, nothing difficult, just a simple way to weave the fabrics together.

IMG_7325.1

The finished look of the Joined Whip Stitch or Braided Join

The look that this technique creates has a hand sewn appearance to some, and a braided effect to others. It is a little slow, and only a little, as removing your hook and getting it placed and then reworking the stitch can take a little time, not to mention a little fear of the working loop being pulled out. However the technique is simple and can be worked with any motif pattern without having to change the stitch structure. So give this method a try next time you have a motif to put together, you may find that it makes your project a little more enjoyable, with no needles required.

Flower Trellis Afghan, Where You Place the Stitches Makes the Difference

ScannedImageThe unique thing about crochet is that it all depends upon where you place your hook. Basically there are only a couple of stitches, but a very look happens when the stitches are placed in different places.0001830918_small2

1_Page_042_Image_0002_medium2

One side of Flower Trellis Afghan “Flowers” Photo courtesy of Annie’s

1_Page_042_Image_0001_medium2

Opposite side of Flower Trellis Afghan, “Snowflake” Photo courtesy of Annie’s

My Flower Trellis Afghan, on the cover of the current special issue of Crochet! Magazine From Scraps to Sensational, really shows how stitch placement can create a completely different effect, allowing this afghan to have two different but equally beautiful sides.

This afghan is comprised of motifs, which are only 3 round each. The first 2 rounds are the pops of color! Only a little yarn is needed for these rounds, so it really puts the scraps in your stash to work, the more interesting the color, or variegation, or hue of the yarn, the more interest to the overall effect.

1_Page_041_Image_0001_medium2

Flower Trellis Afghan Photo courtesy of Annie’s

1_Page_043_Image_0001_medium2

Flower Trellis Afghan Photo courtesy of Annie’s

The really magic occurs in the third round. The stitch placement of working in round 1 behind round 2, allows for the petals of the “flowers” to become distinguished, while creating the “snowflake” appearances on the opposite side. Or at least that is what I envision when I see them.

The other great feature about this afghan is that it is joining as you go; all is worked in the third round. So working the color of the motifs can be completely portable, and then join them all together when working the last round. This is a rewarding project, as it really helps clean up the left over bits of yarn you have been holding onto for the “special” project, and by placing your stitches in a different location you find that you have a project that has a personality, and differing effect on either side

Welcome the Designs for Fall

ScannedImageMy secret confession….time has completely gotten away from me. Okay, that is probably not a secret, and I am sure that I am not alone. However in the drought stricken California it has brought fall on a little earlier then expected; I am already harvesting peaches from my little trees, my neighbors are already harvesting grapes to begin the “crush” and create wine, none of this usually ever happens before September, so I am probably thinking it is later in the year then it is.

Autumn Leaves Placemat_CW2015OctI am pulling out the dehydrator and beginning to get my canning supplies together to put up fruit from this early season. My little farm is awaiting new arrivals as I have a broody chicken, a hen that is sitting on eggs, and I should soon be seeing new little chicks. However, even with all this rural lifestyle events I have some fun things happening in crochet.

Since autumn us so prevalent on my mind lately I am happy to share the release one of my latest designs in Crochet World Magazine. The October 2015 issue features my Autumn Leaves Place Mat. This place mat is created in utilizing 5 join as you go motifs, which are shaped to resemble leaves, created in Cotton Classic Lite from Tahki Yarns. I find that I use place mats in my home more then I would have thought; this is mostly due to the fact that I actually picked out and purchased my dining room table, but the wood is a little softer than I realized and is can scratch and mar without much effort. So this place mat is just big enough to fit a plate and silverware while adding a fun and festive feel to my meal table. Even though the design is worked in fall colors, I think a nice gold or orange would be nice, even a striking brown, but I could also reinvent this design for spring and work some up in beautiful shade of green.

Crochet World_Oct2015I hope that winter does not delve in to quickly (although I wouldn’t mind some rain), so that I can savor a little of this time of change.

Imagical Seasons- A Success! A Giveaway!

ScannedImageI always find it fun, the way that crochet can be worked in so many different ways and still come together to create something that makes you say “WOW!”

The designs in Alla Koval’s latest books, Imagical Seasons- Spring & Imagical Seasons- Summer are no exception. Alla has won awards for her designs in the Crochet Guild of America annual Design contest, and having seen her work in person I can tell you that photos just don’t do them justice. She uses creative construction techniques and fun stitch placement to make her designs shine. Summer Tropicale Cover01

If you want to check out Alla’s designs for yourself, I am fortunate enough to be able to give away both of her new books, 1 to each of 2 lucky winners! The Imagical Seasons- Spring will go to the first, and the Imagical Seasons- Summer will go to the second. All you have to do is leave a comment on this blog post by the end of the day, Wednesday, August 26, 2015 and the winners will be randomly selected the following day and announced on Twitter and my Facebook page. Spring Parfait Bolero03