Charity Block- Old World

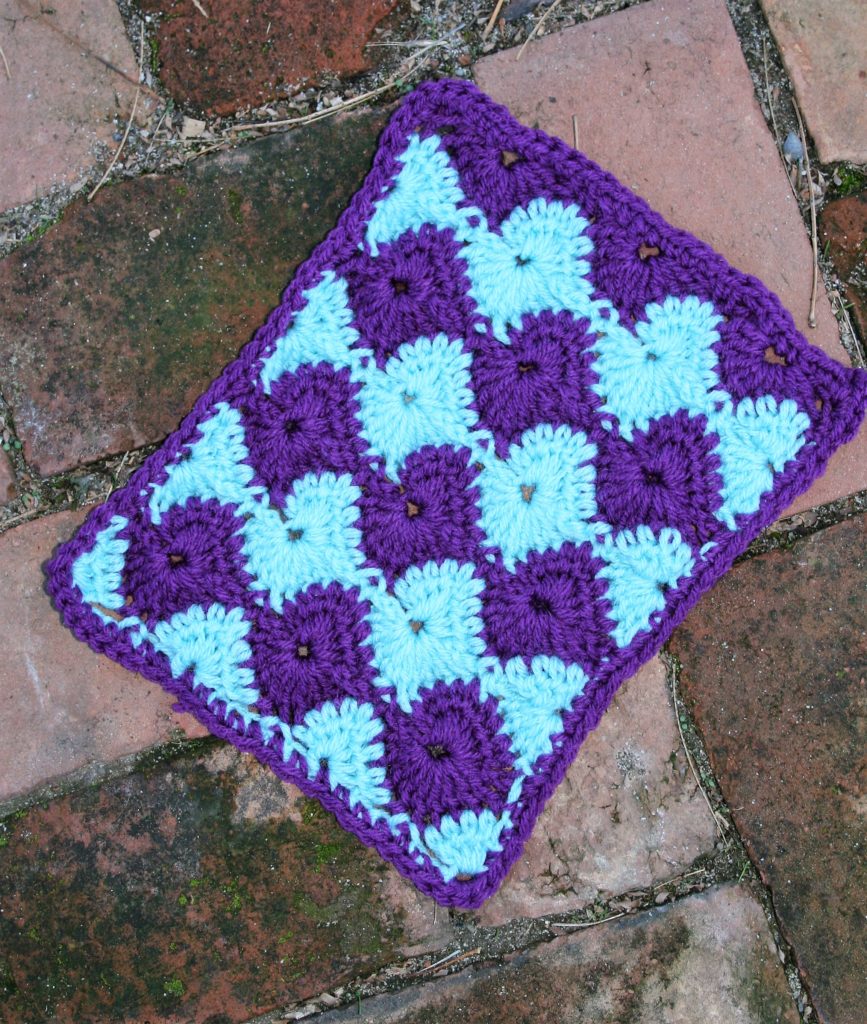
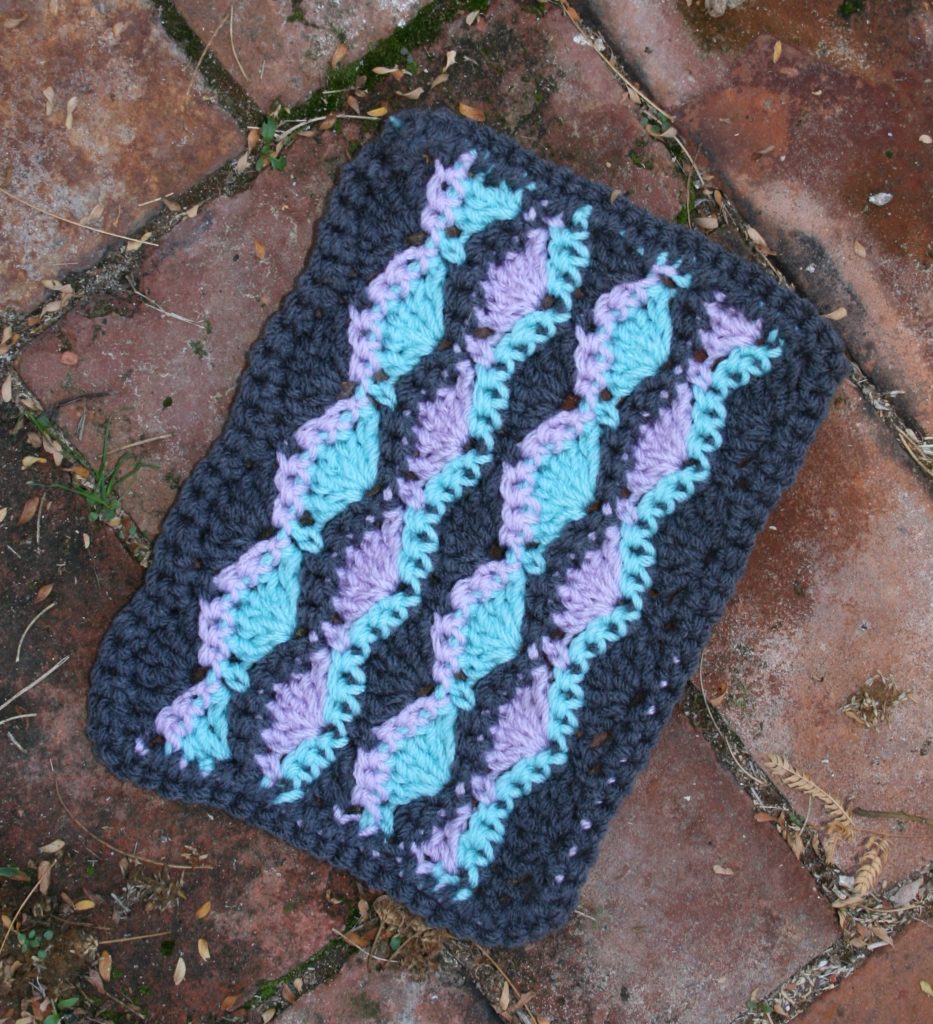
Over the last several weeks I have been doing a lot of work creating new design blocks for charity. These blocks can be used as you see fit to benefit others.

Materials

  • Cascade Yarn Pacific medium weight yarn, 60% acrylic/40% superwash merino wool (100g/3.5oz/213 yrd/195 m)
  • Hook size I/9/5.5mm, unless otherwise specified

Block measures 7″ x7″

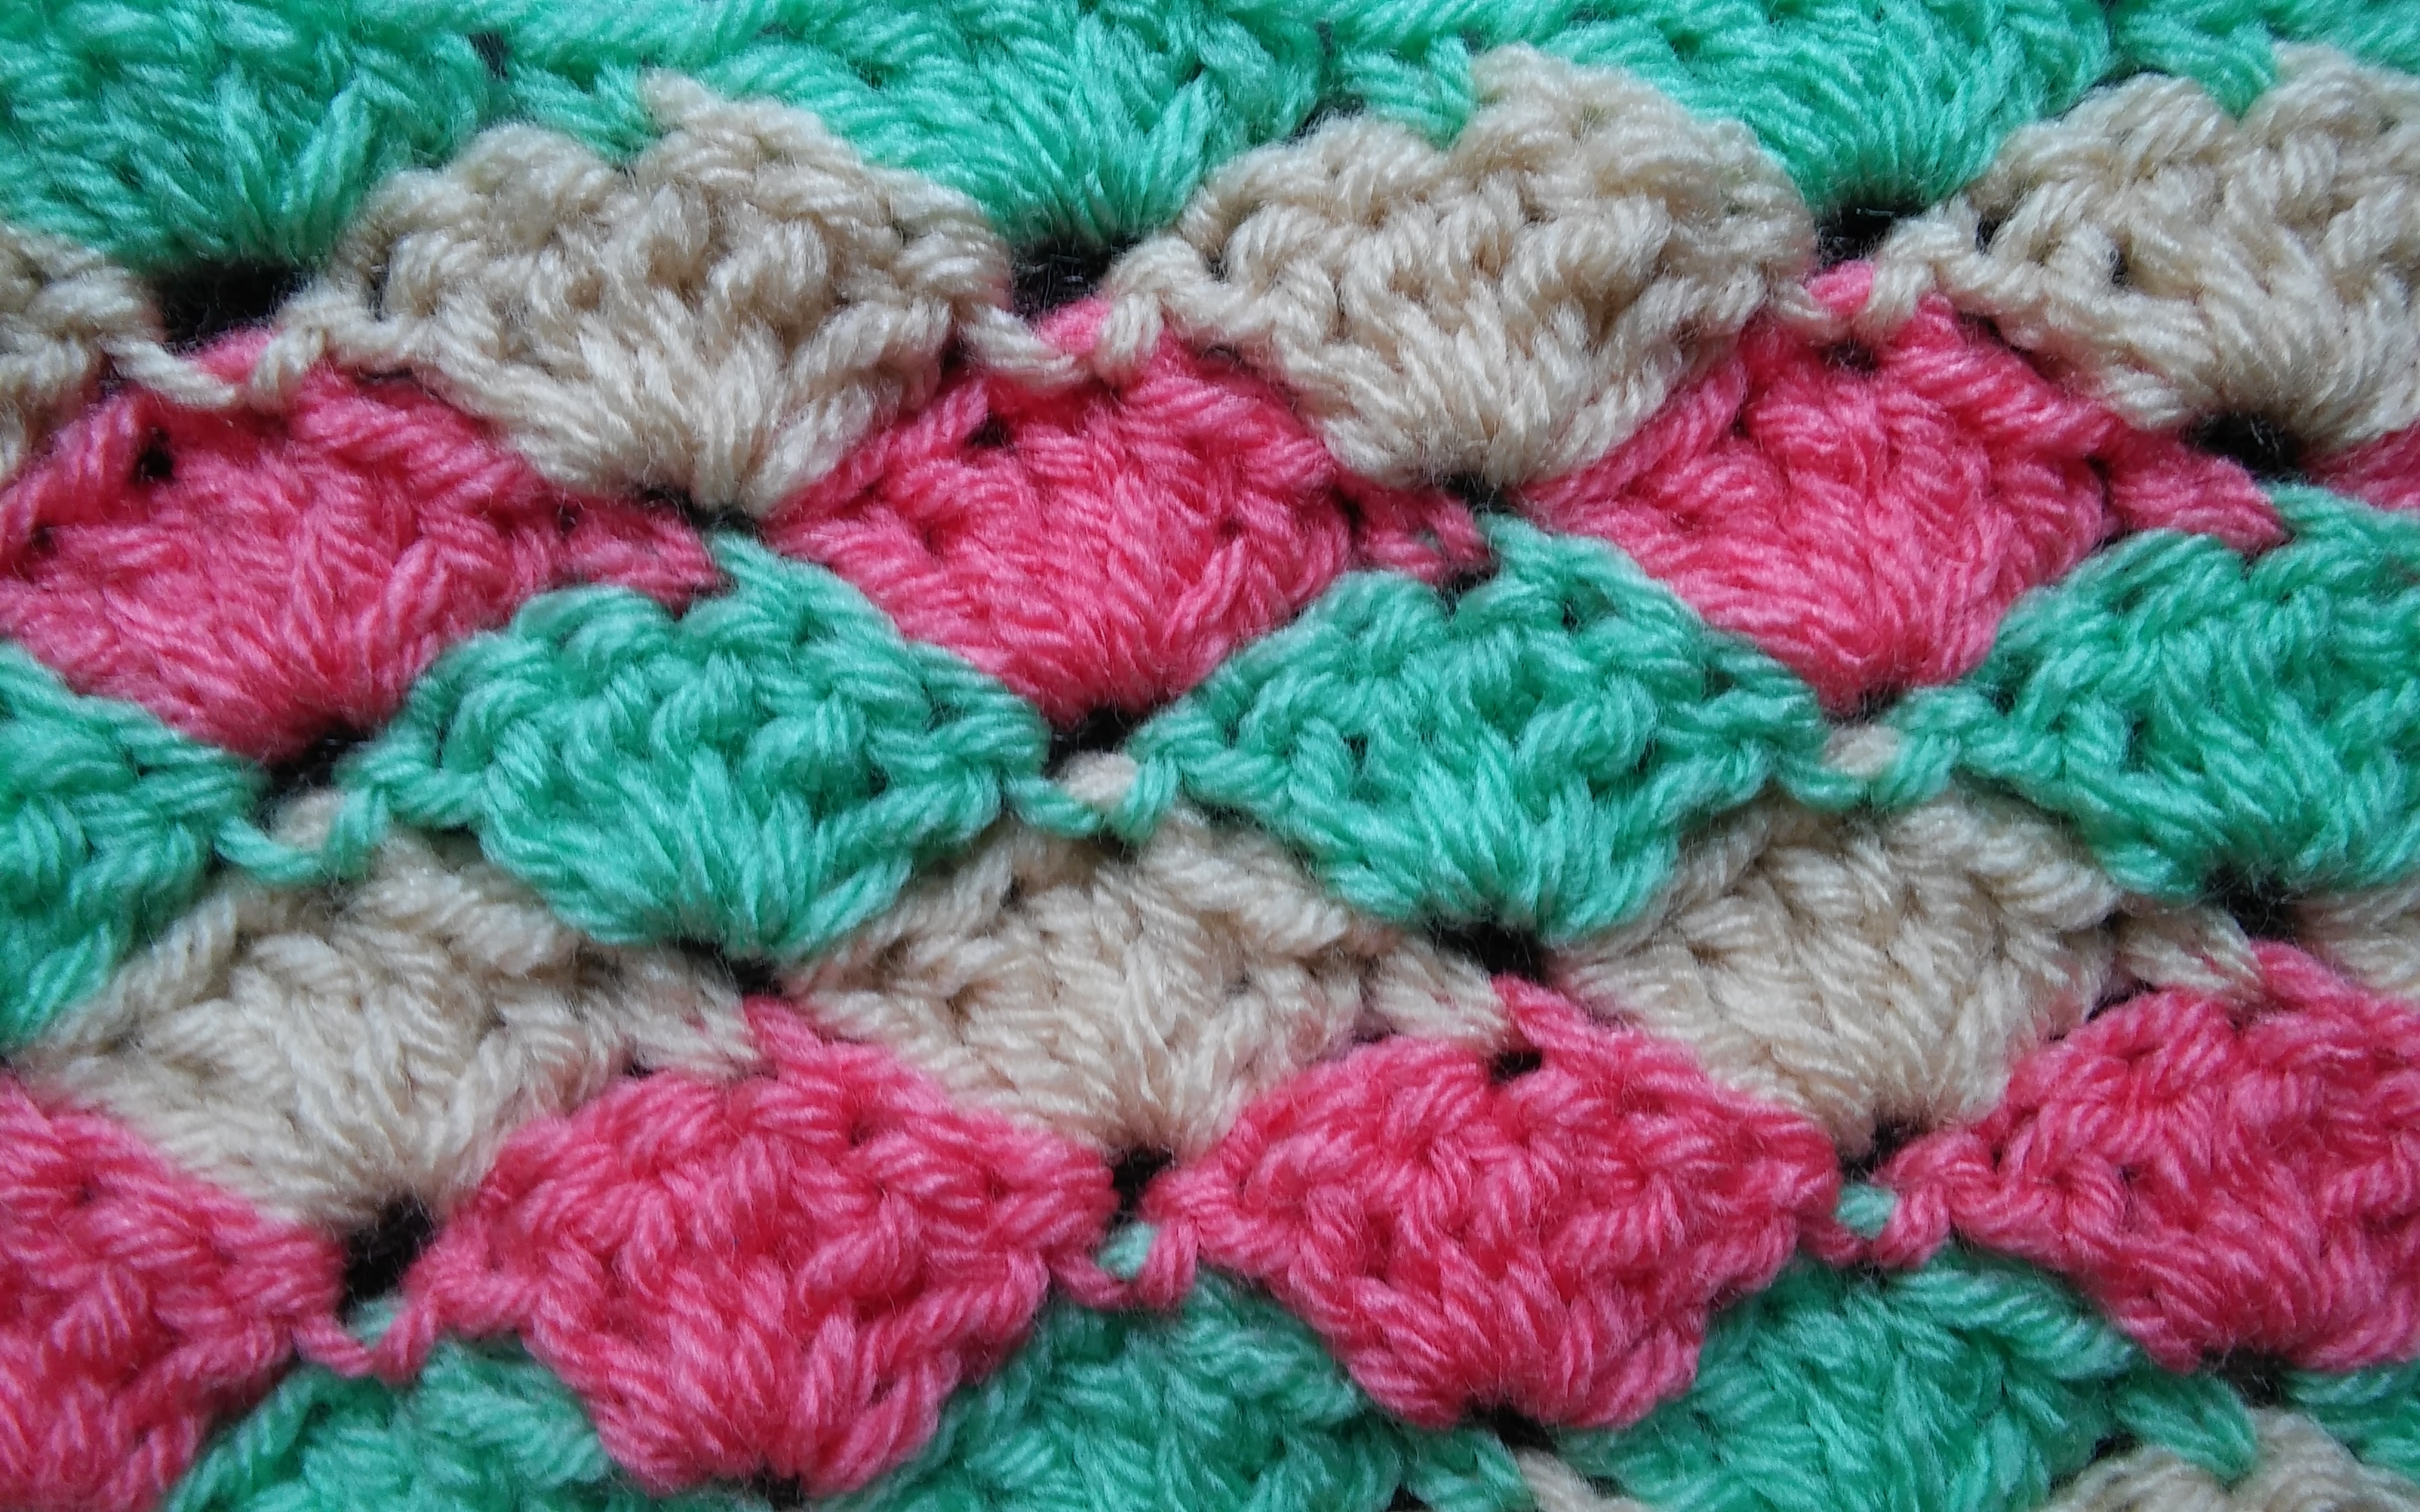
Old World Block for Charity

Old World block for charity

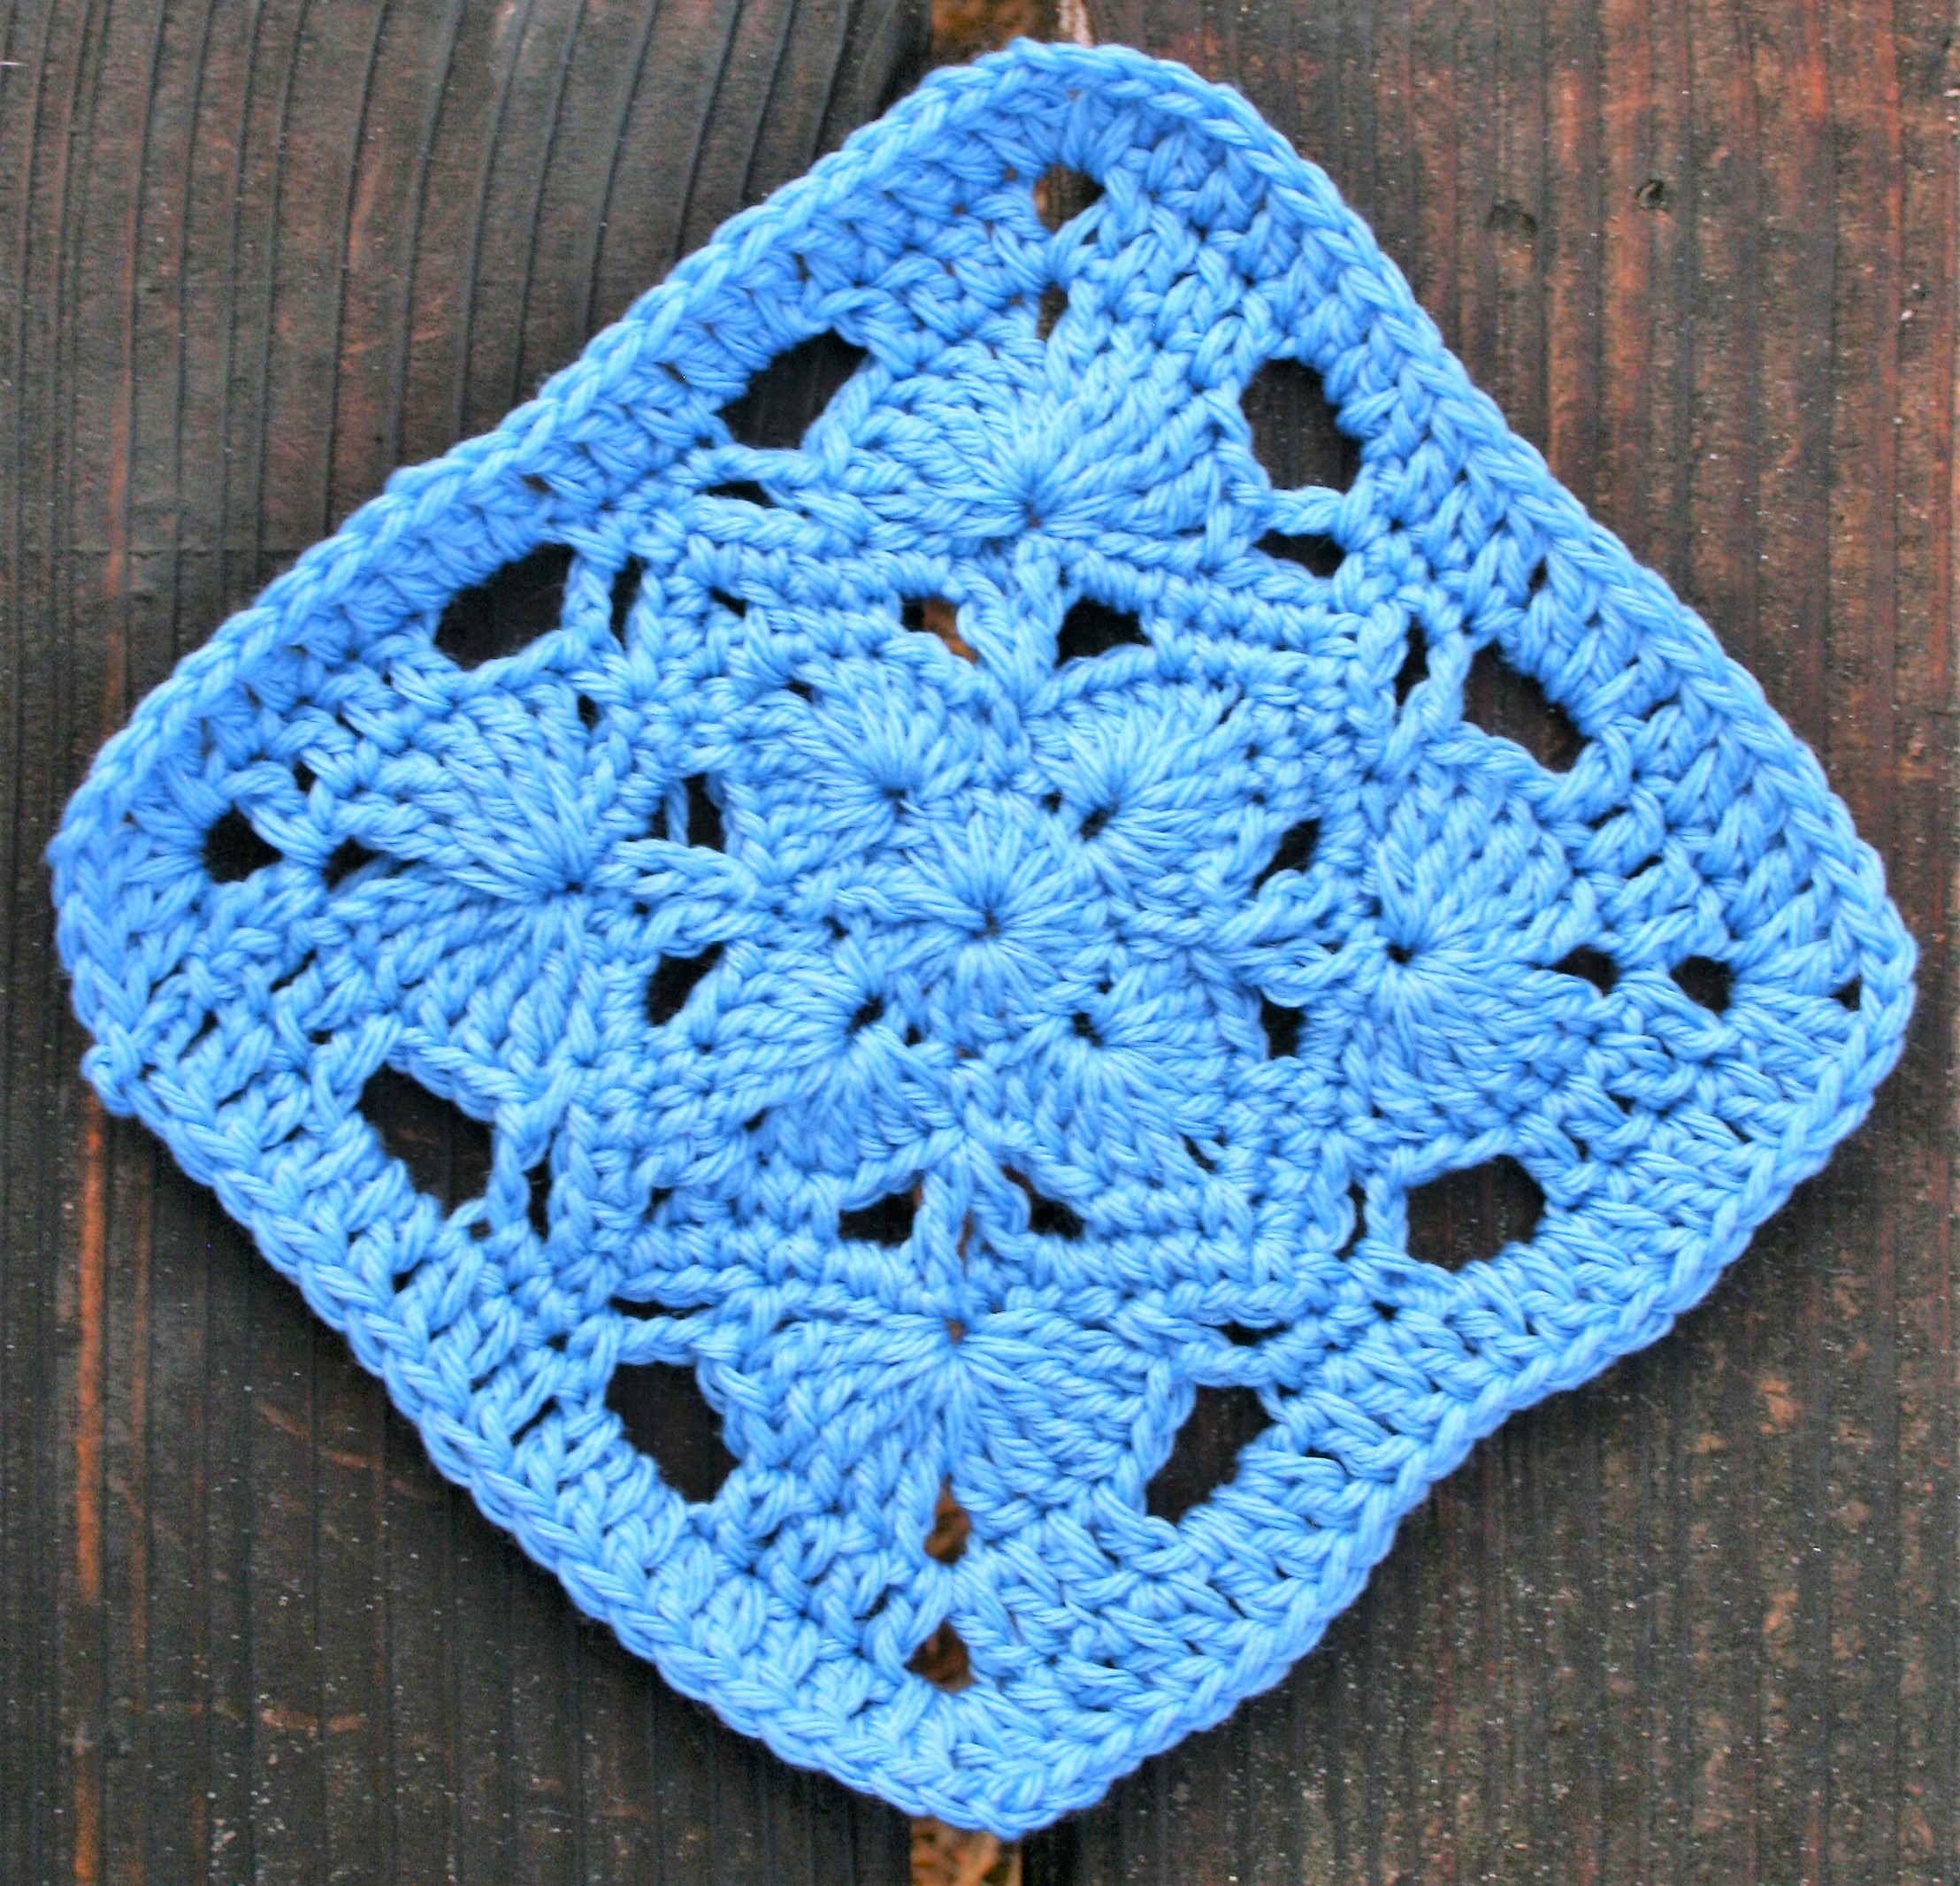
Rnd 1: Ch 4 (counts as dc), 15 dc in the 4th ch from hook, sl st in top of beg ch-4 to join. –16 dc

Rnd 2: Ch 1, sc in same st, sk 1 st, (5 dc, ch 2, 5 dc) in next st, sk 1 st, [sc in next st, sk 1 st, (5 dc, ch 2, 5 dc) in next st, sk 1 st] 3 times, sl st in first sc to join. –4 sc, 4 ch-2 sps, 40 dc

Rnd 3: Ch 4 (counts as dc + 1 ch), dc in same st, ch 2, sk 3 dc, sc in next 2 dc, (sc, ch 2, sc) in ch-2 sp, sc in next 2 dc, ch 2, [(dc, ch 1, dc) in next sc, ch 2, sk 3 dc, sc in next 2 dc, (sc, ch 2, sc) in ch-2 sp, sc in next 2 dc, ch 2] 3 times, sl st in 3rd ch of beg ch-4 to join. –8 dc, 24 sc, 4 ch-1 sps, 12 ch-2 sps

Rnd 4: Ch 1, sc in same st, sc in ch-1 sp, sc in next dc, 2 sc in ch-2 sp, sc in next 3 sts, (sc, ch 1, sc) in ch-2 sp, sc in next 3 sts, 2 sc in ch-2 sp, [sc in next dc, sc in next ch-1 sp, sc in next dc, 2 sc in ch-2 sp, sc in next 3 sts, (sc, ch 1, sc) in ch-2 sp, sc in next 3 sts, 2 sc in ch-2 sp] 3 times, sl st in first sc to join. –4 ch-1 sps, 60 sc

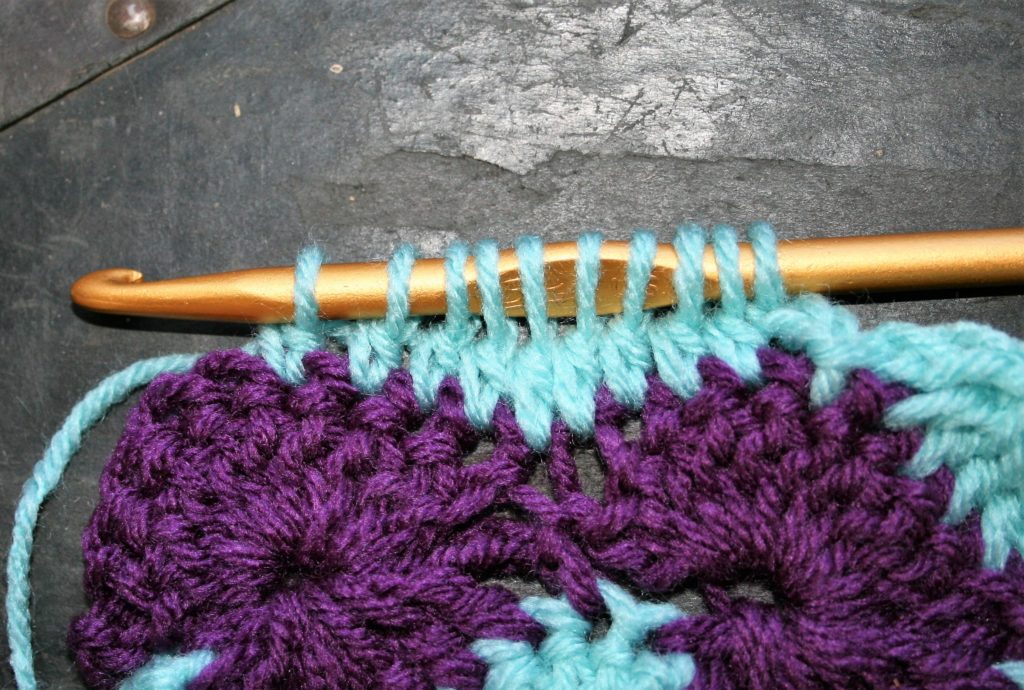
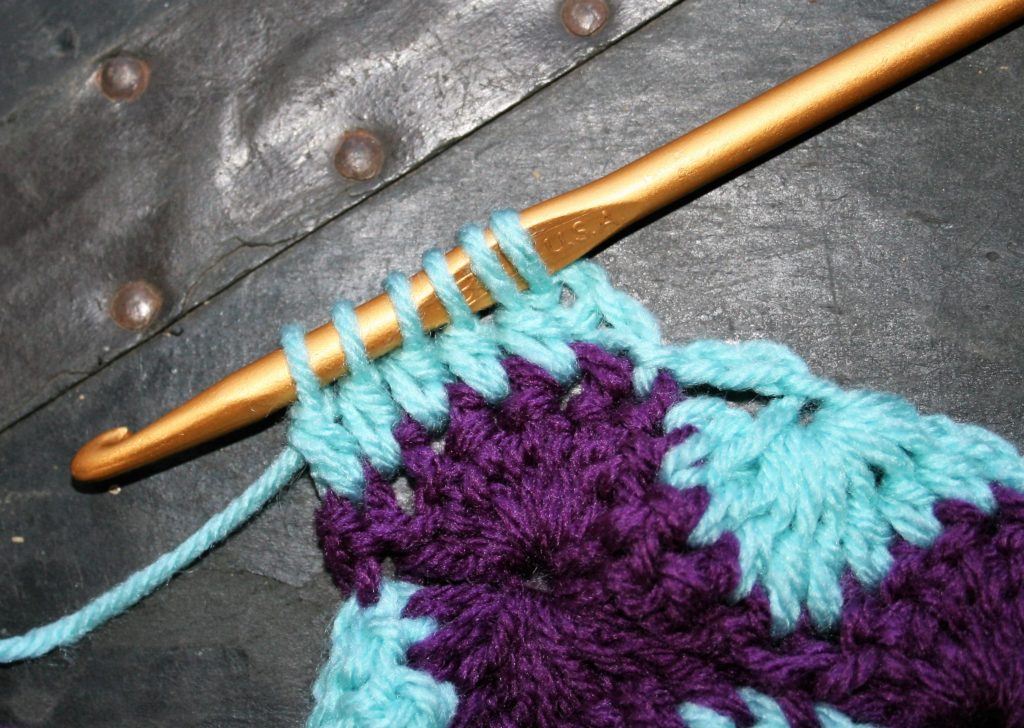
Rnd 5: Sl st in next st, ch 4 (counts as 1 tr), 4 tr in same st, [sk 3 sts, sc in next st, ch 3, sc in ch-1 sp, ch 3, sk 3 sts, sc in next st, sk 3 sts, (5 tr, ch 2, 5 tr) in next st] 3 times, ch 3, sk 3 sts, sc in ch-1 sp, ch 3, sk 3 sts, sc in next st, 5 tr in first st, ch 2, sl st in top of beg ch-4 to join. –40 tr, 4 ch-2 sps, 12 sc, 8 ch-3 sps

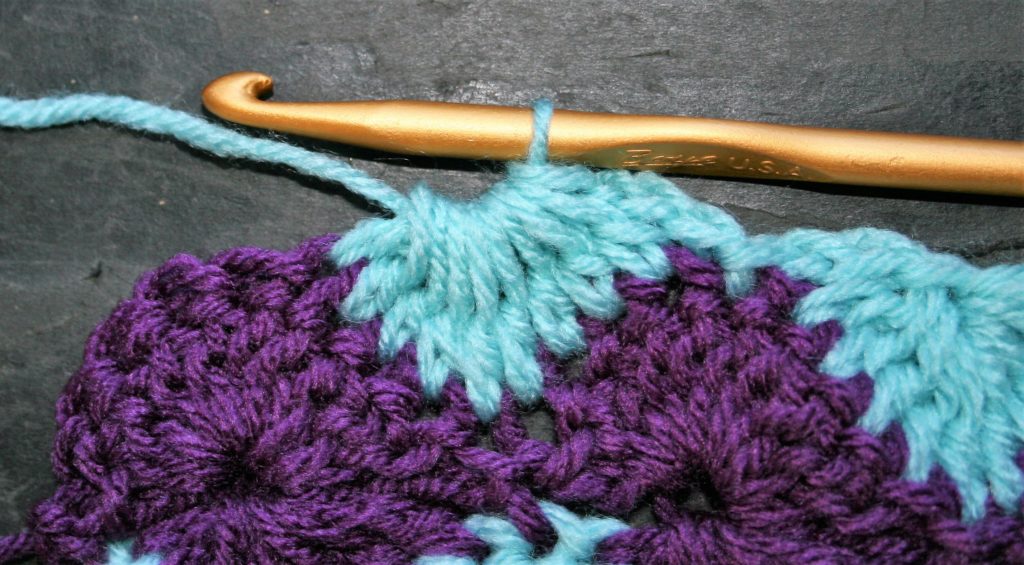
Rnd 6: Ch 3 (counts as dc), dc in next 2 sts, ch 3, sc in ch-3 sp, sc in next sc, sc in next ch-3 sp, ch 3, sk 2 tr, dc in next 3 tr, (dc, ch 2, dc) in ch-2 sp, [dc in next 3 tr, ch 3, sc in ch-3 sp, sc in next sc, sc in next ch-3 sp, ch 3, sk 2 tr, dc in next 3 tr, (dc, ch 2, dc) in ch-2 sp] 3 times, sl st in top of beg ch-3 to join. –32 dc, 12 sc, 4 ch-2 sps, 8 ch-3 sps

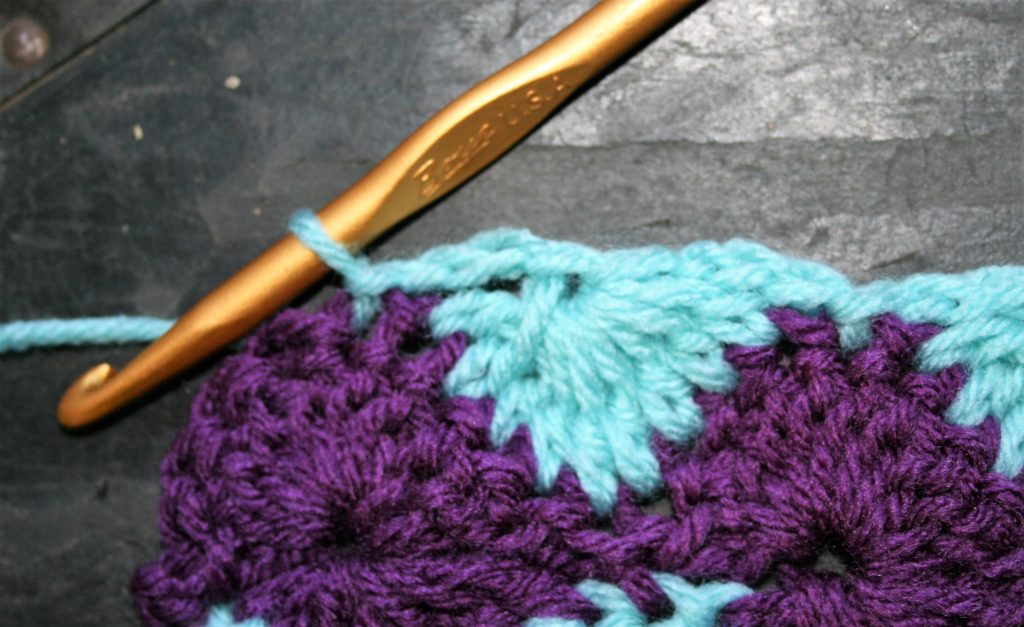
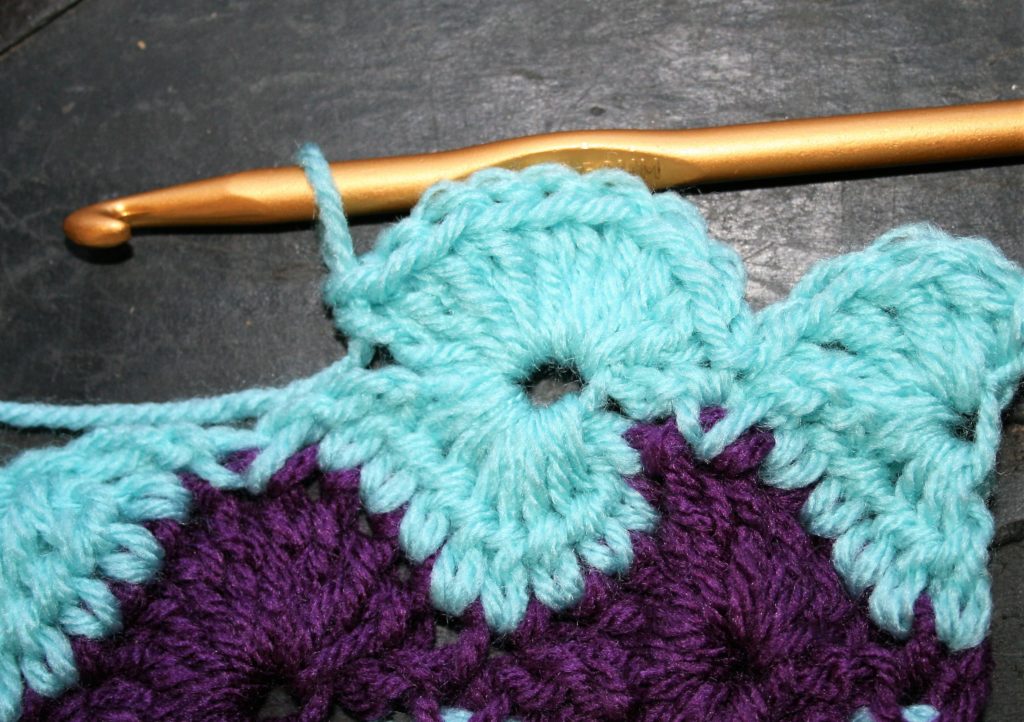
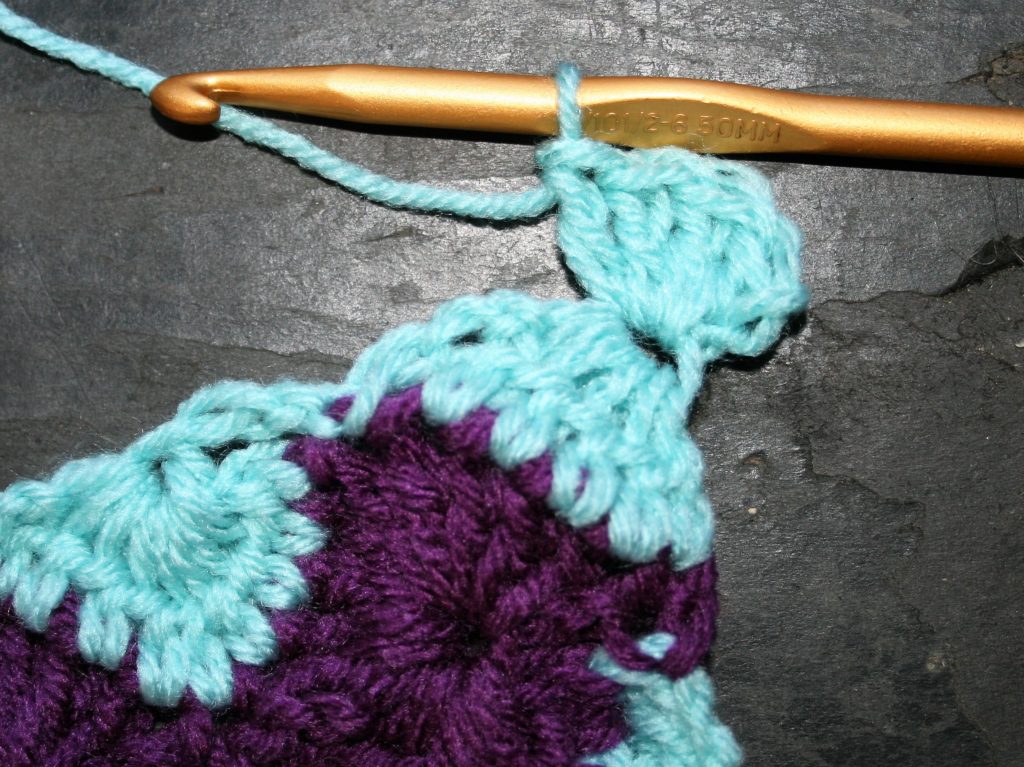
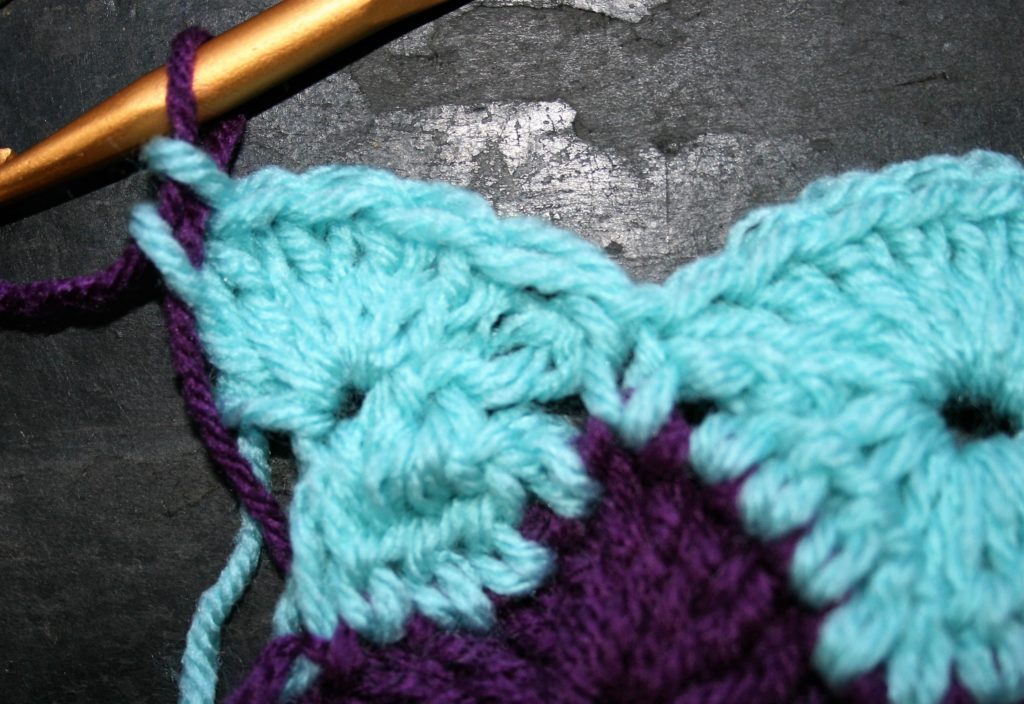
Rnd 7: Ch 3, [dc in each st and ch across to next corner ch-2 sp, (2 dc, ch 2, 2 dc) in ch-2 sp] 4 times, dc in last st, sl st to join. –84 dc

Fasten off, weave in ends, block.

1 for Me, 1 for You- Rolling Along Block

Help me help local communities by creating blocks for Warm Up America, by making a block for yourself and one for a community project with this free pattern. I will be creating a new block every few weeks and sharing it with you, I just ask that make one for donation.

Warm Up America is a nationwide organization that encourages local donations, but will also except donations to be sent to their office so that blocks can be assembled and then blankets can be donated through the United States.

Rolling Along Block

Even if you do not want to participate with Warm Up America, please consider creating blocks, or blankets for your local community. There are various places in every community that accept donations.

Rolling Along Block

Working the Catherine’s Wheel

Catherine’s Wheel is a classic crochet stitch that works one row of shells over a row of decreases to create a circle or wheel look. I have made a couple of changes to the classic pattern. For starters instead of working a single crochet after completing the shell or decrease, I work a slip stitch. I find that this help prevent “gapping” that occurs in the chain 3 area.

Working a dc9tog, you will have 10 loops on the hook.
Yarn over and pull through all the loops on the hook.
Slip stitch worked after the chain 3, to secure the decrease.
Working a decrease on the corner, dc5tog.

I should also point out that I work the shells in “the center of the decrease”, this is the biggest opening. However it is really not the completion of the decrease stitch, but the third chain. I feel that working here emphasizes the “center”, when working in the actual point of completion just looks a bit wonky.

Work the Shell in the center of the decrease, it creates a “hole”.
Working a shell at the beginning of a row means working in the center of the decrease.

I do have an exception to this, and that is when finishing a row with a shell it needs to be worked in the top of the turning chain to keep the edge straight. This will be just over from the “center”.

The “exception” the last shell is worked in the top of the turning chain, this helps to keep a straight edge.

Gauge

7”x9” rectangle

Materials

Medium weight yarn, in 2 colors MC (main color), CC1

K/10 ½/6.5mm crochet hook

Special Stitches

Double crochet 4 together (dc4tog): Working over the next 4 sts, [yo, insert hook into next st, yo, pull up a loop, yo, pull through 2 loops] six times, yo, pull through all 5 loops on hook.

Double crochet 5 together (dc5tog): Working over the next 5 sts, [yo, insert hook into next st, yo, pull up a loop, yo, pull through 2 loops] six times, yo, pull through all 6 loops on hook.

Double crochet 9 together (dc9tog): Working over the next 9 sts, [yo, insert hook into next st, yo, pull up a loop, yo, pull through 2 loops] six times, yo, pull through all 10 loops on hook.

Note:

Change colors without fastening off the yarn. Instead carry the yarn along the edge, and it will be hidden in the edging round. Here are some tips for do it.

The Pattern

With MC Chain 25

Row 1: Sc in 2nd ch from hook, [sk 3 chs, 9 dc in next ch, sk 3 chs, sc in next ch] three times, change to CC1, turn. –(3) 9 dc shells, 5 sc

Row 2: Ch 3, dc4tog, ch 3, sl st in next st, ch 3, dc9tog, ch 3, sl st in next st, ch 3, dc9tog, ch 3, sl st in next st, ch 3, dc5tog, turn. – (2) dc9tog, (1) dc4tog, (1) dcs5tog

Row 3: Ch 3, 4 dc in same st, sl st in next sl st, 9 dc in center of dc9tog, sl st in next sl st, 9 dc in center of dc9tog, sl st in next sl st, 5 dc in top of turning ch-3, change to MC, turn. (2) 9 dc shells, (2) 5 dc shells

Row 4: Ch 1, sl st in same st, ch 3, dc9tog, ch 3, sl st in next st, ch 3, dc9tog, ch 3, sl st in next st, ch 3, dc9tog, ch 3, sl st in last st, turn.

Row 5: Ch 1, sl st in same st, 9 dc in center of dc9tog, sl st in next sl st, 9 dc in center of dc9tog, sl st in next sl st, 9 dc in center of dc9tog, sl st in last st, change to CC1, turn.

Row 6-13: Rep Rows 2-5 twice.

Row 14: Rep Row 2. Fasten off.

Edging

With color MC, sc in each st across, 3 sc in corner, work evenly sc around block working 3 sc in each corner. Finish off.

1 for Me, 1 for You- Shells in a Row Block

Help me help local communities by creating blocks for Warm Up America, by making a block for yourself and one for a community project with this free pattern. I will be creating a new block every few weeks and sharing it with you, I just ask that make one for donation.

Warm Up America is a nationwide organization that encourages local donations, but will also except donations to be sent to their office so that blocks can be assembled and then blankets can be donated through the United States.

Even if you do not want to participate with Warm Up America, please consider creating blocks, or blankets for your local community. There are various places in every community that accept donations.

Shells in a Row

These simple 5 double crochet shells are just off-set from one another, but a simple contrasting row of color gives it a different feel, allowing the for a real stand out.

Working with three colors has the added benefit of having less ends to weave in, by carrying the color along the edge. To learn more about this technique, check it out here.

Gauge: 7”x9” rectangle

Materials

Medium weight yarn, in 3 colors MC (main color), CC1, CC2

K/10 ½/ 6.5mm hook

Block Pattern

With MC Ch 26

Row 1: Sc in 2nd ch from hook, [sk 2 chs, 5 dc in next ch, sk 2 chs, sc in next ch] 4 times, turn. -4 (5dc shells), 5 sc sts

Row 2: Change to CC1, ch 1, sc in same st, sc in each st across, turn. -25 sts

Row 3: Change to CC2, ch 3, 2 dc in same st, sk 2 sts, sc in next st, [sk 2 sts, 5 dc in next st, sk 2, sc in next st] 3 times, sk 2 sts, 3 dc in last st, turn. -3 (5 dc shells) 4 sc sts, 2 (3 dc half shells)

Row 4: Change to MC, ch 1, sc in same st, sc in each st across, turn.

Row 5: Change to CC1, ch 1, sc in same st, [sk 2, 5 dc in next st, sk 2, sc in next st] 4 times, turn. -4 (5dc shells), 5 sc sts

Row 6: Change to CC2, ch 1, sc in same st, sc in each st across, turn.

Row 7: Change to MC, ch 3, 2 dc in same st, sk 2 sts, sc in next st, [sk 2 sts, 5 dc in next st, sk 2, sc in next st] 3 times, sk 2 sts, 3 dc in last st, turn. -3 (5 dc shells) 4 sc sts, 2 (3 dc half shells)

Row 8: Change to CC1, ch 1, sc in same st, sc in each st across, turn.

Row 9: Change to CC2, ch 1, sc in same st, [sk 2, 5 dc in next st, sk 2, sc in next st] 4 times, turn. -4 (5dc shells), 5 sc sts

Row 10: Change to MC, ch 1, sc in same st, sc in each st across, turn.

Row 11: Change to CC1,  ch 3, 2 dc in same st, sk 2 sts, sc in next st, [sk 2 sts, 5 dc in next st, sk 2, sc in next st] 3 times, sk 2 sts, 3 dc in last st, turn. -3 (5 dc shells) 4 sc sts, 2 (3 dc half shells)

Row 12: Change to CC2, ch 1, sc in same st, sc in each st across, turn.

Row 13: Change to MC, ch 1, sc in same st, [sk 2, 5 dc in next st, sk 2, sc in next st] 4 times, turn, do not fasten off. -4 (5dc shells), 5 sc sts

Edge

Rnd 1: Ch 1, sc in sc in same st, sc in each st across until 1 st remains, 3 sc in last st, working over row ends evenly sc across to beg ch, 3 sc in last st, working in unused loops of beg ch, sc in each chain across, 3 sc in last st, working over row end evenly sc across, 2 sc in last st, sl st to beg sc, fasten off.

Weave in ends, block.

Staggered Shells-Crochet for a Difference

Some crochet stitches appear more difficult then they may actually be, Staggered Shells I believe is one of these. This stitch is essentially comprised of single crochets worked between shells that are made up of five double crochets.

New crocheters sometimes do not realize that what creates a different look may simply be where you place a stitch, and that you can work more than one stitch in a location. However like all crochet stitches the name “shell” doesn’t tell you the entire story. “Shell” essentially means that there are a number of stitches worked in the same location, without looking at the Special Stitches section of a pattern there is no way to fully understand how this stitch is worked, what number of stitches, or which stitch for that matter is worked. For this shell pattern I have used five double crochets worked in the same stitch.

Staggered Shells www.lindadeancrochet.com

Staggered Shells, changing color every row.

I have written this stitch pattern out in an untraditional method to attempt to help in understand how to better read your stitches. In my teaching I have found that crochet can be very forgiving if you have learned how to read your work and not worry so much about counts. Seeing the pattern can free up your work (at the end of this post the stitch pattern is written in a traditional format).

Row 1: To begin you create a chain that is a multiple of 5, then add 2 more chains. Single crochet in the second chain from the hook, [skip the next 2 chains, work a shell (5 double crochets) in the next chain, skip the next 2 chains, single crochet in the next chain] repeating everything in the [ ] across, turn.

Row 2: Chain 3, 2 double crochet in the same stitch as the beginning chain, this creates a half shell at the edge of the fabric, work a single crochet in the center double crochet of the next shell, [then work a shell in the next single crochet (between shells), work a single crochet in the center double crochet of next shell] repeat everything in the [ ] until you reach the top of the last shell, after working the single crochet in the top of the last shell, work 3 double crochets in the last single crochet stitch (this is another half shell at the other edge of the work, turn.

Row 3: Chain 1, single crochet in the same stitch, [shell in the next single crochet, single crochet in the center double crochet of the next shell] repeat in the [ ] across, turn.

Repeat Rows 2 & 3 until it is the desired length.

I always like to practice new stitches and feel like I am accomplishing something at the same time, so I find places that may be interested in receiving a handmade blanket donation, you may want to consider reaching out to your local fire station and see if they maybe interested in receiving small afgahns that they can give to children or others that may be in the need of some extra comfort during a time of trauma. Not all trauma is physical and sometimes wrapping yourself in a blanket, or even having one draped over your shoulders can add comfort during difficult times.

The traditional pattern:

Shell: 5 dc in same st

Ch a multilple of 5 +2

Row 1: sc in 2nd ch from hook, [sk 2 chs, shell, sk 2 chs, sc] repeat across, turn.

Row 2: Ch 3, 2 dc in same st, sk 2 dc, sc in next dc, [shell in next sc, sk 2 dc, sc in next dc] repeat across, 3 dc in last sc, turn.

Row 3: Ch 1, sc in same st, [shell in next sc, sk 2 dc, sc in next dc] repeat across, turn.

Repeat Row 2 & 3 until desired length.

Where Designs Grow- The Bharat Star Table Runner

ScannedImageThe New Year seems like it has been a bit of a whirl wind, especially since I have several designs coming out in various publications over the next several weeks. I enjoy sharing my thoughts of where these designs grew from, and the latest of these is the Bharat Star Table Runner, that is now available in the special issue of Crochet World Magazine, Blue Ribbon Crochet (available on newsstands and for download now).

871501_BlueRibbon_COVERThis table runner created with #10 cotton thread (Nazli Gelin Garden, color #700-09), was a design that grew out my approach to seeing in uses for the picot stitch. The picot stitch is a crochet classic, which is often used in an edging, sometimes within lace stitches, and is essentially working a chain-3 loop among a row or round of stitches. This creates a little, for lack of a better term, “nub” to rise above the other stitches and create a visual interest.

In playing with this classic technique, I have used the picot, instead of an embellishment as a location of additional stitch work. I have found that increasing the picot to a chain-4 loops, this becomes an excellent place to put shell or fan stitches, that creates a nice rounded arch.

image-1

photo courtesy of Annie’s

So while sitting in grass at my old high school, waiting for my kids to finish their parks & recreation tennis lessons last summer, I was playing with motifs. I was originally attempting to create large lace motif, but after working my fourth round by working a shelled arch in a picots I could not find a way to continue it further. I loved the shape that it made. I knew I was really on to something with it when the other parents waiting for their kids commented on how much they liked what I was making (once again crochet is an ice breaker).

I added the small motif squares to the mix, as a way to assist in a smooth join to the fabric, and believe that the square shape is a nice compliment to the star shape. I actually enjoy this stitch pattern enough that I have considered, several times, adding more motifs to make a wrap, or even a full table cloth.

If you do not feel comfortable using thread, this pattern can use yarn, and offer beautiful results as well.

I enjoy many of my designs, but this one is up among my favorites.