Stitch Order Can Make All the Difference

Simple stitch switches can create a very different appearance. Sometimes these “switches” happen by mistake…I speak from experience, and sometimes they are thoroughly thought out.

Often my students look at me with a bit of “sure, that is true” look whenever I explain that crochet essentially has only 3 stitches, everything else is just variations. They think I am even crazier when I explain, it is all about stitch location that causes all the different looks.

I happened to reinforce this for myself just the other day. I was working up a pattern, and looking at my notes it stated “sc, dc” stitches. Pretty straight forward and I thought I knew what I meant, however when working up my fabric is was not looking like the sample swatch.

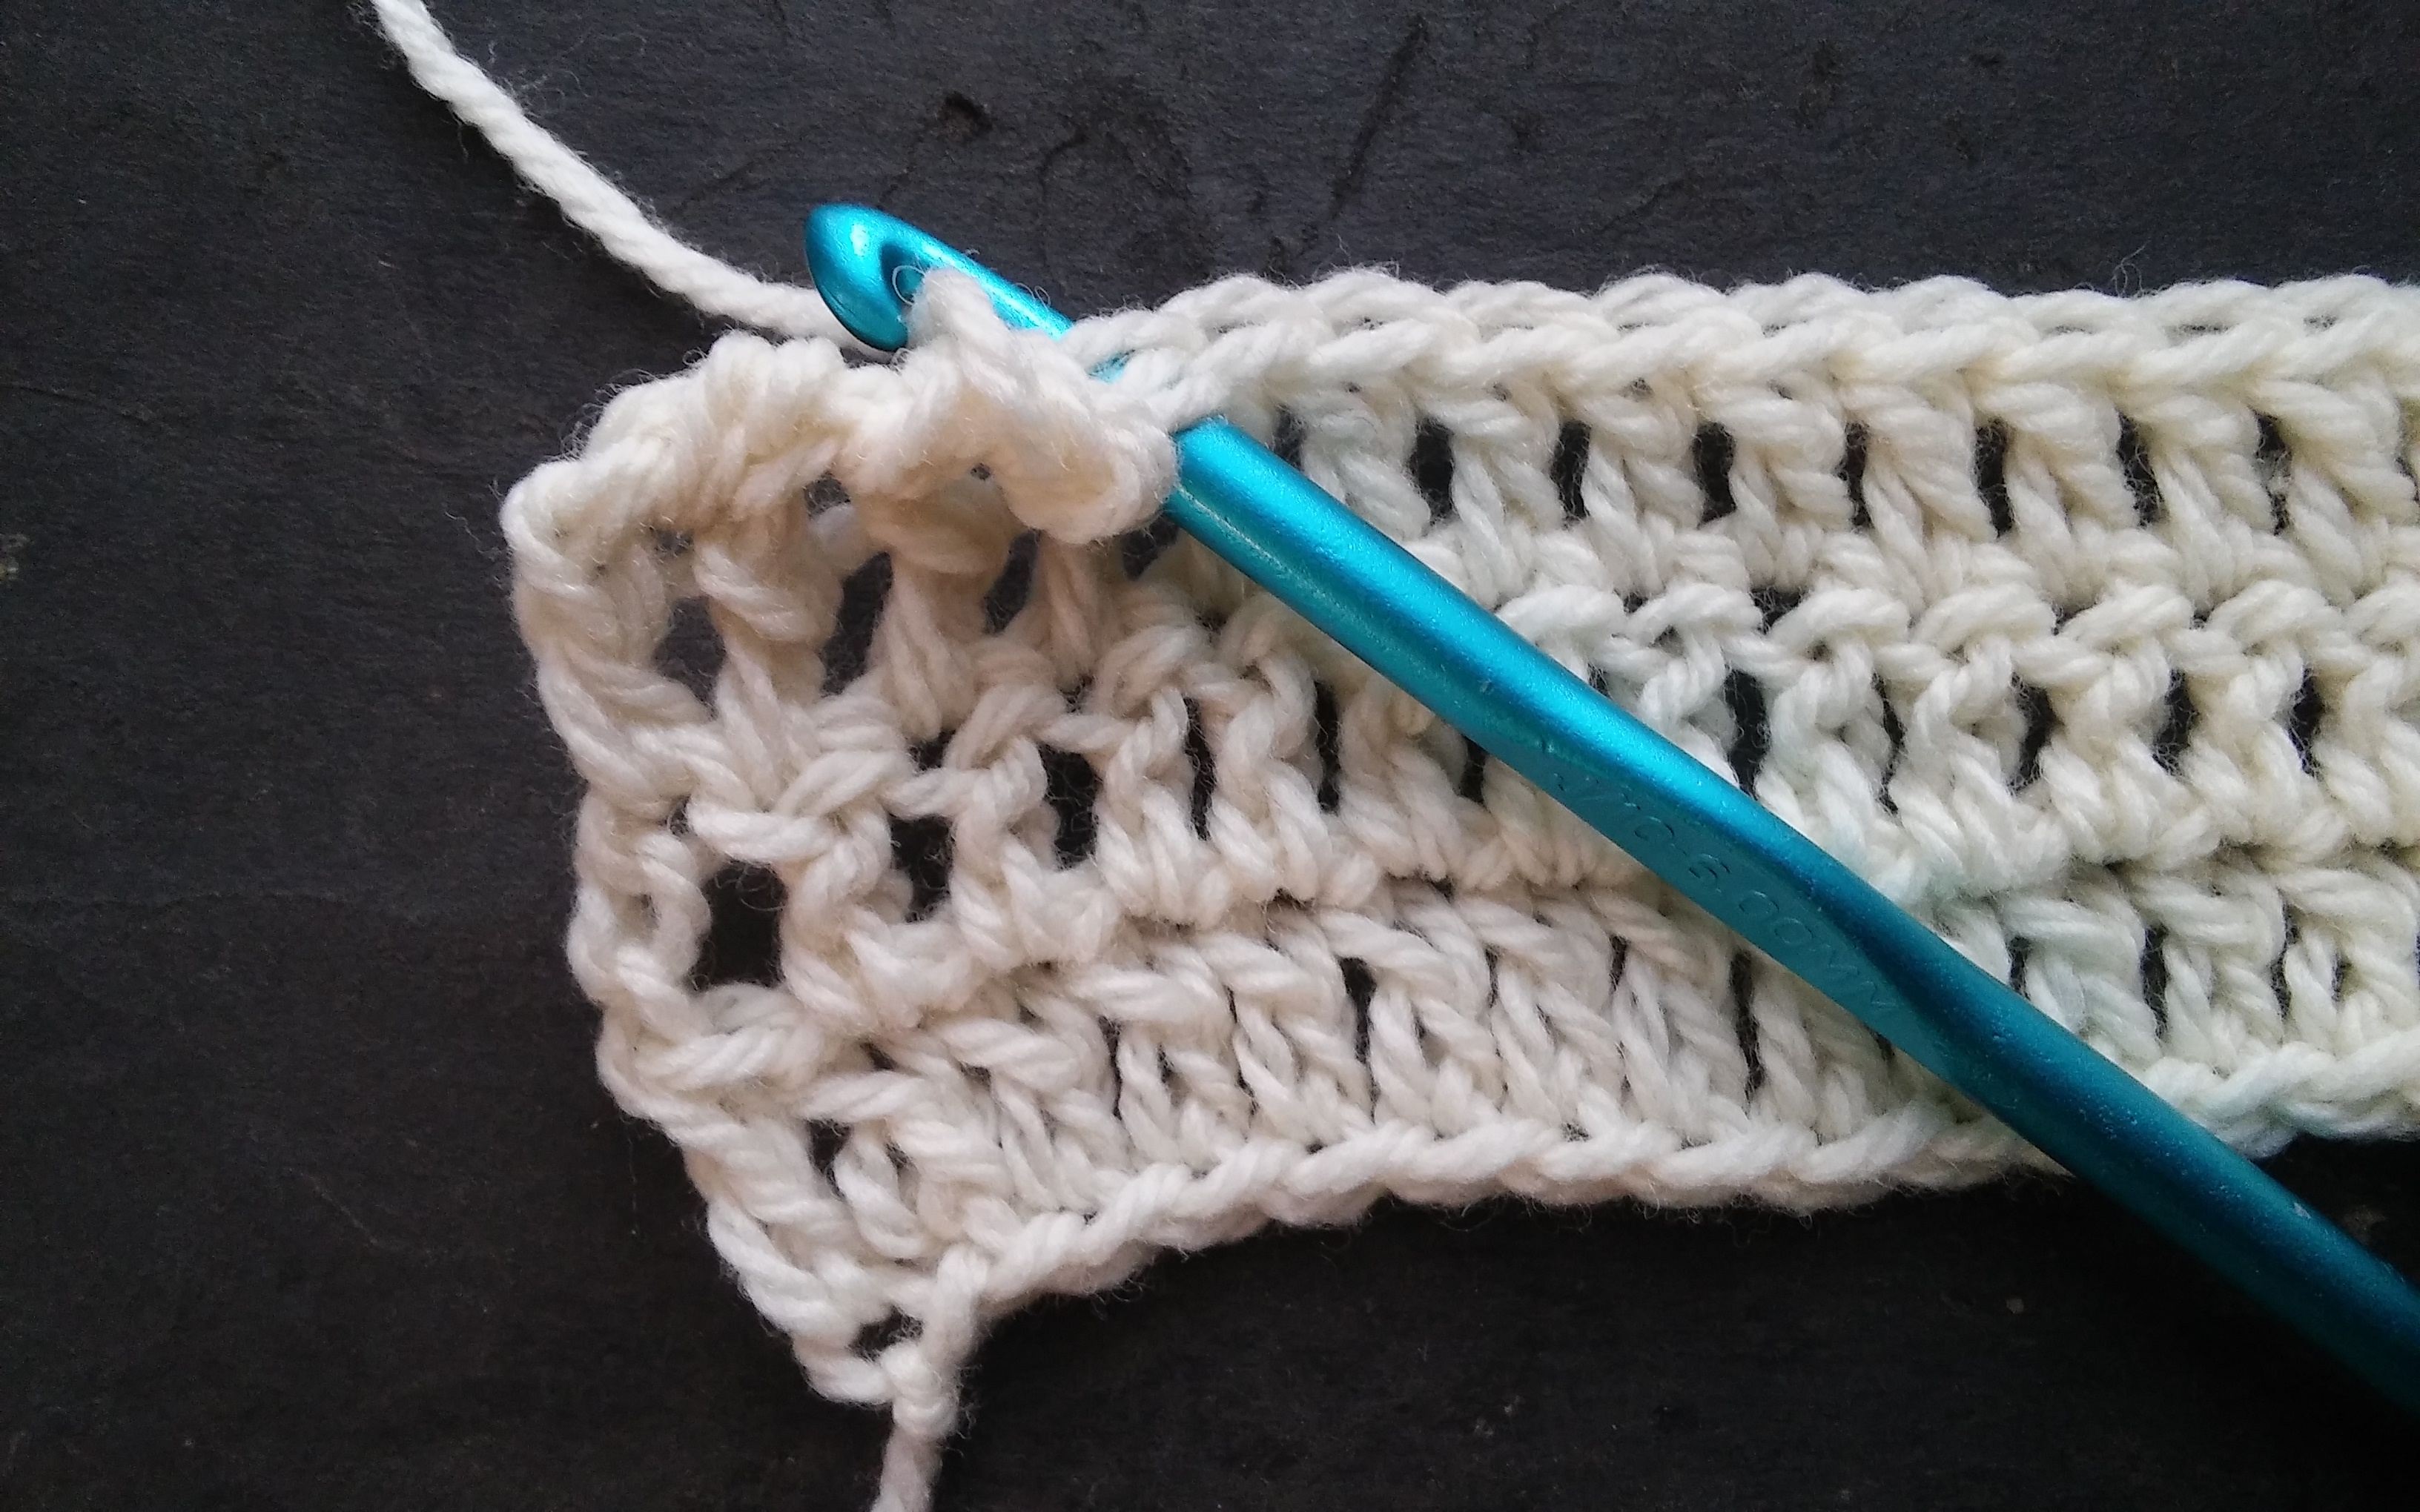
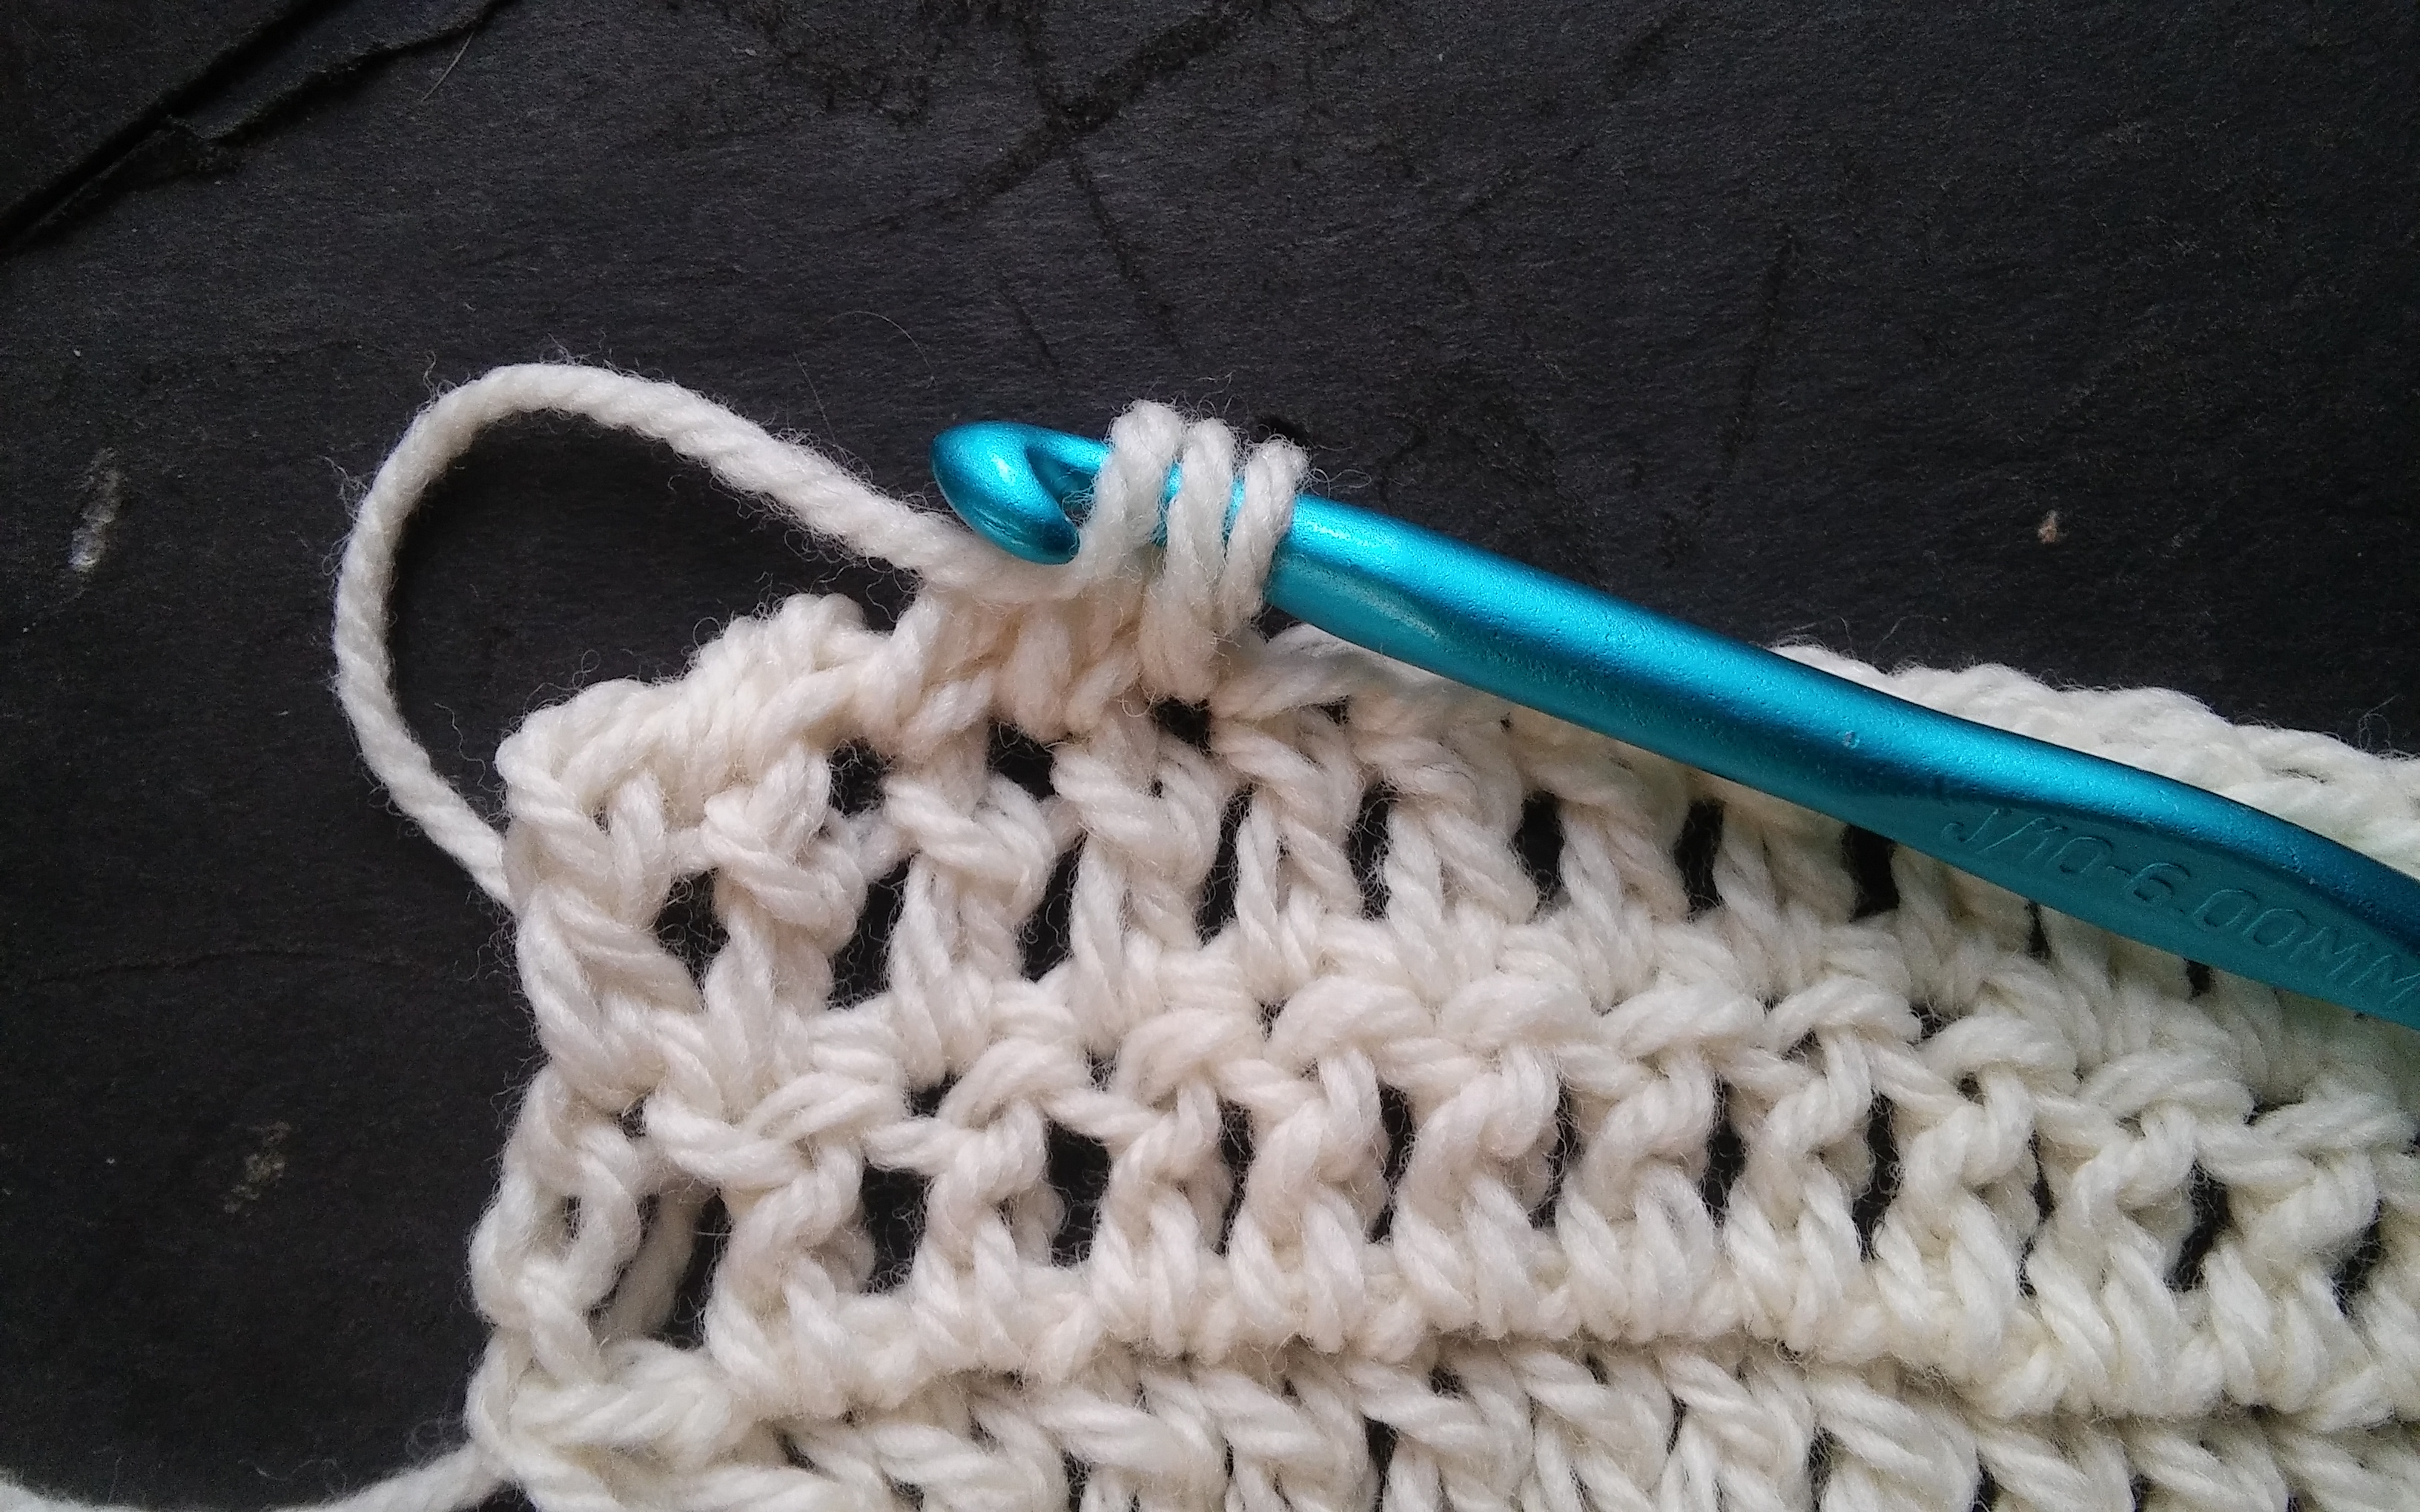
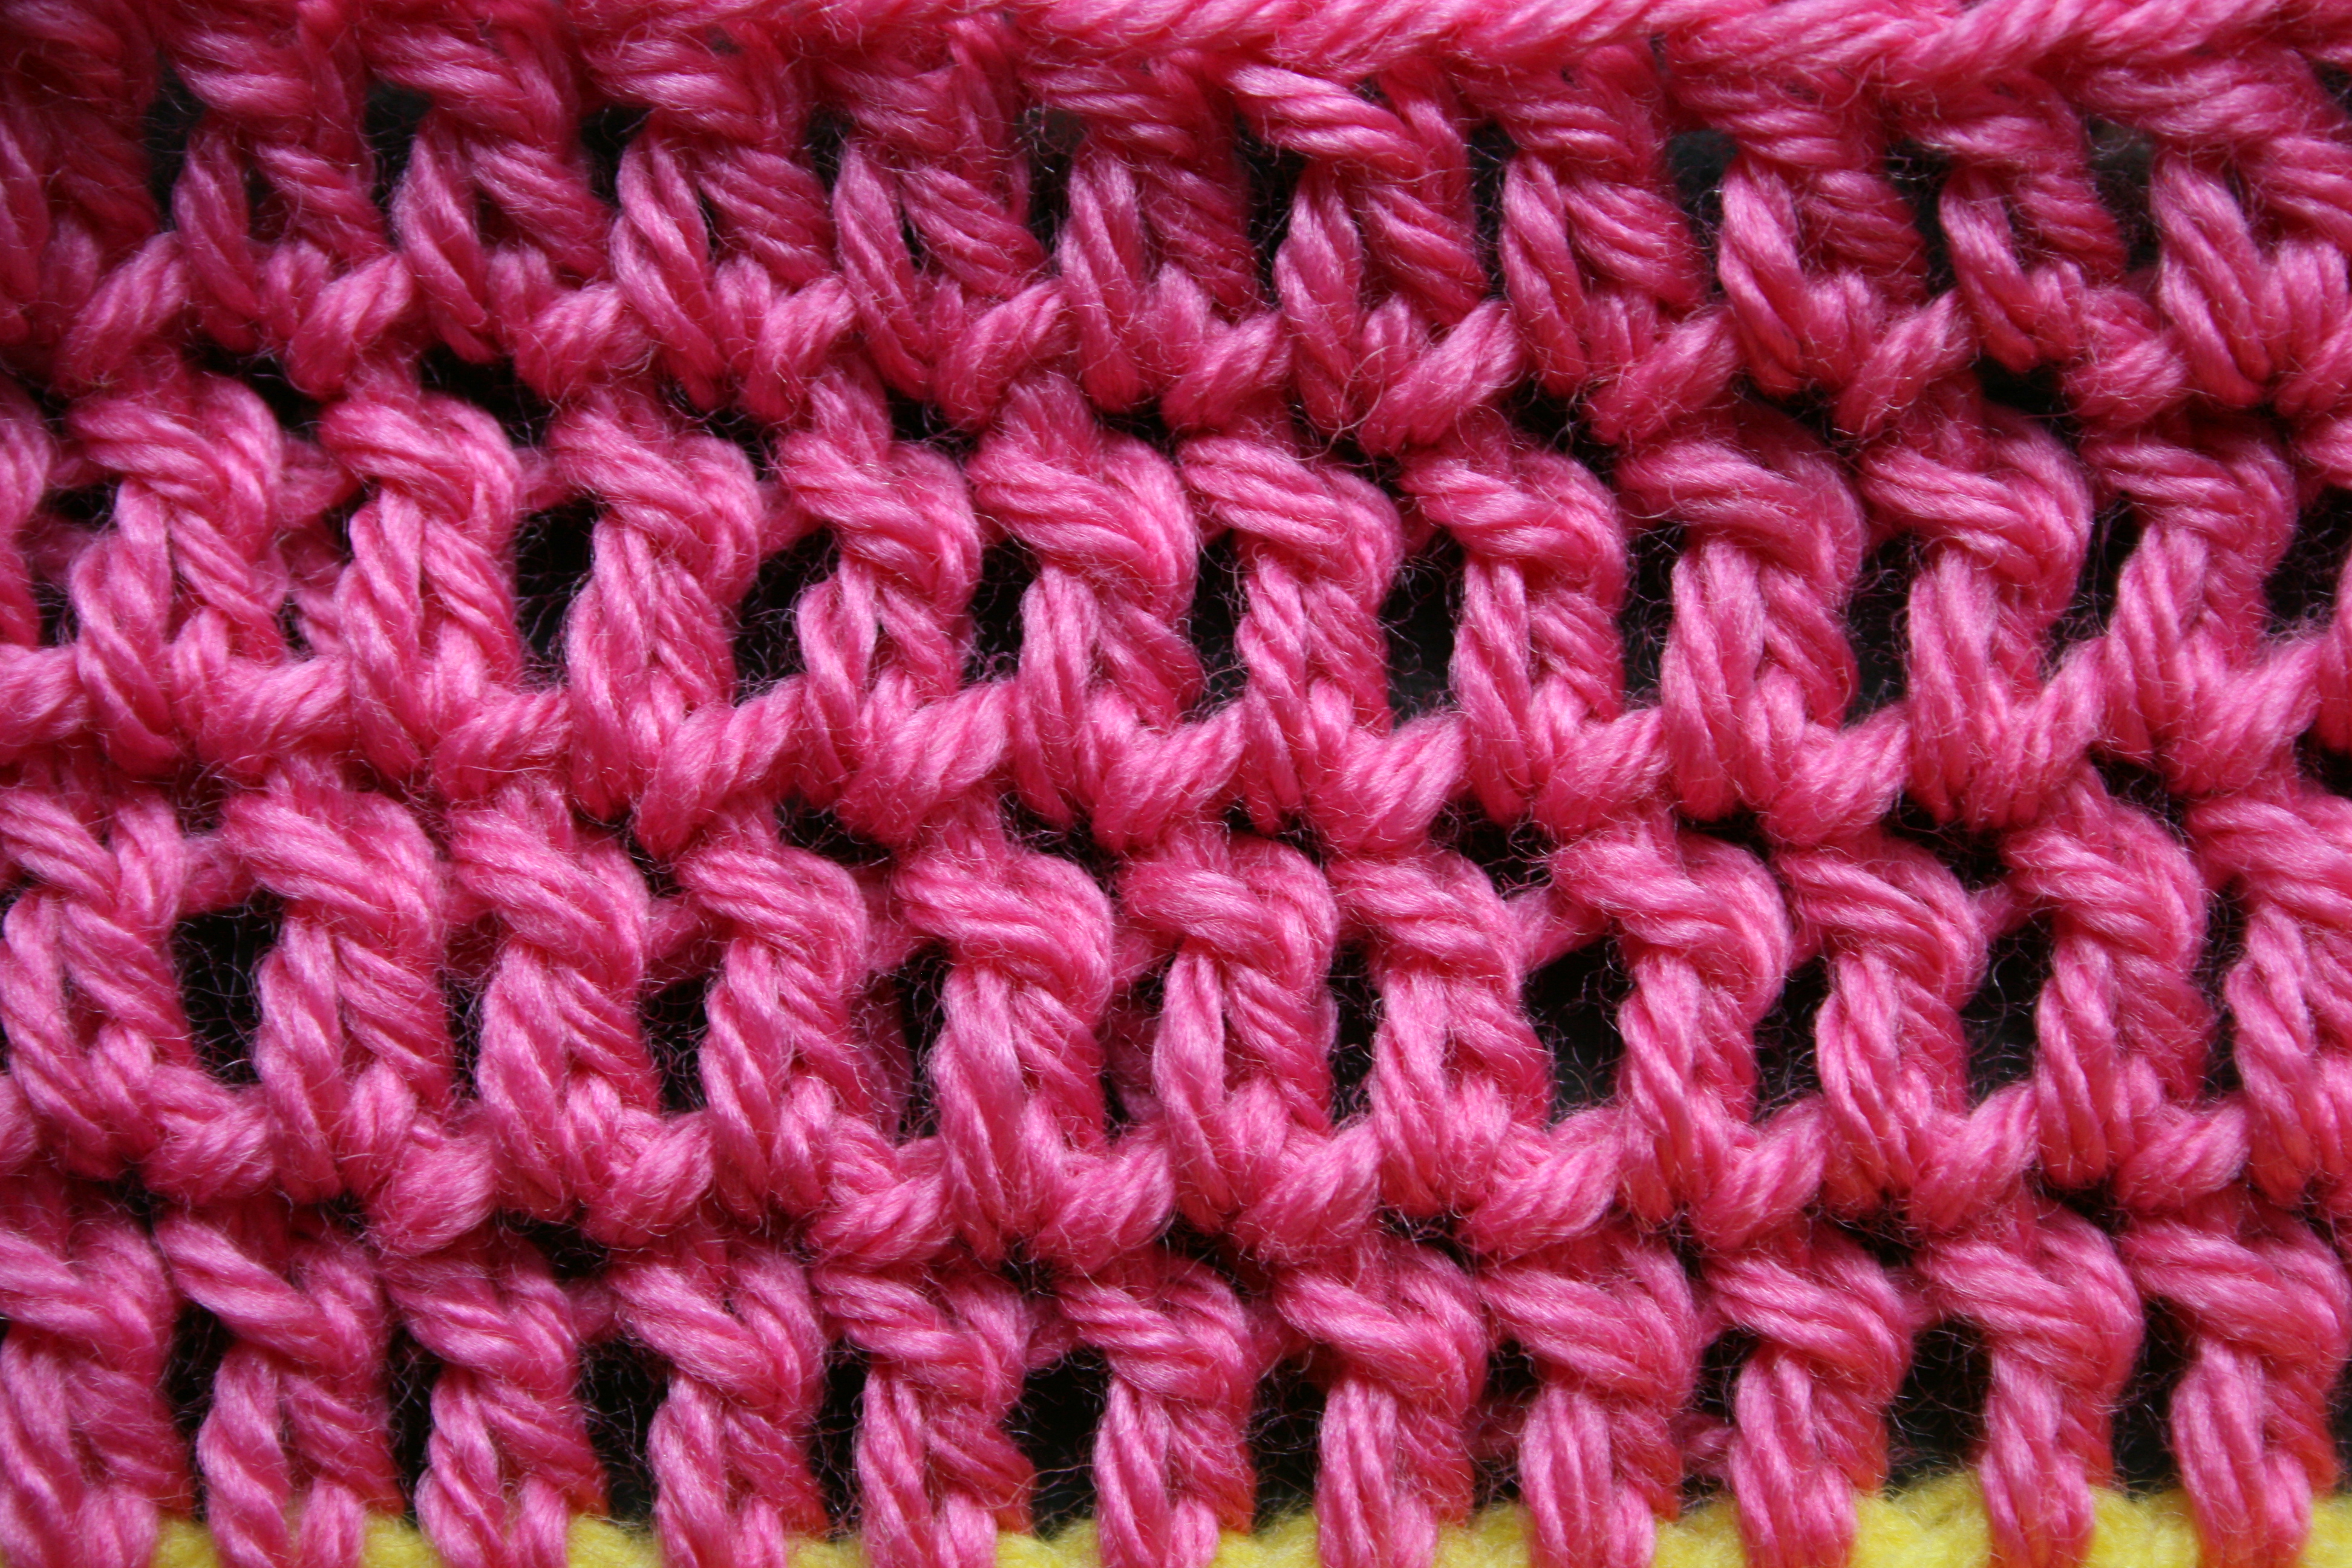
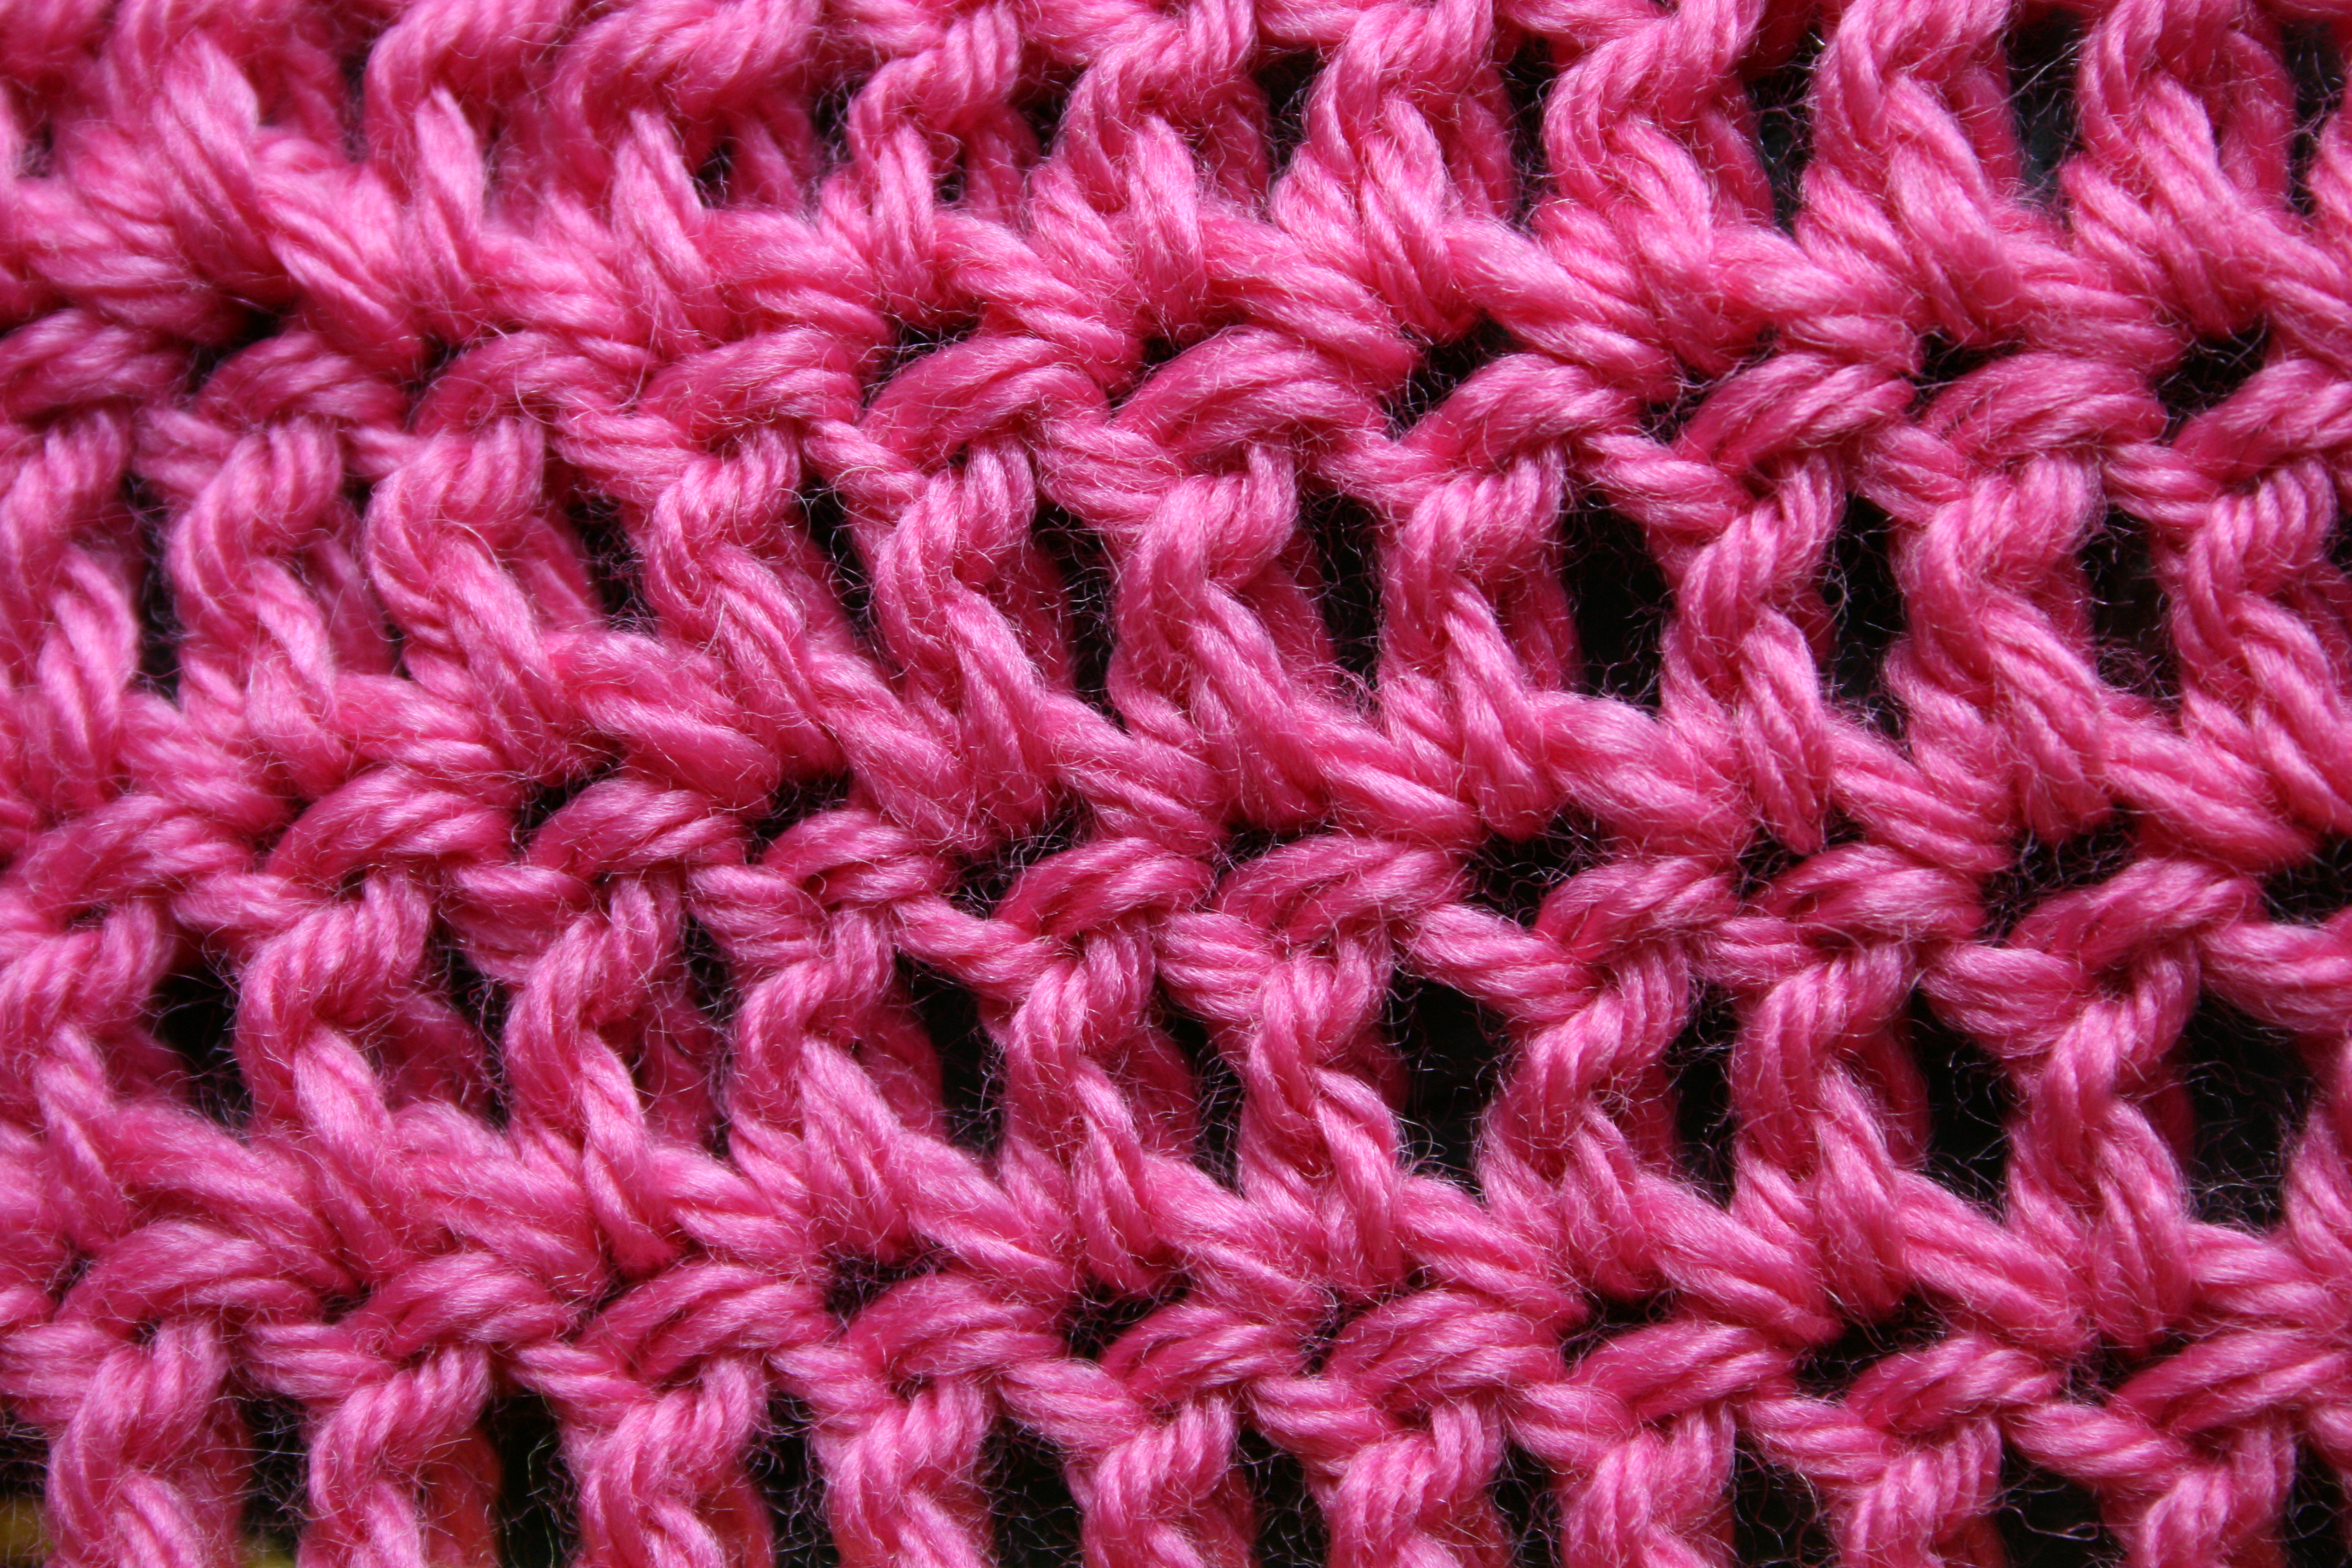
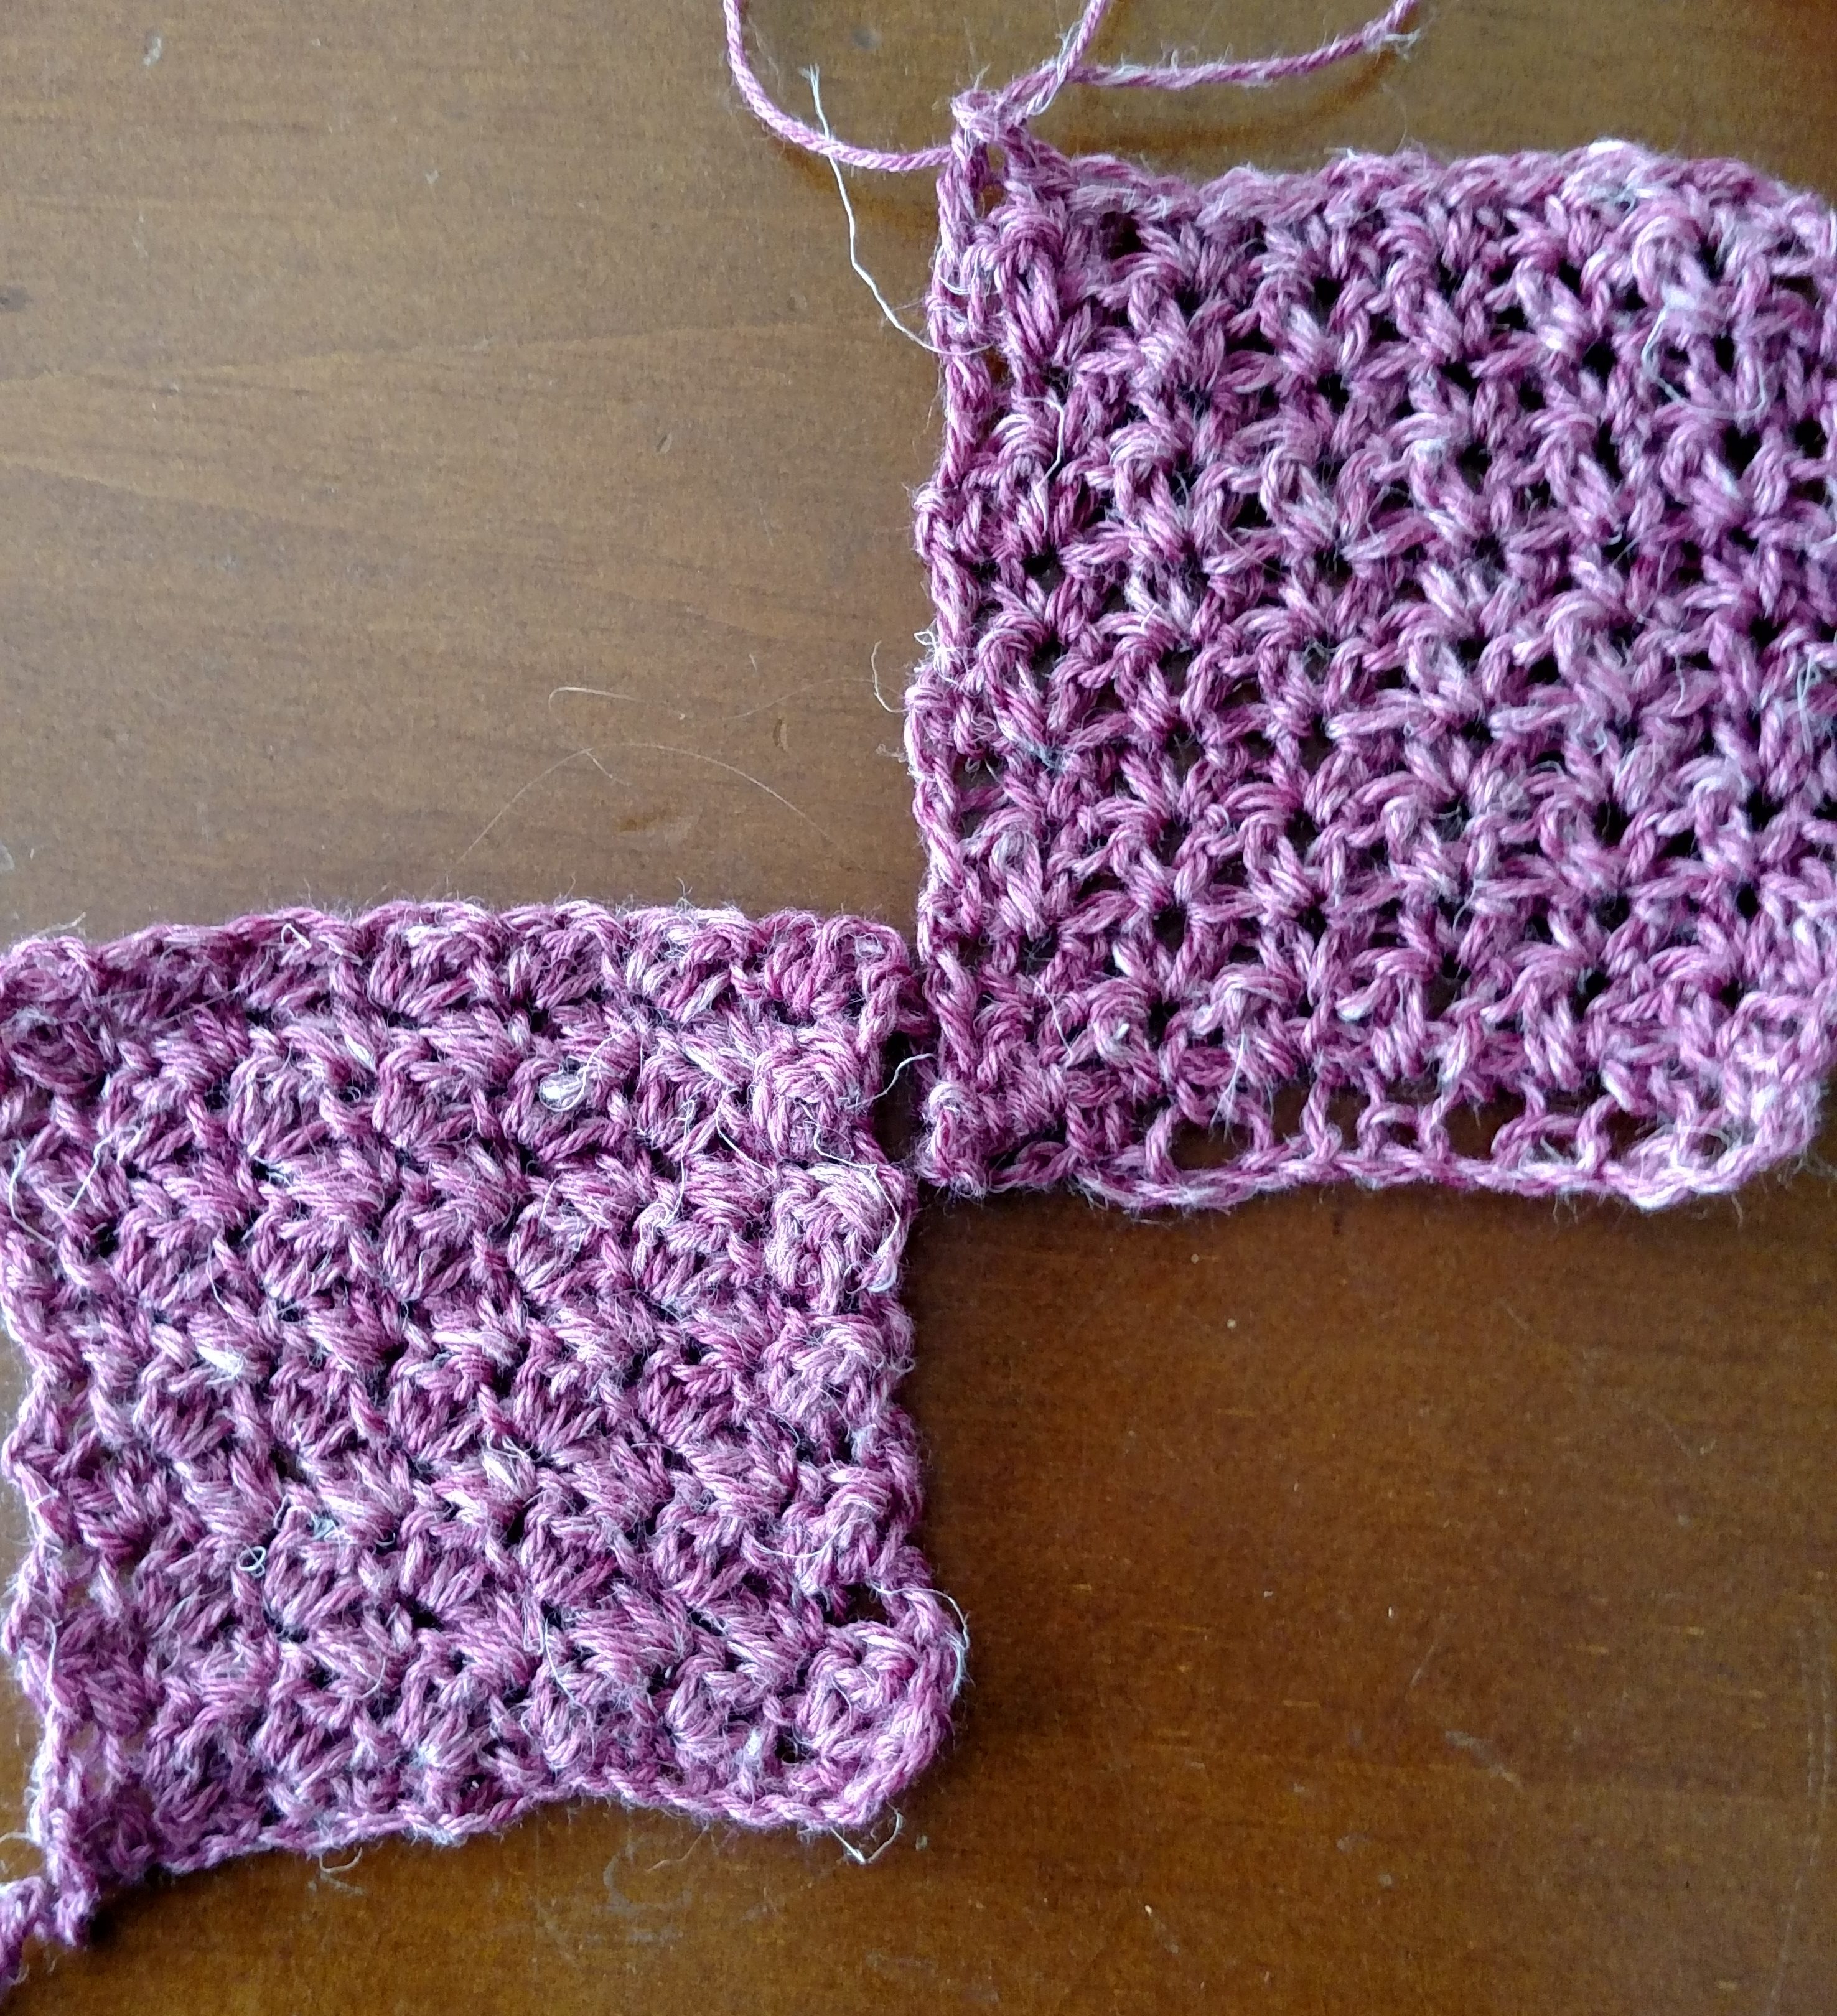
I had to go back and study my sample swatch…I was working my stitches in the single crochet on both fabrics so why were they so different in appearance? I finally found my answer….I worked the stitches in the opposite order. I was working a single crochet then a double crochet in the next single crochet stitch in the swatch sample, but in the fabric I was working a double crochet then a single crochet in the next single crochet stitch. Wow, I was surprised by the difference it caused.

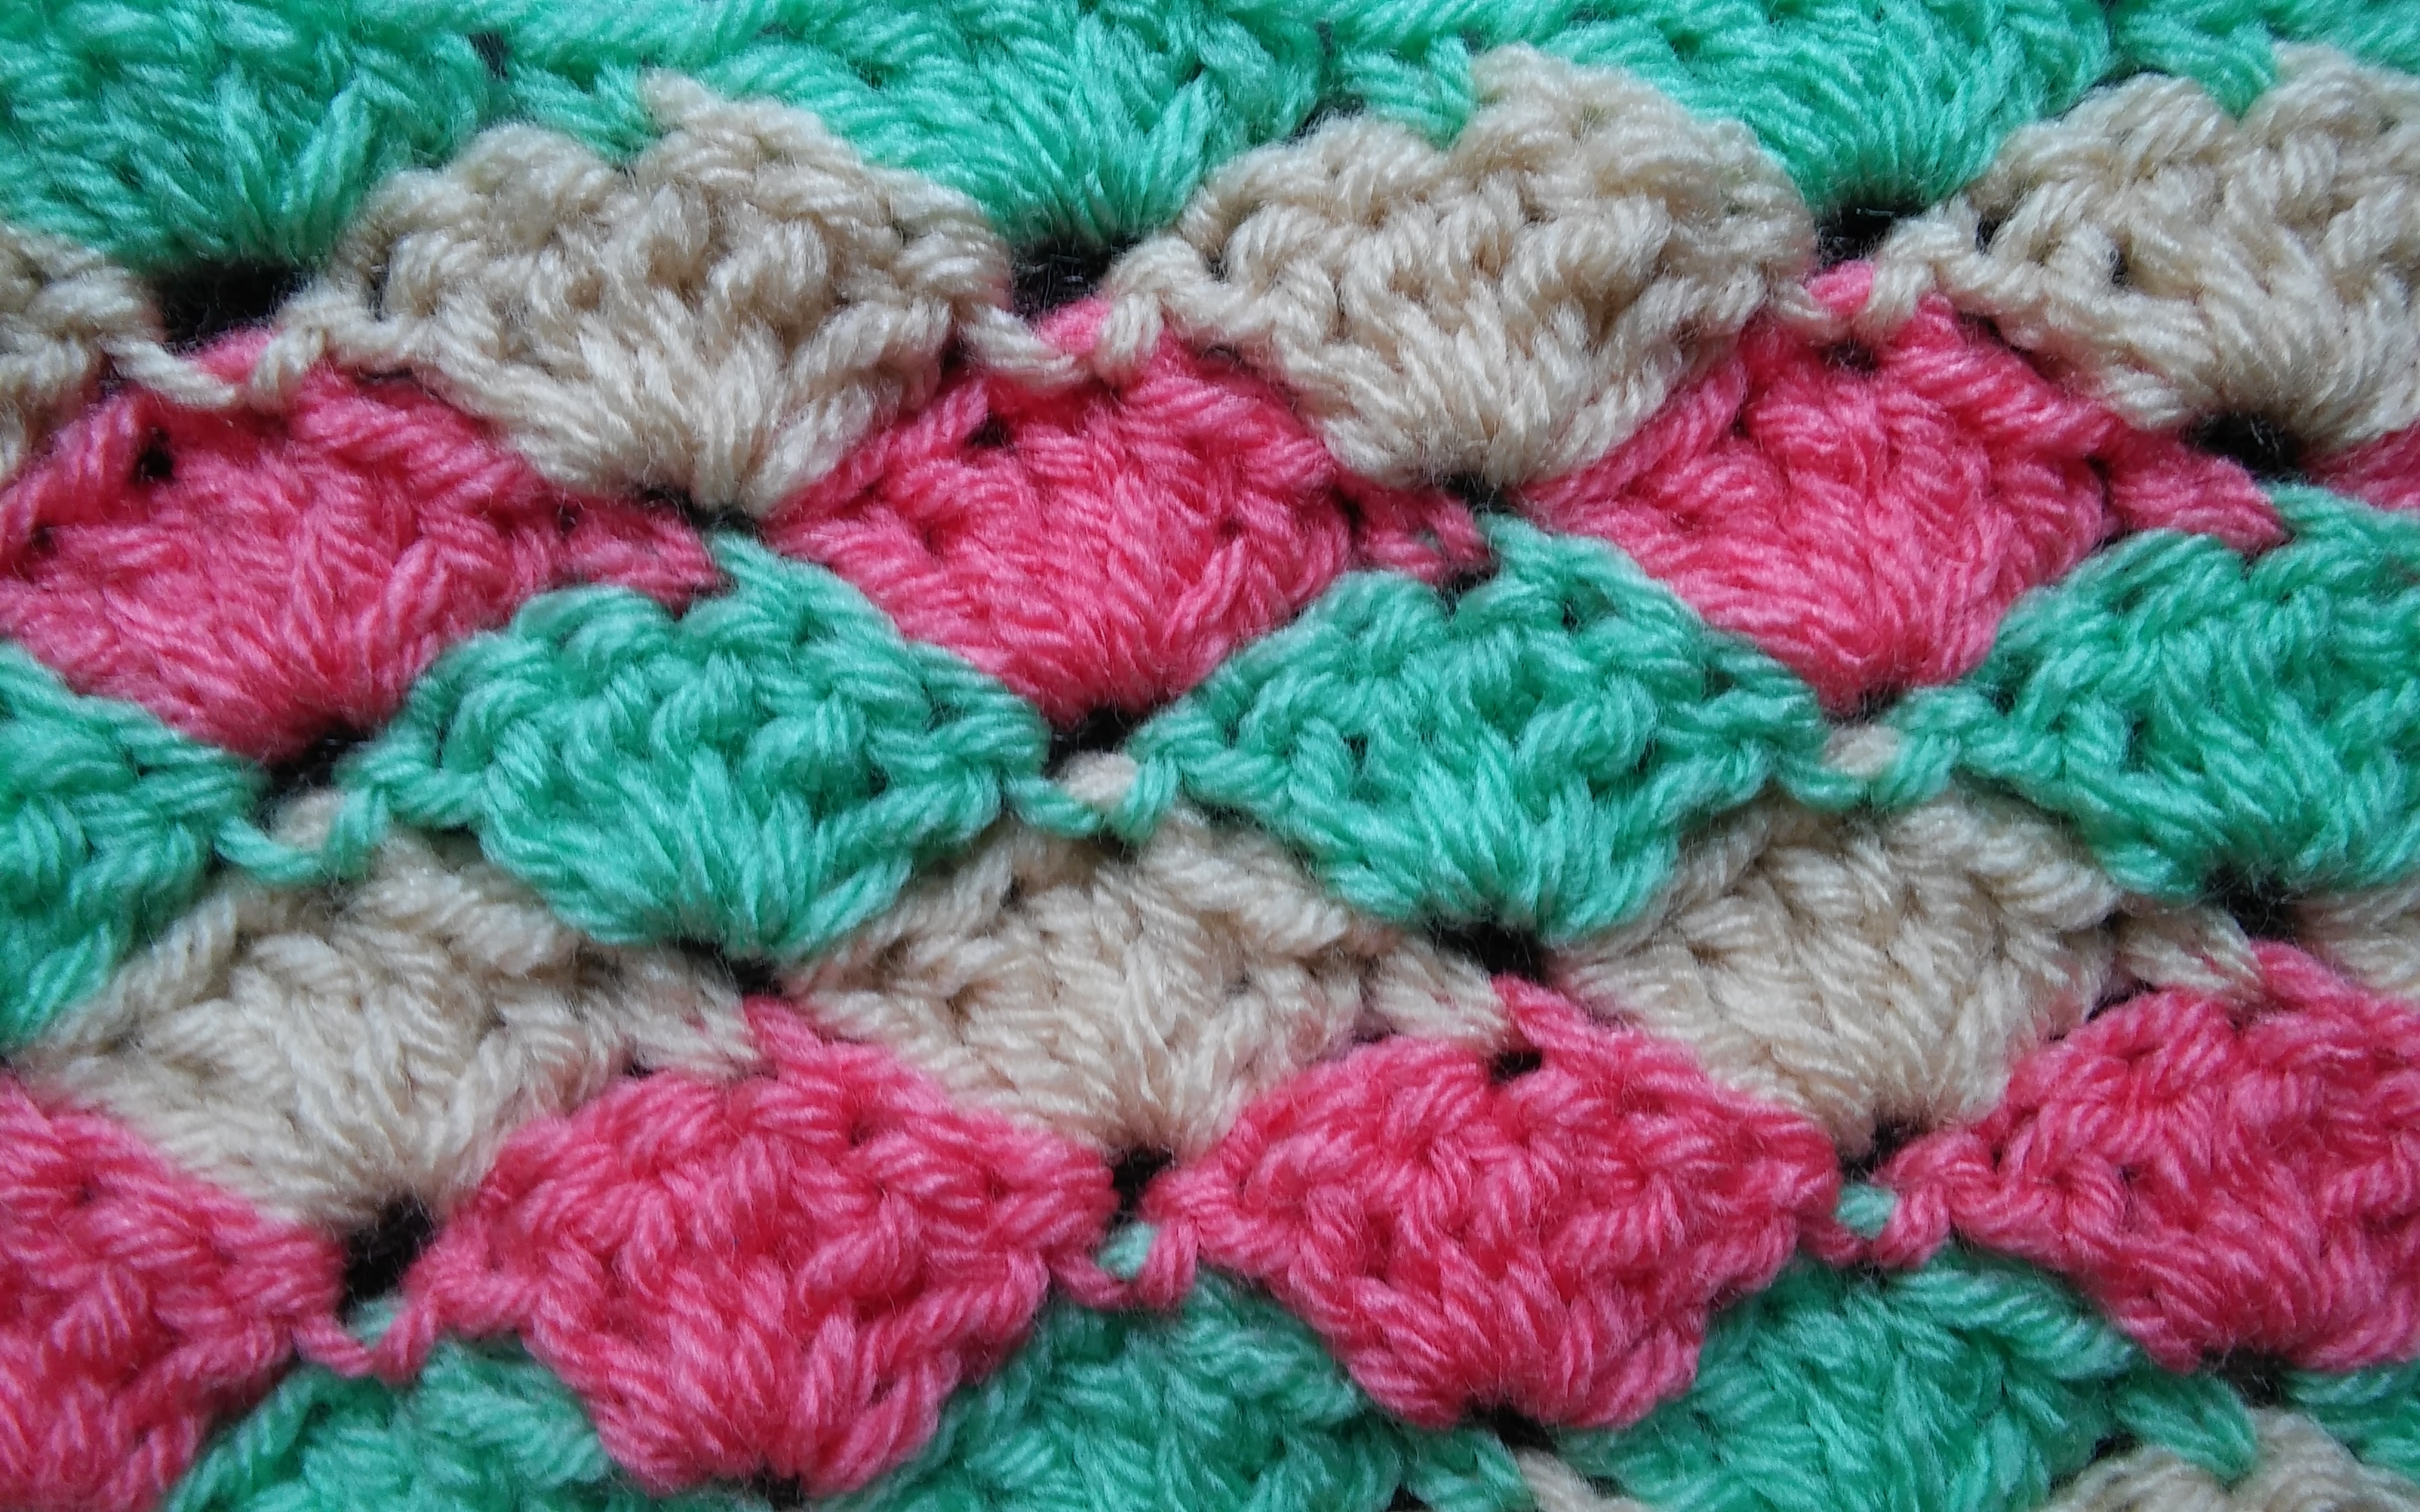
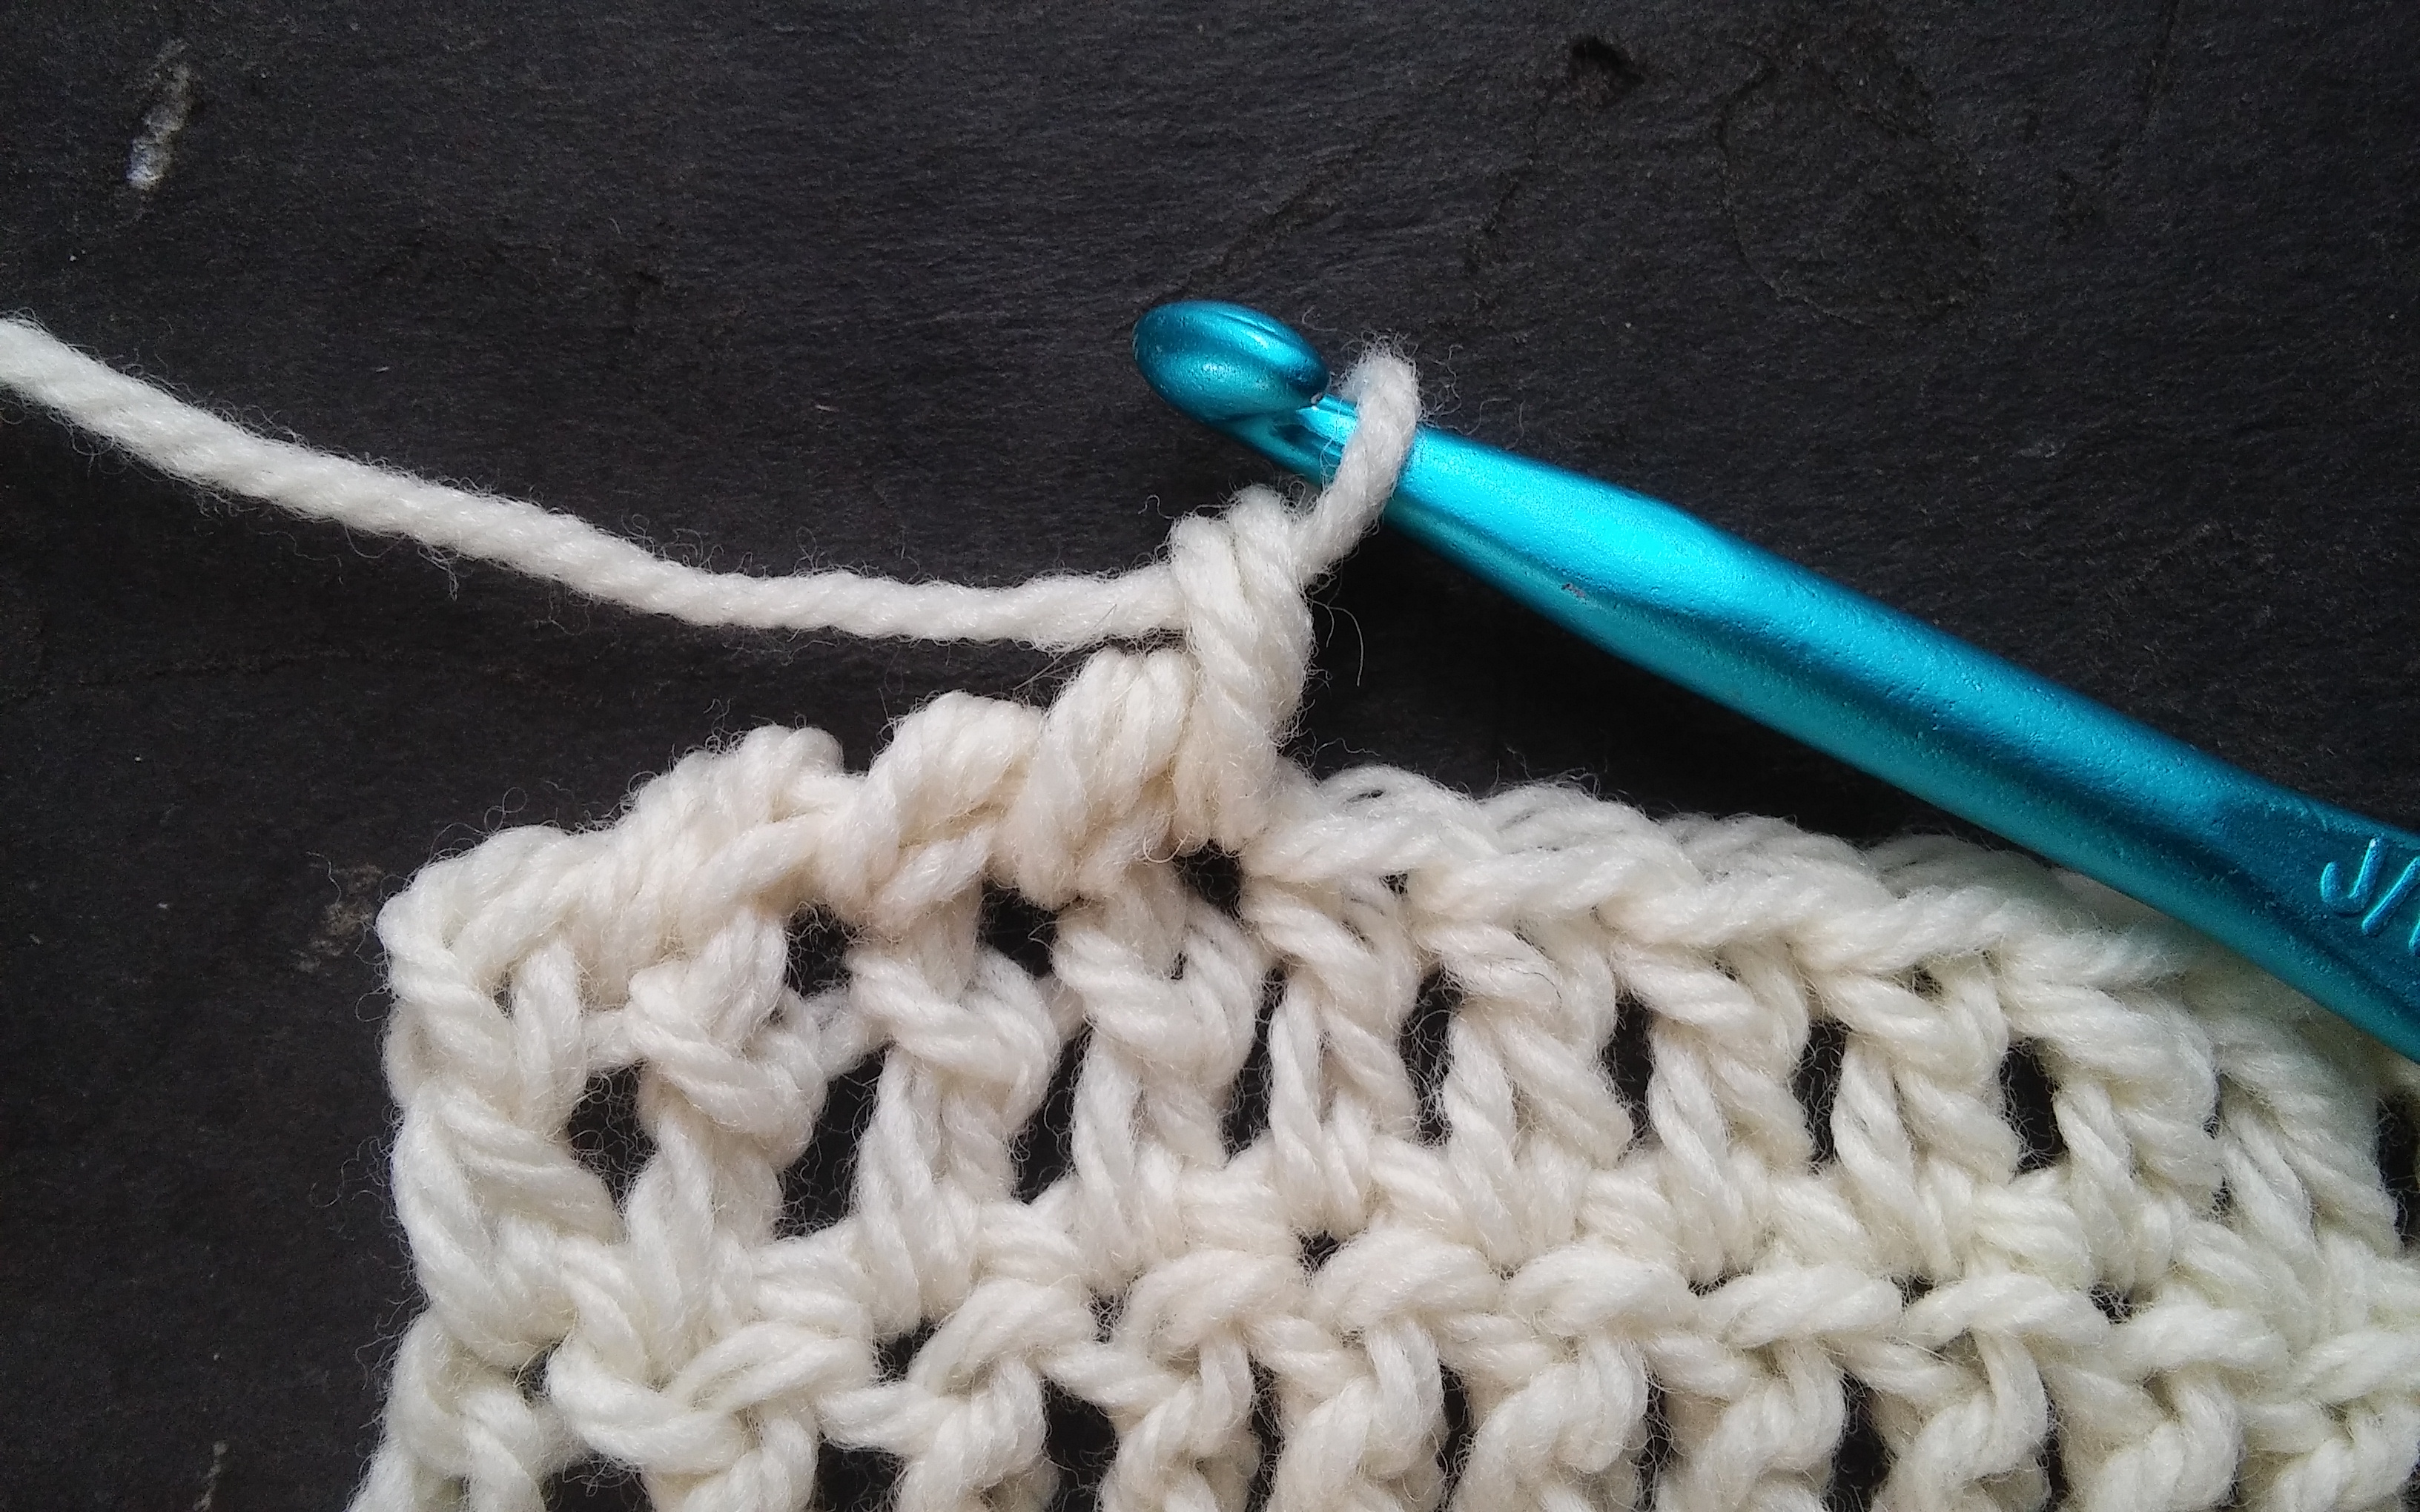
One swatch looks like little blocks turned slightly aside, while the other looks a bit lacy, and almost like a stacked “v”. They are both worked with the same hook, the same yarn, the same number of stitches, yet the simple error of working the stitches in the opposite order caused a very different look.

I plan on playing around more with “switching” my stitches, you never know where I new idea can be generated and maybe by intentionally changing the stitch order I might find something truly fabulous…I will have to keep you posted.


Staggered Shells-Crochet for a Difference

Some crochet stitches appear more difficult then they may actually be, Staggered Shells I believe is one of these. This stitch is essentially comprised of single crochets worked between shells that are made up of five double crochets.

New crocheters sometimes do not realize that what creates a different look may simply be where you place a stitch, and that you can work more than one stitch in a location. However like all crochet stitches the name “shell” doesn’t tell you the entire story. “Shell” essentially means that there are a number of stitches worked in the same location, without looking at the Special Stitches section of a pattern there is no way to fully understand how this stitch is worked, what number of stitches, or which stitch for that matter is worked. For this shell pattern I have used five double crochets worked in the same stitch.

Staggered Shells www.lindadeancrochet.com

Staggered Shells, changing color every row.

I have written this stitch pattern out in an untraditional method to attempt to help in understand how to better read your stitches. In my teaching I have found that crochet can be very forgiving if you have learned how to read your work and not worry so much about counts. Seeing the pattern can free up your work (at the end of this post the stitch pattern is written in a traditional format).

Row 1: To begin you create a chain that is a multiple of 5, then add 2 more chains. Single crochet in the second chain from the hook, [skip the next 2 chains, work a shell (5 double crochets) in the next chain, skip the next 2 chains, single crochet in the next chain] repeating everything in the [ ] across, turn.

Row 2: Chain 3, 2 double crochet in the same stitch as the beginning chain, this creates a half shell at the edge of the fabric, work a single crochet in the center double crochet of the next shell, [then work a shell in the next single crochet (between shells), work a single crochet in the center double crochet of next shell] repeat everything in the [ ] until you reach the top of the last shell, after working the single crochet in the top of the last shell, work 3 double crochets in the last single crochet stitch (this is another half shell at the other edge of the work, turn.

Row 3: Chain 1, single crochet in the same stitch, [shell in the next single crochet, single crochet in the center double crochet of the next shell] repeat in the [ ] across, turn.

Repeat Rows 2 & 3 until it is the desired length.

I always like to practice new stitches and feel like I am accomplishing something at the same time, so I find places that may be interested in receiving a handmade blanket donation, you may want to consider reaching out to your local fire station and see if they maybe interested in receiving small afgahns that they can give to children or others that may be in the need of some extra comfort during a time of trauma. Not all trauma is physical and sometimes wrapping yourself in a blanket, or even having one draped over your shoulders can add comfort during difficult times.

The traditional pattern:

Shell: 5 dc in same st

Ch a multilple of 5 +2

Row 1: sc in 2nd ch from hook, [sk 2 chs, shell, sk 2 chs, sc] repeat across, turn.

Row 2: Ch 3, 2 dc in same st, sk 2 dc, sc in next dc, [shell in next sc, sk 2 dc, sc in next dc] repeat across, 3 dc in last sc, turn.

Row 3: Ch 1, sc in same st, [shell in next sc, sk 2 dc, sc in next dc] repeat across, turn.

Repeat Row 2 & 3 until desired length.

Working the Opposite for Nice Edges

ScannedImageSometimes all the difference in a handmade piece is the finishing. One of my favorite ways to finish a piece is with edging, and one I really like is the reverse single crochet, sometimes known as the “crab stitch”.

1216161043

The Reverse Single Crochet Stitch

Crochet names, like “crab stitch” does not often tell you anything about the stitch, but at least “Reverse Single Crochet” gives you an idea…and it is pretty accurate. Essentially you are working a single crochet in the reverse direction.

1216161041

Insert your hook in the next stitch, from front to back, but in the Opposite direction from what you usually work.

You work the single crochet in the same manner, inserting your hook into the next stitch, yarn over, pull through a loop, yarn over and pull through two loops, but the difference is that instead of working in the normal direction of your crochet rows it is worked in the opposite stitches. So if you are right handed you will be working in the stitches located to the right of your work, and if you are left handed you will be working in the stitches to the left. This is in the opposite direction than you usually work.

1216161041a

After yarning over and pulling through a loop, yarn over again and pull through 2 loops

The most common error made when working this stitch is reversing the processes even further by inserting the hook from the wrong side of the fabric, this actually creates a single crochet stitch, but it is just a single crochet, just as if you had turned the work. So always insert the hook from the front of the fabric and complete the stitch.

1216161042

Relax your tension, and pull up your loops a little taller than usual.

Starting this stitch can feel very awkward, and the first couple of stitches may look a little odd, but after you work a few you will start to see a stich that looks almost like a rope. It is this twisted effect of the stitch that really allows it to be used only as an edging.

Not only do I use this stitch as an edging, I occasionally use it as a joining stitch. I place the fabrics I am joining together wrong side together and work this stitch through both fabrics. It creates a raised rope at the edges of the fabrics. I find that this creates a nice textural effect as well as visual interest.

There is one tip I can offer to working this stitch, relax with your tension and pull up your loop a little higher than usual, this makes it a little easier to work in this different direction.

Air Pockets…They make the Difference

DSCF0578 - Copy

Rugby in the rain. We received about 8″ with this storm, completely welcomed after nearly 2 months of dry and warm weather.

ScannedImageThe other day, while standing in the long overdue rain, watching my son’s Rugby game, I was thinking about what makes my crochet hat and gloves warmer then my denim jeans. The answer is simple, but also kind of surprising; air. The more little pockets of air that are trapped next to the skin, the warmer you can stay.

The process used in twisting the yarn and creating little knots, creates little pockets that trap air. Depending on the yarn and stitch combination, different levels of warmth can be created; this is why lace can be warmer than expected. The more things are compressed and made tight and dense, does not necessarily create a warmer fabric as it can press the air out of the work.

This is true with the yarn as well. Often it is realized that wool is warmer then bamboo, this is because of the fibers that are used. Bamboo, even though it is a plant fiber, is processed and extruded in factories creating a long smooth yarn that absorbs moisture, and thus in hot weather will keep you cooler by wicking away perspiration and allowing it to be evaporated. While the animal fibers that are utilized in wool yarns, are created naturally to keep the animal warm and dry. This is done by the crimp of the fiber itself.

DSCF0582

2 locks of wool, notice the crimp of the fiber

Wool fibers are not like hair, they are crimped (like the fashion in hairstyles from the 1980’s), it has stretch (like elastic) and it grows in clusters (a patch grows together and can be plucked out together as one group). This nature helps to create air pockets in the yarn that is being created (depending on the process used, more or less air can be trapped).

DSCF0584

My single crochet ribbed hat over my denim pants

So while my woven denim might be durable it does not offer as much warmth because the amount of trapped air is limited. But that hat, made only out of single crochet ribbing and my gloves made from back loop single crochet kept me quite toasty in comparison.

The Touch of Crochet, Reading Stitches

ScannedImageMany people who believe that they can’t read a pattern, really just have a different learning style. This last pattern reading technique I want to discuss is probably the most difficult for most people to grasp, reading stitches. I don’t mean that is too difficult for people to understand, but it is not the most effective way for most people to read a pattern, but there are some that this is a needed style. It reminds me of playing music by ear; you know the melody and are finding the write notes. This is a tactical way of learning, by using your hands and touch, whereas traditionally written patterns are good for oral learners (reading it our loud and it makes perfect sense), and charts are great for visual learners. This doesn’t mean that you only have one learning style, most of use learn effectively from a combination, it is just that tactical instruction is a little less apparent and some people believe they can’t understand a pattern when really they haven’t given themselves permission to realize that they may understand the craft of crochet in a different way than others.

To begin with you won’t really find these patterns in any book, at least not formally. But close up photos lend to assisting in this style. Often this style is worked by directly copying an already completed project.

To read stitches, you have to recognize what your stitches really look like. If you’re like me, you probably never really look at how your stitches. I plug right along and only notice the special stitches like shells or bobbles, but never really pay a lot of attention to a double or single crochet stitch appearance. But there have been times when I have been presented with some old handmade item and asked if I knew the pattern. (Sometimes the item is not crocheted, so I attempt to decipher the creation manner, such as tatting or bobbin lace most often). To recreate this masterpieces, or for those that learn better from this example, you must know what the stitch looks like a know how to recreate it. So let’s take a look at some common stitches.

First you need to identify the top of the work, this can be a little challenging dependent upon the type of work, and you may need to pull out a hook and yarn to see if you can duplicate what you can to determine direction (but once you recognize various stitches you can easily discern the direction, it may take you a little practice).

Chains are usually obvious, but the slip stitch can be a little difficult to locate and recognize without some practice, (as it doesn’t photograph well for me, I recommend you play with some slip stitches and see how they look for yourself.

IMG_5625

Right Side Single Crochet

IMG_5626

Wrong Side Single Crochet

The Right Side(RS) of a single crochet (sc) row looks like a row of little “v”, while the Wrong Side(WS) look like upside down “v” wearing a flat hat, or maybe even a belt with two little legs.

IMG_5624

Right Side Double Crochet

IMG_5627

Wrong Side Double Crochet

For the RS of a  double crochet (dc), if you are right handed (left will be opposite)you will see two diagonal bars, one beginning in the upper left of the stitch and  continuing to the right  where it reaches the second diagonal bar that continues in the same direction appearing to wrap around to the back of the post. While the WS has one horizontal bar at the top and one diagonal bar from the upper right, just under the horizontal bar, down to the left ending at the middle of post and appearing to go between the base of the stitch (I love the description Vashti Braha uses for this part of the stitch as “feet” since they appear to be like ballet slippers at point).

This style of pattern reading is one that lends itself well to expanding your creative side, as it gives you a better understanding of stitch construction. Even if this is not the easiest method for you to follow or understand I recommend that you work up some sample and really look at you stitches, it is amazing how improving your techniques at this basic level can really improve the overall appearance of your work, not to mention help you greatly when you are approached with the question; “I love the doily my great-great grandmother made, can you show me how to make one like it?”