
 There are various ways to create a stitch in crochet, and one that can turn peoples head a bit is one that is often referred to as the star stitch. I am not completely sure where this stitch gets its name, to me it does not really look like a star unless I count the middle of the night squinting I do at the little light on the smoke detector and wonder if I need glasses. It has the light radiating in a couple of directions, a bit like light through a prism.
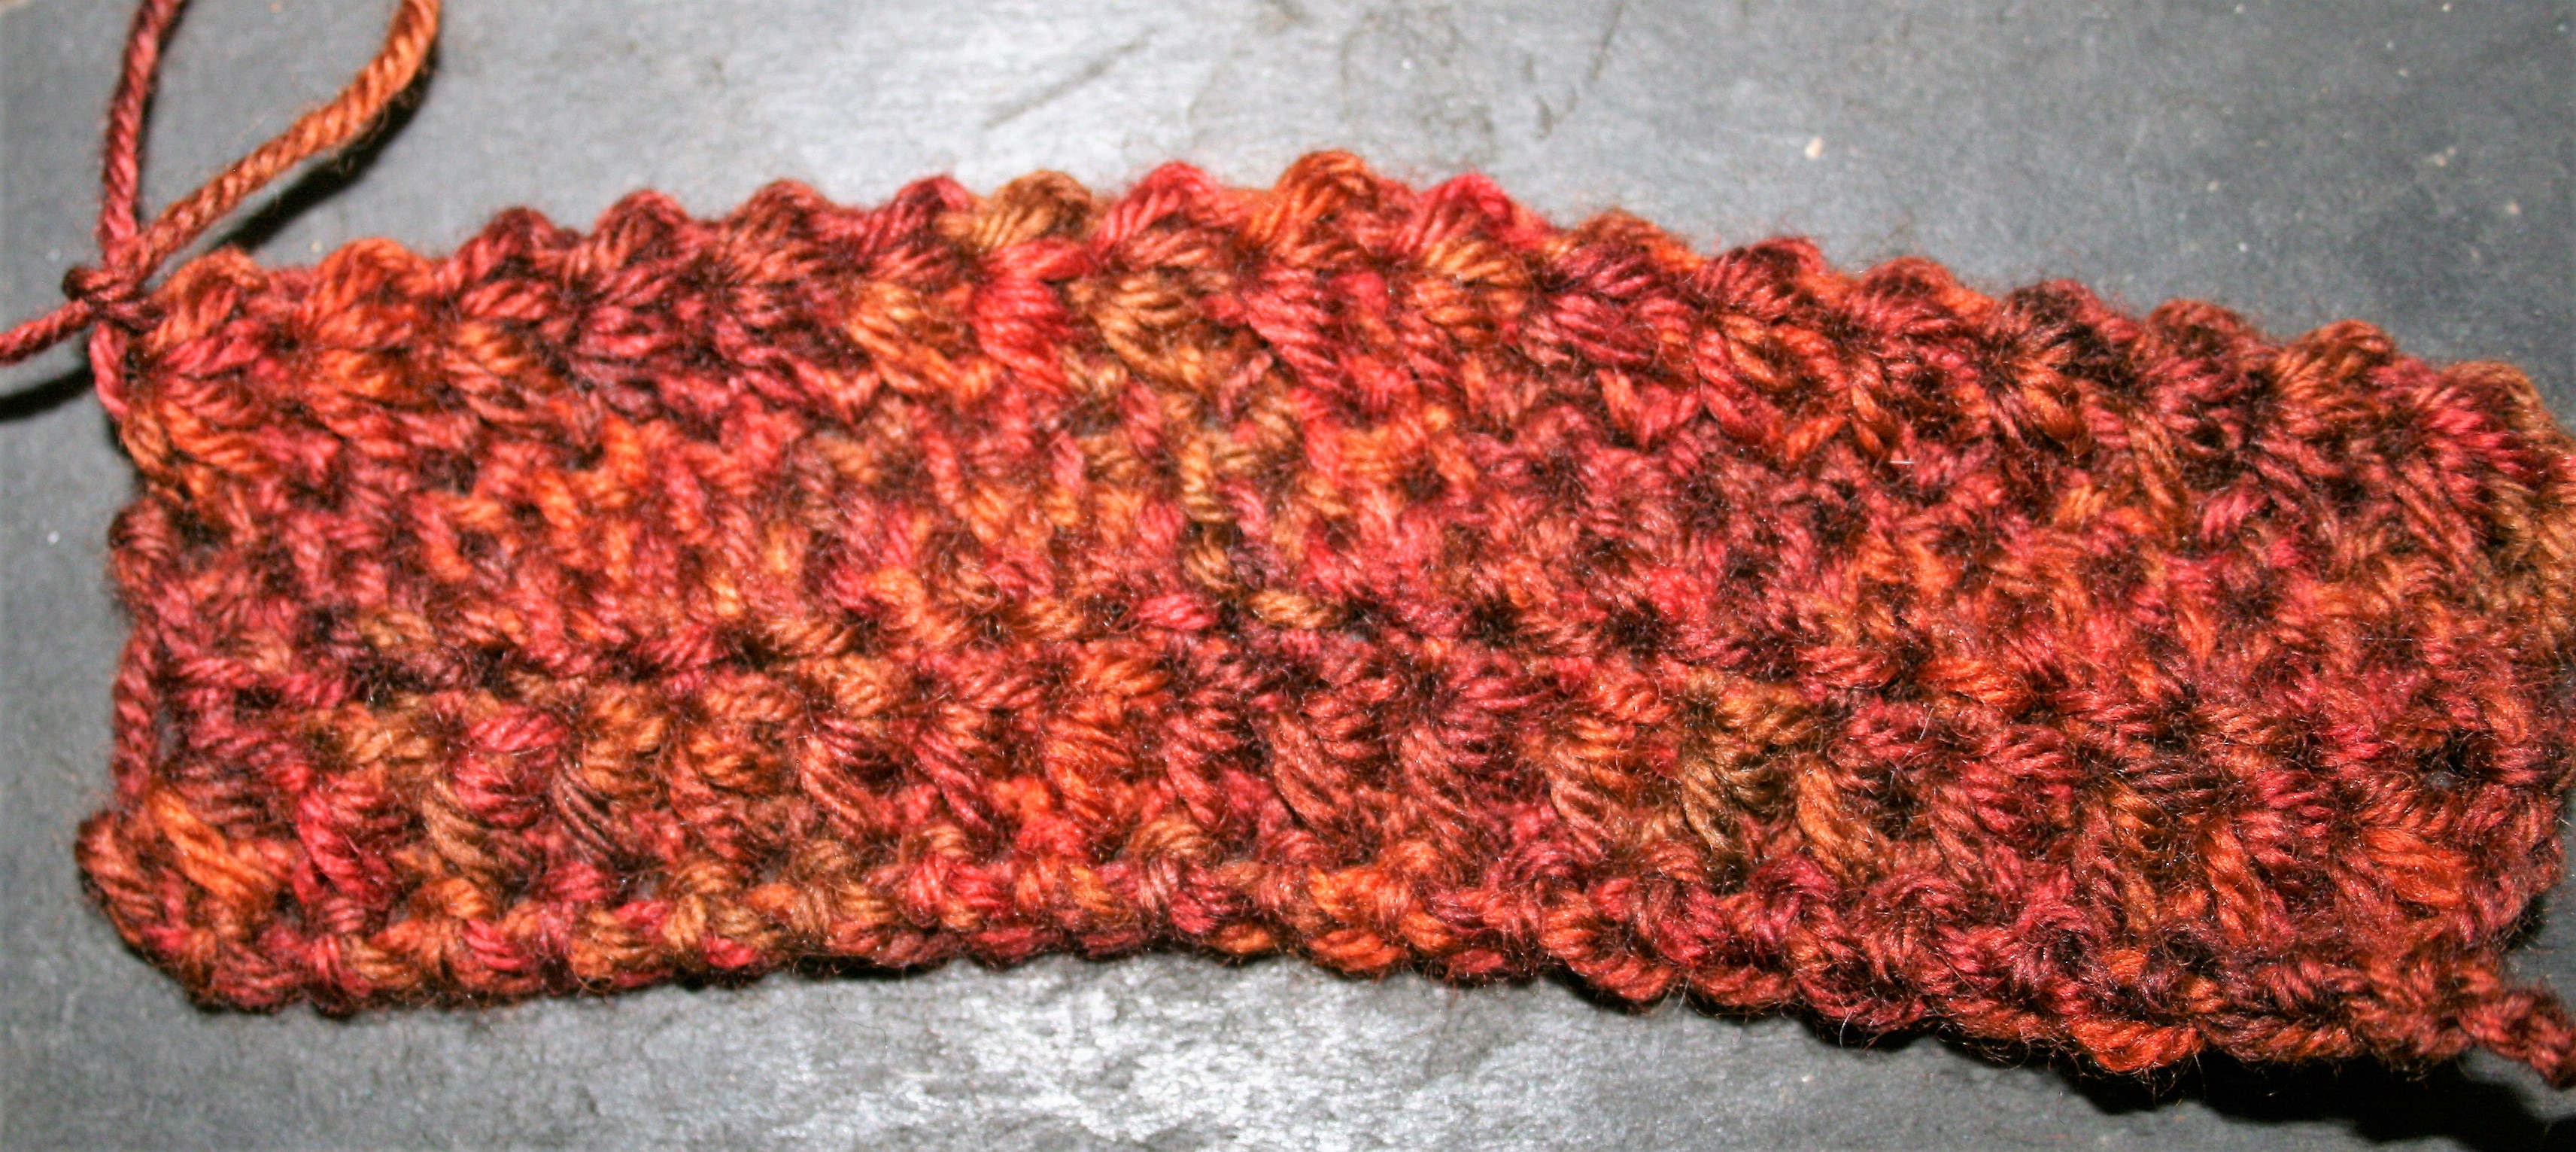 Some find this stitch intimidating, as it looks more difficult than it is. Essentially this stitch is worked very similar to a single crochet decrease over multiple stitches, but instead of working it over several stitches you are working it with the parts and components of just one stitch. This makes really the only difficult part of this stitch is knowing where to place your hook.
I find it easiest to work a row of basic crochet stitches, either a row of single or double crochet, then working the star stitch in subsequent rows. This does not mean that you cannot work the start stitch directly into a foundation chain, it is simply my preference to have a little more fabric to hold on to.
The stitch is worked by first inserting the hook into the “eye” or hole of that was created by the last yarn over and pull through of the adjacent stitch, you then yarn over and pull up a loop.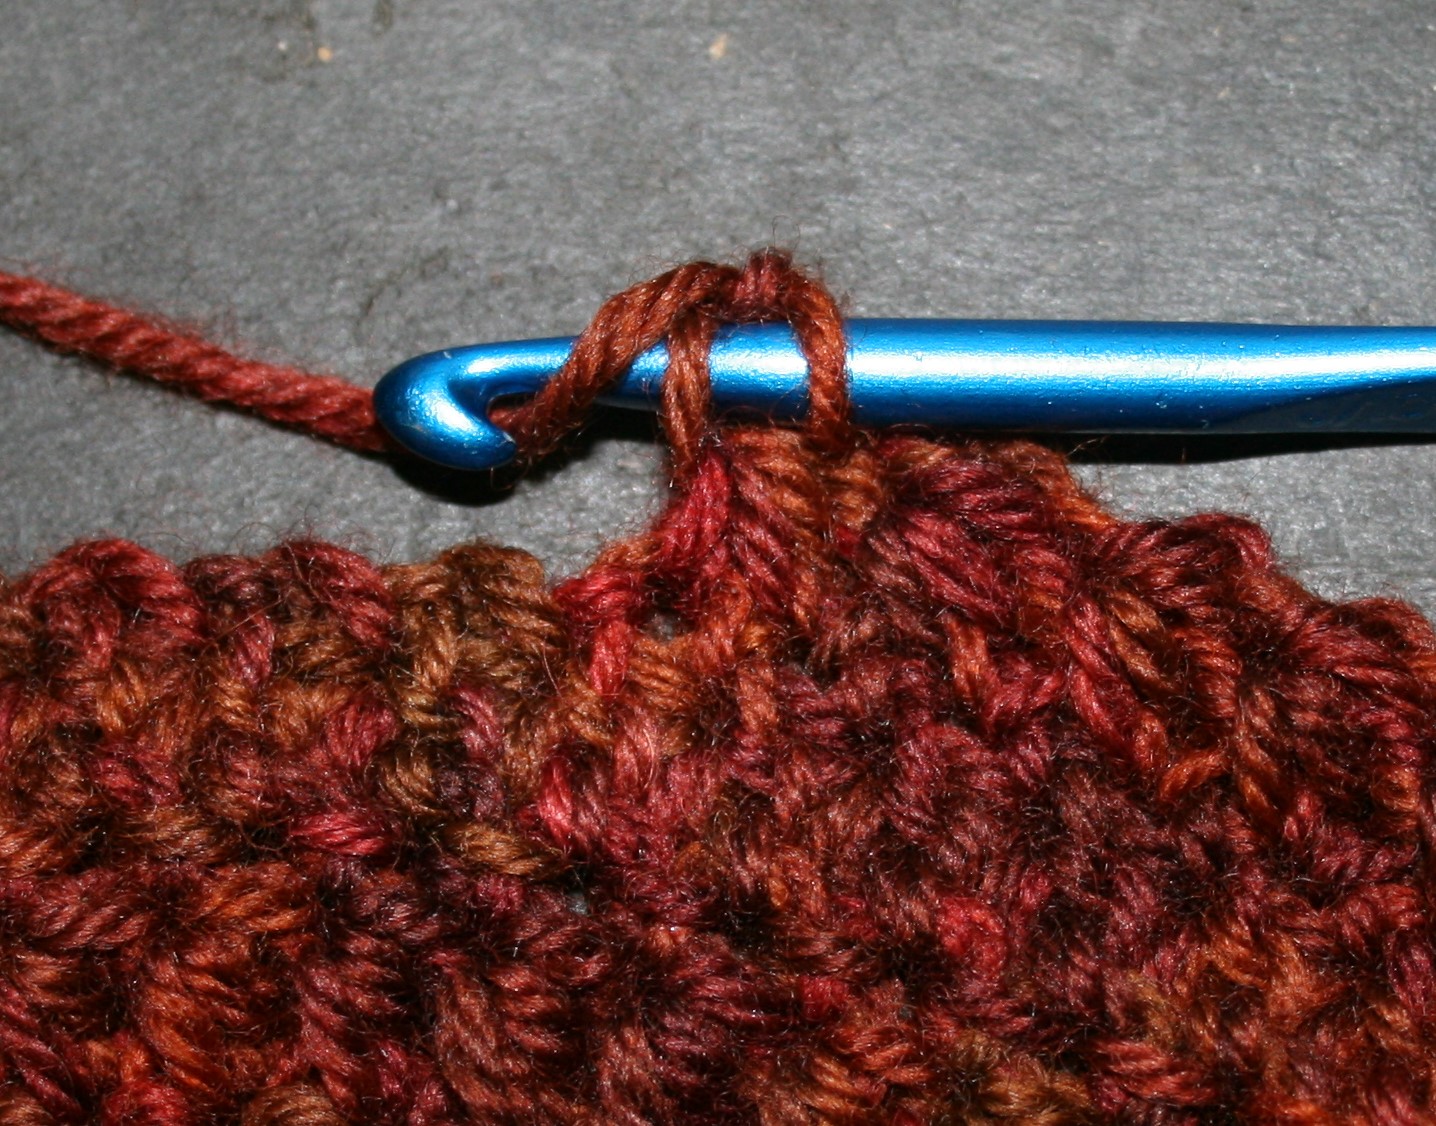
Next insert the hook around the last “leg” of the adjacent stitch. I tend to only pick up the front portion of the “leg” and do not worry about putting the hook all of the way through the fabric. Yarn over and pull up a loop.
For the third insertion point (fourth loop on your hook) you insert your hook into the stitch in the row below, which has already been worked into by the adjacent stitch, once again yarn over and pull up a loop.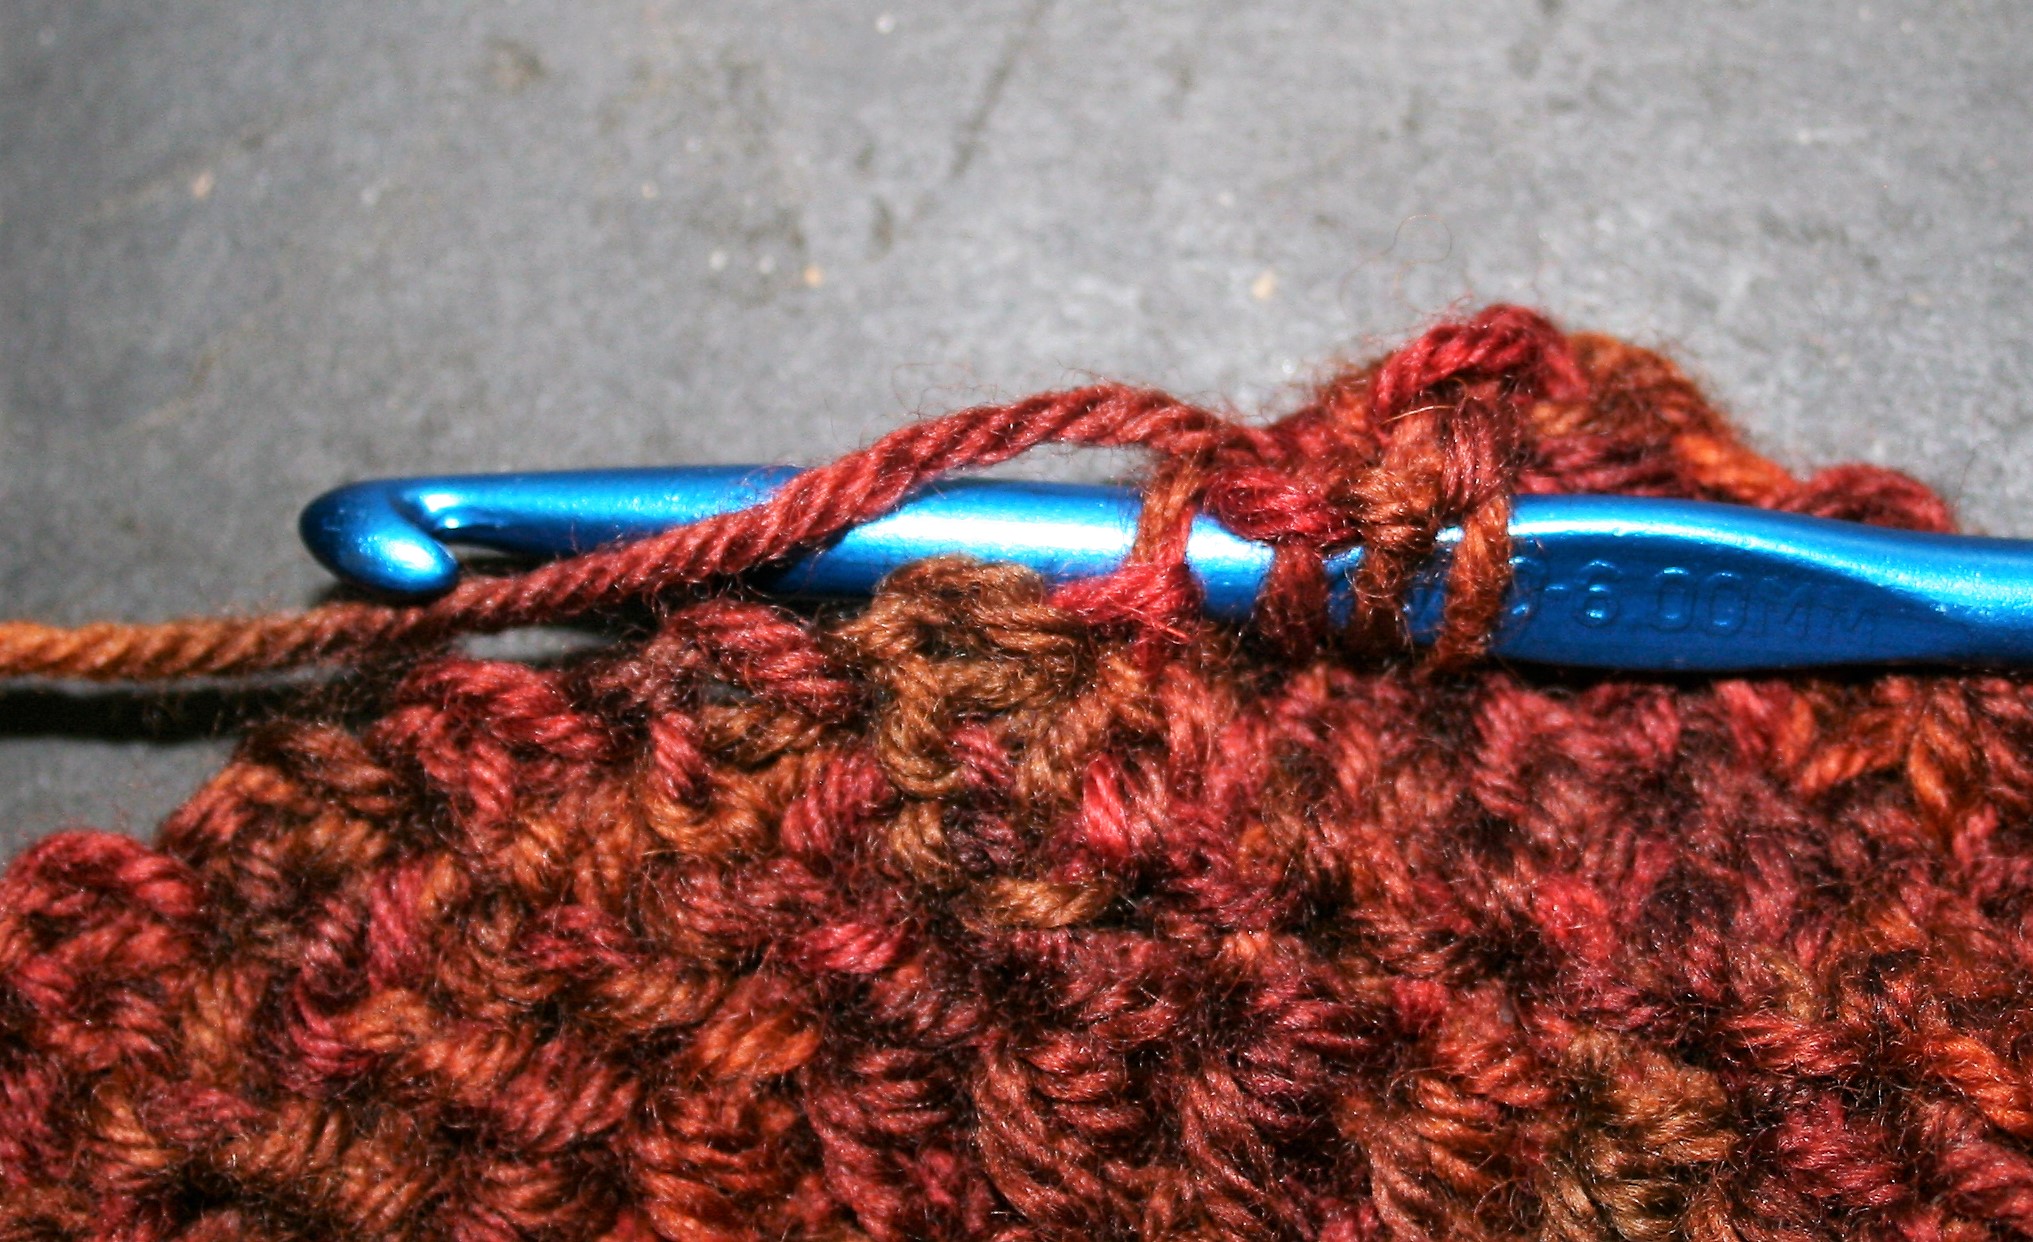
The final insertion point is to insert your hook into the next stitch, and pull up a loop.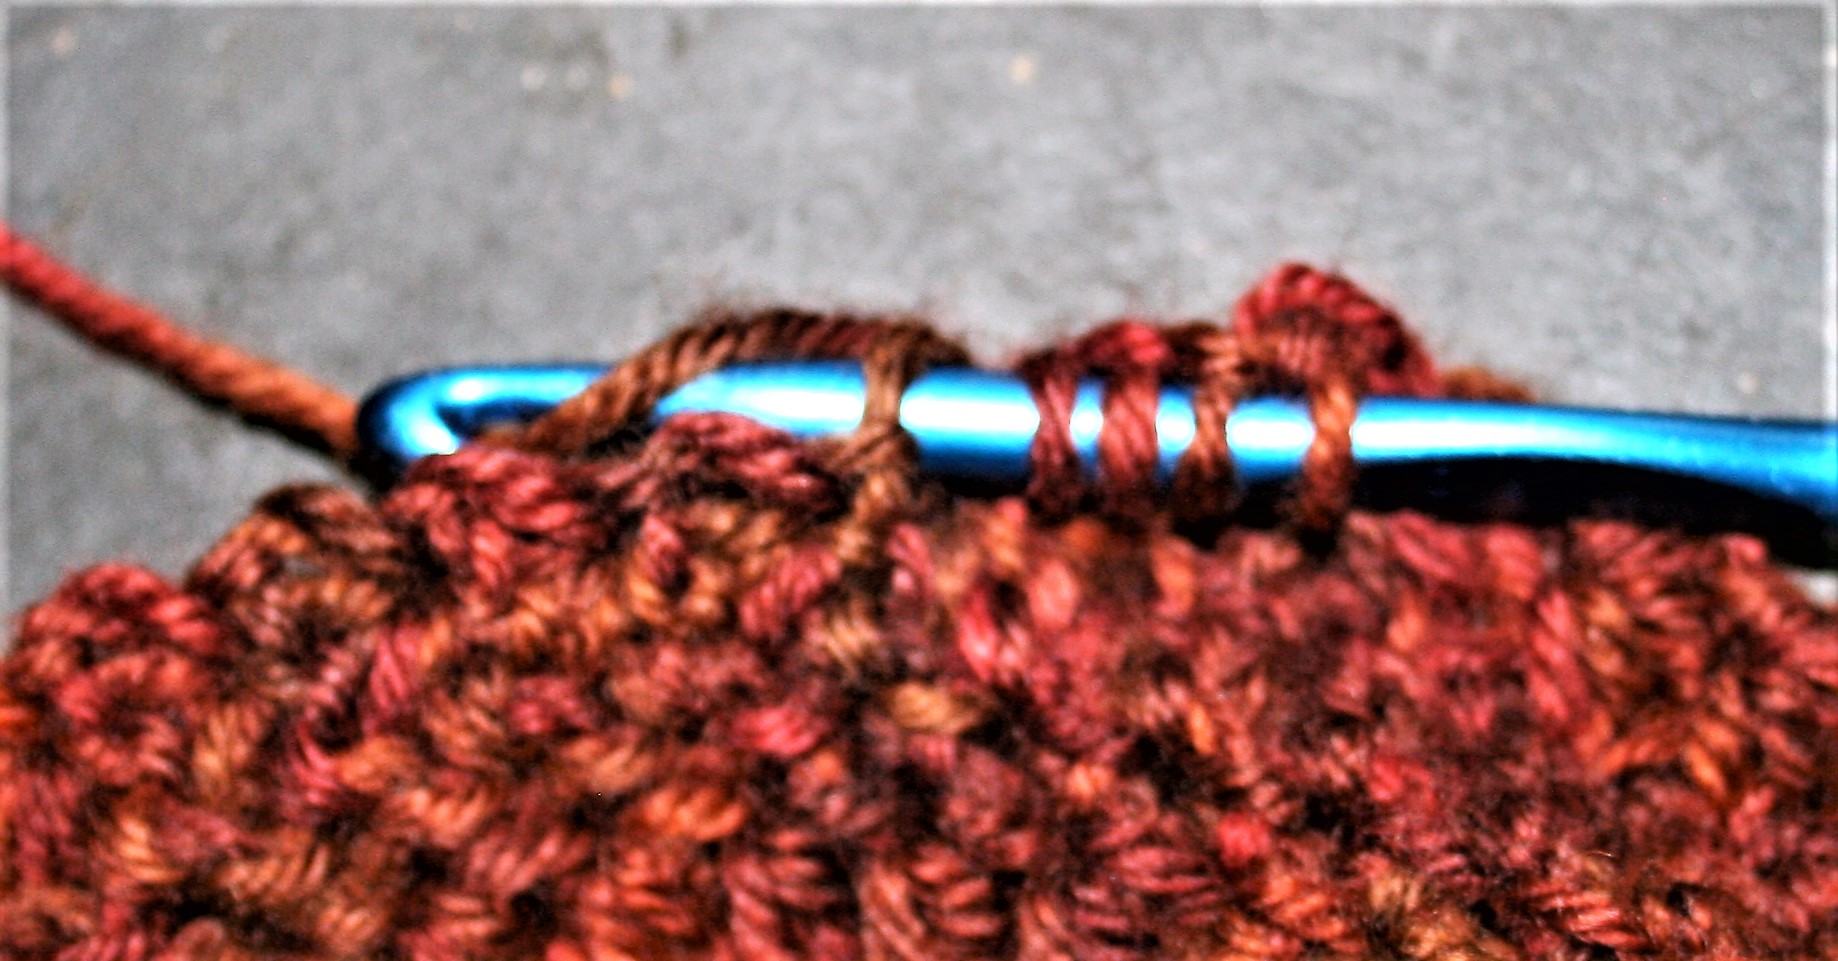
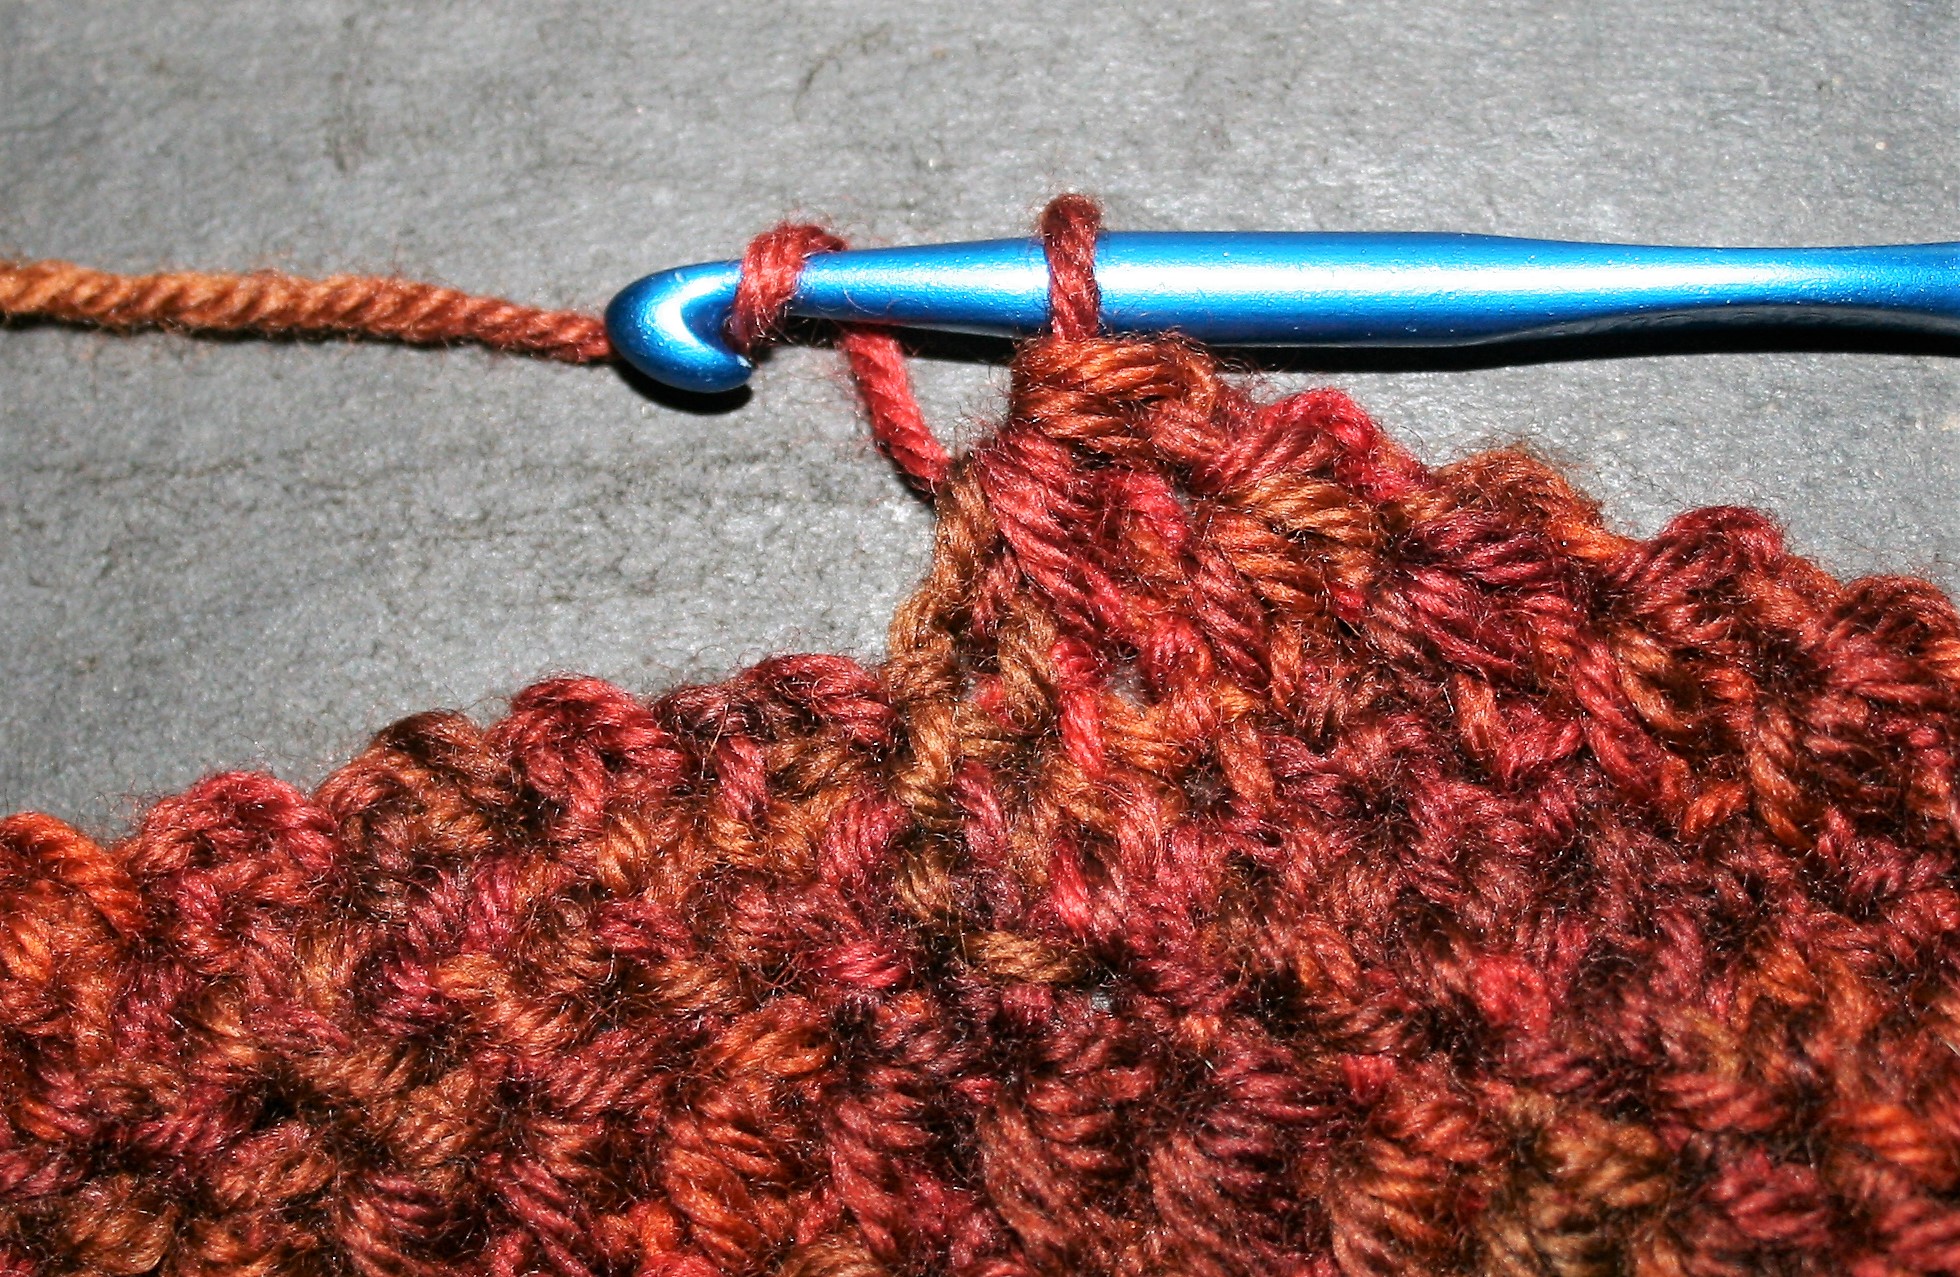
You will now have 5 loops on you hook, yarn over and pull through all 5 loops. Now chain 1, this will create the “eye” that the next star stitch will begin being worked into.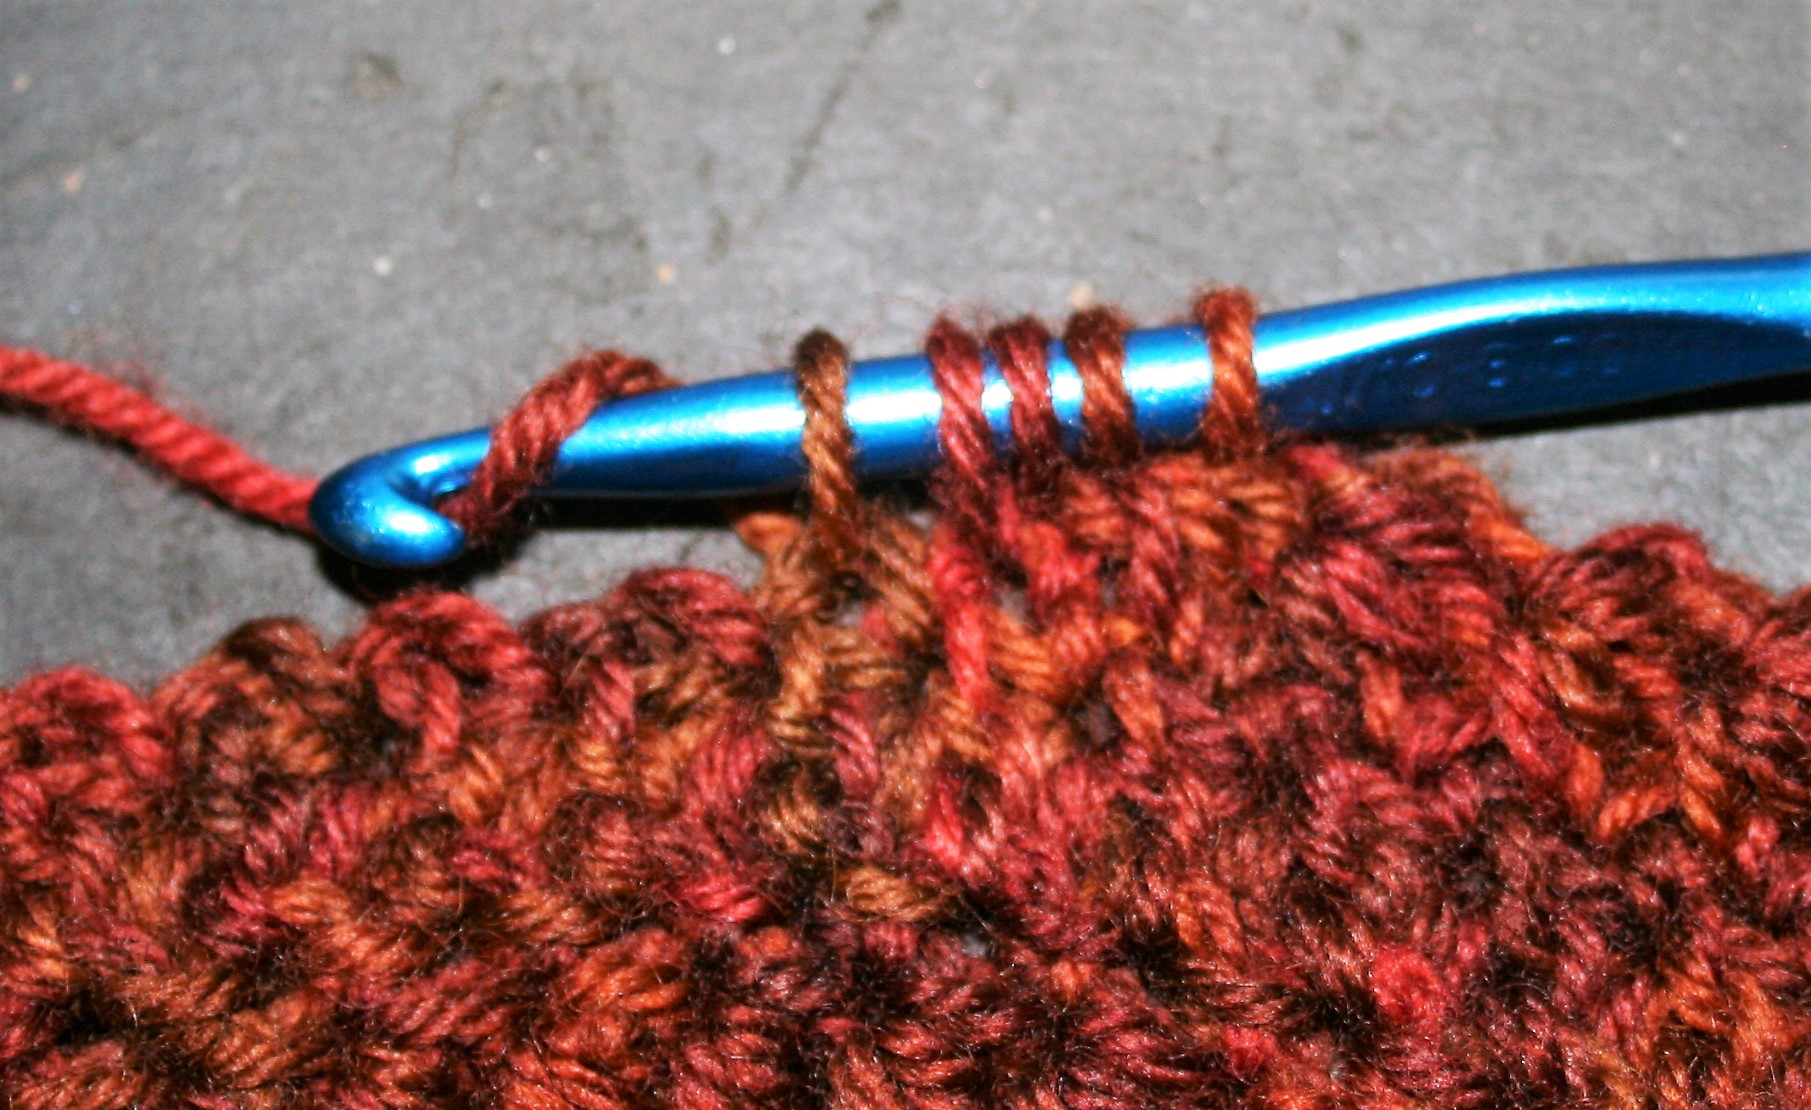
If you are beginning a new row, there is no adjacent stitch to work into, so you pick up loops in the turning chain in the same manner as you would for the stitch. The turning chain is typically a chain 2 to match the height of the stitch, you then simply insert your hook into each chain and pull up a loop in each chain, insert the hook in the base of the chain and pull up a loop, then insert the hook in the next stitch and pull up a loop.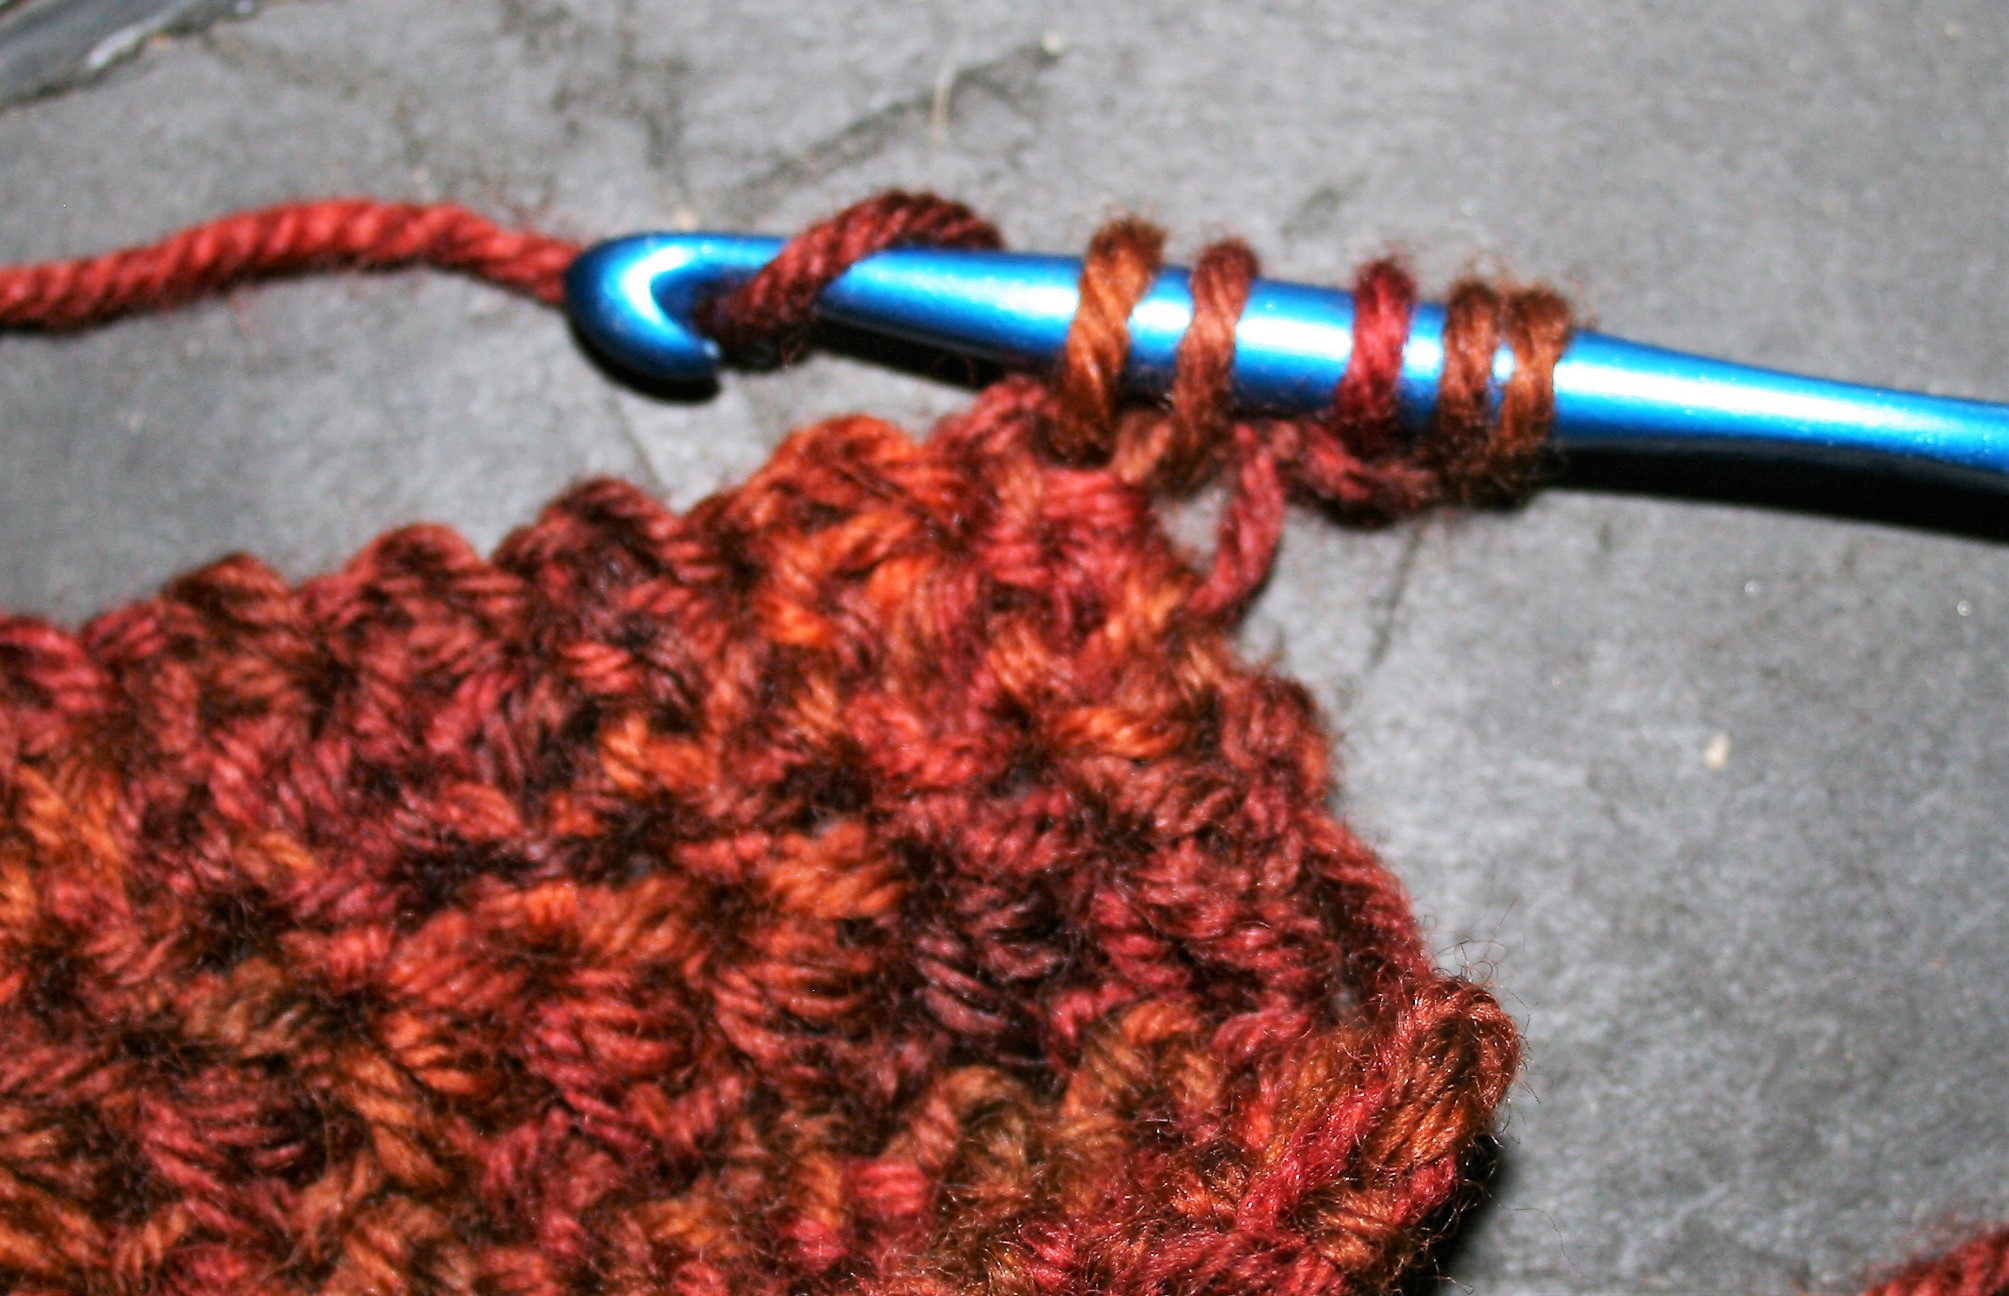
This stitch can create a dense fabric, so prepare to use a large hook if you want a bit more drape. Also, this stitch has a very different look if it is worked in the round, without turning every row. If you like this look, yet need a flat fabric there are people that cut the yarn at the end of every row and then reattach and work with only the right side of the fabric ever facing forward. This is a really nice look, I am just not a fan of weaving in that many ends.
So give this stitch a try, it does share interesting texture and appearance, something not every stitch can garner.