Help me help local communities by creating blocks for Warm Up America, by making a block for yourself and one for a community project with this free pattern. I will be creating a new block every two weeks and sharing it with you, I just ask that make one for donation.
Warm Up America is a nation wide organization that encourages local donations, but will also except donations to be sent to their office so that blocks can be assembled and then blankets can be donated through the United States.
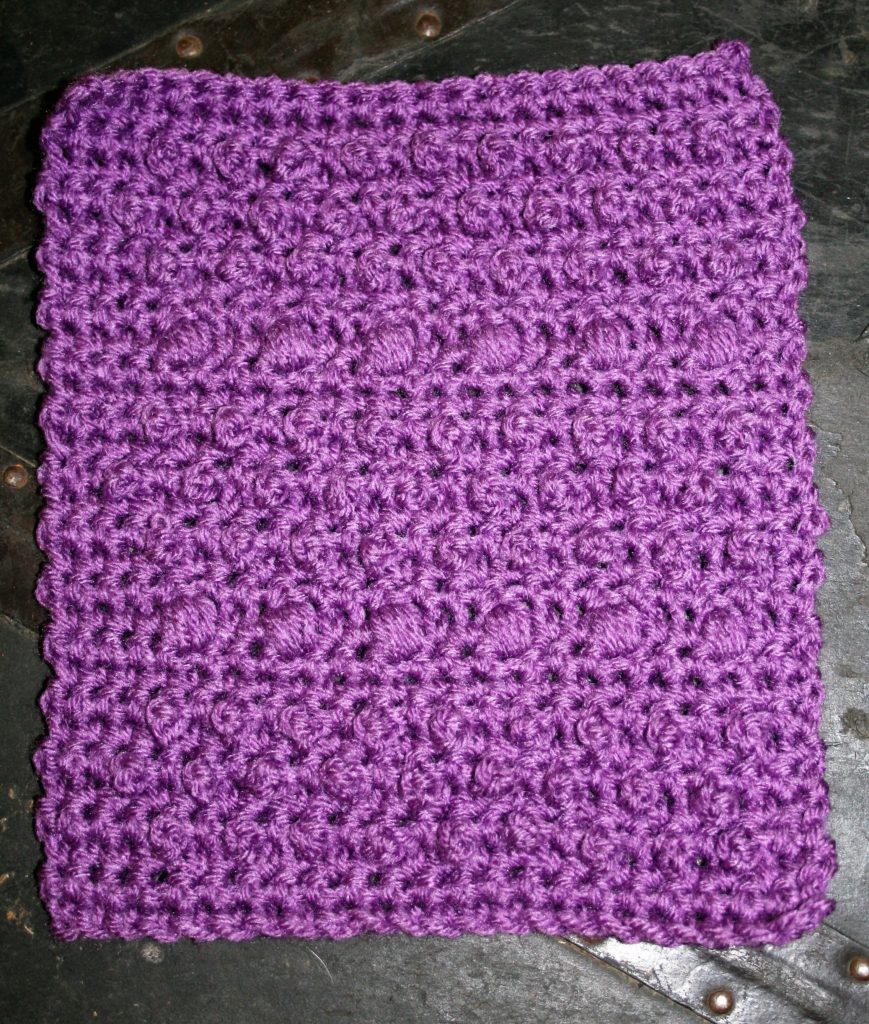
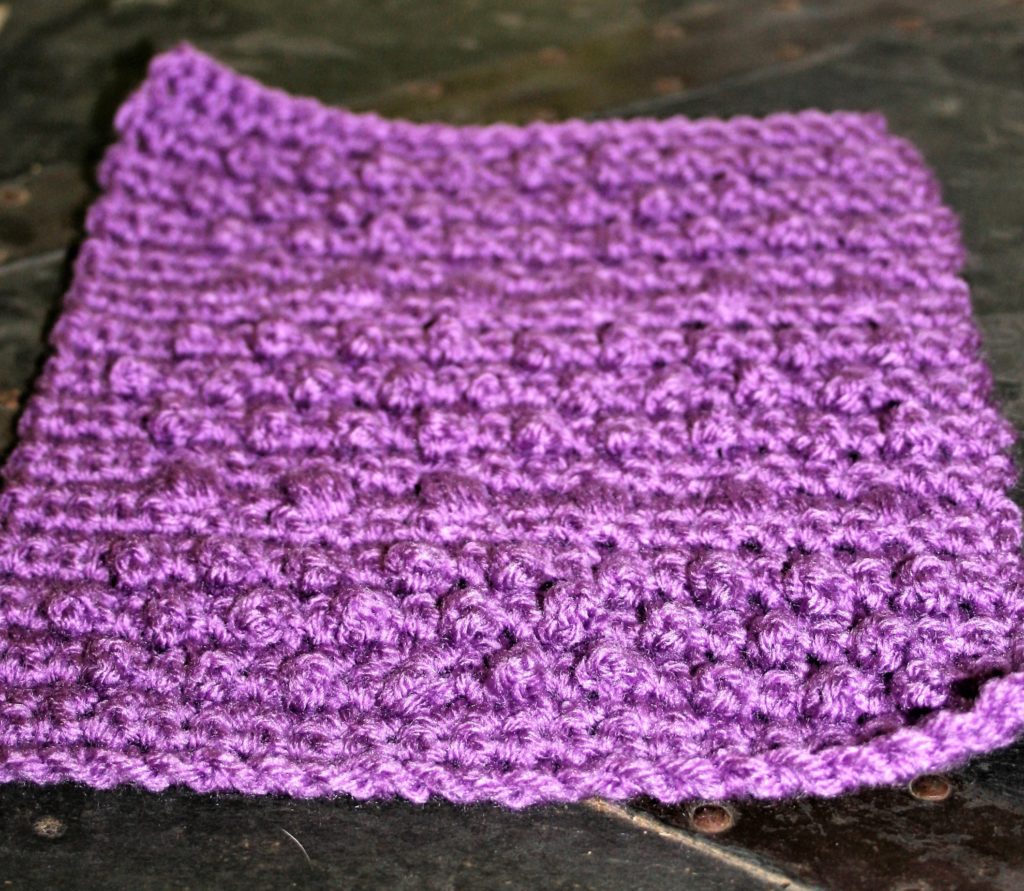
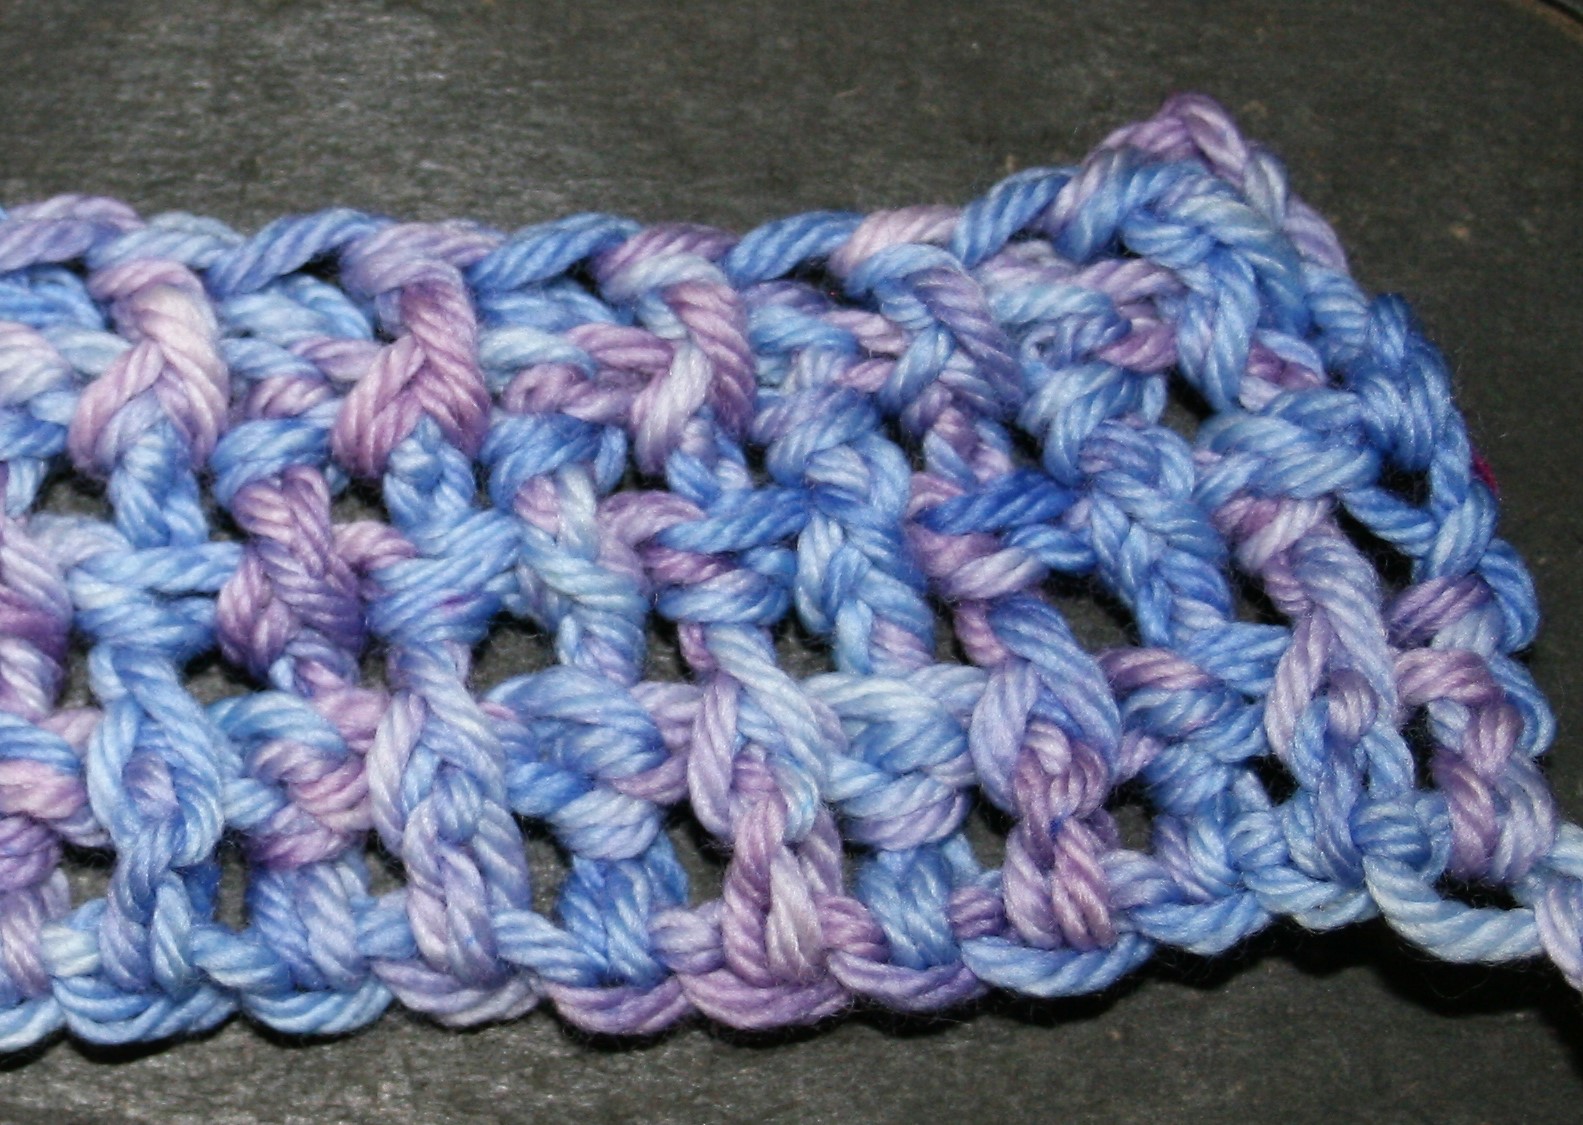
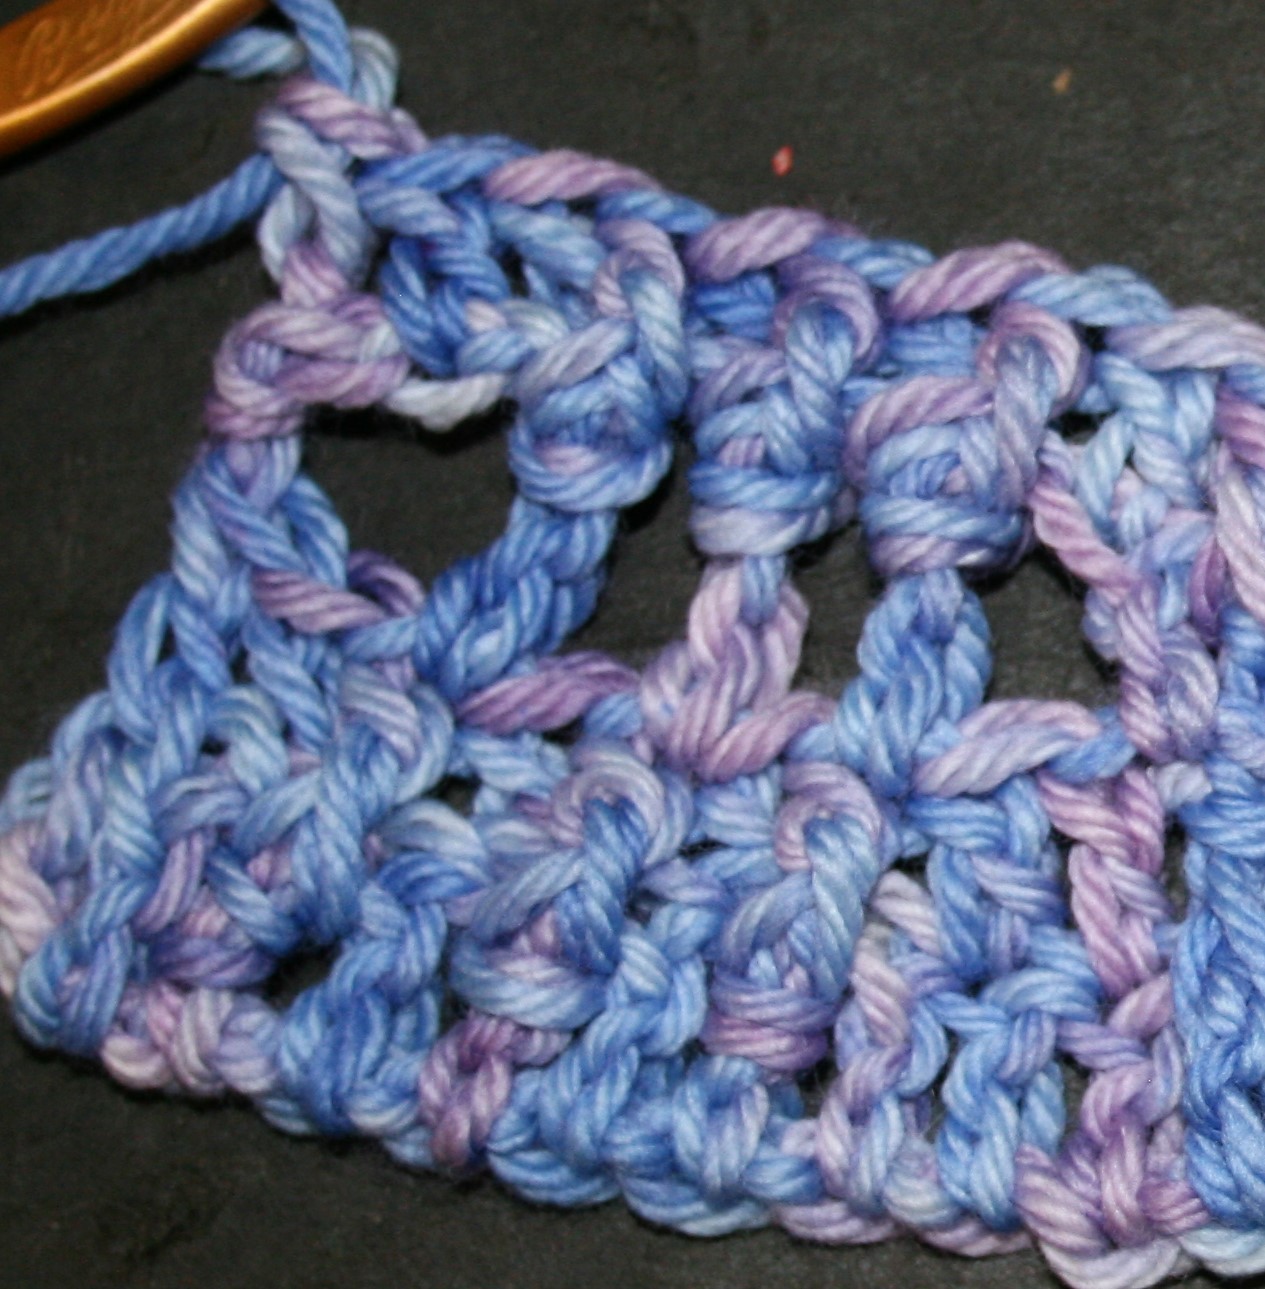
Berries and Bobbles Block
Even is you do not want to participate with Warm Up America, please consider creating blocks, or blankets for your local community. There are various places in every community that accept donations.
Berries and Bobbles Block
This block features some texture, by utilizing chain loops that create little “bumps” or “berries” while it is broken up by strips of bobbles.
Gauge: Square measures 7”x 9”
Materials
Medium weigh yarn
J/10/6.00mm crochet hook
Special Stitches
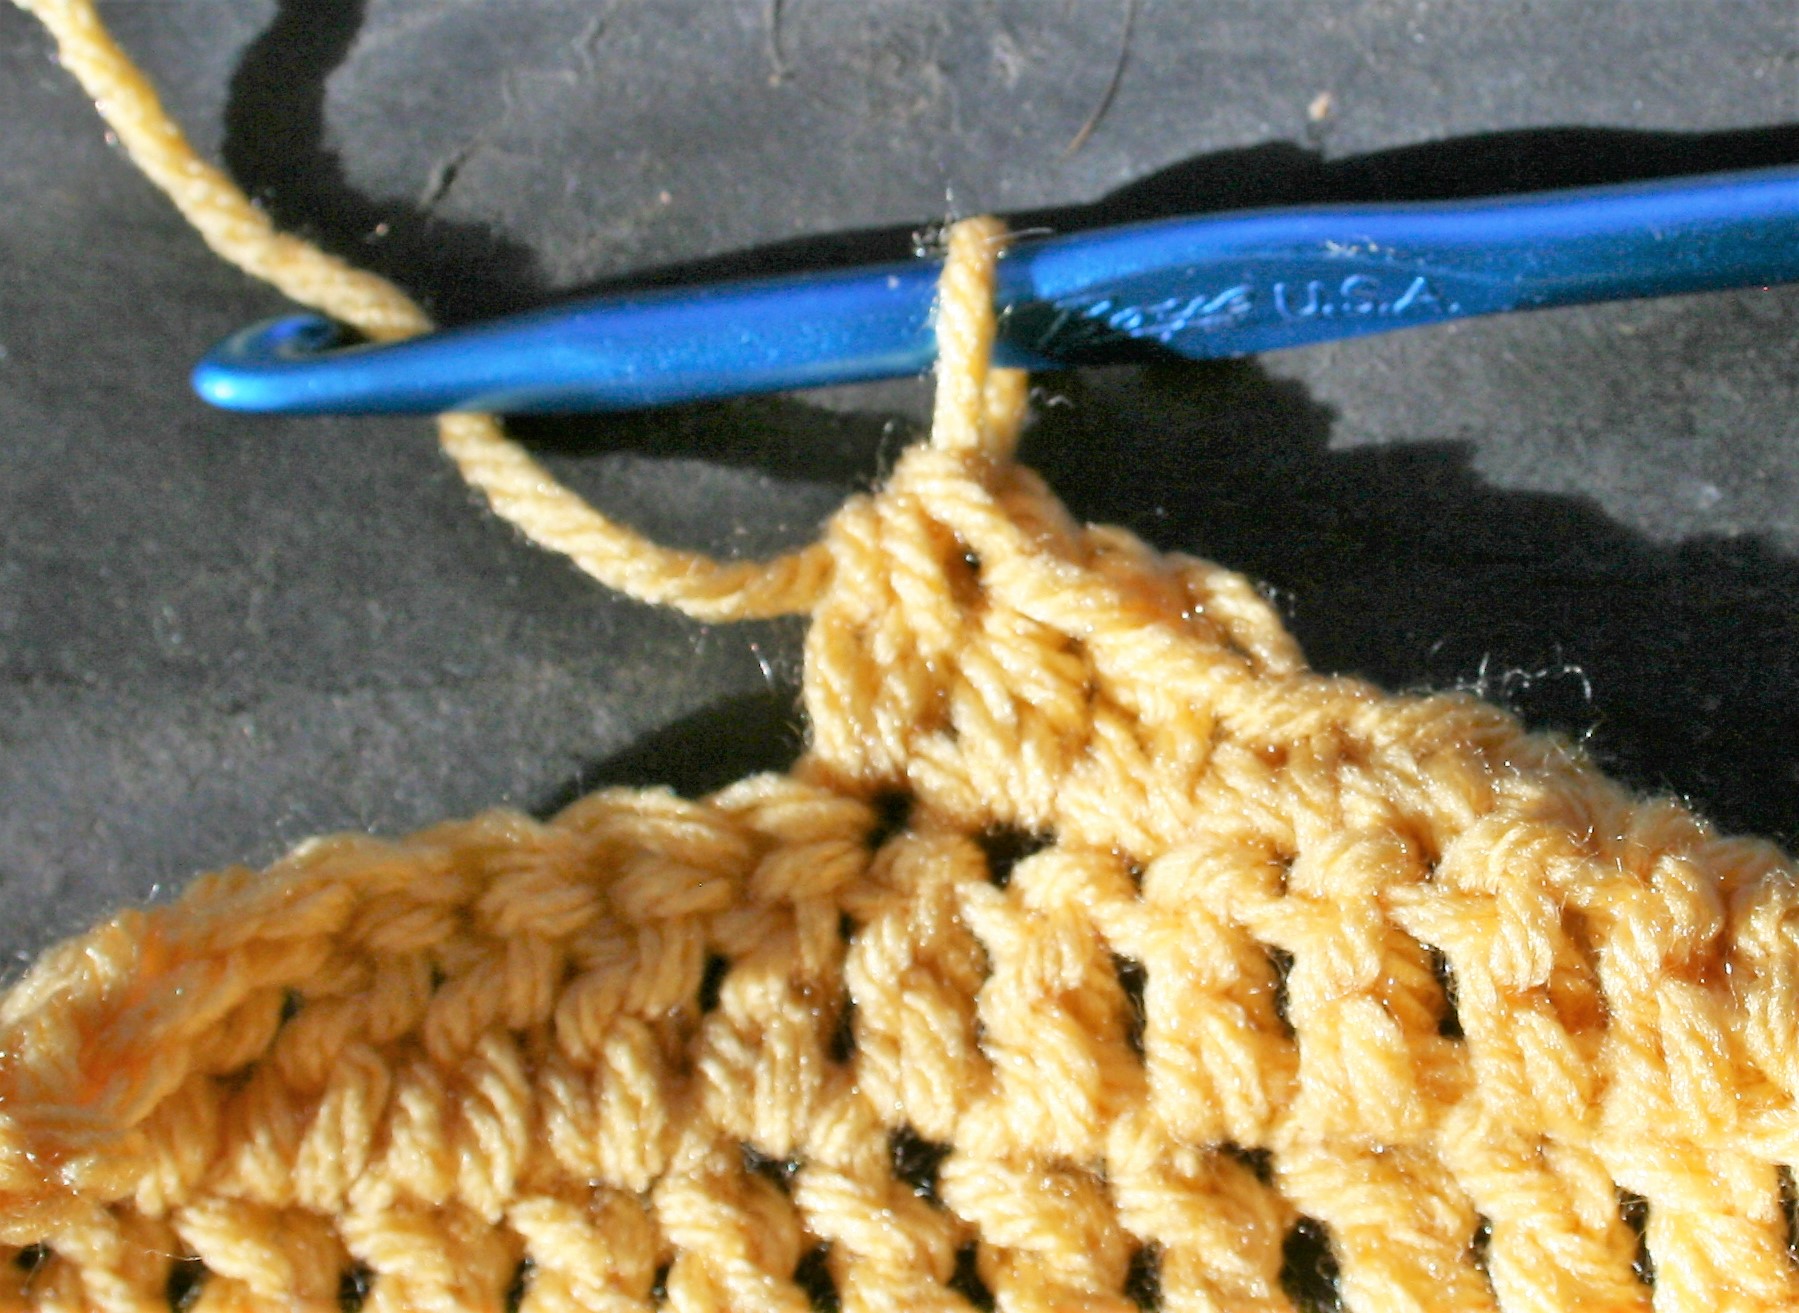
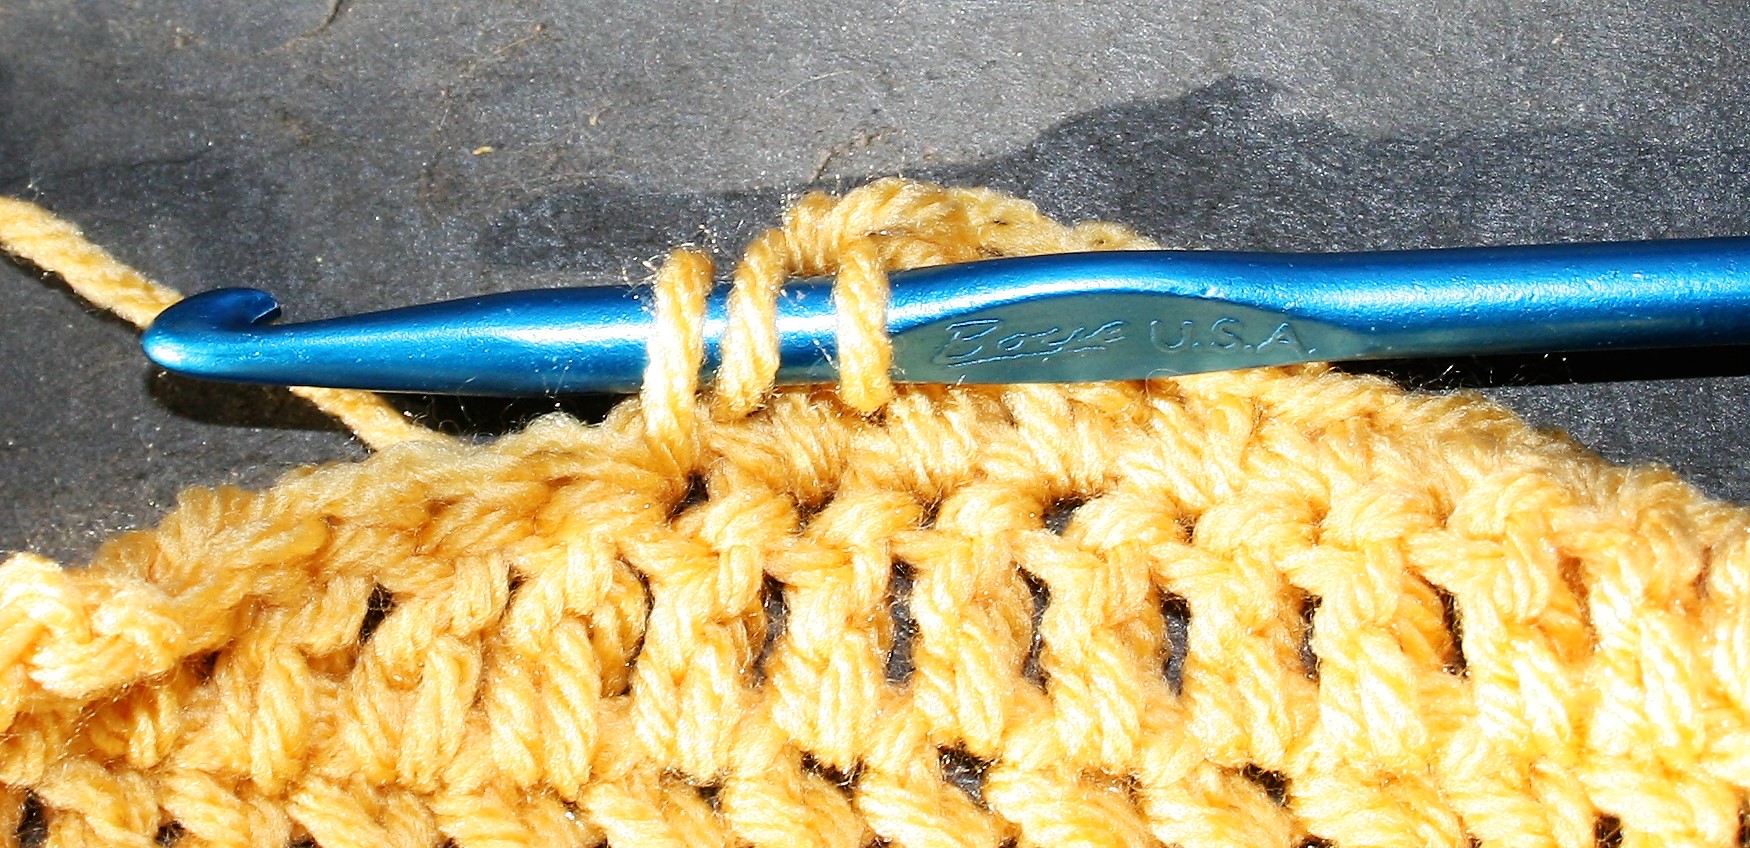
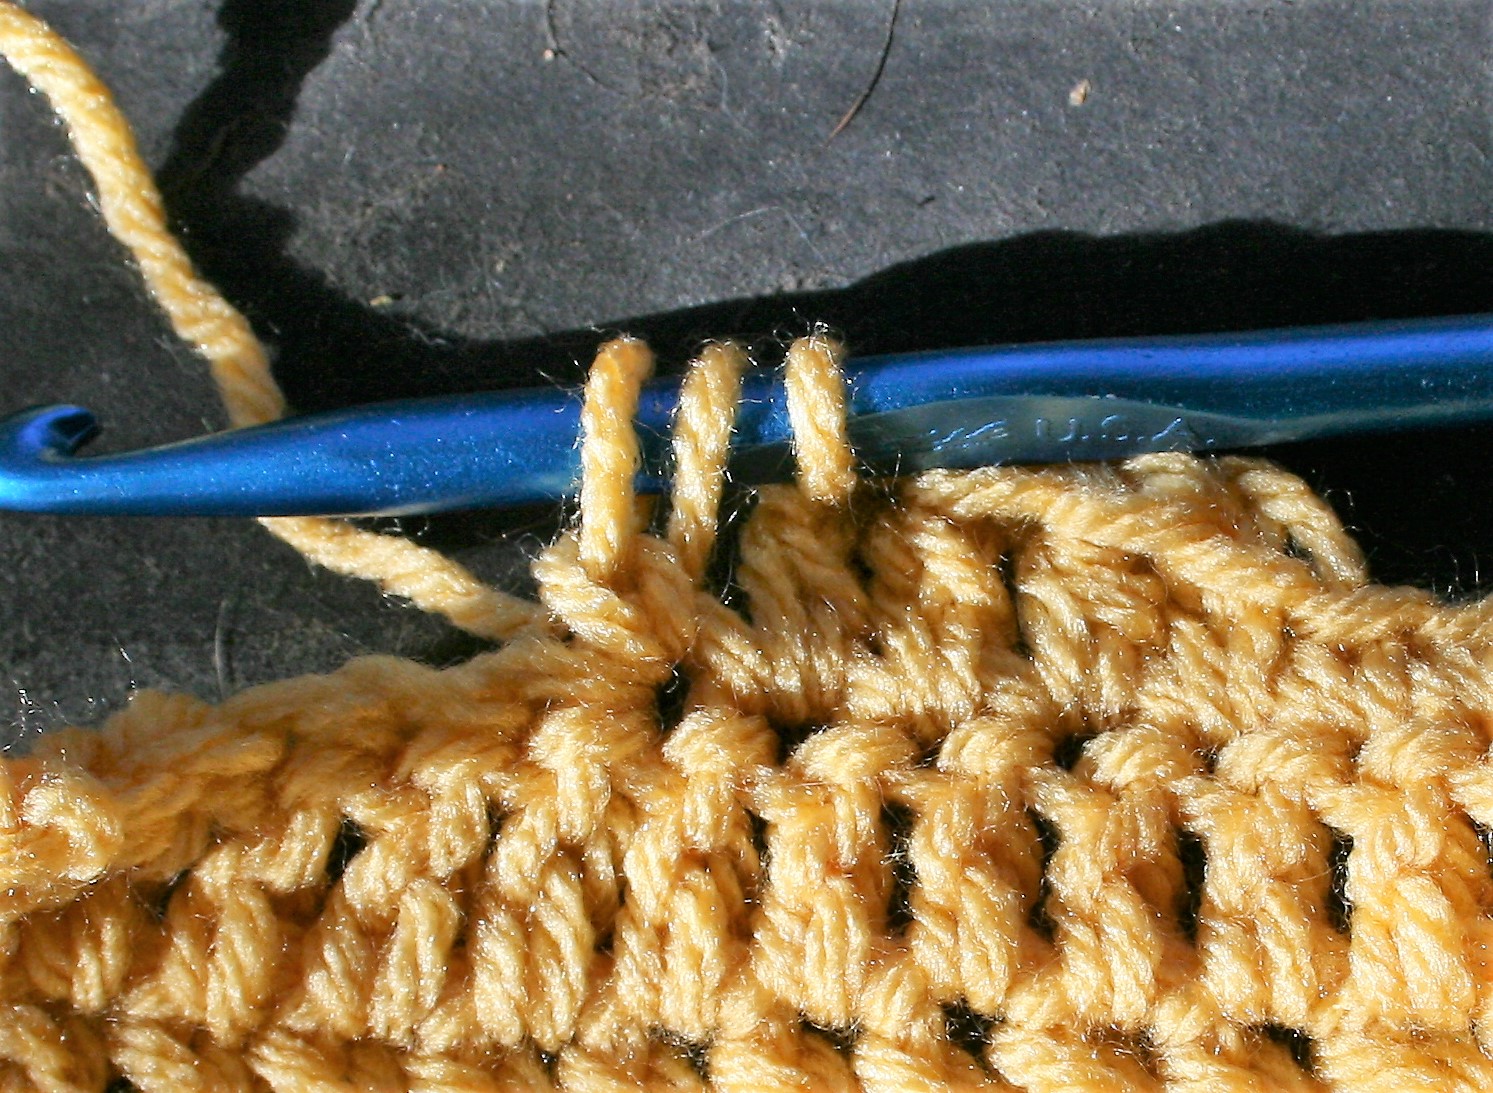
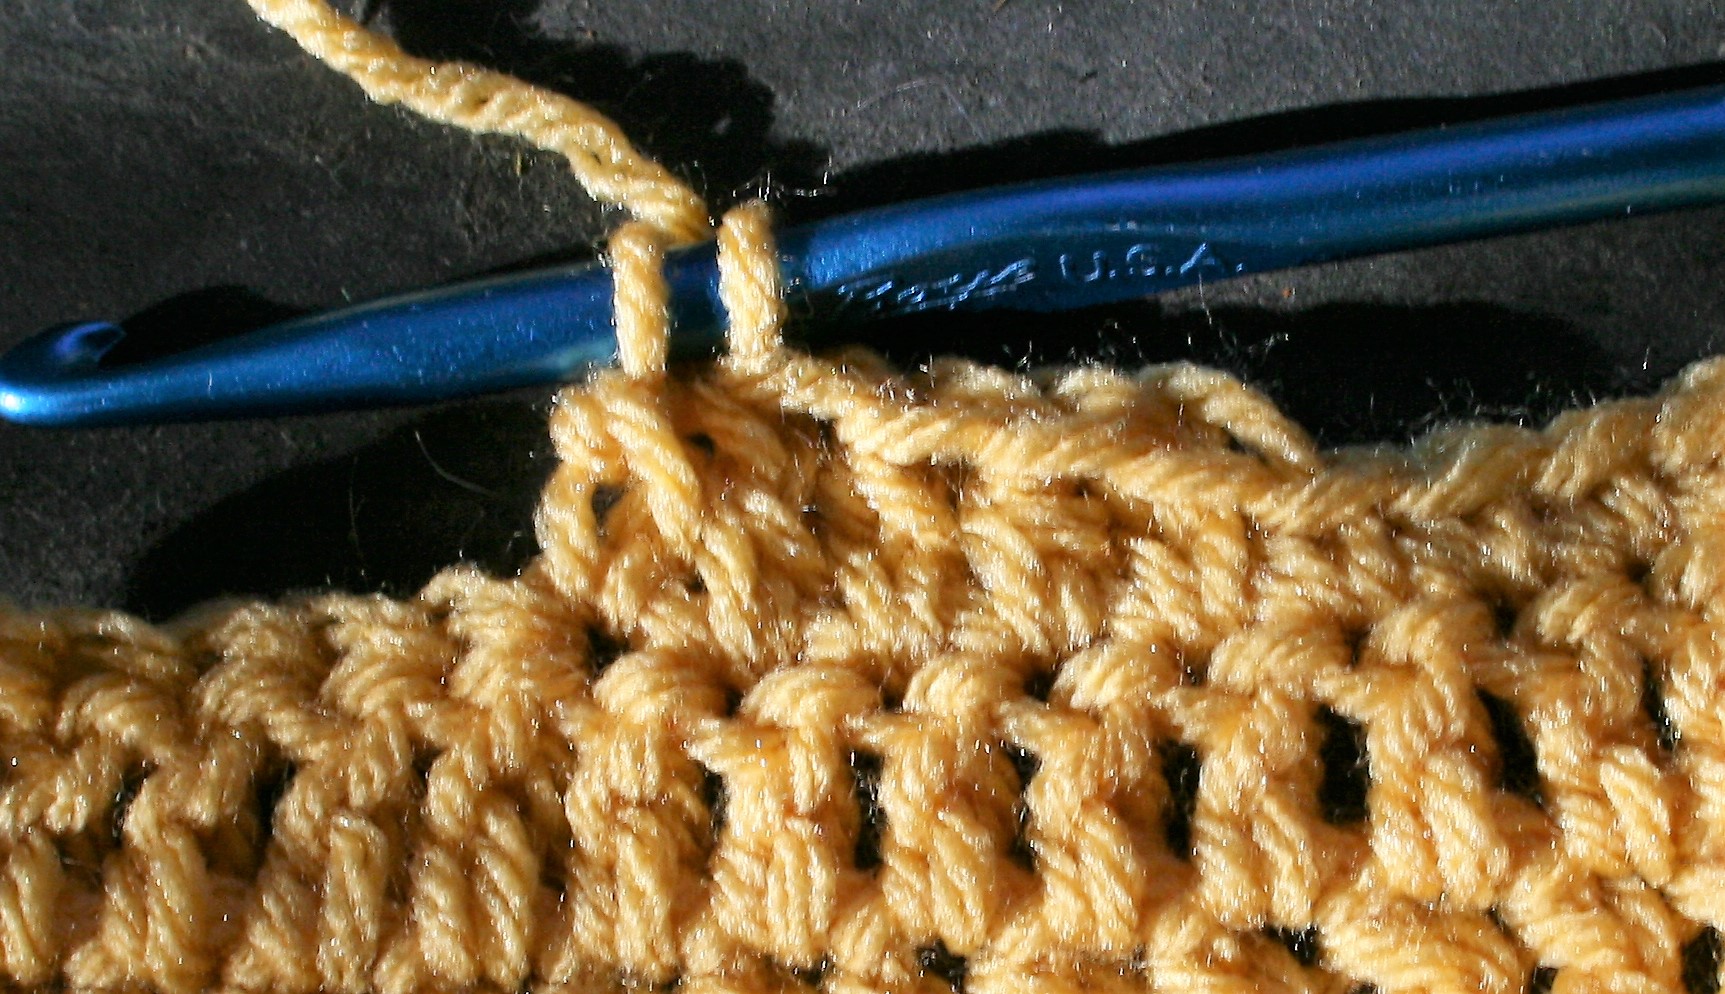
Bobble: [Yo, insert hook in stitch, yo, pull through a loop] rep 4 times, yo, pull through 8 loops.
Block Pattern
Ch 23
Row 1: Sc in second ch from hook, sc in each ch across, turn. -22sc
Row 2: Ch 1, sc in same st, sc in each st across, turn.
Row 3: Ch 1, sc in same st, sc in next st, [ch 3, sc in next 2 sts] 9 times, sc in last 2 sts, turn. -9 ch-3 loops
Row 4: Ch 1, sc in same st, sc in each sc across, pushing ch-3 loops to the back side of work, turn.
Row 5: Ch 1, sc in same st, sc in next 2 sts, [ch 3, sc in next 2 scs] 9 times, sc in last st, turn. -9 ch-3 loops
Row 6: Rep Row 4.
Rows 7-8: Rep Rows 3-4.
Row 9: Ch 1, sc in same st, sc in each st across.
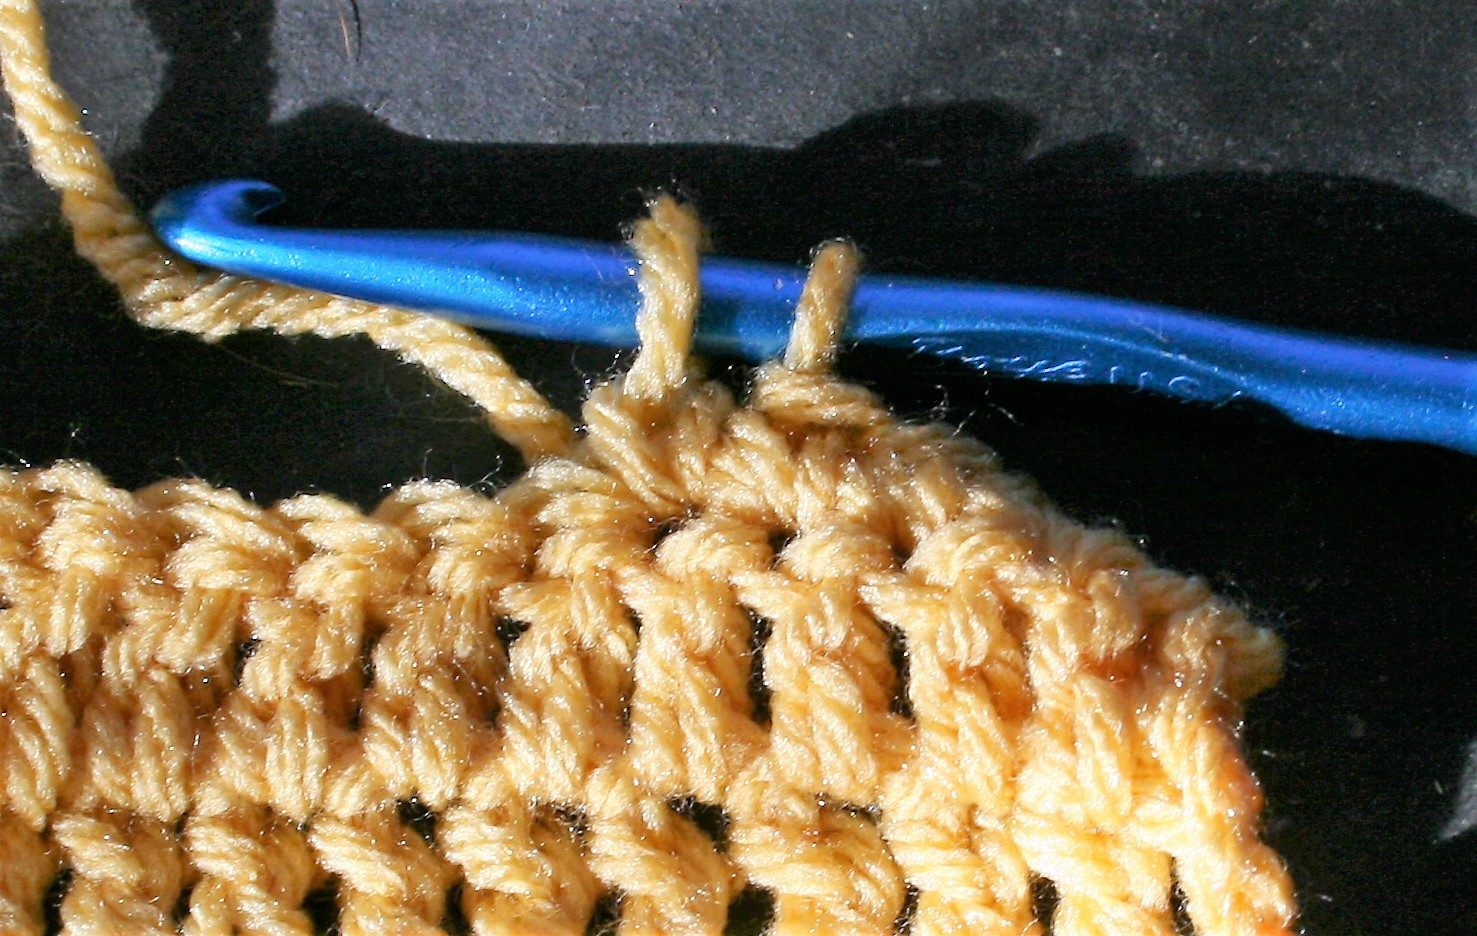
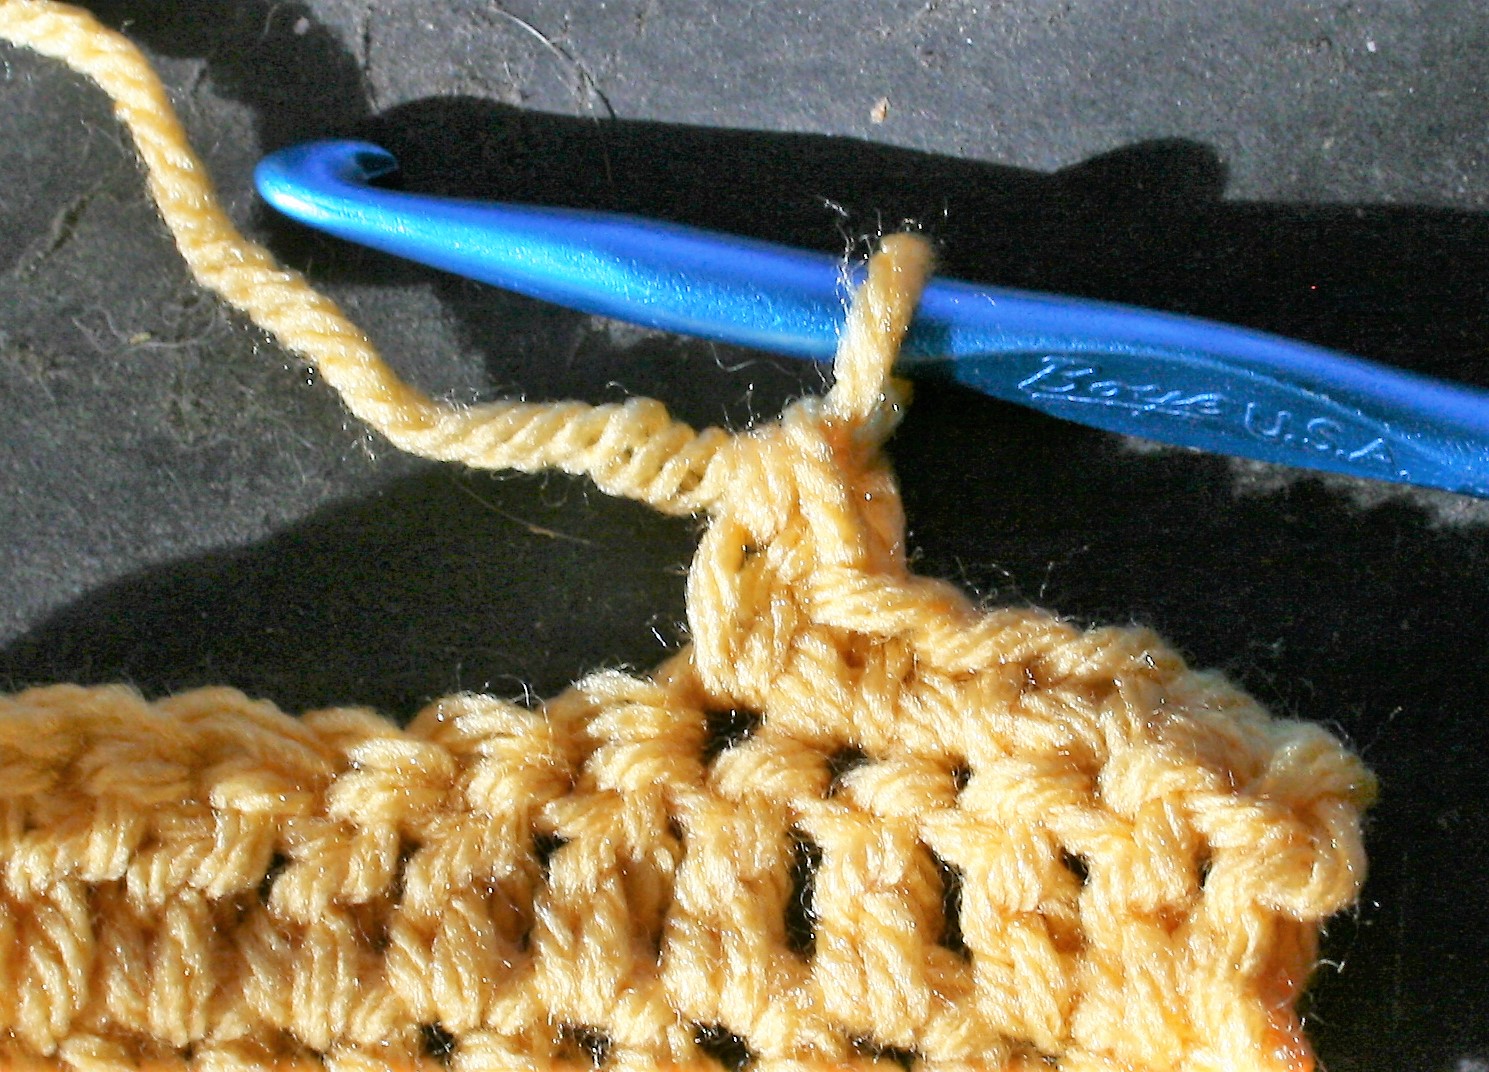
Row 10: Ch 1, sc in same st, sc in next st, [Bobble in next st, ch 1, sc in next 2 sts] 6 times, sc in last 2 sts, turn. -6 bobbles
Row 11: Ch 1, sc in same st, sc in each sc and bobble skipping ch sts, turn. -23 sc
Row 12: Ch 1, sc in same st, sc in each st across, turn.
I pick up this stitch again recently and begun playing with
it in the round. This stitch is typically worked at only half the row height
increase of the single crochet stitch, working in both its on row stitch and
the one adjacent. As a result of this one, stitch stacked upon one stitch approach
it takes a bit of thinking to work the flat circular increases.
The first hurdle is to actually begin the round. You really
need to work 2 rows of fabric in the same beginning stitches to ensure an even
fabric consistency throughout. I have found two approaches to this in the
round.
Please note that I worked this fabric as a different color
on each side, as it really helped me to keep the process understandable. In
doing such I would drop the color, leaving the working loop for the color live
and pick up the new color, switching like this between every Round. In addition,
I worked the entire fabric in a spiral method, meaning I did not join the
rounds when completed, I simply began the next stitches in the next round. This
was also so ease of keeping track of my location in the work. I have to play a
bit more with the end of the Rounds, as even working in a spiral they appear to
easily as the stitches become a bit clustered and dense, but it does allow for
the thermal stitch to be created.
Beginning:
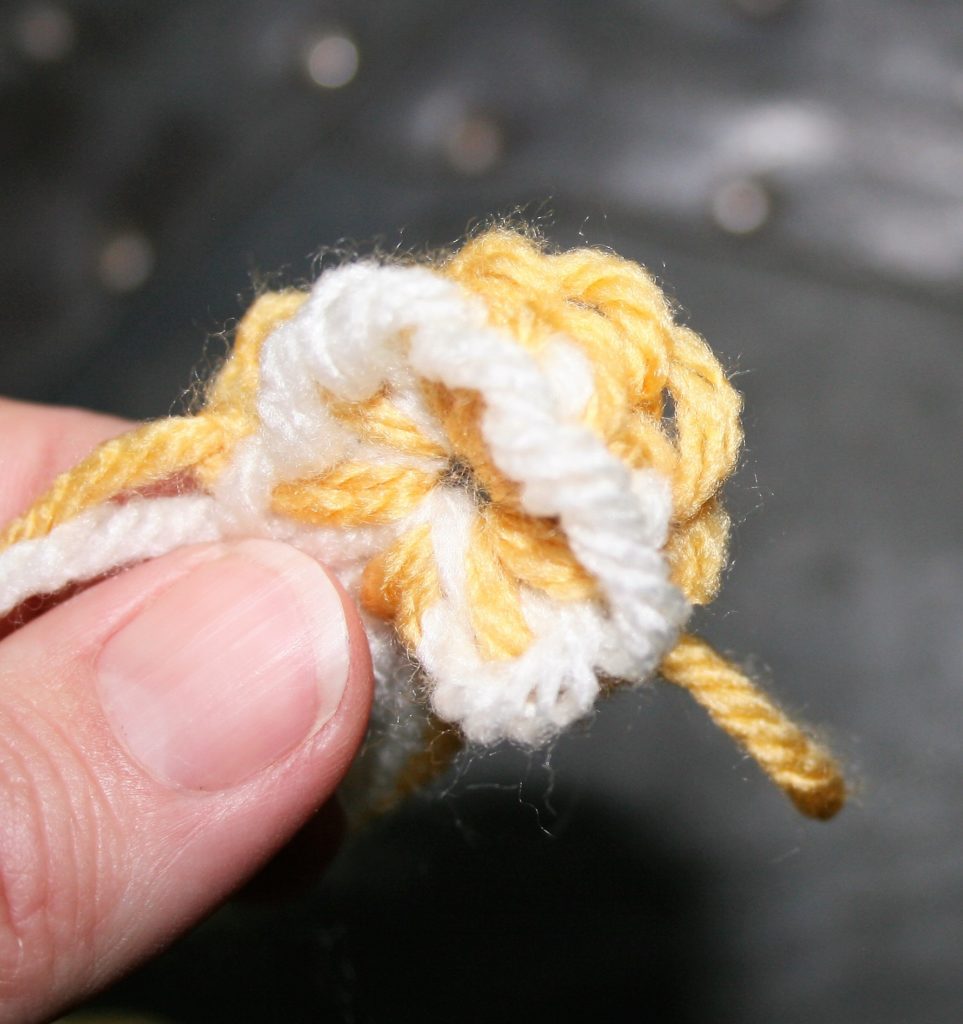
Method one: The magic loop/ring/circle. Essentially this technique involves making a loop of yarn and crocheting in this loop, like when crocheting over item (like the demonstration here making holiday wreaths).
Round 1: Work 8 single crochets into the loop (color cream),
turn.
Round 2: Drop color
from round one, join new color (color yellow). Working between stitches in between
the stitches of Round 1, [insert your from behind the magic ring, and through
the top loop closest to you in Round 1….this feels a bit awkward, but
essentially what you are doing is inserting your hook into the bottom ring and
the loop of the stitch in round 1, yo, pull through a loop, yo, pull through 2
loops] repeat 8 times, turn. -8 sts
Pull ring closed.
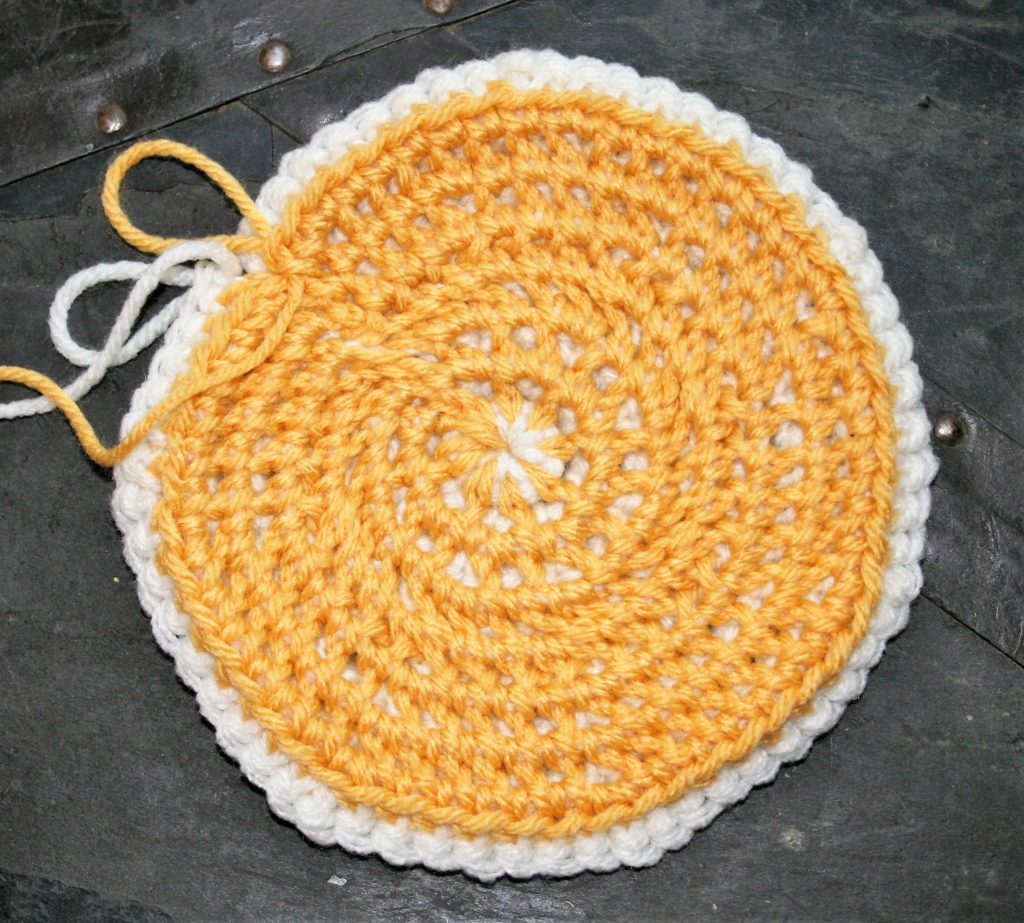
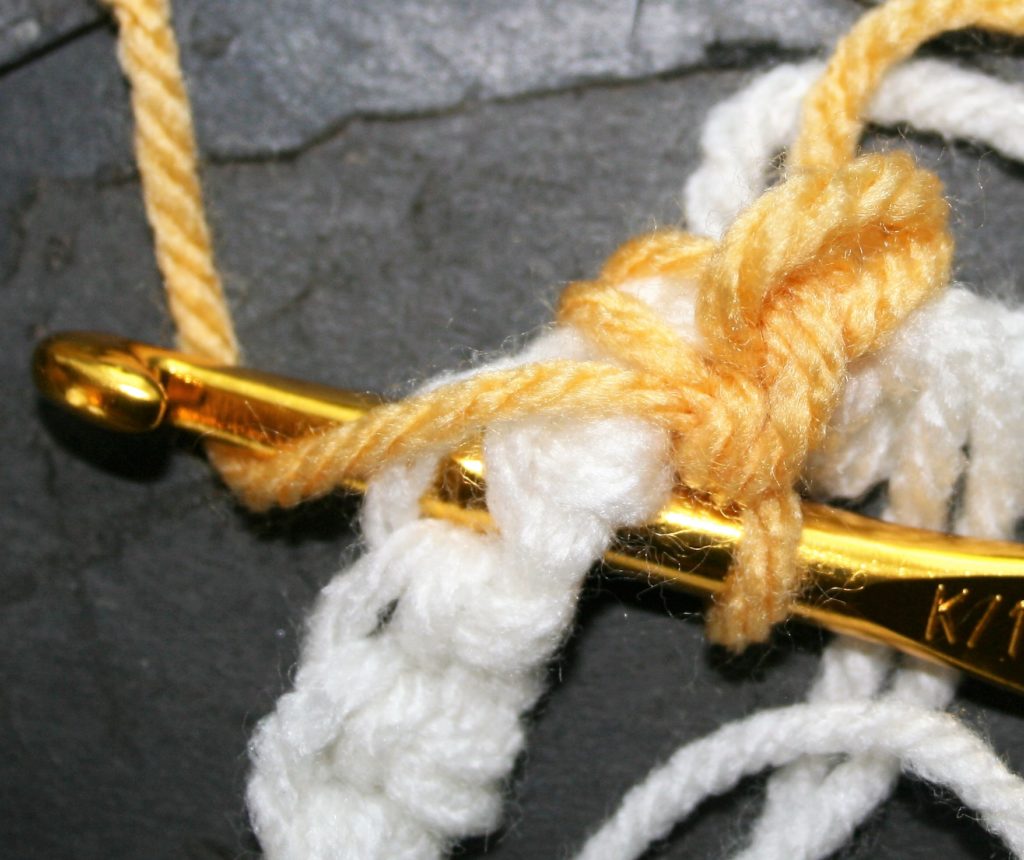
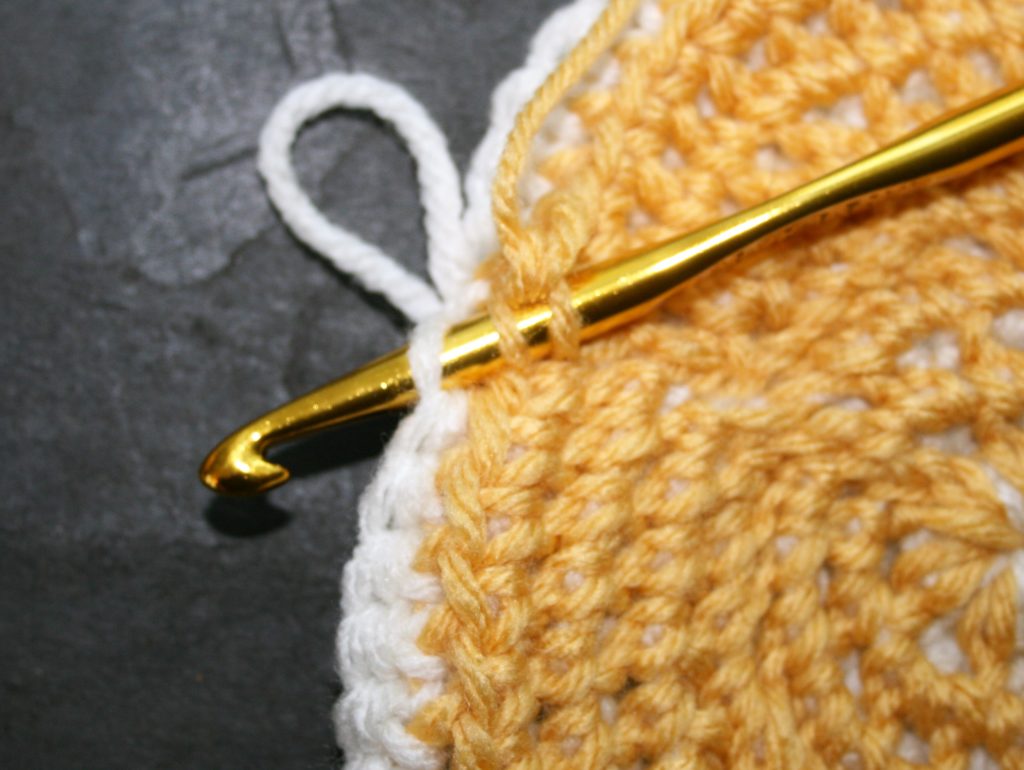
Working Round 2 of Magic Circle method, inserting hook behind ring and through top loop closest to you,Working Round 2 of Magic Circle Method as viewed from the Wrong SideThermal in the Round, Completed Round 1 & 2
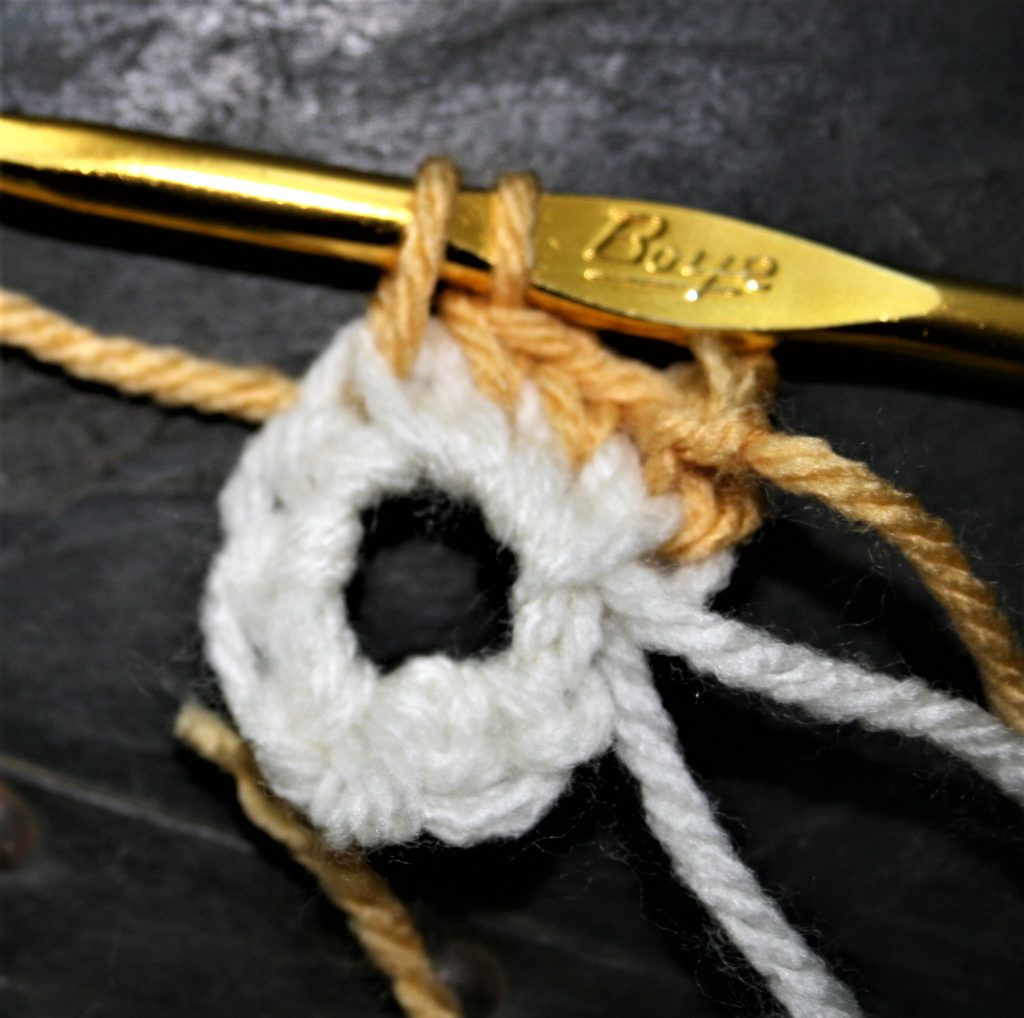
Method two: Working into a ring. Chain 4, and slip stitching to the first chain to form a ring.
Round 1: Ch 1, 8 sc in ring (color white), turn. -8 sts
Round 2: Drop color from Round 1, join new color (color
yellow) to one “leg” of the single crochet stitch, insert hook through same
point as join and the top loop closes to you of Round 1, yo, pull through a
loop, yo, pull through 2 loops, [insert hook into one “leg” of next single crochet
and the top loop of next stitch, yo, pull through a loop, yo, pull through 2
loops] 7 times, turn. -8 sts
Thermal in the Round, Round 2 working in the “through the stitch leg” method. Insert hook through one “leg” of the stitch and the top loop closest to you.
All Subsequent Rounds….Working the Increases
Increases need to happen in each Round, but you are
essentially working the same increase for 2 rounds. Meaning that the stitch
count for Rounds 3 and 4 will be in same, the same number of stitches are
worked in the white, the same number in the yellow….like working two separate fabrics
at once. However the increases are slightly different in approach.
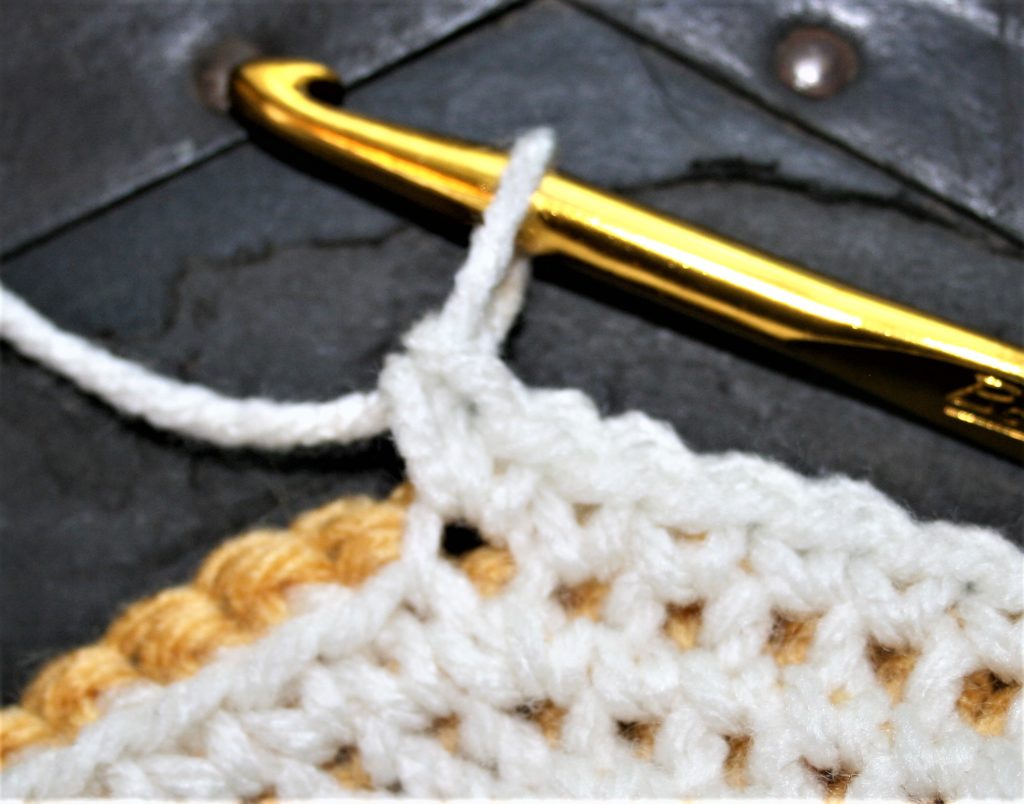
Round 3: Dropping yellow and picking up white, insert hook
through the front loop of Round 1, and the top loop closest to you in Round 2, yo,
pull through, yo, pull through 2 loops, insert hook into same location as
stitch just made and rework stitch, this is your increase. Work 2 thermal
stitches in each stitch around, turn. -16 sts
Thermal in the Round, Odd Round increase
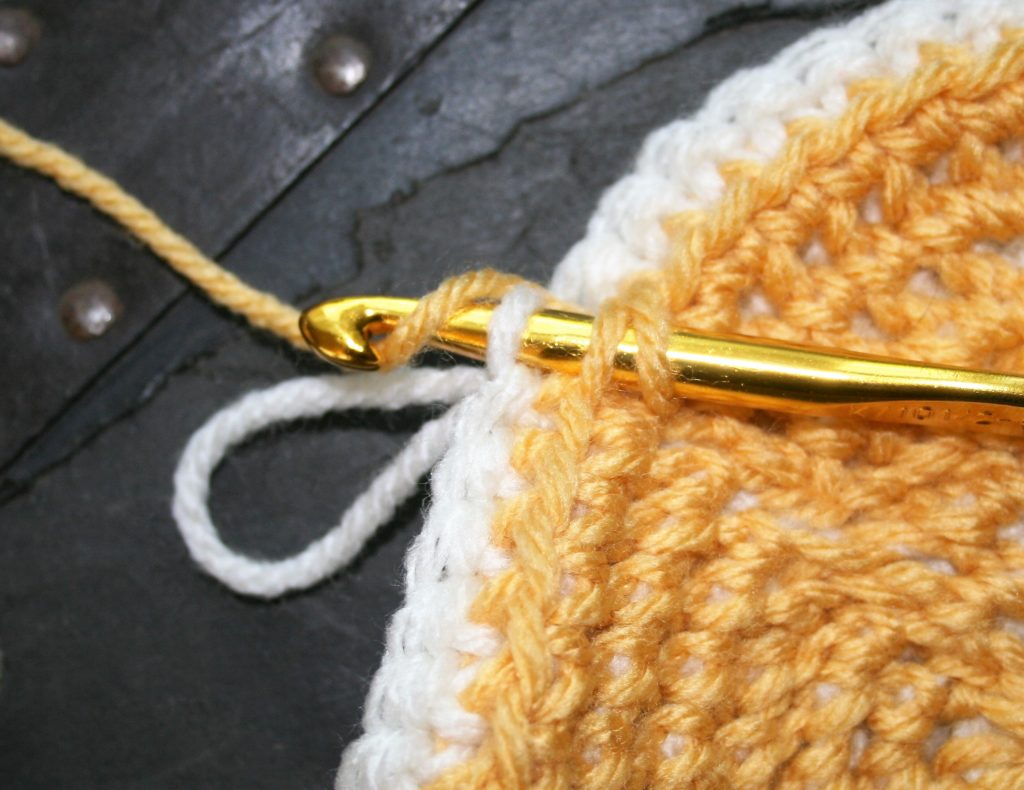
Round 4: Dropping white and picking up yellow, [insert hook
through the front loop of Round 2 and the top loop closest to you in Round 3,
yo, pull through, yo, pull through 2 loops, insert hook into the same front
loop of Round 2, and next top loop closest to you in Round 3 (note there are
already twice as many stitches in Round 3 as there are in Round 2…so there are
less front loops to work into then there are completed stitches, as a result
you need to increase Round 4 by working 2 stiches in the same Front loop, but
do not in the top loop closest to you)] repeat 7 times, turn. -16 sts
Thermal in the Round, Even Round Increase, first stitchThermal in the Round, Even Round Increase, second stitch
You work the same formula for a flat circle (you can find that here), in all the rounds going forward. I tend to think of the rounds in sets, a pair of one odd round and one even round (Round 1 & 2, Round 3 & 4, Round 5 & 6, etc.) Working all increases in Odd number rounds by working into the same front loop and the same top loop closest to you. Working all Even Round increases as the same front loop but different top loop closest to you. All non-increase stitches are worked as traditional Thermal Stitch (see tutorial for basic stitch)
This subtle difference in the increases between the rounds
is one reason the different colors helped me. I could remember that every time
I used the yellow yarn I was doing an even number Round increase.
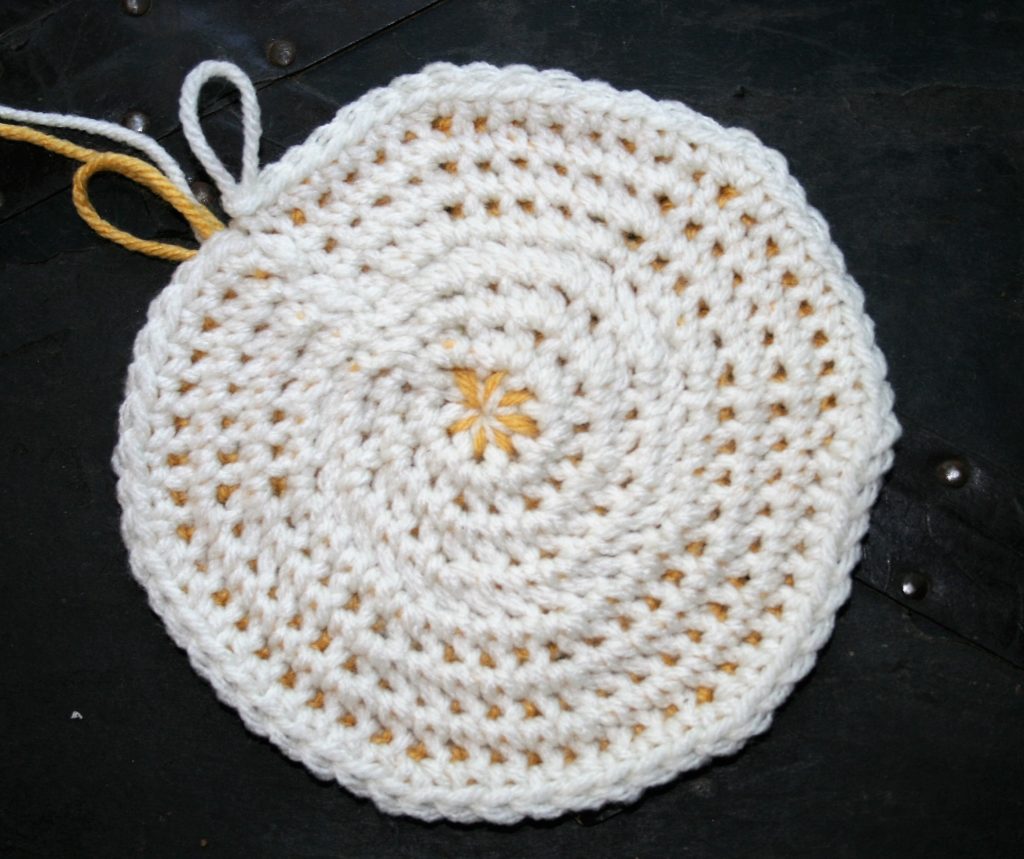
Thermal in the Round view from Odd Rounds
This process takes a bit of practice, but the resulting
fabric has a nice textured look, and the dense nature lends itself nicely to
pot holders, trivets, wash scrubby, I could even see a nice warm hat in the
future.
When I am teaching I find that if my students make a mistake, it is because they are attempting something more advanced than they had learned. One such “more advanced stitch” is working Extended Stitches.
Extended stitches are a great way to make more gentle curves, or even help make gauge, and they are pretty easy to create. The technique of extending can be used with any crochet stitch, and only adds one additional step.
To create the stitch you start whichever stitch you are work, just as you always do. Meaning if you are creating a single crochet, insert you hook in the indicated stitch, yarn over and pull through; if you are creating double crochet, yarn over then insert in you hook in the indicated stitch, yarn over and pull through. The extension happens right after the “yarn over and pull through”, this is the point in a stitch that I refer to as “anchoring” as it secures the stitch being created to fabric being created.
After “anchoring the stitch” you yarn over and pull through a loop, essentially creating a chain. Then you complete the stitch as usual. This little added chain gives a little extra height to the stitch, however it does not make it as tall as the next typical stitch in crochet. This helps create a gentler curve in a gradual stitch taper.
There is only a slight difference in the appearance of these extended stitches, and that is a little extra “v” at the base of the stitch post.
Steps for working typical crochet stitches, note: all photo examples are worked to the left of the typical version of the stitch for comparison:
Extended Single Crochet (esc):
Insert hook into indicated stitch, yarn over pull through a loop to anchor, chain one, yarn over and pull through 2 loops.
Extended Half Double Crochet (ehdc):
Yarn over, insert hook into indicated stitch, yarn over pull through a loop to anchor, chain one, yarn over and pull through 3 loops.
Extended Double Crochet (edc):
Yarn over, insert hook into indicated stitch, yarn over and pull through a loop to anchor, chain one, yarn over pull through 2 loops, yarn over pull through 2 loops.
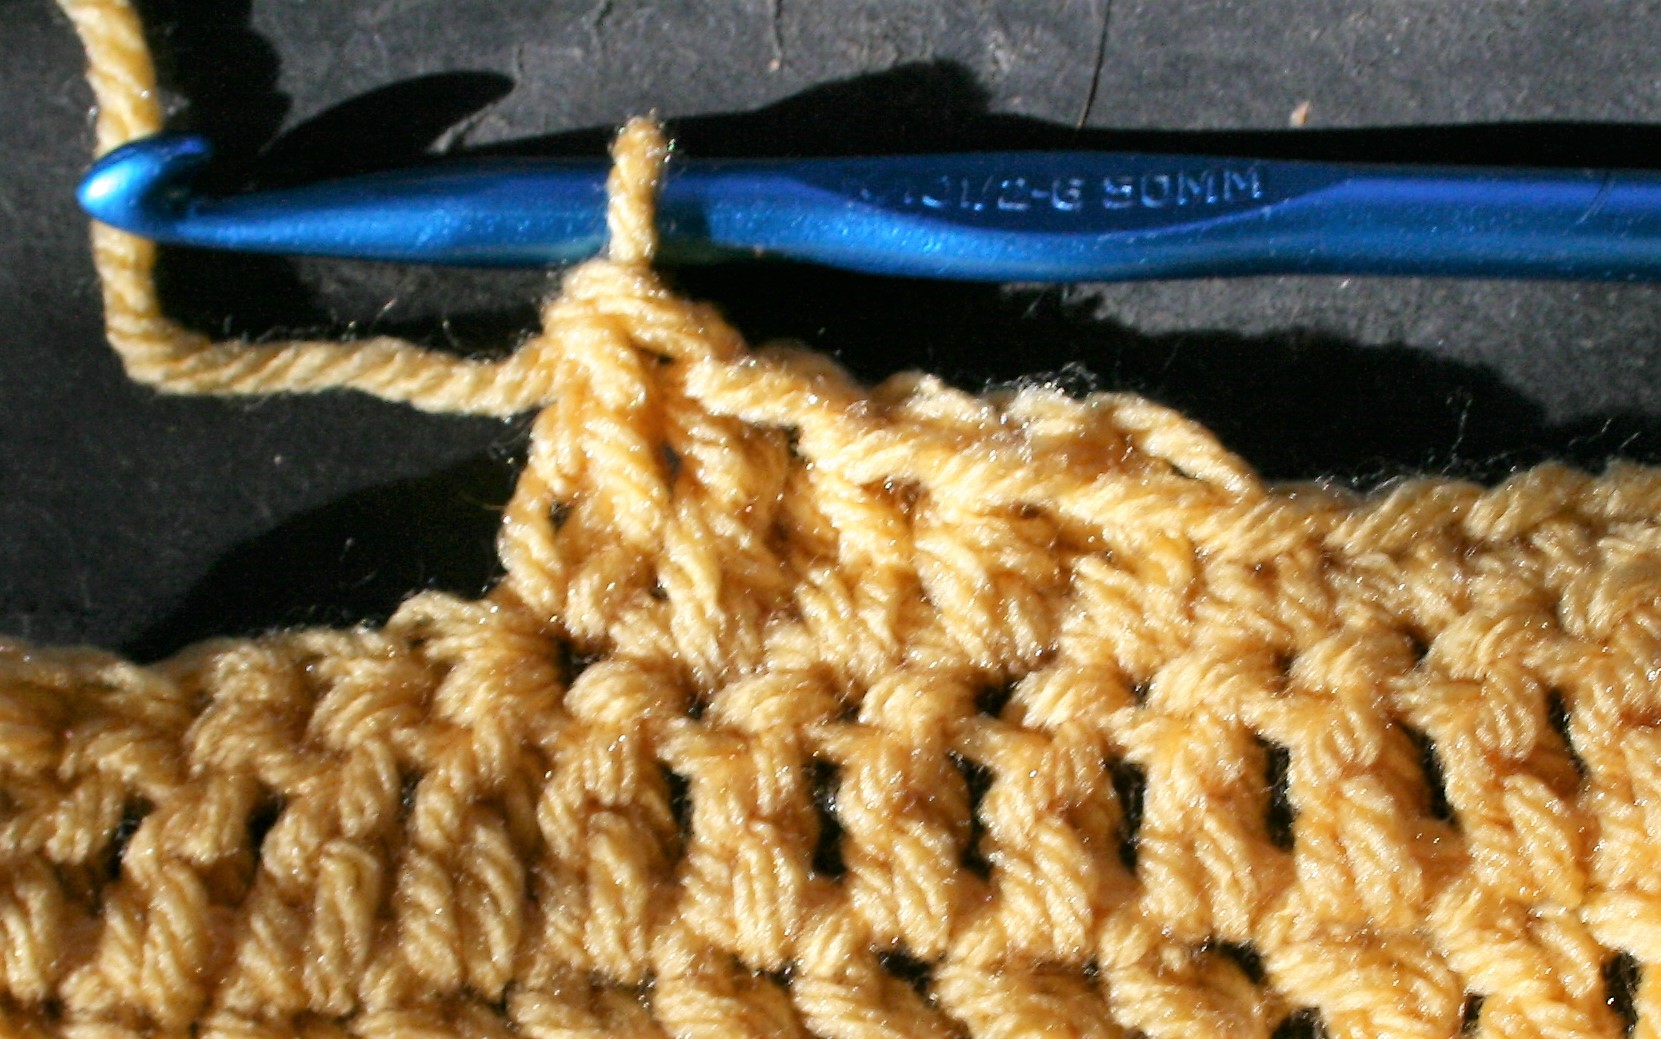
For the last few years I have released new patterns featuring yarn from Lisa Souza Dyeworks to highlight the New York Sheep in Wool show, affectionately known to many simple by the town that hosts it, Rhinebeck. This year is no different.
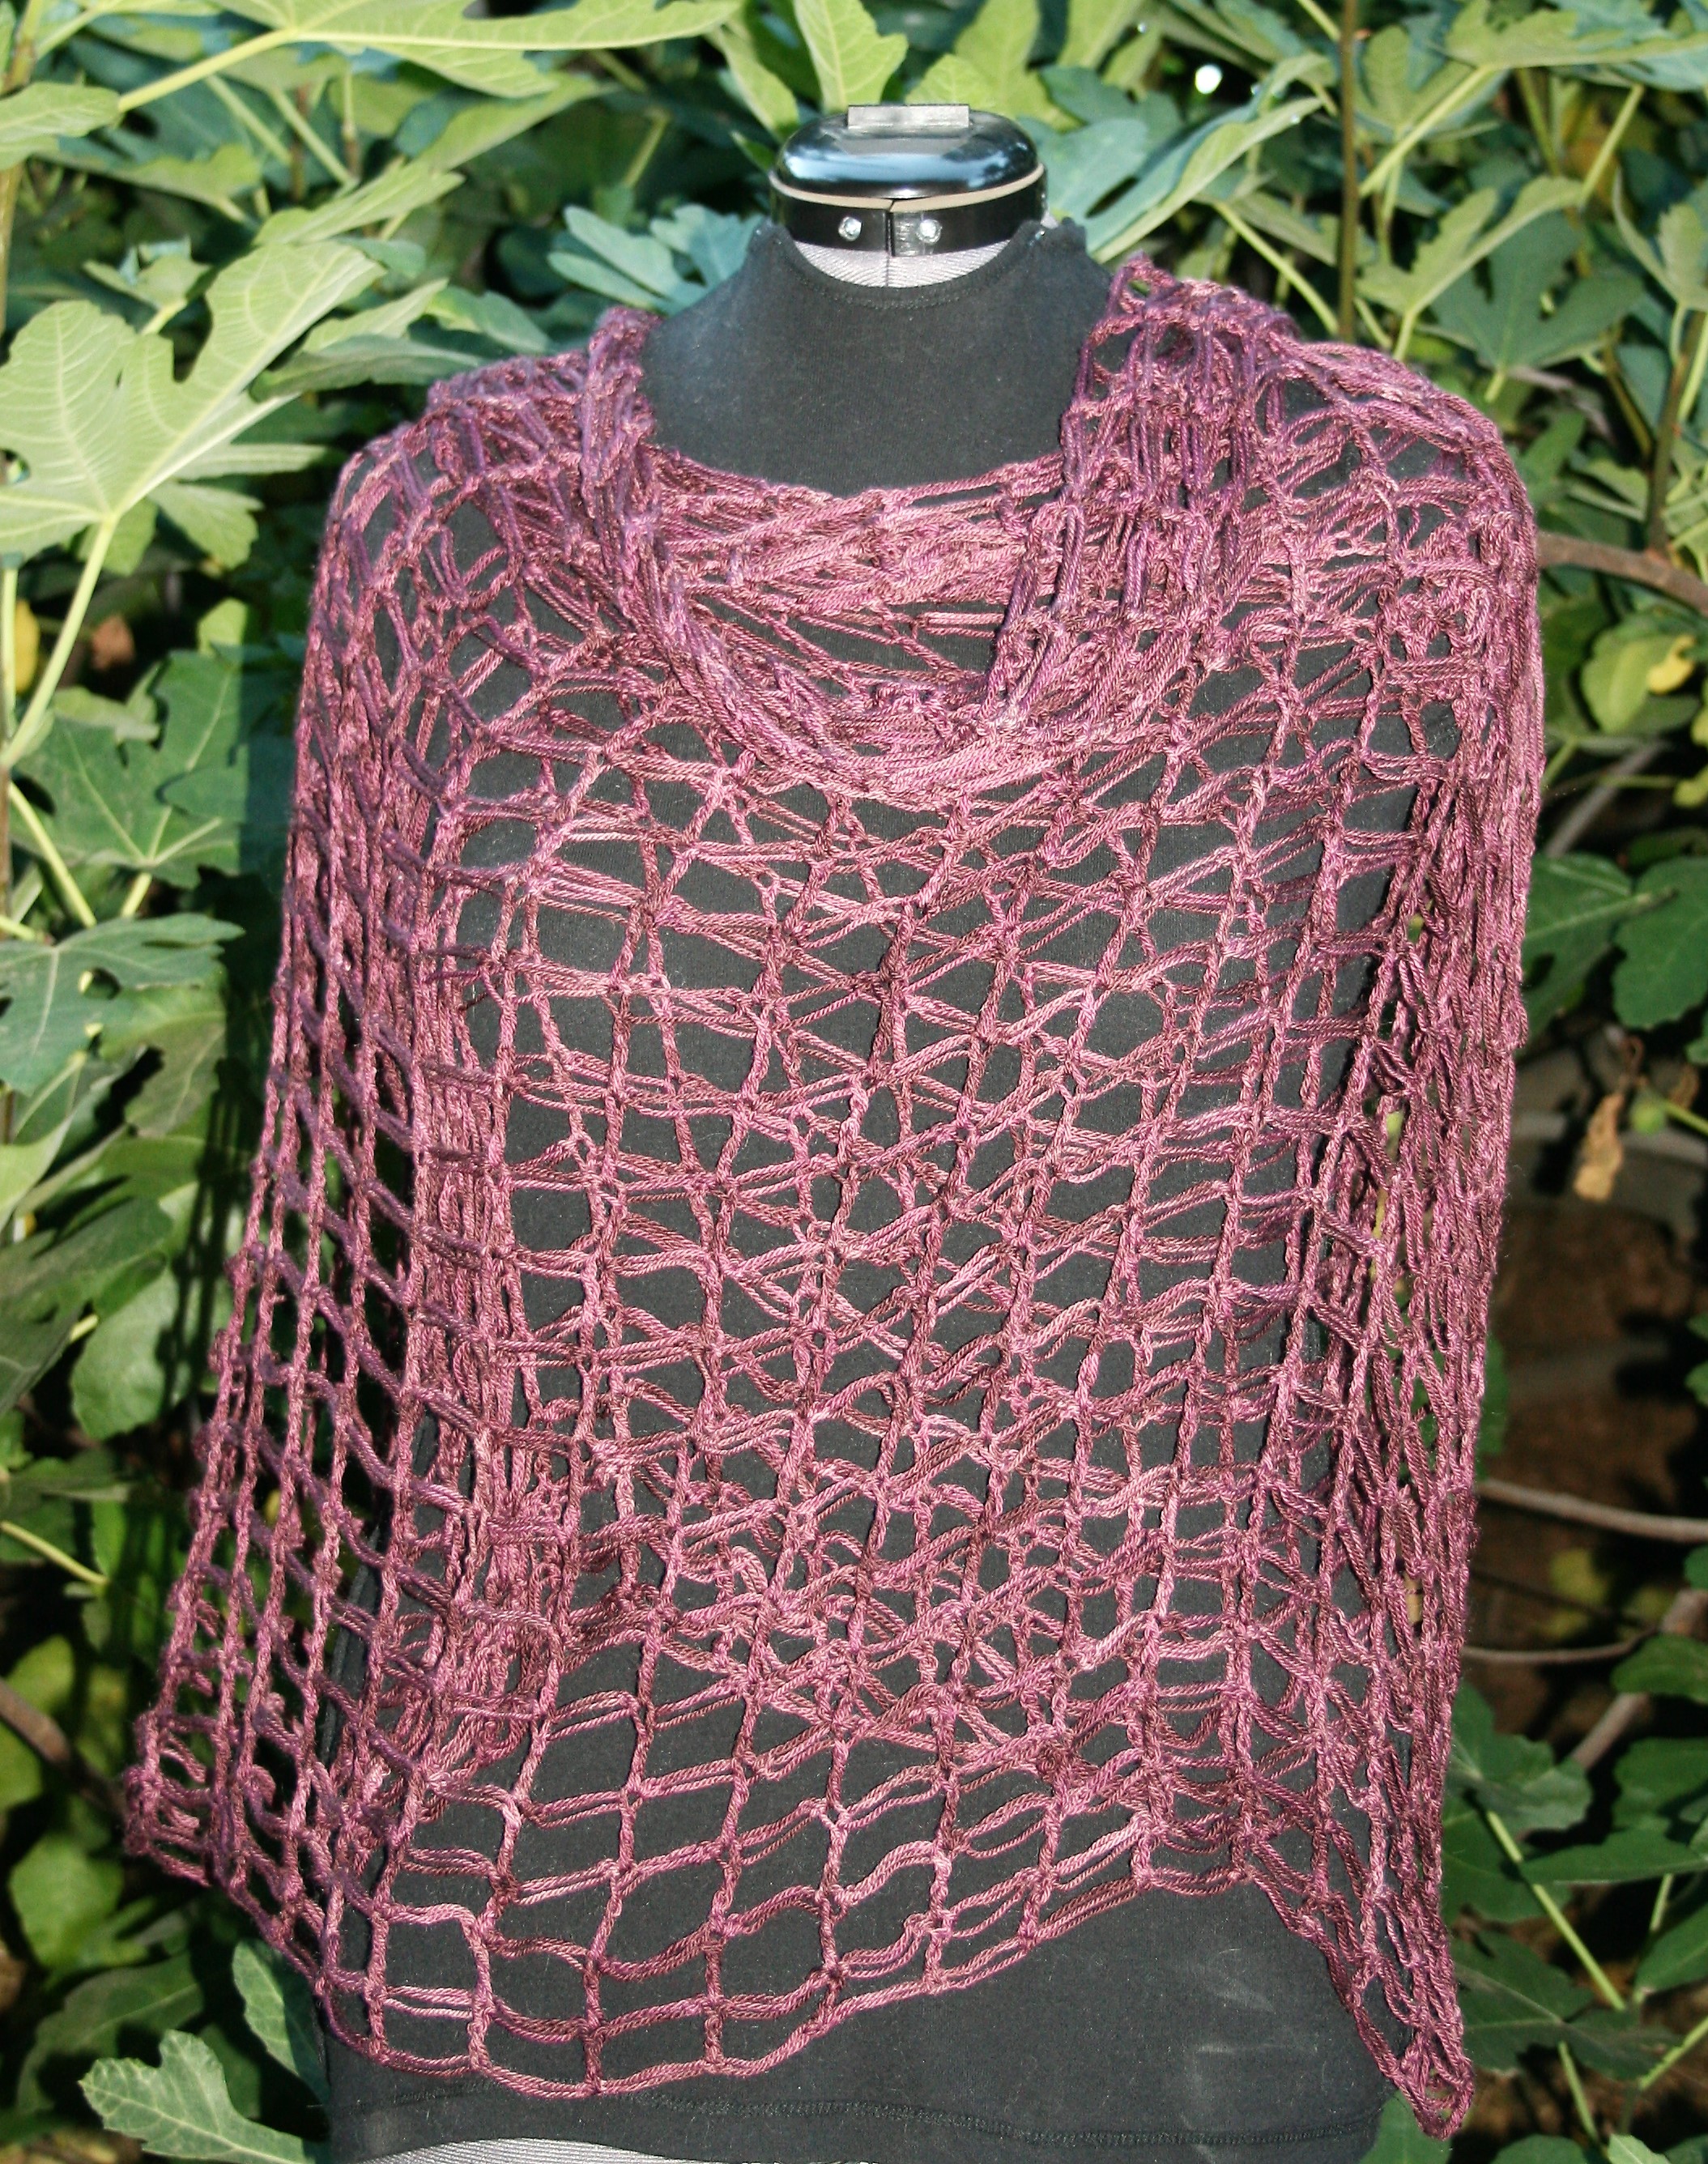
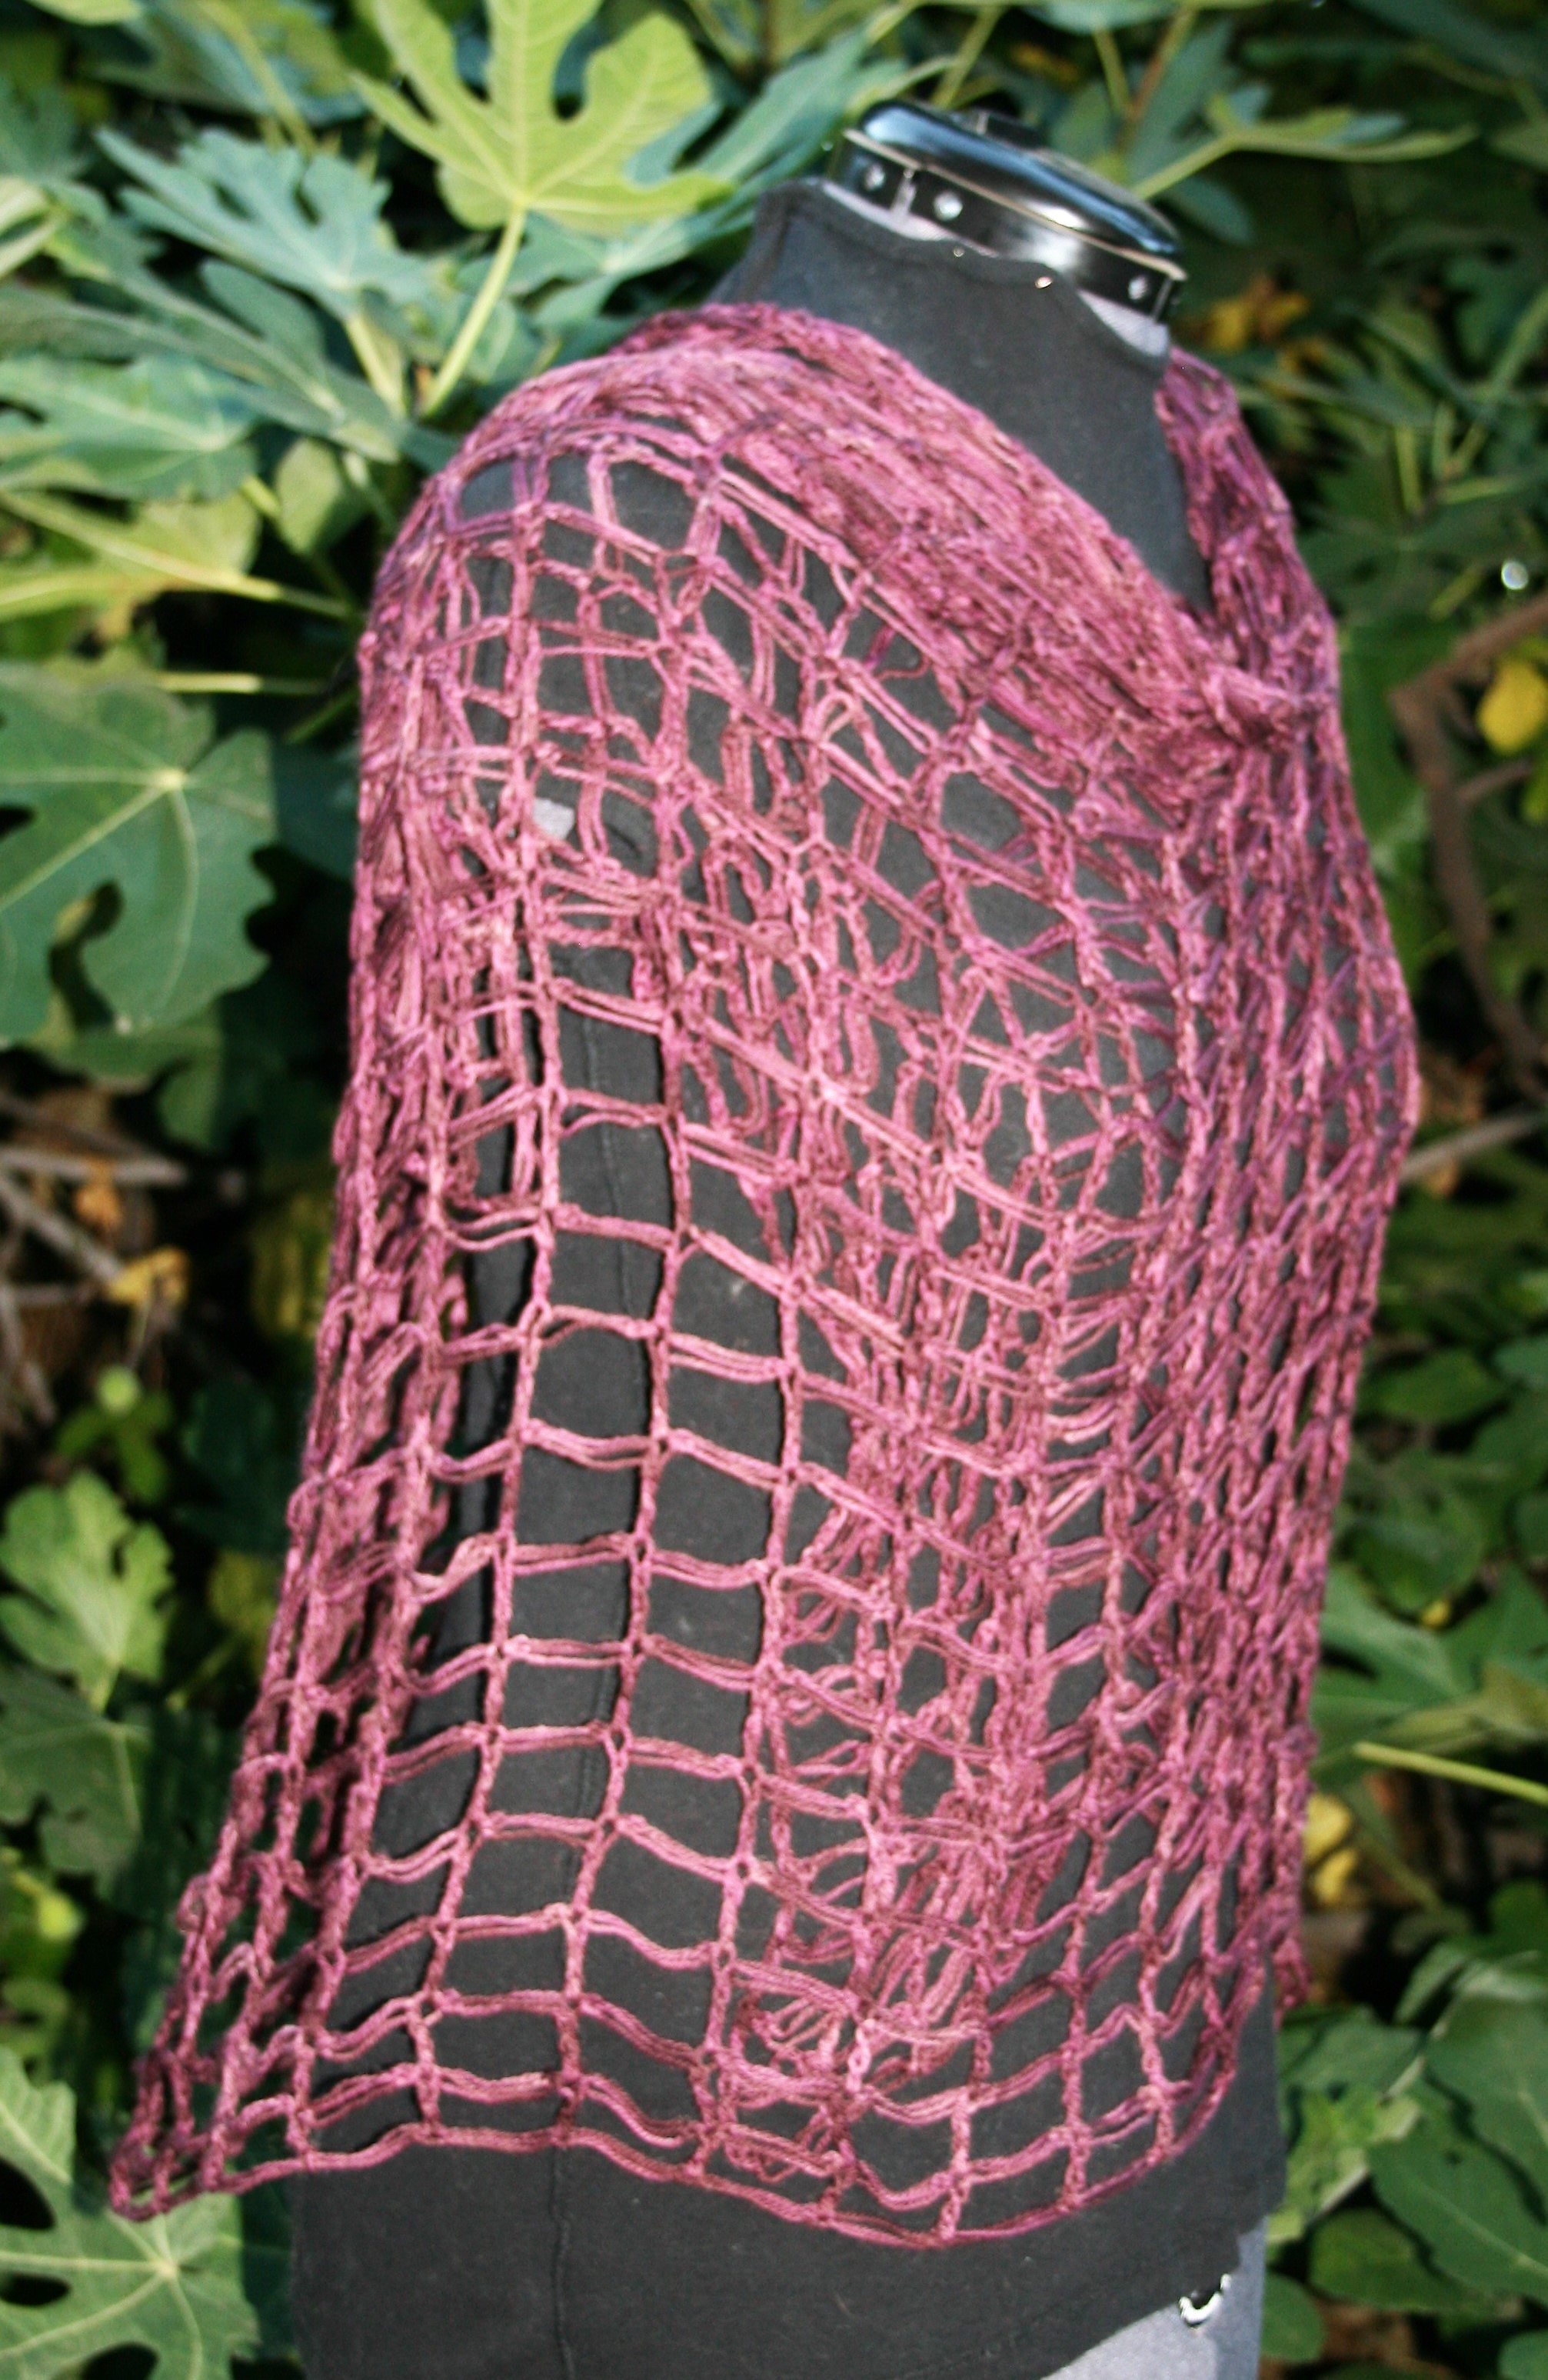
With Rhinebeck occurring this next weekend, October 20 & 21, 2018 at the Duchess County Fairgrounds, I have designed a new shawl; Woven Kisses.
This wrap is airy and have a beautiful drape. One of the things that I always find interesting is that even with the openness, it is quite warm, making for a delightful project. In addition, this entire wrap is created with only one skein of yarn, everyone loves that. It helps keep things cost effective, while also only having 2 ends to weave in, my favorite kind of project.
Even if you cannot attend Rhinebeck, you can enjoy this design, since I am sharing it as a free pattern. I hope you enjoy it and that it helps you get into the crochet season.
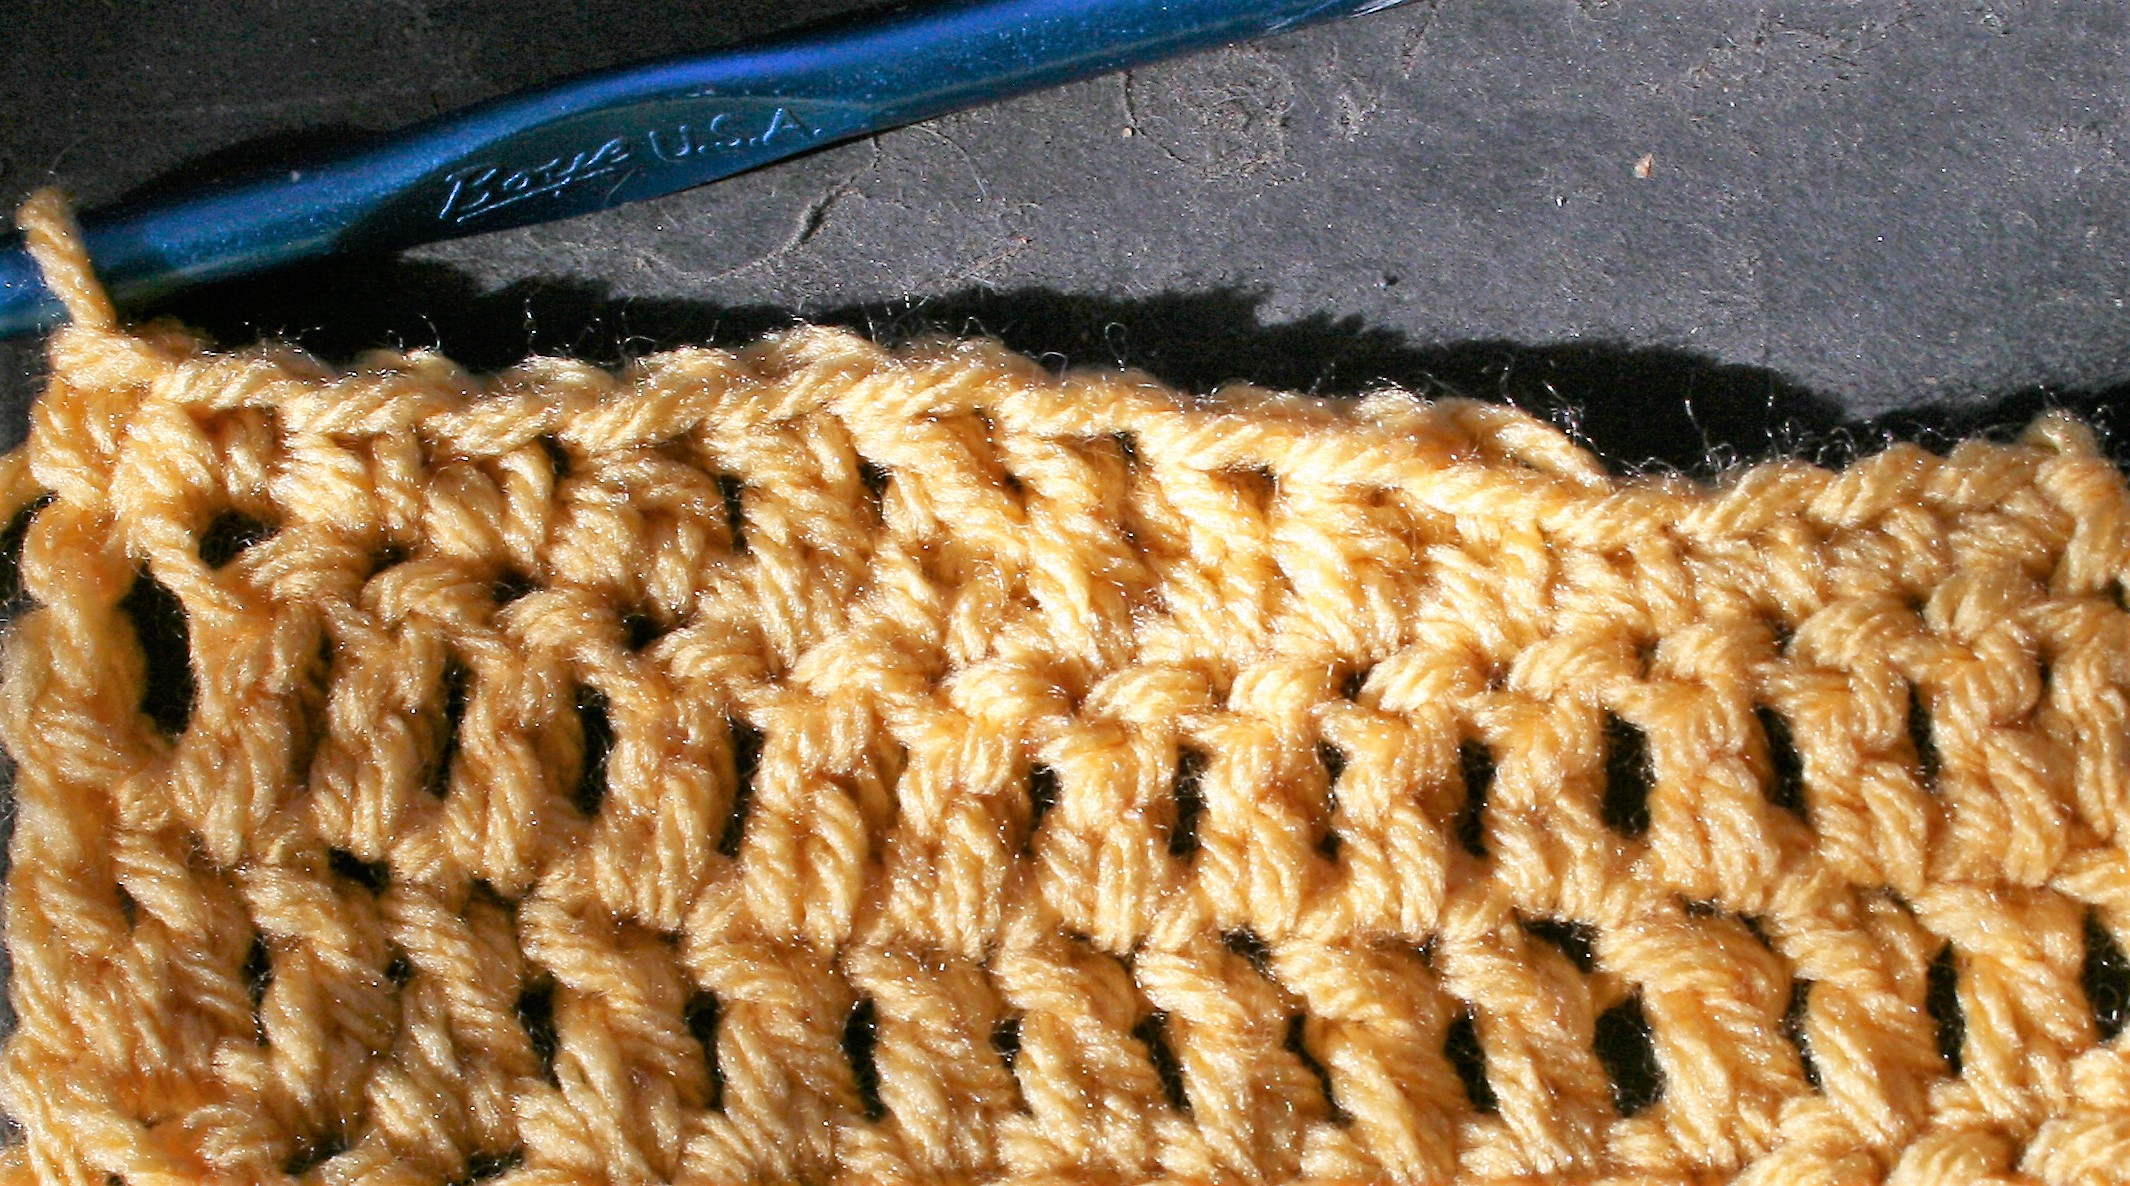
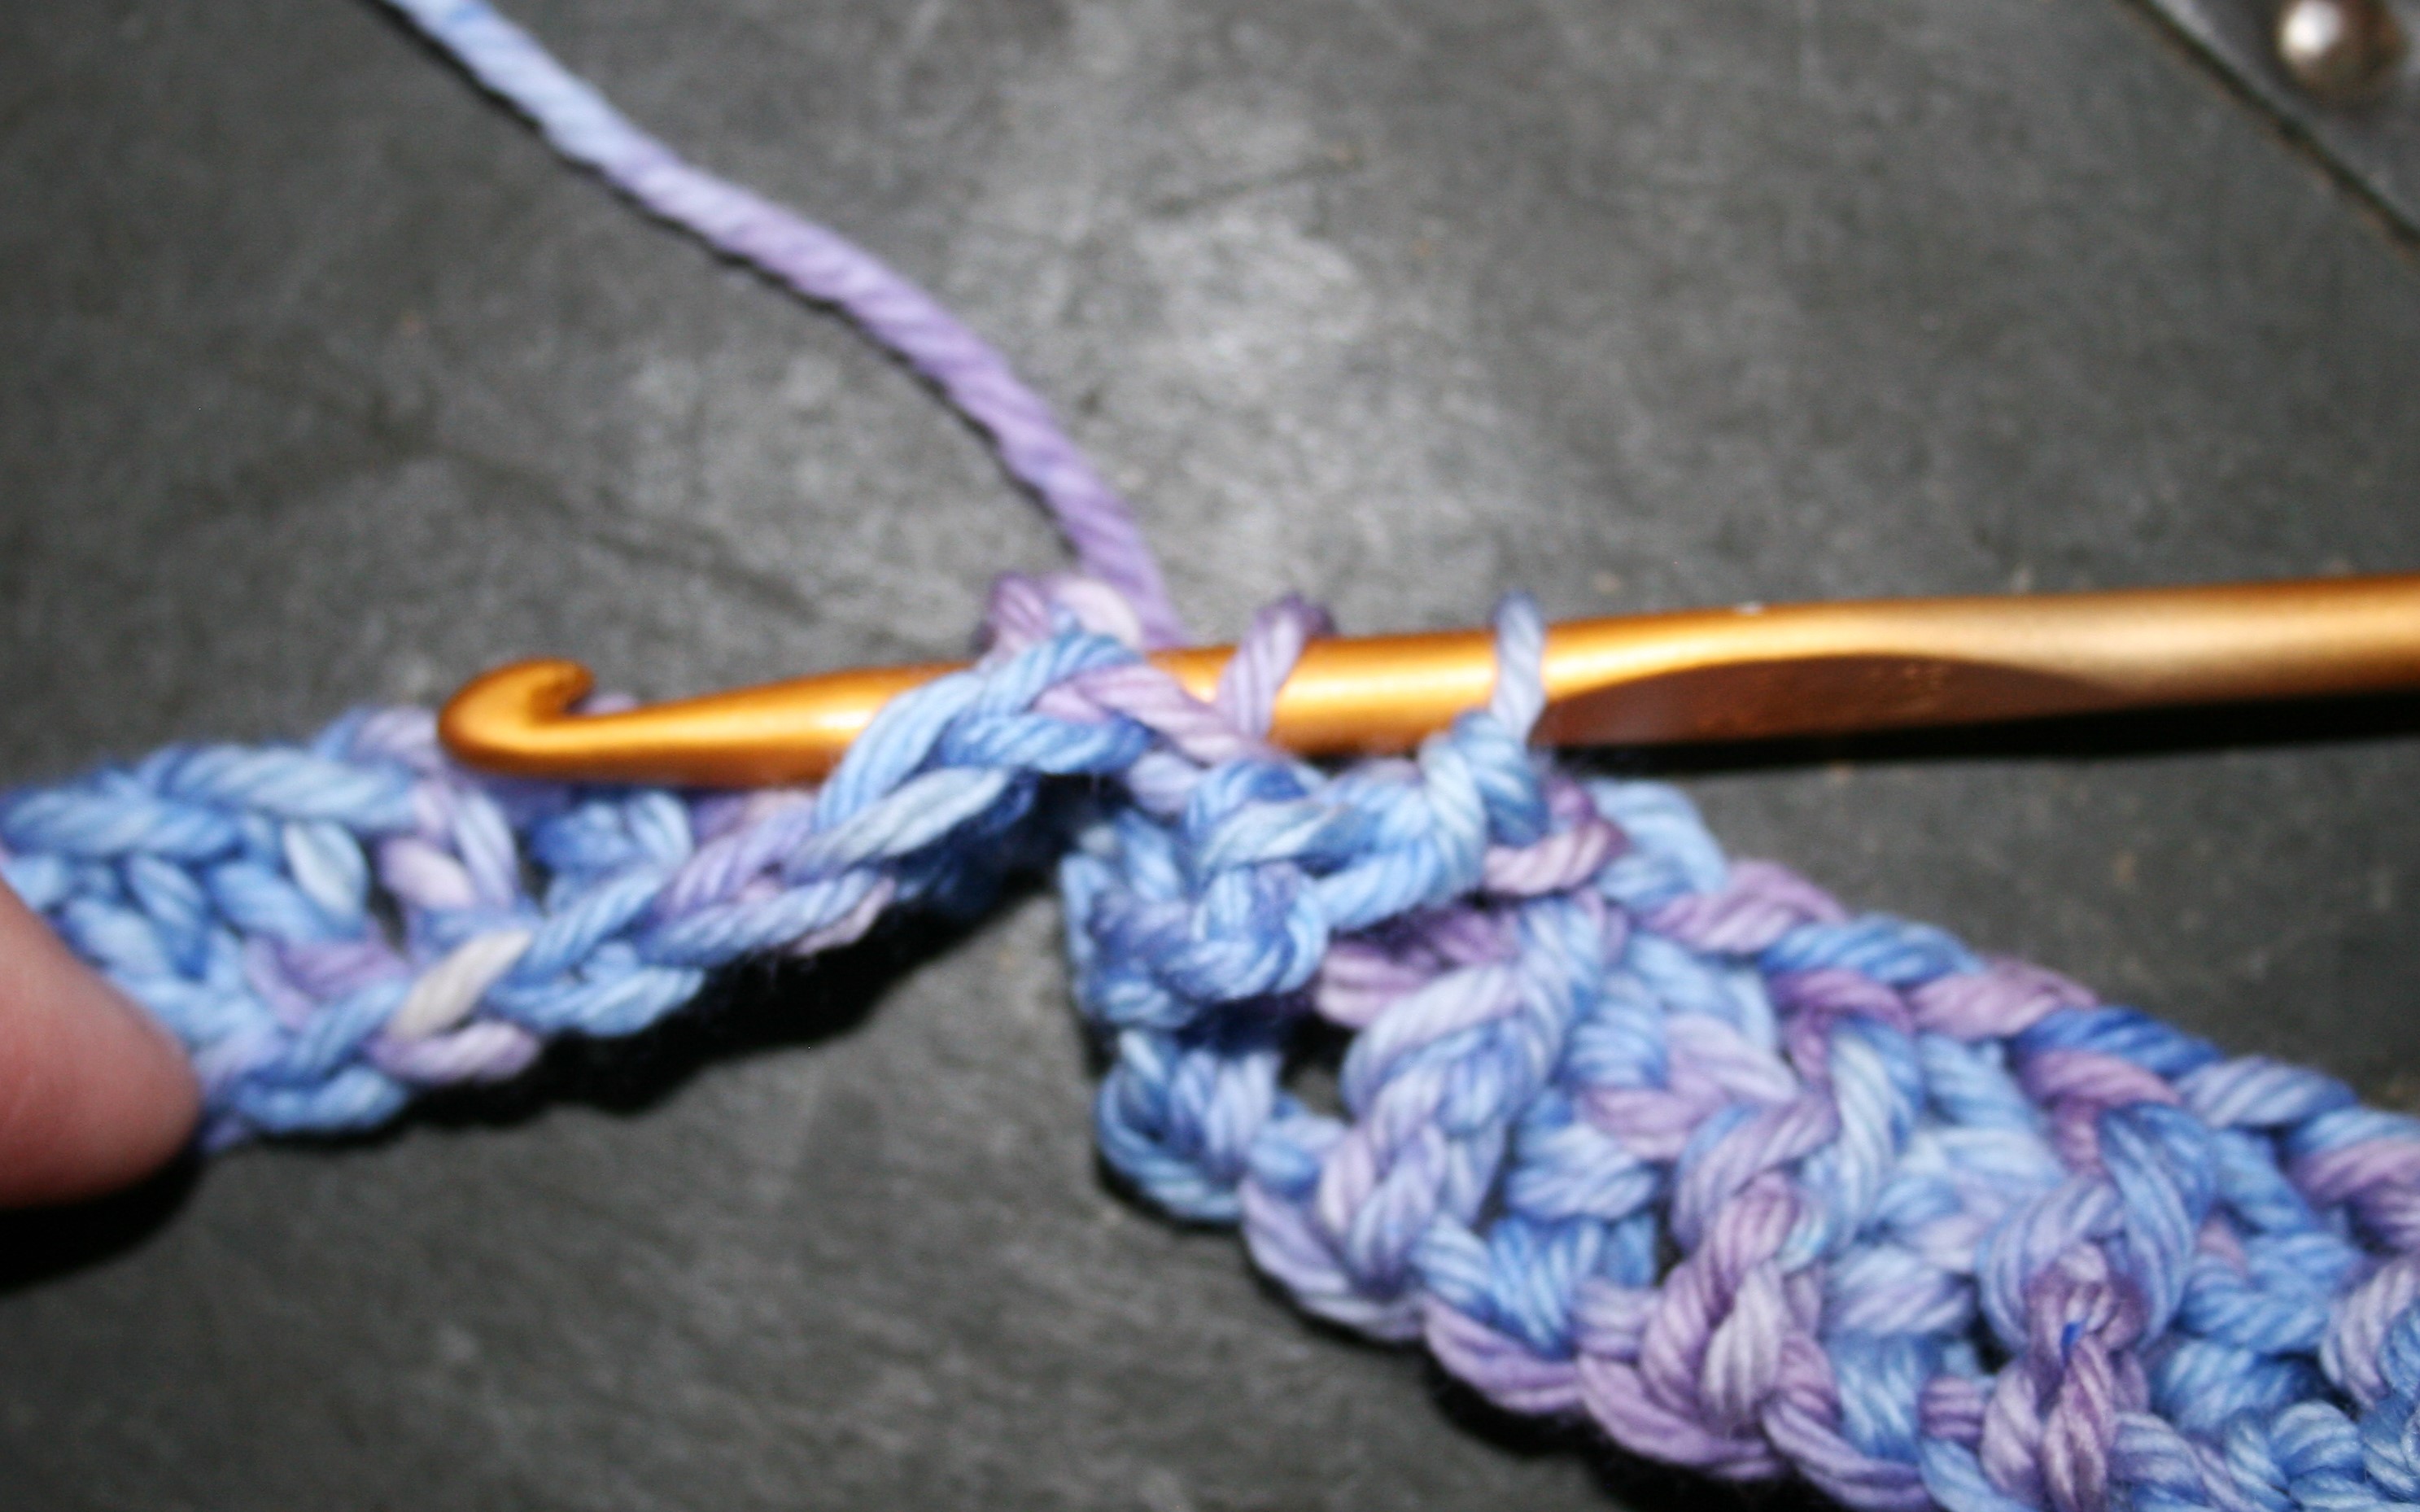
In crochet Post Stitches are all about where you put your hook. It really can be that simple, yet it can be intimidating. It is from post stitches that interesting textures and designs can be created. But first it helps to understand the basics.
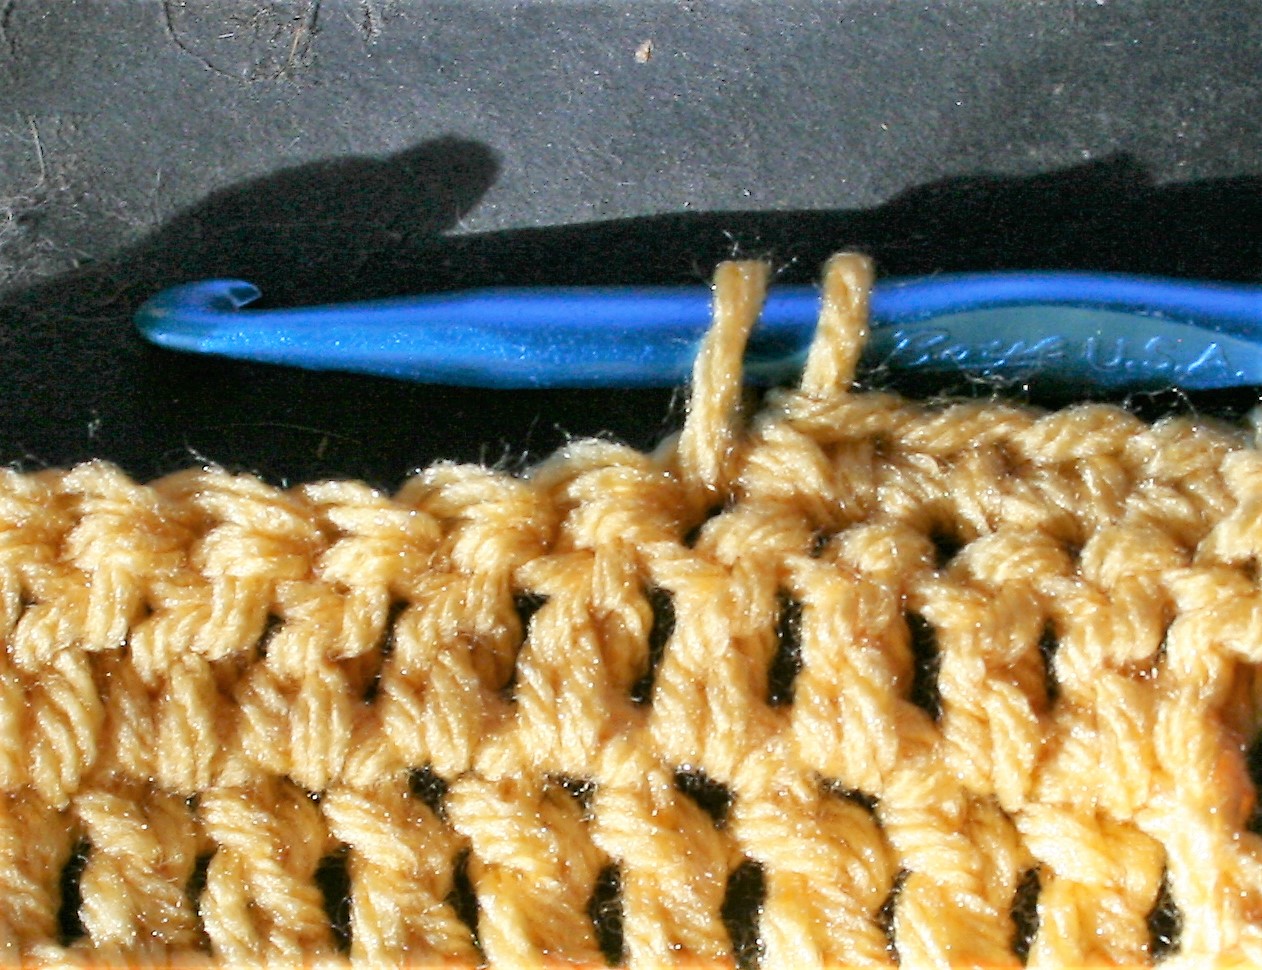
To work a Front Post Stitch, the hook is inserted between the “body” of a stitch, from the front of the fabric to the back, then returned back to the front of the fabric. Causing a post (or “body”) of a stitch to be pushed forward. In all the examples I show here I am demonstrating with Double Crochet stitches (US Standard), but really any stitches can be utilized in this manner. Then the indicated stitch is completed as normal.
As for a Front Post Double Crochet -FPDC, (US Standard), you would yarn over first, insert the hook as indicated above, yarn over and pull through a loop to anchor the stitch, then yarn over pull through 2 loops, and repeat the yarn over pull through of the last 2 loops on the hook.
To work a Back Post Stitch the process is very similar, it is just placing the hook in the reverse order, pushing the post (or “body”) of the stitch toward the back of the fabric. Essentially inserting the hook between the “body” of the stitch, from the back of the fabric to the front, then returning the hook to the back of the fabric. Once again you complete the stitch as indicated.
When working a Back Post Double Crochet -BPDC, (US Standard), you would yarn over first, insert the hook around the post of the stitch from back to front, then front to back as described above, yarn over and pull through a loop to anchor the stitch, then yarn over and pull through 2 loops two times.
Knowing these stitch positions opens up many different stitch texture opportunities, such as basket-weave and cables, I have displayed here a simple basket-weave of alternating front and back posts, as well as working a front and back post stitch around the same stitch. Working around the same stitch you will have to skip a stitch between or work the stitches over a mesh base. Using the same stitches, and in this case even in the same order (alternating front and back post stitches), you can get very different effects. Try this stitch placement out for your self.