Crochet Around- How to Use a Non-Crochet Foundation

Sometimes the classics of crochet are not really special stitches, but where you put them, or what you crochet them over.

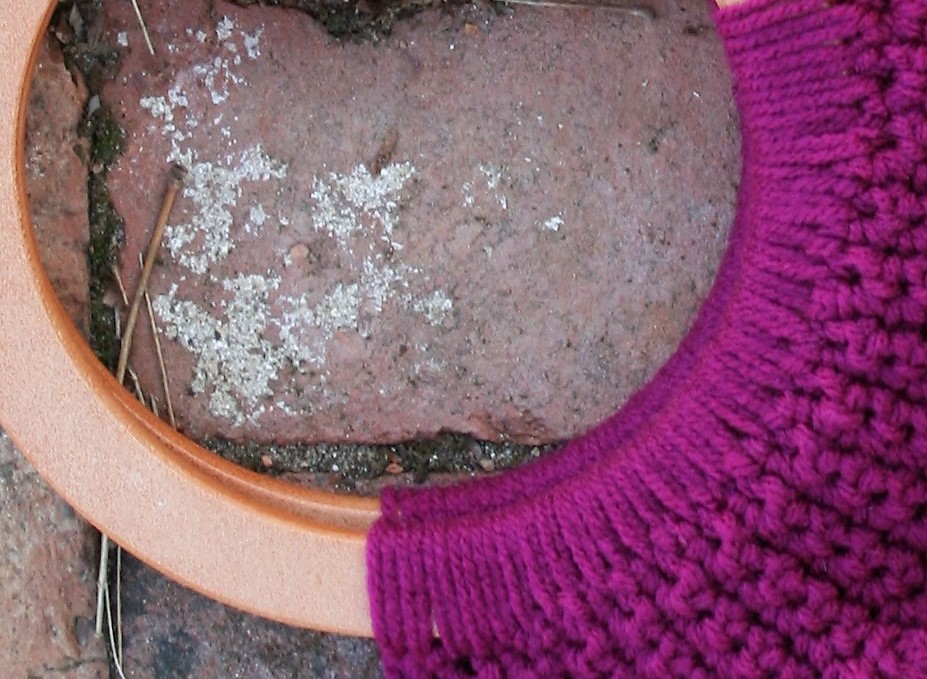
This technique can seem daunting at first, but essentially you are using the item you are working stitches over as a foundation chain. It can be used to create padded hangers, rugs, wreaths, purse handles, just about anything you can imagine.

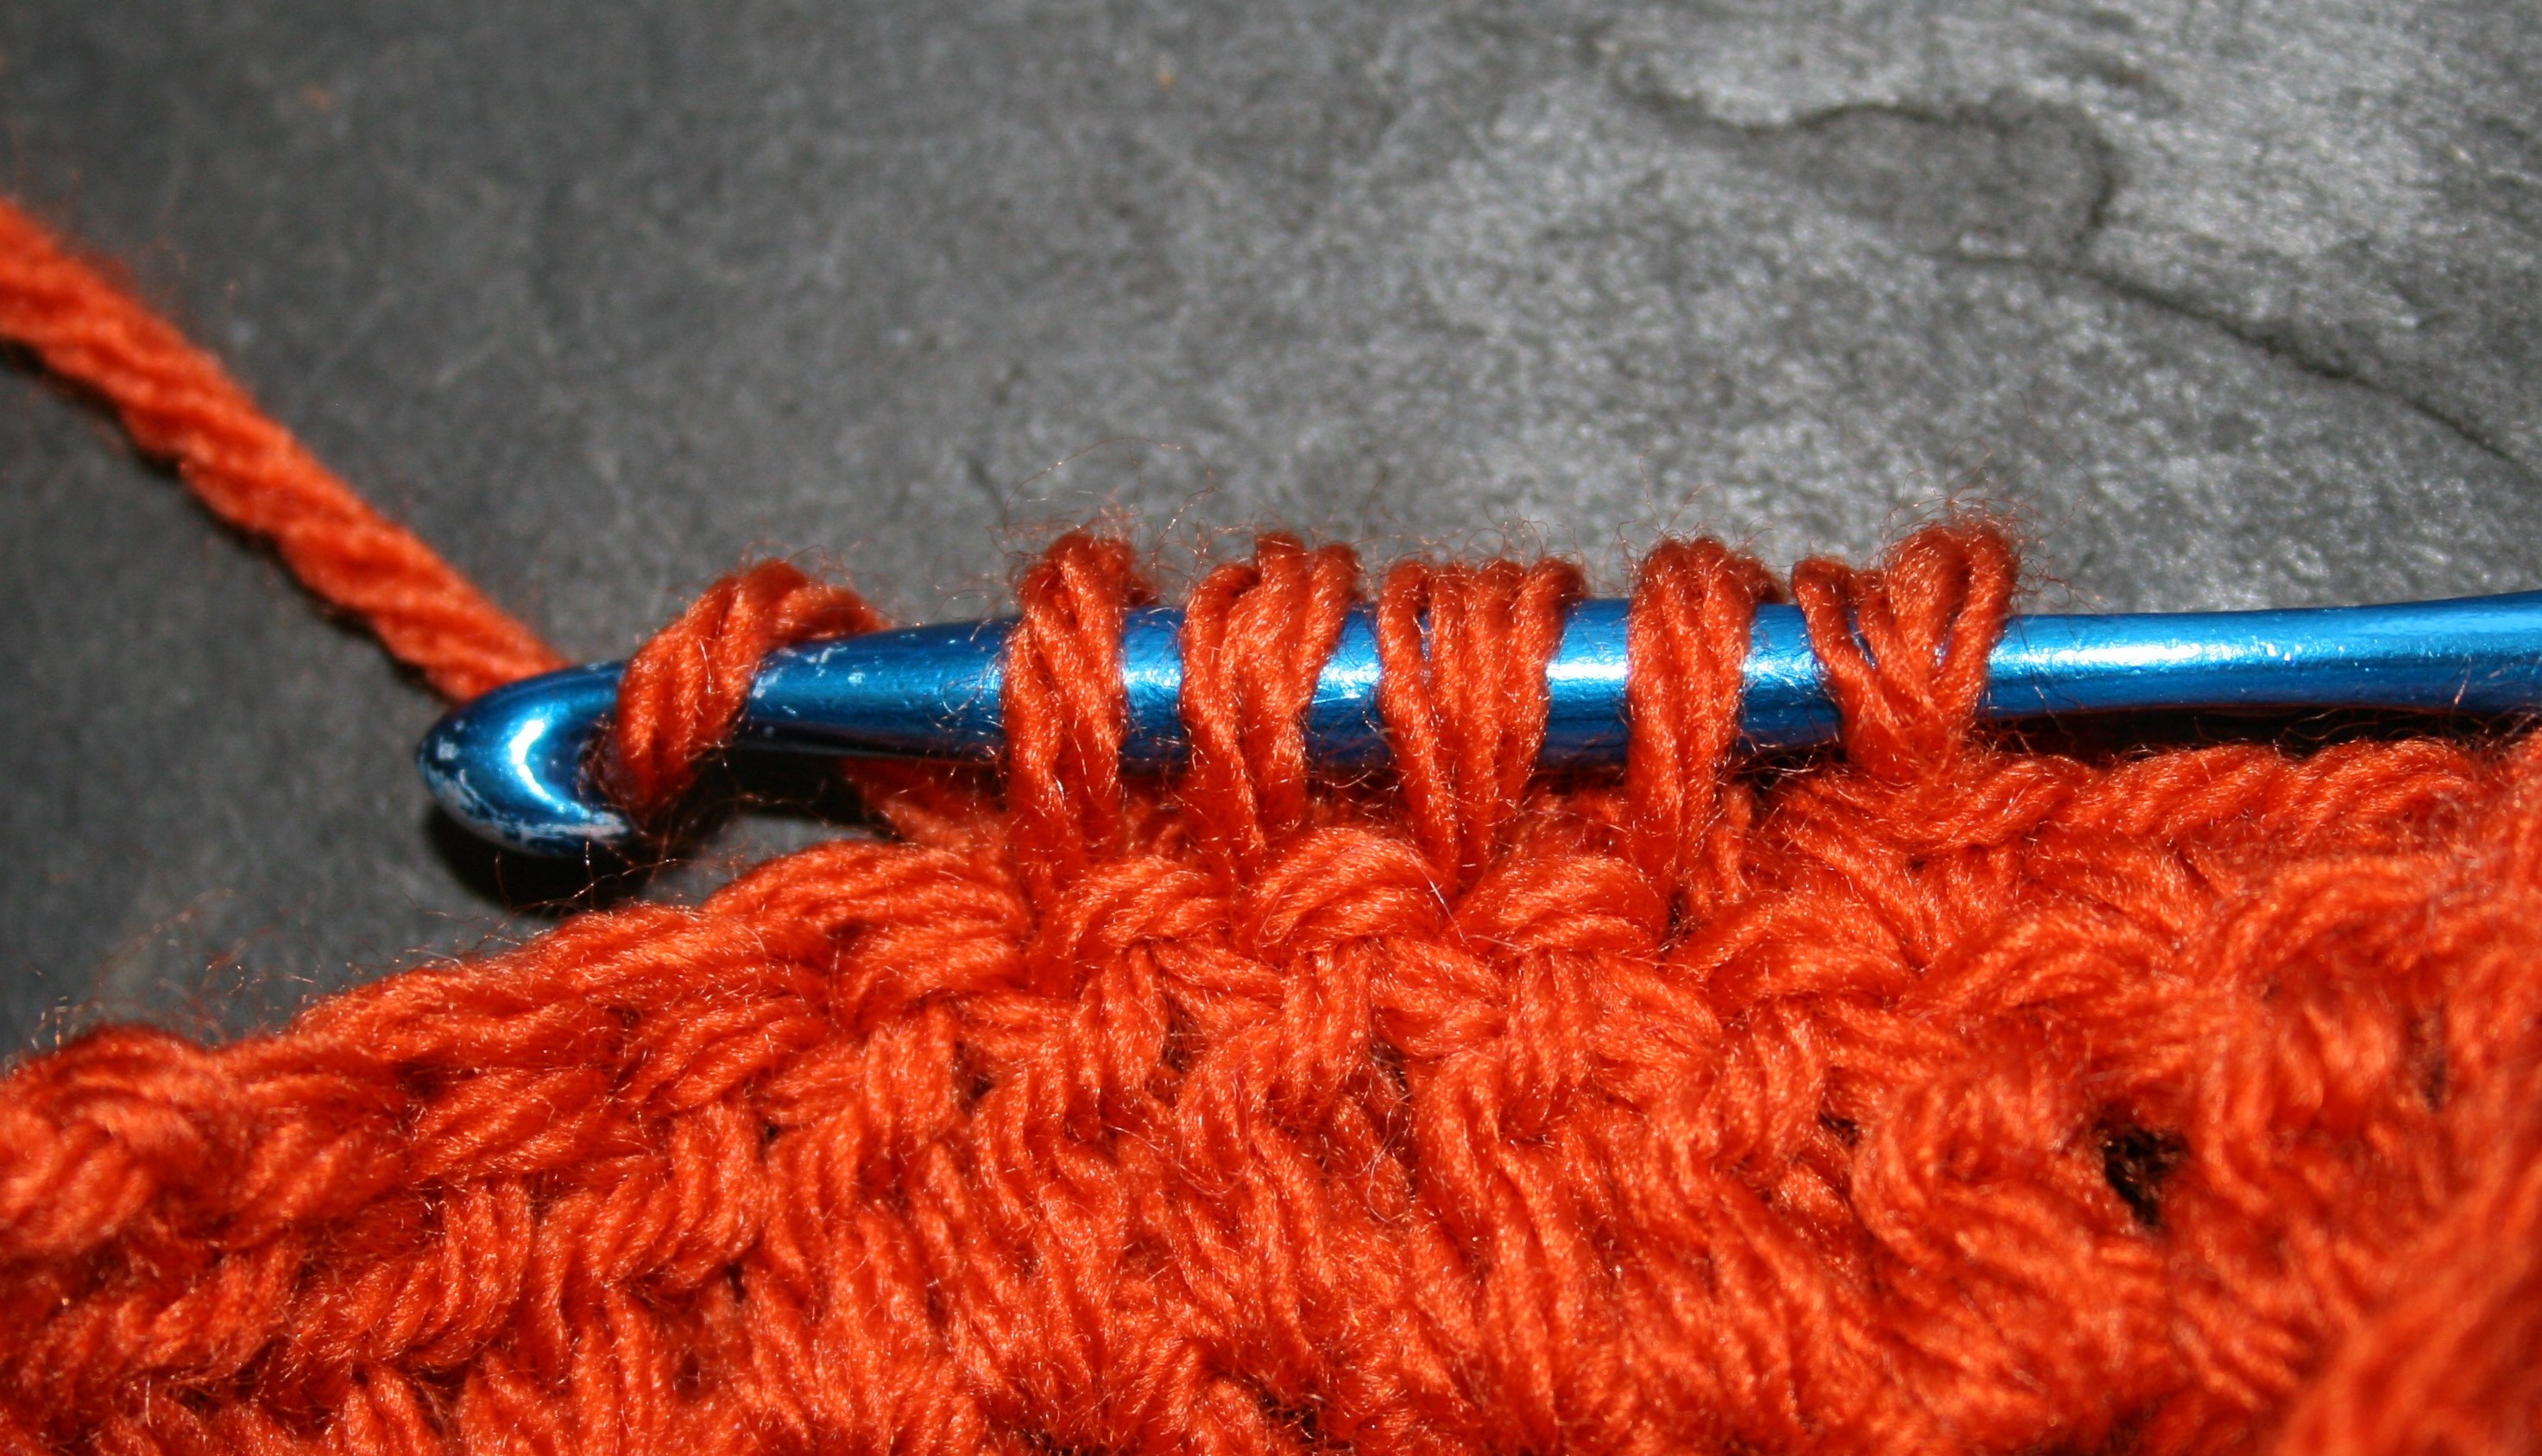
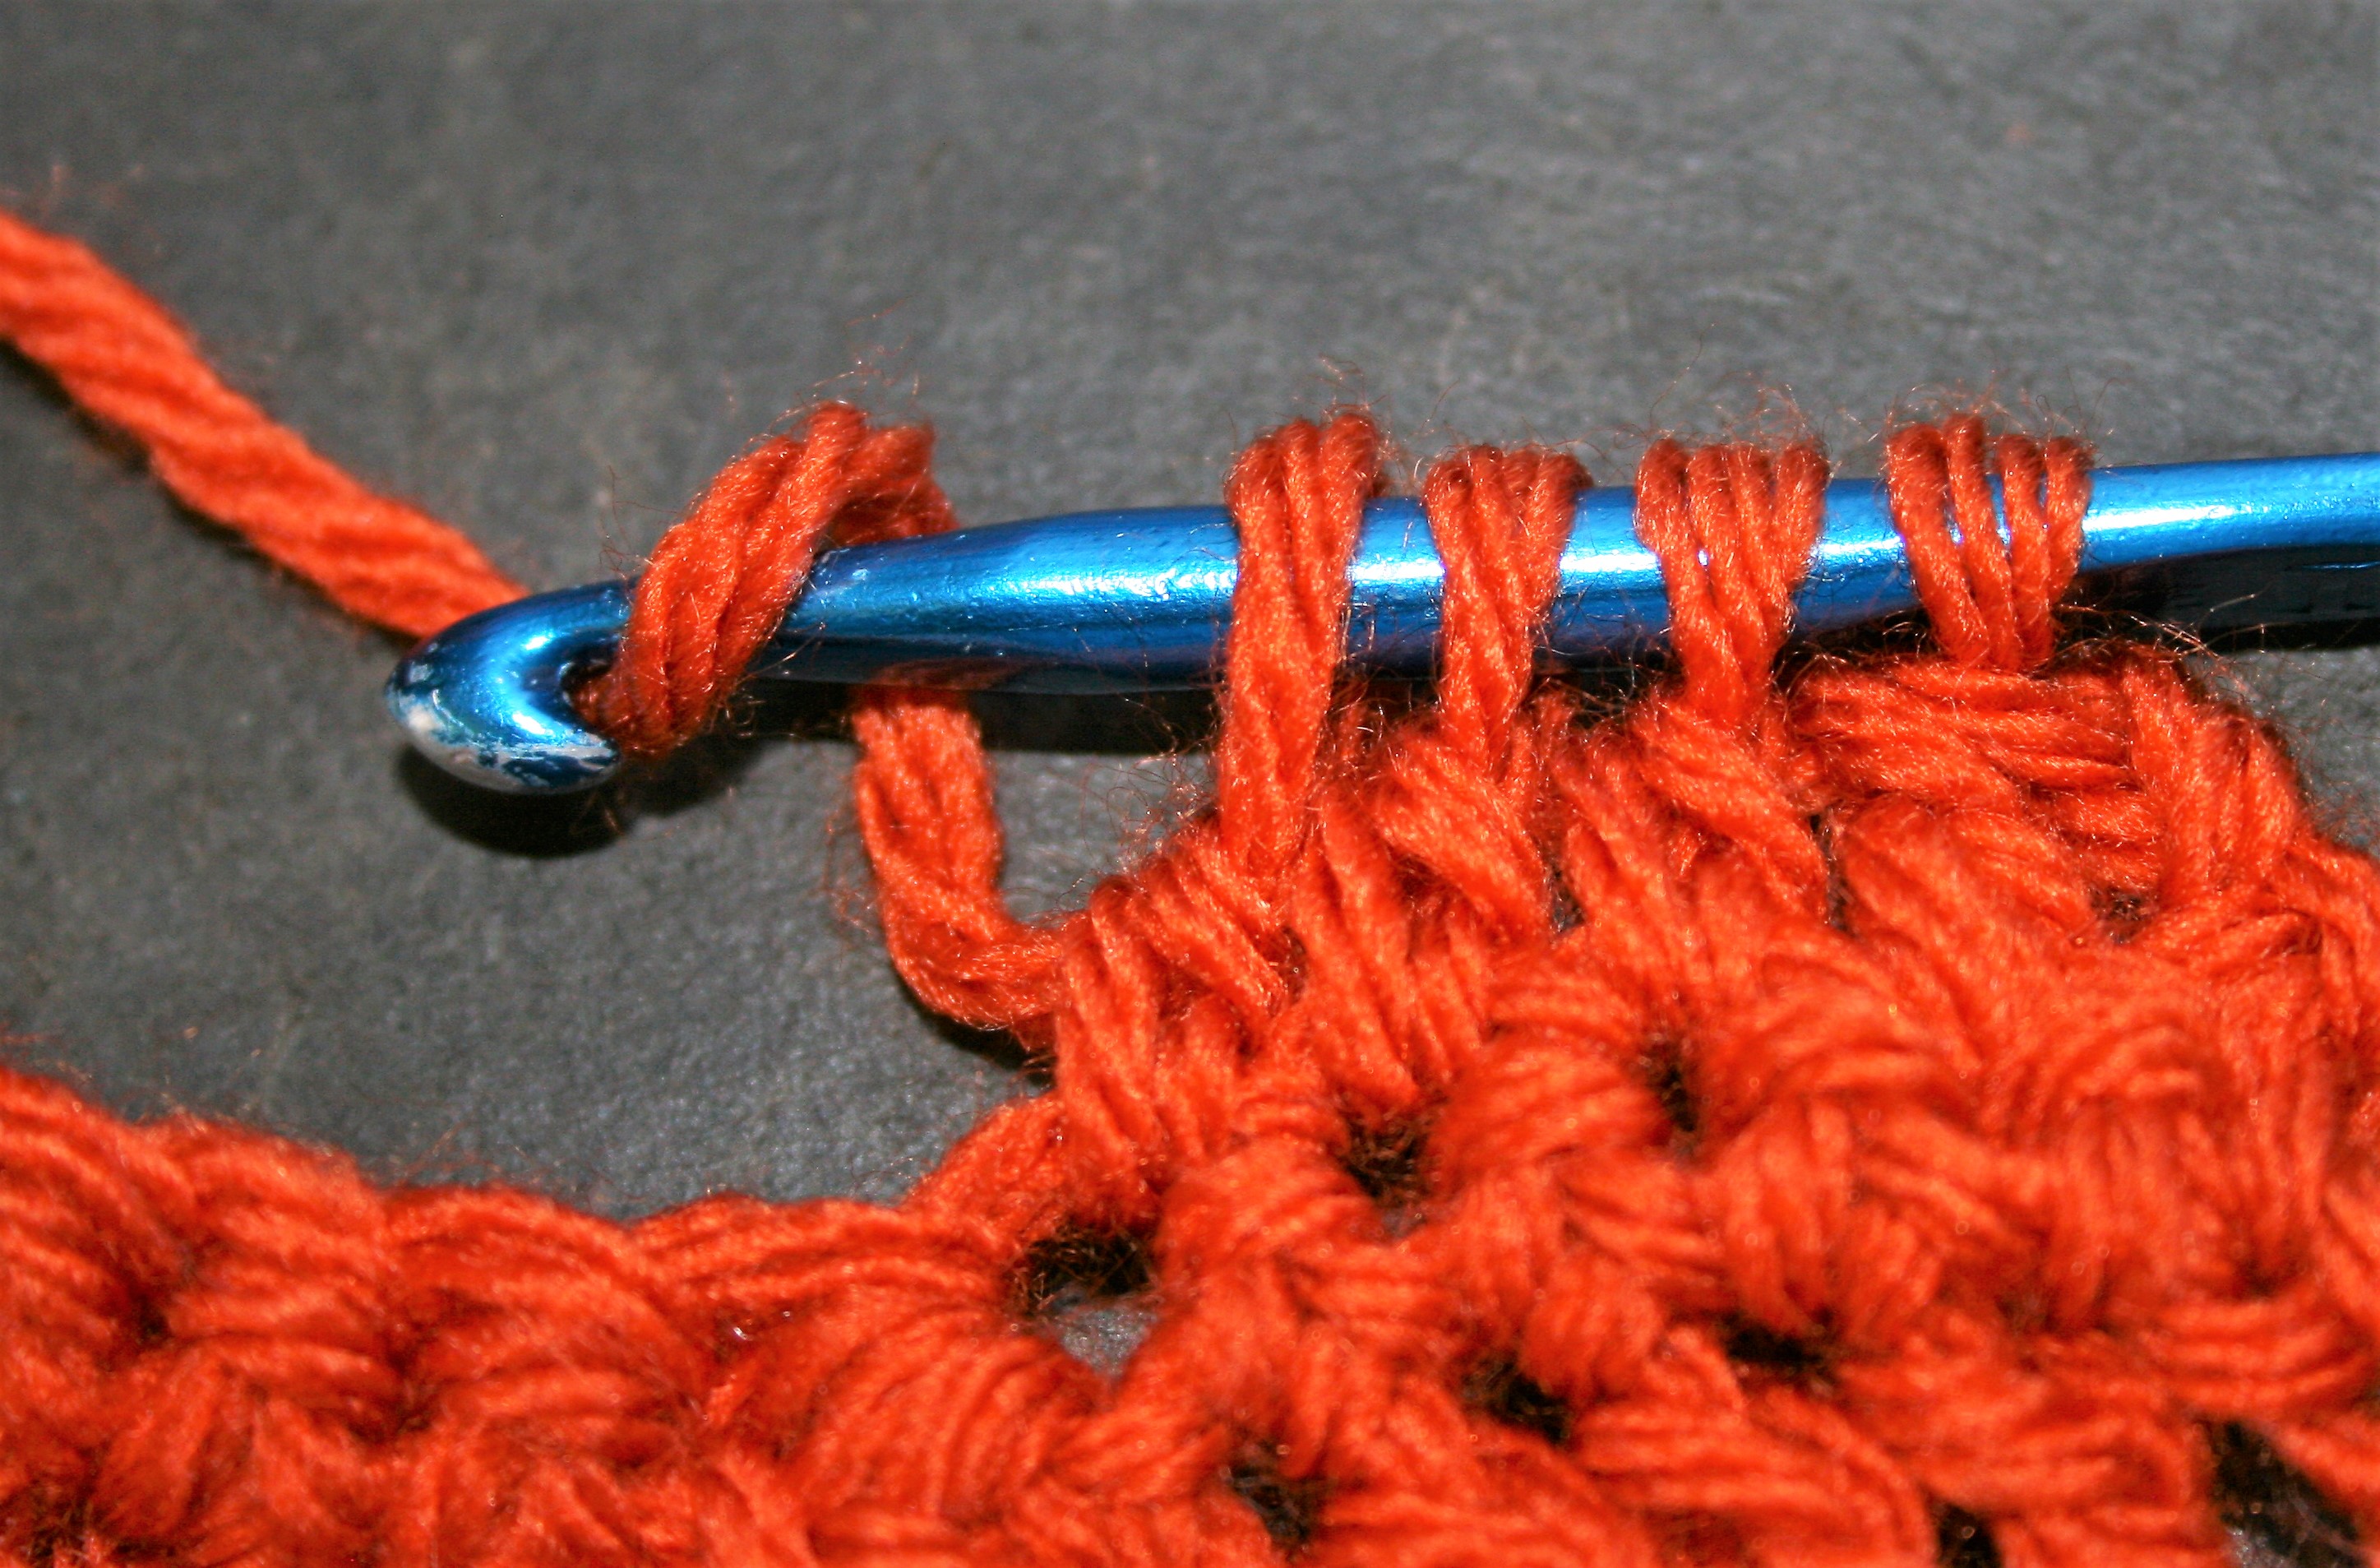
I typically recommend working a single crochet stitch (Double crochet if you are used to UK standard). I use this stitch as it creates more “yarn wraps” over the foundation item than using a slip stitch, while creating a stitch with minimal height.

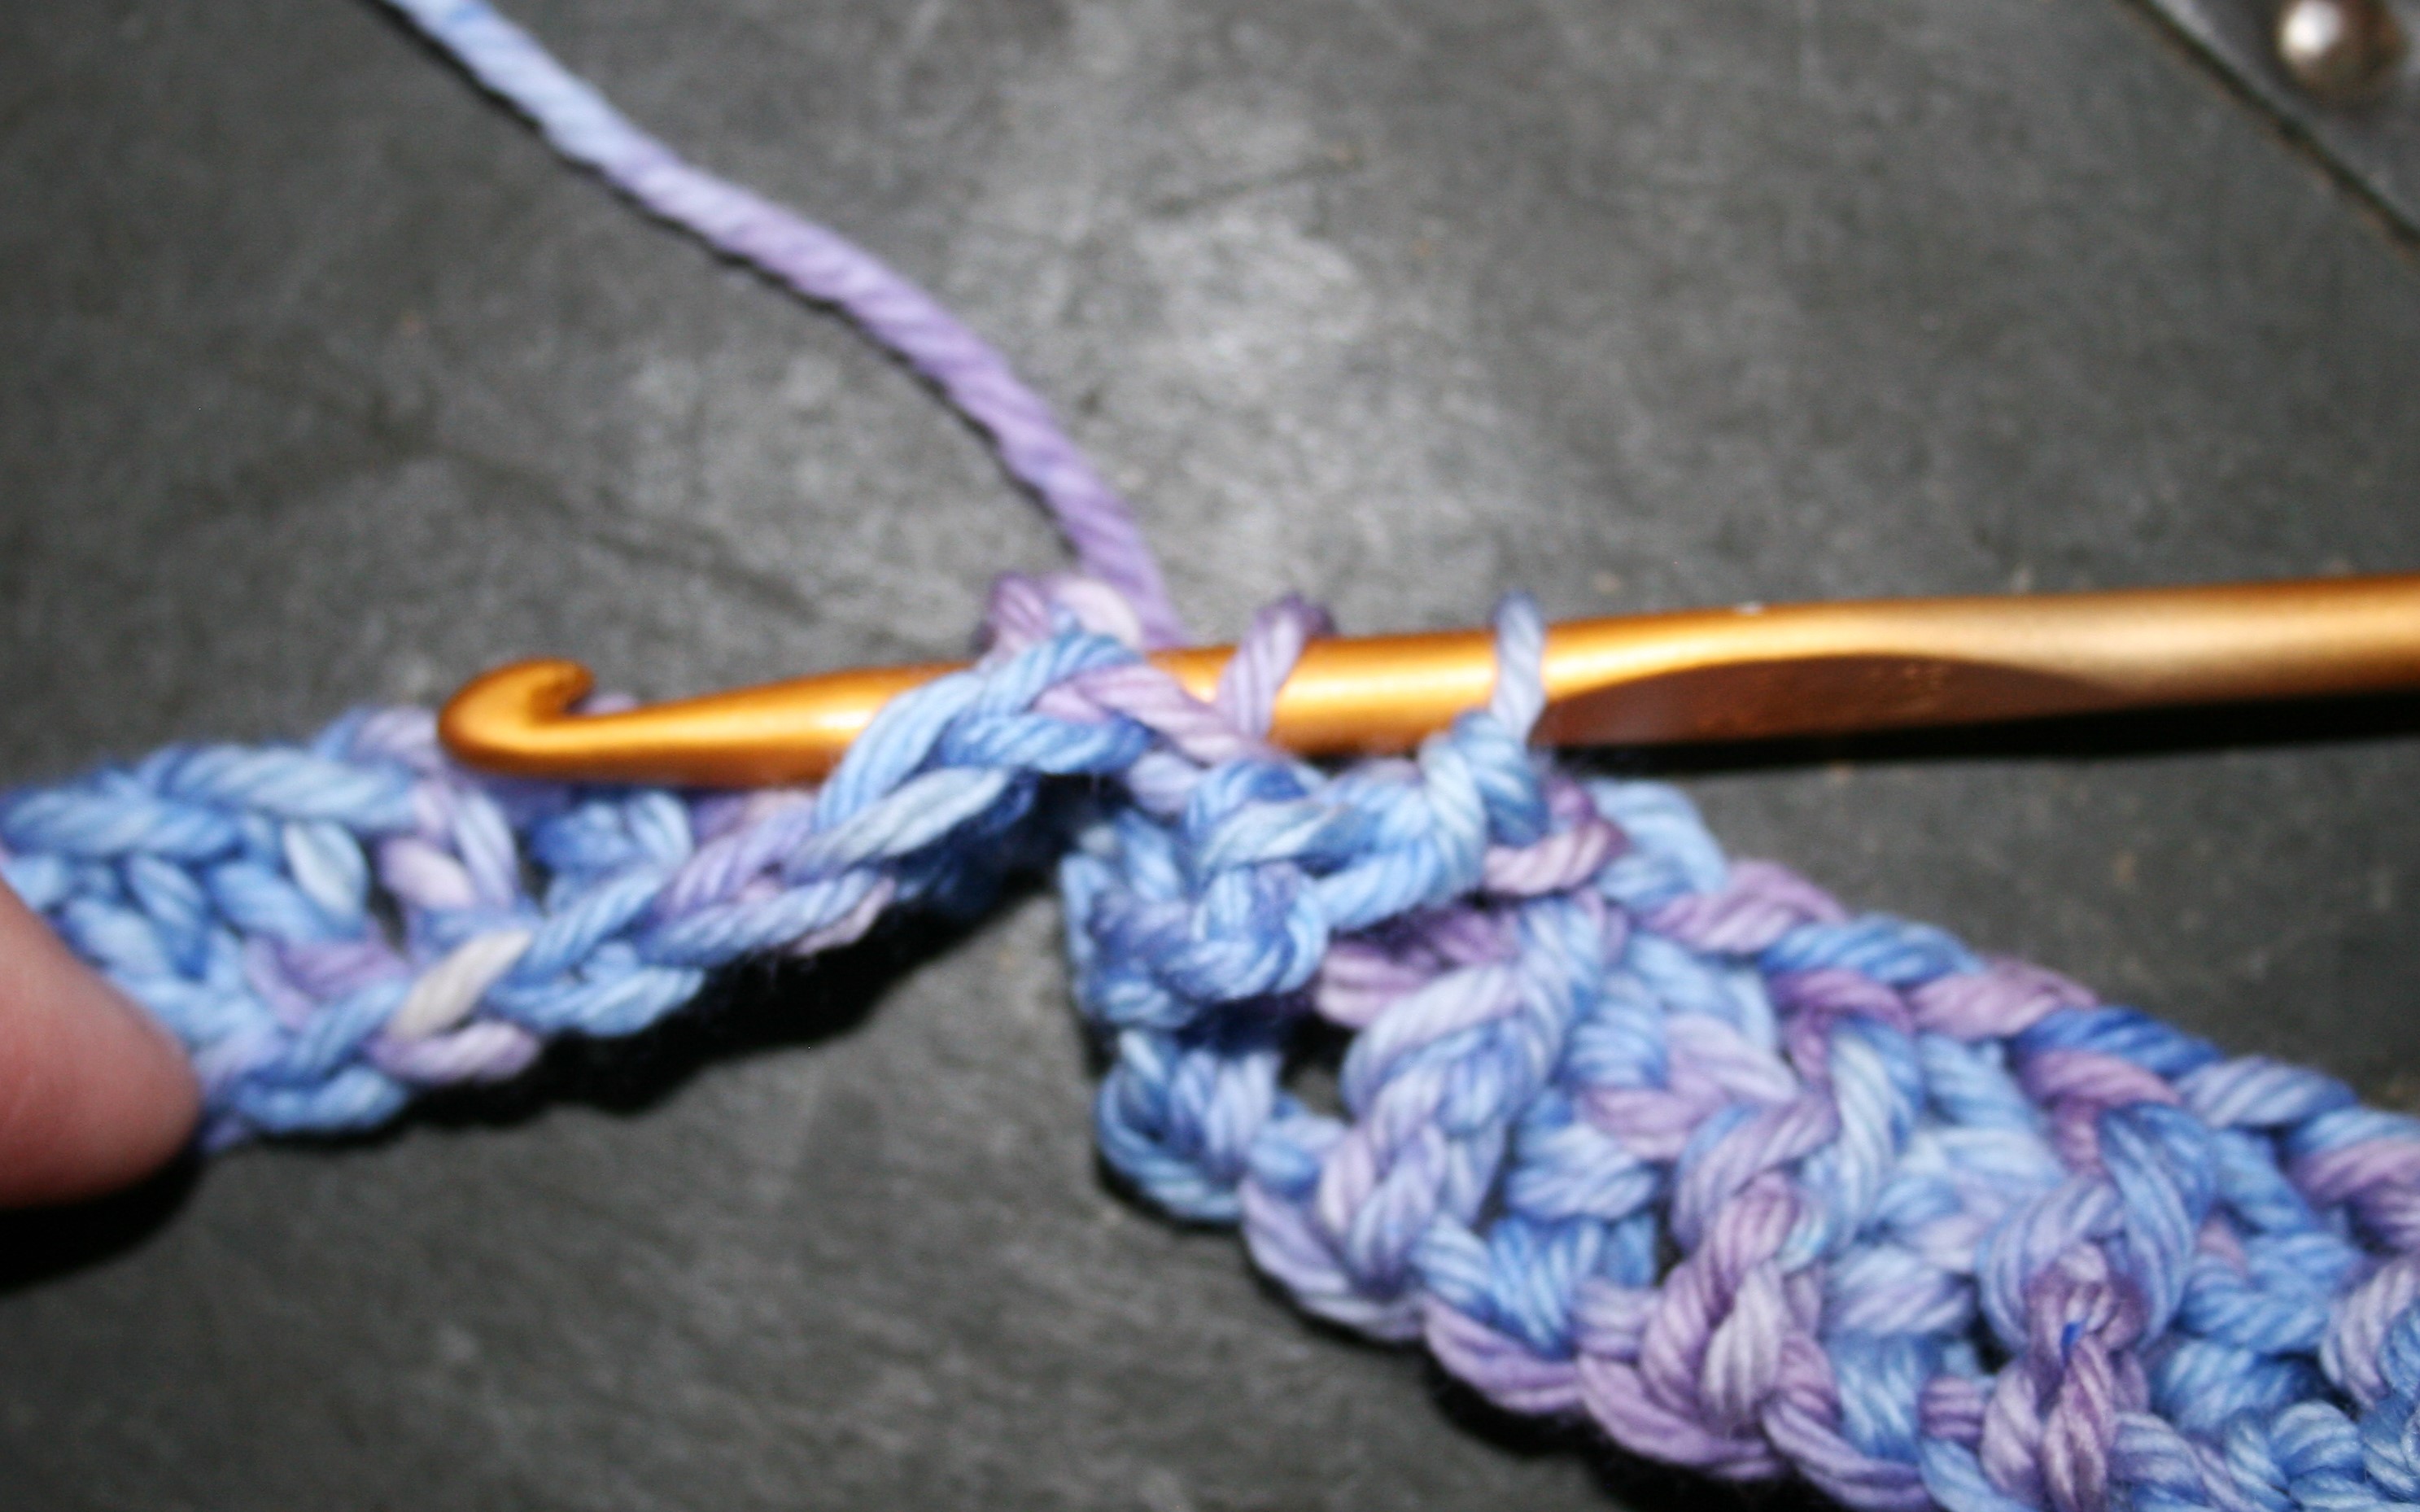
To begin, you need to find a method of holding the item to be crocheted over, this can actually be the most challenging part of the process. You then work your crochet stitch.

Insert your hook, yarn over, 
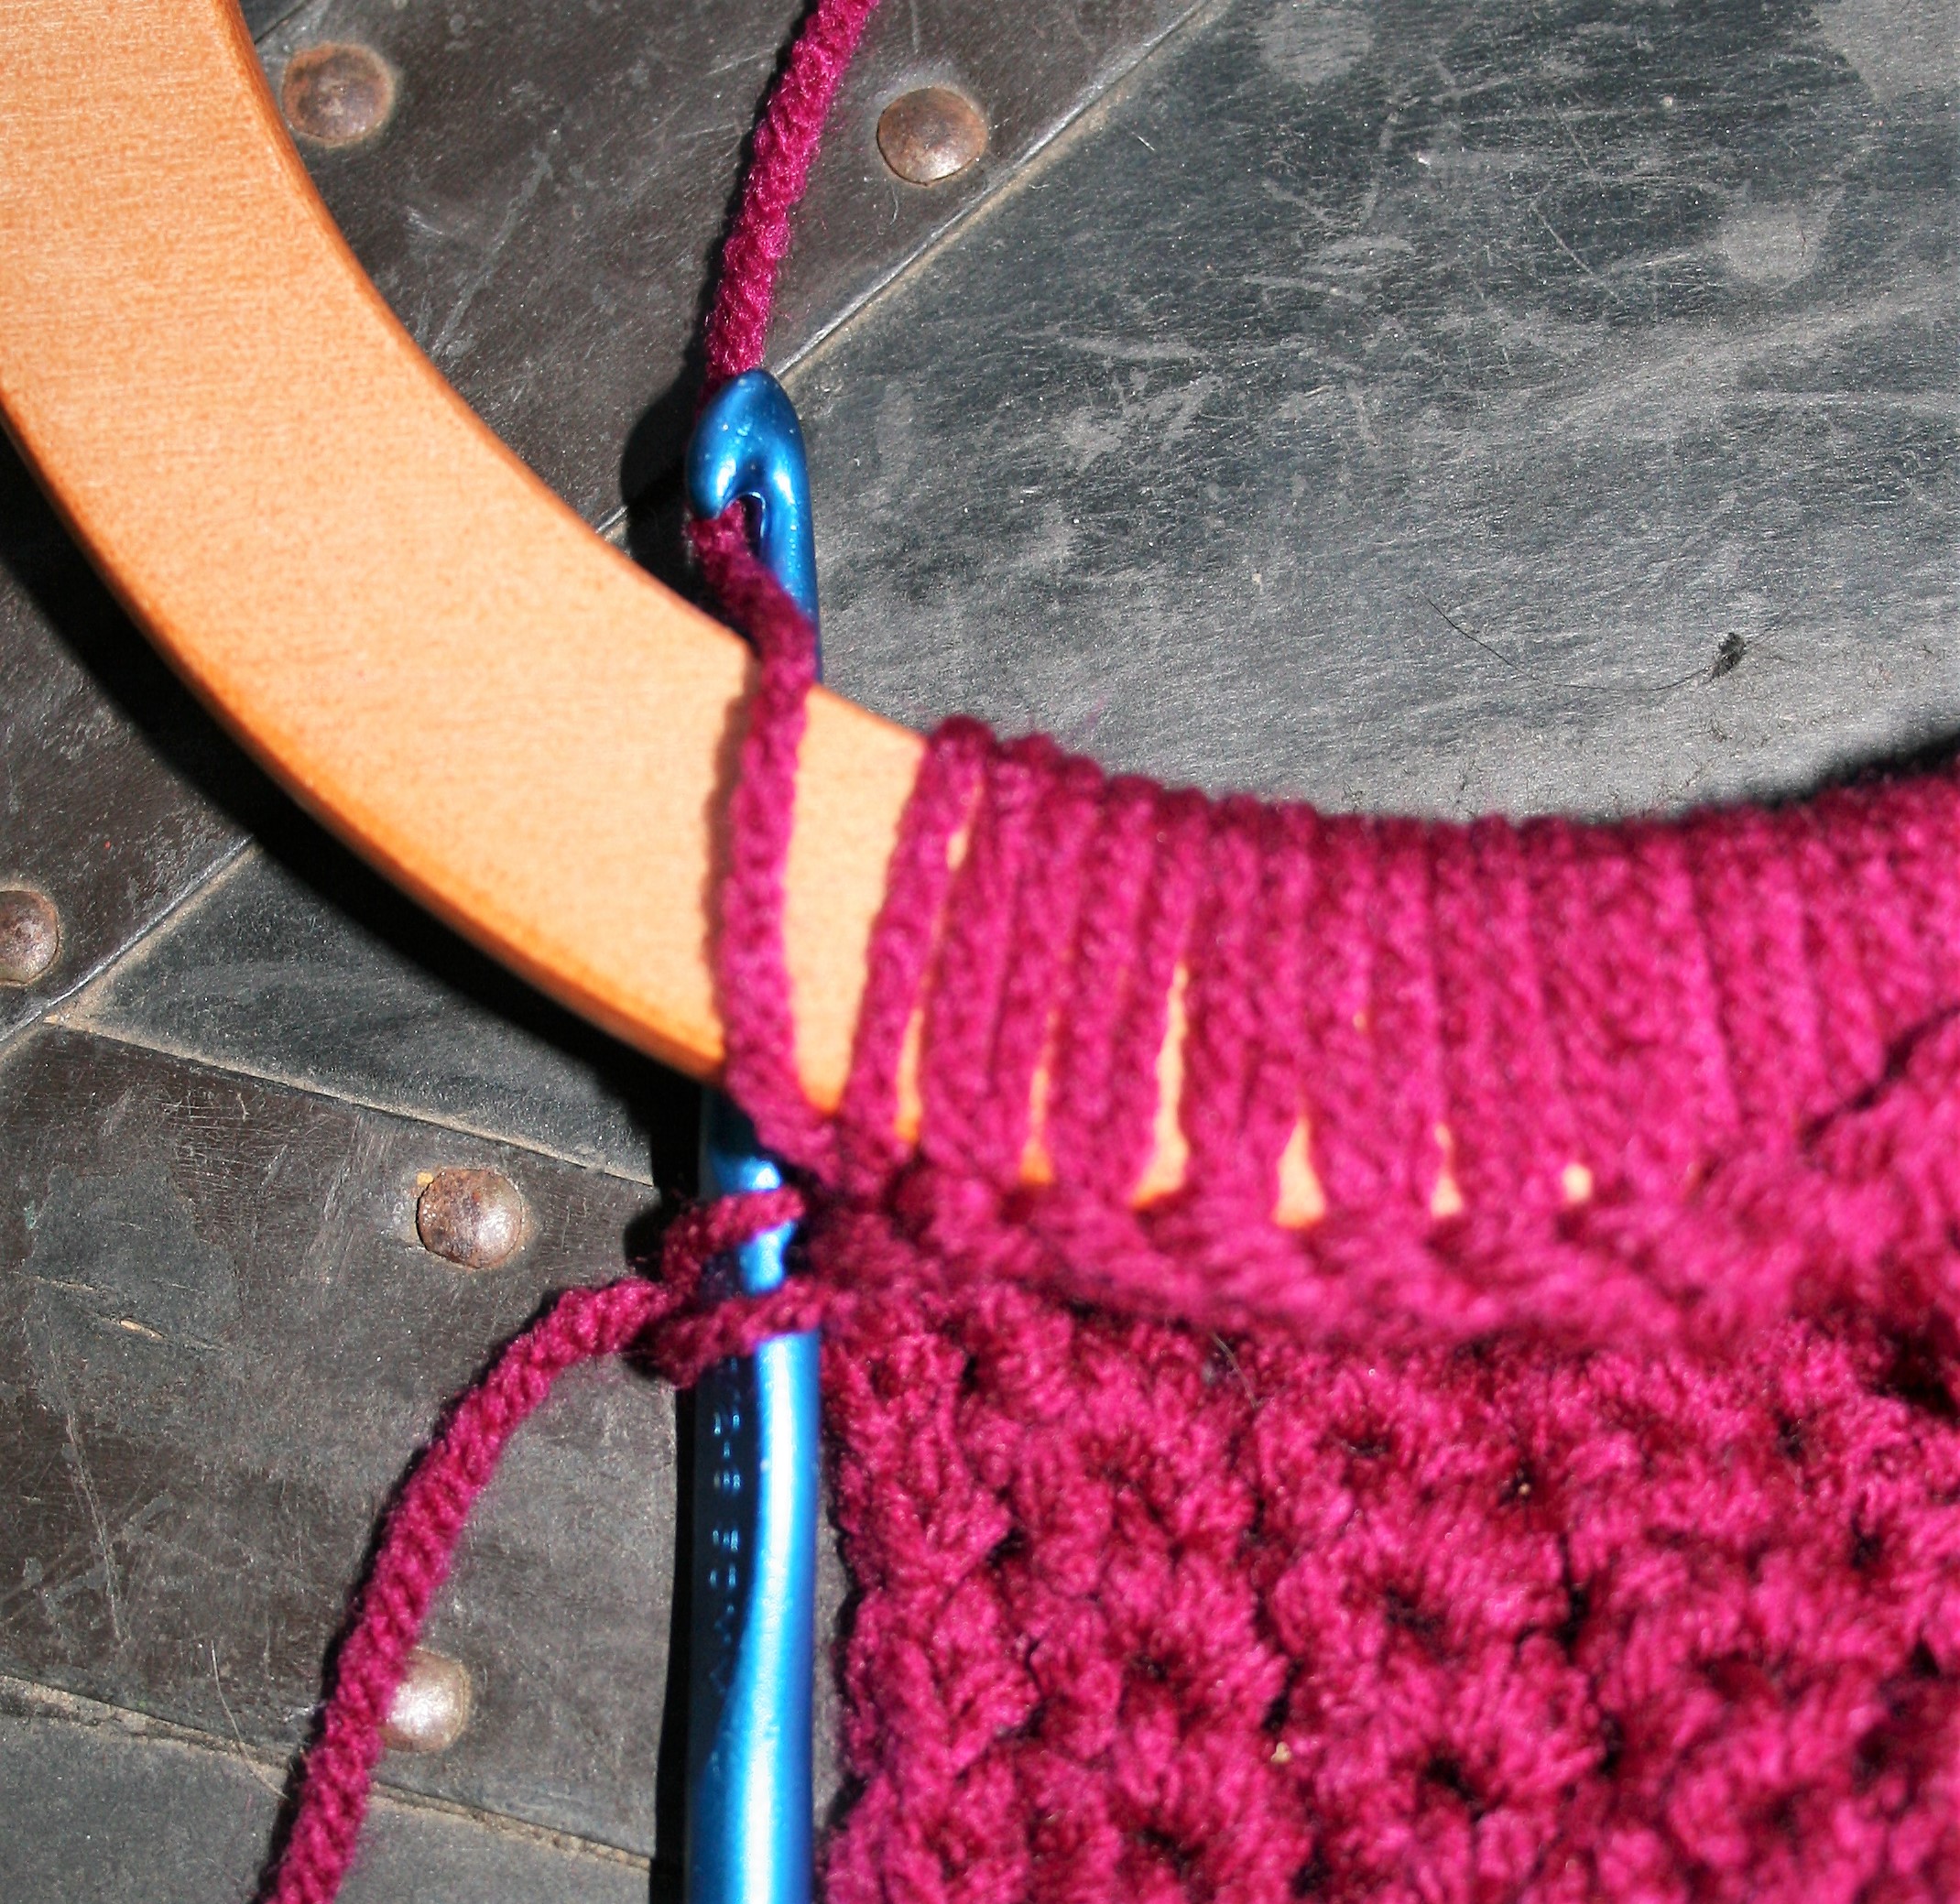
 

pull up a loop, 

yarn over, 

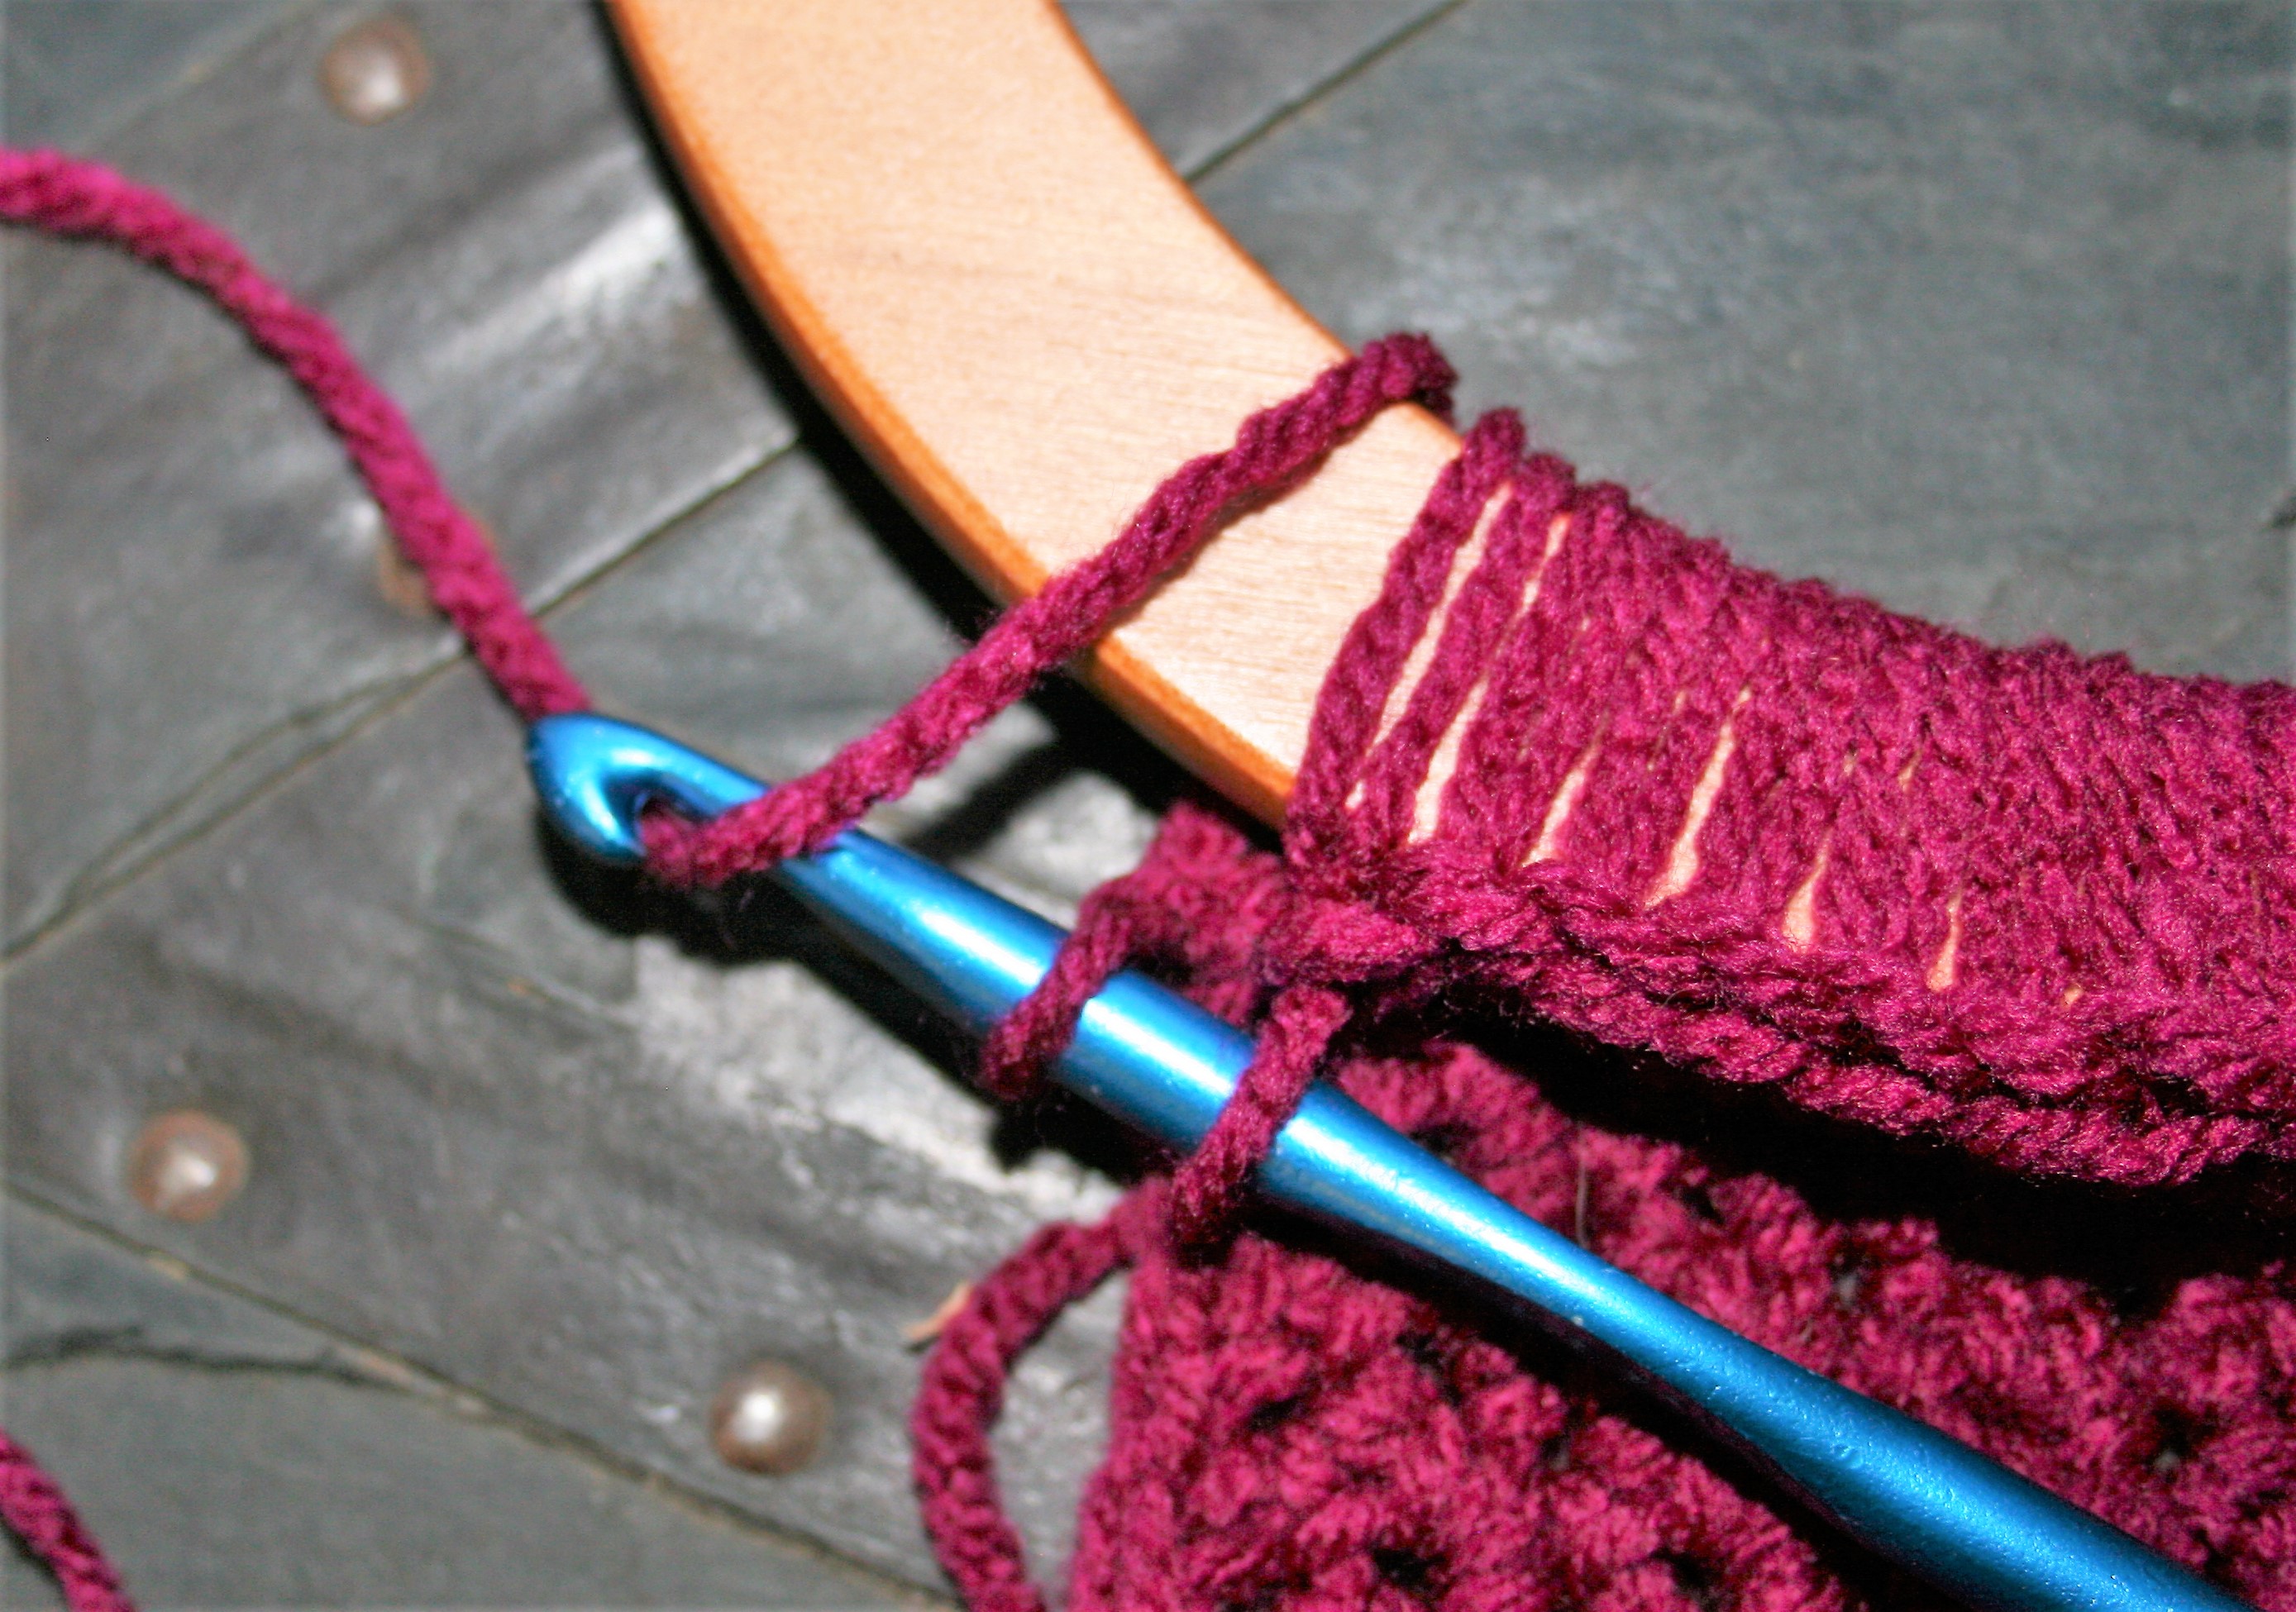
pull through 2 loops to complete stitch. 

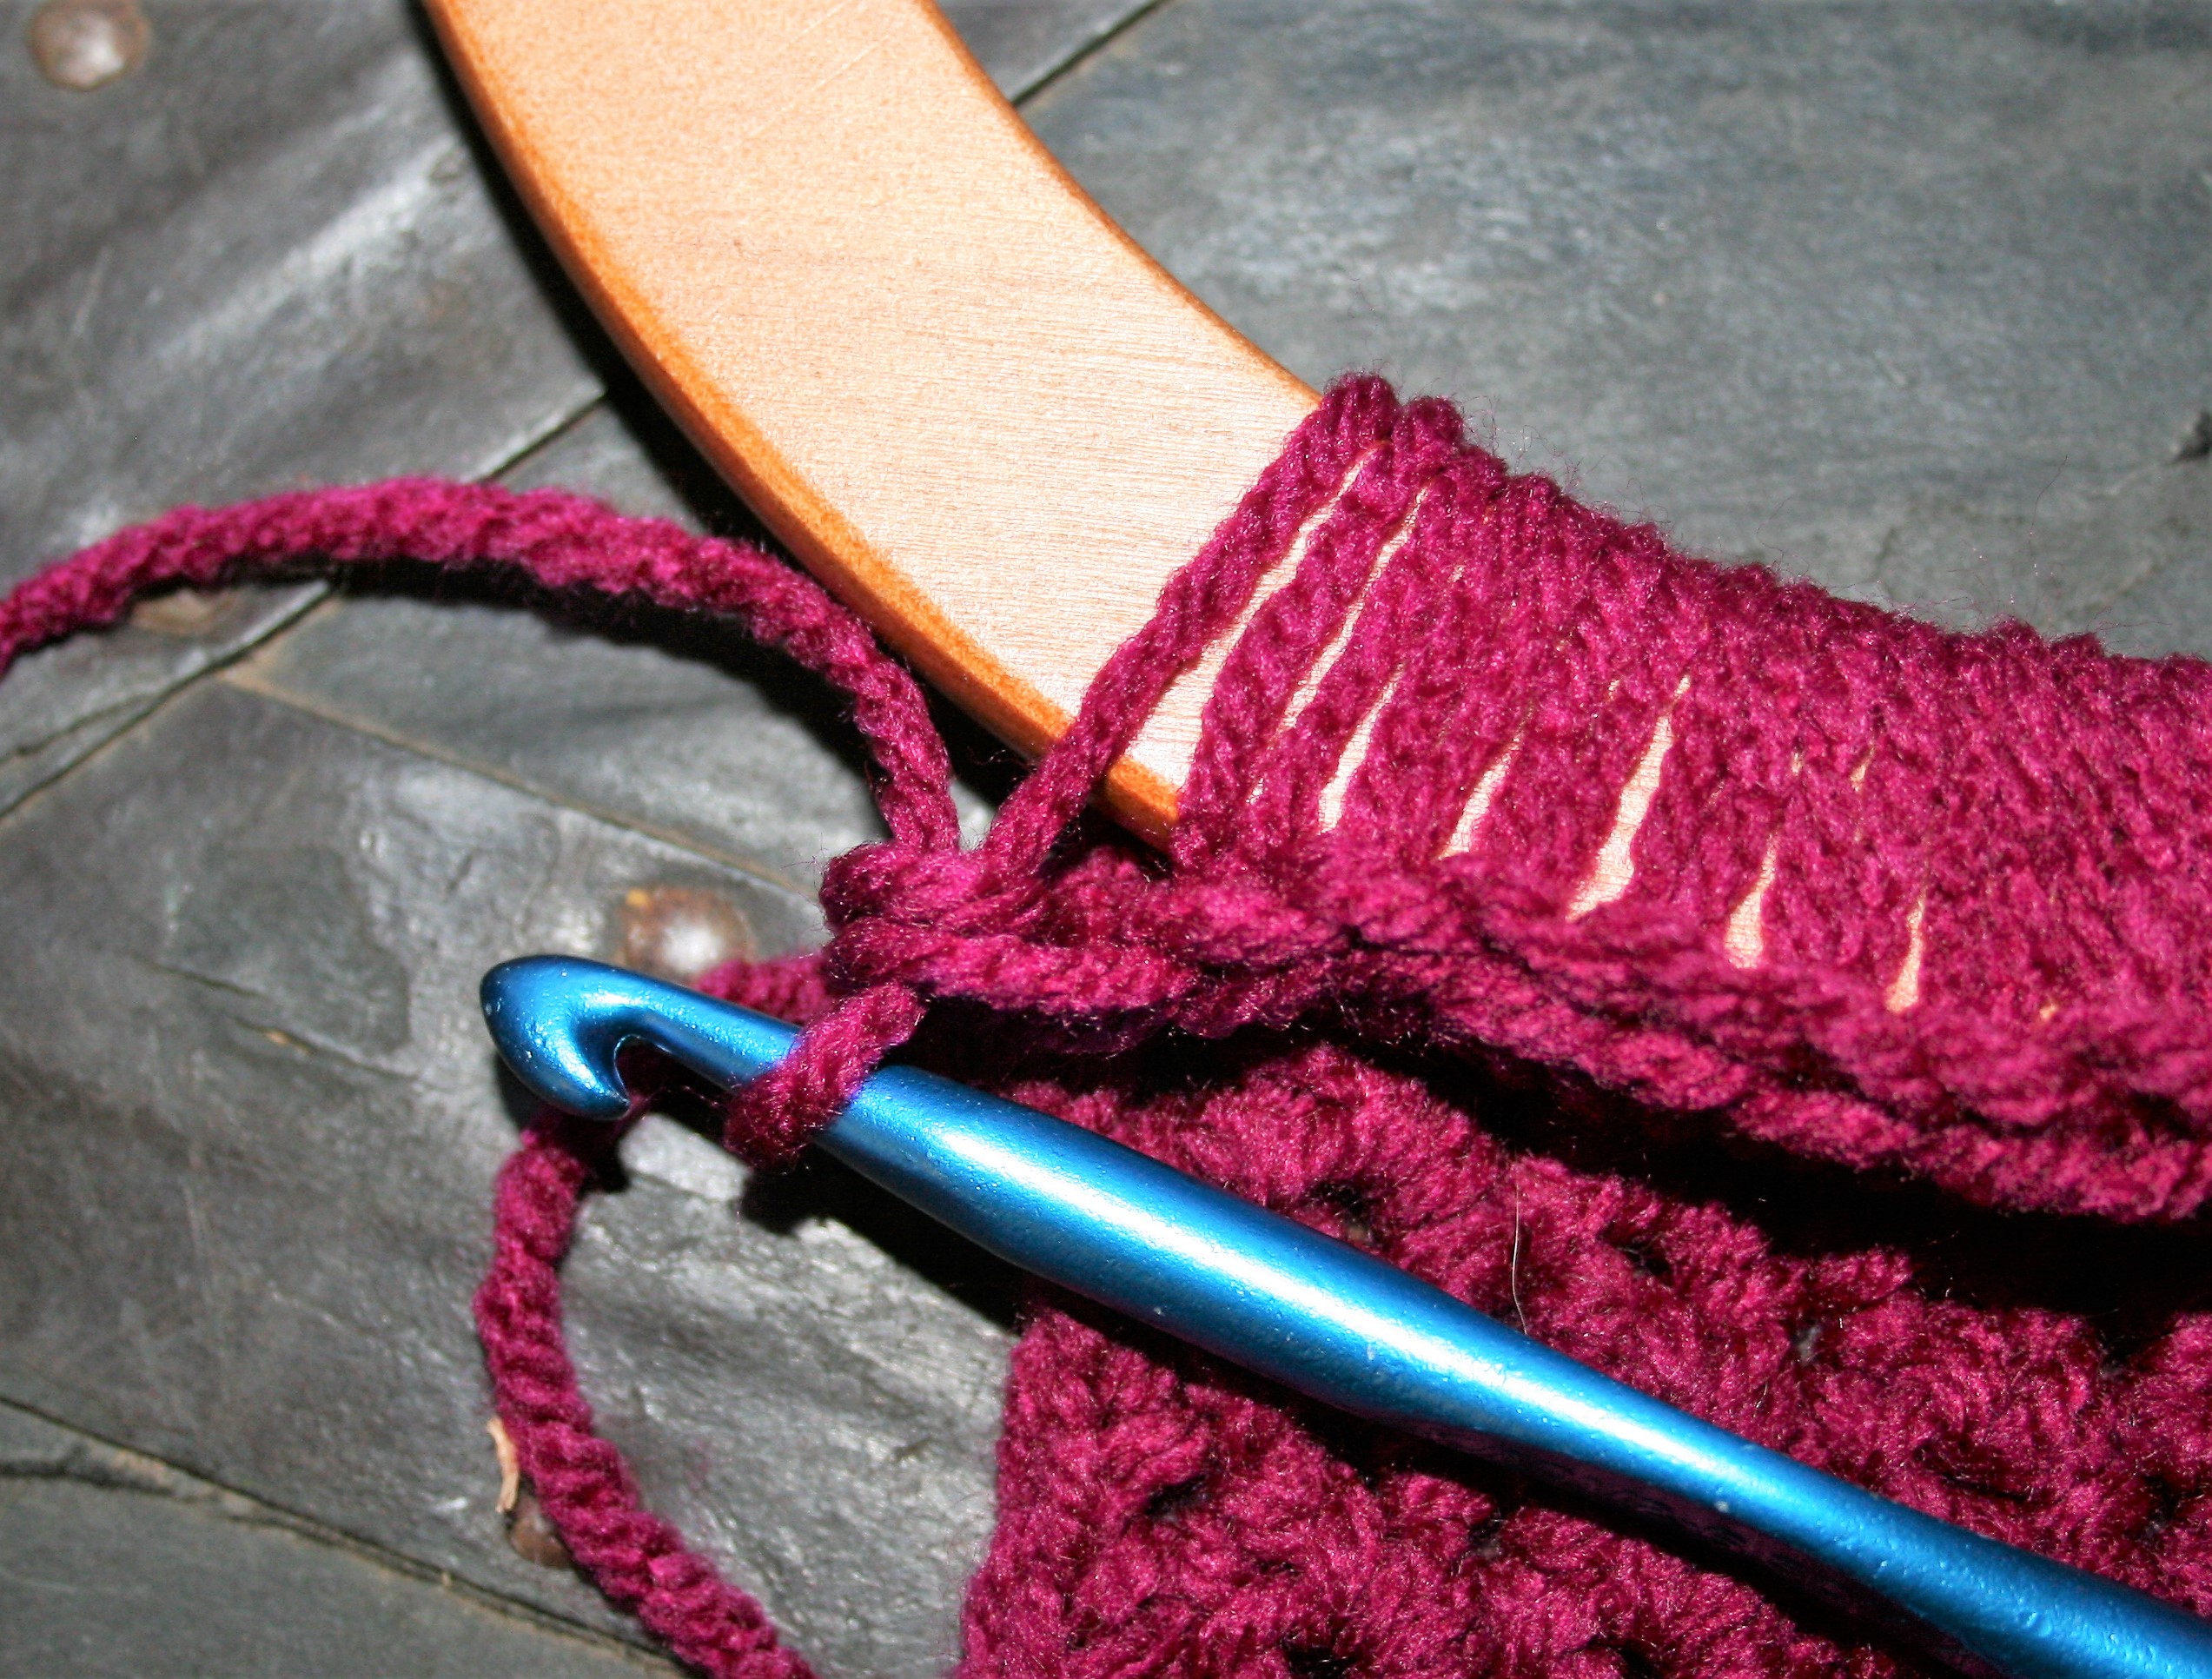
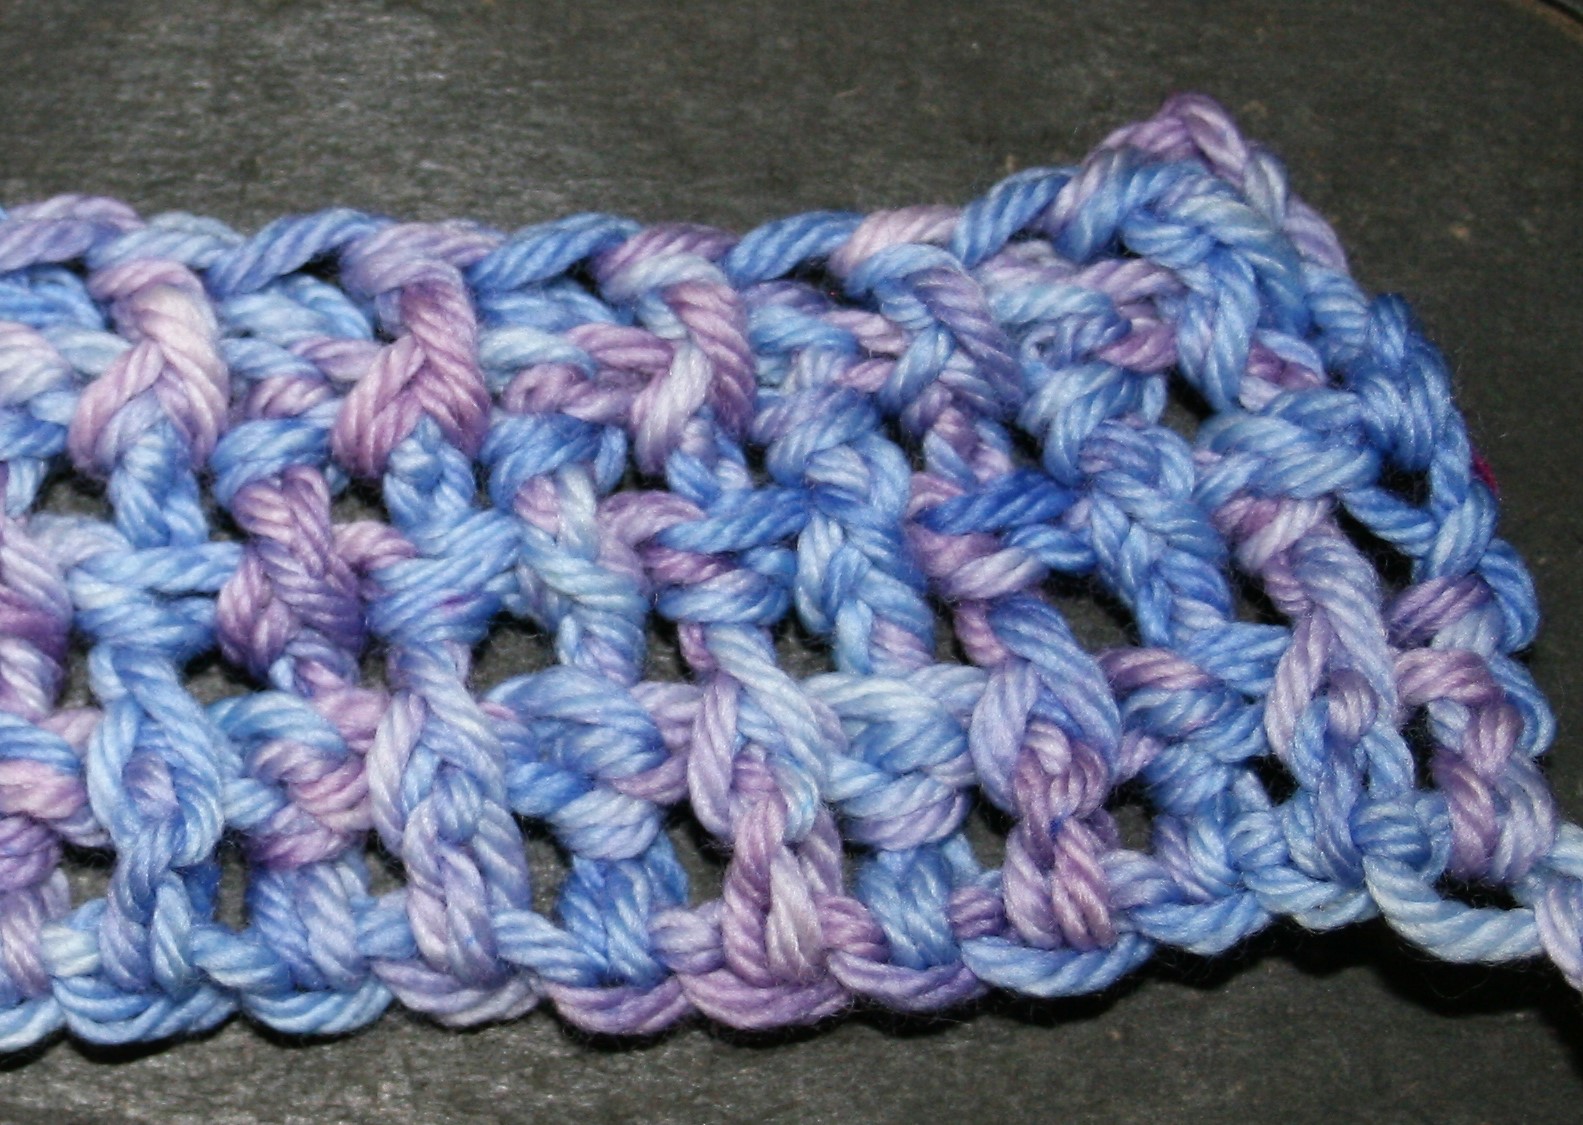
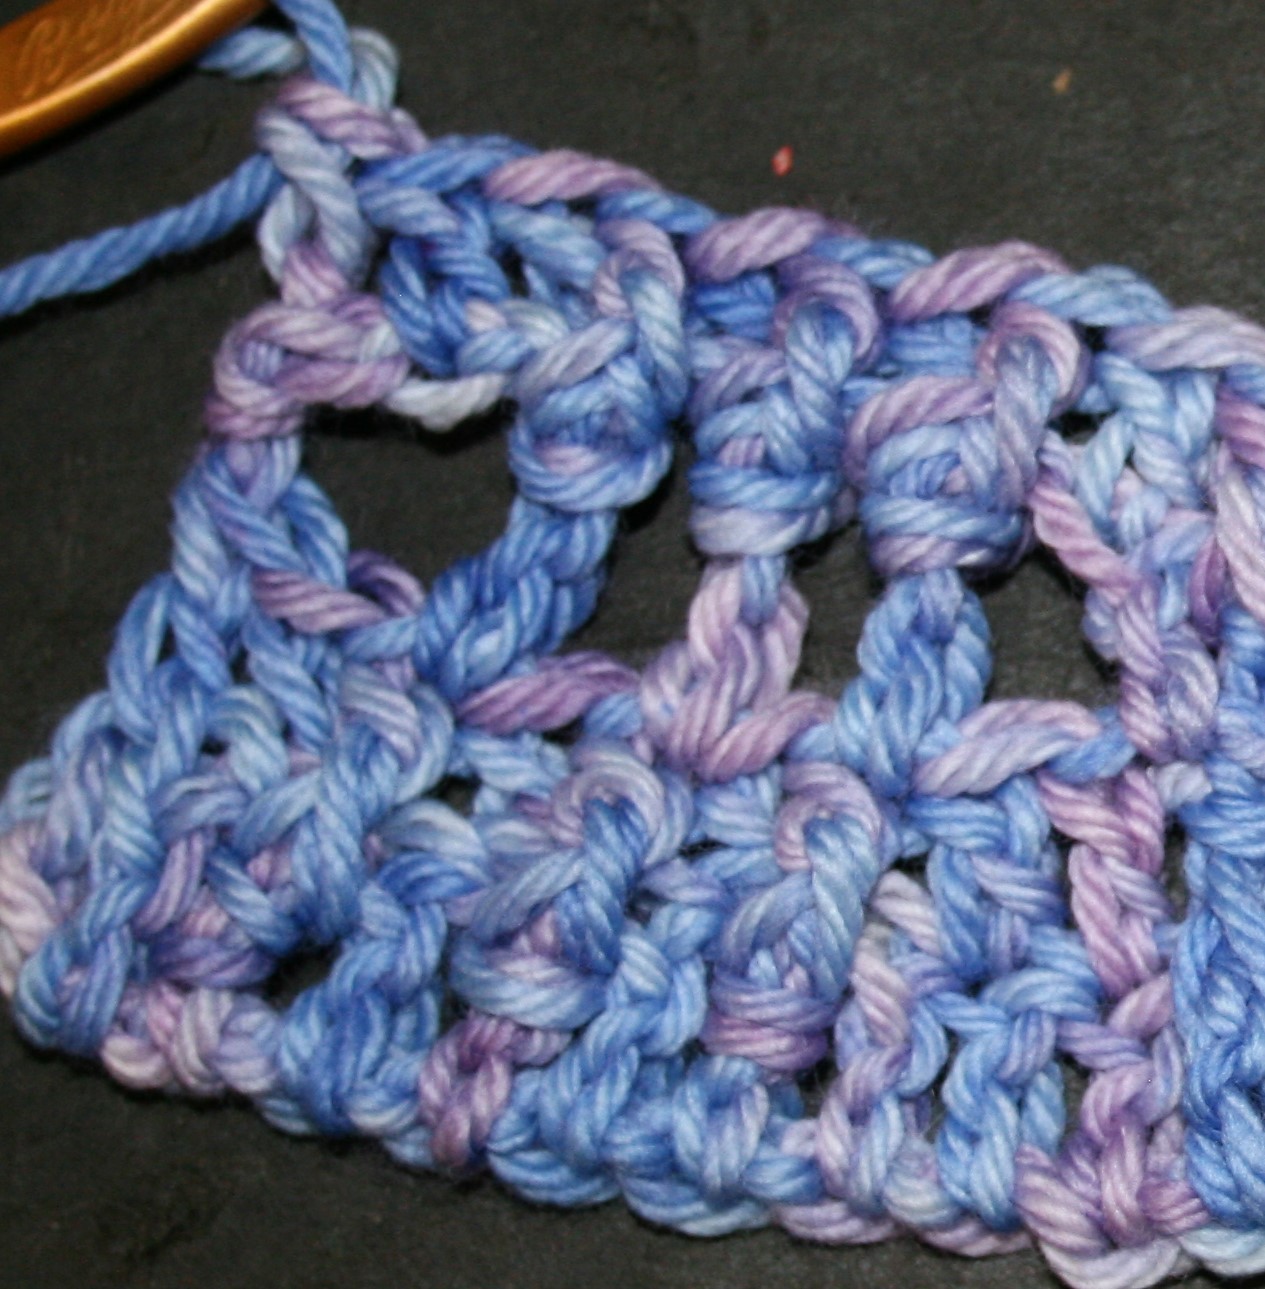
In the sample above I was working single crochet stitches over a round purse handle, I really like this simple approach to creating a professional looking handbag. This same approach created the padded hangers that rest in my closet, and the wreath holiday ornaments that I shared a while back (find it here). I have used this technique to save space with electronic devises (find that story here)…it can also be applied to creating baskets or rugs by crocheting over clothesline (it uses the same approach as the electronic devises that is still here).


Understand Crochet Post Stitches

In crochet Post Stitches are all about where you put your hook. It really can be that simple, yet it can be intimidating. It is from post stitches that interesting textures and designs can be created. But first it helps to understand the basics.

To work a Front Post Stitch, the hook is inserted between the “body” of a stitch, from the front of the fabric to the back, then returned back to the front of the fabric. Causing a post (or “body”) of a stitch to be pushed forward. In all the examples I show here I am demonstrating with Double Crochet stitches (US Standard), but really any stitches can be utilized in this manner. Then the indicated stitch is completed as normal.

As for a Front Post Double Crochet -FPDC, (US Standard), you would yarn over first, insert the hook as indicated above, yarn over and pull through a loop to anchor the stitch, then yarn over pull through 2 loops, and repeat the yarn over pull through of the last 2 loops on the hook.

To work a Back Post Stitch the process is very similar, it is just placing the hook in the reverse order, pushing the post (or “body”) of the stitch toward the back of the fabric. Essentially inserting the hook between the “body” of the stitch, from the back of the fabric to the front, then returning the hook to the back of the fabric. Once again you complete the stitch as indicated.

When working a Back Post Double Crochet -BPDC, (US Standard), you would yarn over first, insert the hook around the post of the stitch from back to front, then front to back as described above, yarn over and pull through a loop to anchor the stitch, then yarn over and pull through 2 loops two times.

Knowing these stitch positions opens up many different stitch texture opportunities, such as basket-weave and cables, I have displayed here a simple basket-weave of alternating front and back posts, as well as working a front and back post stitch around the same stitch. Working around the same stitch you will have to skip a stitch between or work the stitches over a mesh base. Using the same stitches, and in this case even in the same order (alternating front and back post stitches), you can get very different effects. Try this stitch placement out for your self. 


Decrease Stitches Like a Pro

Decreasing basic stitches in crochet is easier than you might expect.

The process may have always been relatively easy, but it has not always been written in a manner that was universal in understanding in patterns. The current term I see most is the type of stitch (single or double crochet) followed by a number, then followed by “tog”, and it is all just one little abbreviation; such as sc4tog.

Breaking it down a bit helps you to better understand it, so sc4tog, is essentially “single crochet 4 stitches together”. Patterns will usually list this process in its special stitches section, but with some further understanding you will not have to find this “Special Stitch” description. 

This stitch decrease process is one that I describe as a “monster with 1 head and multiple legs”, meaning when you are finished there will only be 1 stitch (the classic “V” top and back loop section of a stitch at the top) while working over multiple stitches. It makes a solid fabric, without any holes that can be created in other decrease methods that have you simply skip the next stitch.

If you keep in mind this simple rule, than you will be able to work this technique no matter what the notations. You work the indicated type of stitch until you are only 1 yarn over and pull through away from completing, then you start the next stitch.

So if you were working the sc4tog, you would insert your hook into the next stitch, yarn over, pull through a loop-STOP. You now have 2 loops on the hook, and one more yarn over and pull through will finish the stitch, so this is when you begin the next stitch. So you insert your hook into the next stitch, yarn over and pull through a loop- STOP. To finish a single crochet you would perform one more yarn over and pull through, but you are still decreasing. You currently have 3 loops on you hook (1 more than the number of stitch “parts” you have worked). Repeat the process of inserting your hook, yarning over, pulling through a loop until you have 1 more loop on your hook then the number indicated in the abbreviation, in this case, until you have 5 loops.

Now, you yarn over and pull through all 5 loops on your hook.

Basically you are working 4 stitches part way, and then completing them all together.

This same principal applies in you are working a decrease in double crochet, such as dc3tog. You would begin a double crochet in the next stitch, stopping when you only have one more yarn over and pull through to finish the stitch. You then begin the next stitch, and repeat the process.

By understanding the basic concept, it has helped me be more independent in work a pattern, I don’t feel like I need to work the explicit directions of the special stitch section, I am more free to enjoy the process. Other tips that help, are understanding and recognizing your stitches….find more information here.