Short Rows in Crochet

To help you celebrate National Crochet Month, I am sharing a technique to help advance your crochet skills, and including a free pattern. Today I am sharing how to work Short Rows, in both traditional and Tunisian Crochet.

First, I would like to thank Crochetville for including me in they blog tour for this month long celebration. Everyday you are introduced to a new designer, or hobbyist or teacher, to help inspire a new desire of crochet within you. Don’t miss a day, check out the participants here.

There are some terms that can be a bit intimidating the fiber arts, short rows can be one of them. However, they really are quite straight forward.

What Makes it Special

Learning how to work short rows in crochet will help expand crochet skills by adding subtle shaping in garments and the ability to create dramatic effects in just about any work you wish.

A short row is exactly as it sounds, you work your row short. Meaning you do not finish the row.

Sometimes this is worked by tapering the stitch height, by working shorter and shorter stitches until they are near a slip stitch. The work is turned, and possibly started by tapering the stich height upward, it is completed.

Working As A Dart

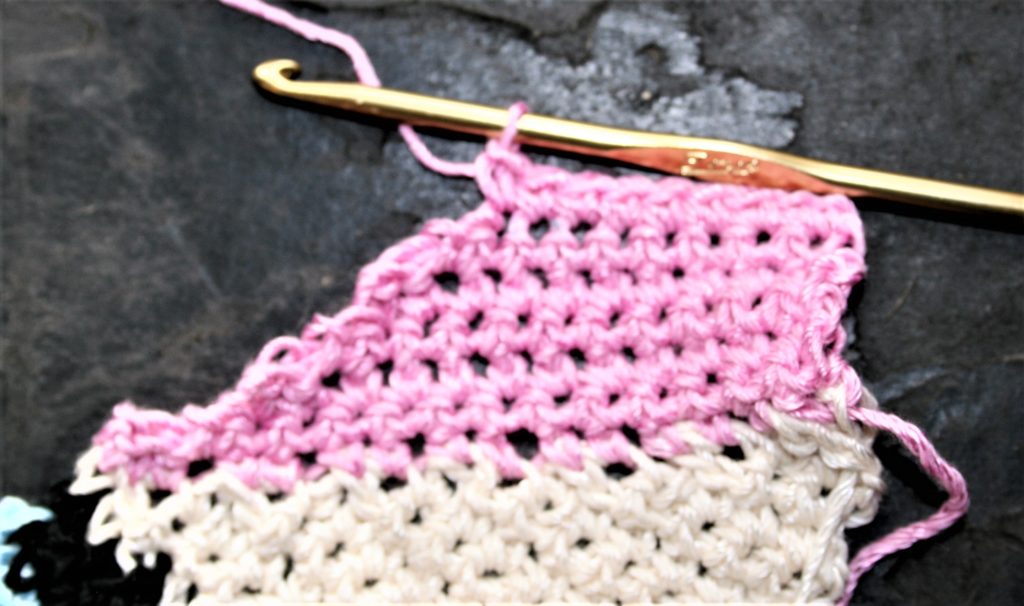
In the case of using short rows as is seen in sewing as if a dart, or a point in fabric, you work un-worked stitches. The next row works to the point where two rows below the row was worked short, then it continues to the remained of the stitches not worked three rows below.

Making A Wedge…

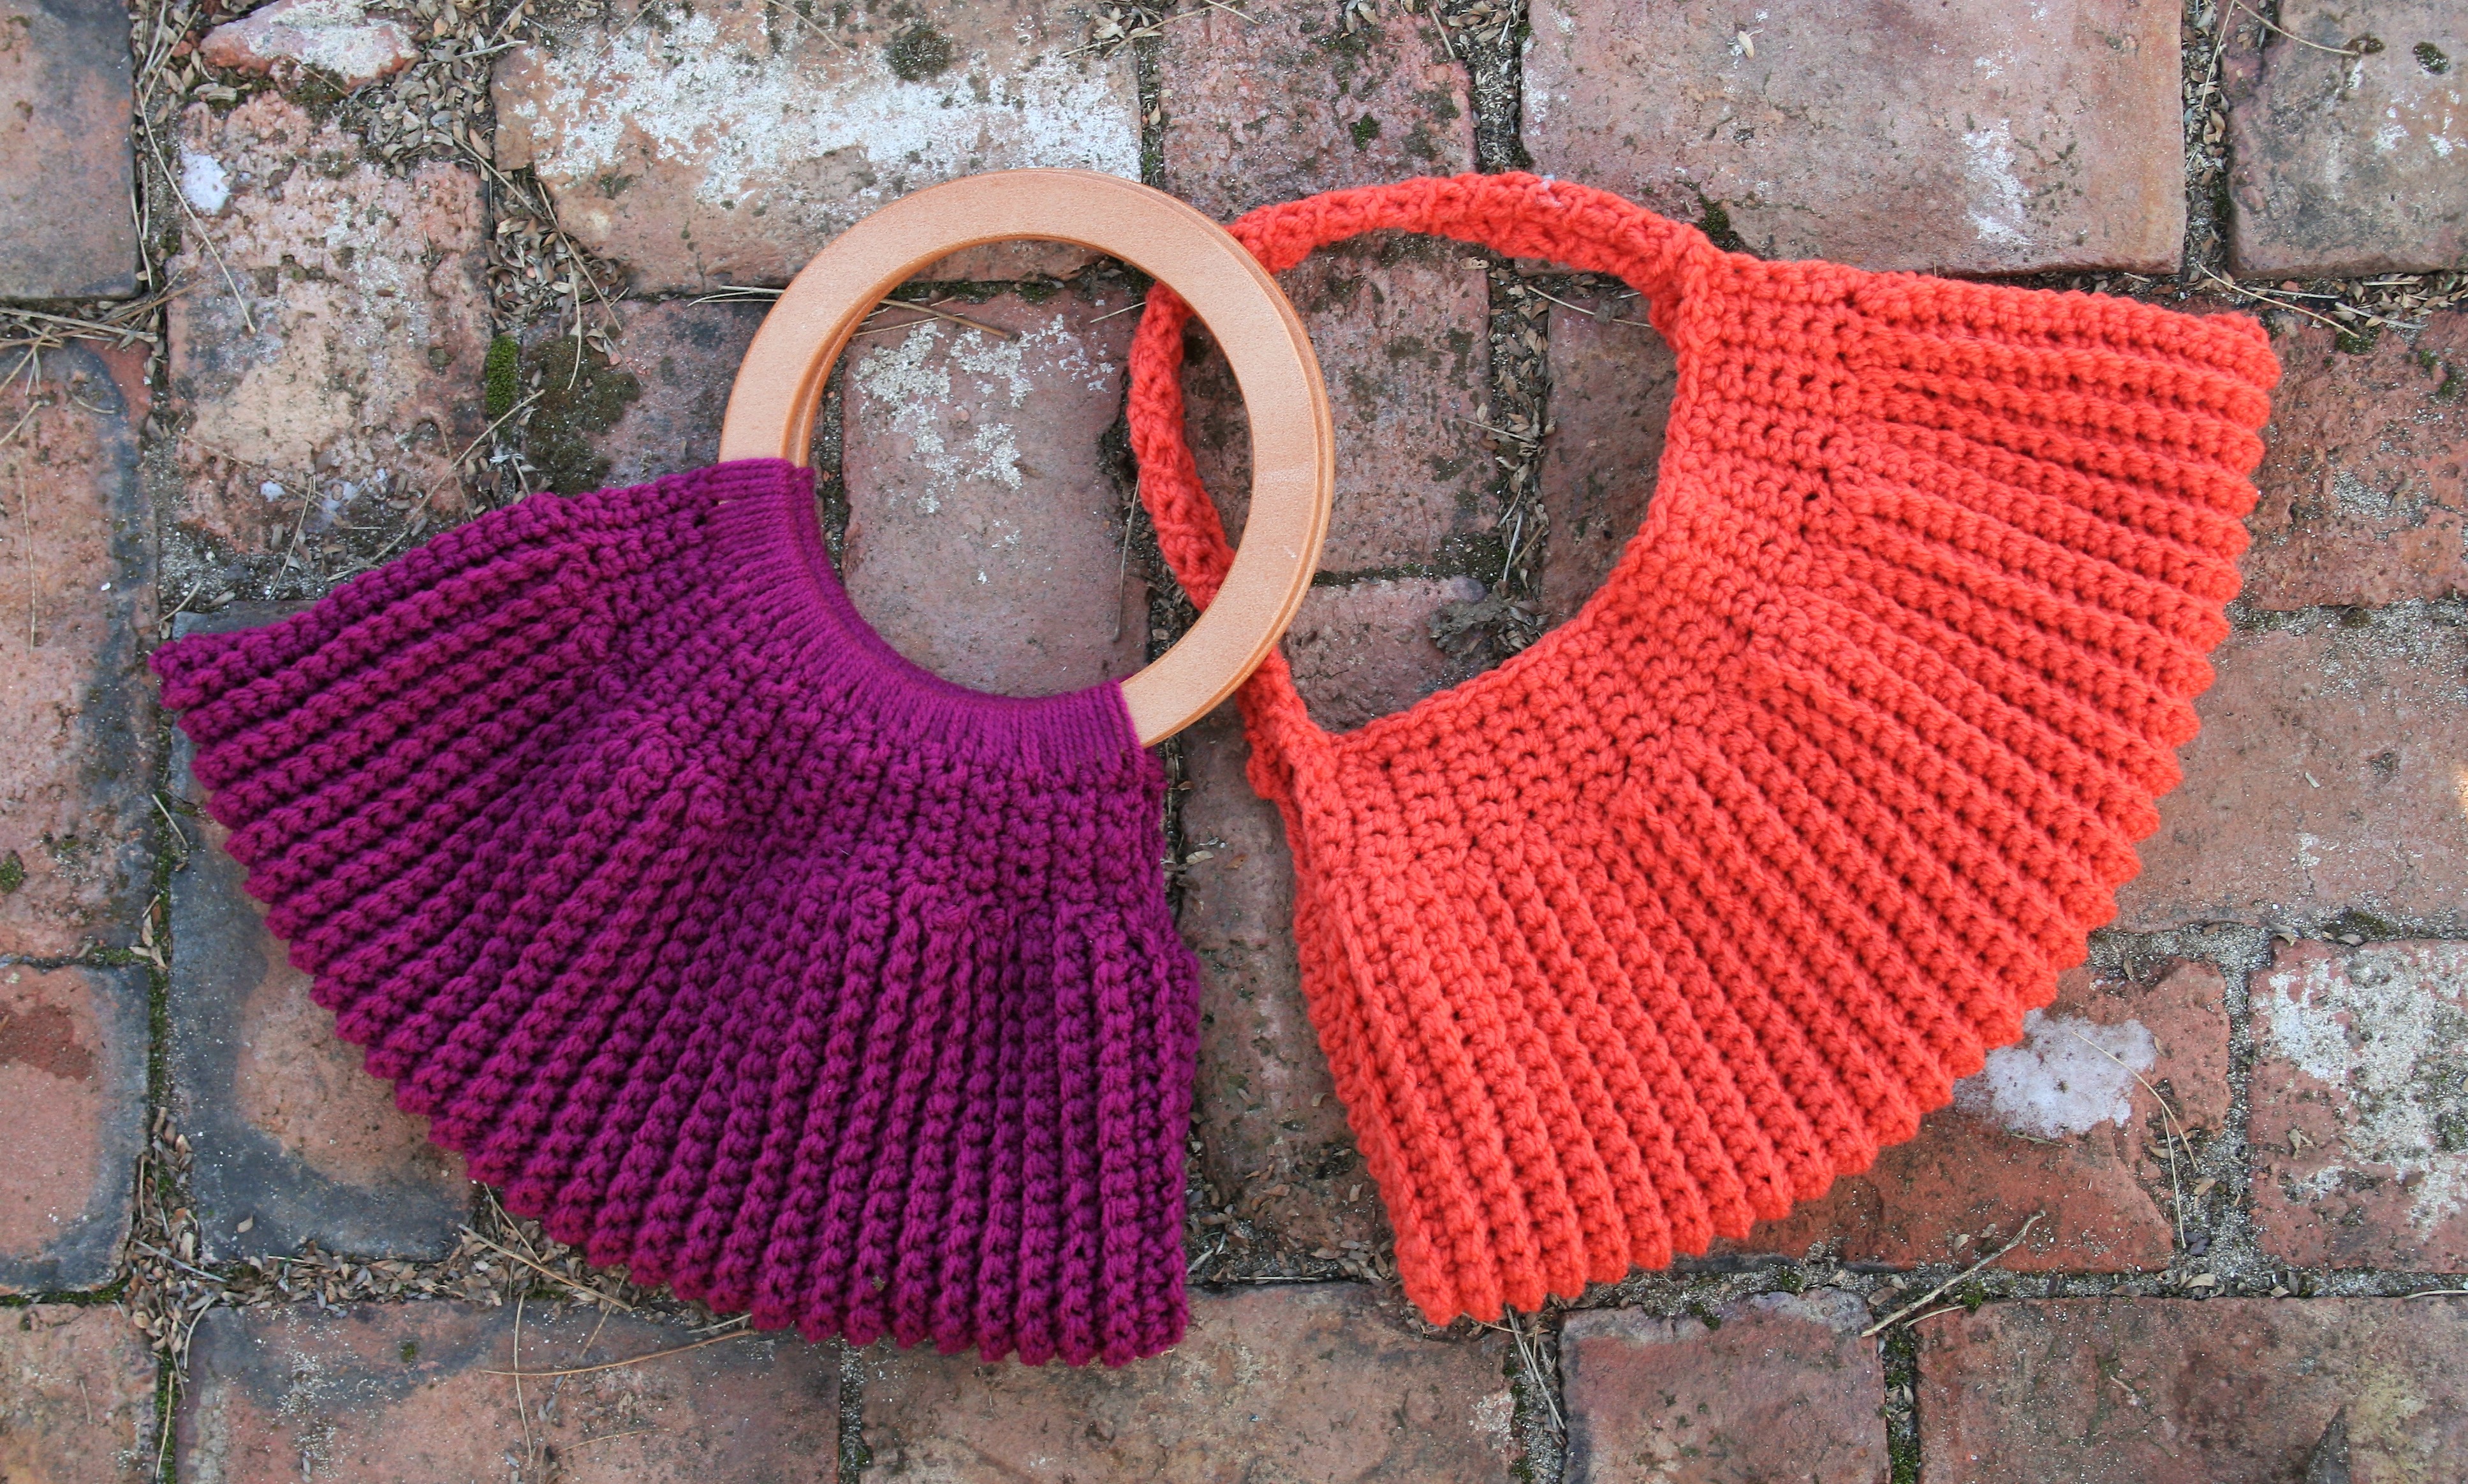
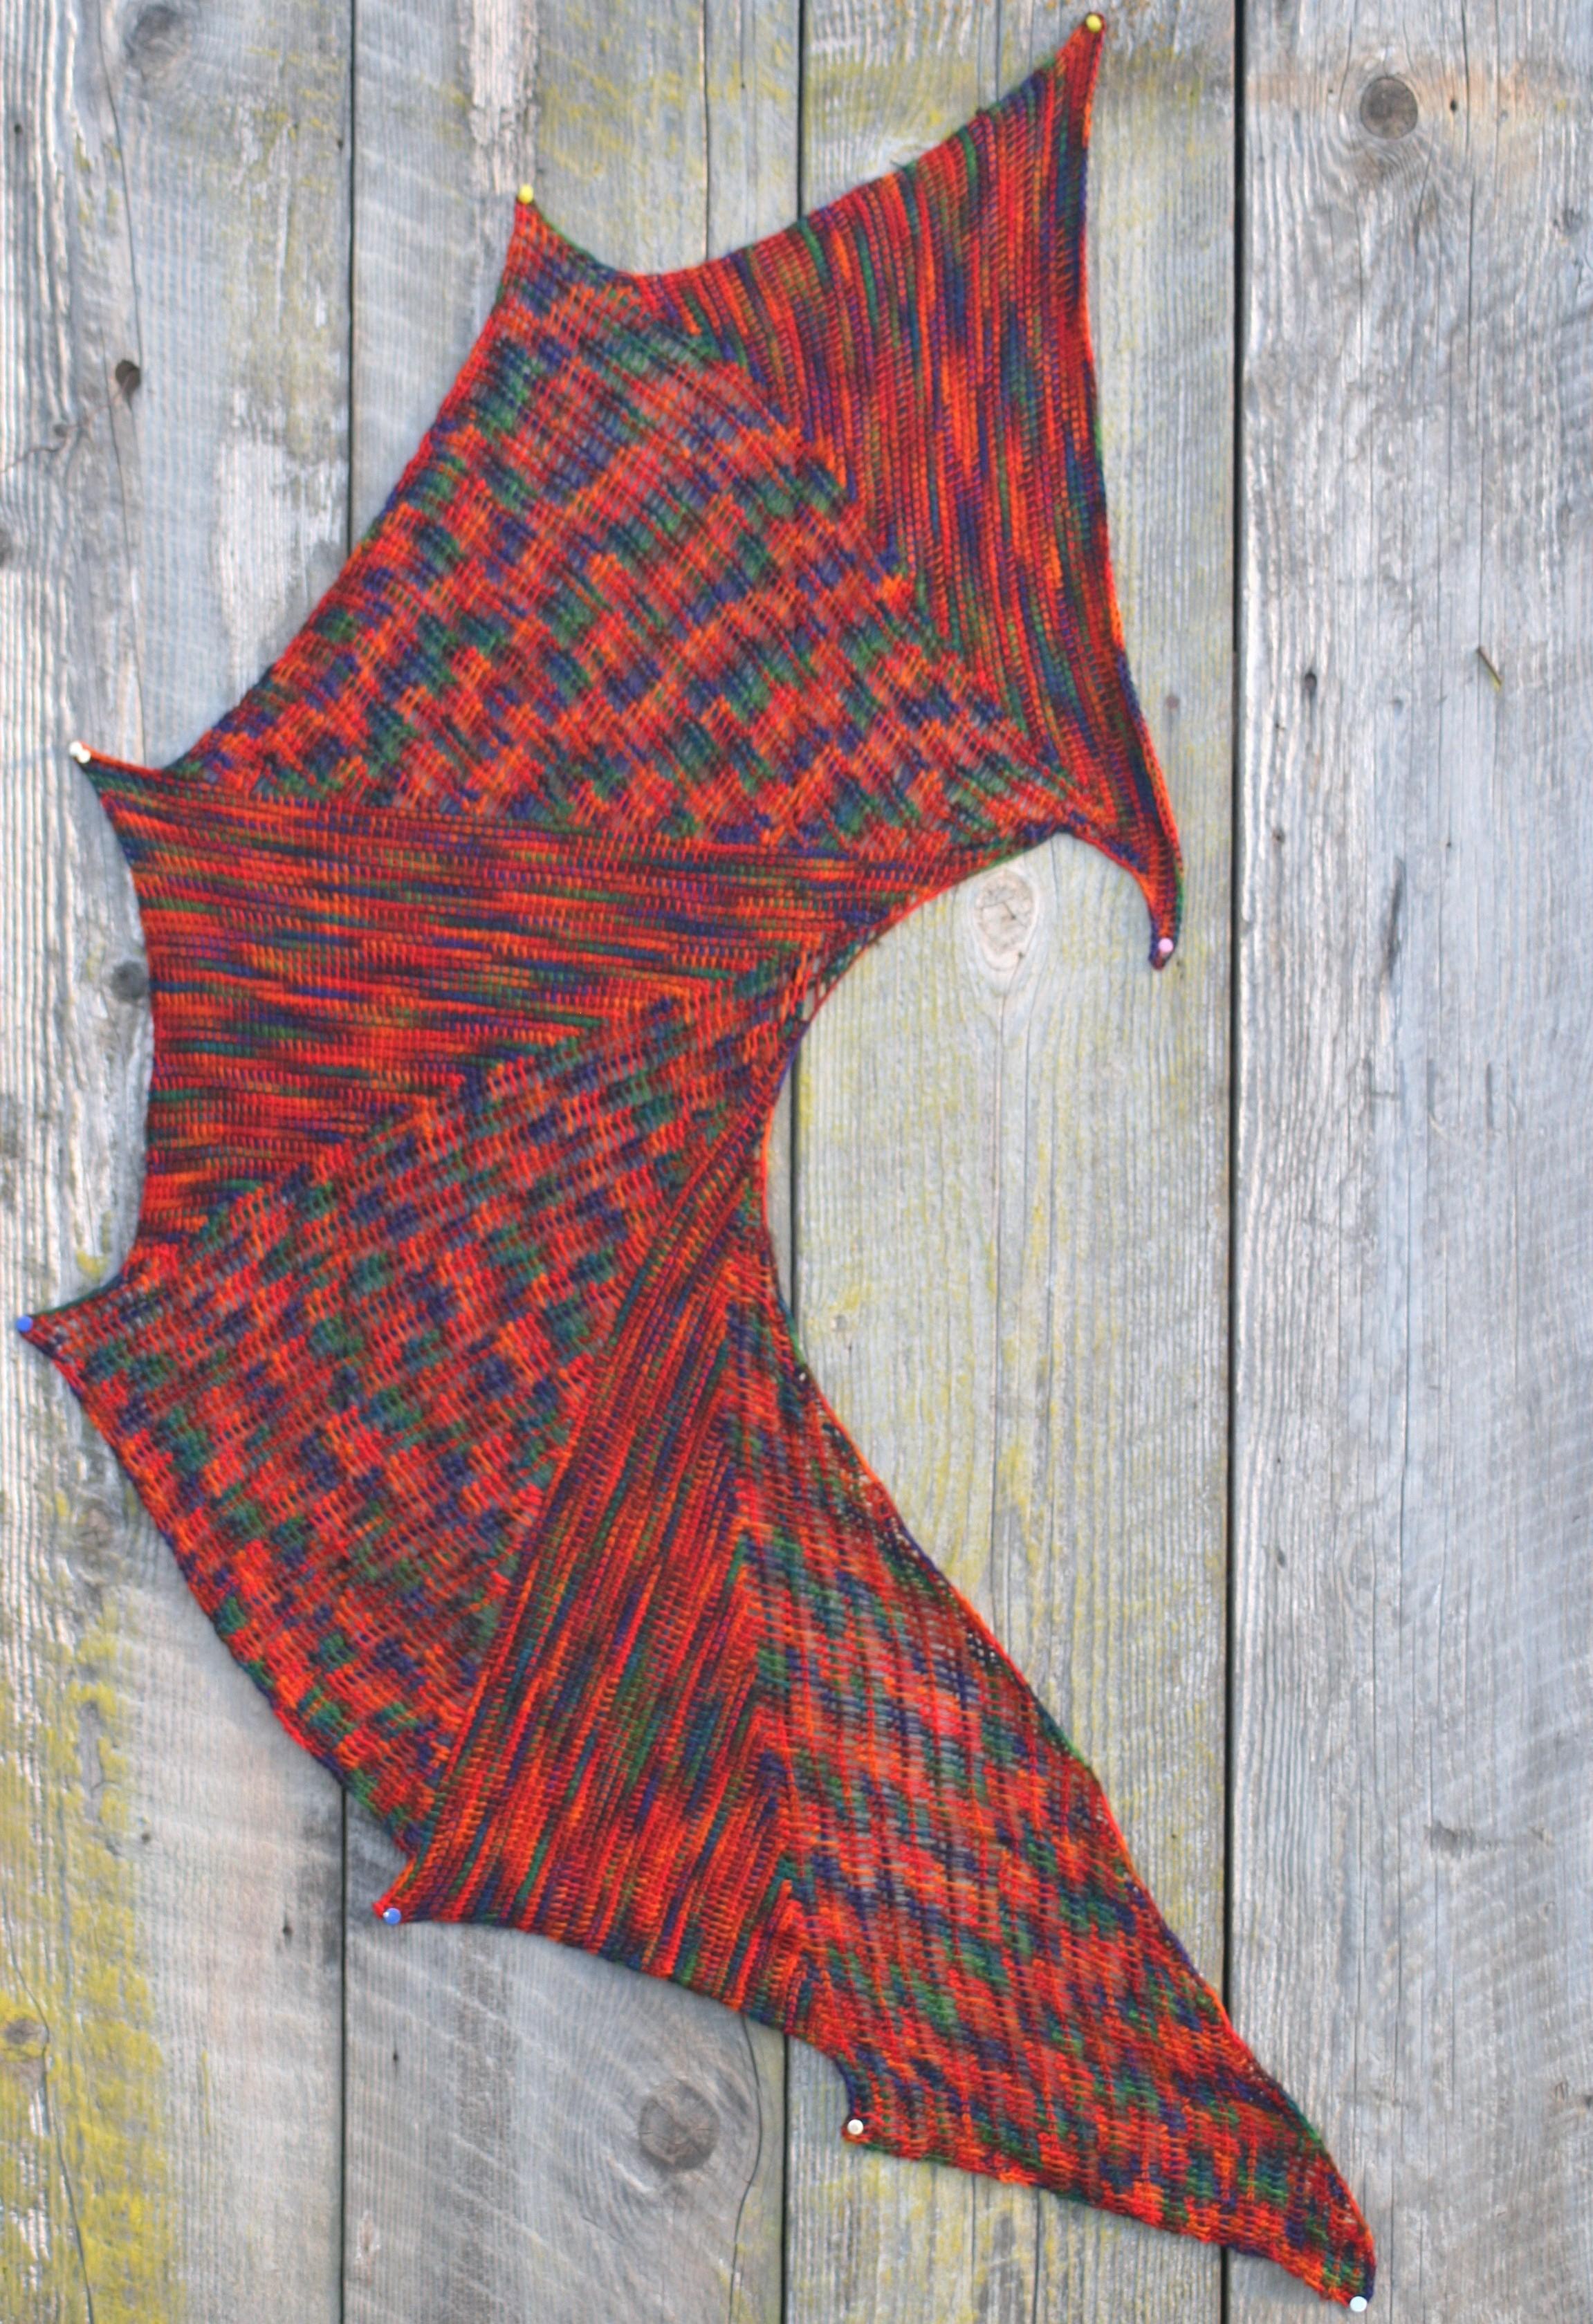
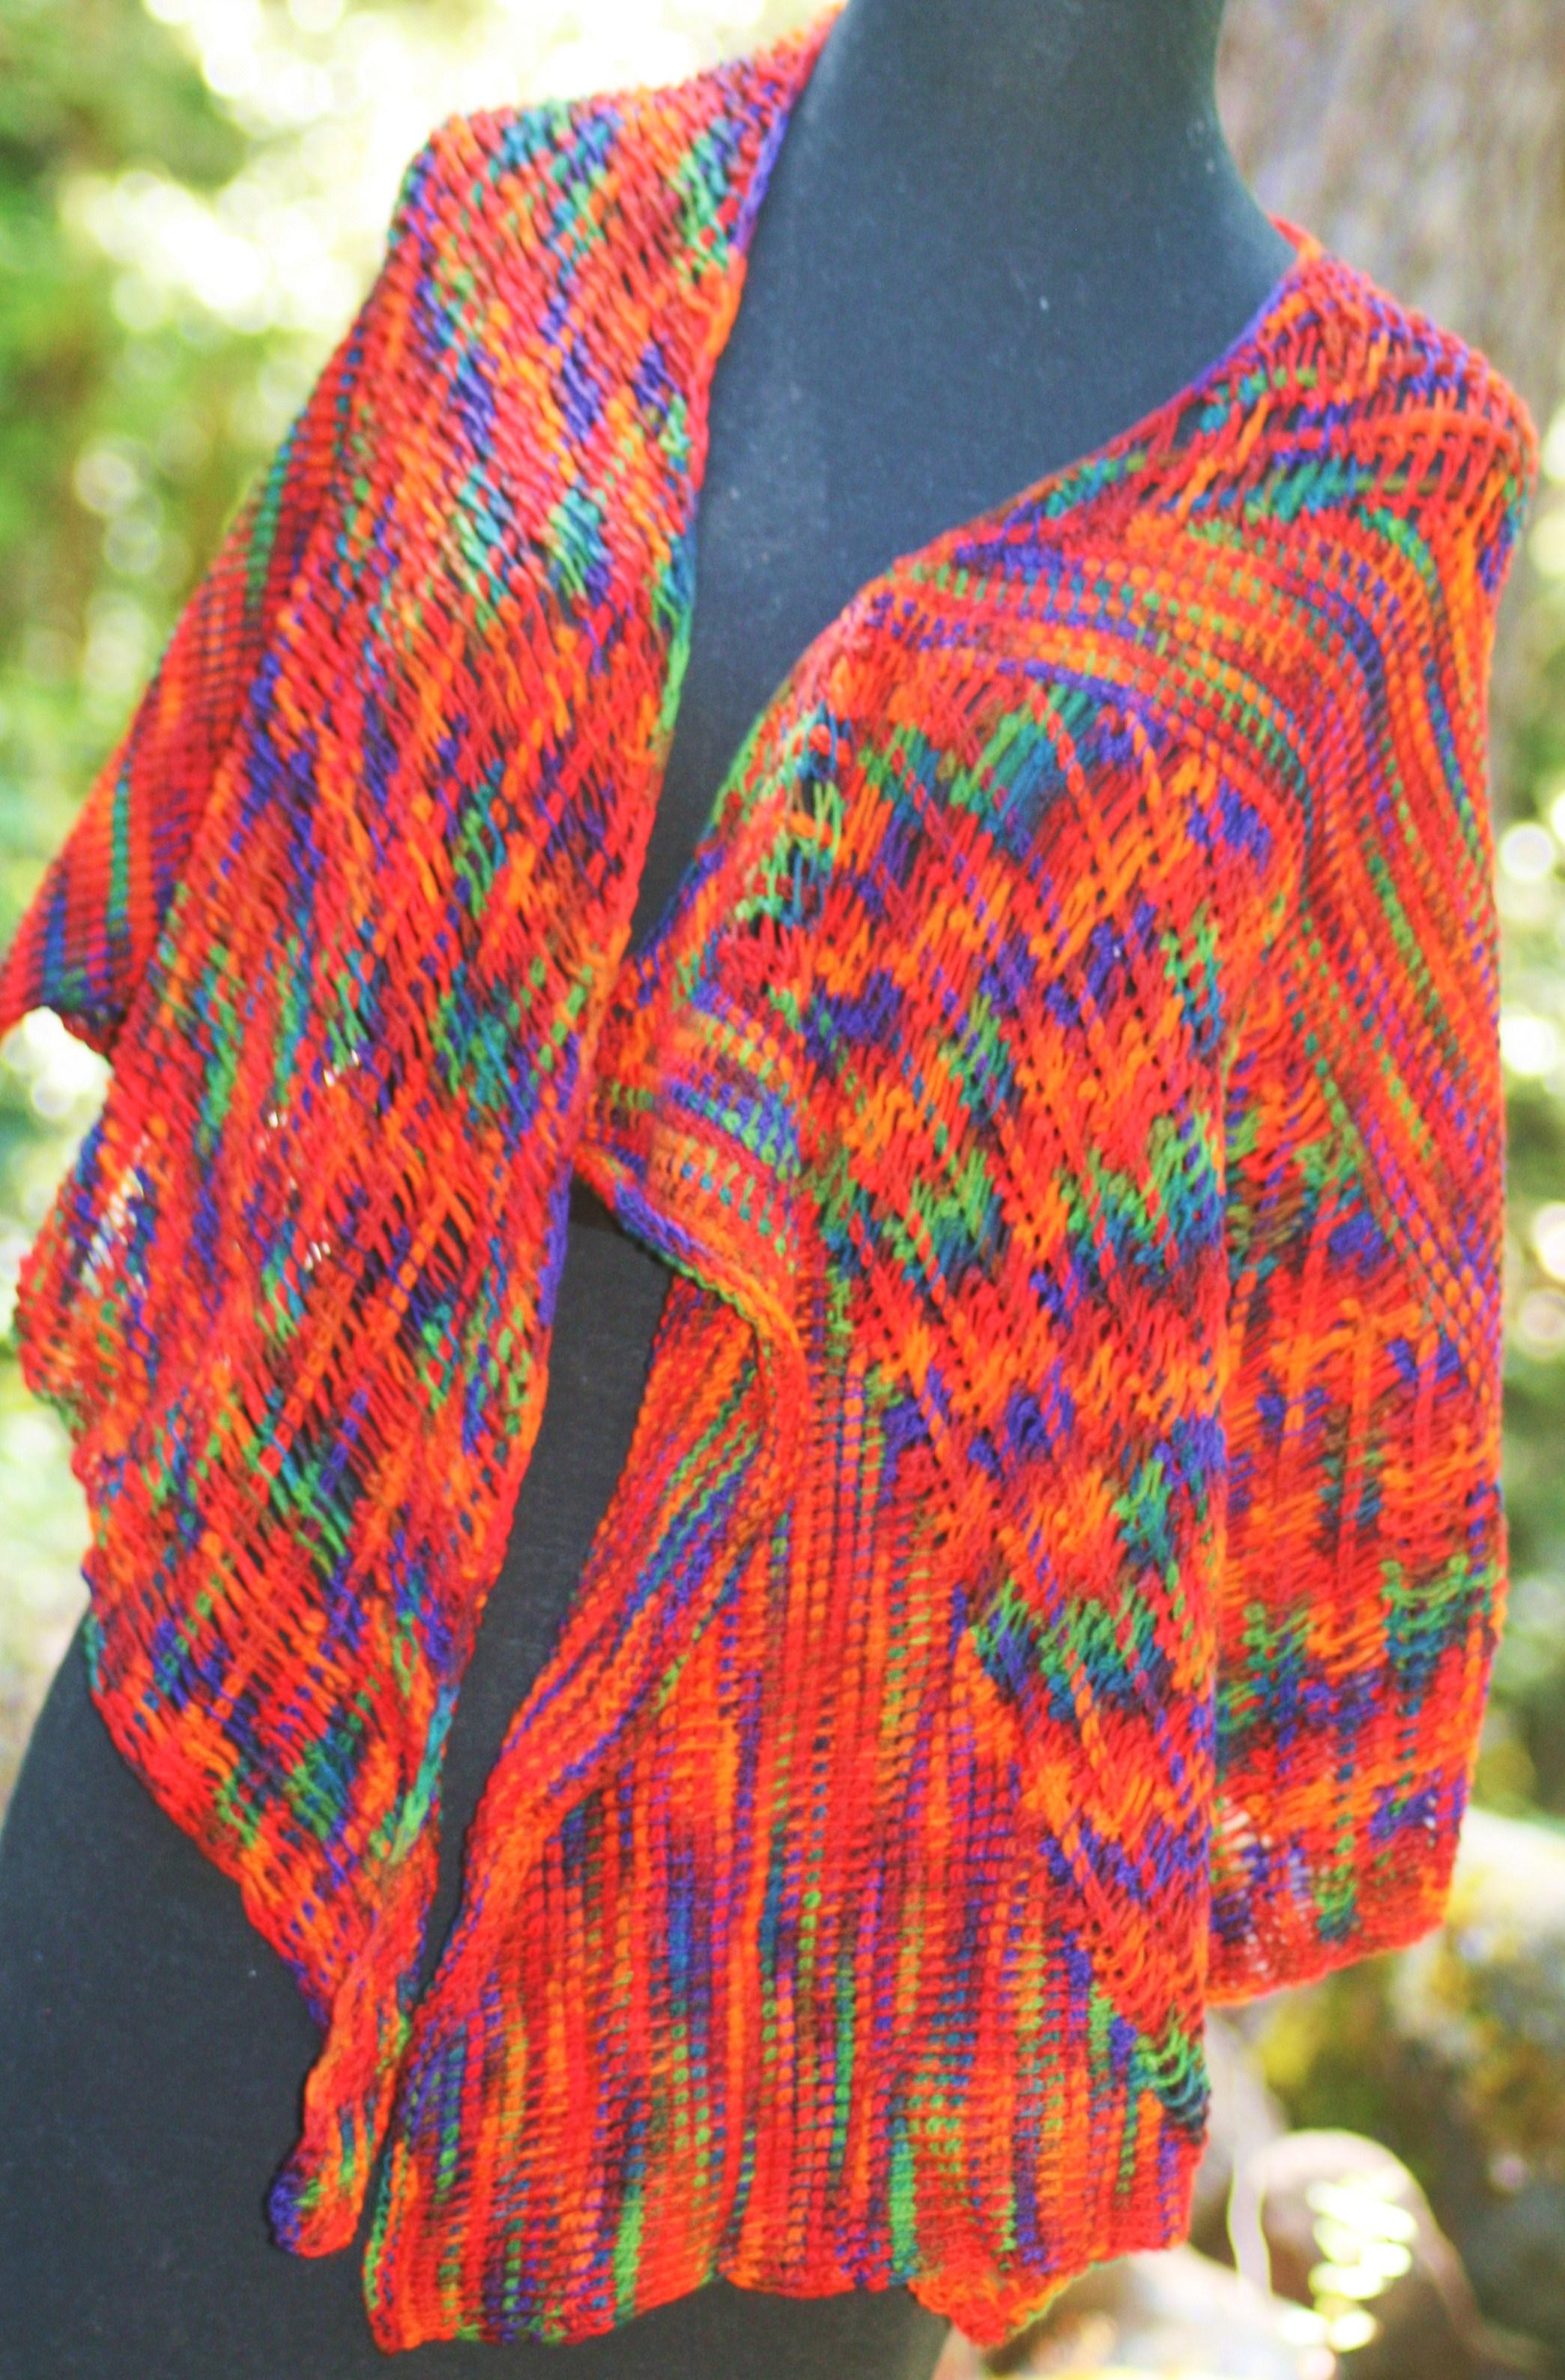
In the case of making a triangular shape, a multiple of short rows are worked, so that there are fewer stiches in each row. I often use this approach in creating shawls, essentially creating triangular wedges that I then build atop one another.

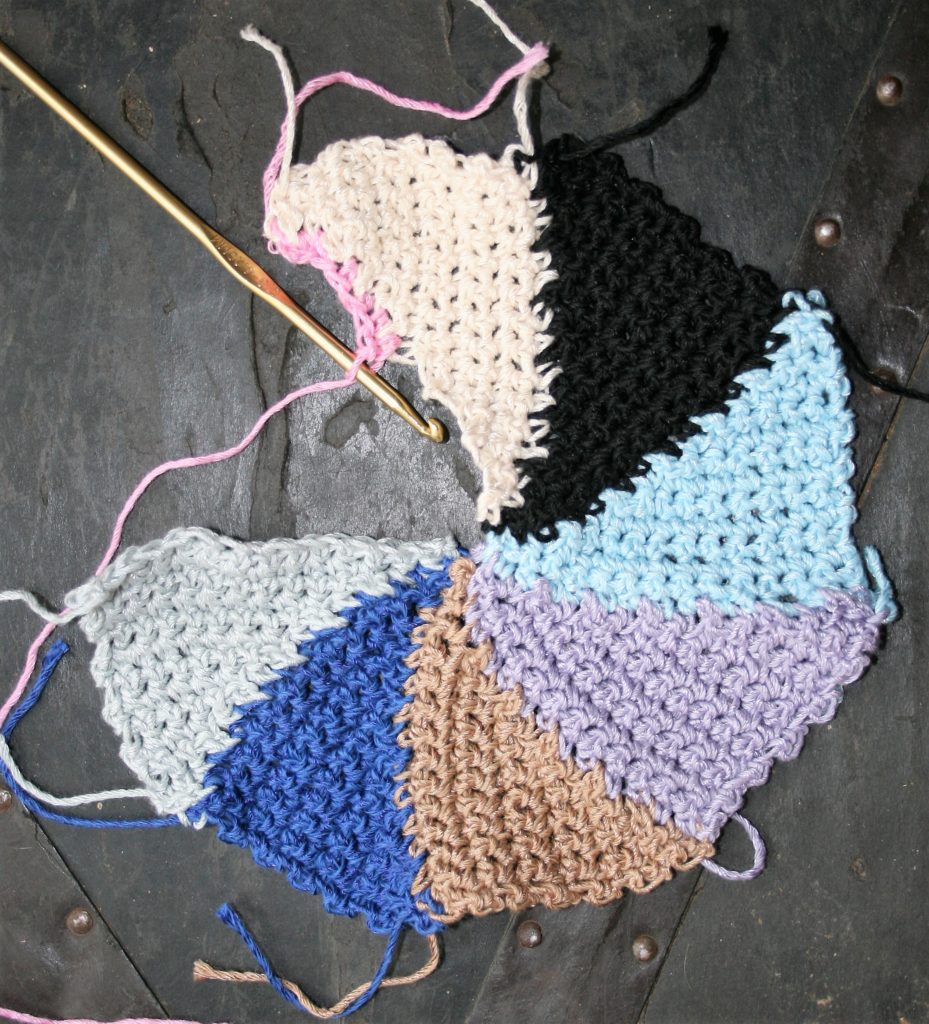
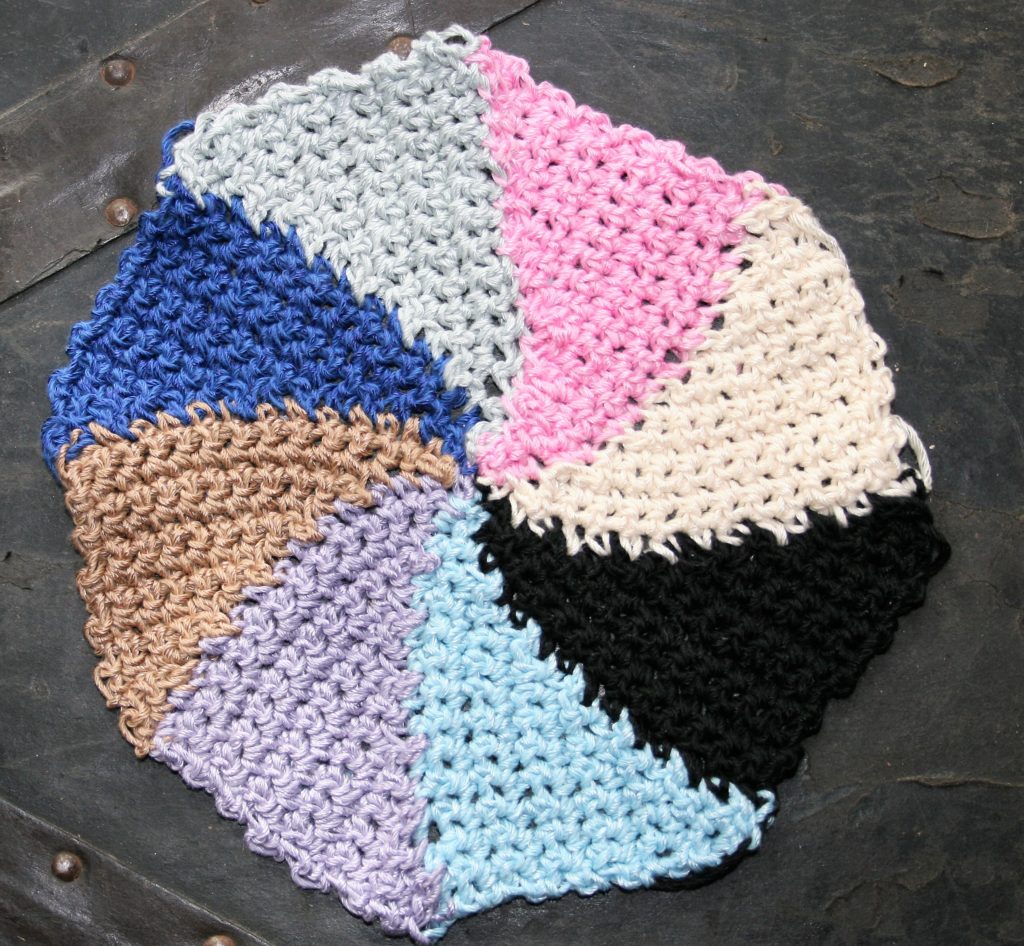
It is this last approach that I also use to create washcloths and potholders. I create “wedges” of triangles that work on one another to eventually create a circle.

Starting Your Circle

Using any yarn, with a comparable size hook, these patterns are great for scrap yarns. You can adjust the size by adjusting the number of beginning chains as the foundation. Just remember that this is only half the size of the finished product, and you will remove one stitch per row on the same edge of the fabric. It can be used utilizing either traditional crochet or Tunisian, and I share a quick pattern for both below.

Short Row Washcloth/Potholder

Short Row Crochet Washcloth/Potholder- Worked in Wedges

First Wedge

Row 1: Ch 16, sc in 2nd ch from hook, sc in each ch across, turn. -15 sc

Row 2: Sl st in same st, sl st in next st, ch 1, sc in same st, sc in each st across, turn. -14 sc

Row 3: Ch 1, sc in same st, sc in next 12 sts, leaving last st unworked, turn. -13sc

Row 4: Sl st in same st, sl st in next st, ch 1, sc in same st, sc in each st across, turn. -12 sc

You Should Start Seeing the “Stair Stepping”

Row 5: Ch 1, sc in same st, sc in next 10 sts, leaving last st unworked, turn. -11sc

Row 6: Sl st in same st, sl st in next st, ch 1, sc in same st, sc in each st across, turn. -10 sc

Don’t work the last stitch, and slip stitch in the first stitch of the next row…removing one stitch in each row on the same edge of the fabric.

Row 7: Ch 1, sc in same st, sc in next 8 sts, leaving last st unworked, turn. -9sc

Row 8: Sl st in same st, sl st in next st, ch 1, sc in same st, sc in each st across, turn. -8 sc

Over Halfway on the First Wedge….

Row 9: Ch 1, sc in same st, sc in next 6 sts, leaving last st unworked, turn. -7sc

Row 10: Sl st in same st, sl st in next st, ch 1, sc in same st, sc in each st across, turn. -6 sc

Row 11: Ch 1, sc in same st, sc in next 4 sts, leaving last st unworked, turn. -5sc

Row 12: Sl st in same st, sl st in next st, ch 1, sc in same st, sc in each st across, turn. -4 sc

Almost There…

Row 13: Ch 1, sc in same st, sc in next 2 sts, leaving last st unworked, turn. -3sc

Row 14: Sl st in same st, sl st in next st, ch 1, sc in same st, sc in each st across, turn. -2 sc

Row 15: Ch 1, sc in same st, turn. -1 sc

Row 16: Sl st in same st, turn.

Second Wedge

Row 17: Ch 1, sc in same st, sc in the edge stitch of Rows 15-1 (essentially either the stitch skipped in a row, or the slip stitch after the row is turned), turn. -15 sc

Row 18-32: Rep Rows 2 through 16 of wedge 1.

Wedges 3-8

Repeat Second Wedge.

Seam Wedge 1 to Wedge 8.

Tunisian Short Row Washcloth/Potholder

Short Row Tunisian Crochet Washcloth/Potholder

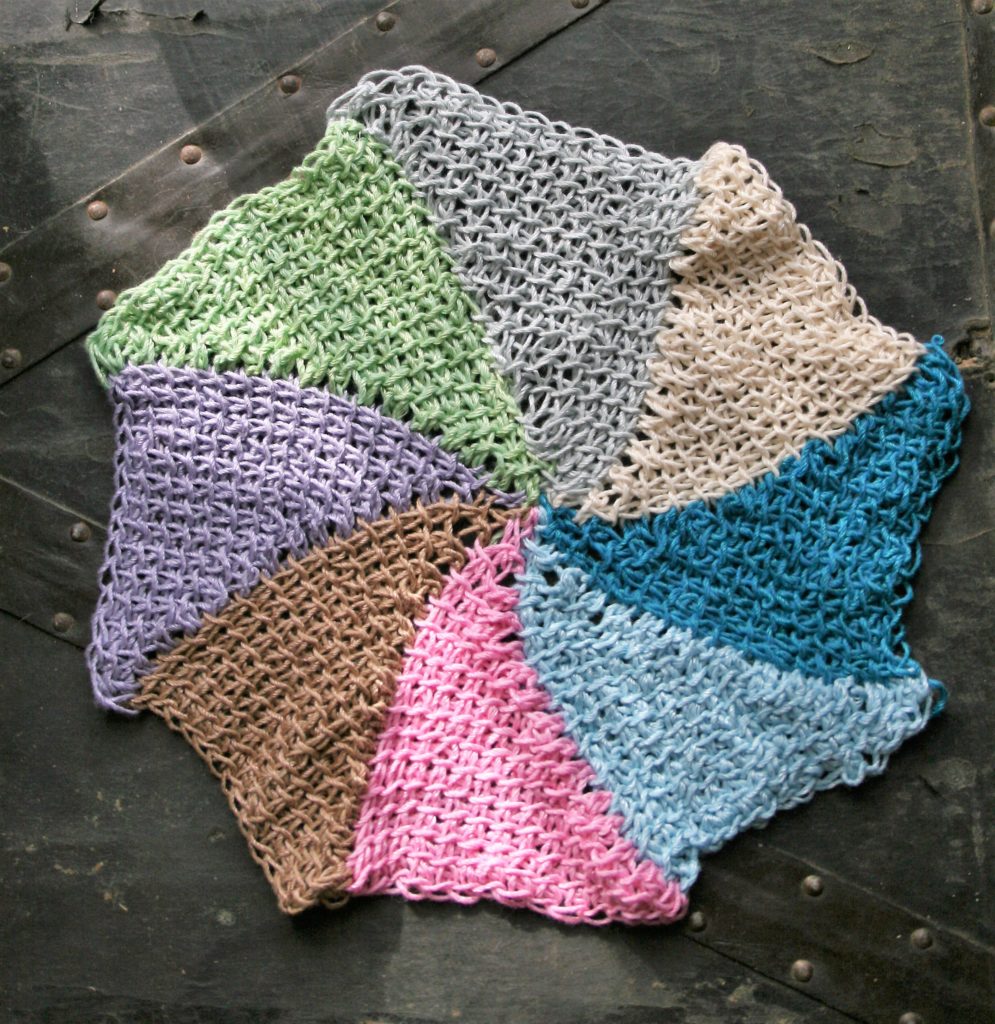
These same principals apply to Tunisian crochet as well.

First Wedge

Row 1: Ch 15, pick up loops in each ch across. RP. -15 sts

Row 2: Tss in next 13 sts, leaving last st unworked. RP. -14 tss

Row 3: Tss in next 12 sts, leaving last st unworked. RP. -13 tss

Row 4: Tss in next 11 sts, leaving last st unworked. RP. -12 tss

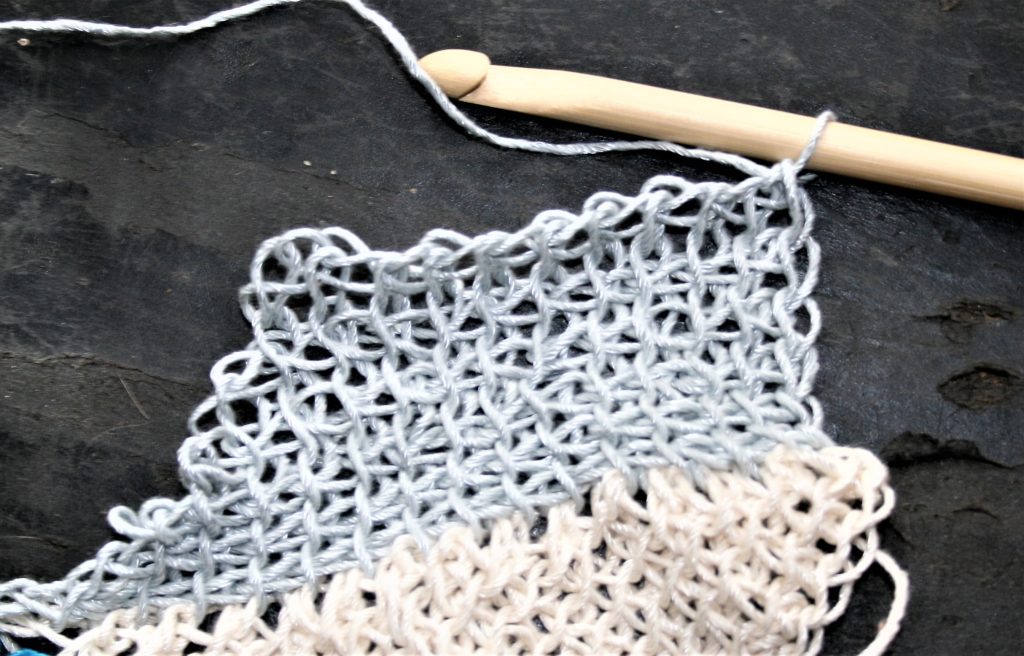
Still not working the last stitch…

Row 5: Tss in next 10 sts, leaving last st unworked. RP. -11 tss

Row 6: Tss in next 9 sts, leaving last st unworked. RP. -10 tss

Don’t work the last stitch of each row of Tunisian crochet, then begin the regular Return Pass. Thus removing 1 stitch from each row on the same edge of the fabric.

Row 7: Tss in next 8 sts, leaving last st unworked. RP. -9 tss

Row 8: Tss in next 7 sts, leaving last st unworked. RP. -8 tss

Are you seeing the angle?

Row 9: Tss in next 6 sts, leaving last st unworked. RP. -7 tss

Row 10: Tss in next 5 sts, leaving last st unworked. RP. -6 tss

Row 11: Tss in next 4 sts, leaving last st unworked. RP. -5 tss

Row 12: Tss in next 3 sts, leaving last st unworked. RP. -4 tss

Almost finished the first wedge…

Row 13: Tss in next 2 sts, leaving last st unworked. RP. -3 tss

Row 14: Tss in next 1 st, leaving last st unworked. RP. -2 tss

Row 15: Tss in same st, leaving last st unworked. RP. -1 tss

Second Wedge

Row 16: Pick up loops in each unworked stitch of rows below. RP.-15tss

Row 17-30: Rep Rows 2-15 of wedge 1.

Wedges 3-8

Repeat Second Wedge.

Seam Wedge 1 to Wedge 8.

Cathy’s Classic Handbag- Make It For Me!

Thank you to ELK Studio for putting together this Make it For Me event! what a nice way to kick off the new year, after months of crocheting gifts for everyone else it is time to rejuvenate and focus a bit more inward and create something for you! (Check out the entire list of month long projects here)

I am thrilled to be able to join this event with my Cathy’s Classic Handbag. It is made with less than one skein, so you can reach into your stash. I even provided two options for handles…I really like the wooden round handles, but reality…I enjoy crocheting and getting to the craft store or even ordering on line means I am not finishing it the same day I start, so I provided a crochet handle option too. (If you want to learn how to attach the wooden handles, I have some instructions to help you here).

This handbag was inspired by one of my students. Cathy always has a smile and carries herself with a rural, country chic charm. She brightens the room no matter what her day may have contained, and to get all dressed up I could see her with this classic style.

Cathy’s Classic Handbag by: Linda Dean

A classic handbag that is fast to work up and has a lot of charm. A bit of stretch and a bell shape add to this great purse. With optional handle options you can utilize a simple round wooden handle or crochet your own. 

Skill Level: Advanced Beginner

Finished Size Approximately: 7”x 16” (18 x 40.5 cm)

Gauge: 12 sts /16 rows=4”

Materials List:

  • K/10 ½/6.50mm size crochet hook
  • Red Heart With Love medium weight 100% acrylic (370yds/338m/7oz/198g) Sample color: 1907 Boysenberry or #1971 Tigerlily
  • Tapestry needle
  • Everything Mary Round Wood Handle (optional)

Abbreviations:

blsc: back loop single crochet (need help identifying the back loop, check this out)

ch(s): chain(s)

rem: remaining

rep: repeat

sc: single crochet

sp(s): space(s)

st(s): stitch(es)

yo: yarn over

Pattern Notes

The body of the bag is worked from one side across the bottom to the other side.

The body of the bag is worked with short rows.

The handles of the bag are attached to the row ends of the bag.

There are 2 options provided for handles.

Row 1: Ch 45, sc in 2nd ch from hook, sc in each ch across, turn. -44 sc

Row 2: Ch 1, sc in next 5 sts, blsc in next 34 sts, leaving rem sts unworked, turn.  -39 sc

Row 3: Ch 1, blsc in next 34 sts, leaving rem sts unworked, turn. -34 sc

Row 4: Ch 1, blsc in next 34 sts, sc in next 5 sts of the row 2 below, turn. -39 sc

Row 5: Ch 1, sc in next 5 sts, blsc in next 34 sts, sc in next 5 sts of the row 2 below, turn. -44 sc

Row 6-61: Rep Rows 2-5 fourteen times.

Wooded Handle Attaching (Option 1)

Working along the row ends, sc around the wooden handle, working 32 sc across edge. Fasten off. (For tips on how to work around the handle, check out this tutorial)

Repeat on opposite side.

Crochet Handle Attaching (Option 2)

Ch 1, working along the row ends, 4 sc in first row end, working in a spiral (meaning that you are working in the round but are not joining the round, you continue working in the next stitch) to create a cord, blsc in the first sc worked in the end row, blsc in each sc until the cord measures about 14” (35.5cm), sl st to opposite end row from the beginning of the cord, sl st next 3 sts of cord to same st, sc in each row end across to beginning of the cord, fasten off.

Seaming

Folding handles together, whip stitch the open ends of the purse leaving between 1-2” open from the handles.

Weave in ends.

Crisscross Mesh- The Easy Top

I have long found that using a fine weight yarn and a large crochet hook can create some stunning effects, and my latest design is no exception. The Crisscross Mess Top can be found in the Spring 2018 Special issue of Crochet! Magazine Boutique Style Crochet and I think that you will really enjoy it.

photo courtesy Annie’s

The yarn used for this design, Juniper Moon Farm Zooey DK, is a cotton/linen blend at 60%/40% respectively. It has a slightly uneven texture, being that it is a bit thinner/thicker in some places then others, but not drastically. It is not necessarily the first yarn I would have thought to design with, but I am very happy with the results. Find a more in depth review and thoughts of this yarn from my post in June 2017, here.

The design for this top is really pretty simple. It is rates as easy, and honestly….it is. Basically the large hook and fine yarn do all the work. You simply work 2 different size rectangles, and sew them together, then add sleeves. It only utilizes one crochet stitch, so it is pretty straight forward, yet has a really nice effect. There is no need to worry about shaping, or anything of such, the sleeves use what is referred to as short rows. Short rows are basically the act of not finishing a row, leaving stitches unworked, then when returning to work a row in the same direction you then work the unstitched stitches. Basically if you have 10 stitches in row 1, you work 5 stitches in row 2, as a result there are 5 stitches in row 3, then in row 4 you work the 5 stitches of row 3, and the 5 unworked stitches in row 1, resulting in 10 stitches. Really this is the only technique in this design that is not “repeat Row 2”.

To help the fabric open up, I actually hung it up when I blocked it. The weight of the wet fiber helped pull the stitches open even more than the stitches themselves. This helps give it a casual chic look. However it is definitely not a “wear it alone” type of top. You want to have something underneath, so that effectively makes this a statement type piece.

So if you are looking for a bit of a current fashion statement, give this design a try.

Changes that Lead to Opportunities

IMG_6940.1

Shards Tunisian Shawl

ScannedImageI may have mentioned that my local yarn store, Lofty Lou’s recently sold to a new ownership group; a group of 26 ladies that loved the store and wanted to ensure that it did not close. This change in ownership has given me many opportunities to see the industry from different points of view. I have been teaching various individuals how to crochet as well as various aspects of yarn, all while observing the challenges that running this small store take on.

One of the interesting opportunities has been the need for the store to have crochet samples. They wanted to feature my designs, but I had no patterns in the particular yarn they had in store. Fortunate for me that they wanted a new design worked up in Mountain Color Yarn, so I was eager to undertake a new challenge; what could I create with only two skeins of Crazyfoot?

IMG_6925.1

Shards Tunisian Shawl

So after some playing the Shards Tunisian Shawl was born. It utilizes Tunisian stitches with short rows for an effect that is stunning. The varying of the stitch types in the sets of short rows allows the color way to offer a completely different appearance, almost like it is dancing. I had the unique opportunity to meet the dyers, and found that one had a connection to my little home town; her son owned a restaurant on Main Street, and made the travels from Montana to Northern California to visit her new grandbaby. So in a sense I feel this yarn has a local connection, and I always like to support local.

I have released this pattern for sale on line (Ravelry & Craftsy), while the sample adorns the store and brings attention to the beauty of the yarn. If you feel inclined check it out. I am very pleased with its results…if only the photographs truly captured the personality it has, you could fully appreciate its wow factor.