Fronts & Backs, the Confusion, the Difference

ScannedImageSometimes it can be the simplest things that trip us up; this is even true in crochet. Sometimes, it is just because we are overthinking things. This can be true when utilizing the front and back loops of a stitch. In crochet the standard fall back for all stitches is to work through both loops that are created at the top of a stitch, so if a pattern does not specify anything you are assumed to work through both loops, however there are times you do get a noted distinction….front loops and back loops.

DSCF1093

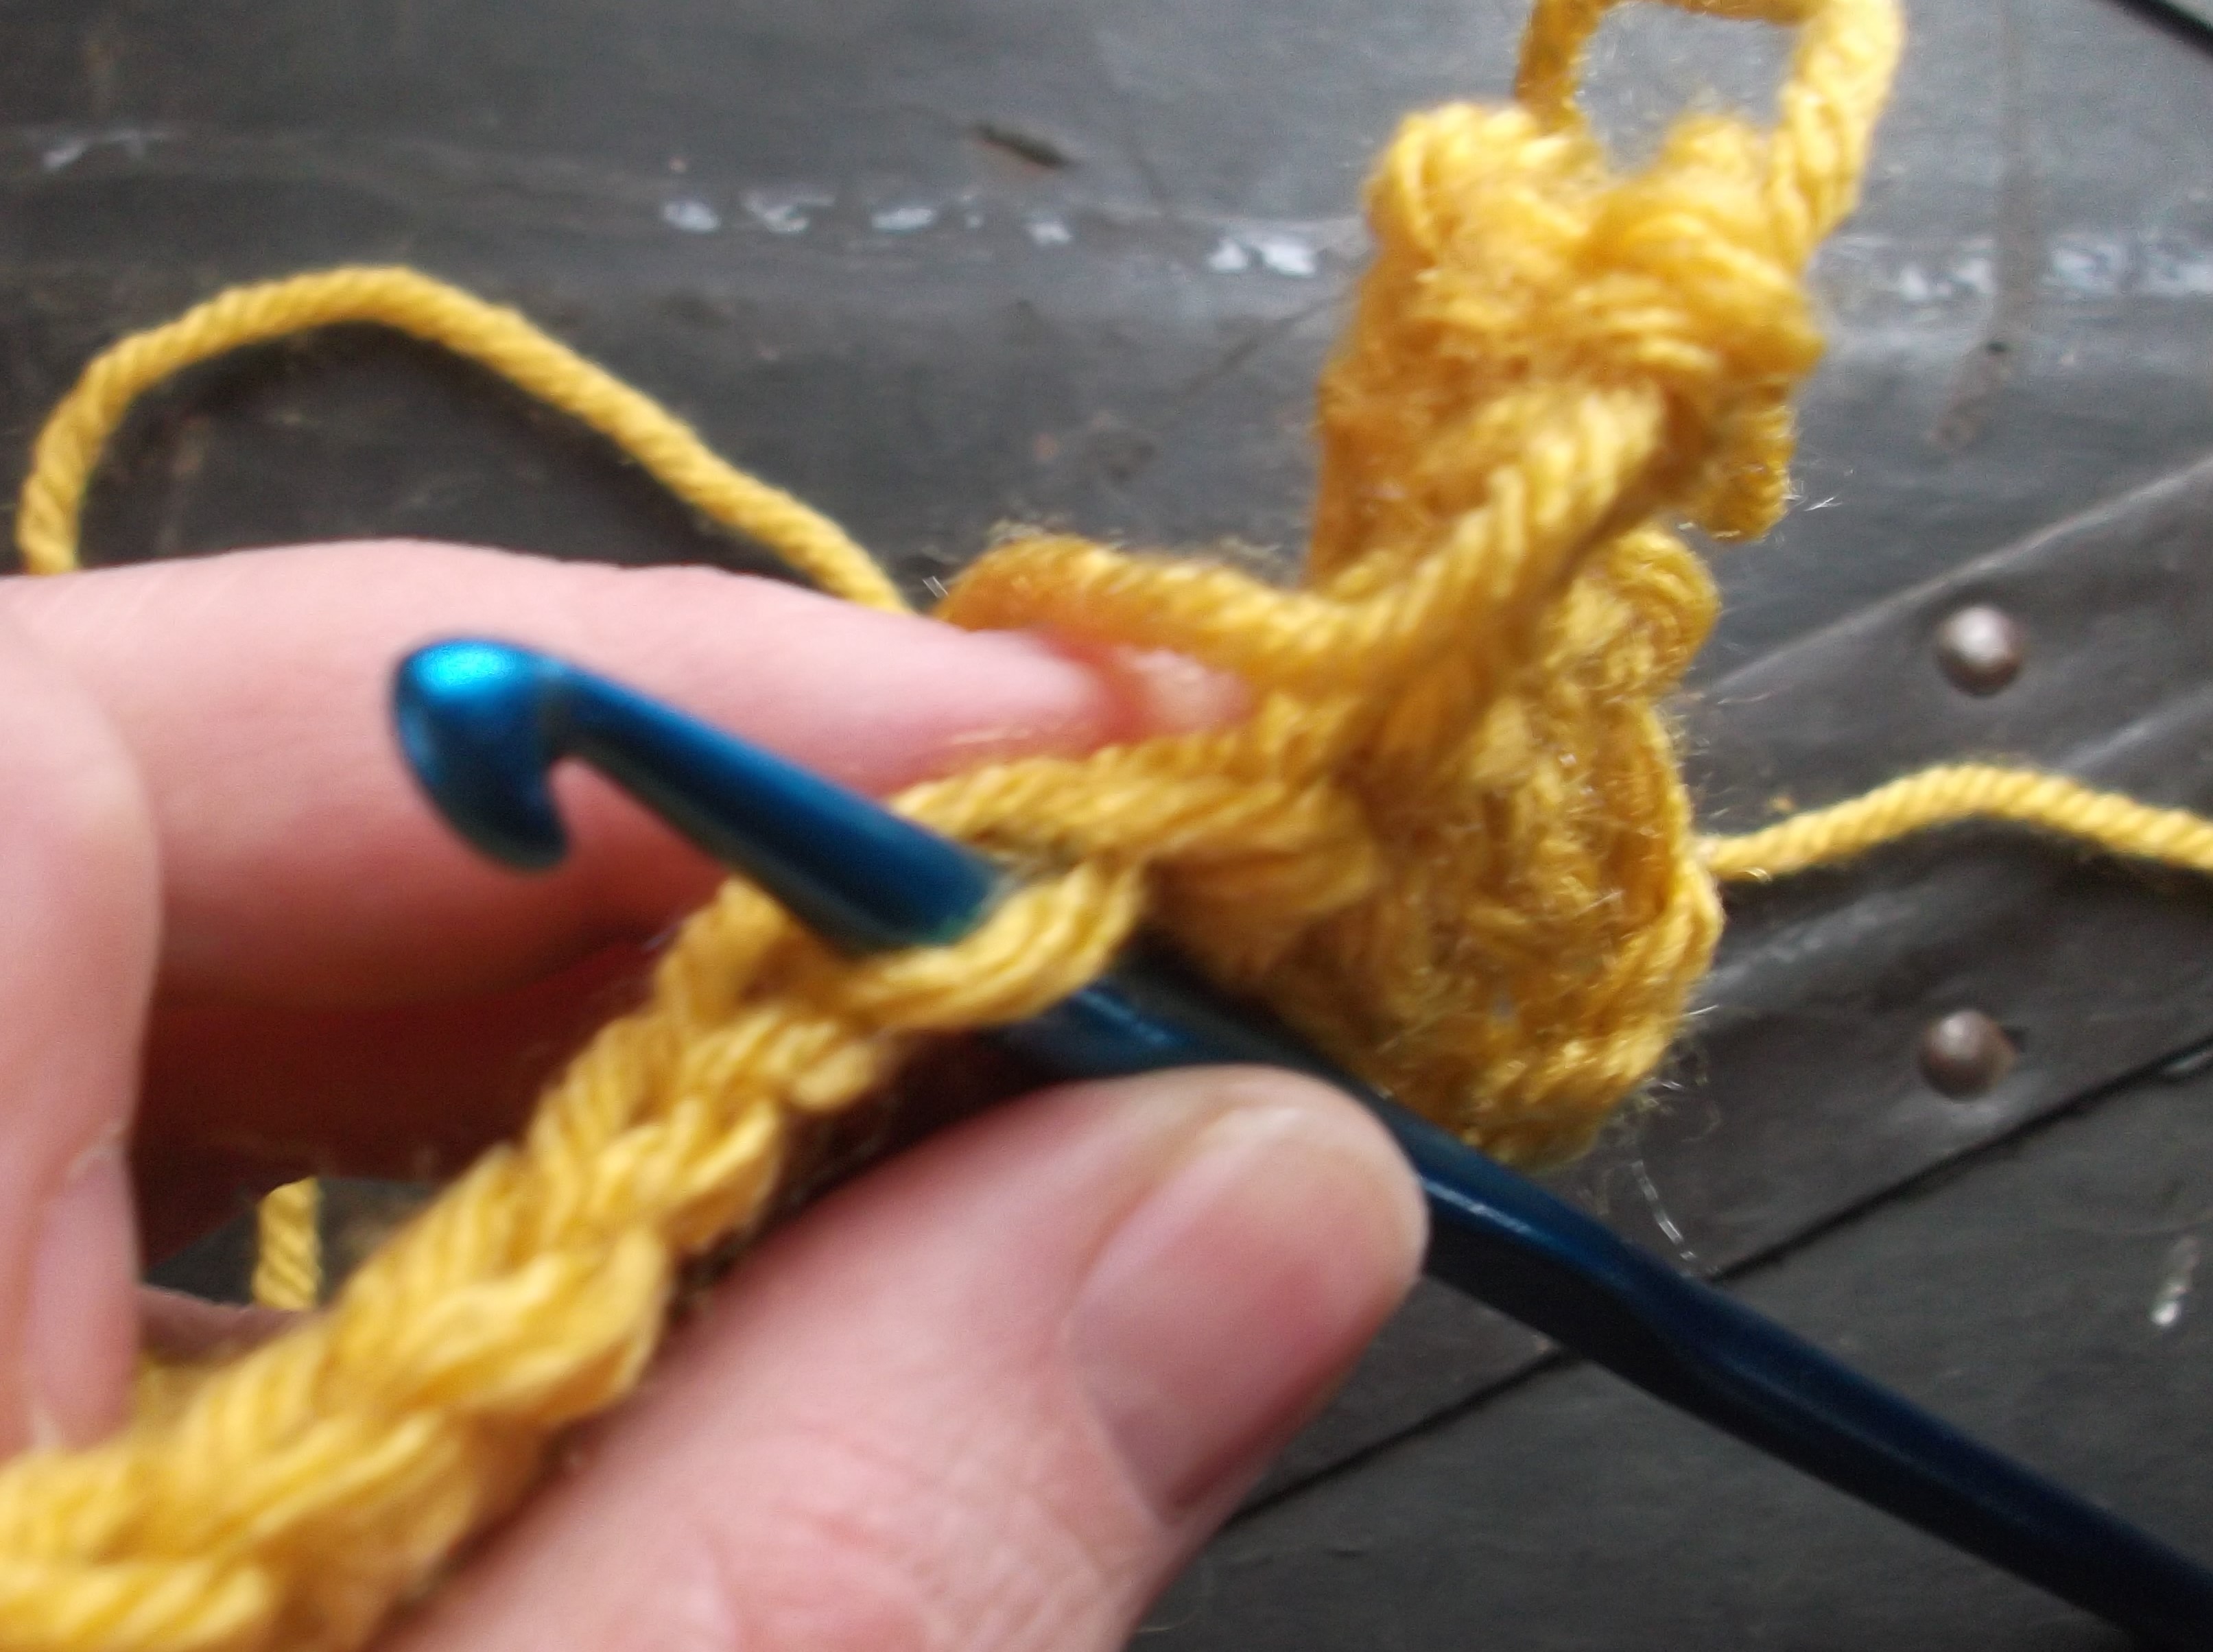
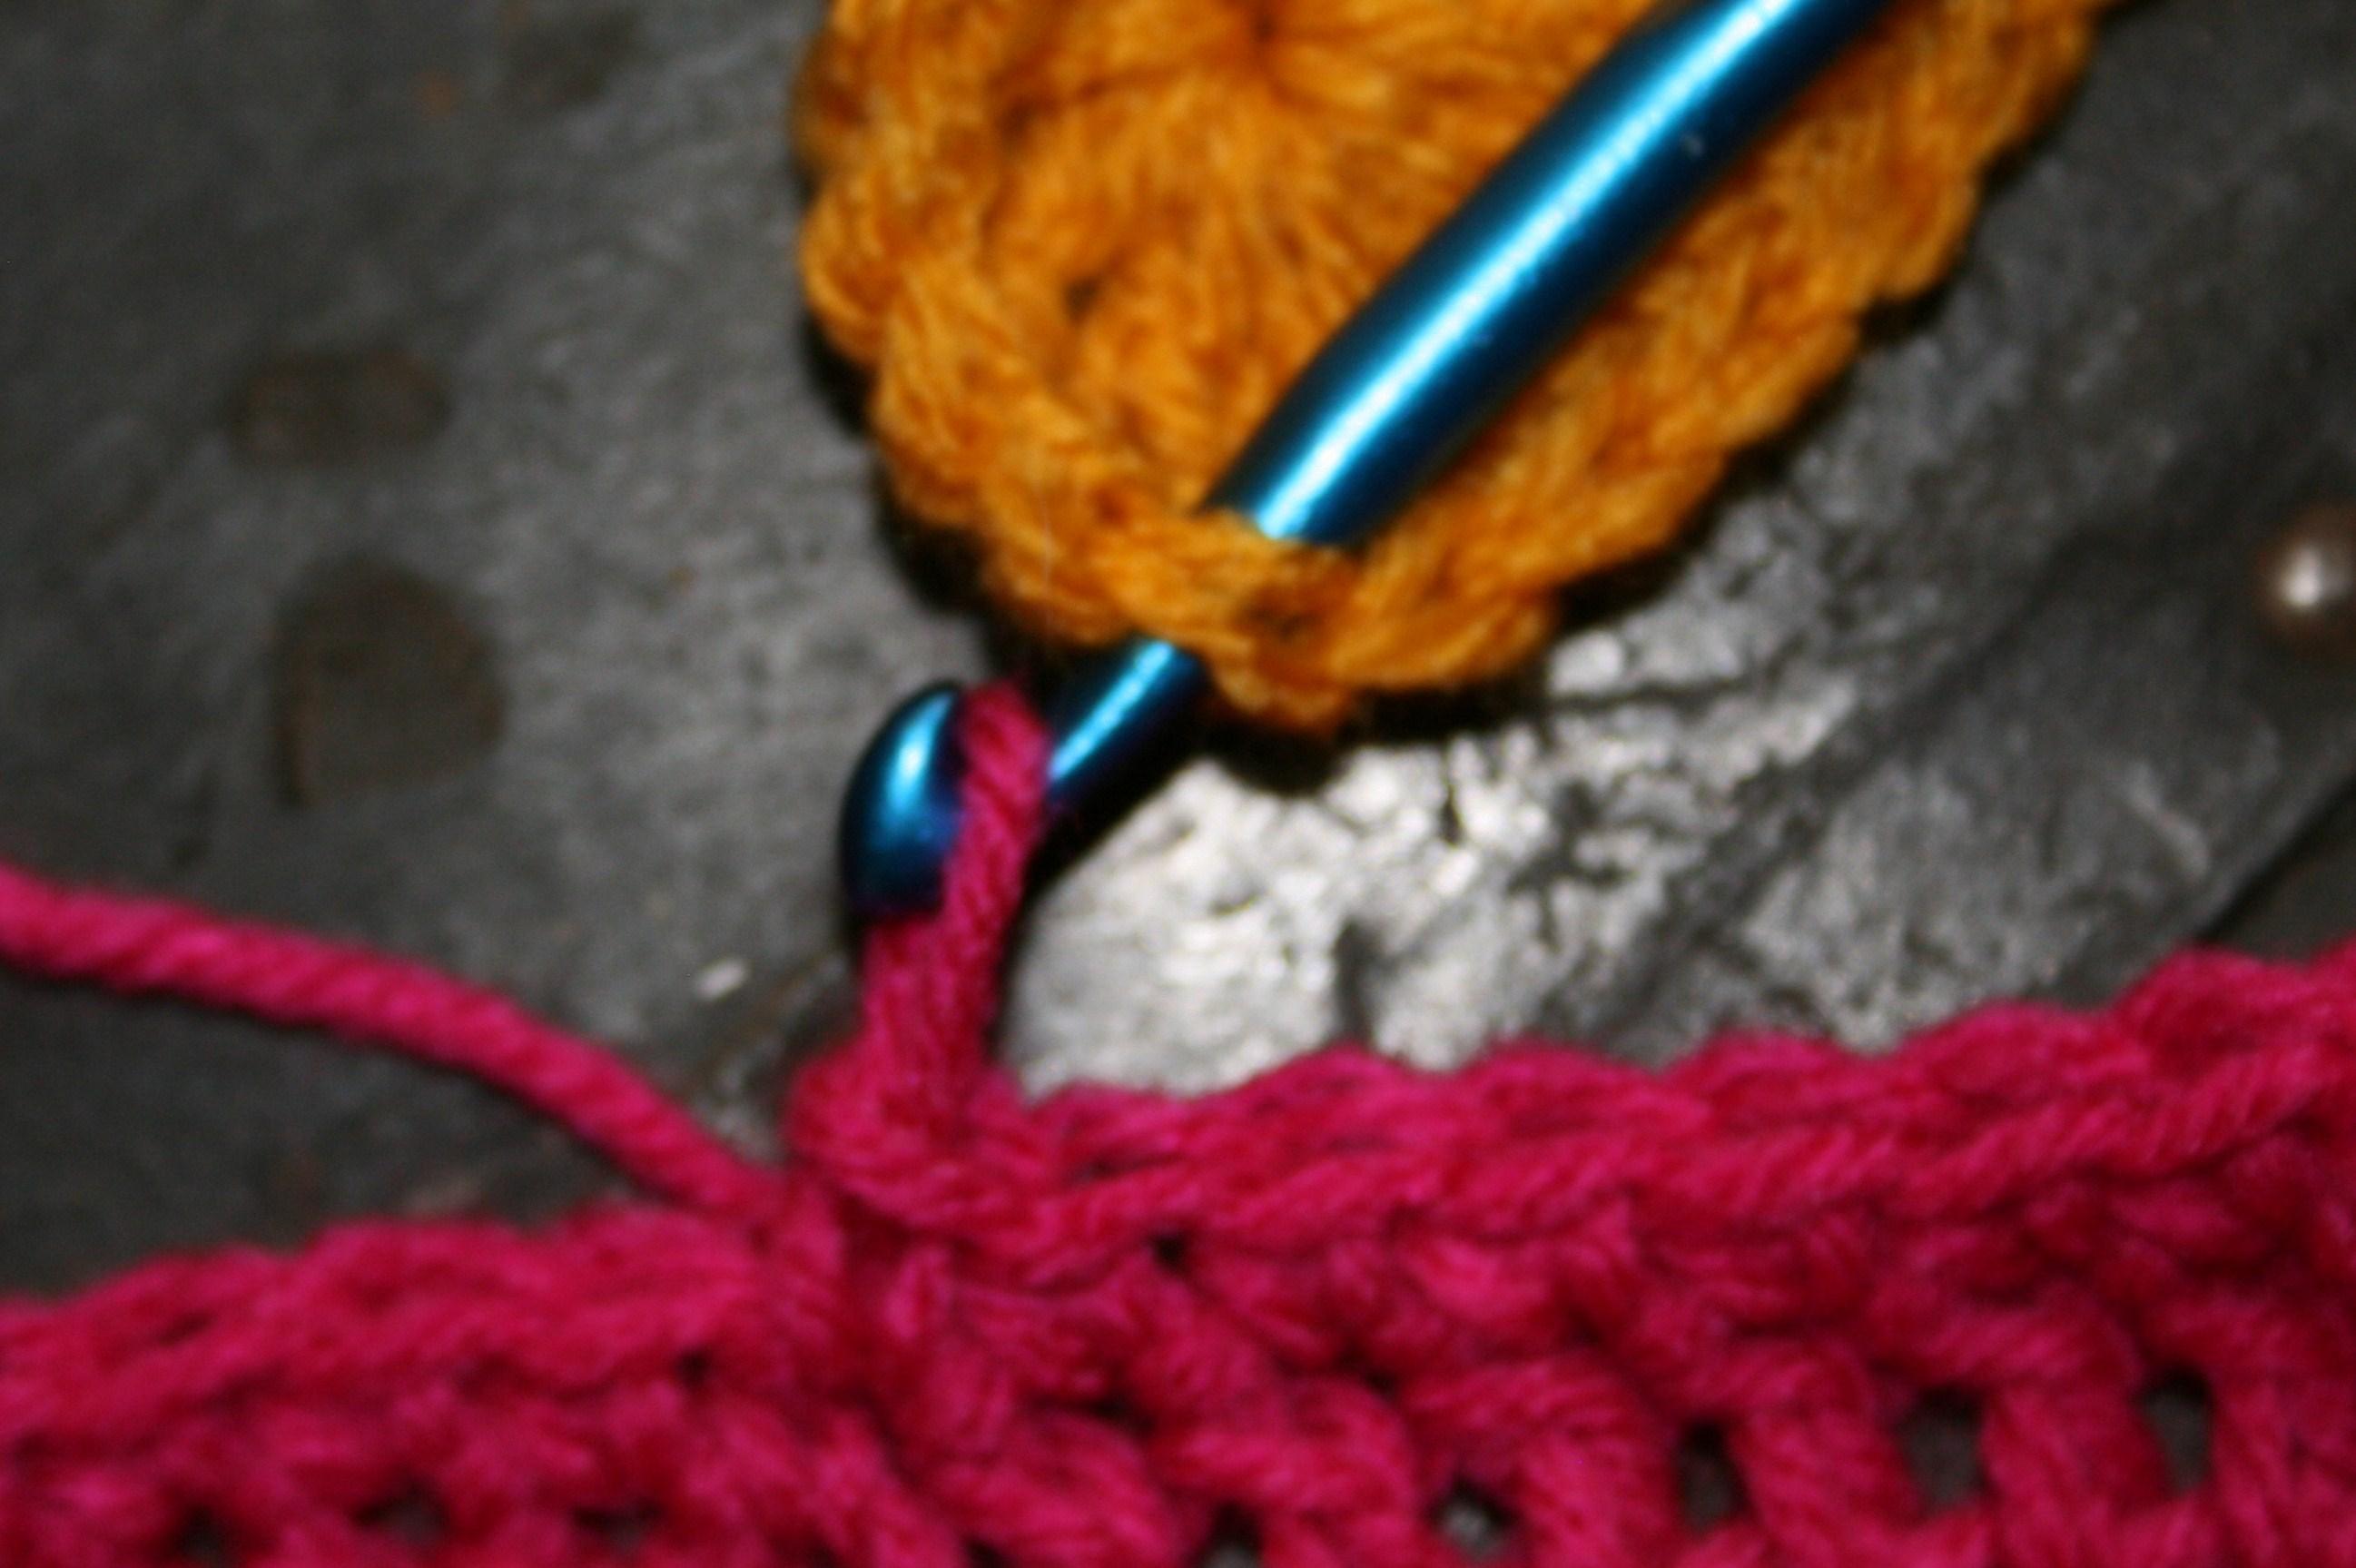
Working in the front loop, notice how the hook comes from the bottom of the loop upward.

It almost sounds too easy. Working in the front loops across….working in the back loops across….But I will admit, my brain sometimes holds onto the prior position of the loop, instead of where it really is right now. I think we have all had these moments. Our brain is a little groggy, a little overloaded, and a little set in its ways, so it just almost quits processing the information. By this I mean, when you work a stitch, the loop on the top closest to you is the front loop, and the on top furthest away is the back loop; when you turn your work, these same principles still apply, but now the names you just recognized for the loops to row before has switches. 

The position of the loops applies to the row you are currently working into, not the position of the loops on the stitch just being created.

DSCF1095

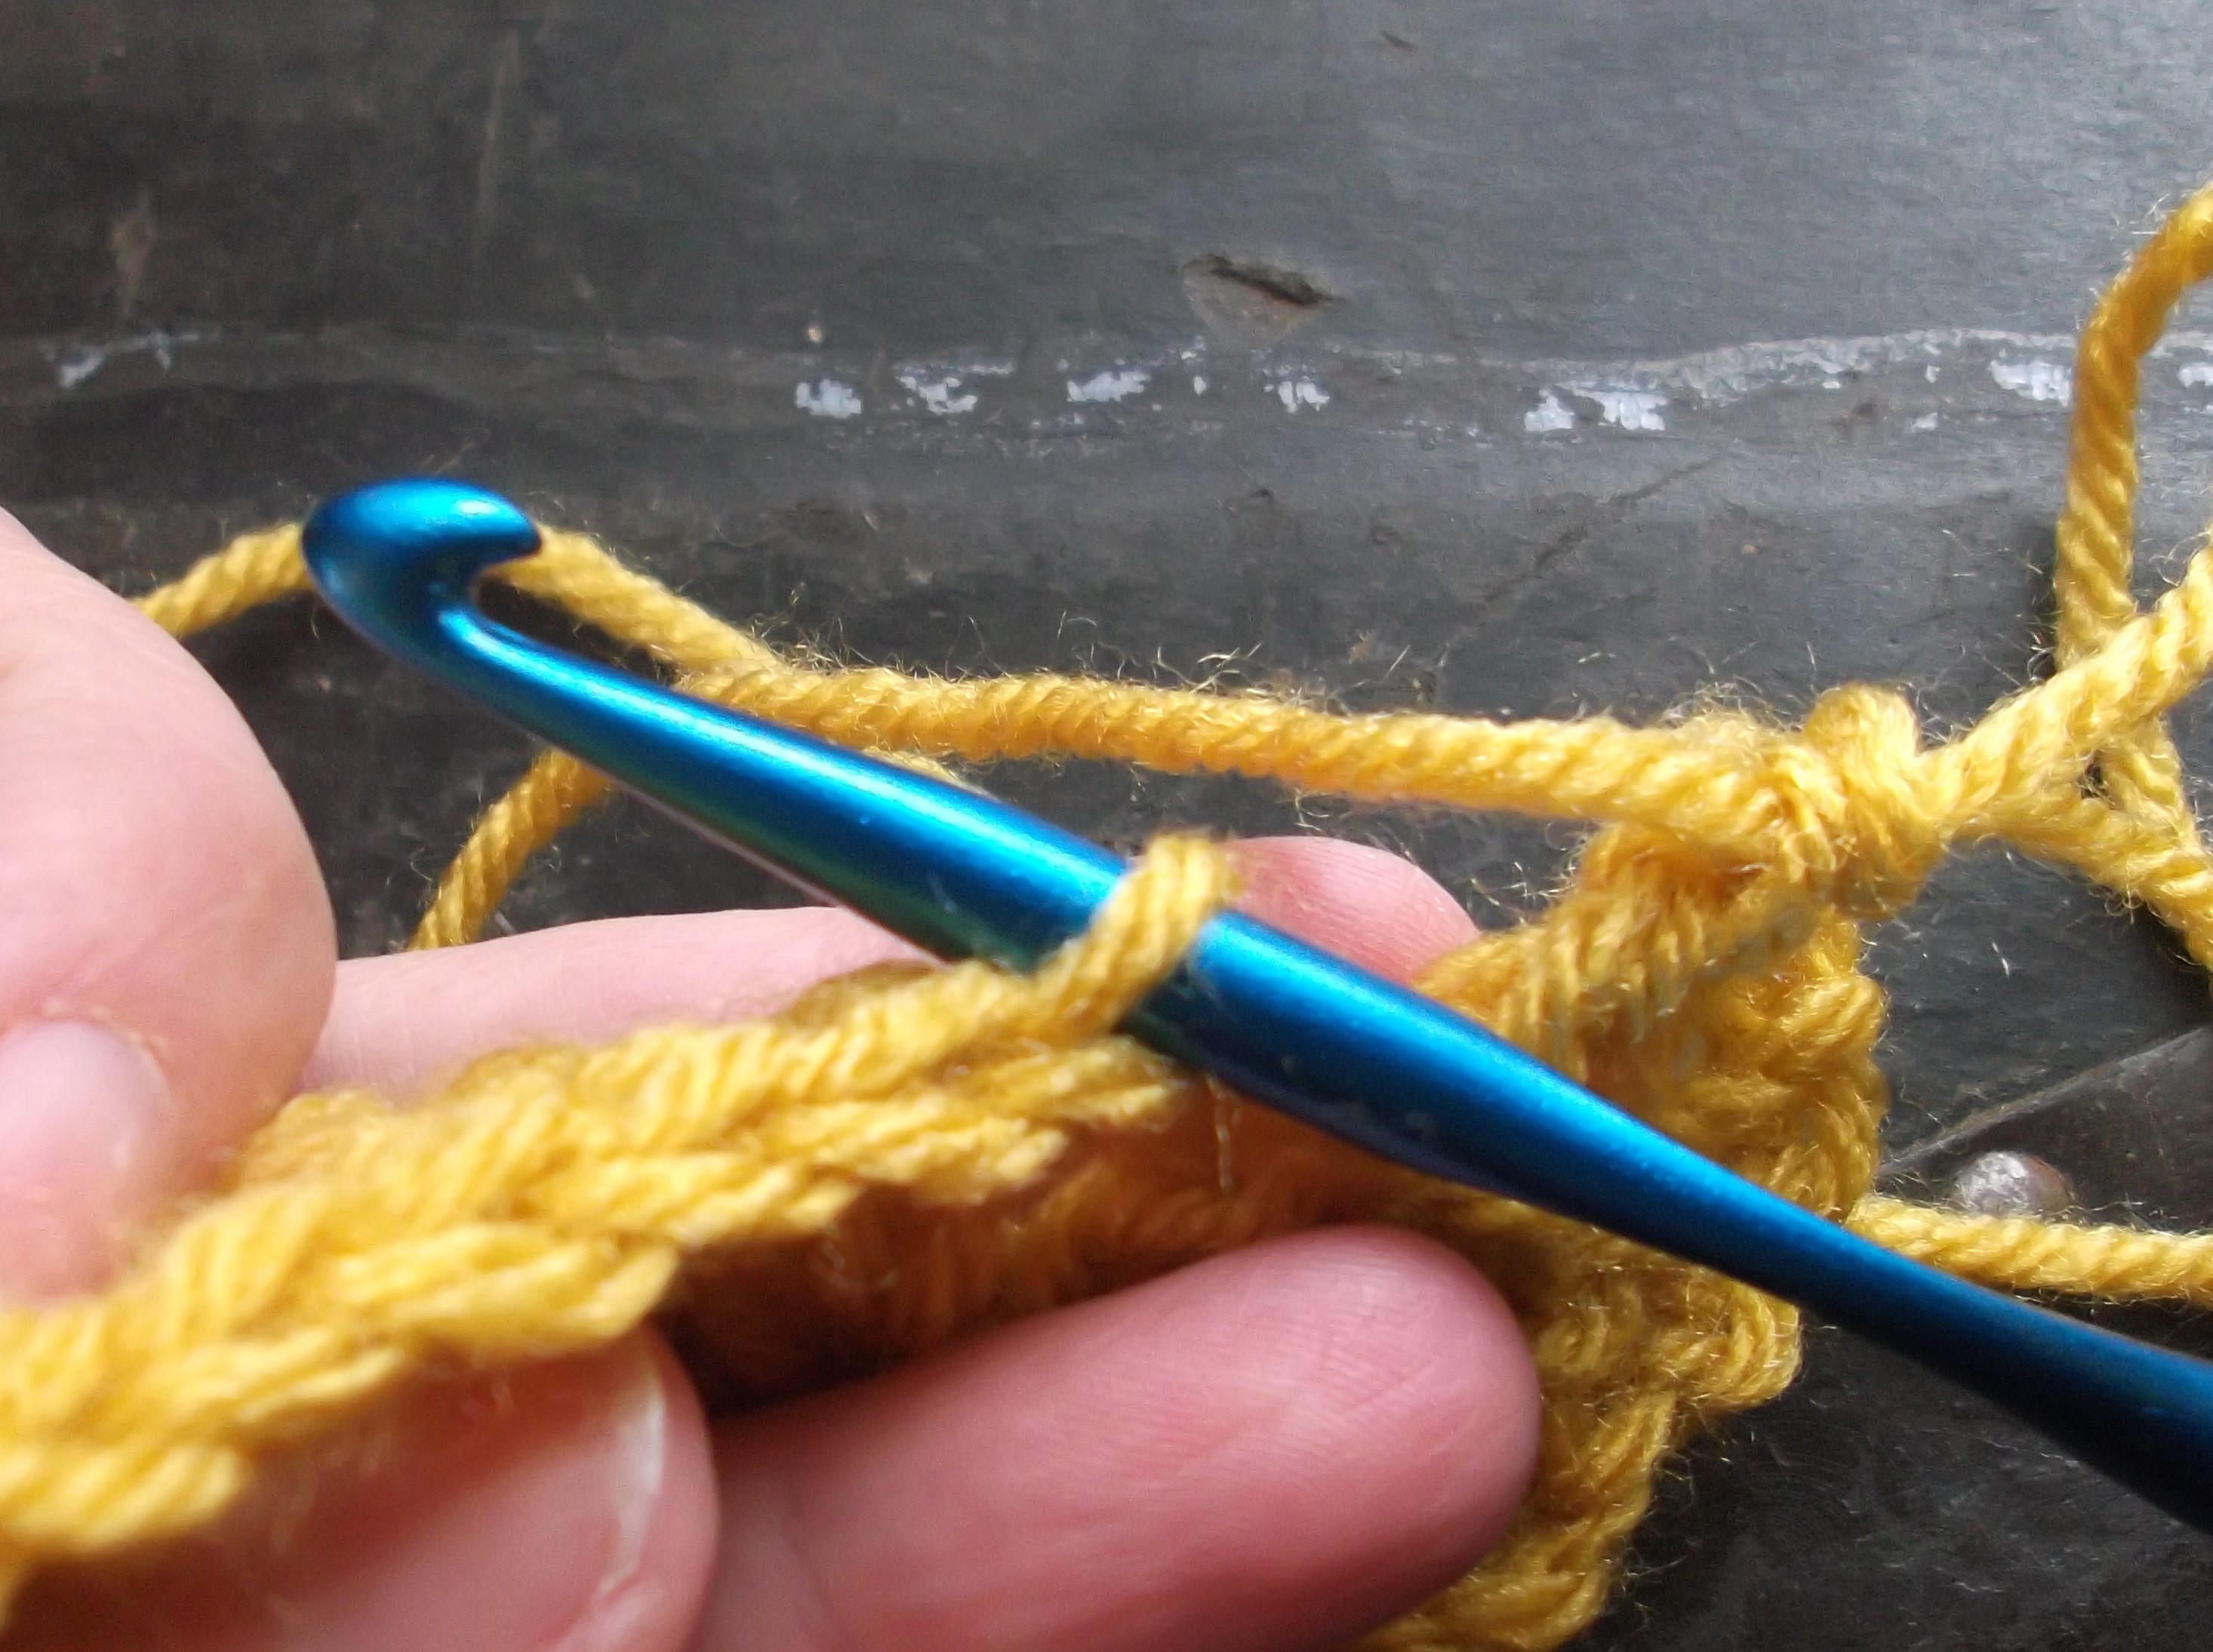
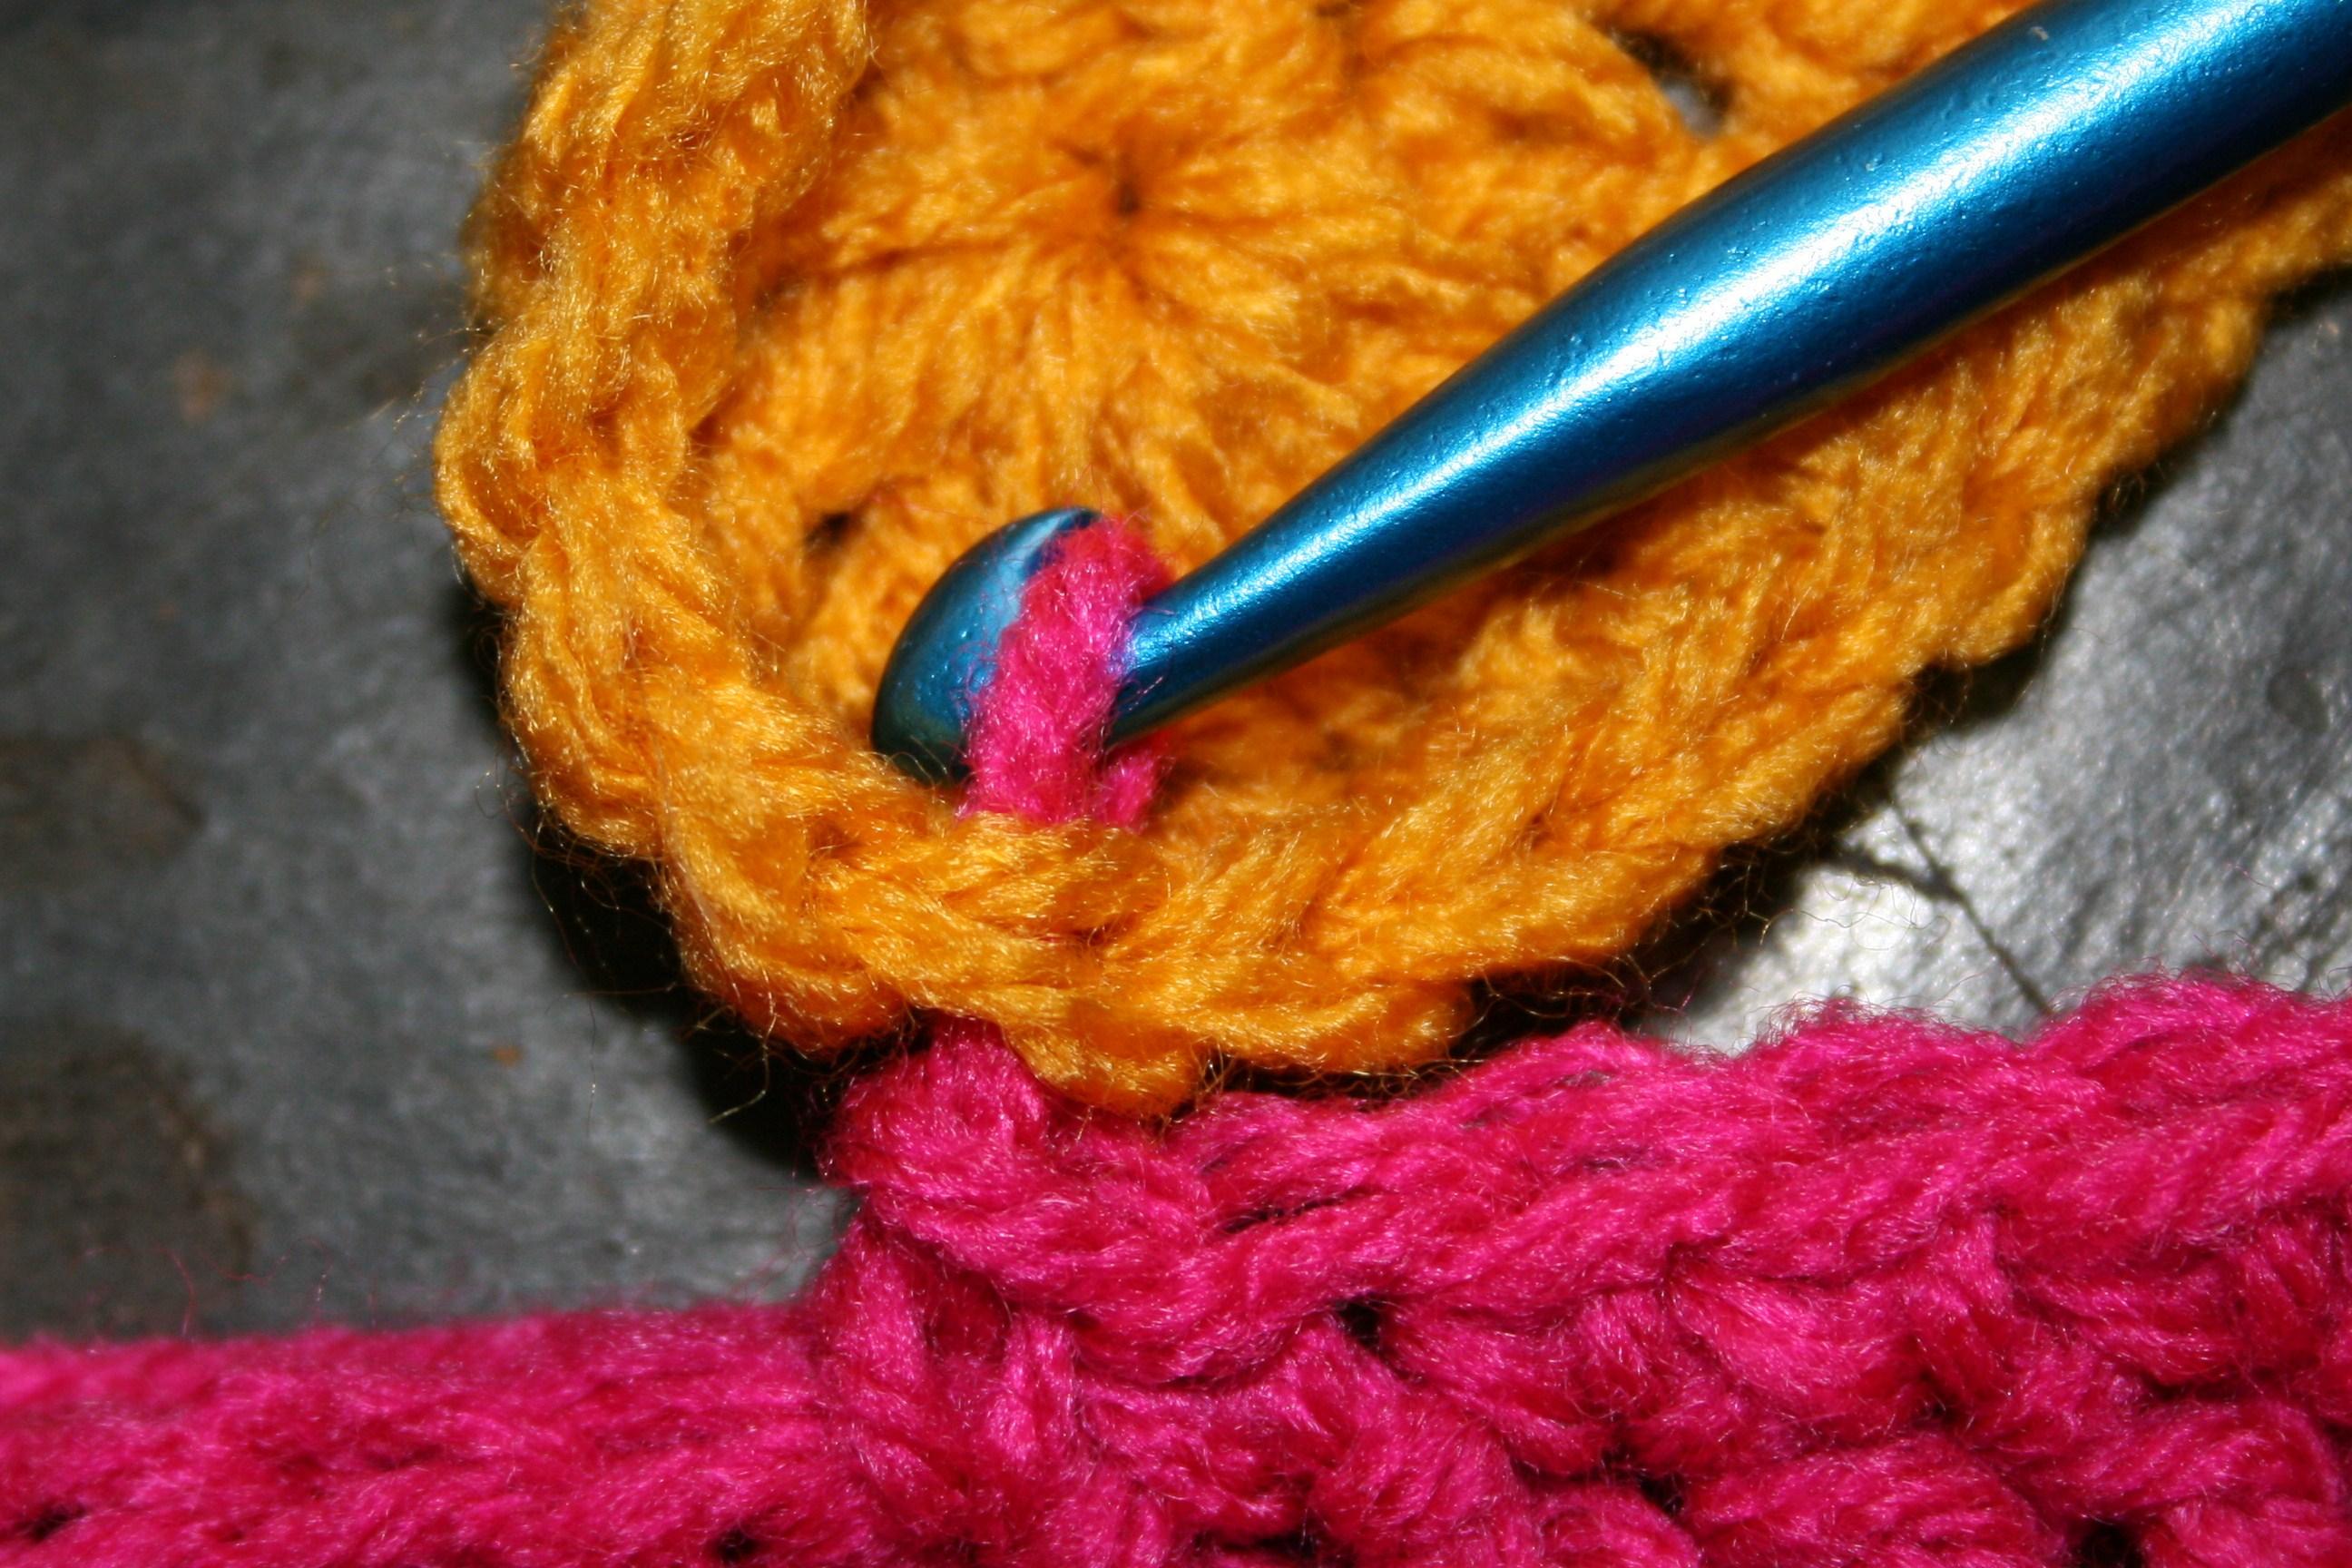
Working in the back loop, notice how the hook comes down from the top through this loop.

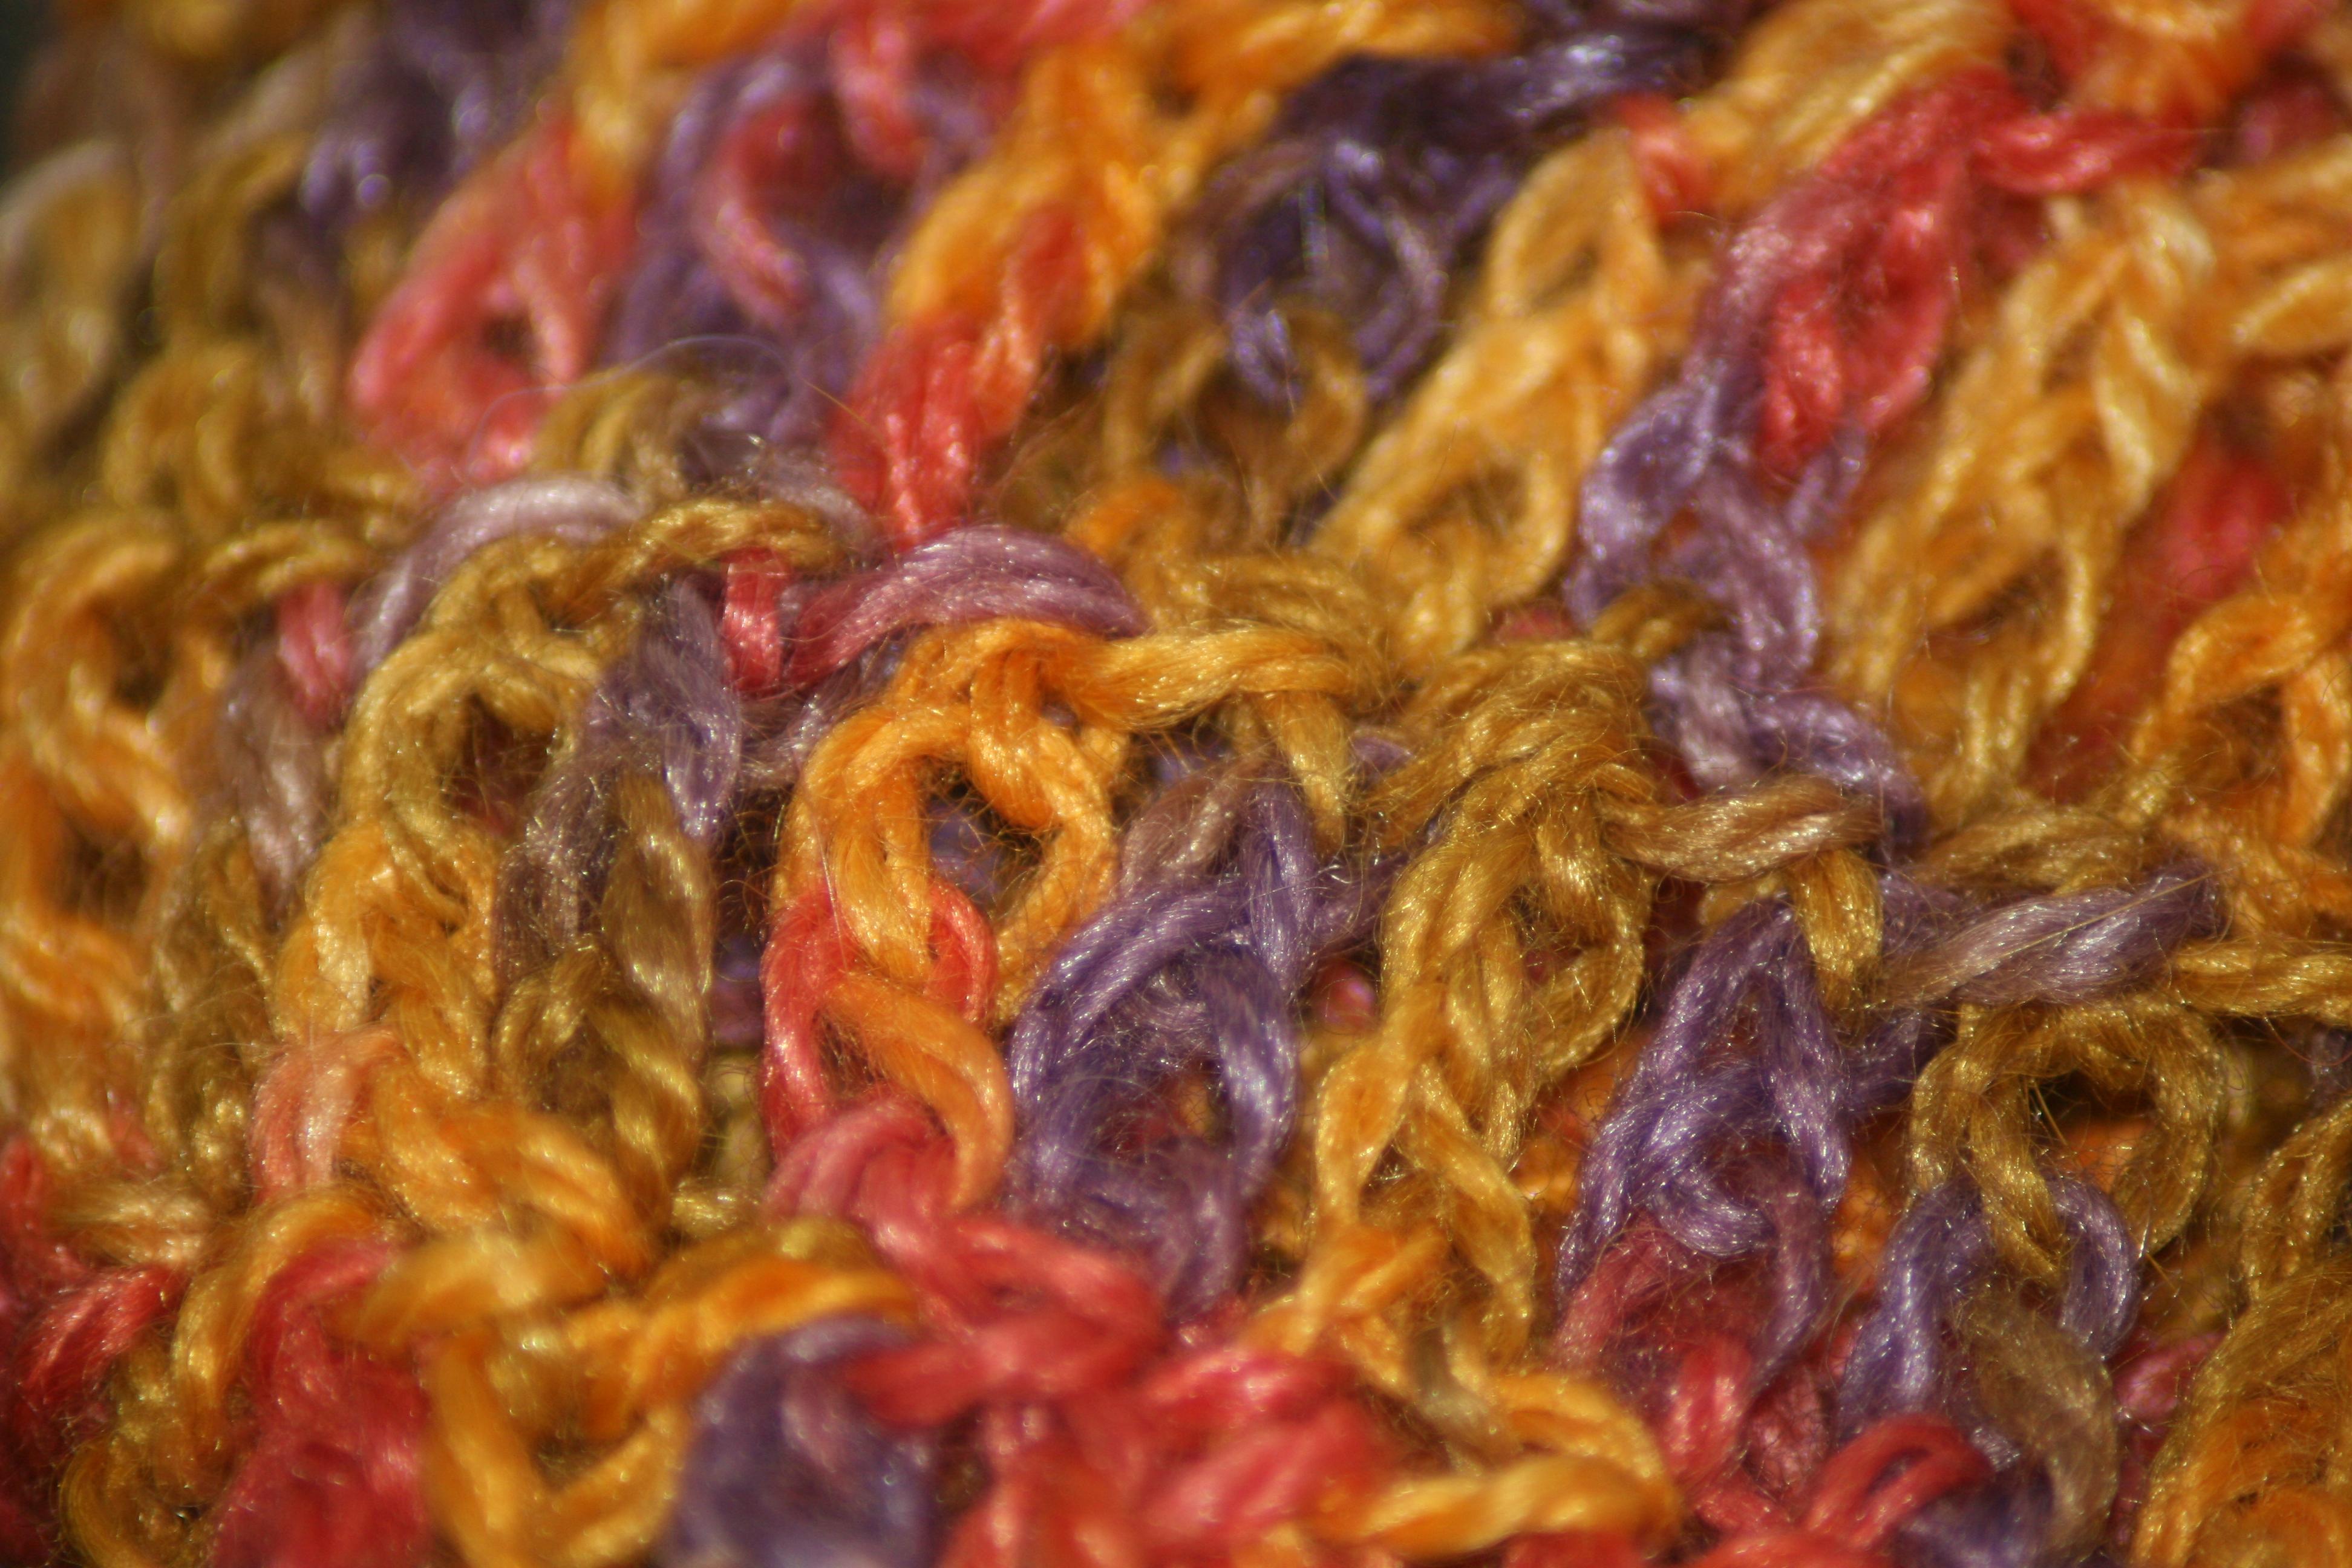
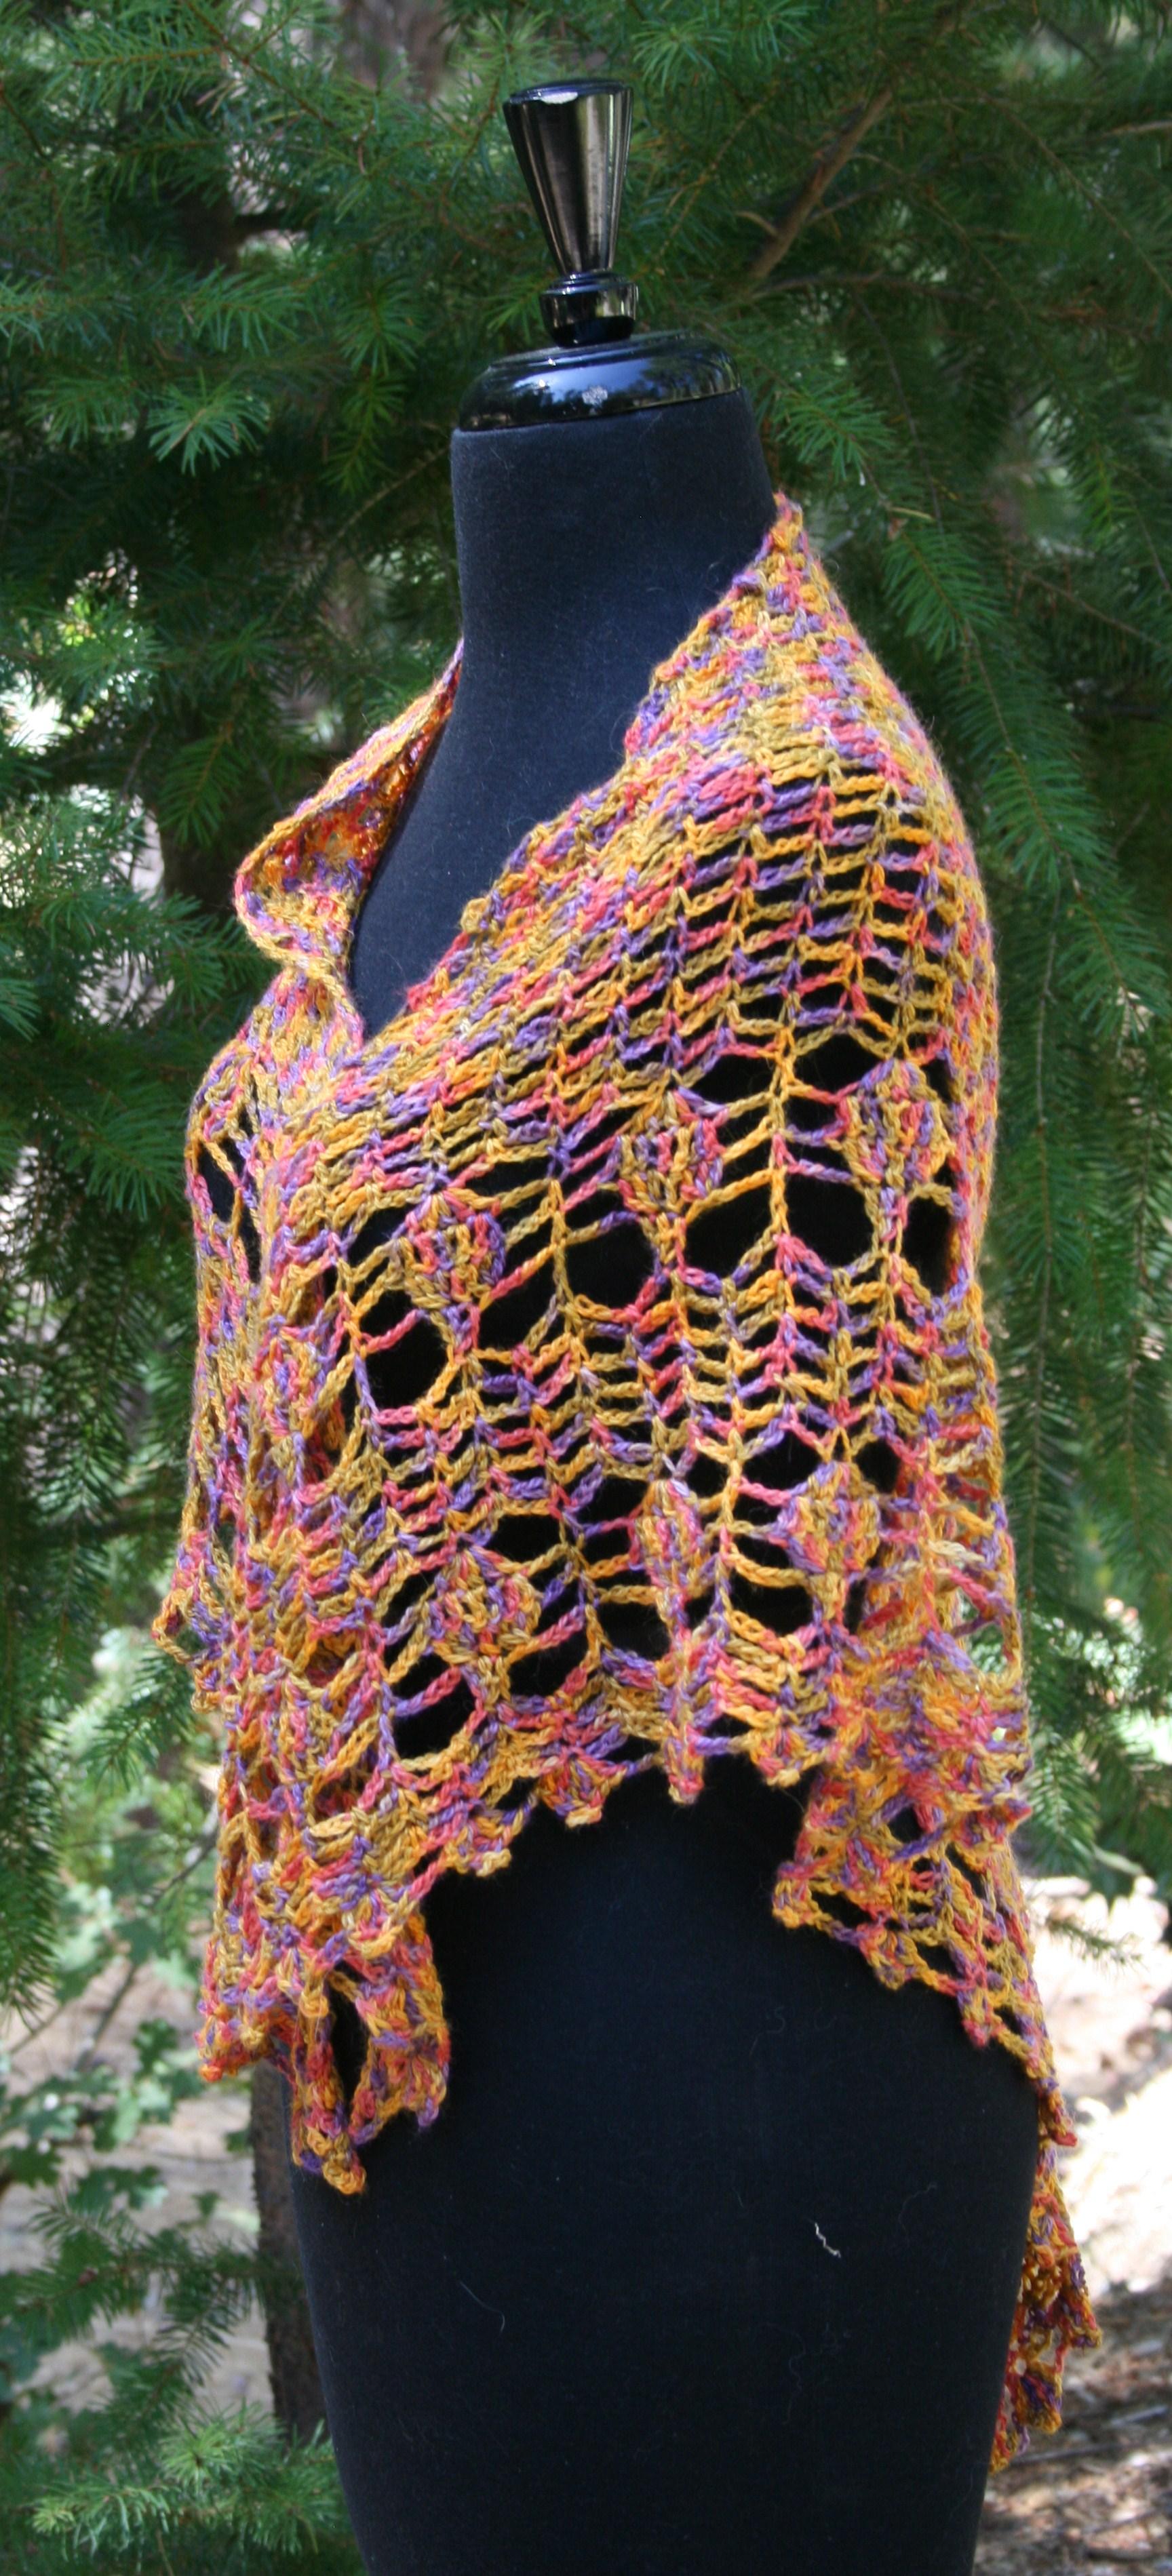
This does become an important distinction, as it gives the fabric a different look and structure. Working in the back loops of a row give a more textured feel to the fabric as well as creating a little more stretch. While working in the front loops adds a simple decorative element and a little extra height to the fabric overall. The reason for these differences is actually the nature of crochet stitches. If you really look at a row of stitches, you will find that they actually are a little tapered, with the right side facing you the back of a stitch will be a little taller than the front. It is this slant that creates the ribbing effects of some stitches, and the decorative effect of others.

DSCF1089

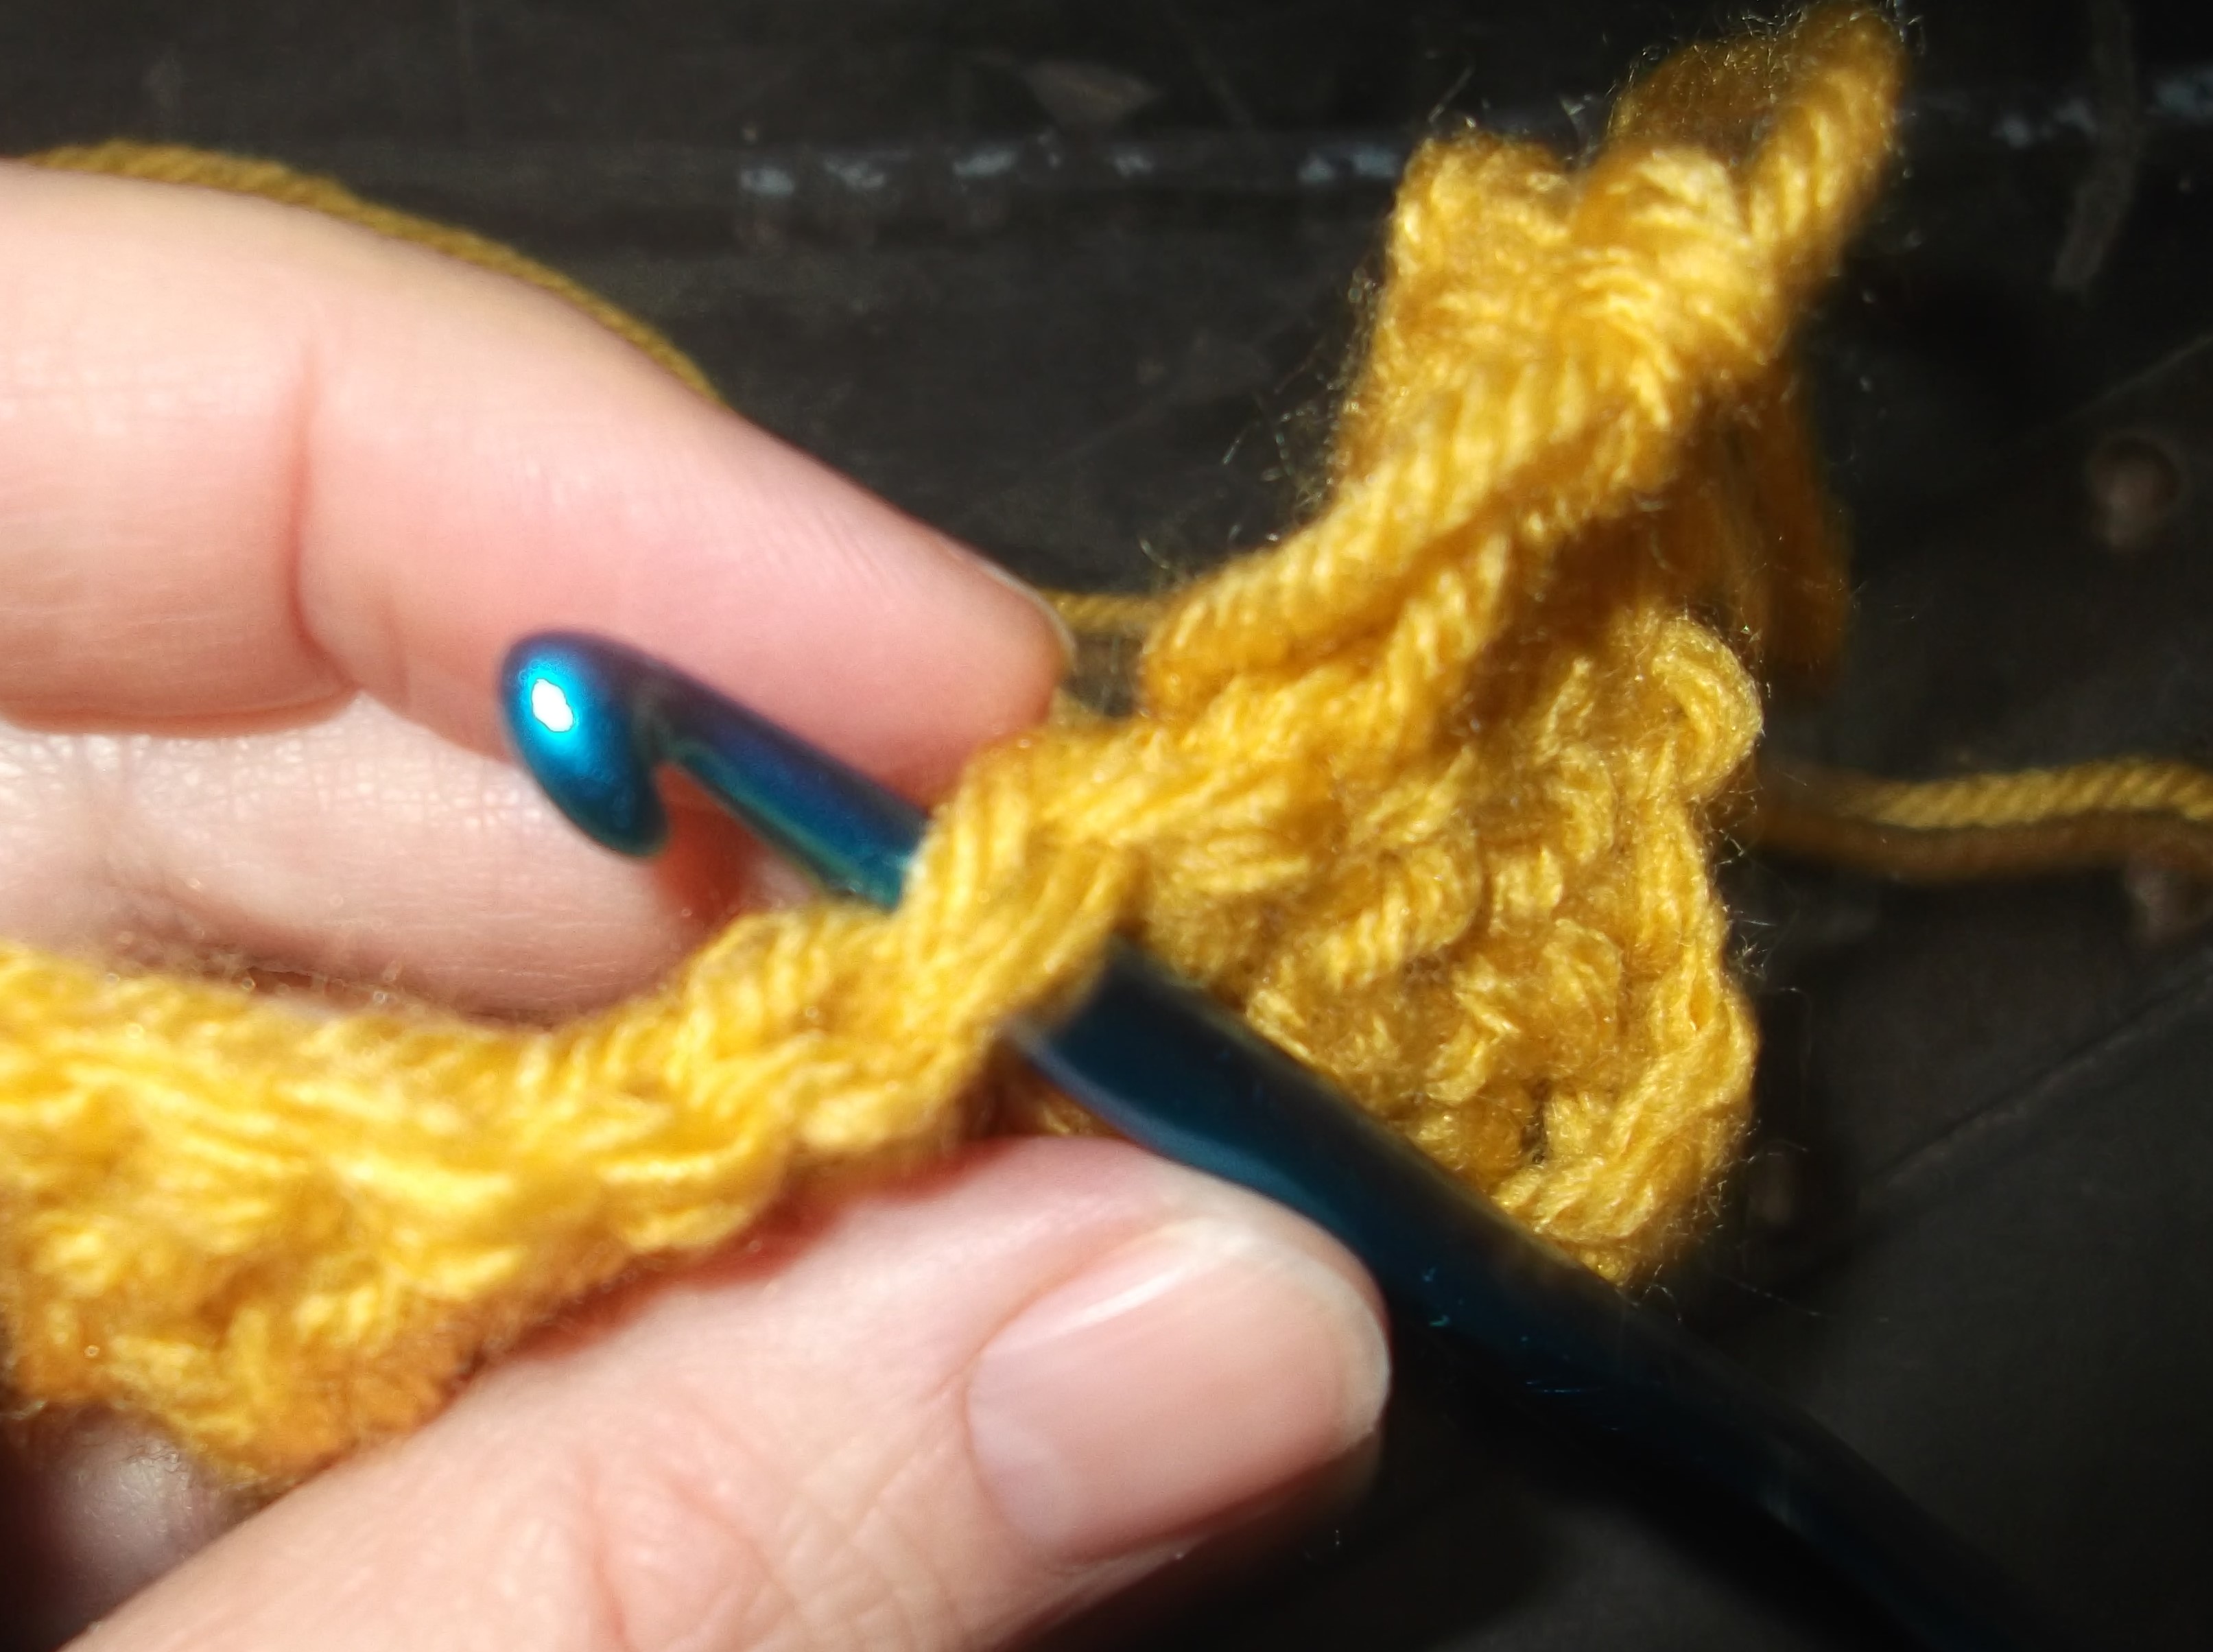
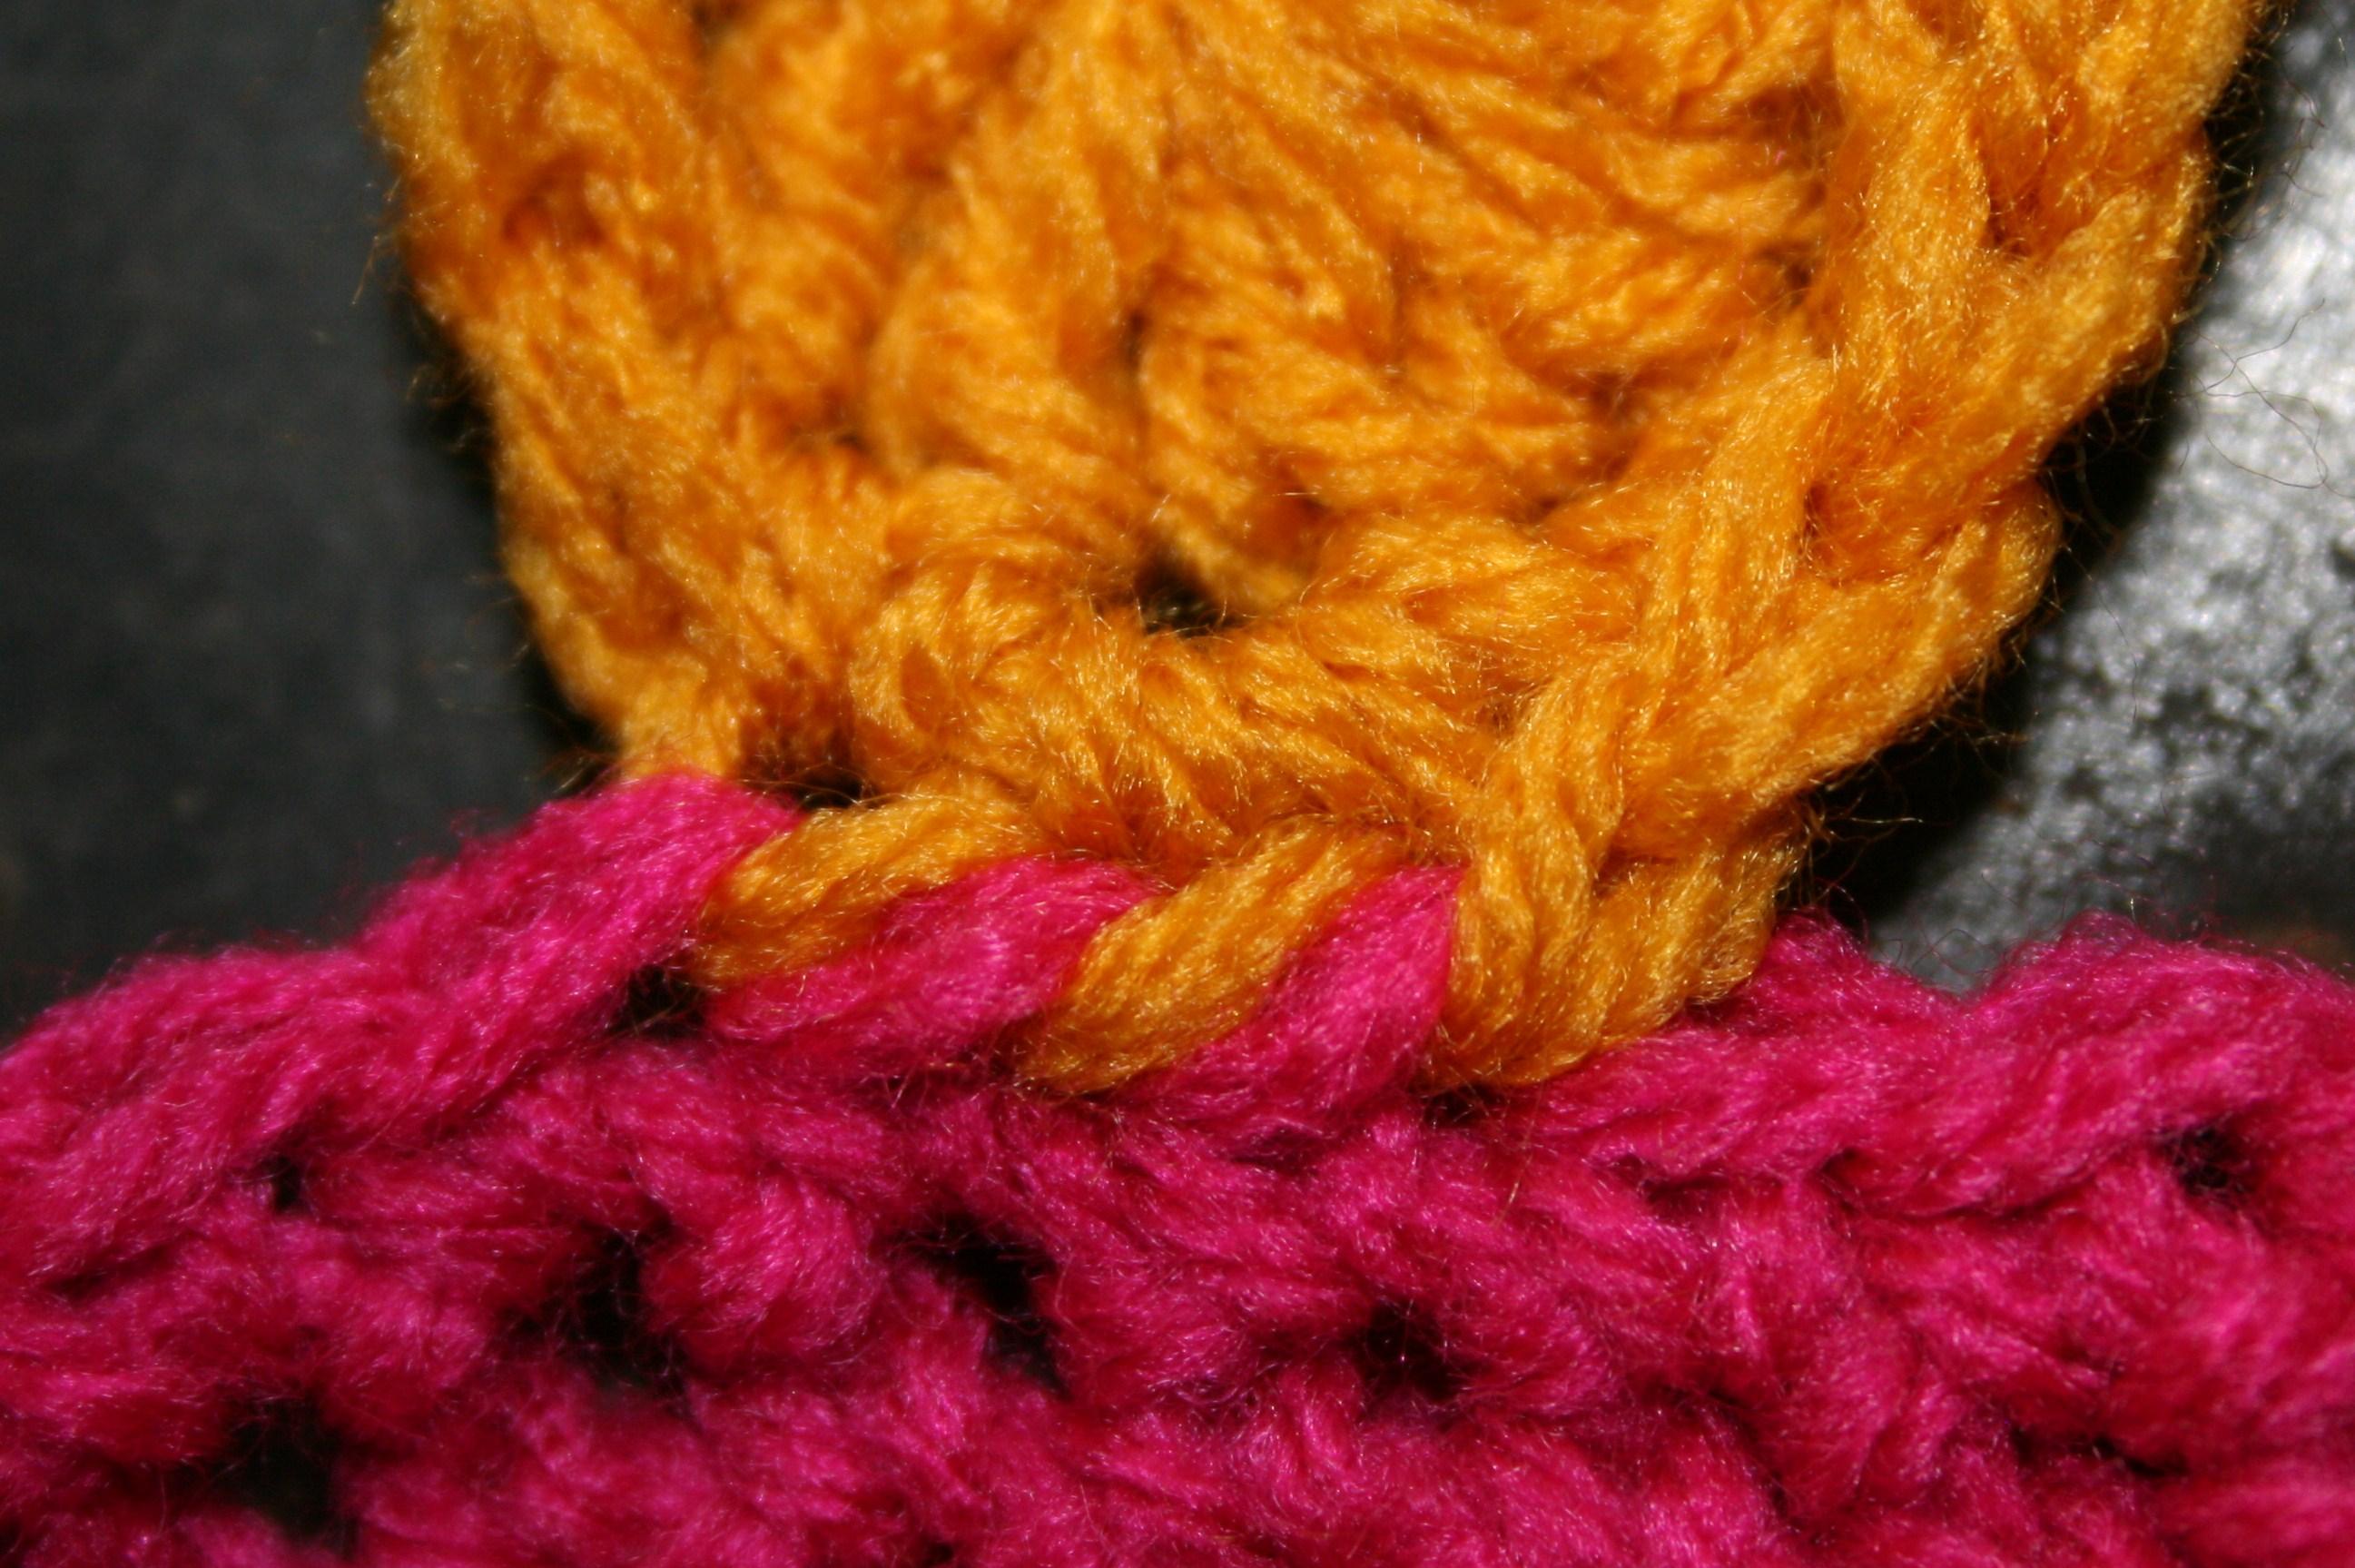
The standard method of beginning a stitch, if not otherwise stated, working under both loops.

Just keep in mind, that we all have those days, so if your fabric doesn’t look how you have expected, revisit if you are placing your stitch in the right location; it can make all the difference. 


Sometimes It Is the Basics That Make All the Difference

ScannedImageIt is interesting how sometimes you overlook the simple. I always think of it as a challenge to see if there is a new way I can use a crochet hook; create a new approach to an old technique or combine pieces of several different techniques to create something different. However, sometimes it is just a simple chain stitch that can make the difference.

IMG_7297.1

Crossroad Leaves Shawl

Everyone that has used a hook has created a chain. It is the foundation to the beginning of almost every piece of fabric that a crocheter creates, but can it create a fabric its self? Of course it can.

In my latest design, I basically stumbled upon using the chain in this manner. I was using a lovely yarn, which had a very pretty, yet short color repeat. I wanted to get an effect of color pooling, or at least spans of the same color. Most crochet stitches were unable to aid me in creating this effect, as each stitch would use enough yarn to have more than one color in a stitch. Tunisian crochet allows for the color to work this way more, but I wanted a fabric that was a little more fluid. So I began to play.

Sometimes when I am attending an event of one of my children, I bring along a yarn that has no particular project and play with various stitches as a visit with other parents or cheer my child on. This was the case with this design. My fingers almost mindlessly began creating chains stacked upon chains, and I was really drawn to the result, from it Crossroad Leaves Shawl was born.

IMG_7280.1This shawl is worked from the center outward with a simple stitch repeat for the main fabric, and has two bands of my rendition of leaves, and edged with smaller “leaves”. Overall it has a beautiful drape, and feels great in the hand. It is actually a one skein project, using Lisa Souza Dyeworks Baby Alpaca Silk Petite, the color way is a limited edition (Rhinebeck 2015), but the color way of Deep Fall, Fall Leaves, or Leaf Pile easily can fit the bill for an almost exact replica. However there are so many beautiful colors available and this pattern would easily highlight any colors that may have a short repeat.

IMG_7300 - Copy.1

Crossroad Leaves Shawl

The creation of this design does have me reviewing some stitches I may have overlooked (this particular stitch is already destined for another design), and opening my thoughts to some of the simple structure that is the back bone of crochet.

If you would like to add this pattern to your collection, you can find it on Ravelry & Craftsy.

Changing Weather Makes Me Think of Some Warm Designs

ScannedImageIt is finally beginning to feel like fall, and those designs that I made last spring are finally available to keep yourself or a loved one warm. The Winter 2015 issue of Crochet! Magazine is packed full of great designs, and I am fortunate enough to be included among them.Crochet! Winter2015

The Essential Fingerless Mitts are sized for both men and women, and have a nice stretch in the stitch work. Now I must admit, I use to wonder what the fascination with fingerless gloves was. Why only keep part of your hand warm? I hate it when my fingers are cold, and usually notice this before my palm; however I had some scrap yarn a few years ago, and was having the need to move a crochet hook. I had made plenty of hats, and was not in the mood to start another scrap afghan, so why not give this trend a try. I created a pair of fingerless gloves and immediately understood the benefits.

Essential Fingerless Mitts_Crochet! Winter2015

Essential Fingerless Mitts, Crochet! Winter 2015 Photo courtesy of Annie’s

They really do keep my hands warm, while actually keeping my hands fully functional. When I wear standard gloves I do not like to eat food, driving the car doesn’t feel as natural, I wouldn’t even think about crocheting while wherein gloves, but fingerless gloves are a completely different story. I have no problem doing almost anything while wearing them. I even would wear them while practicing at my dance class, as the room always seems to have a chill. It was a way of adding warmth to my hands while still being able to do just about anything. It is almost like having extra long sleeves. I am now a fan, and this pattern is a quick project so you can work them up as a gift for the holidays or simply as personal need to keep warm for this upcoming winter.

Brewer Jacket_Crochet! Winter2015

Brewer Jacket, Crochet! Winter 2015 photo courtesy of Annie’s

In addition to the fingerless gloves, I have the Brewer Jacket, designed with the men in my life, in mind. This hooded vest is created in the Thermal Stitch (want to learn how to work this stitch, check it out here). This stitch creates a fabric that is double layered and has an appearance that resembles being woven. I have found that if I create any fabric that you can see any light through that the men in my life consider it too feminine. This creates a fabric is dense, thus it is not the fastest project in the world, but it does have a nice even repeatable pattern that does not require a lot of attention. So you may not finish this jacket over night, but it is a relaxing pattern to follow, and ends up looking great.

I even found the button selection interesting when seeing the masculine perspective. I had pick out some wooden buttons originally, and the guys at my home felt they were to bold, they wanted something simpler, something that did not stand out against the fabric. I found some coconut buttons that almost matched perfectly the color of the yarn, but they felt that they were too textured. So after much trial and error the simple plastic button was the one. I do think that the final design looks great, and will get a lot of use.

In addition to the above mentioned designs, you can also find my article about wool in the magazine. I did some research and share my findings about how not all wool is created equal. There are so many breeds of sheep and the wool that they produce has properties that can make a difference in the yarn and thus your final project. Some yarn manufactures are beginning to highlight some of the breeds in yarn lines, so this article helps you to understand what they mean on you yarn label.

So, if you haven’t, already pick up the latest issue and give it a read. I think you will enjoy yourself…and while you’re at it if you happen to want to check out one of my designs, I think you will enjoy them too.

There is More then One Way to Join a Motif Together

ScannedImageWhen the average non-crocheter thinks of crochet, often one of the first thoughts is the classic granny square. This motif has become a historic staple, however working any motifs worked in crochet can have a fun, stunning, and classic appeal. The draw back? Stitching them together.

IMG_7319.1

Remove hook from working loop, insert hook into stitch to be joined to and re-insert into working loop.

I have stated it before, but I am a crocheter, not a seamstress. So join-as-you-go has been a savior of sorts for me. It has allowed be to work various motifs without having to stitch them together, but simply work a stitch into the adjoining motif and they are now connected.

IMG_7320.1

Pull working loop through stitch

IMG_7323.1

Complete the stitch, and continue.

There are various applications that can be used in join-as-you-go, but one that I have been enjoying recently, has a finish that looks like I’ve spent time whip stitching the pieces together, without ever picking up a needle and thread (or yarn). To work this Joined Whip Stitch, or Braided Join, is actually pretty easy. When you are ready to join to the adjacent motif you simply remove your hook from your working loop, insert your hook through the stitch you wish to join to, re-insert into the working loop and pull it through the stitch, then begin and complete the stitch you wish on the motif you are working on. Essentially you are bringing the loop through another fabric and then completing your work, there is nothing fancy, nothing difficult, just a simple way to weave the fabrics together.

IMG_7325.1

The finished look of the Joined Whip Stitch or Braided Join

The look that this technique creates has a hand sewn appearance to some, and a braided effect to others. It is a little slow, and only a little, as removing your hook and getting it placed and then reworking the stitch can take a little time, not to mention a little fear of the working loop being pulled out. However the technique is simple and can be worked with any motif pattern without having to change the stitch structure. So give this method a try next time you have a motif to put together, you may find that it makes your project a little more enjoyable, with no needles required.

Flower Trellis Afghan, Where You Place the Stitches Makes the Difference

ScannedImageThe unique thing about crochet is that it all depends upon where you place your hook. Basically there are only a couple of stitches, but a very look happens when the stitches are placed in different places.0001830918_small2

1_Page_042_Image_0002_medium2

One side of Flower Trellis Afghan “Flowers” Photo courtesy of Annie’s

1_Page_042_Image_0001_medium2

Opposite side of Flower Trellis Afghan, “Snowflake” Photo courtesy of Annie’s

My Flower Trellis Afghan, on the cover of the current special issue of Crochet! Magazine From Scraps to Sensational, really shows how stitch placement can create a completely different effect, allowing this afghan to have two different but equally beautiful sides.

This afghan is comprised of motifs, which are only 3 round each. The first 2 rounds are the pops of color! Only a little yarn is needed for these rounds, so it really puts the scraps in your stash to work, the more interesting the color, or variegation, or hue of the yarn, the more interest to the overall effect.

1_Page_041_Image_0001_medium2

Flower Trellis Afghan Photo courtesy of Annie’s

1_Page_043_Image_0001_medium2

Flower Trellis Afghan Photo courtesy of Annie’s

The really magic occurs in the third round. The stitch placement of working in round 1 behind round 2, allows for the petals of the “flowers” to become distinguished, while creating the “snowflake” appearances on the opposite side. Or at least that is what I envision when I see them.

The other great feature about this afghan is that it is joining as you go; all is worked in the third round. So working the color of the motifs can be completely portable, and then join them all together when working the last round. This is a rewarding project, as it really helps clean up the left over bits of yarn you have been holding onto for the “special” project, and by placing your stitches in a different location you find that you have a project that has a personality, and differing effect on either side