Taking a Look at the “Extras” that make Crochet

ScannedImageI usually find myself to be a very simple person. I have crocheted for more years then I care to count, and have never thought about much more then my hook and my yarn. However recently I have started to look at “accessories”.

It probably came about from a ceramics class. A group of former students/friends arranged a day out to a local studio called “Color Me Mine”. It is apparently a chain of studios that have ceramic pieces for purchase, that you can then glaze and they will fire in a kiln, resulting in a personalized project that has a professional feel. At our studio day it was arranged for us to create our own yarn bowls.DSCF0937
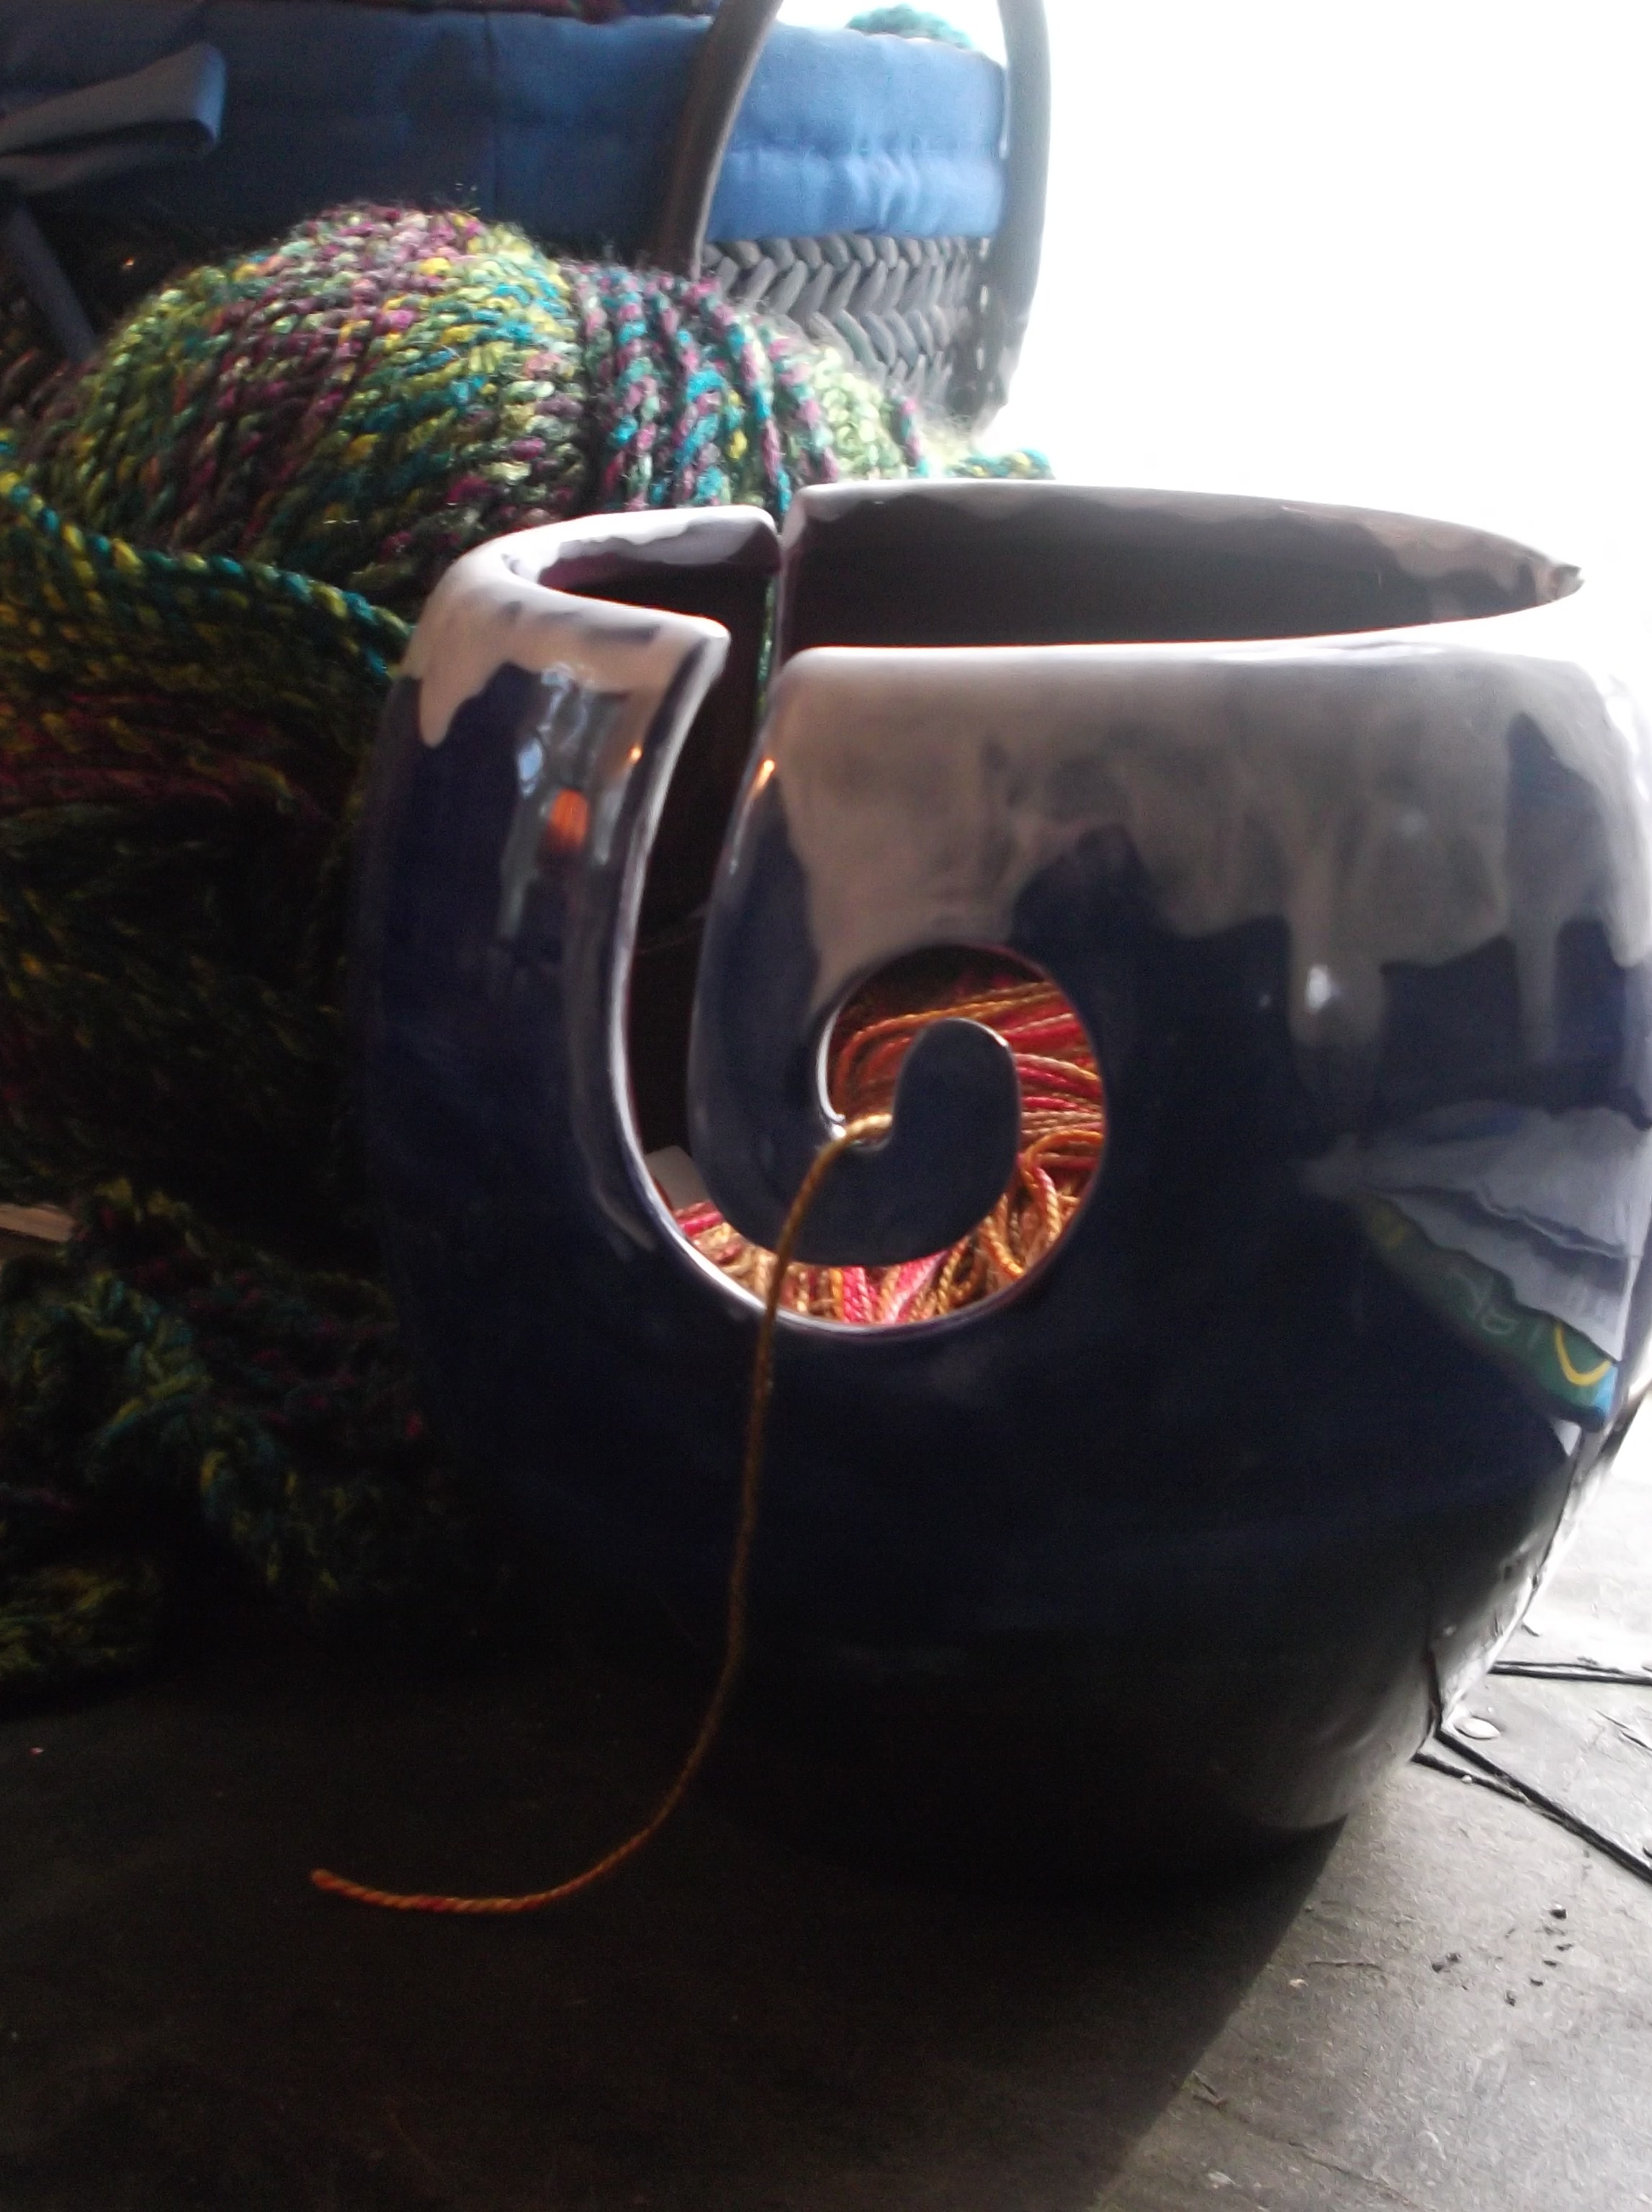
A yarn bowl is a newer concept to me; it is a bowl that holds yarn but has decorative edge that actually functions in reducing your yarn from tangling. So balls of yarn are contained and do not run wild in the house and the pull of the yarn is from the same place every time. I admit, in the past I managed unruly balls of yarn by placing them in a tennis shoe or hiking boot, but this bowl seems to be much more effective. Of the finished pieces I had the pleasure of seeing, they are all beautiful.

Funny how one open door to a new thought can open the door to many others. As this experience had me looking at travel holders for hooks, bags, hooks in general, even coffee cups. So when I was attempting to find a “thank you” gift for a friend, instead of looking at the usual yarn, I began thinking of other possibilities. One that I have decided to undertake and make myself, a hook/needle travel case.
DSCF0927.1

Small pouches for hooks/needles

DSCF0929.1

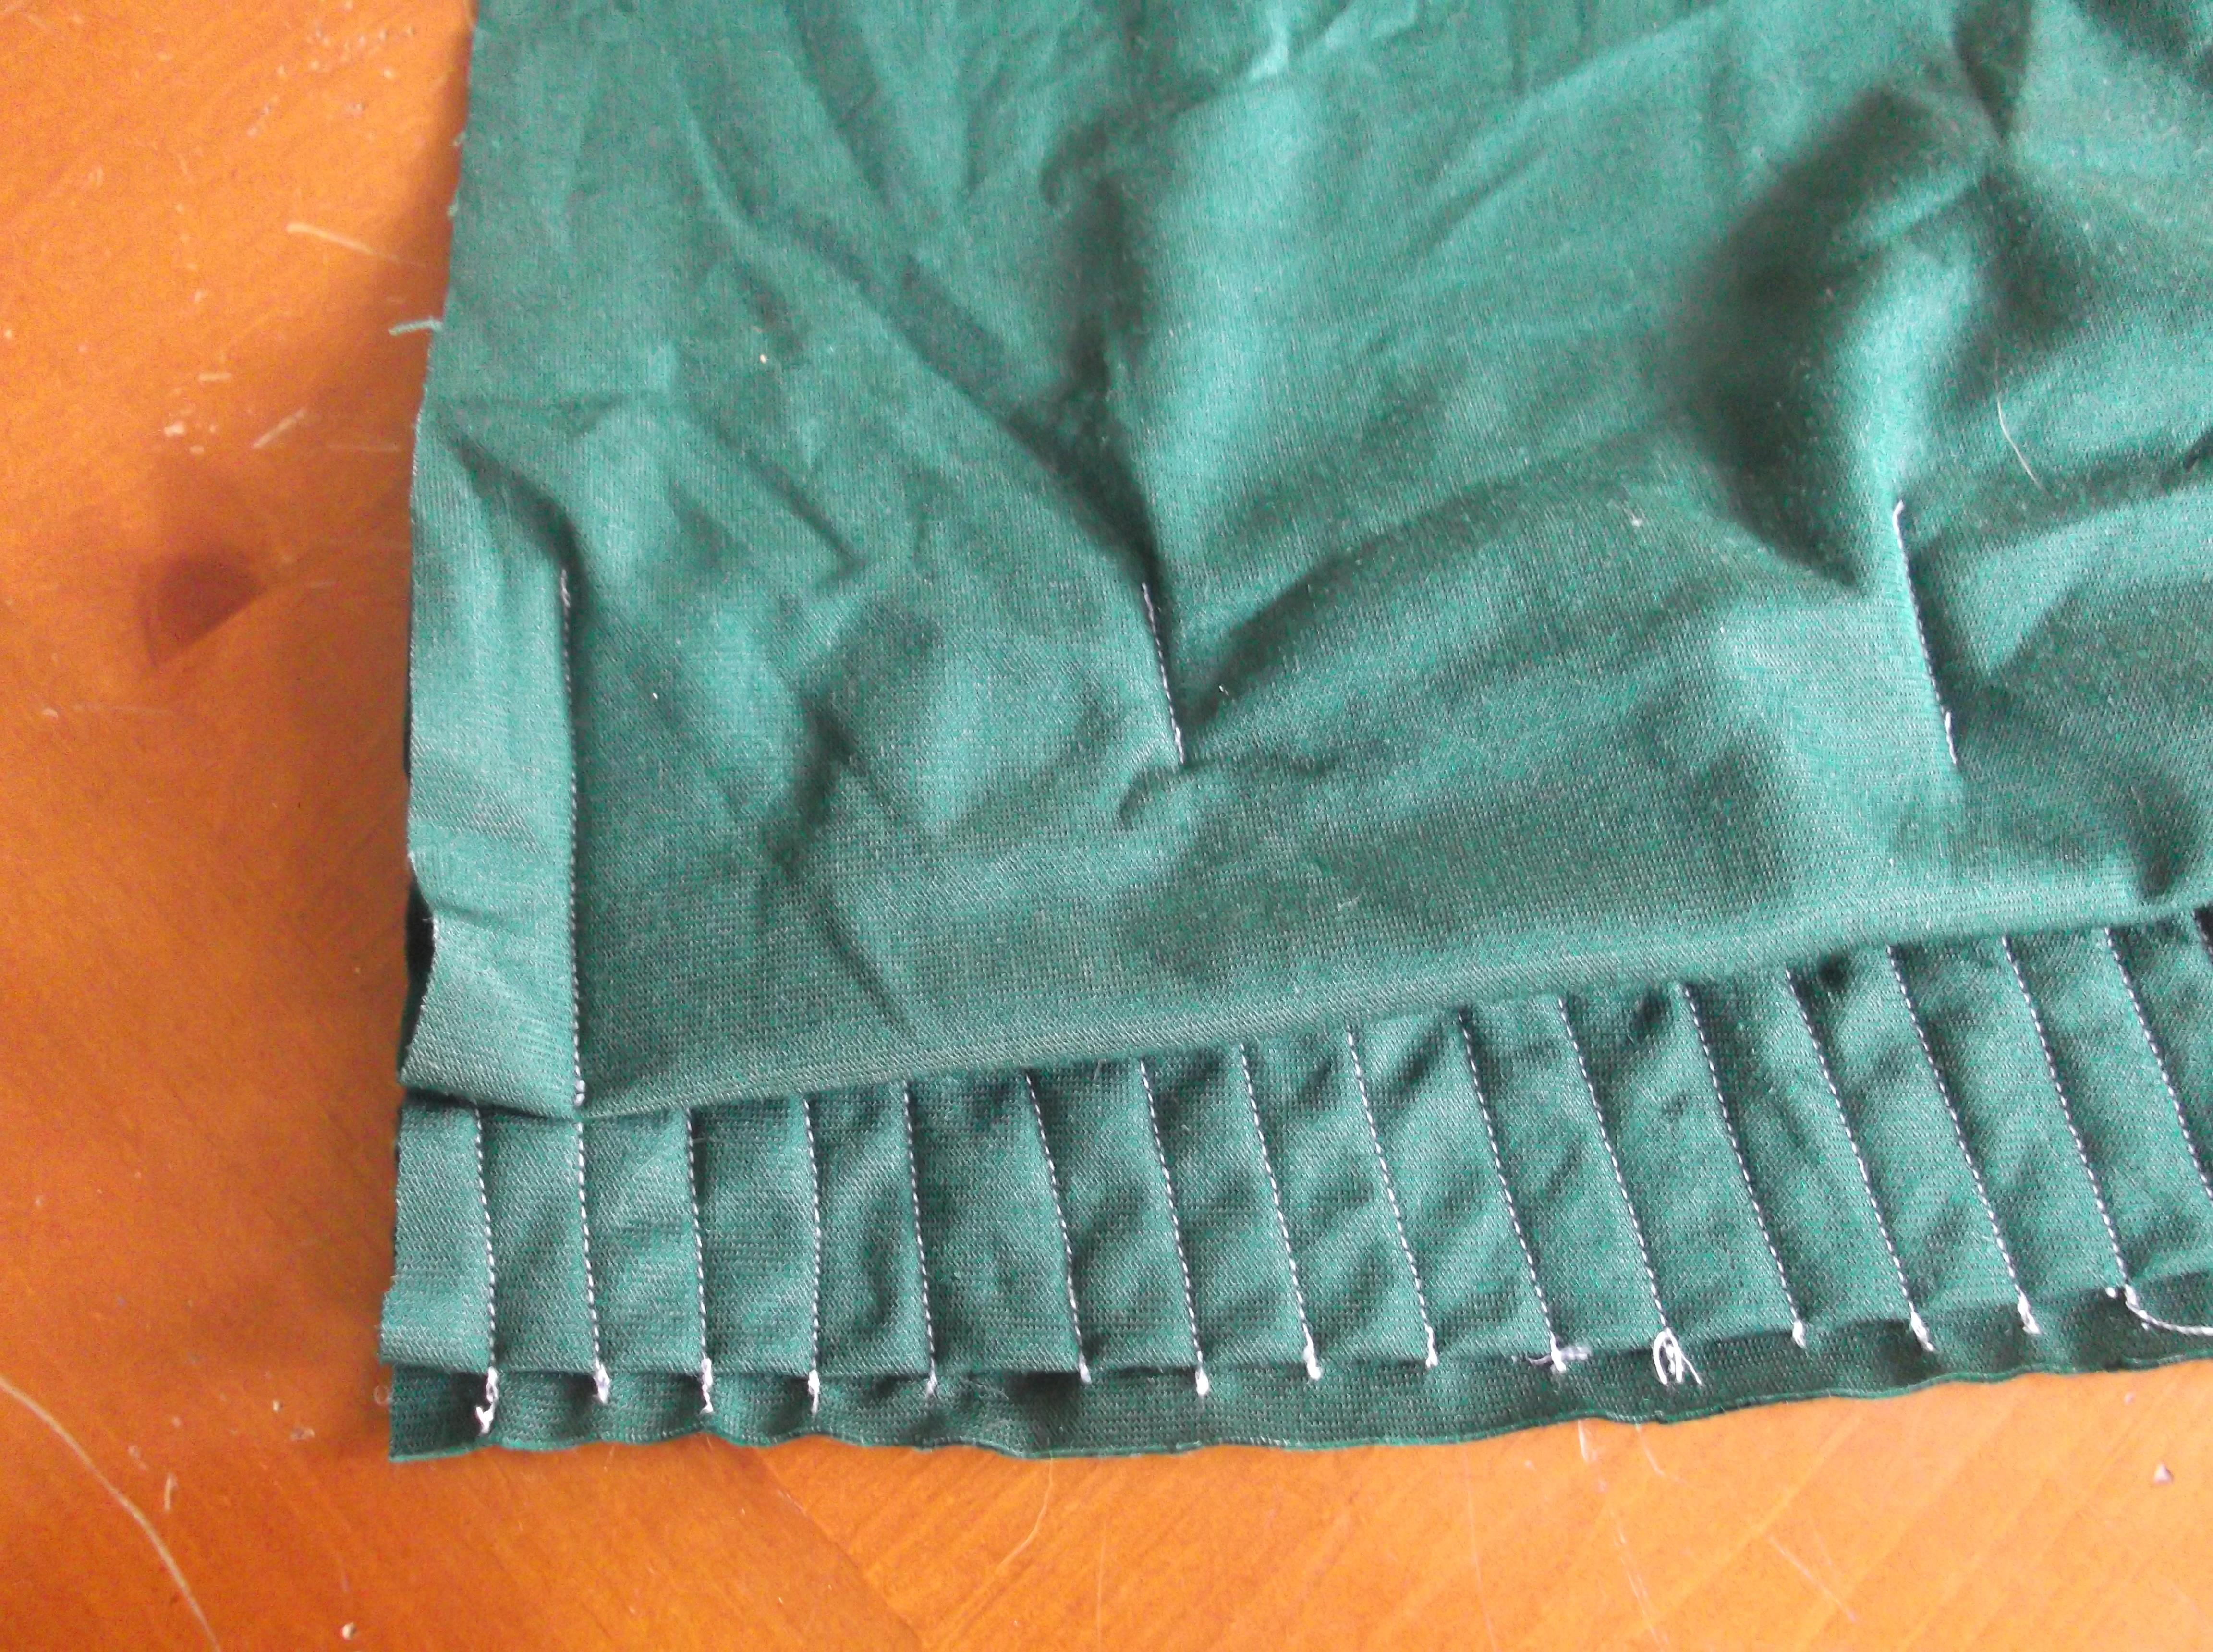
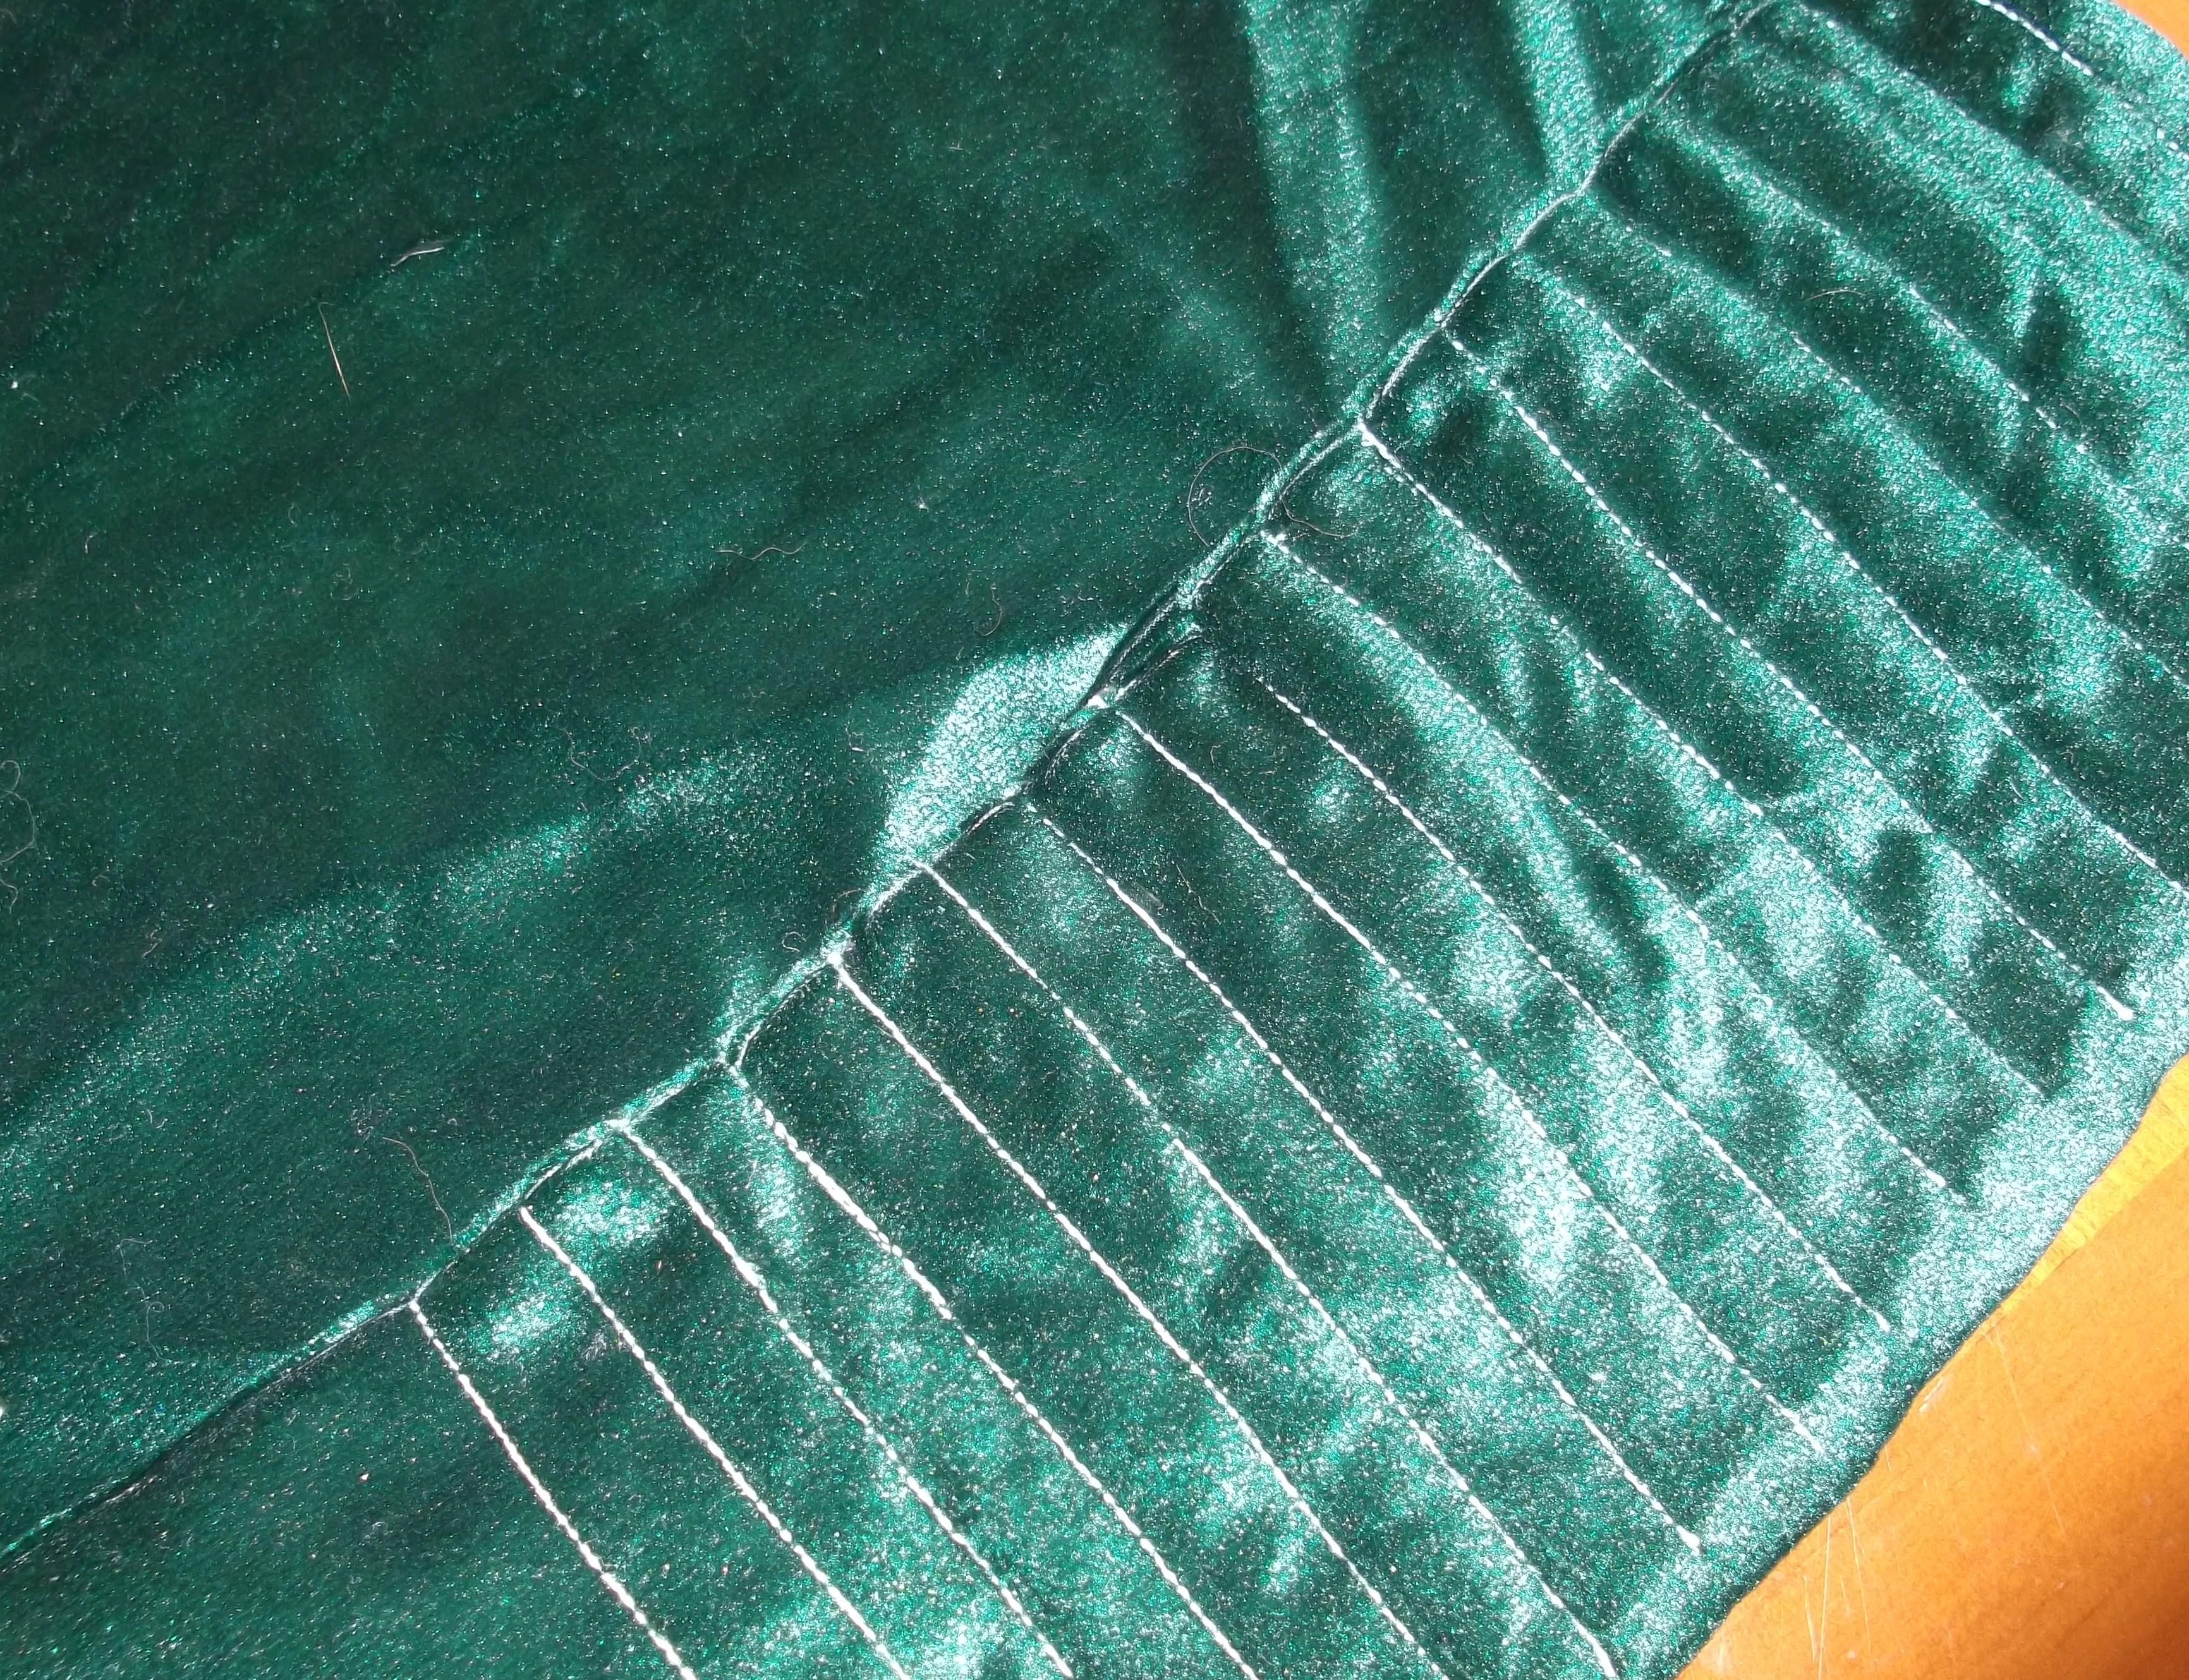
Wrong side of sewn fabric, 2 sets of pockets are created with folds. (hook/needle pouches sewn on the main pocket)

It has not been as difficult as I would have first thought. I found a fabric I liked in my stash, a velvet or velour type in a dark green; I cut a rectangle of 13”x 30” (33x76cm), and then began folding. I folded up 8” (20cm) from the short side, and then folded it in half back down (so that the velvet side of the fabric was facing outward, while at the same time lining the pocket). I then began to stitch creating a pocket and then slender pocket of ½” (1cm) width to hold hooks/needles. I then created a second set of pockets behind the hooks, by pulling up the recently sewn pocket about 2 ½” (6cm) and stitching the sides down. I also placed a couple of additional seams over the stitches created in the hooks sleeves to make about 3” (7.5cm) pouches.
DSCF0931.1

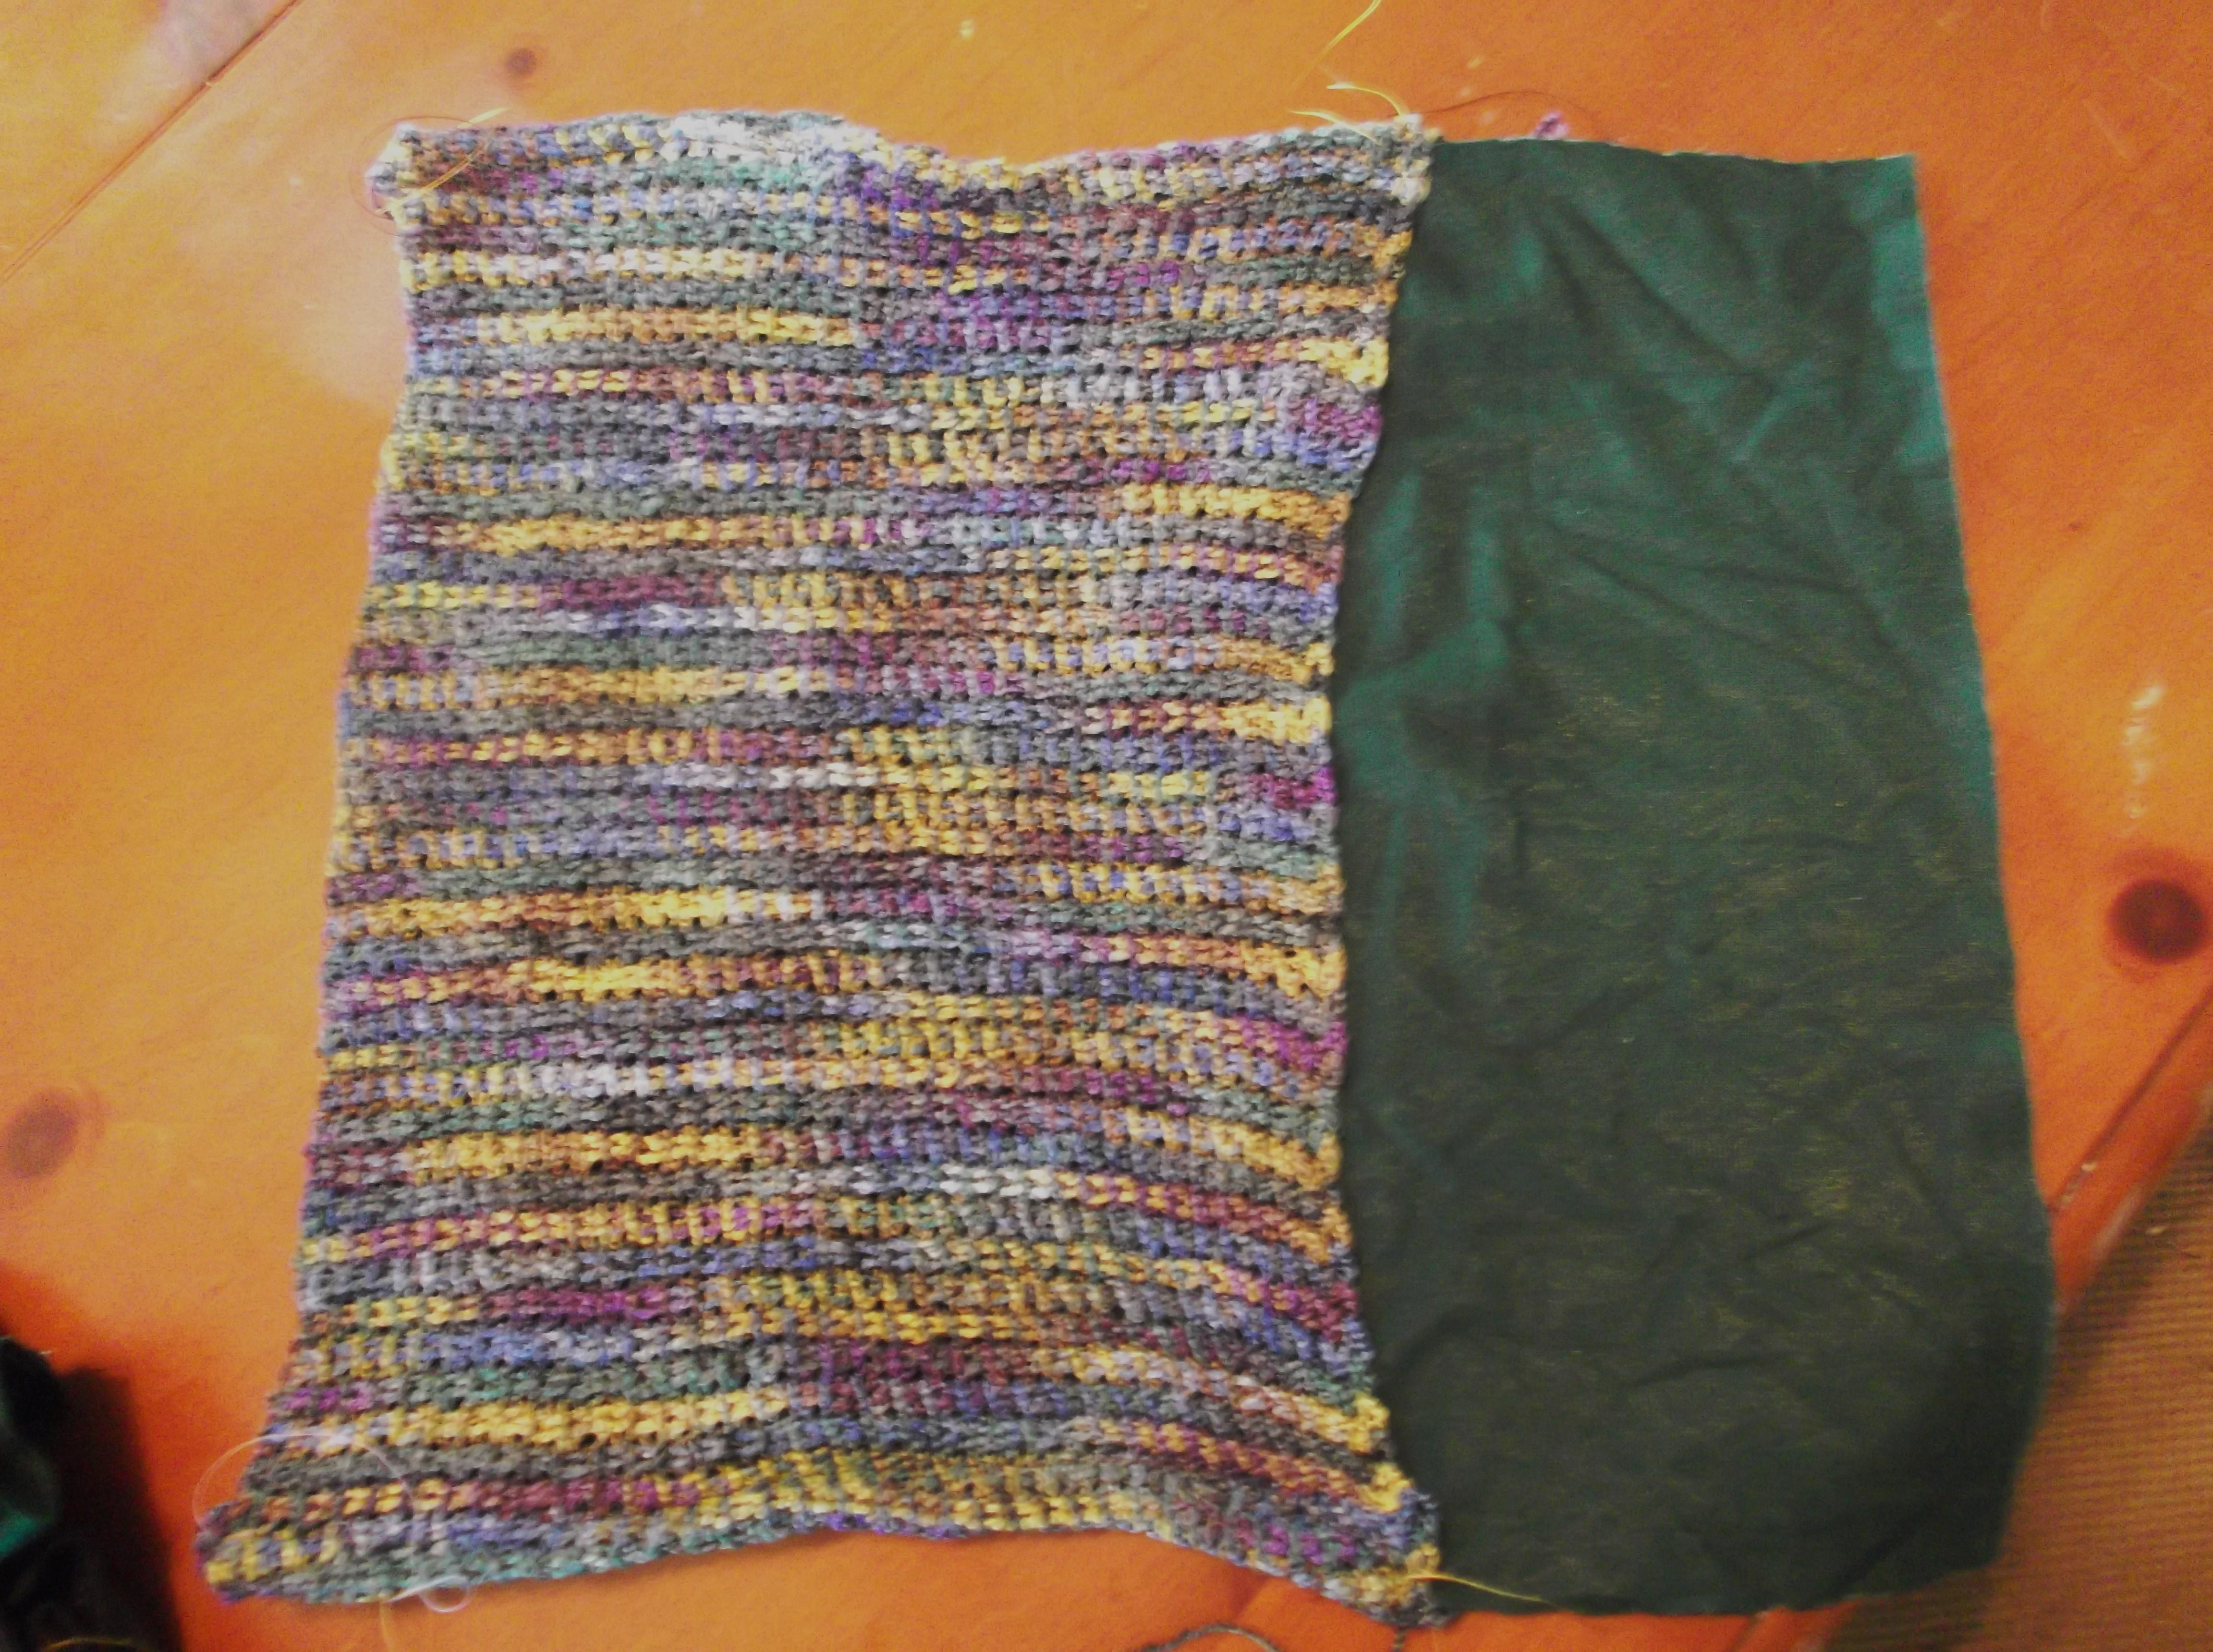
The crochet fabric is sewn to the velvet fabric, wrong sides together.

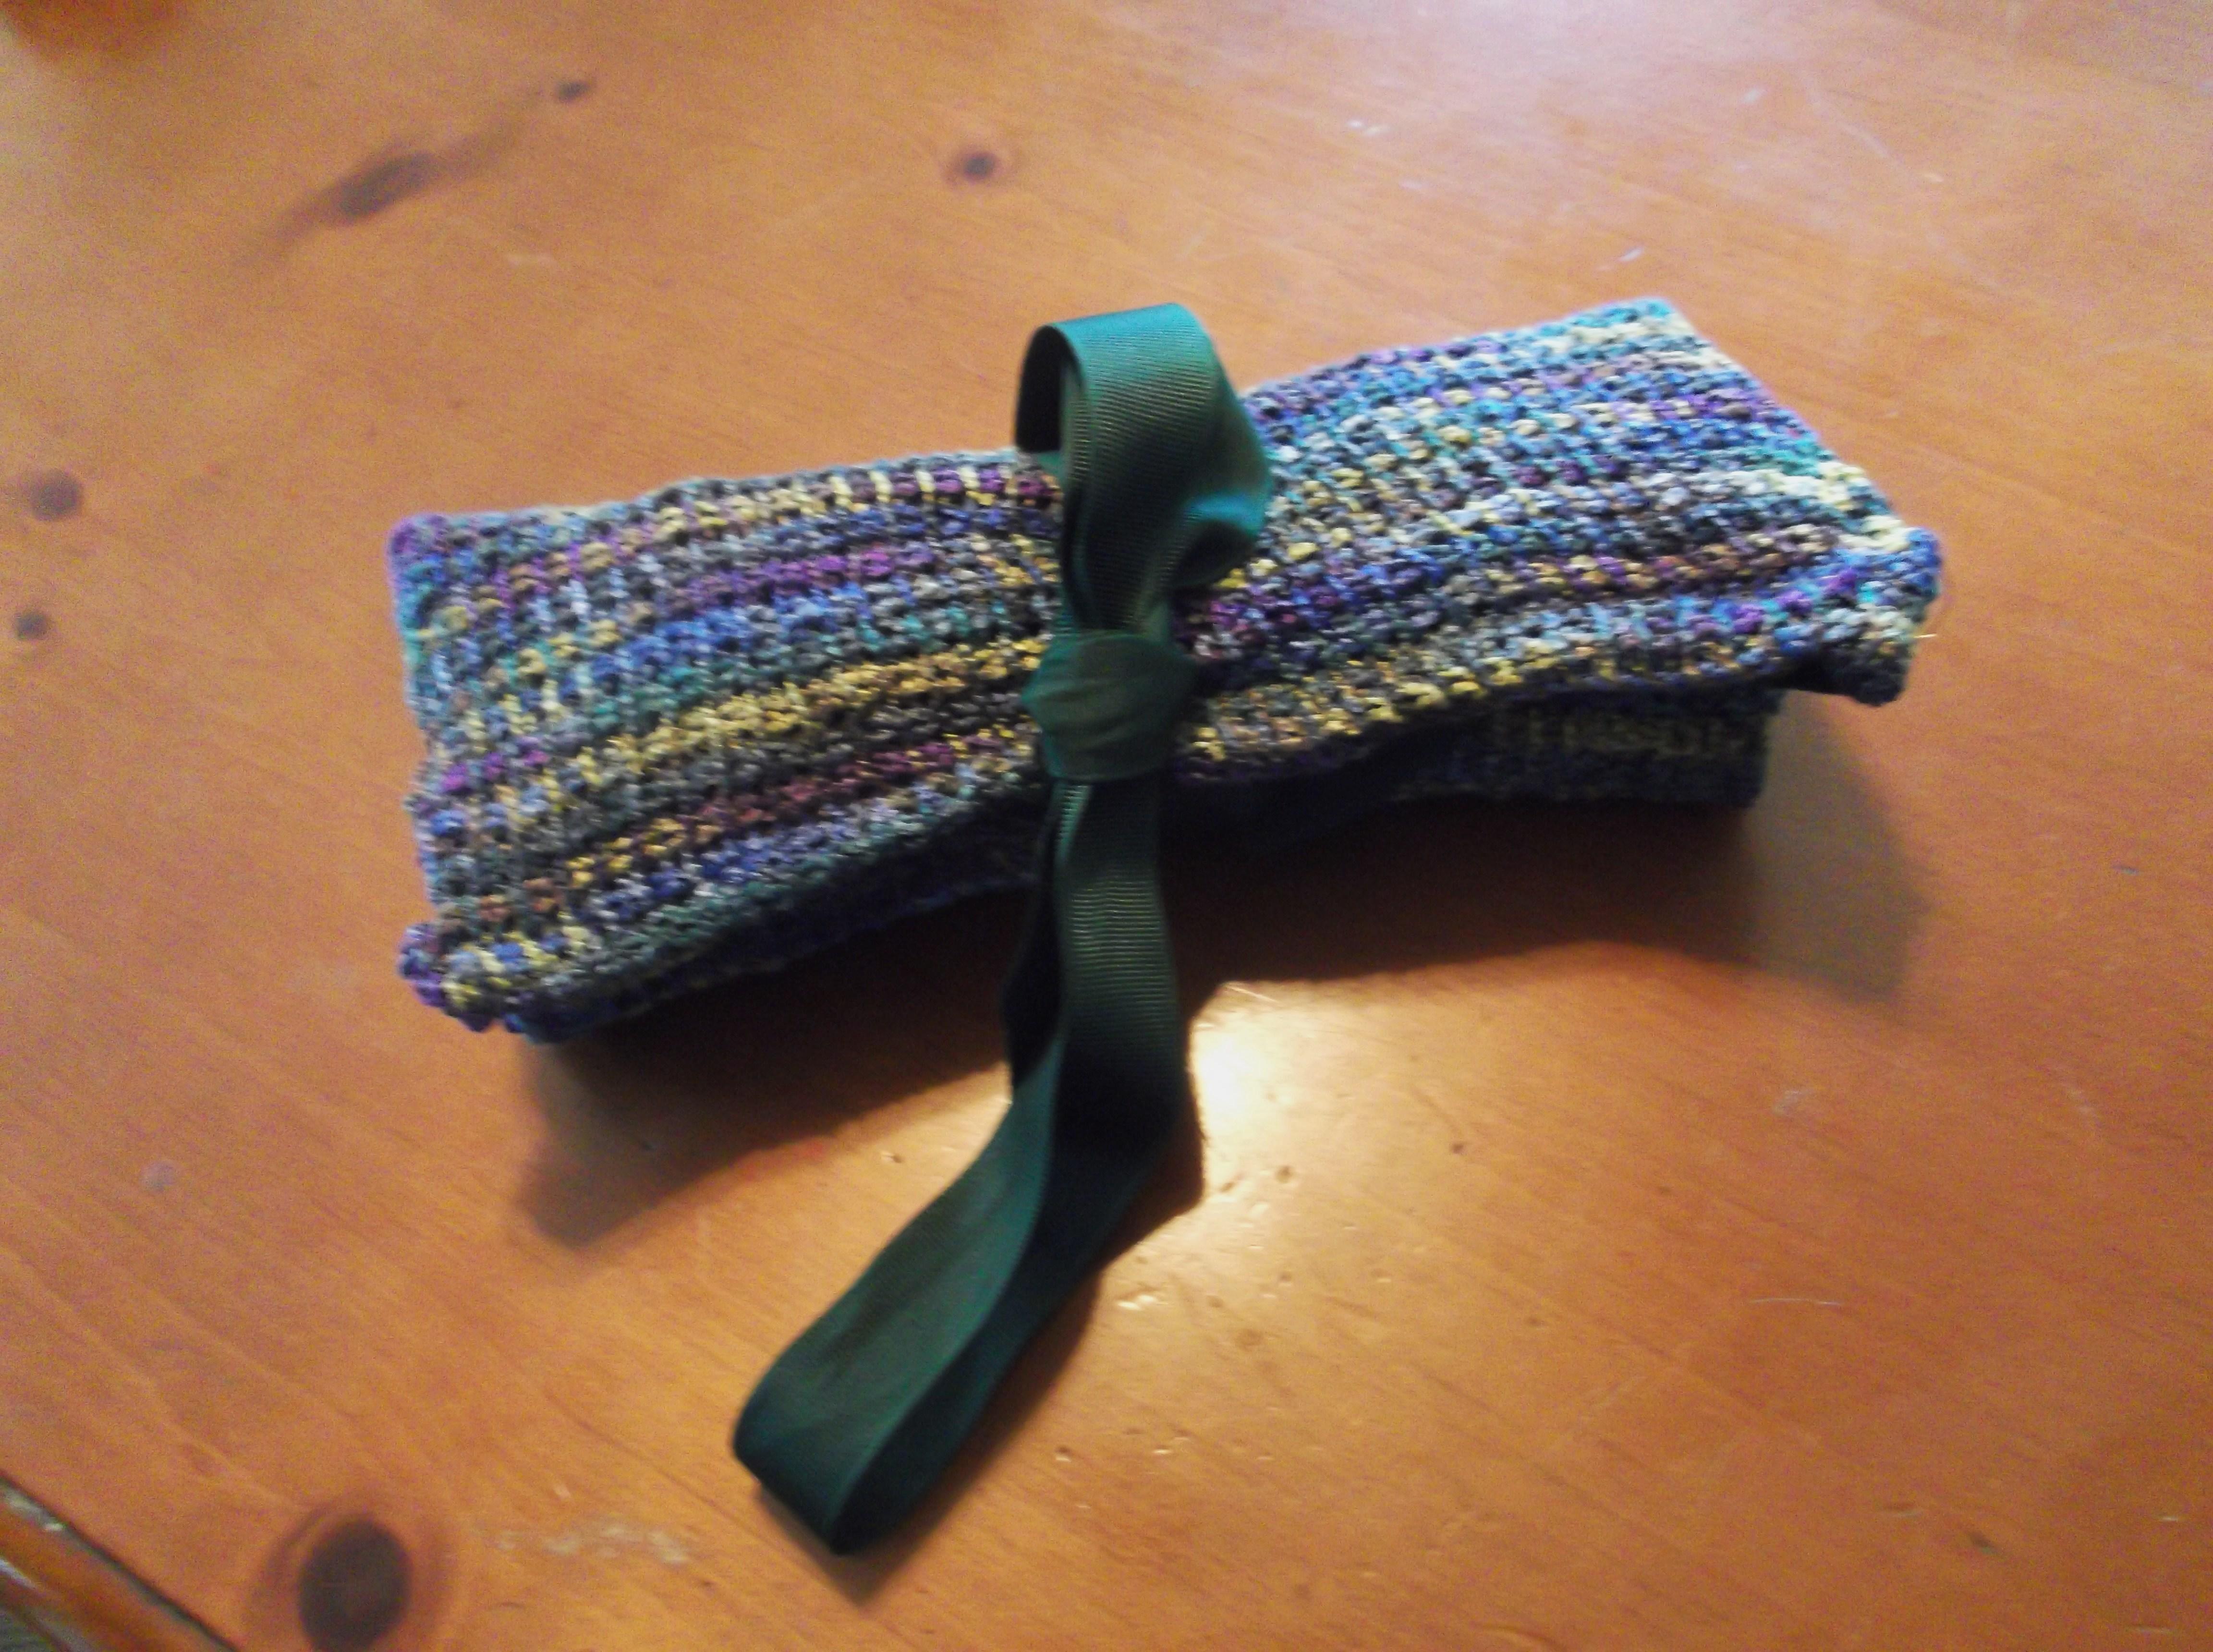
Now that the stitching was done, it was on to the crochet. I made a piece of crochet fabric from some rayon yarn I had, and utilized the Tunisian simple stitch to highlight the subtle color changes, in a size of a 9”x13” (23x33cm)rectangle. Matching the 13” (33cm) sides of the velvet and the crochet, with wrong sides together I stitches the seam, as well as at either end of the of the 9”(23cm) side of the crochet fabric to the velvet piece, and finally stitched the last side of the crochet fabric in place leaving the remaining velvet fabric unstitched (this is used to fold over the hooks/needles). Then sew on some ribbon ties and I think it looks good.
DSCF0936.1

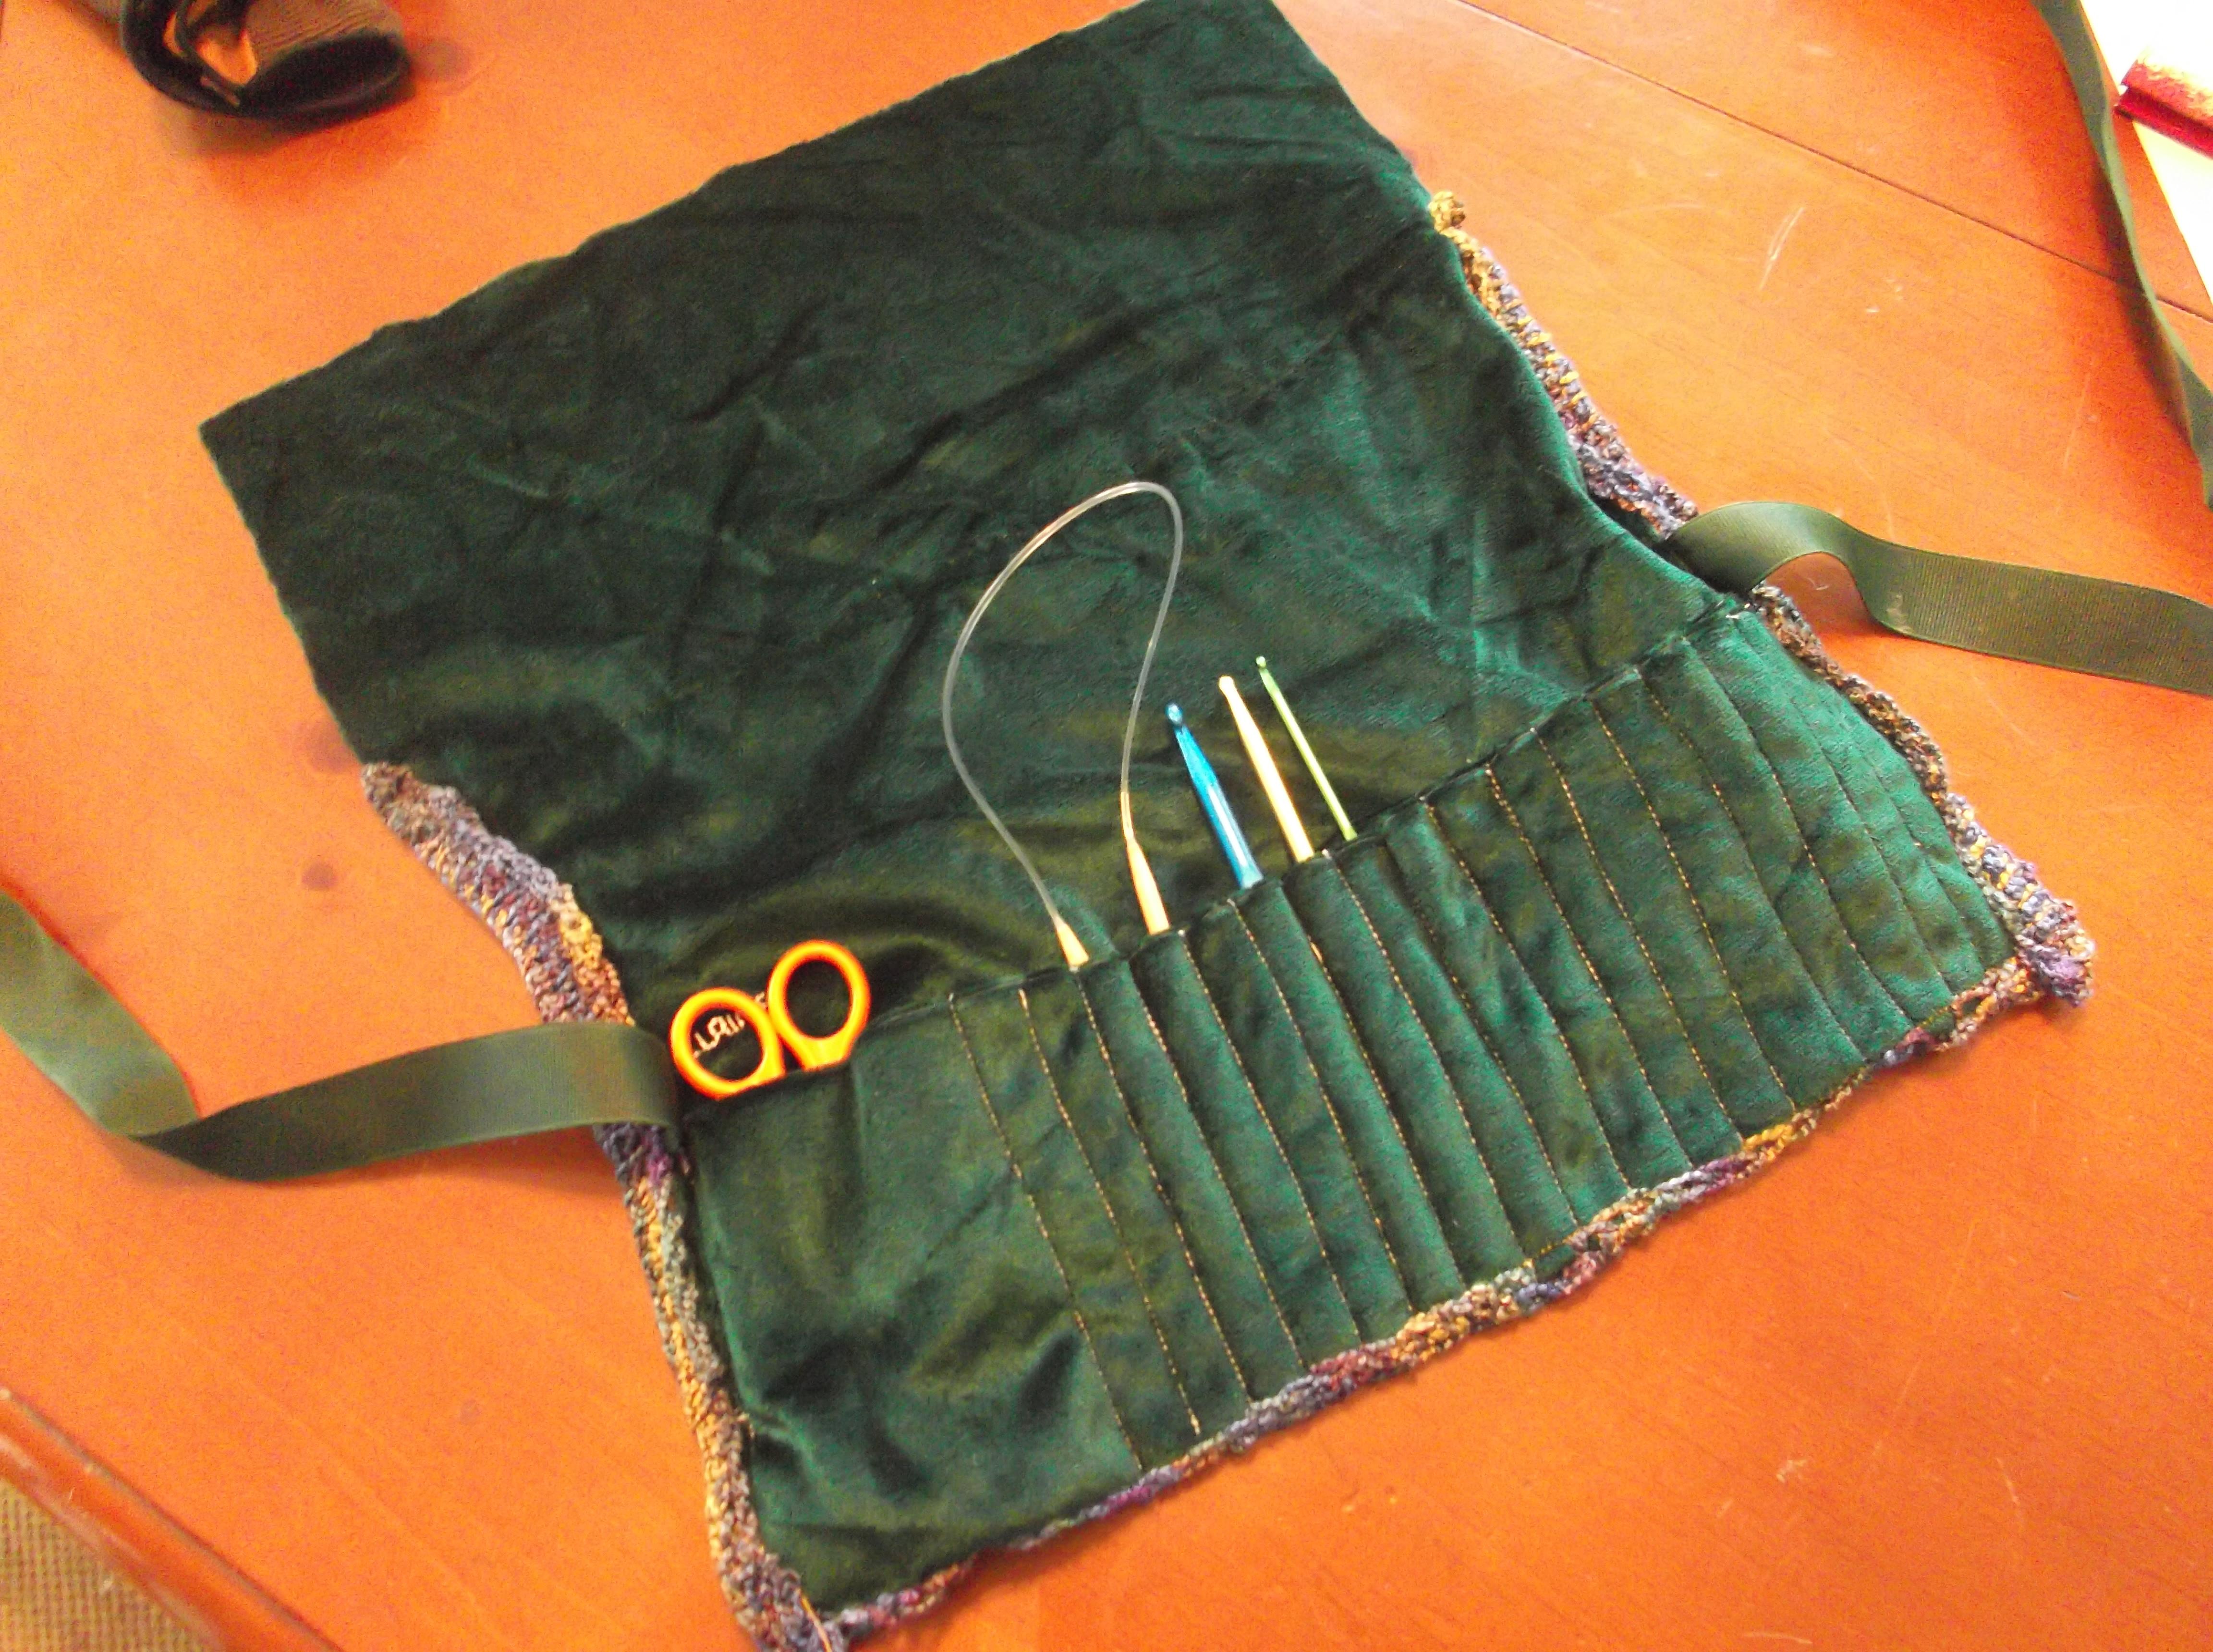
Tied up and ready to go!

DSCF0933.1

Just needs to be filled!

Looking at accessories for the world of fiber, is opening up many new ideas….it seems like a whole new world!
New Again, at Least to Me- Clone Knots

ScannedImageSometimes we find inspiration for crochet in unusual places, sometimes it is just looking at a traditional method in a different light.

XIMG_6867

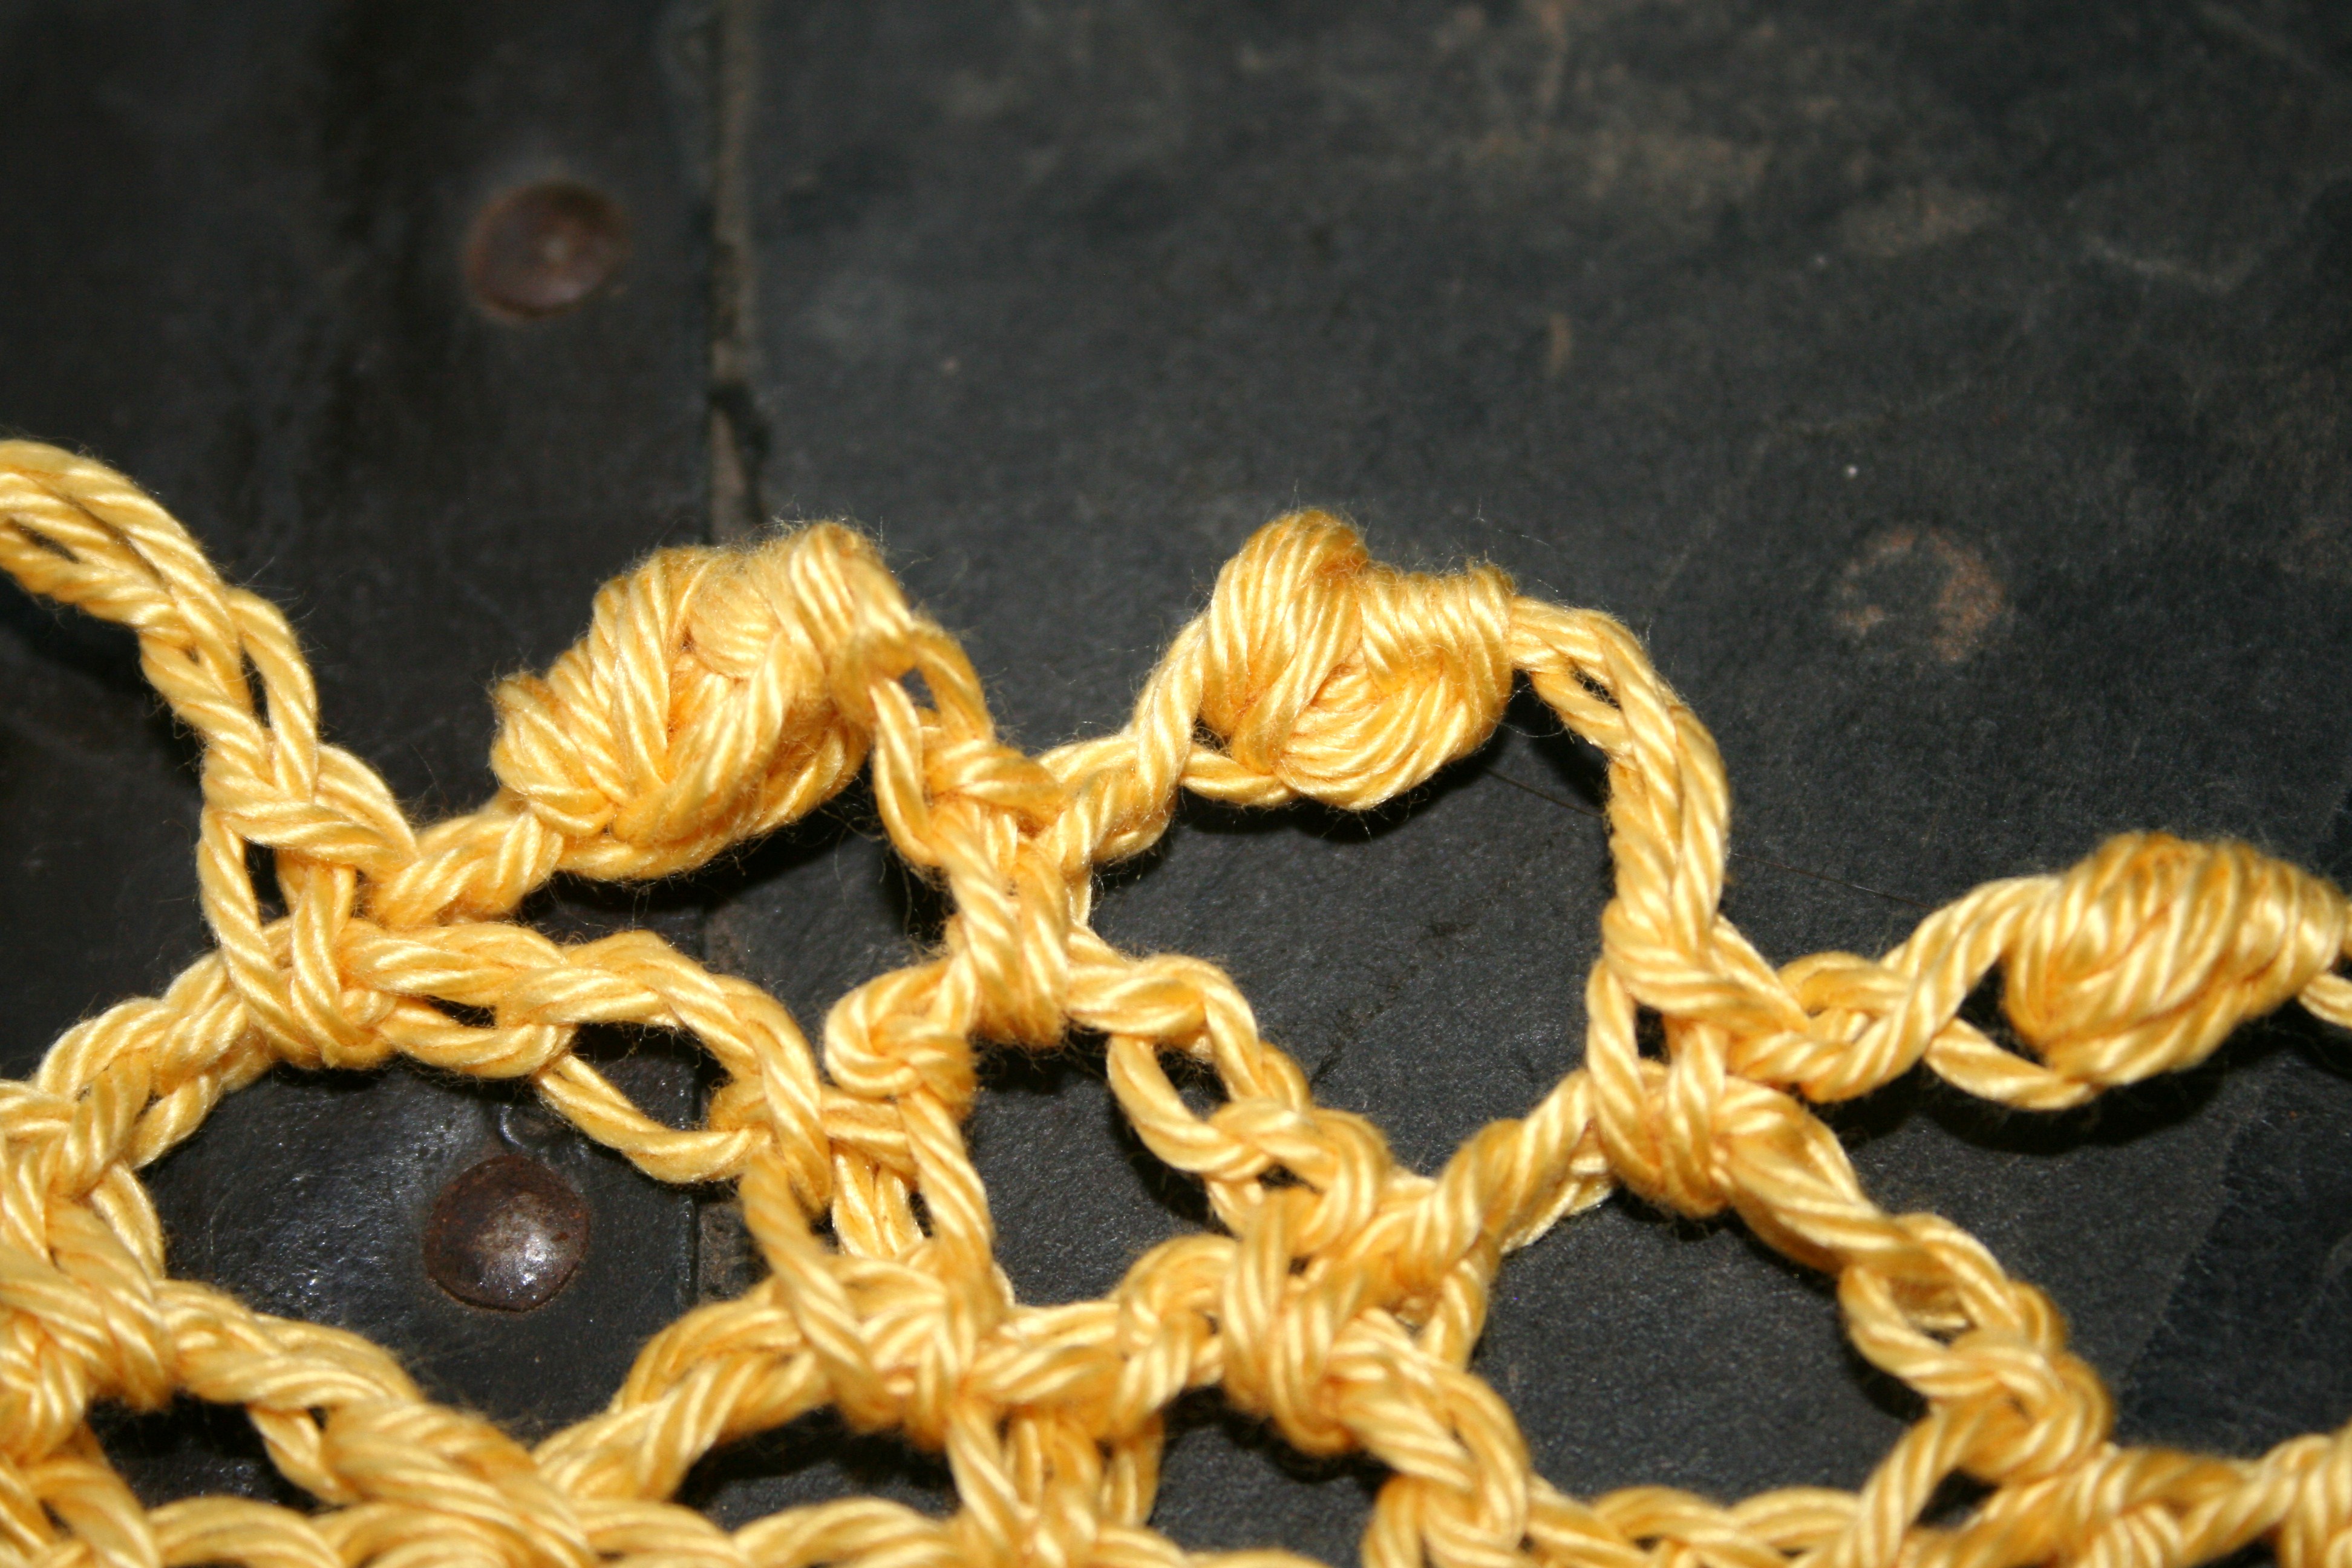
Clone Knots

For me the Clone Knot is one of those stitches that I never really knew existed until I took a thread crochet class from Kathy Earle at a CGOA conference/Knit & Crochet Show a couple of years ago. The class on Irish Crochet really expanded my knowledge, I usually do not work with thread and tiny hooks, however I really have a new level of respect for those that do. I took some of my new found skills and applied them to my yarn crochet, and the clone knot fit into this very well.

The clone knot is essentially a multiple of loops placed on the hook and worked together creating a bump of material in the middle of a set of chains. It creates a unique textural and visual impact to open fabric work, and in Irish crochet is often worked in between motifs during the joining process.

XIMG_6861

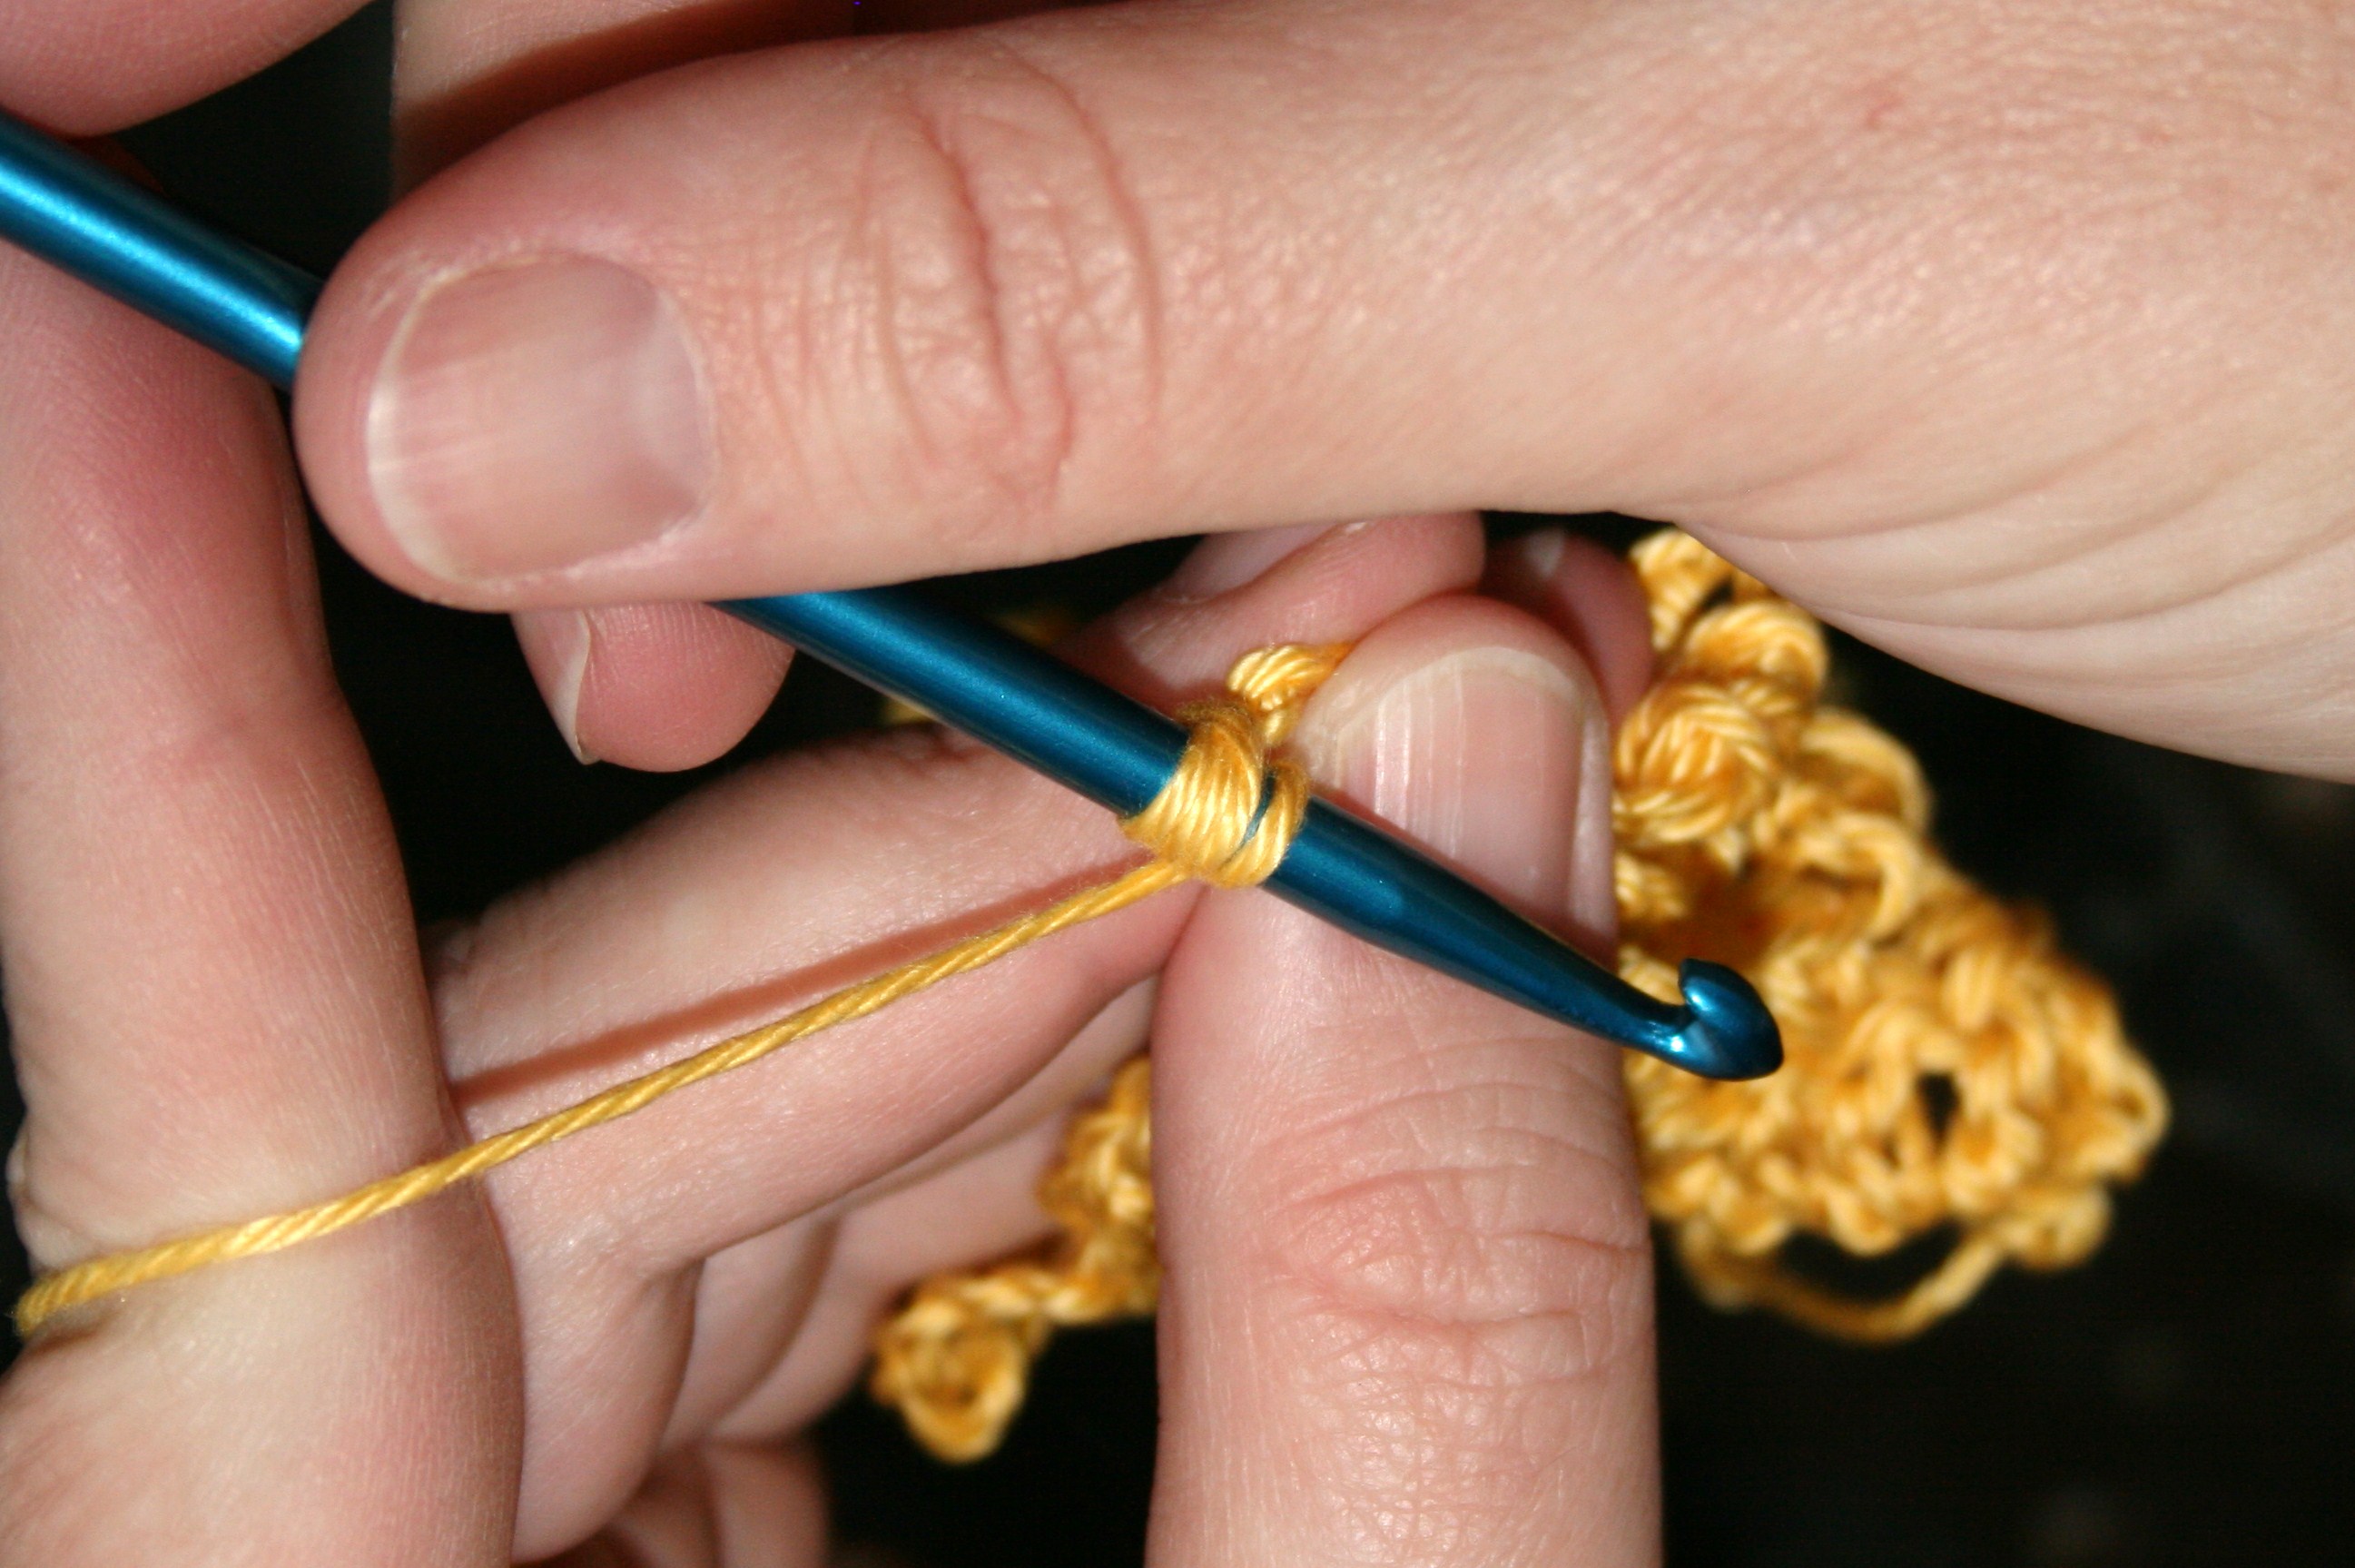
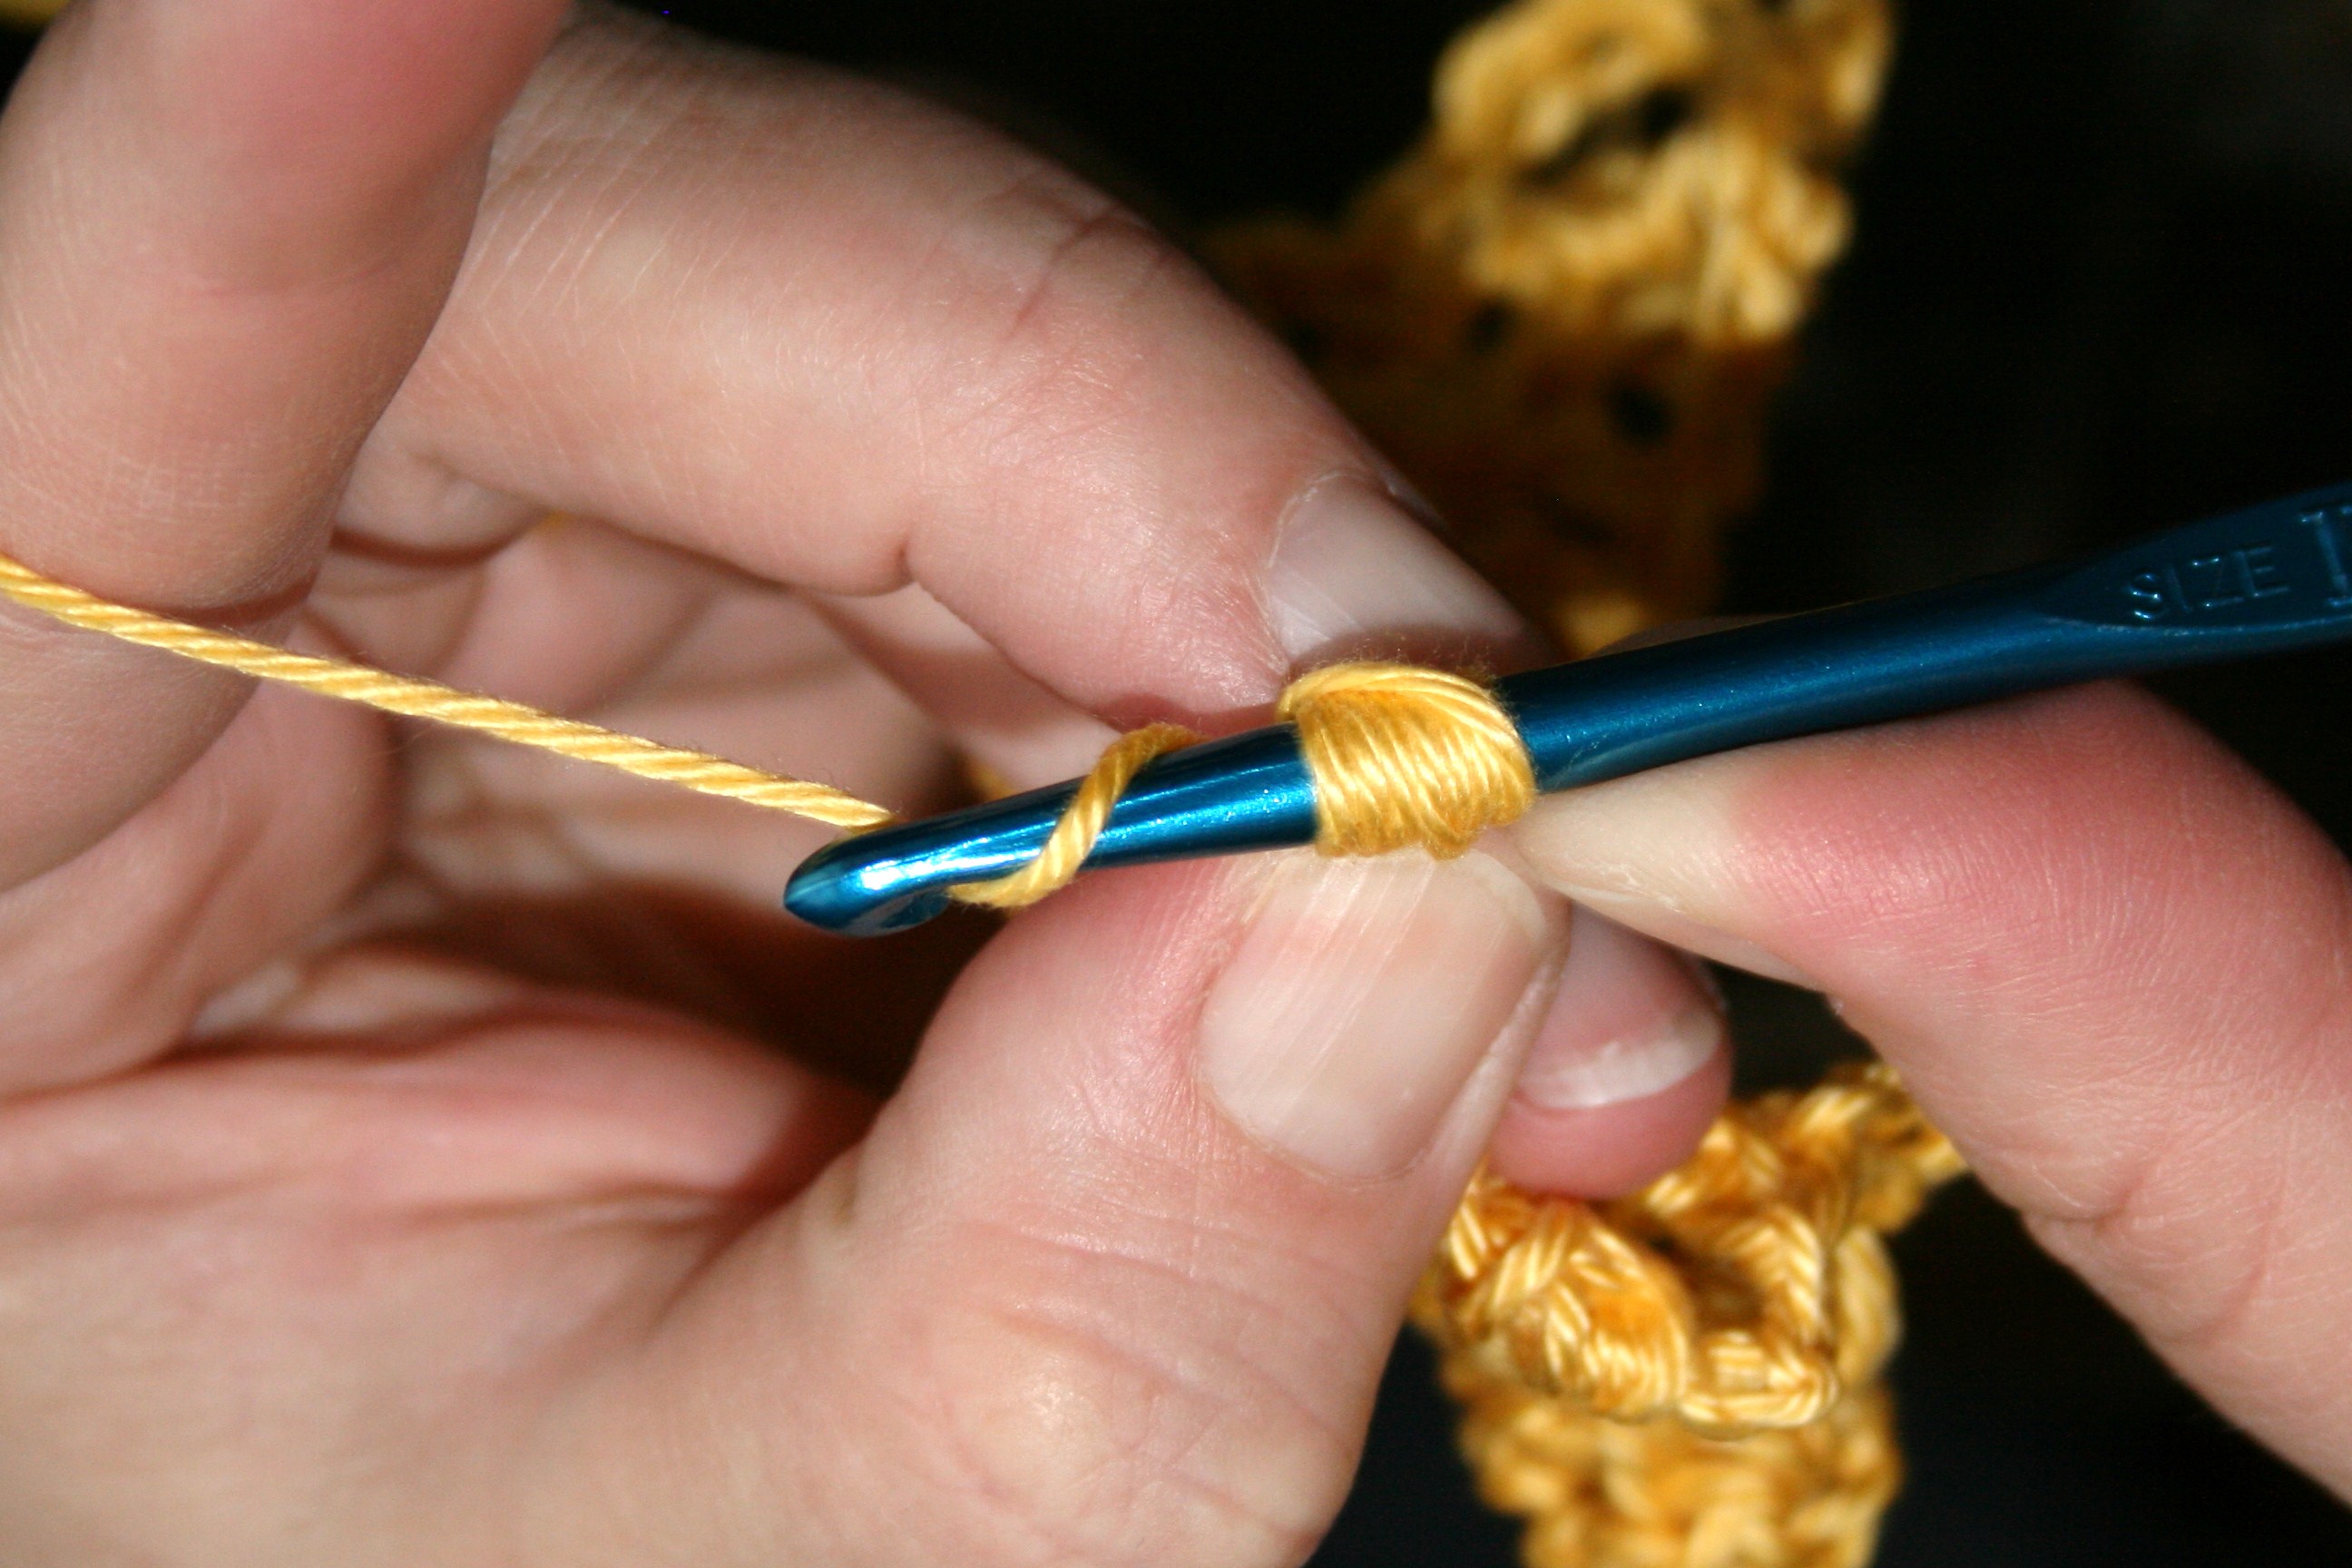
Bring the hook under the working yarn.

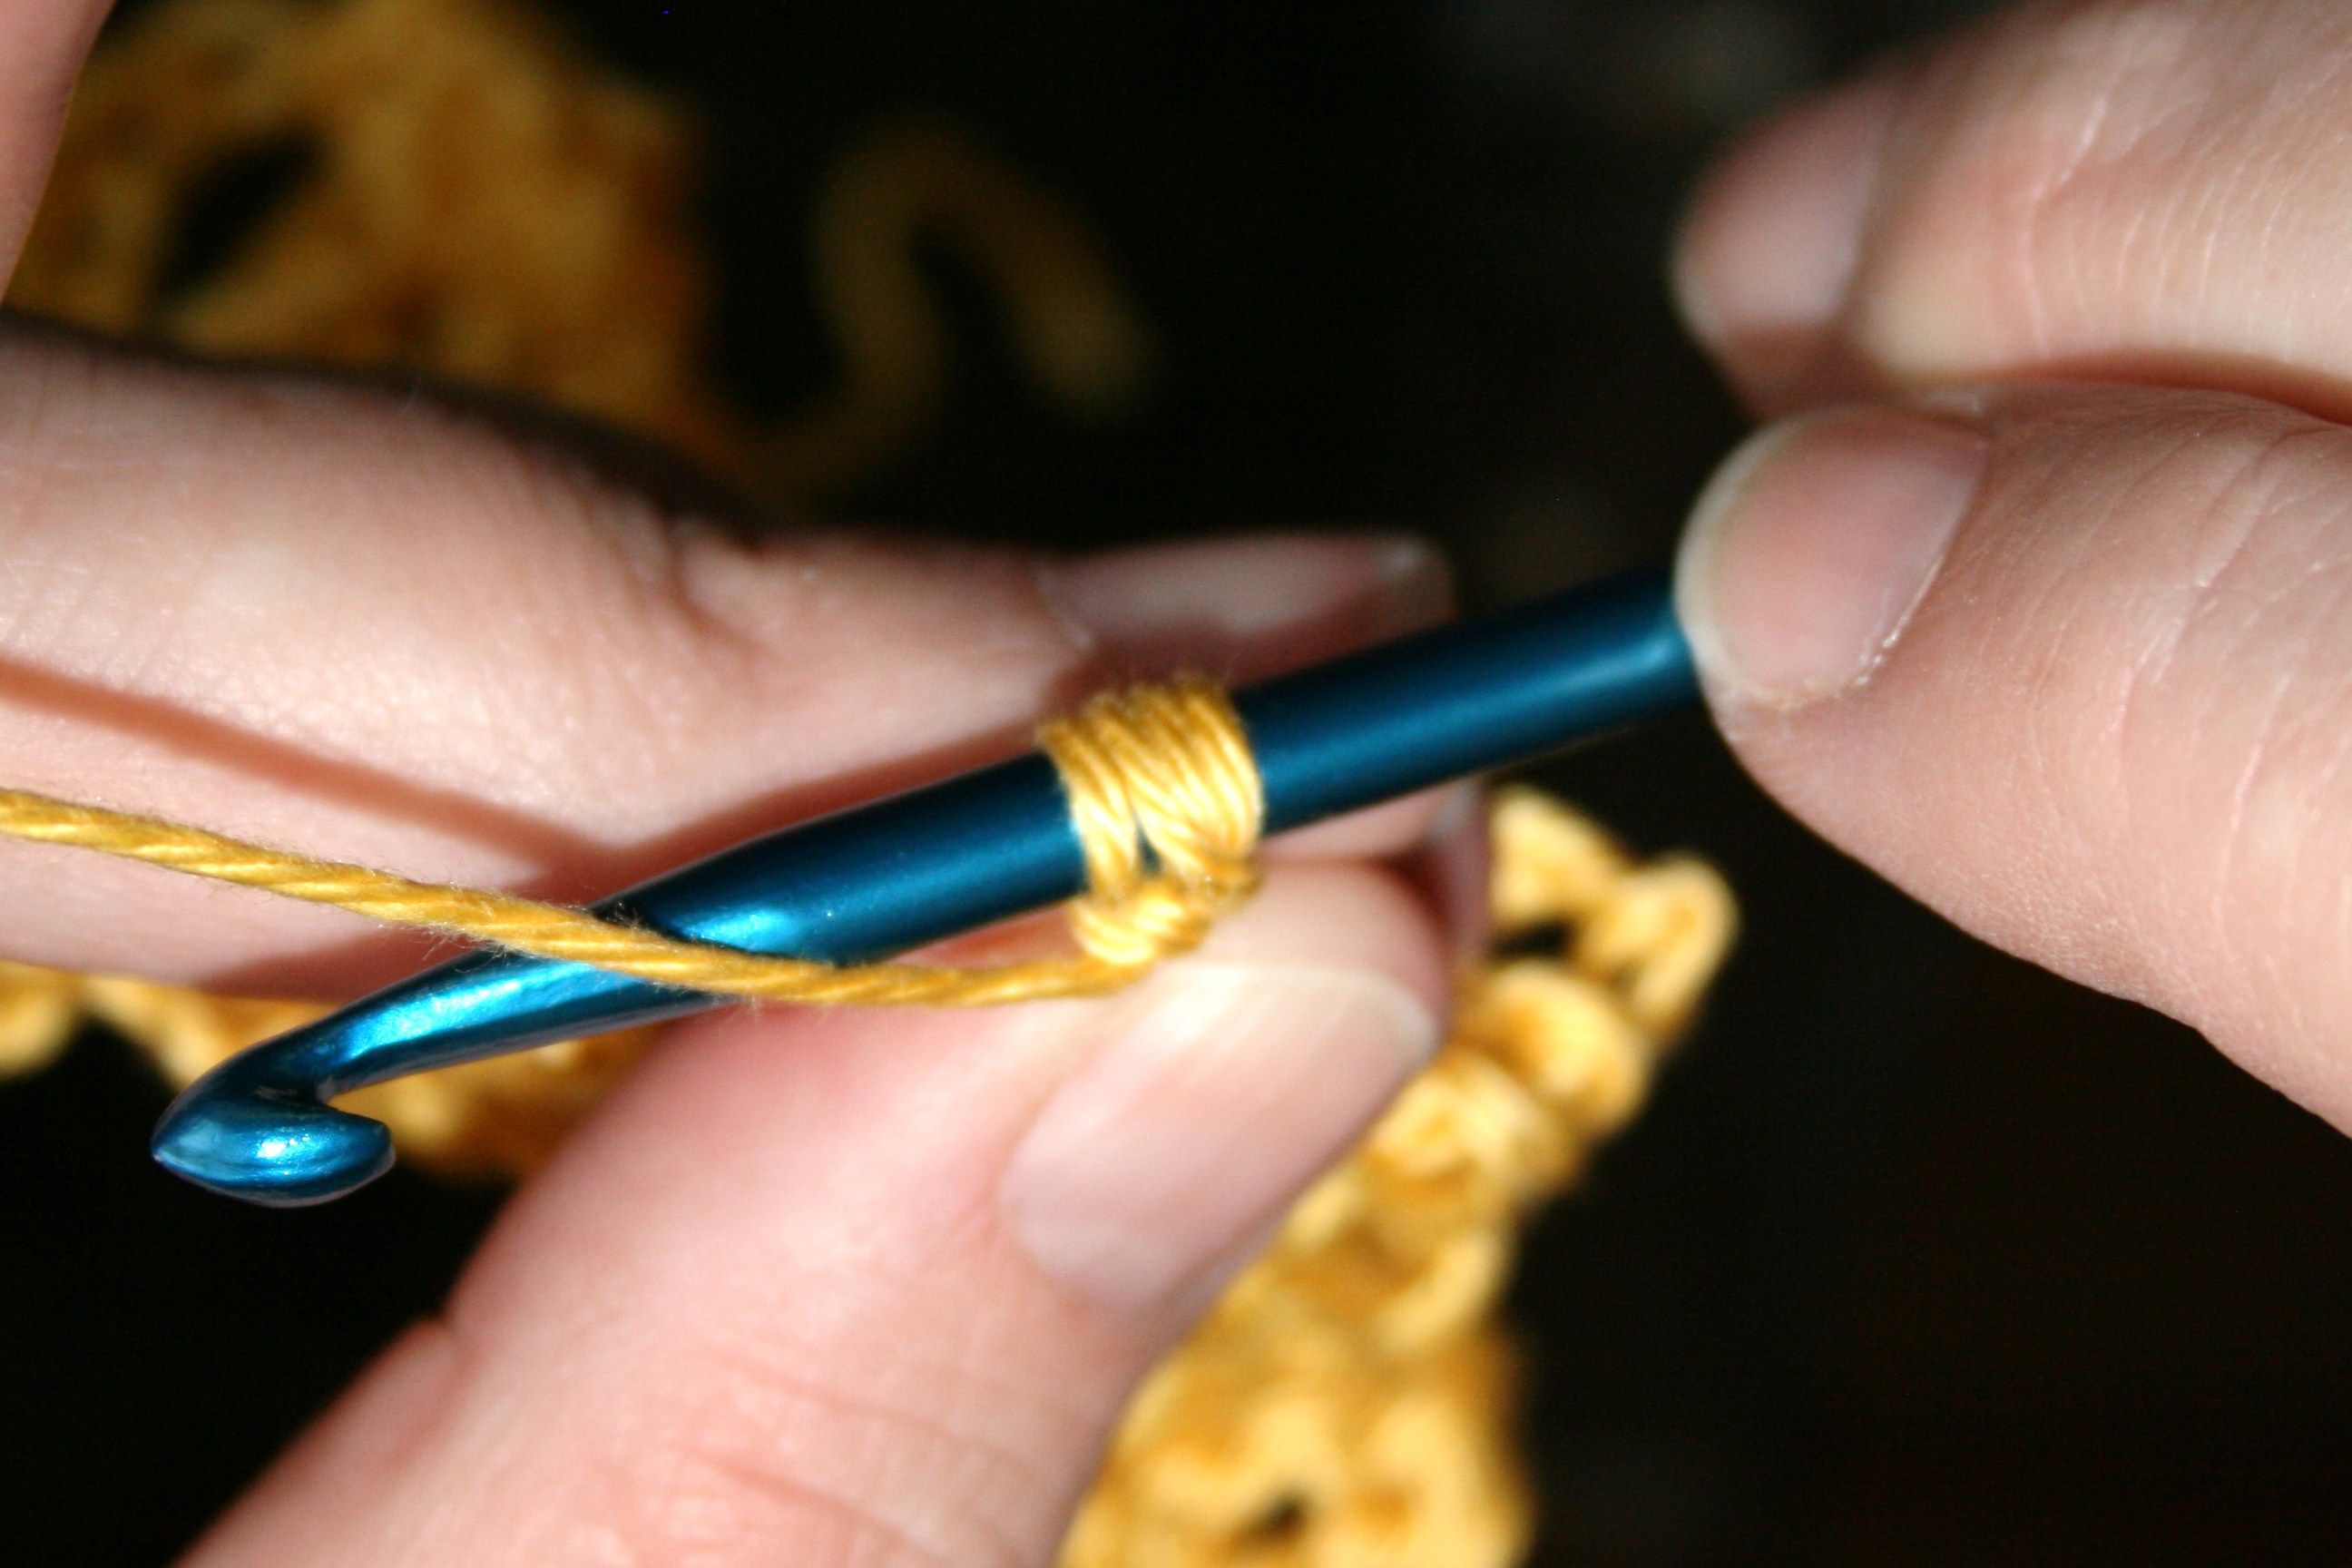
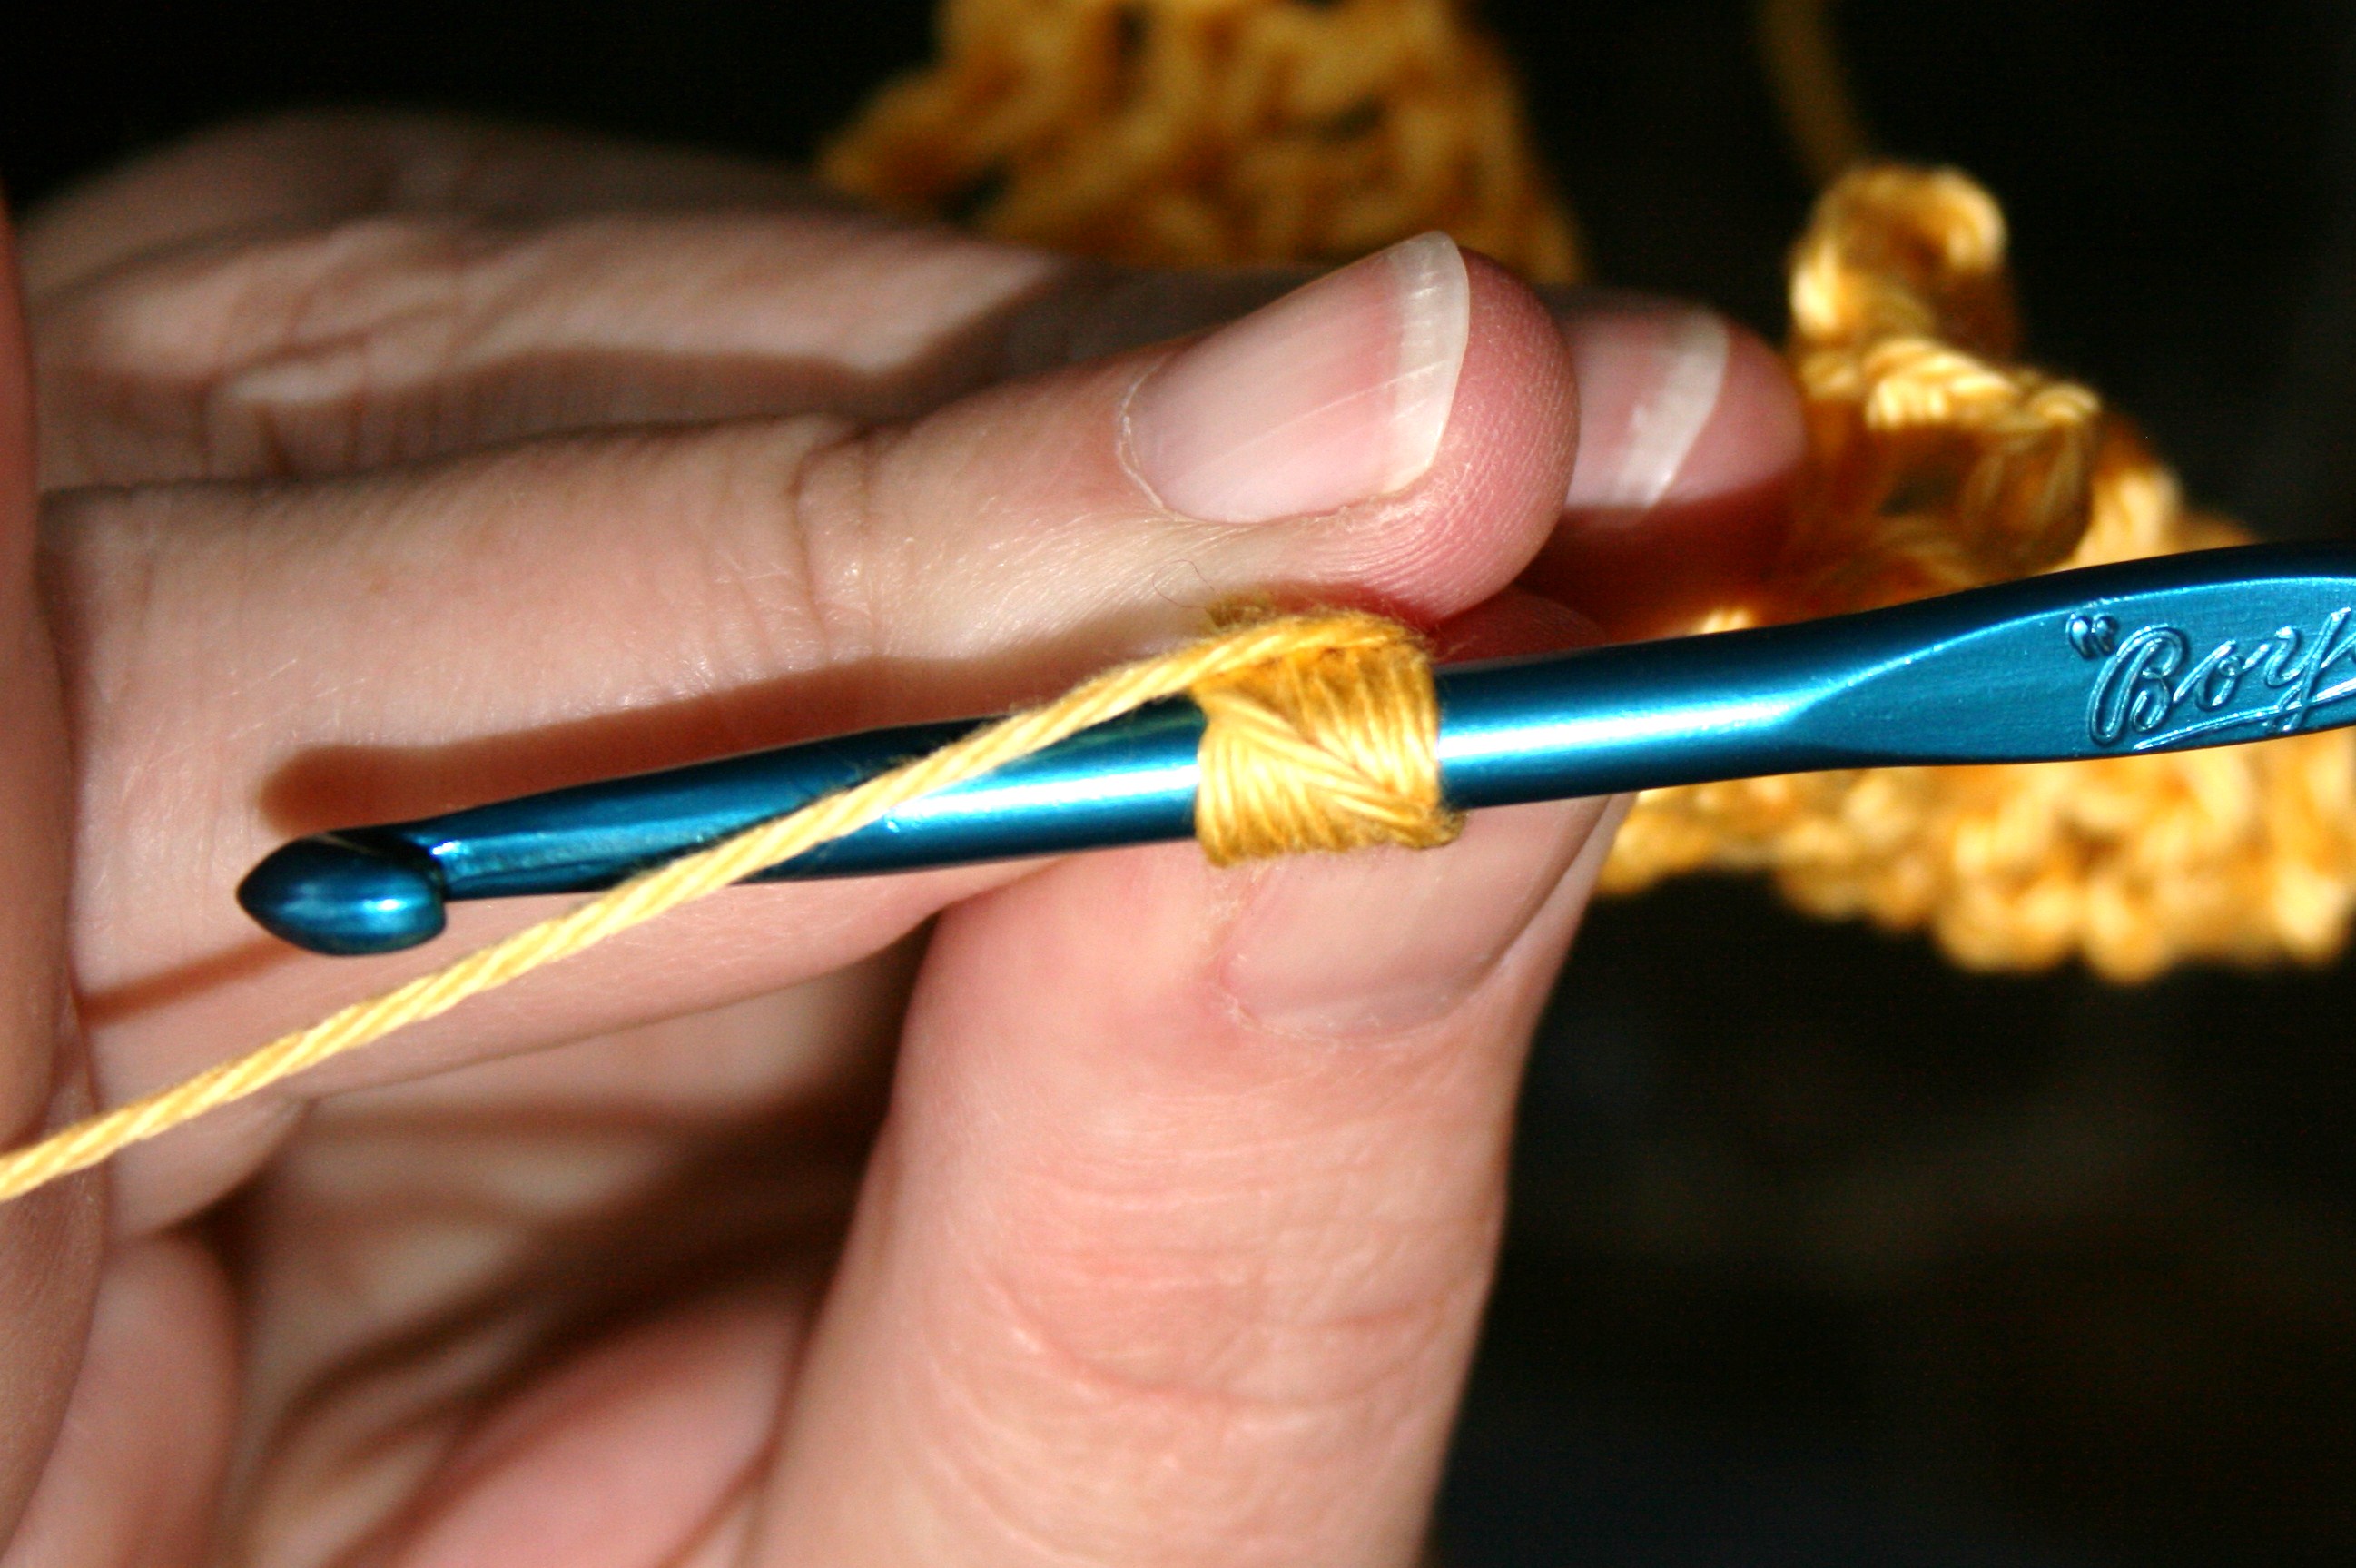
To create this stitch, begin by chaining a couple of chains, then place the hook under the working yarn, rotate the hook 360° and place in under the working yarn again. Placing the hook under the working yarn and rotating the hook causes a loop of yarn to be placed on the hook and twisted to stay in place.

XIMG_6853

Twist hook counter-clockwise 360 degrees

XIMG_6855

Bring hook under yarn again, and re twist clockwise 360 degrees.

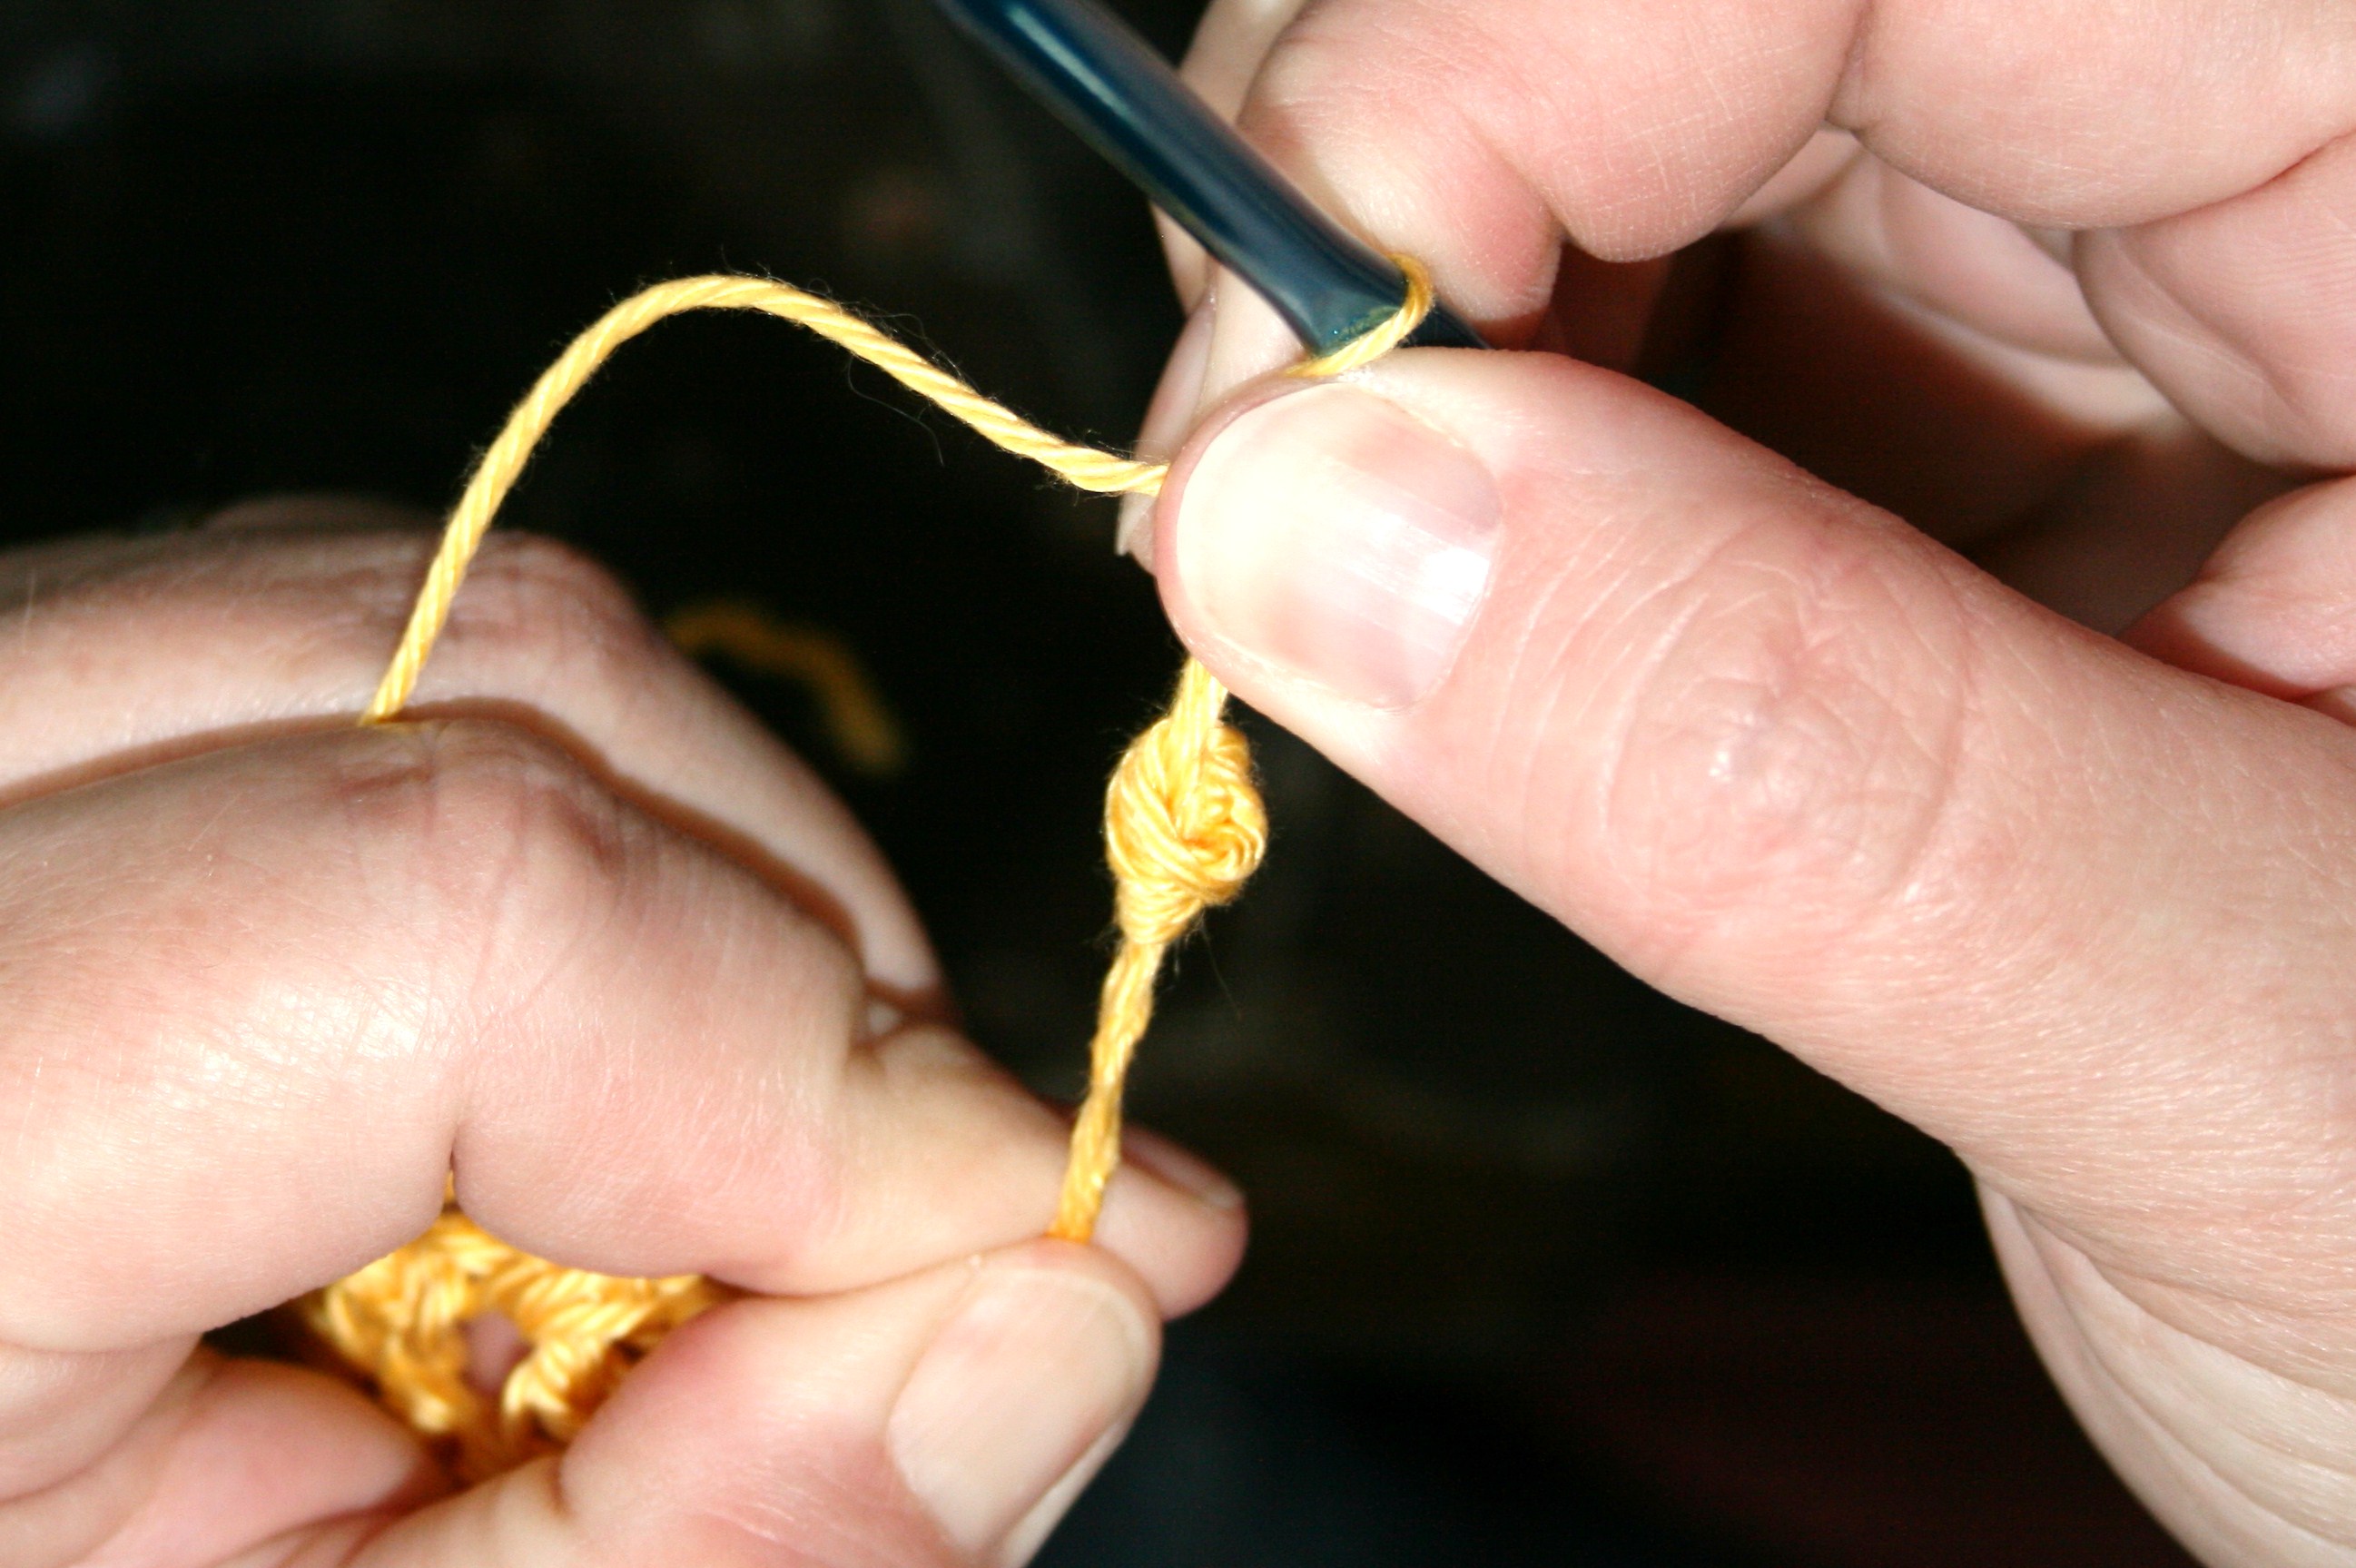
After working this motion a few times or the number indicated in the pattern, yarn over and pull through all the loops. Then chain a couple of more times, now comes the part of securing the stitch. Pull the chain taught and push the loops toward the working end of the chains. You should feel or hear a small pop; this is essentially that you are sliding the loops over the adjacent chain causing it to become secure.

XIMG_6862

Yarn over and pull through all the loops on the hook.

This unique stitch does have a slight disadvantage to what you usually expect from crochet, it is difficult to rip back, as securing it makes the stitch more difficult, as it creates what its name implies, a knot.

XIMG_6866

Pull chain taught and push Clone Knot toward working end of the chain to secure it in place, you will feel or hear a “pop”.

I hope you give this embellishment a try, add it to an edging, an place of open work, any where you want something a little different.

New Approaches to Broomstick Lace- The Bombay Vest with Elongated Loops

ScannedImageIn case you haven’t noticed I enjoy playing with stitch techniques and my latest design is no different.

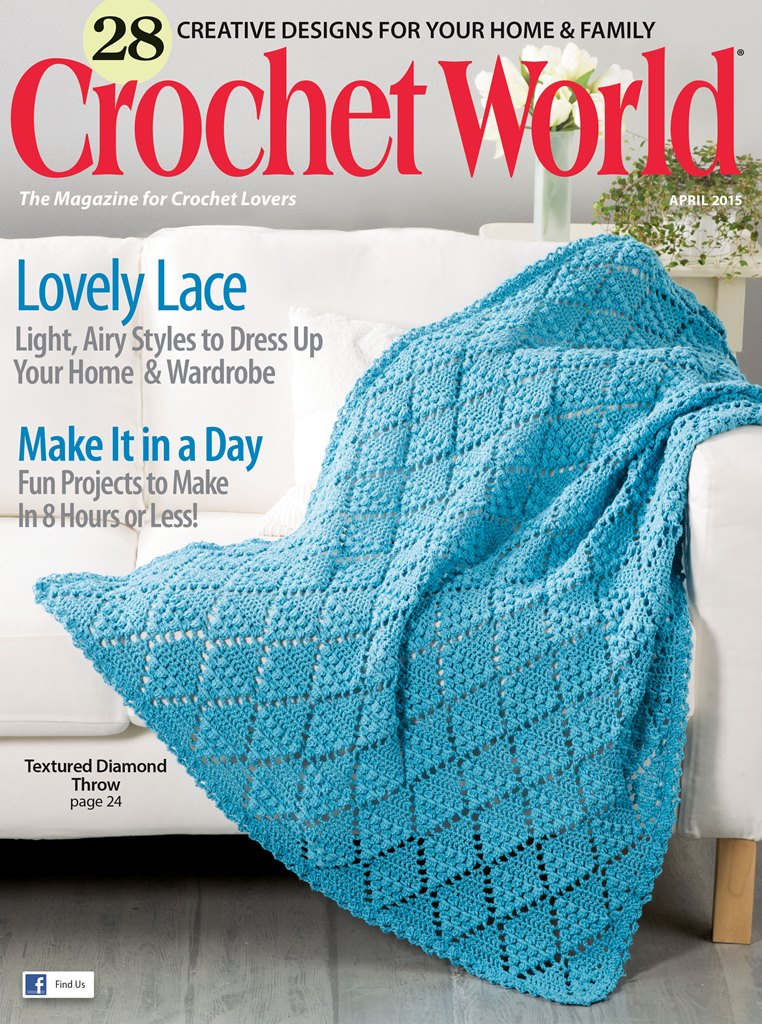
With the Bombay Vest, in The April 2015 of Crochet World, I was playing with broomstick lace. This classic crochet technique is one that I find has a great untapped potential. It creates such a iconic “peacock eye” appearance, but what if you use those loops a little differently?Crochet World_April2015_Cover

For someone new to the concept of broomstick lace, it is a process in which you pull loops through a crochet base and over a large knitting needle (or as in times past a broomstick, hence the name; although it can also go by Jiffy Lace due to a long ago popular pattern). Once all these loops are placed on a needle, they are then grouped, usually in sets of 4-5 loops and single crochets are worked into the set of loops. The single crochet is most traditional, but any stitch can be used to solidify these loops into a group.

One of the ways I decided to play with this stitch was to simply twist the loops before filling it with stitches. This gives a very different positive/negative space appearance, almost more silhouetted, making you recognize the space between the set of stitches then the loops of “eye” created in the center.

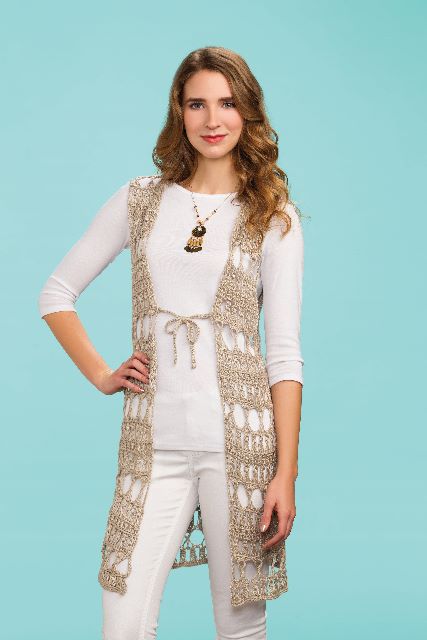
Bombay Vest

Bombay Vest- April 2015 issue Crochet World Photo courtesy of Annie’s

Then I took this one step further, by attempting to create 2 different heights of lace using the same knitting needle. One of the limitations with broomstick lace, in my opinion, is that the height of the row is limited by the size of the knitting needle (or broomstick) you are using. Yes, this tool gives you even and consistent loops, but often they are smaller then I might like, I want something really open, really tall. So I found that I could accomplish this by using every other loop of a set, and pulling the unused loops back into the ones that I have selected. As a result I have a loop set that is twice as tall as the needle created. (To get a better visual of this effect, please watch my video here). My only note of caution is to make sure that if you are going to pull up loops that you make sure that you do not drop the last loop from the needle, make sure that this is a loop that you elongate the length on, as it is part of the last stitch of the row below, and you do not want this to unravel.

When playing with these techniques I ended up creating a swatch, almost by accident, and thought it offered a great, almost retro feel, and immediately thought of a vest to wear. Then to find the proper yarn, I was looking for something that was not to springy and offered great drape, so Paton’s Bamboo Silk worked as an easy fit. This is a fun work project to work up, but I have to say I really enjoy the approach to the technique. So I hope that you consider giving it a try and see what broomstick lace can have the potential of being.

Elegant Crochet Jewelry Made Easy- Formal Jewelry by Karen McKenna

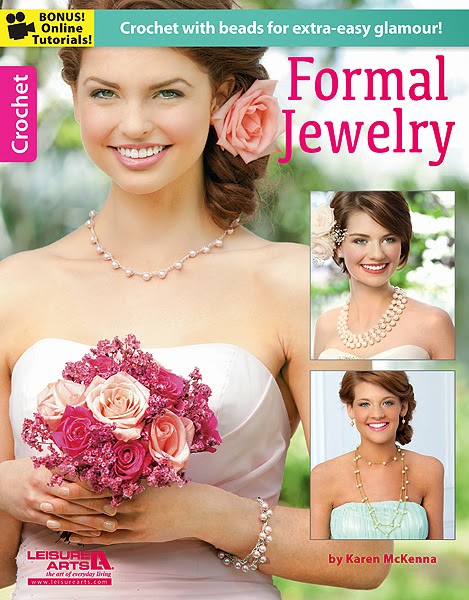
ScannedImageI always keep an eye out for something new to learn, something to new to inspire me, something new to my bookshelf. I definitely think that the latest book by Karen McKenna, Formal Jewelry from Leisure Arts, fits that bill. (Find it on Amazon here)

FJ CoverKaren has a design style that is professional, clean, trendy, yet polished, and it is definitely apparent in the design she shares in this book . This downloadable book offers projects that are simple to construct, and need only basic crochet skills, but have an elegant appearance. The biggest learning concept for me was the use of jewelry tools, clasps and the approach to using beads. There are links to “how to videos” throughout this book. I think that almost every step has a tutorial so that even the most inexperienced stitcher or crafter can produce the stunning pieces. However as I live in an area with limited internet availability I did not personally use the videos, but even without the videos the instructions are quite clear and easy to follow.

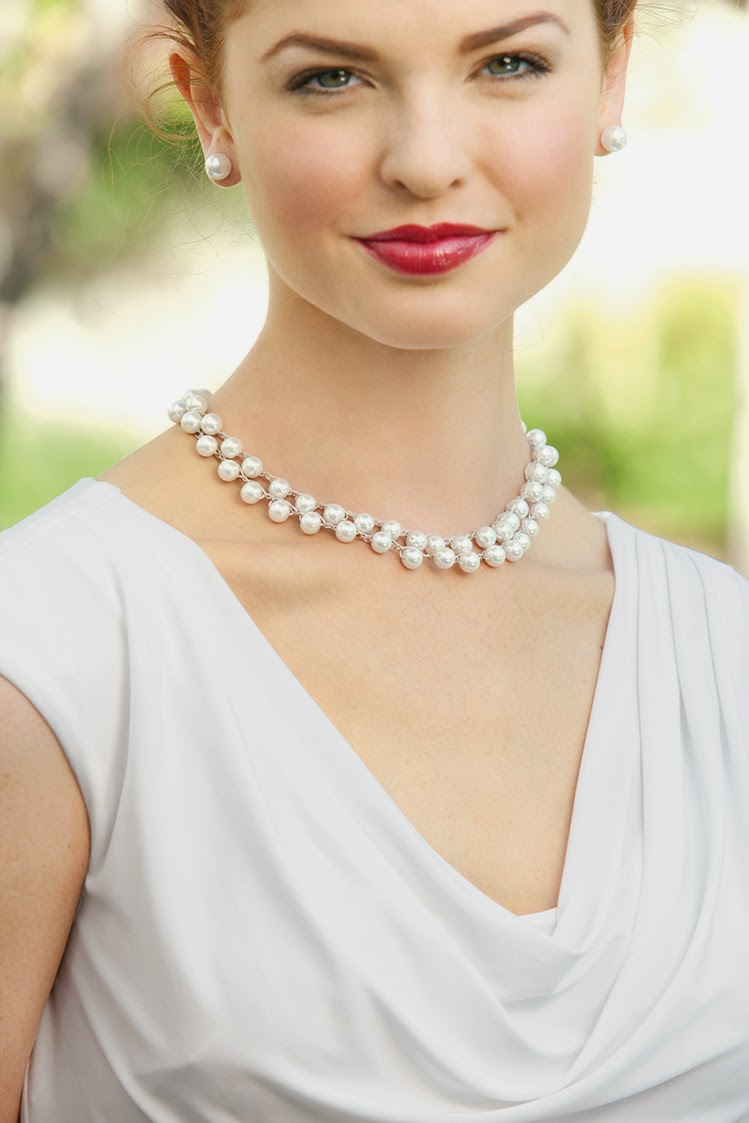
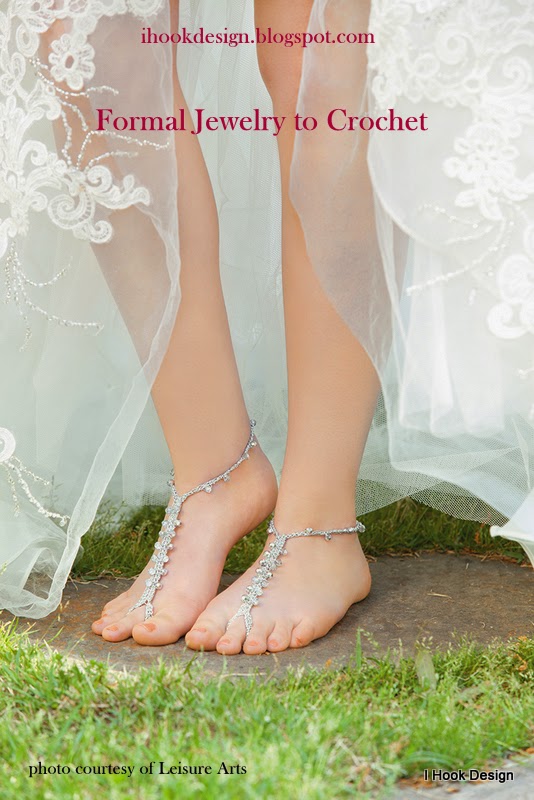
Double Pearl NecklaceMany of the beads are pearls (I am a sucker for pearls), but I can easily see how these formal designs can be made into everyday wear by changing to a less formal bead. The barefoot sandals are quite nice. I could see these as fun additions to a day on the beach as well as enjoyed by several dancer friends, as well as the intended purpose of formal wear.Silver Barefoot Sandal-001

I think my biggest take away from this book is how to get a very professional finish to crochet jewelry. The section on finishing actually focuses directly on working with crochet chains and how to use them with jewelry components effectively.

If you are having a big event upcoming in your life, or the life of a loved one, or simply like elegant jewelry I suggest that you download a copy of this book and give the skills a whirl, I am sure you will enjoy your finished product!

When Enjoying Your Work To Much….

ScannedImageYou need to review your work. Seems like a simple statement, yet one that I have sometimes overlooked. Sometimes I get so involved in a pattern, enjoying the process; they way the stitches work together, the way the yarn feels, the rhythm of the movement. Then when I finally sit back and look at my work, I realize that I made a mistake way back at the beginning. So the re-work process begins again.

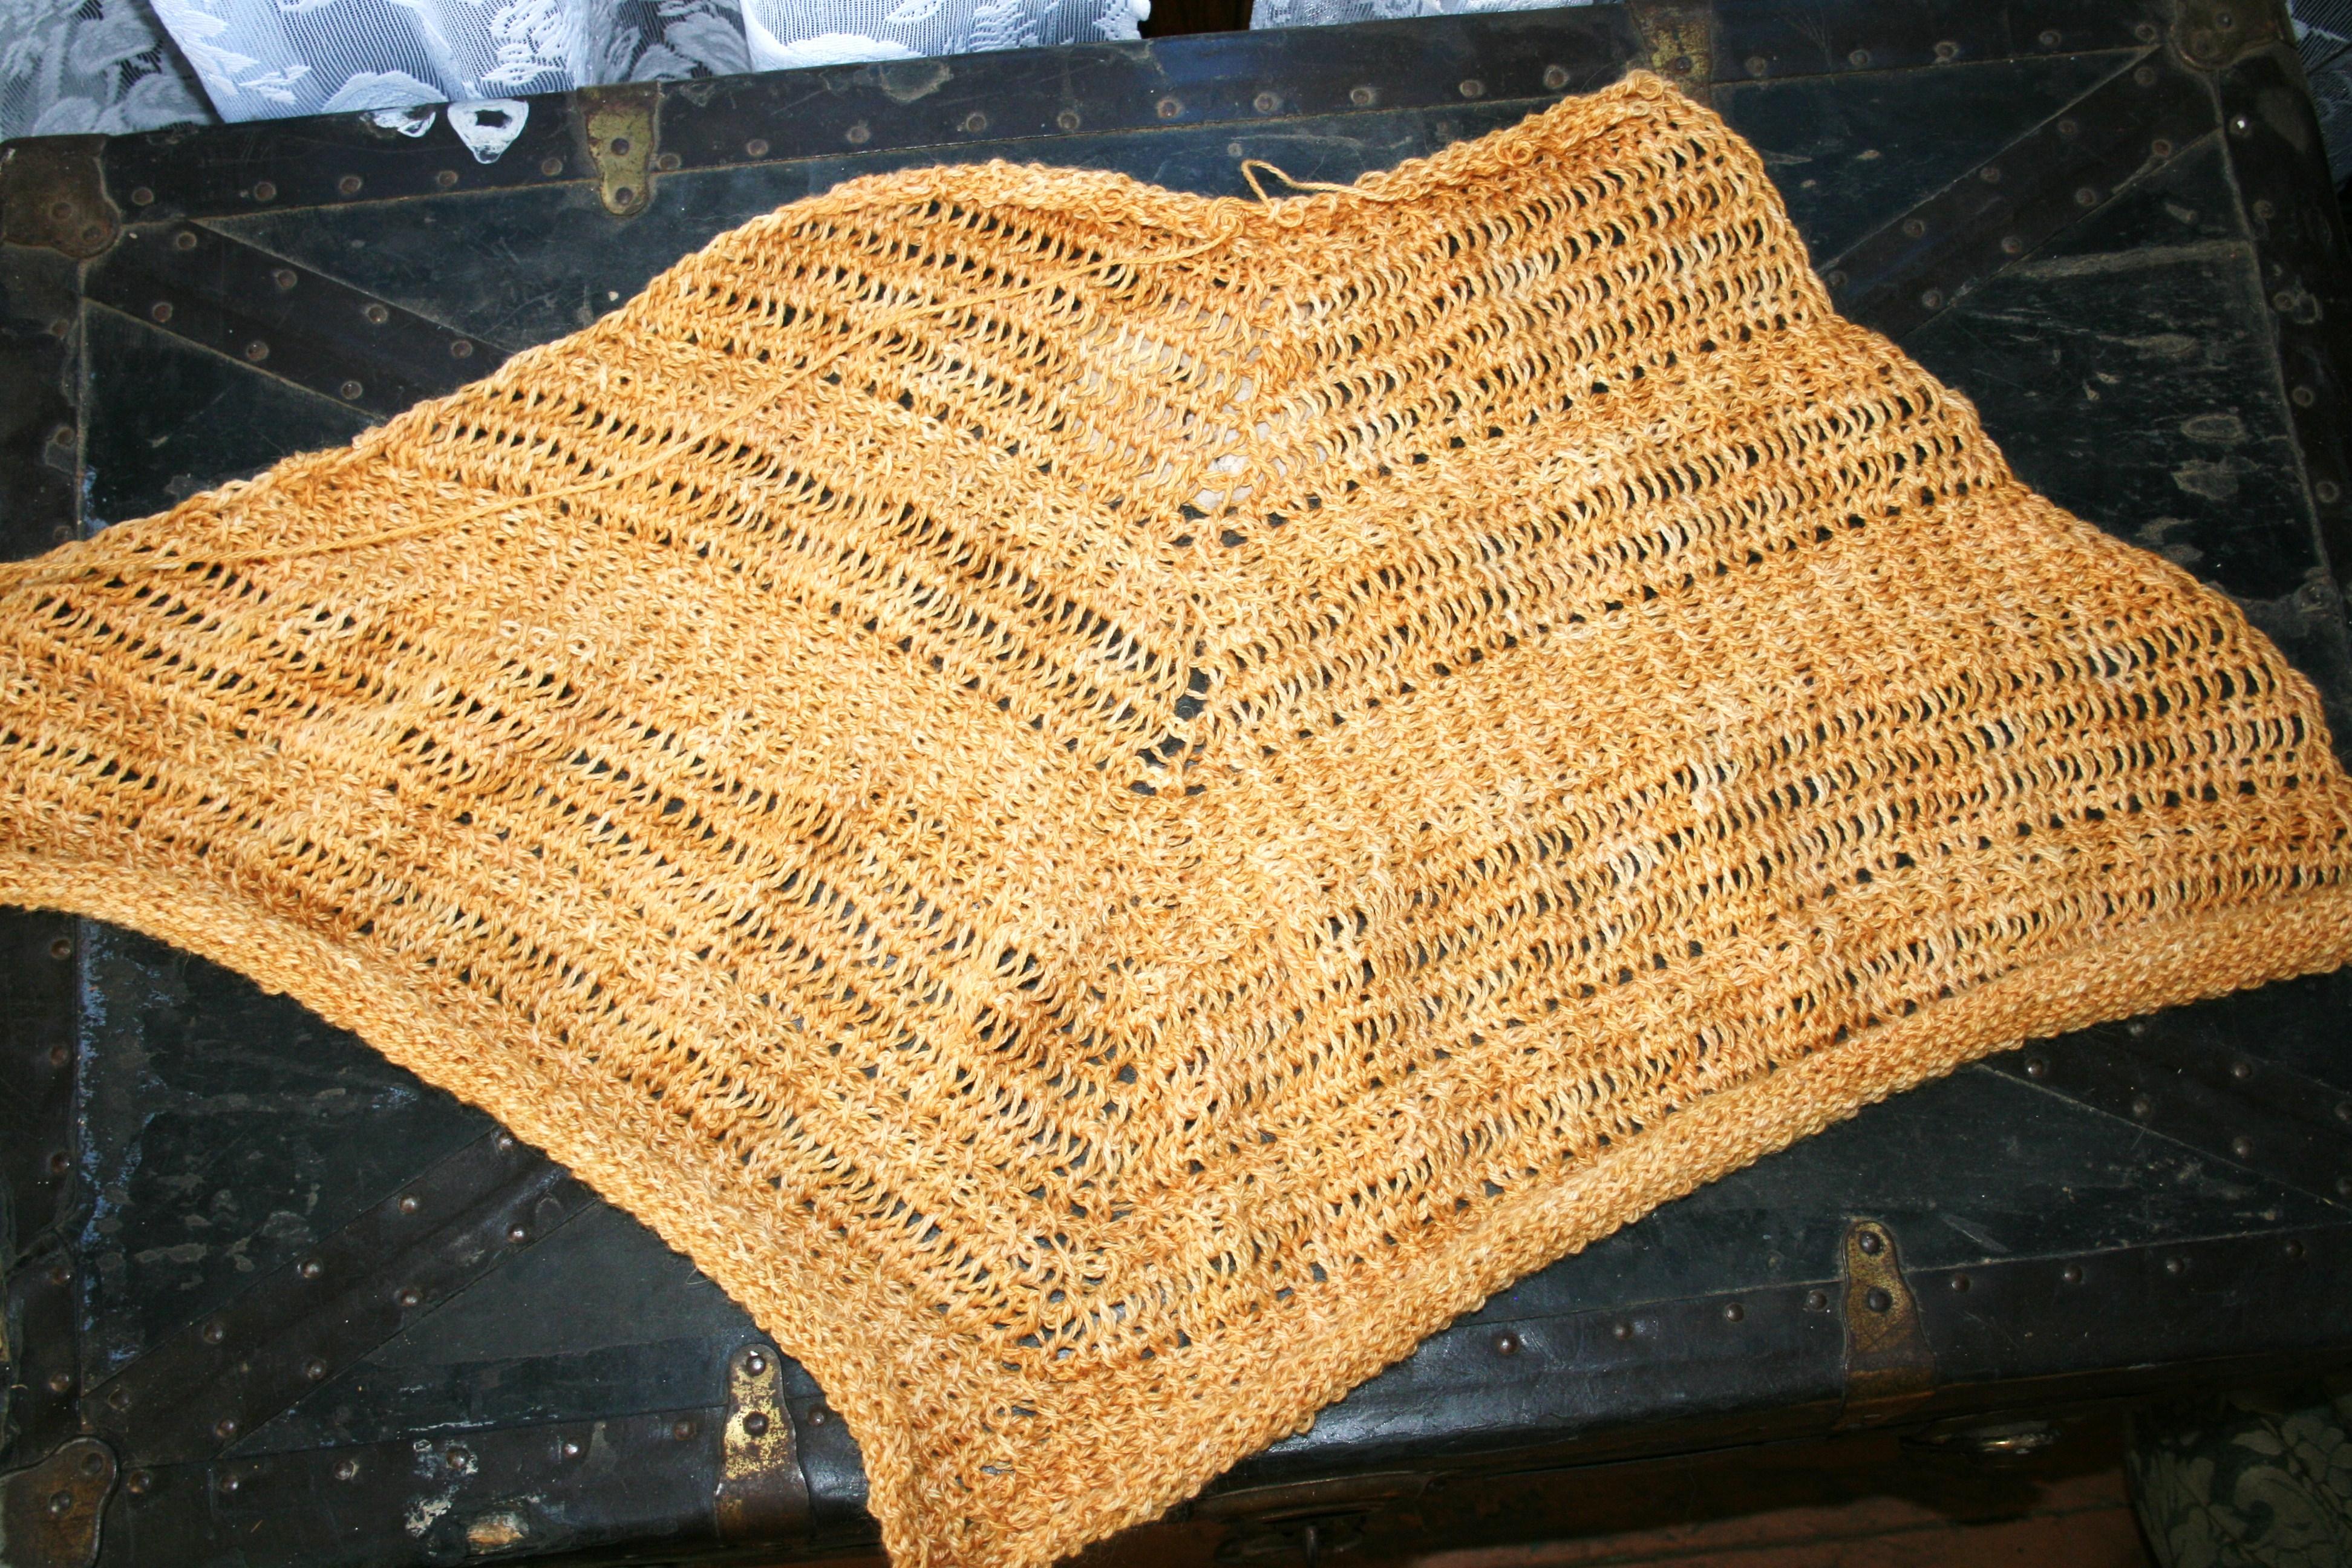
IMG_6740.1Here is my most recent “why didn’t I pay more attention” project. I was working up a shawl in a miter triangle, but have not been working my decreases correctly and thus have something more like a miter square (or trapezoid, it is all up for matter of personal preference). I really enjoy the stitch pattern (and hope to have it available very soon), and love the yarn (Lisa Souza Baby Alpaca/Silk, what is not to love), so it easily puts me into a trance.

So now it is time to pay a little more attention, and work my math a little more.