Corded Edges-A Great Finish

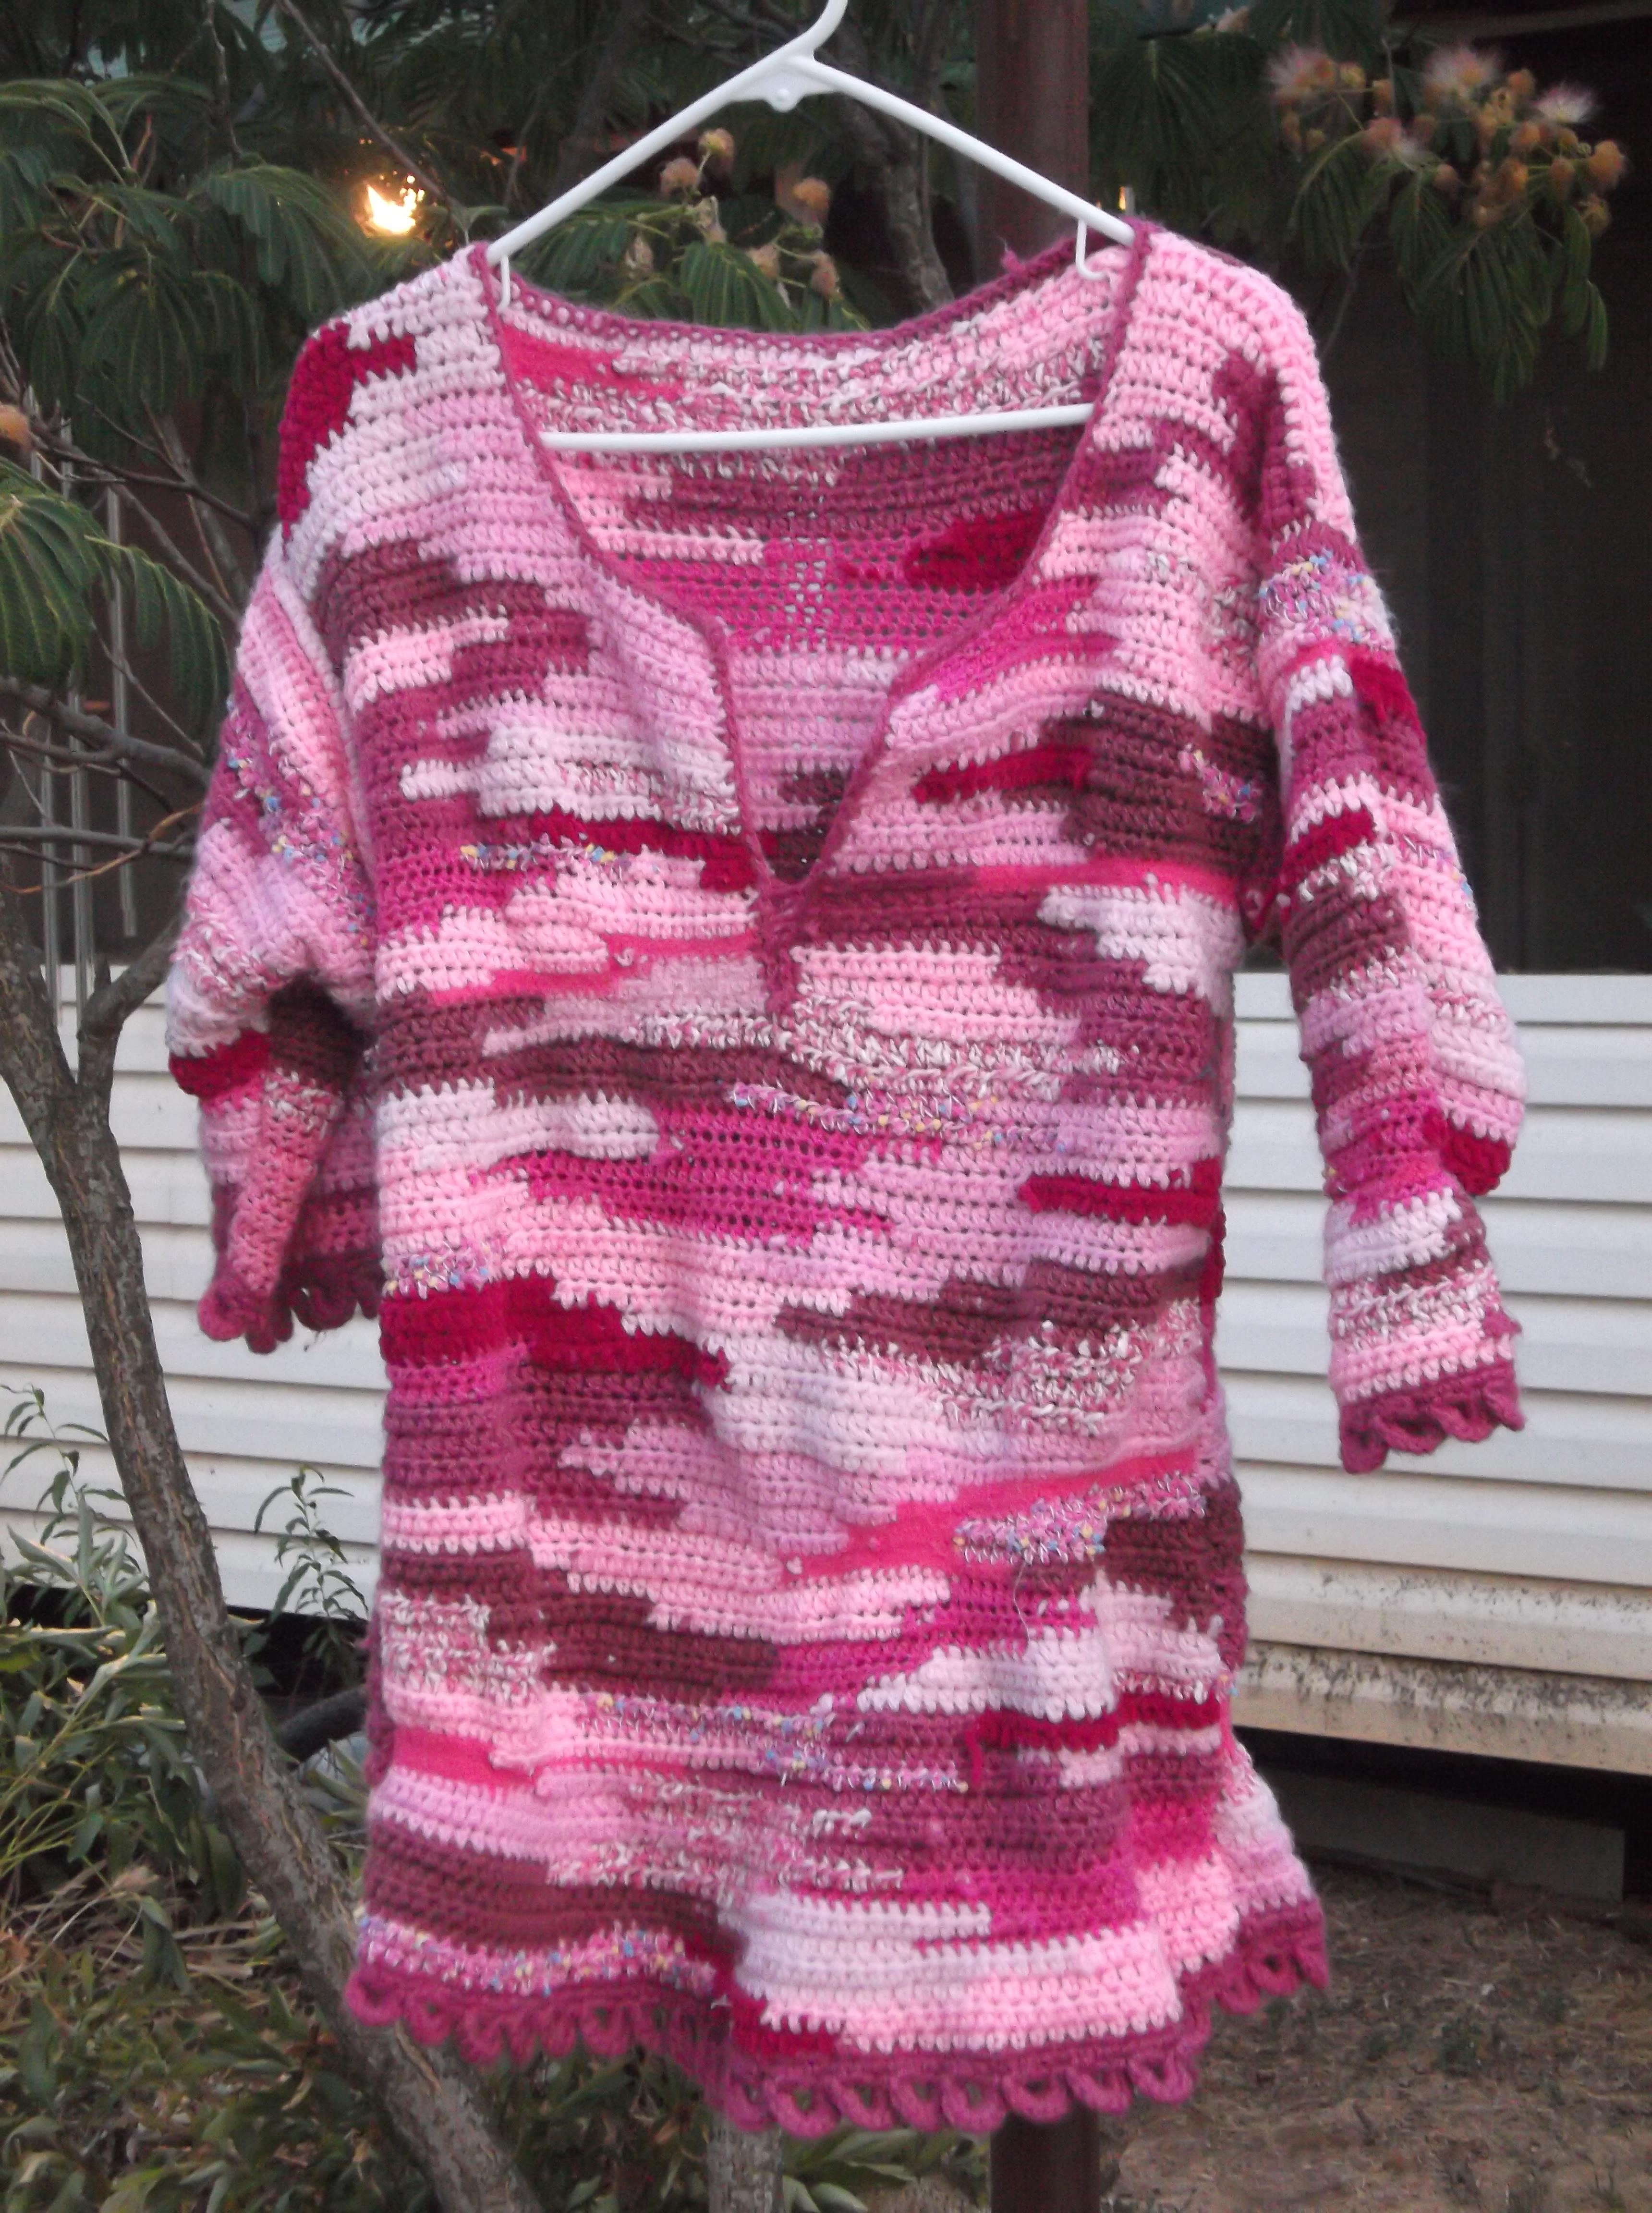
Often times it is the small details that can really cause your crochet work to shine. One of those details can be found in the edging.

There are many times that I finish off a piece of fabric with a Reverse Single Crochet stitch, also known by the name “Crab Stitch”, but in my time teaching I have found that this stitch can be a bit to trying for some students. It requires a good sense of adjusting your yarns tension and working in the opposite direction (I discuss how to work the stitch here). However there is another stitch, The Corded Edge stitch.

The Corded Edge stitch looks very similar to the Reverse Single Crochet, but is easier to work. It is not quite a stitch as much as a technique that creates a braided or cabled look. It is worked in the last row of the fabric and is worked by rotating the two loops on the hook 360 degrees, and then finish the stitch.

Unlike a Reverse Single crochet, this technique can be used with any stitch. Below I have demonstrated this technique with a Corded Single Crochet and a Corded Double Crochet stitch.

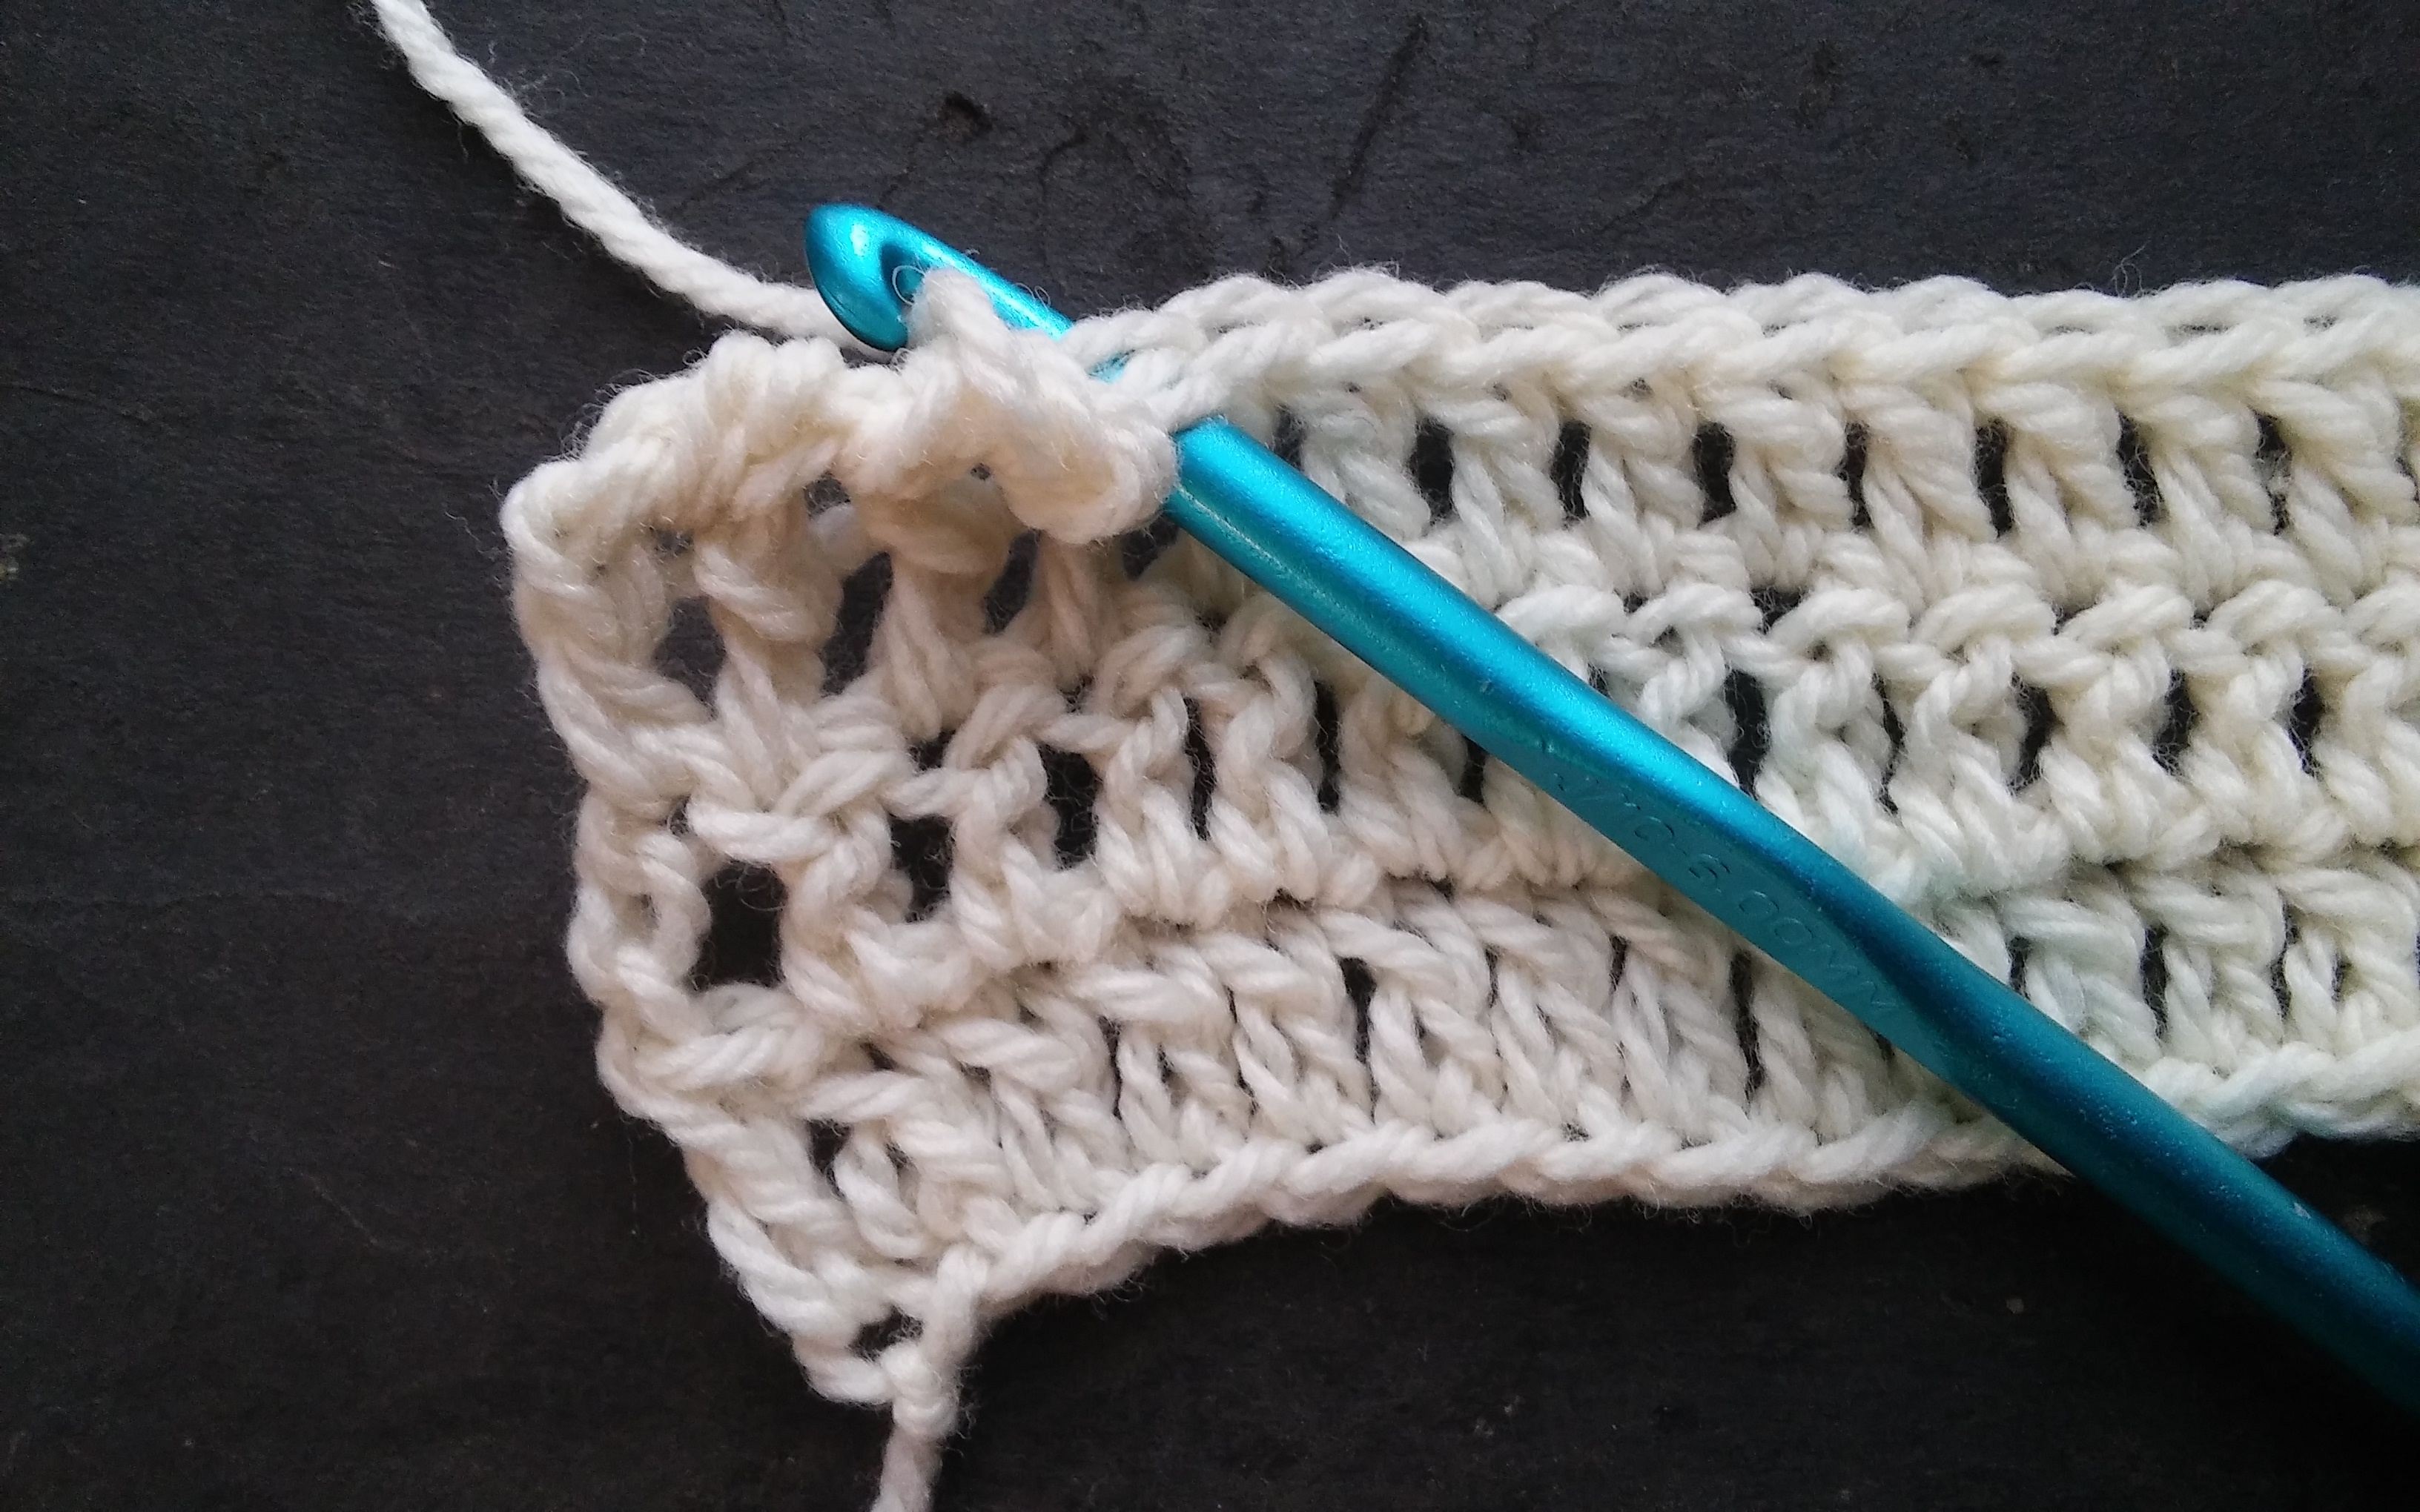
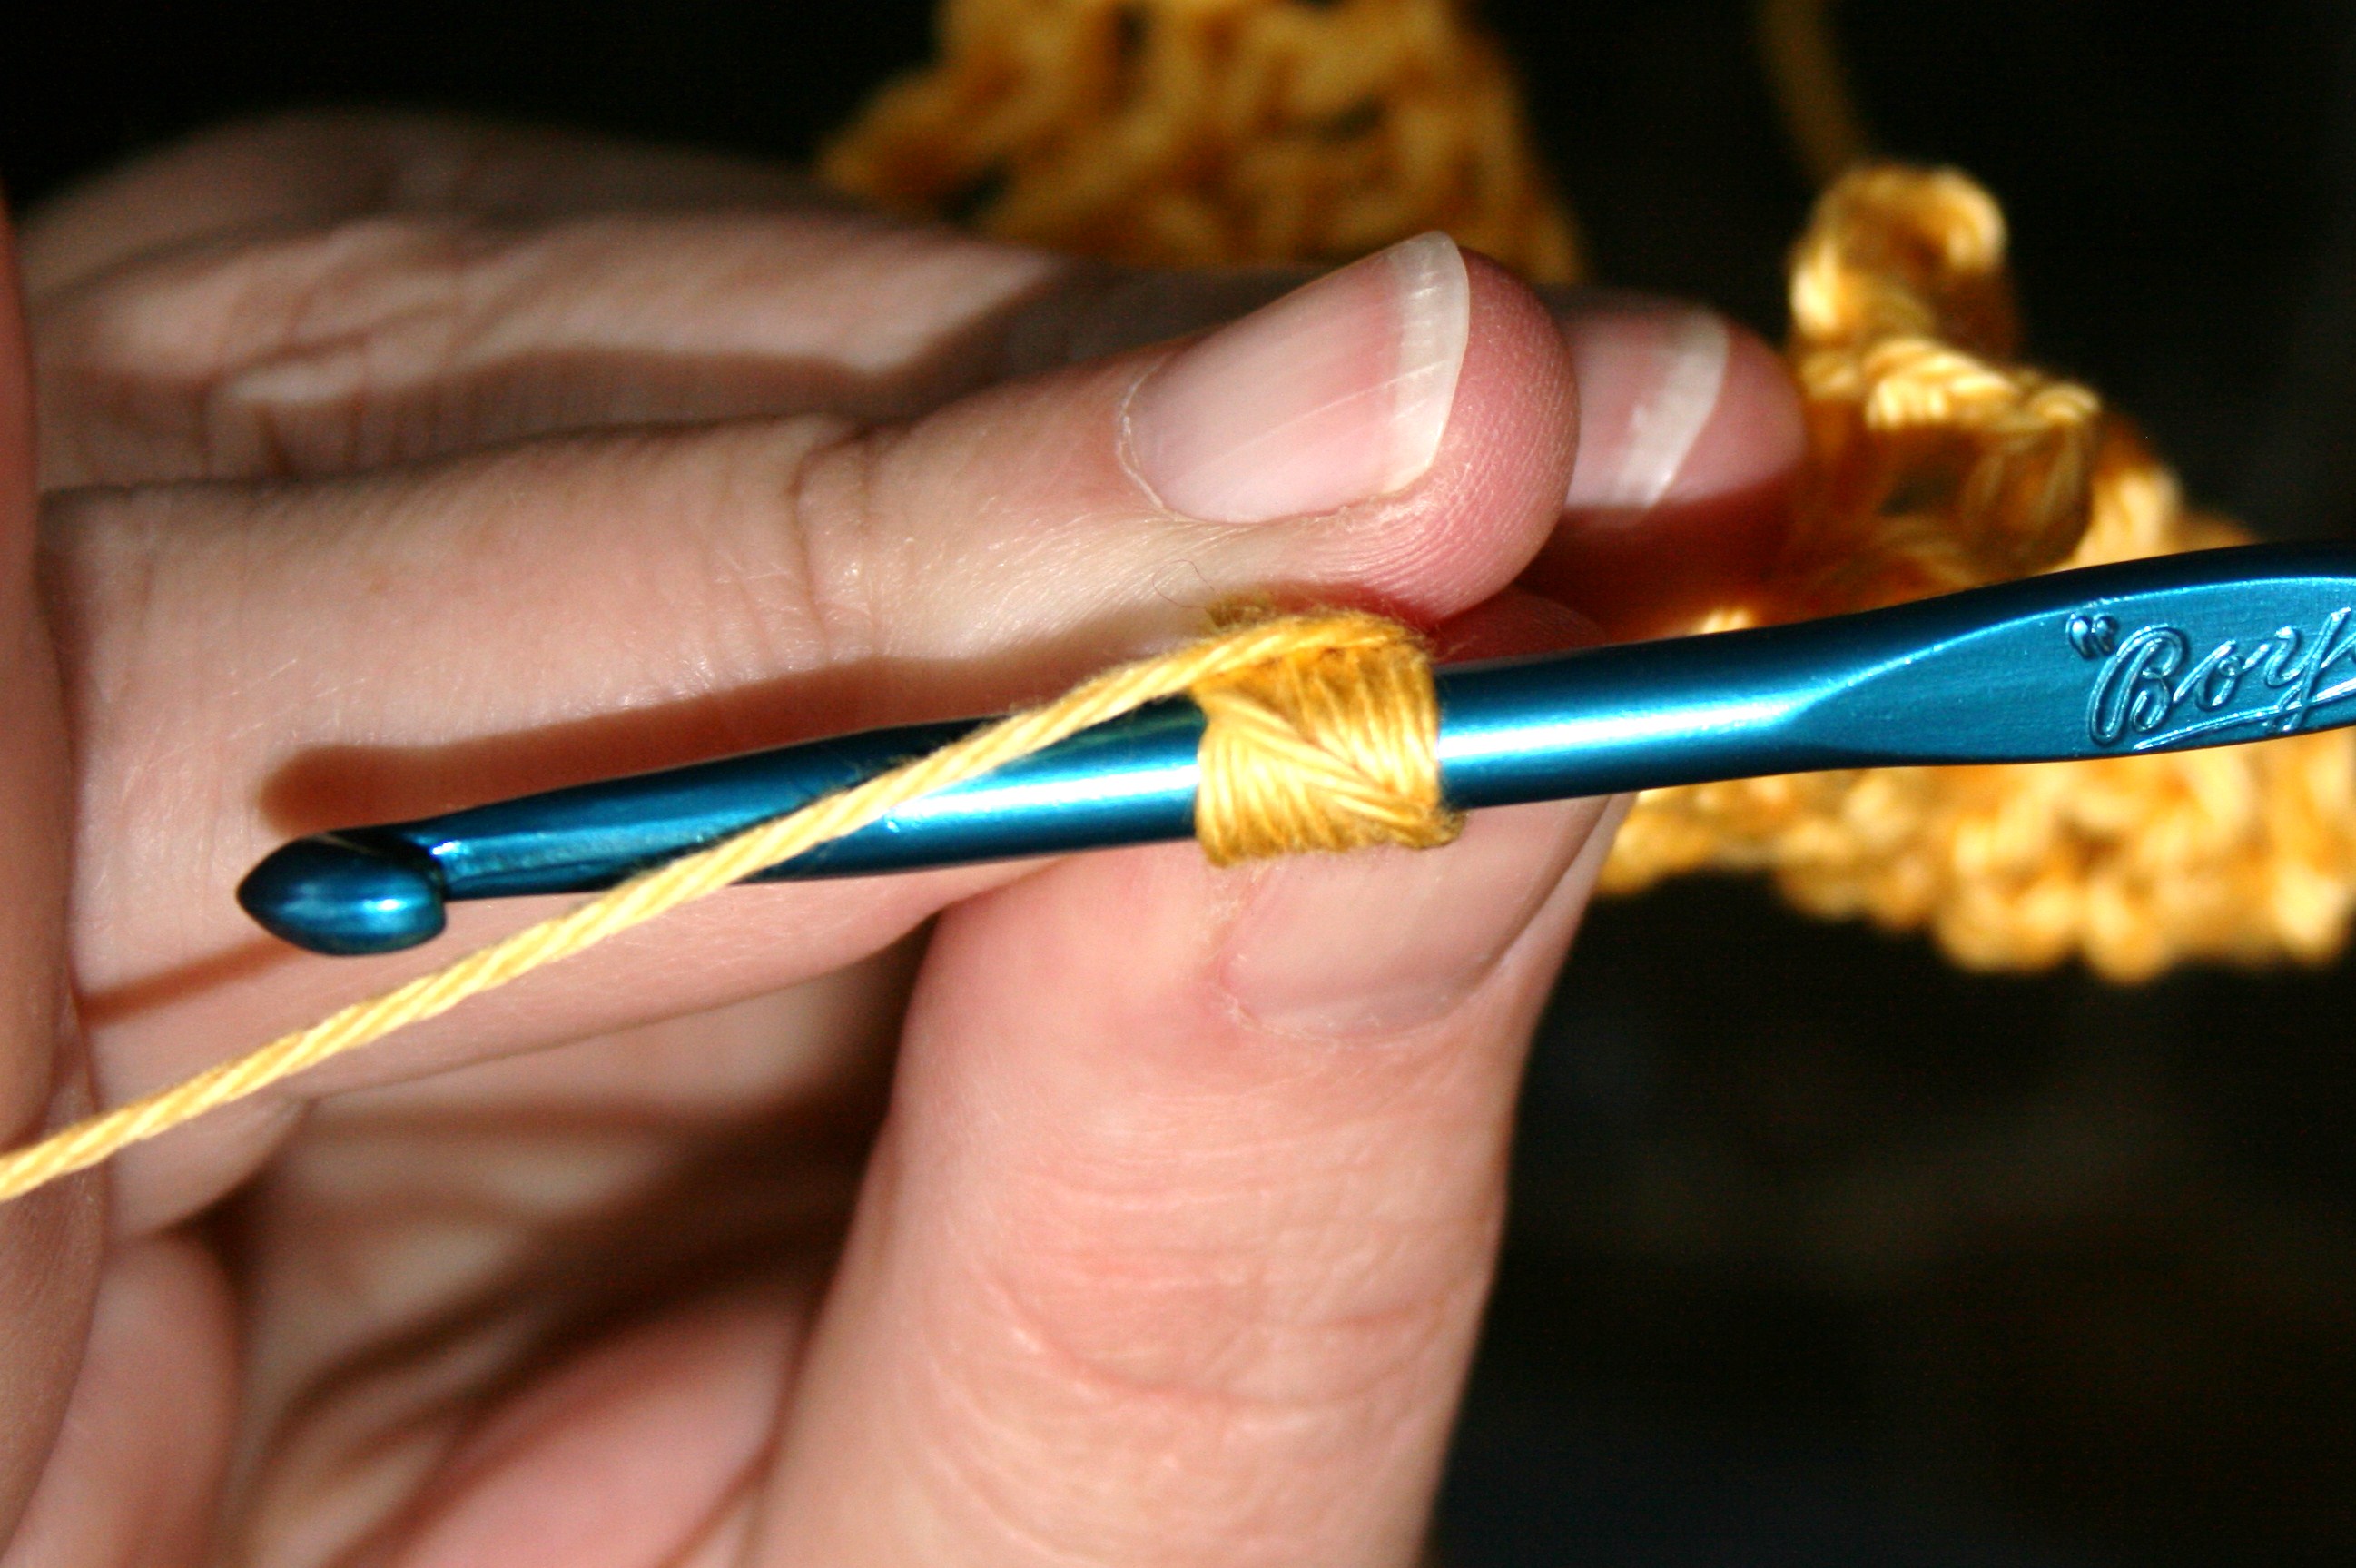
To work a Corded Single crochet, you begin a single crochet just as you always do: 
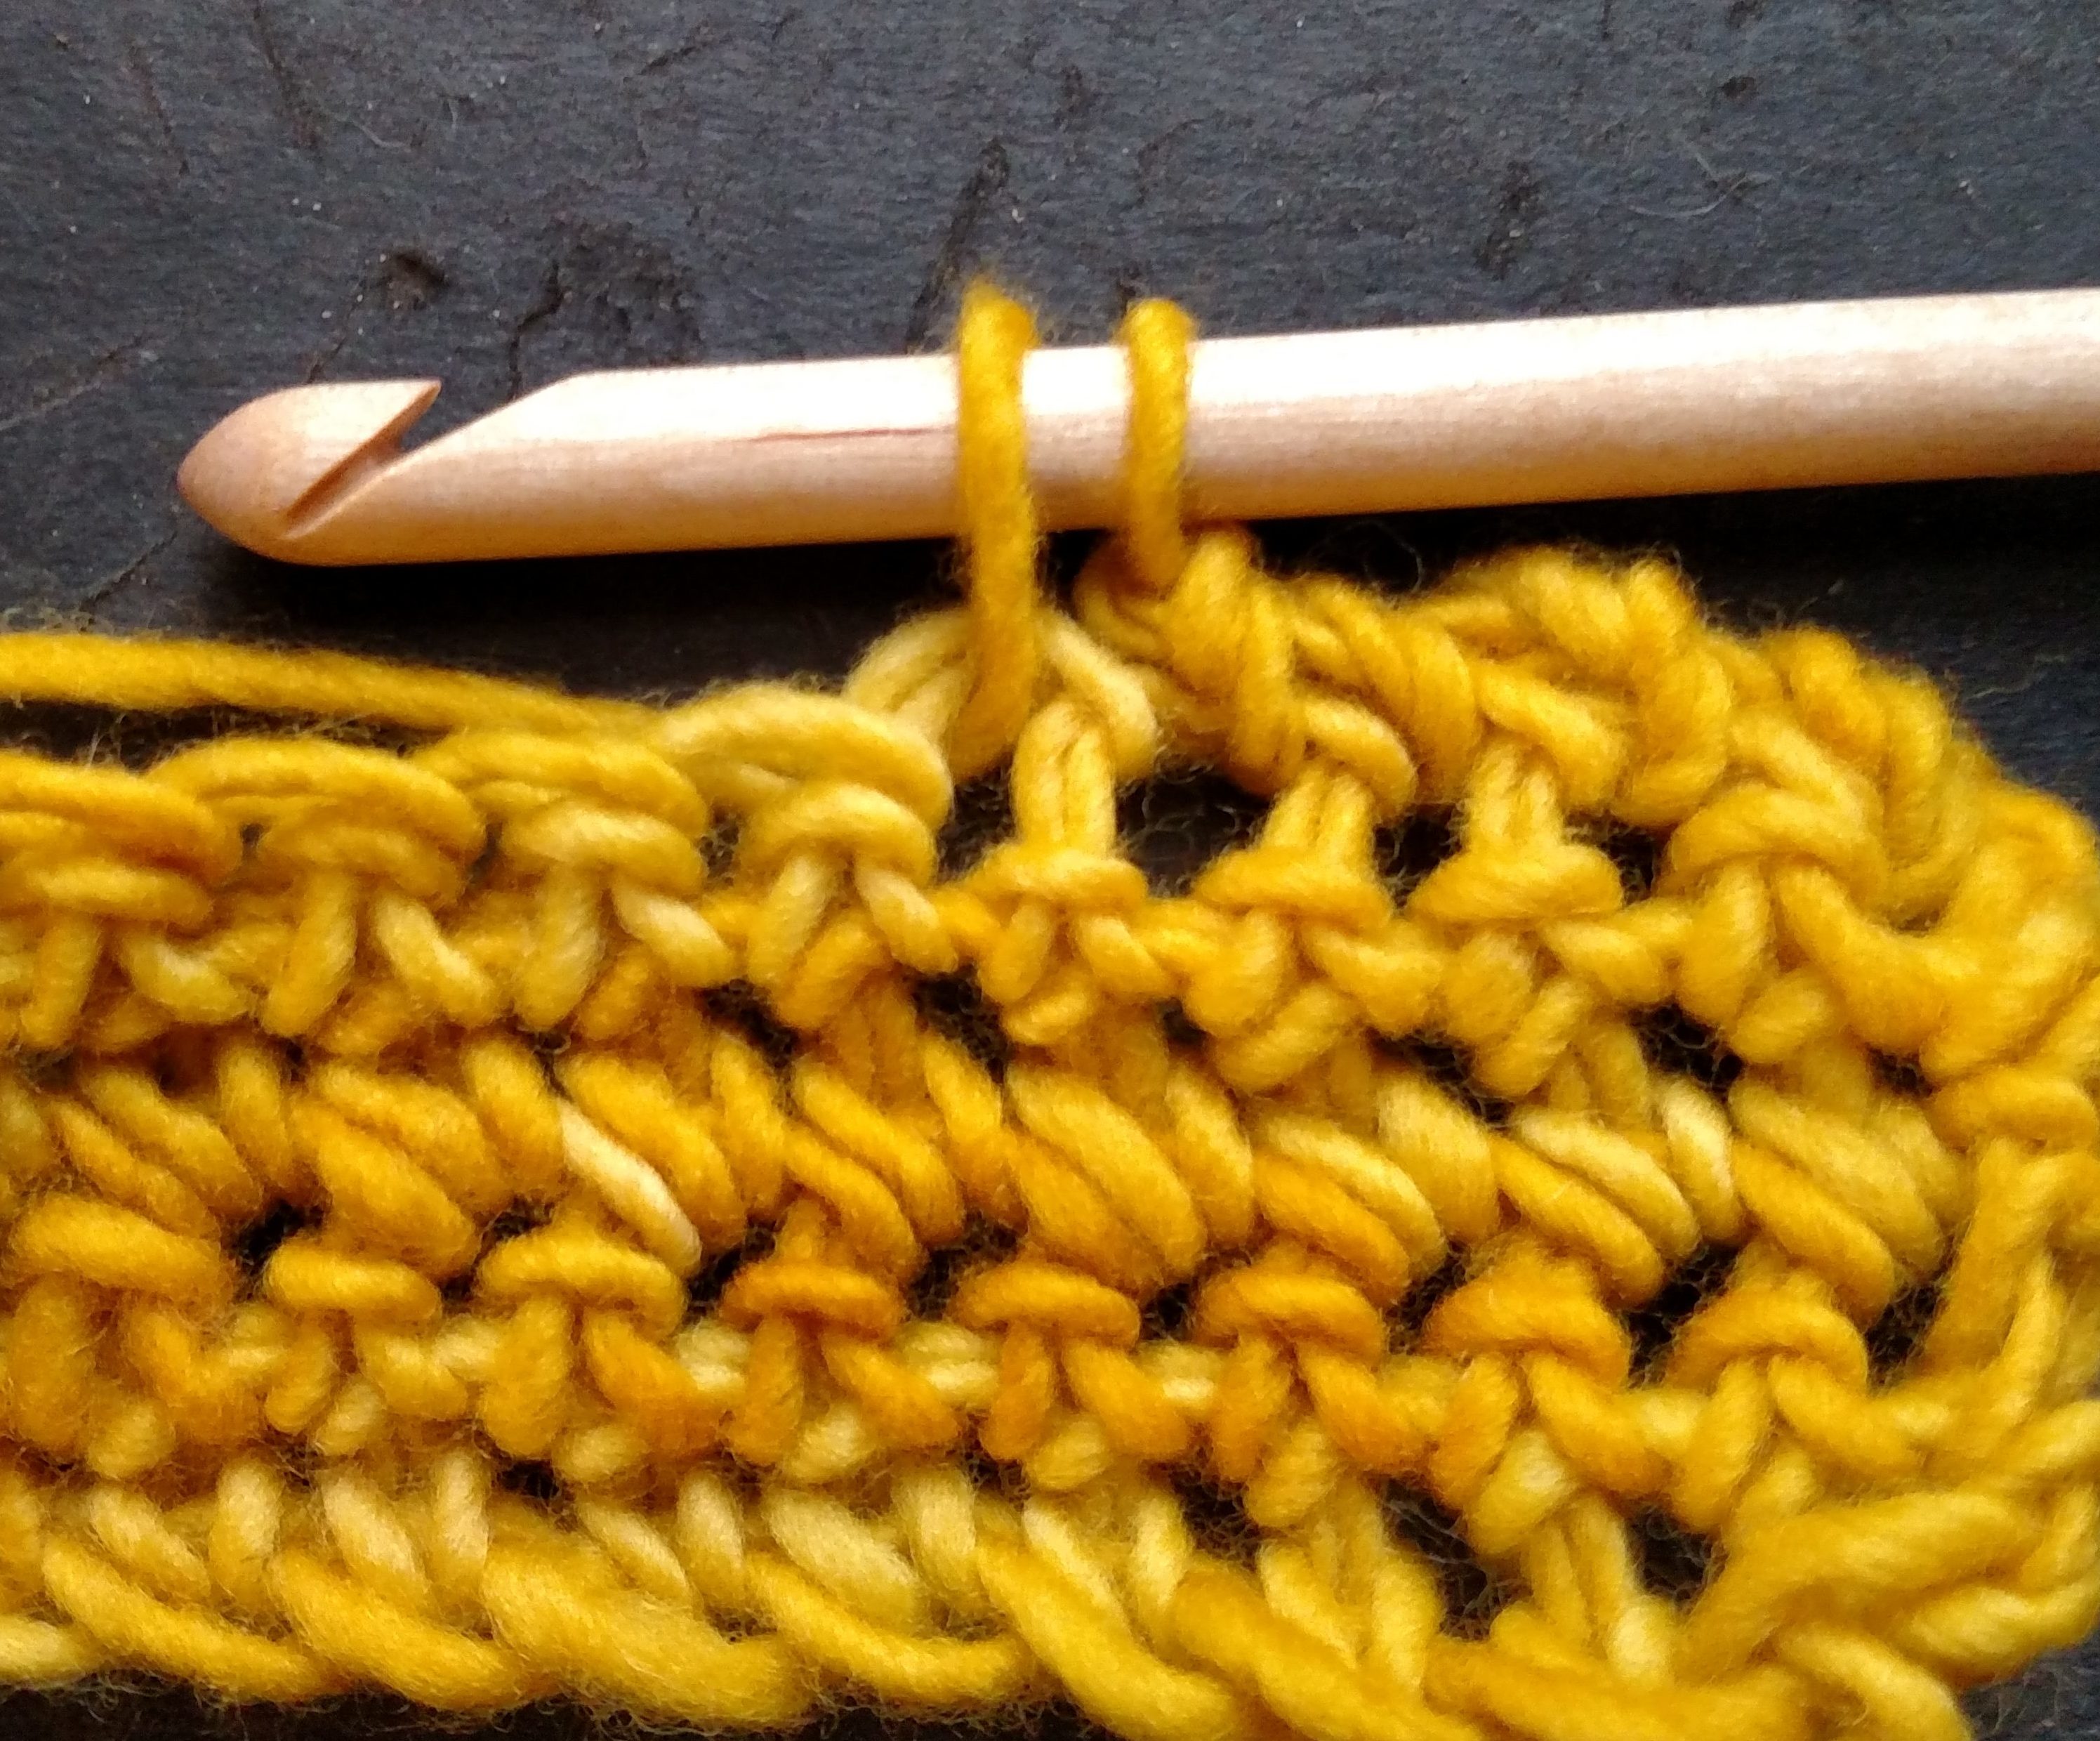
Insert hook in indicated stitch, Yarn over and pull through a loop. 
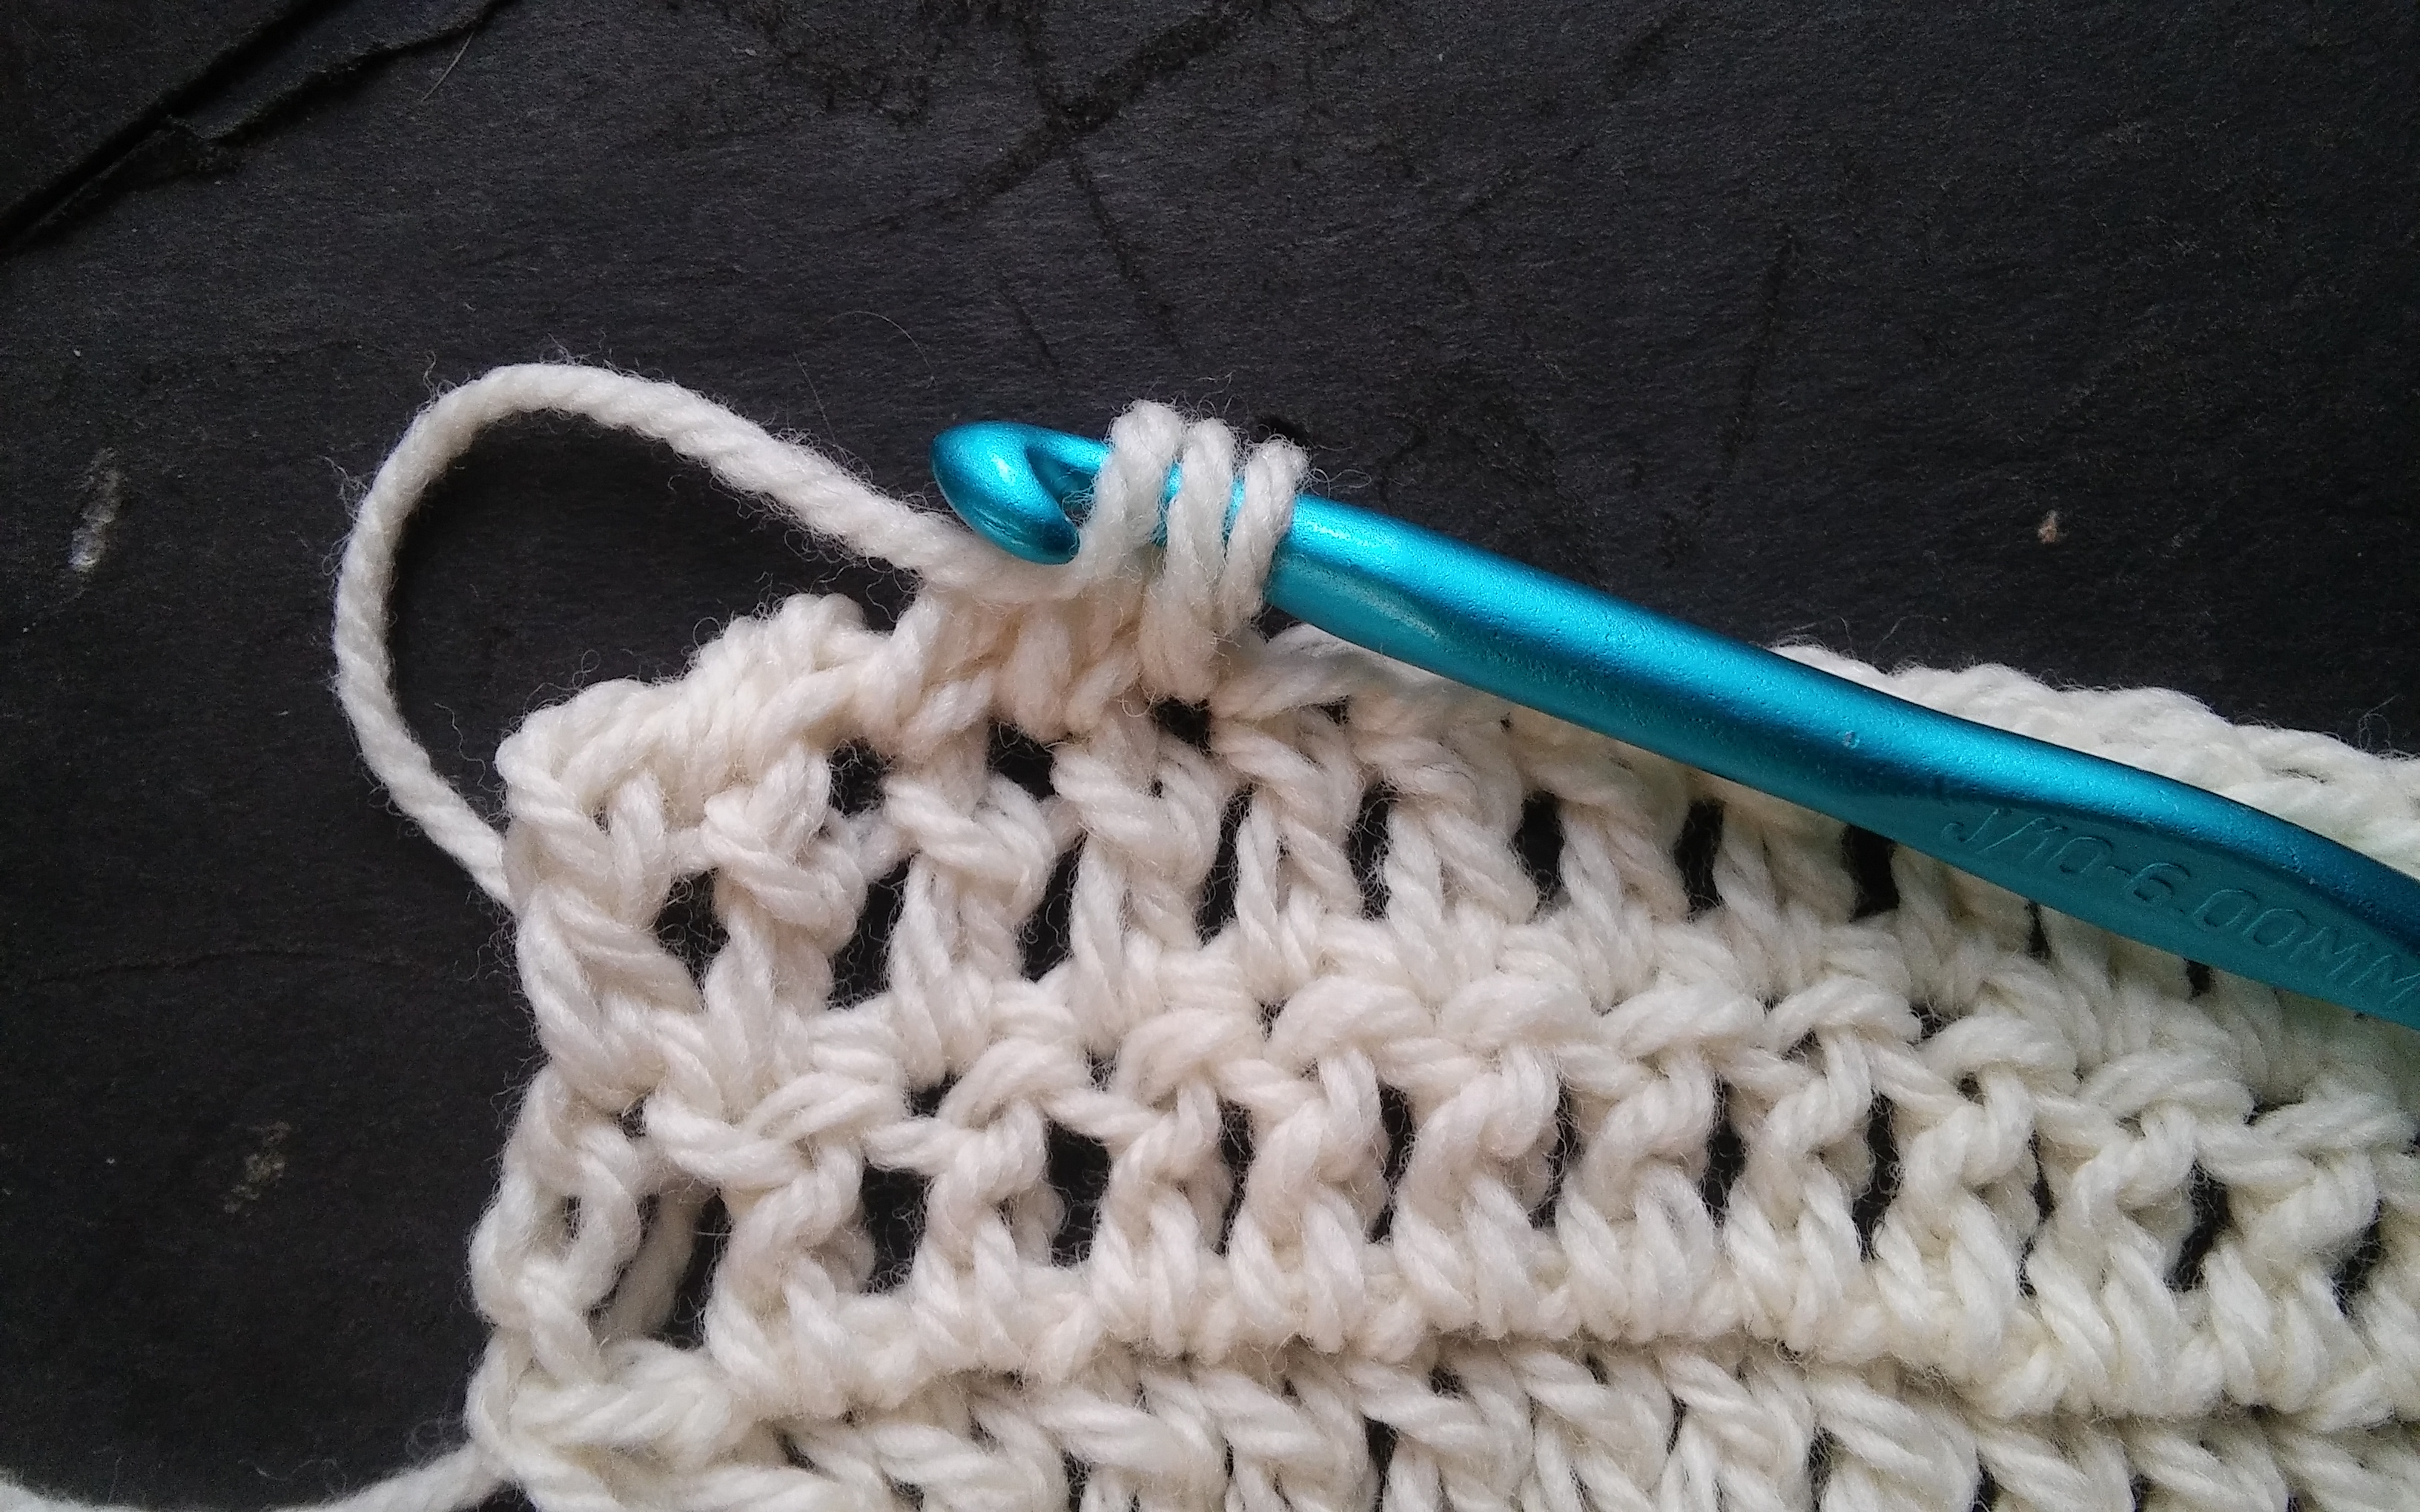
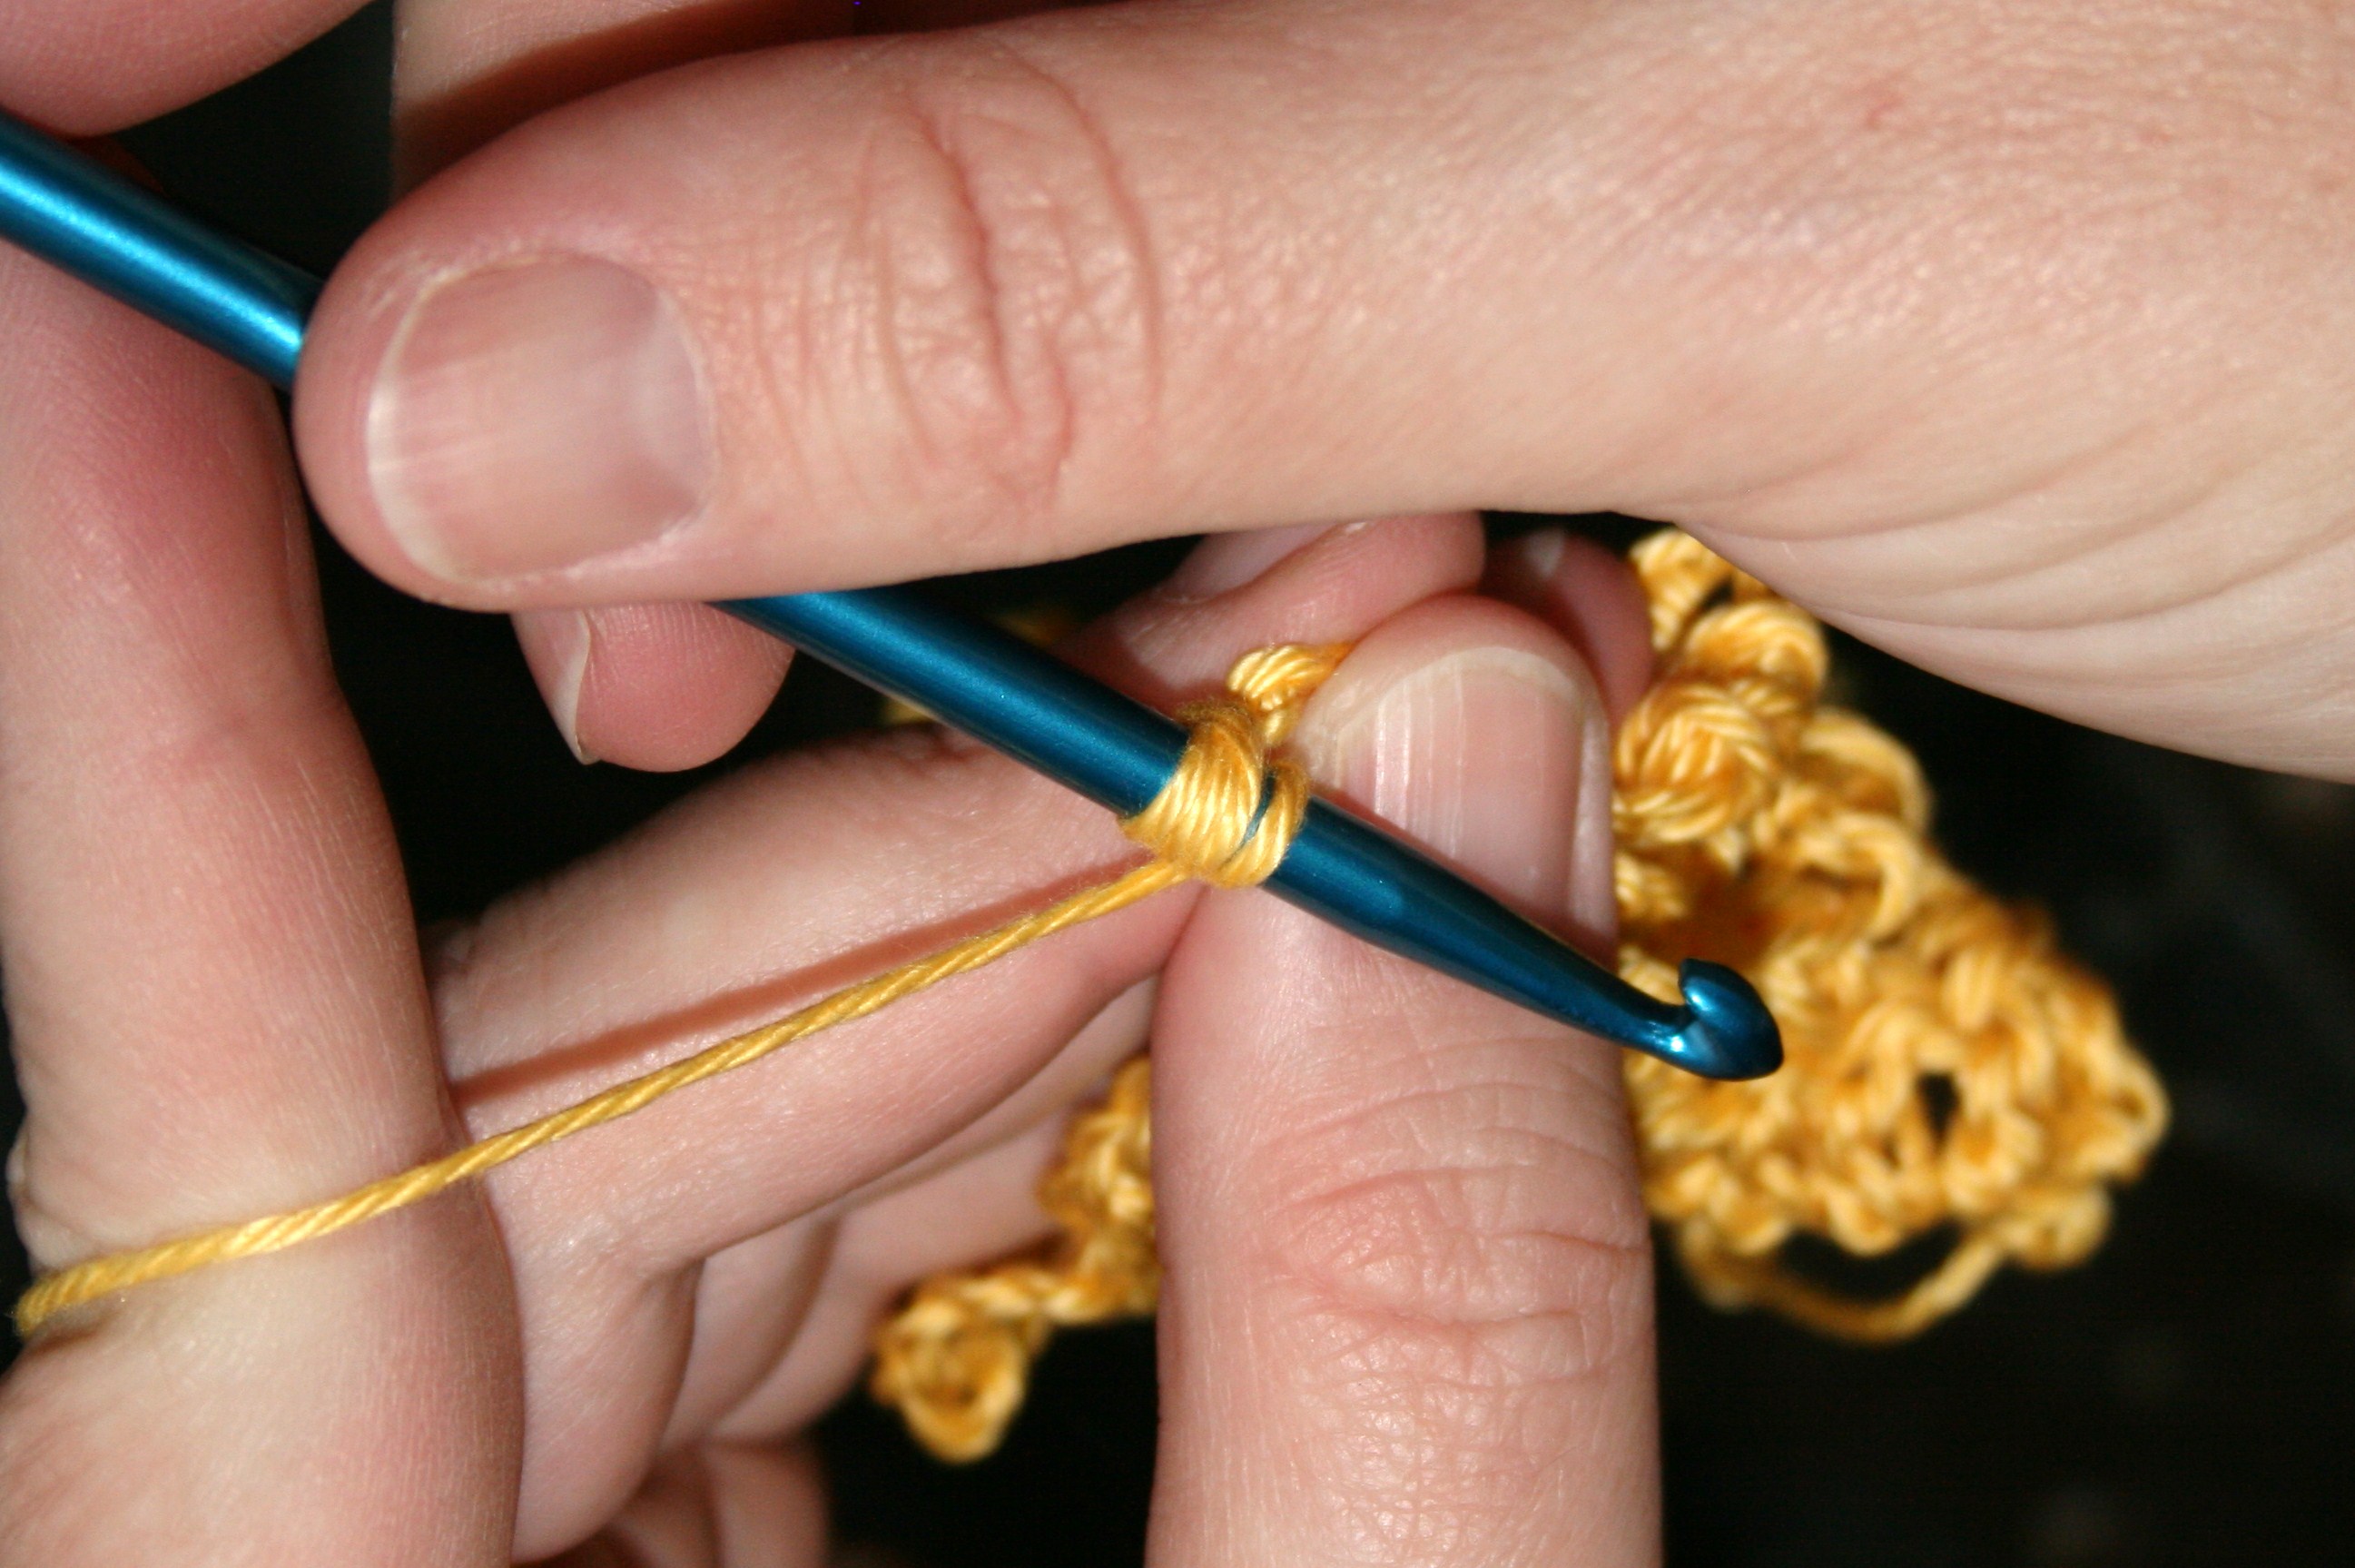
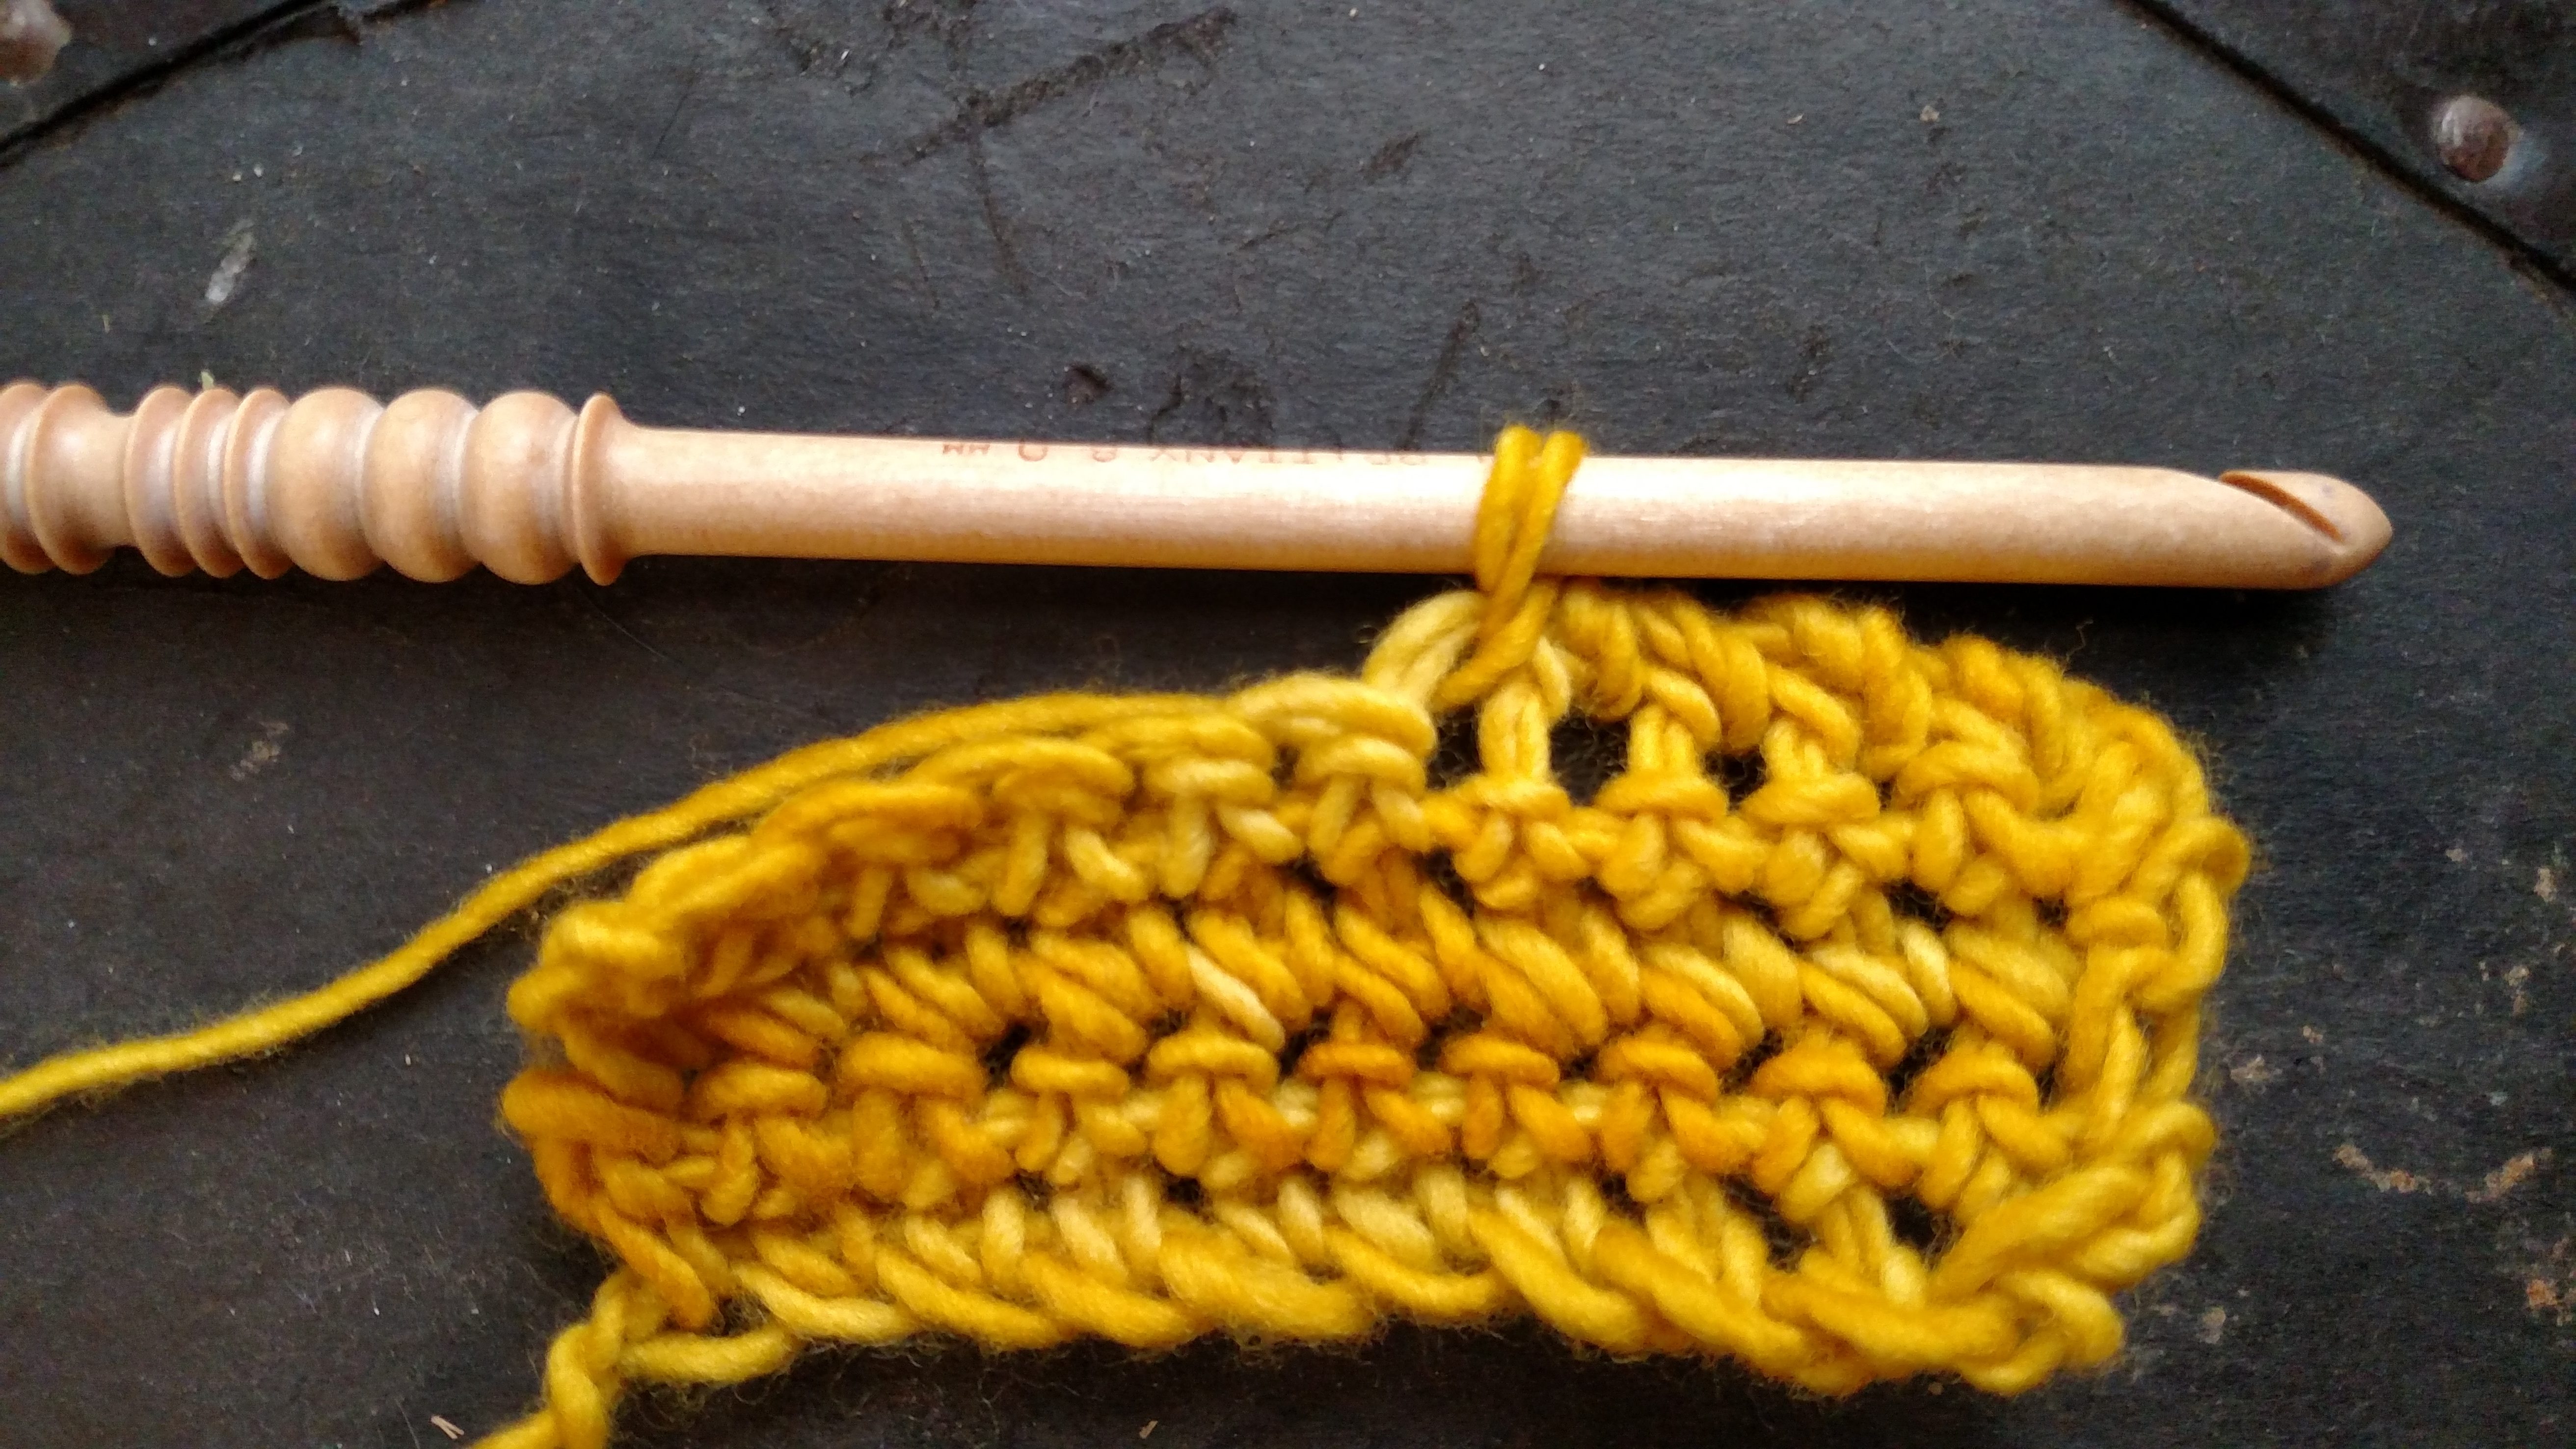
Now with 2 loops on your hook, you rotate your hook 360 degrees. It is not crucial as to which direction you make this turn as long as you are consistent with each stitch. There is a slight difference in the appearance depending which way you rotate, so sample each and see which you prefer. I typically rotate in the direction it feels most comfortable for my hand to work.

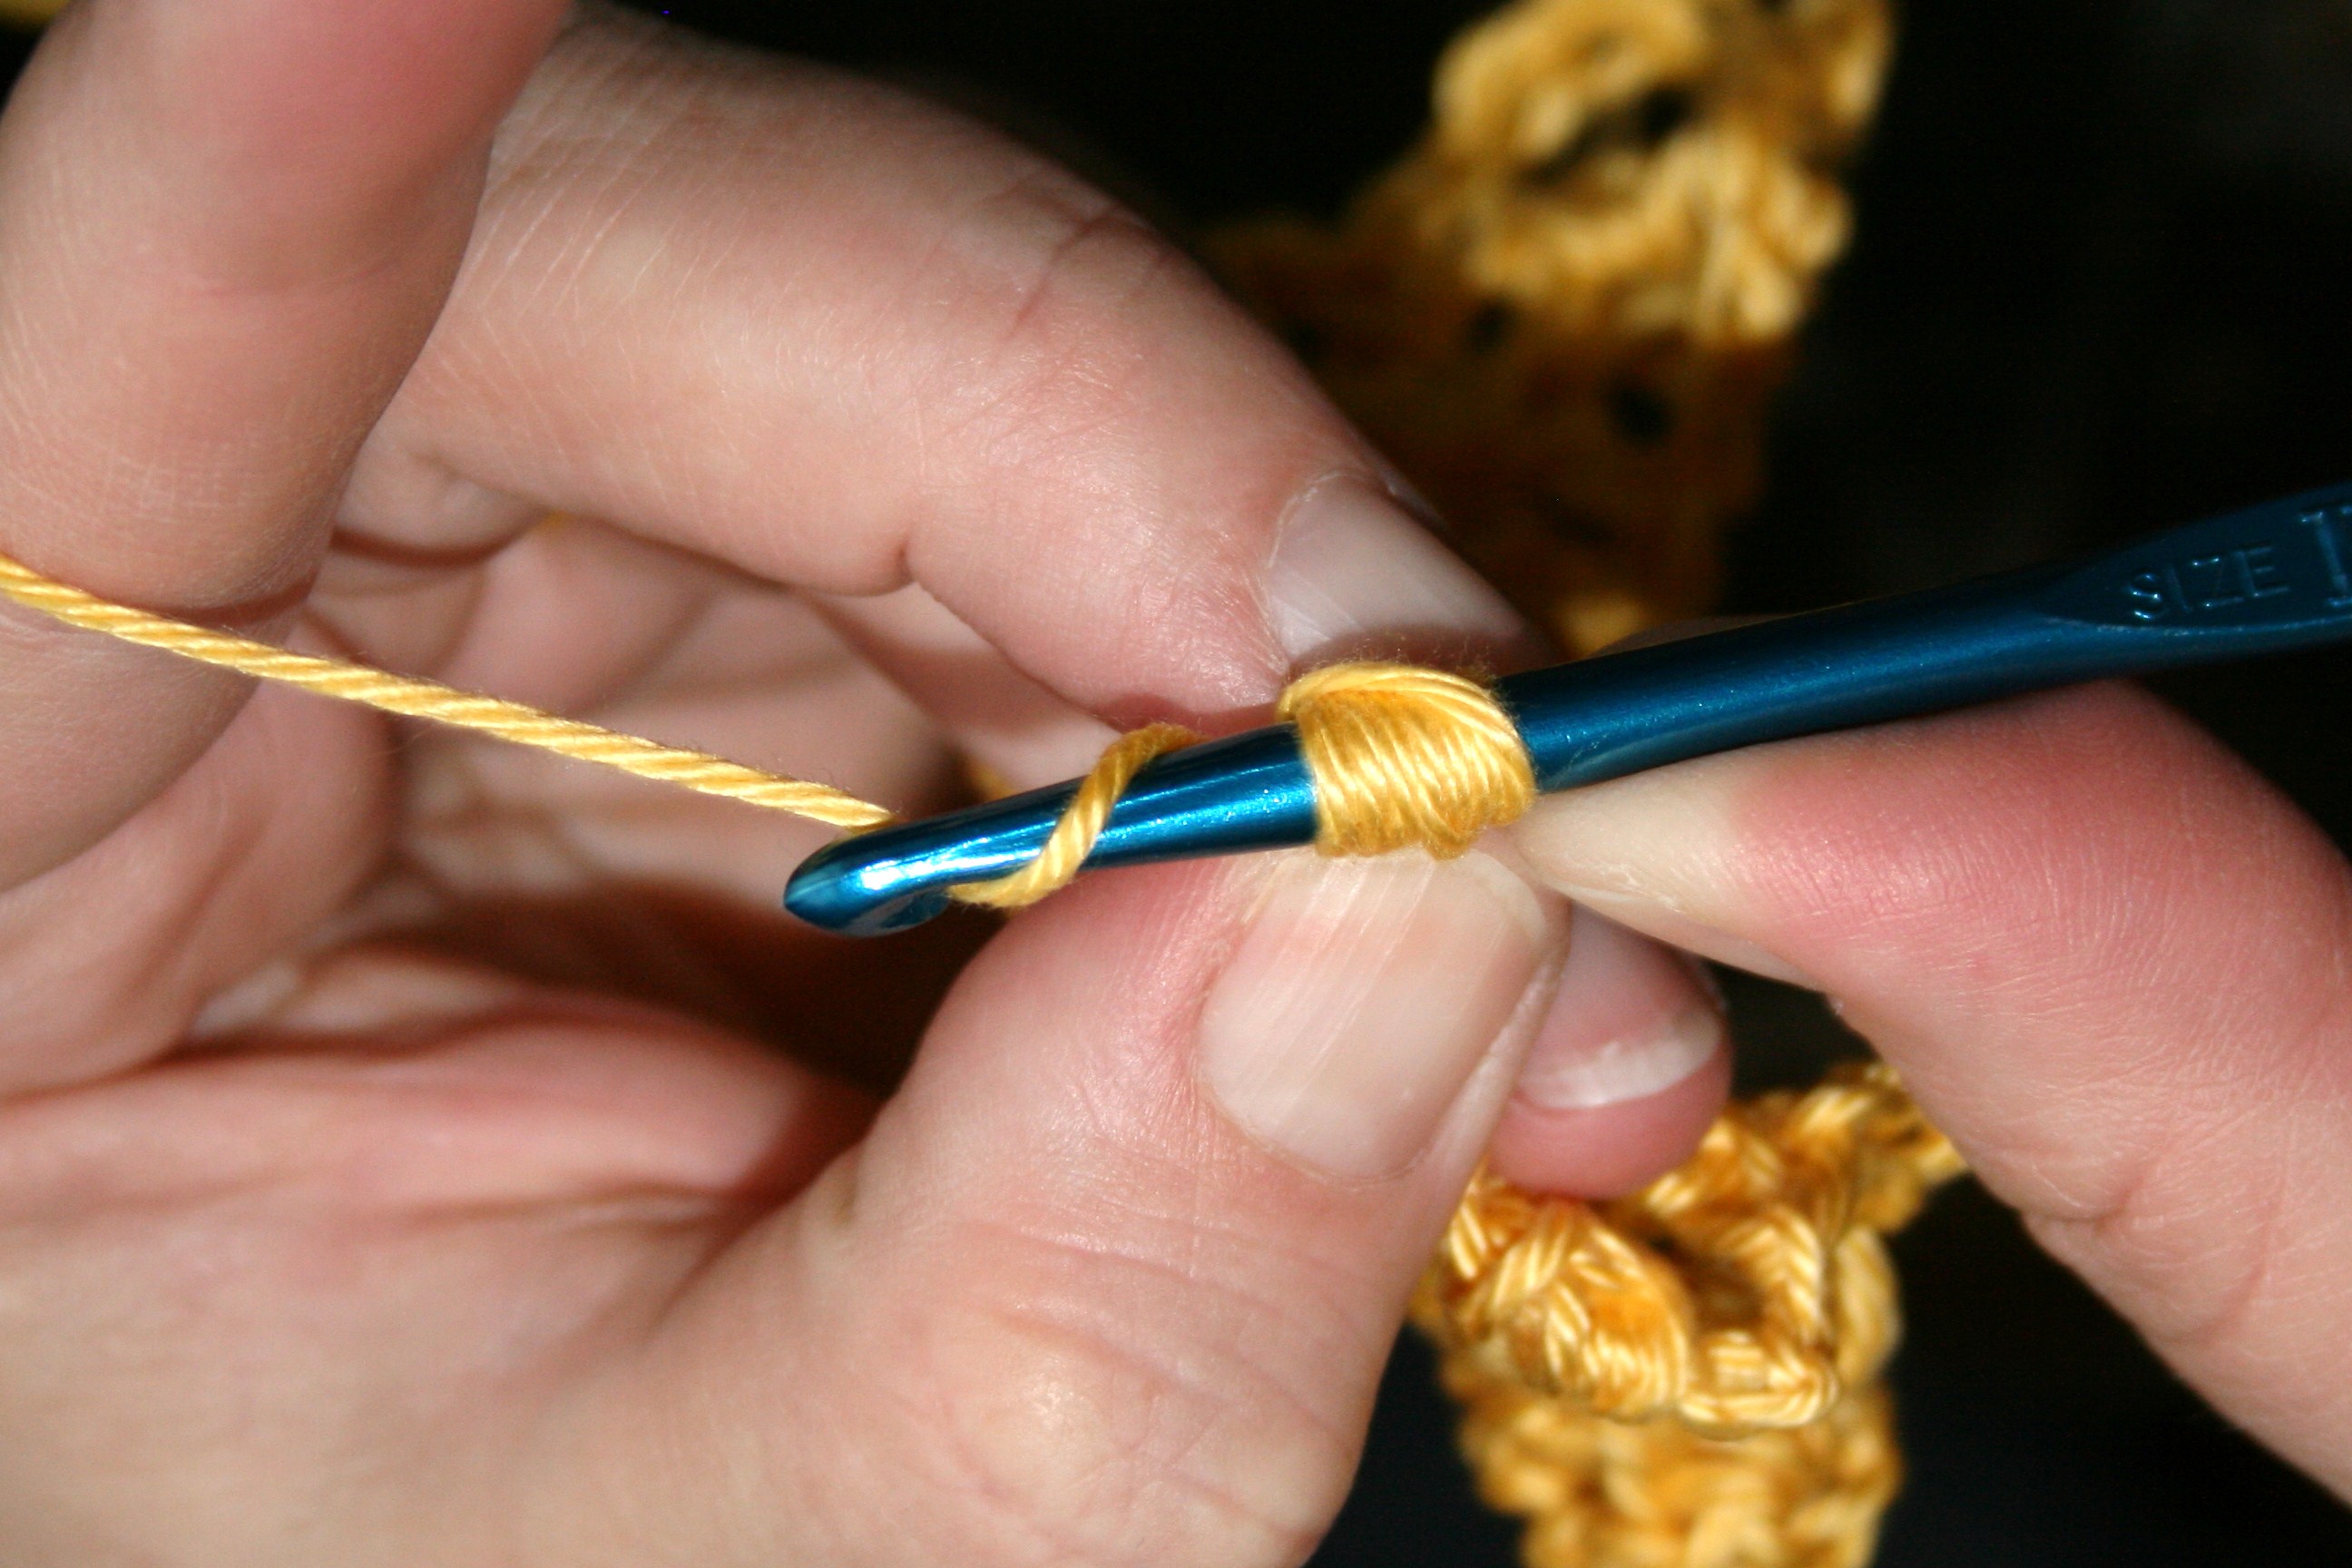
Now you yarn over and pull through the 2 twisted loops on your hook. This completes the stitch, and you repeat it in the next stitch.

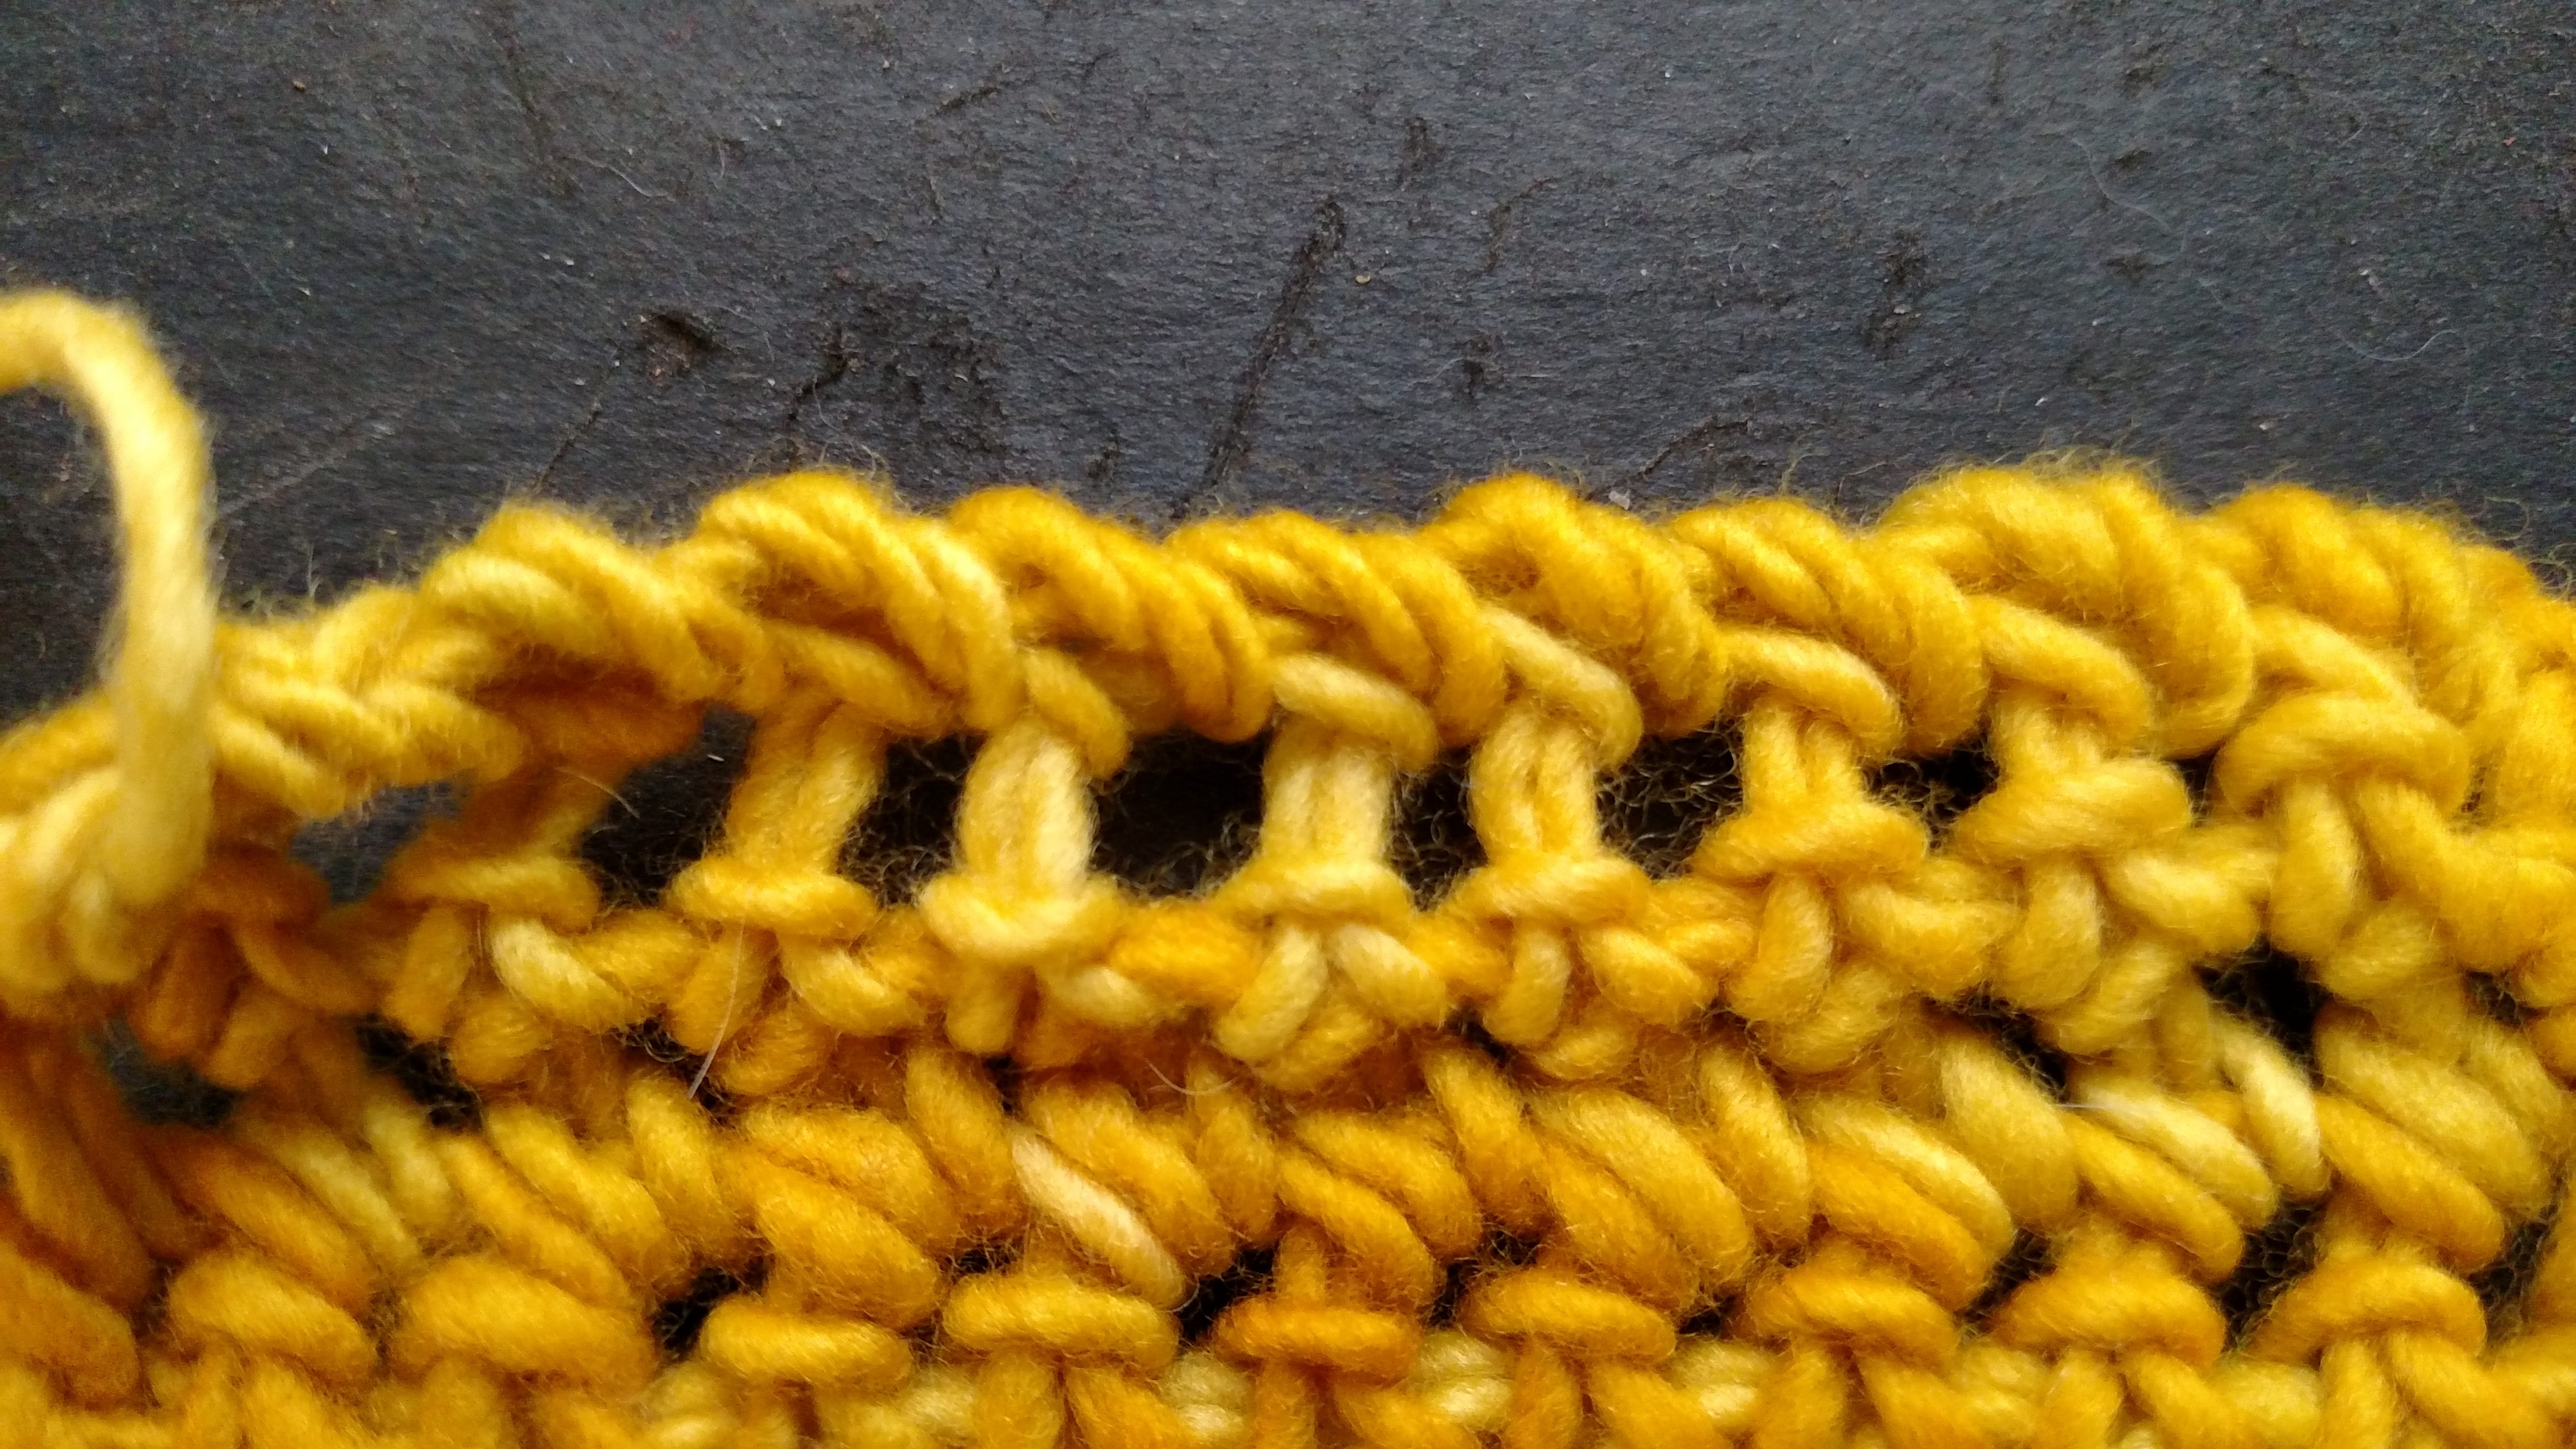
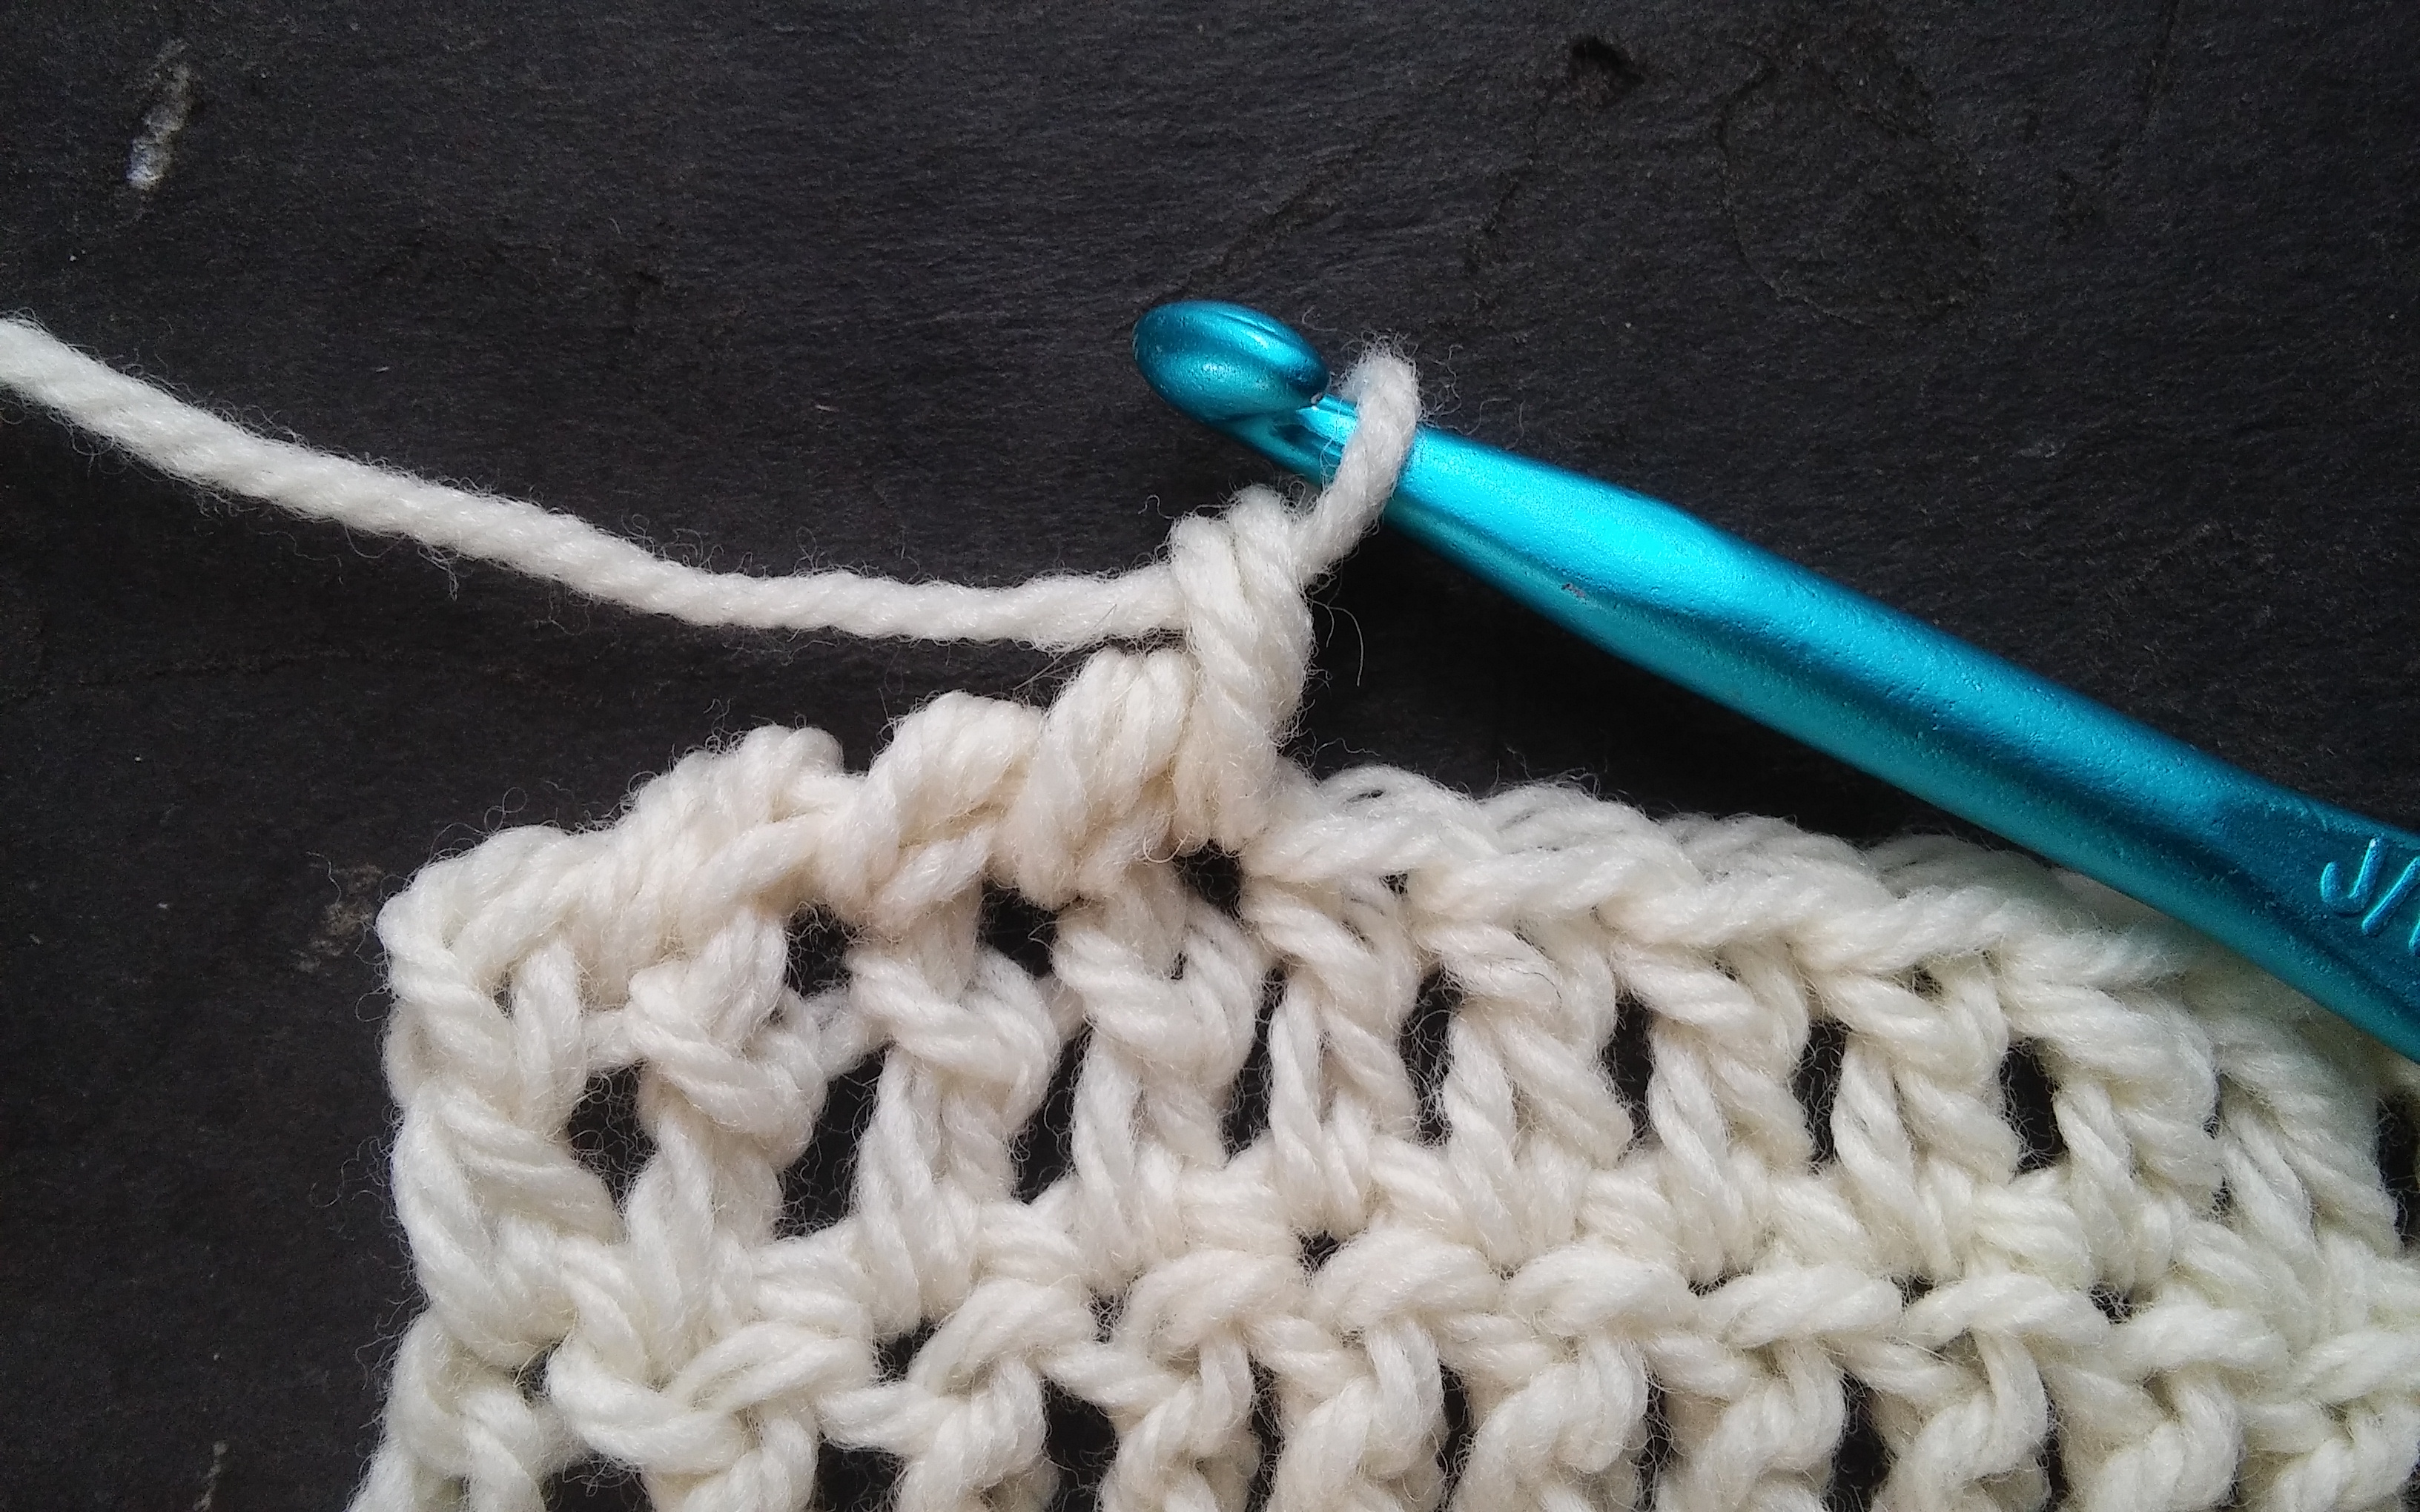
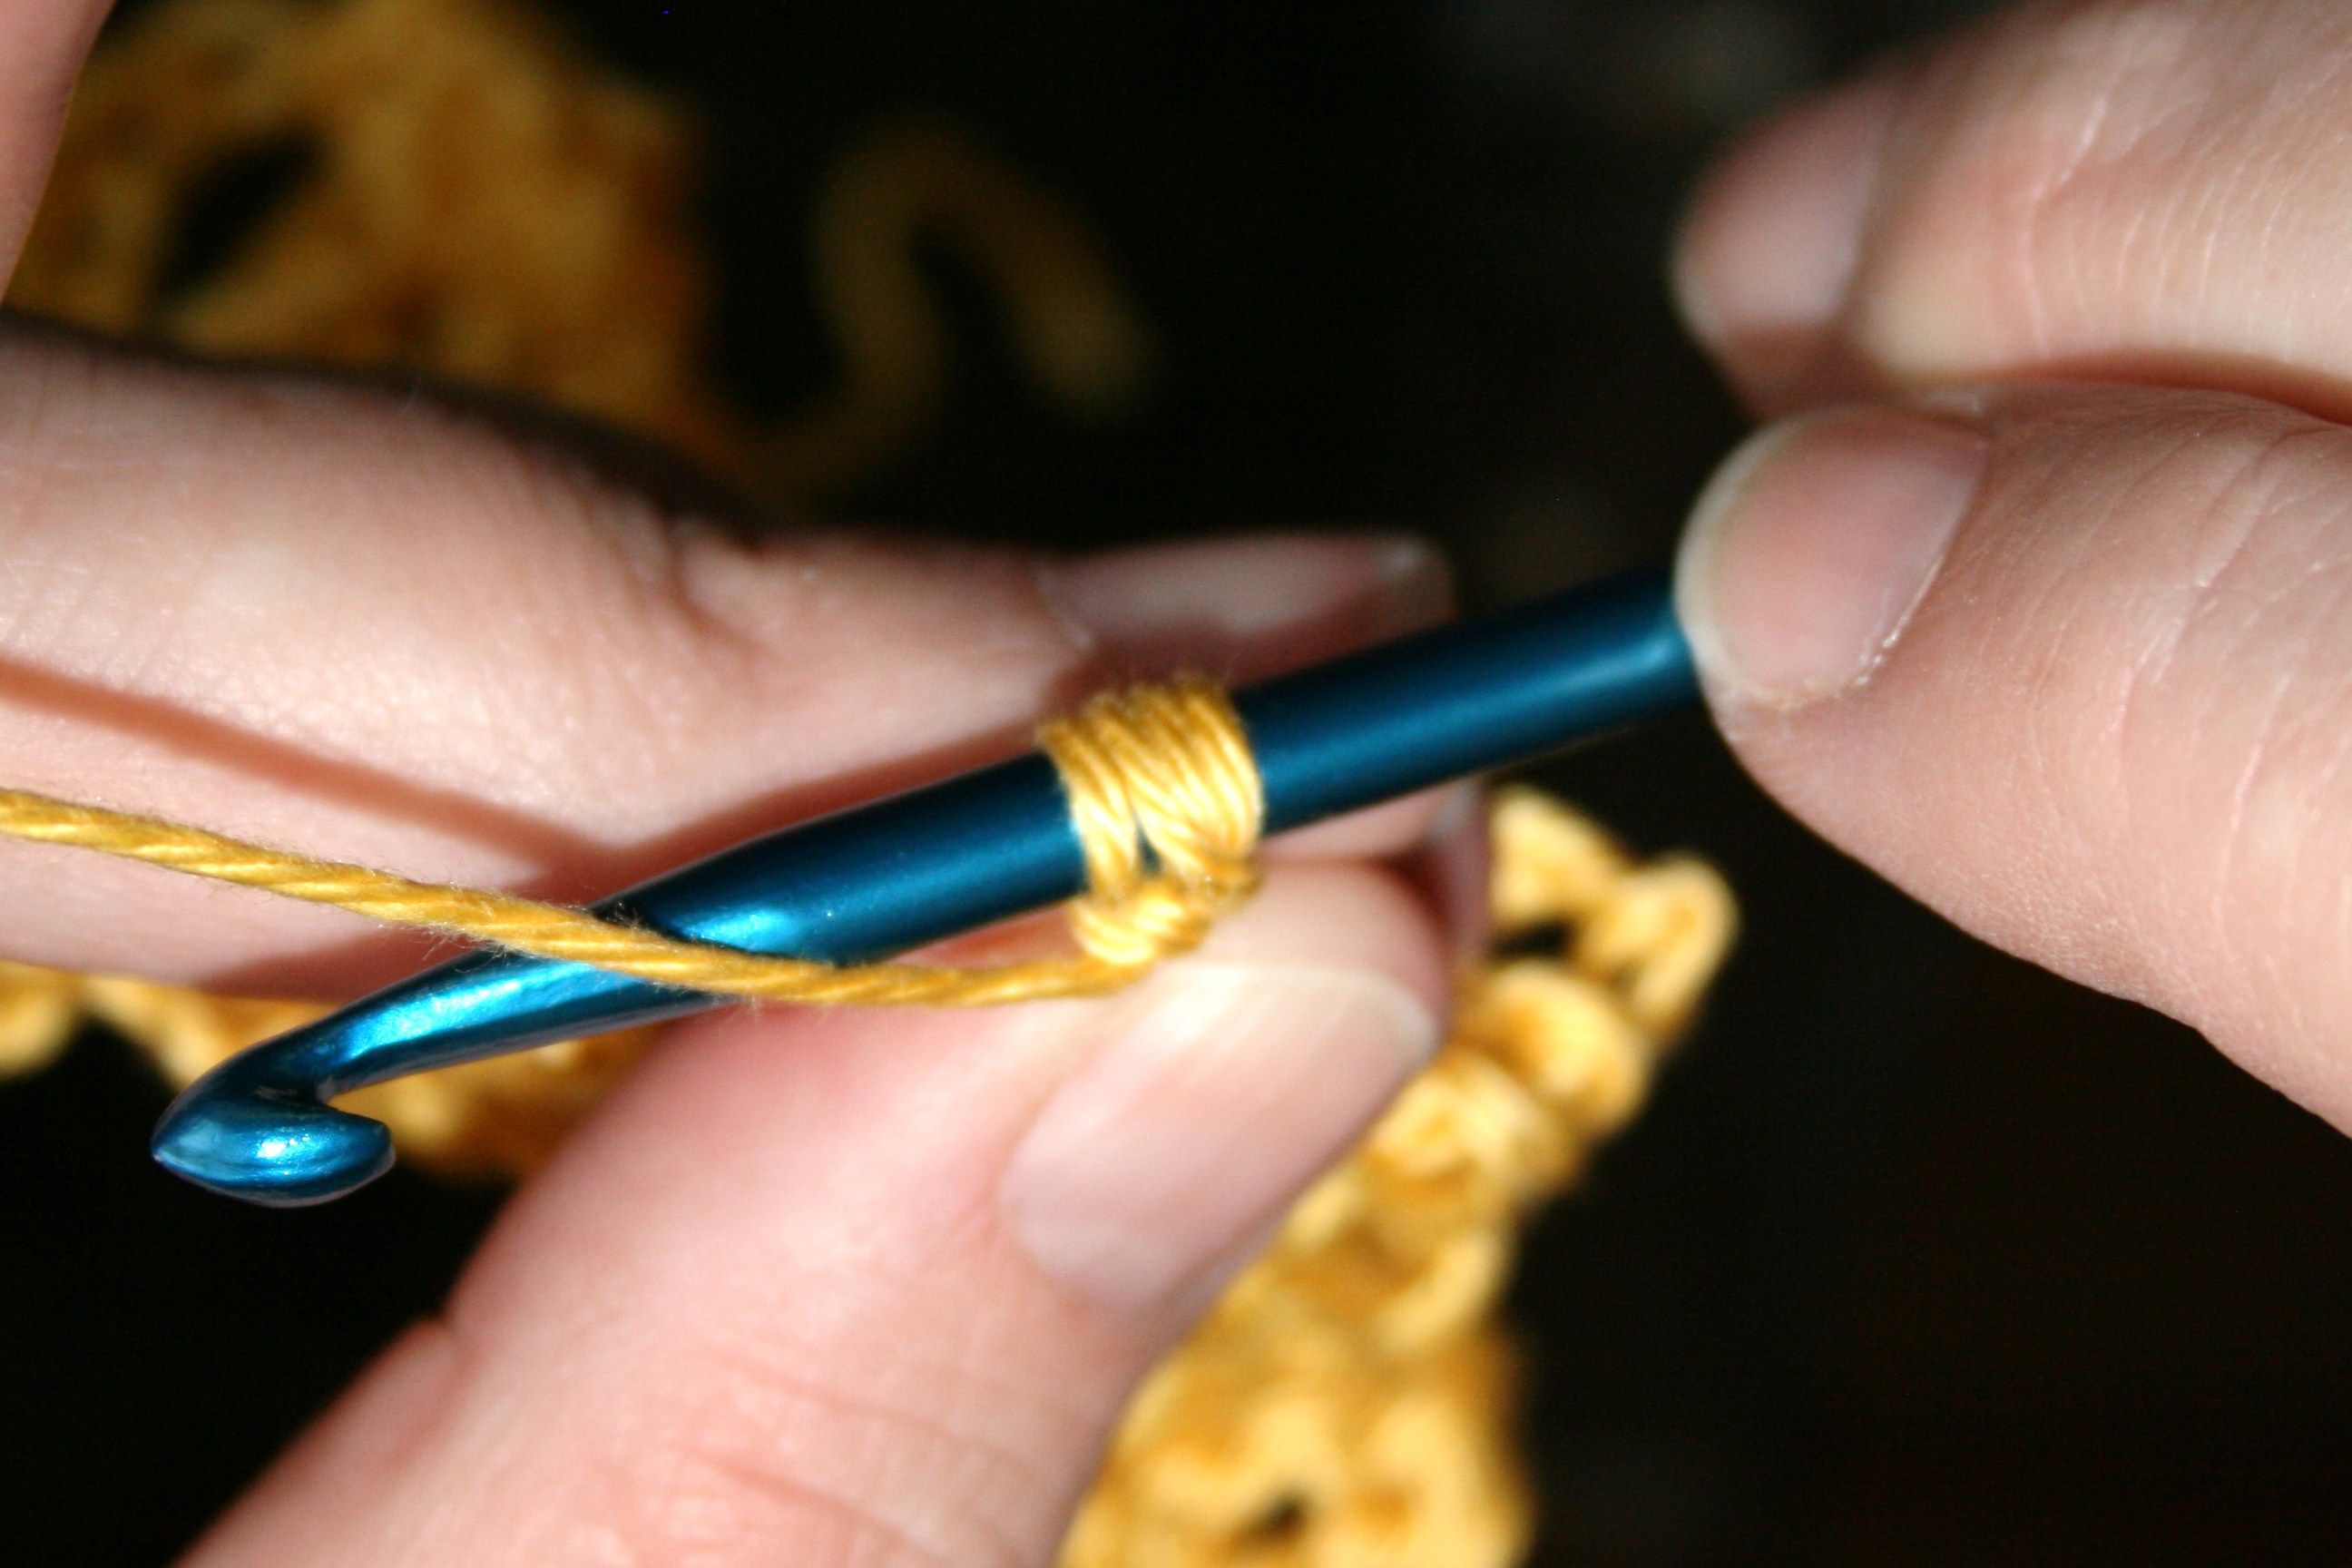
To work this technique as a Corded Double Crochet, you begin the Double crochet as normal: 
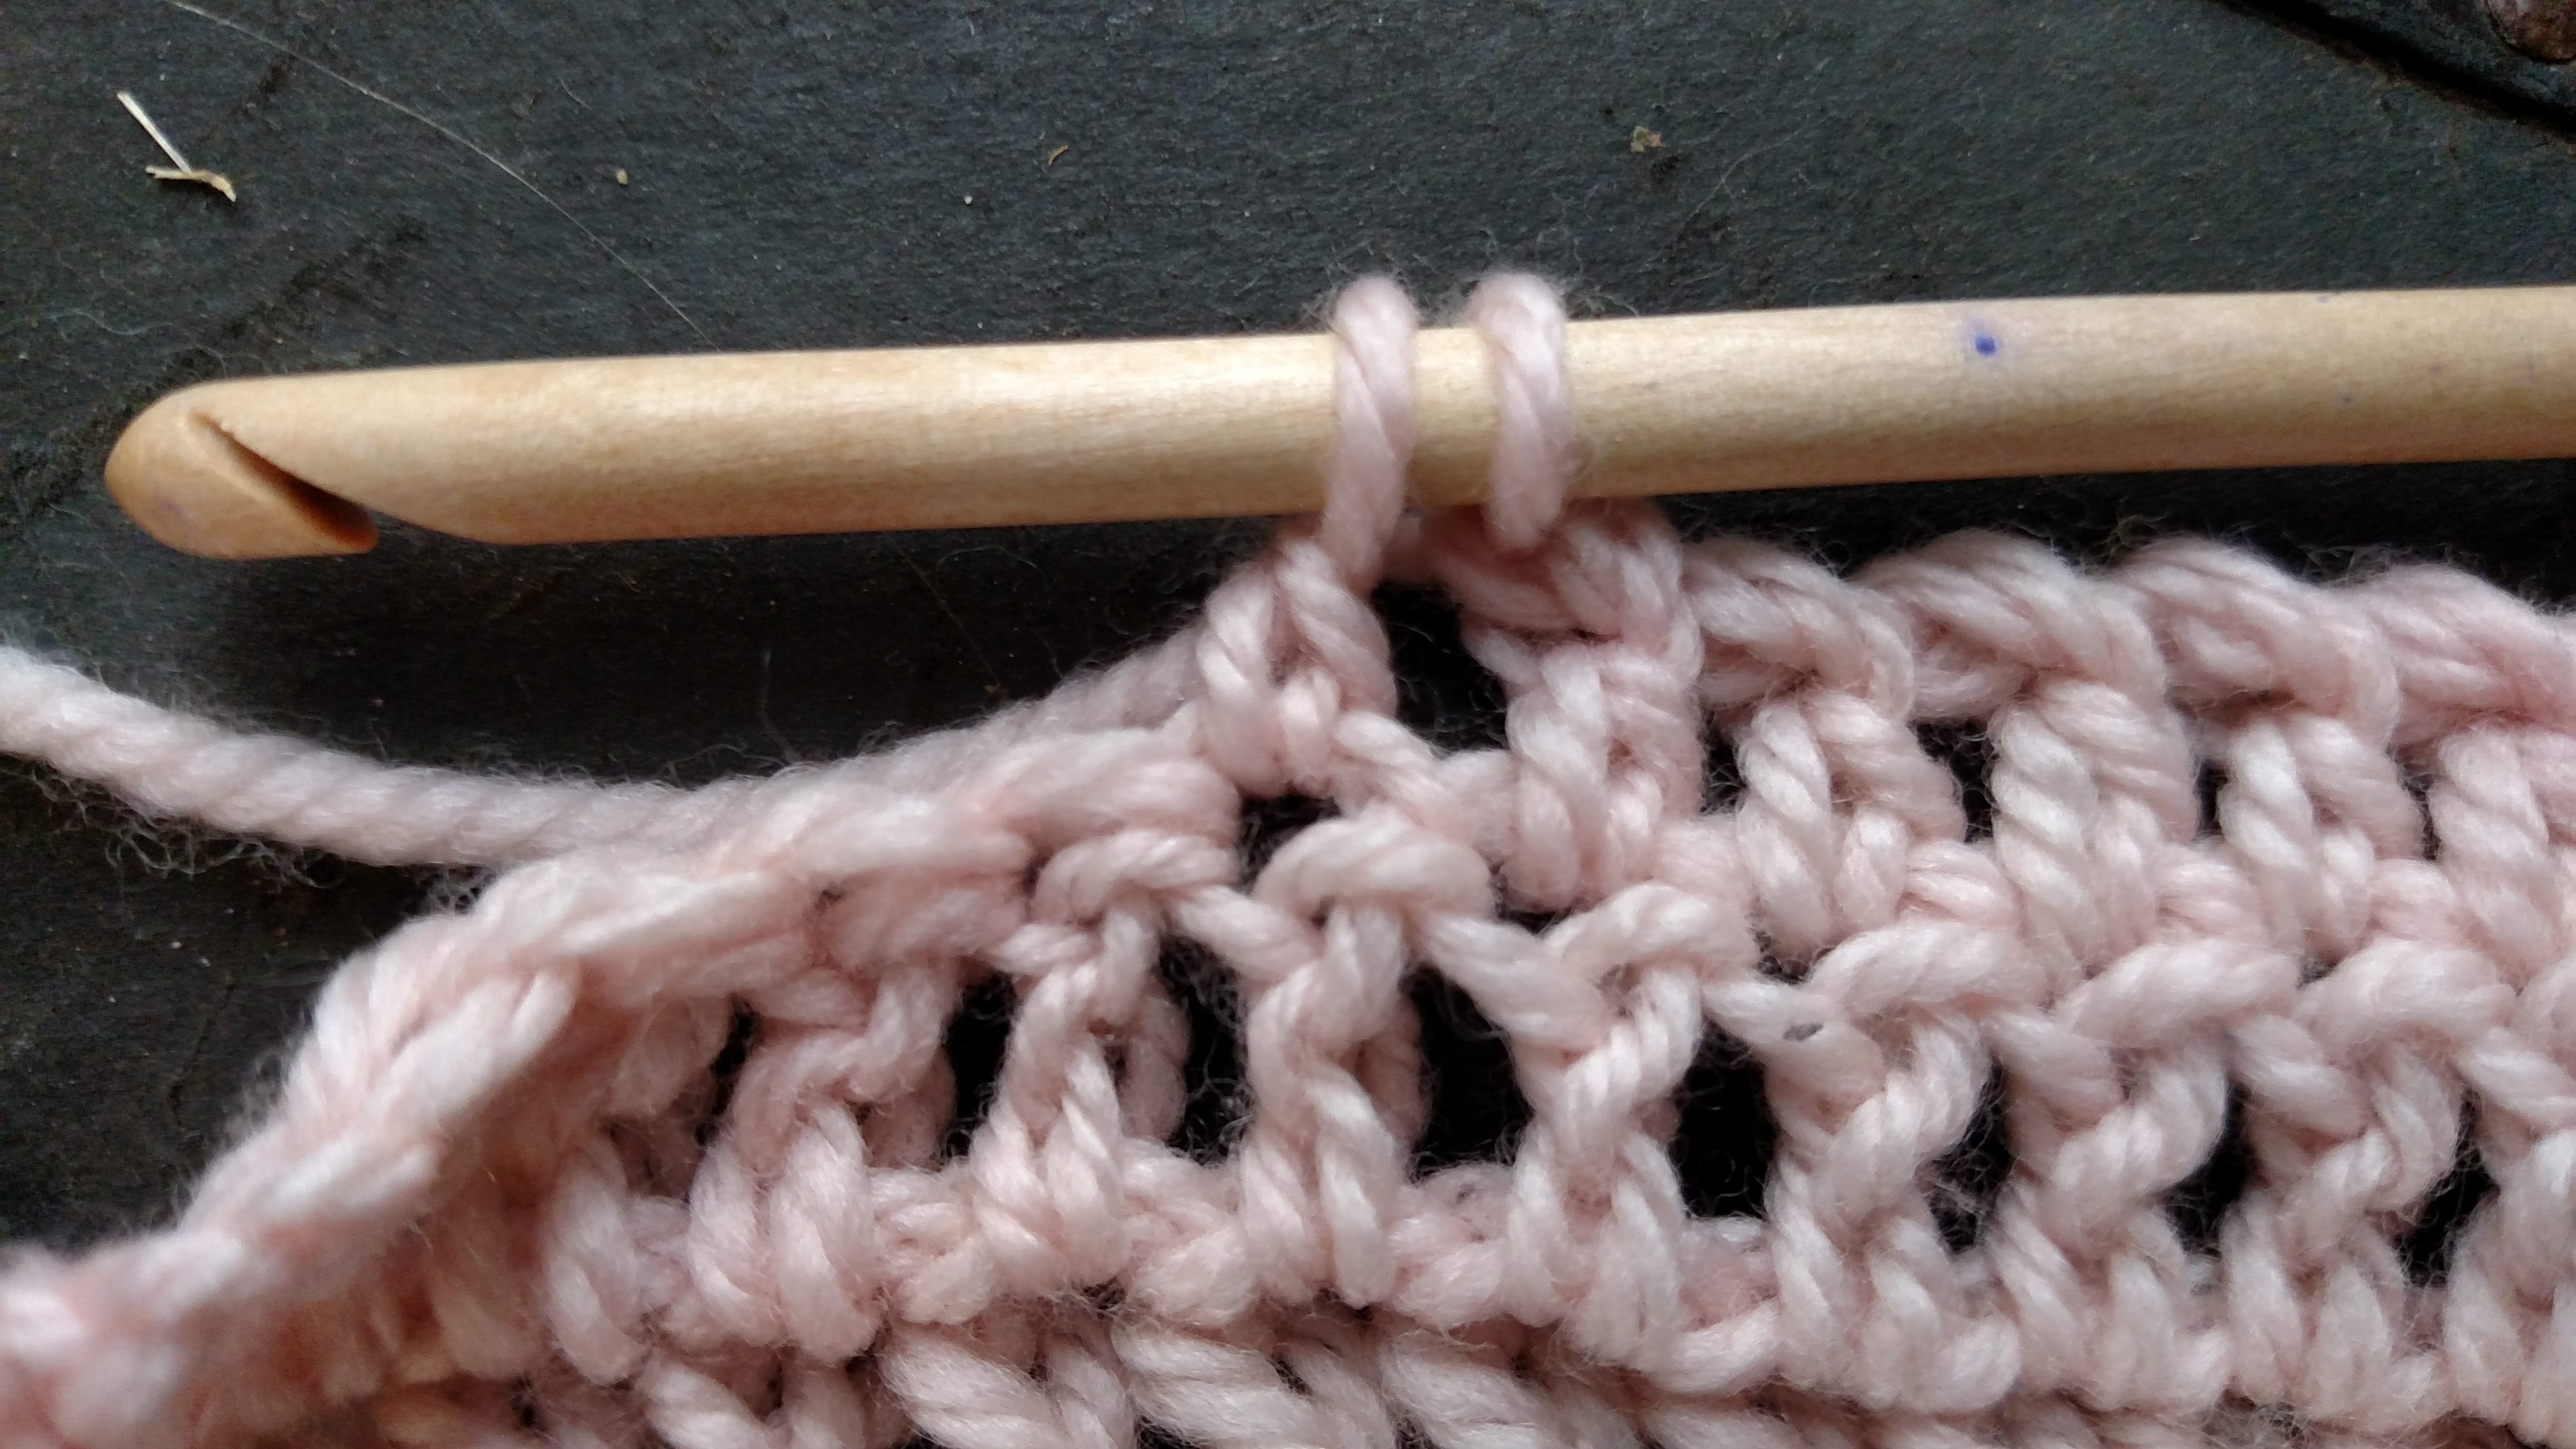
Yarn over, insert hook into indicated stitch, Yarn over, pull through a loop, Yarn over, pull through 2 loops. 
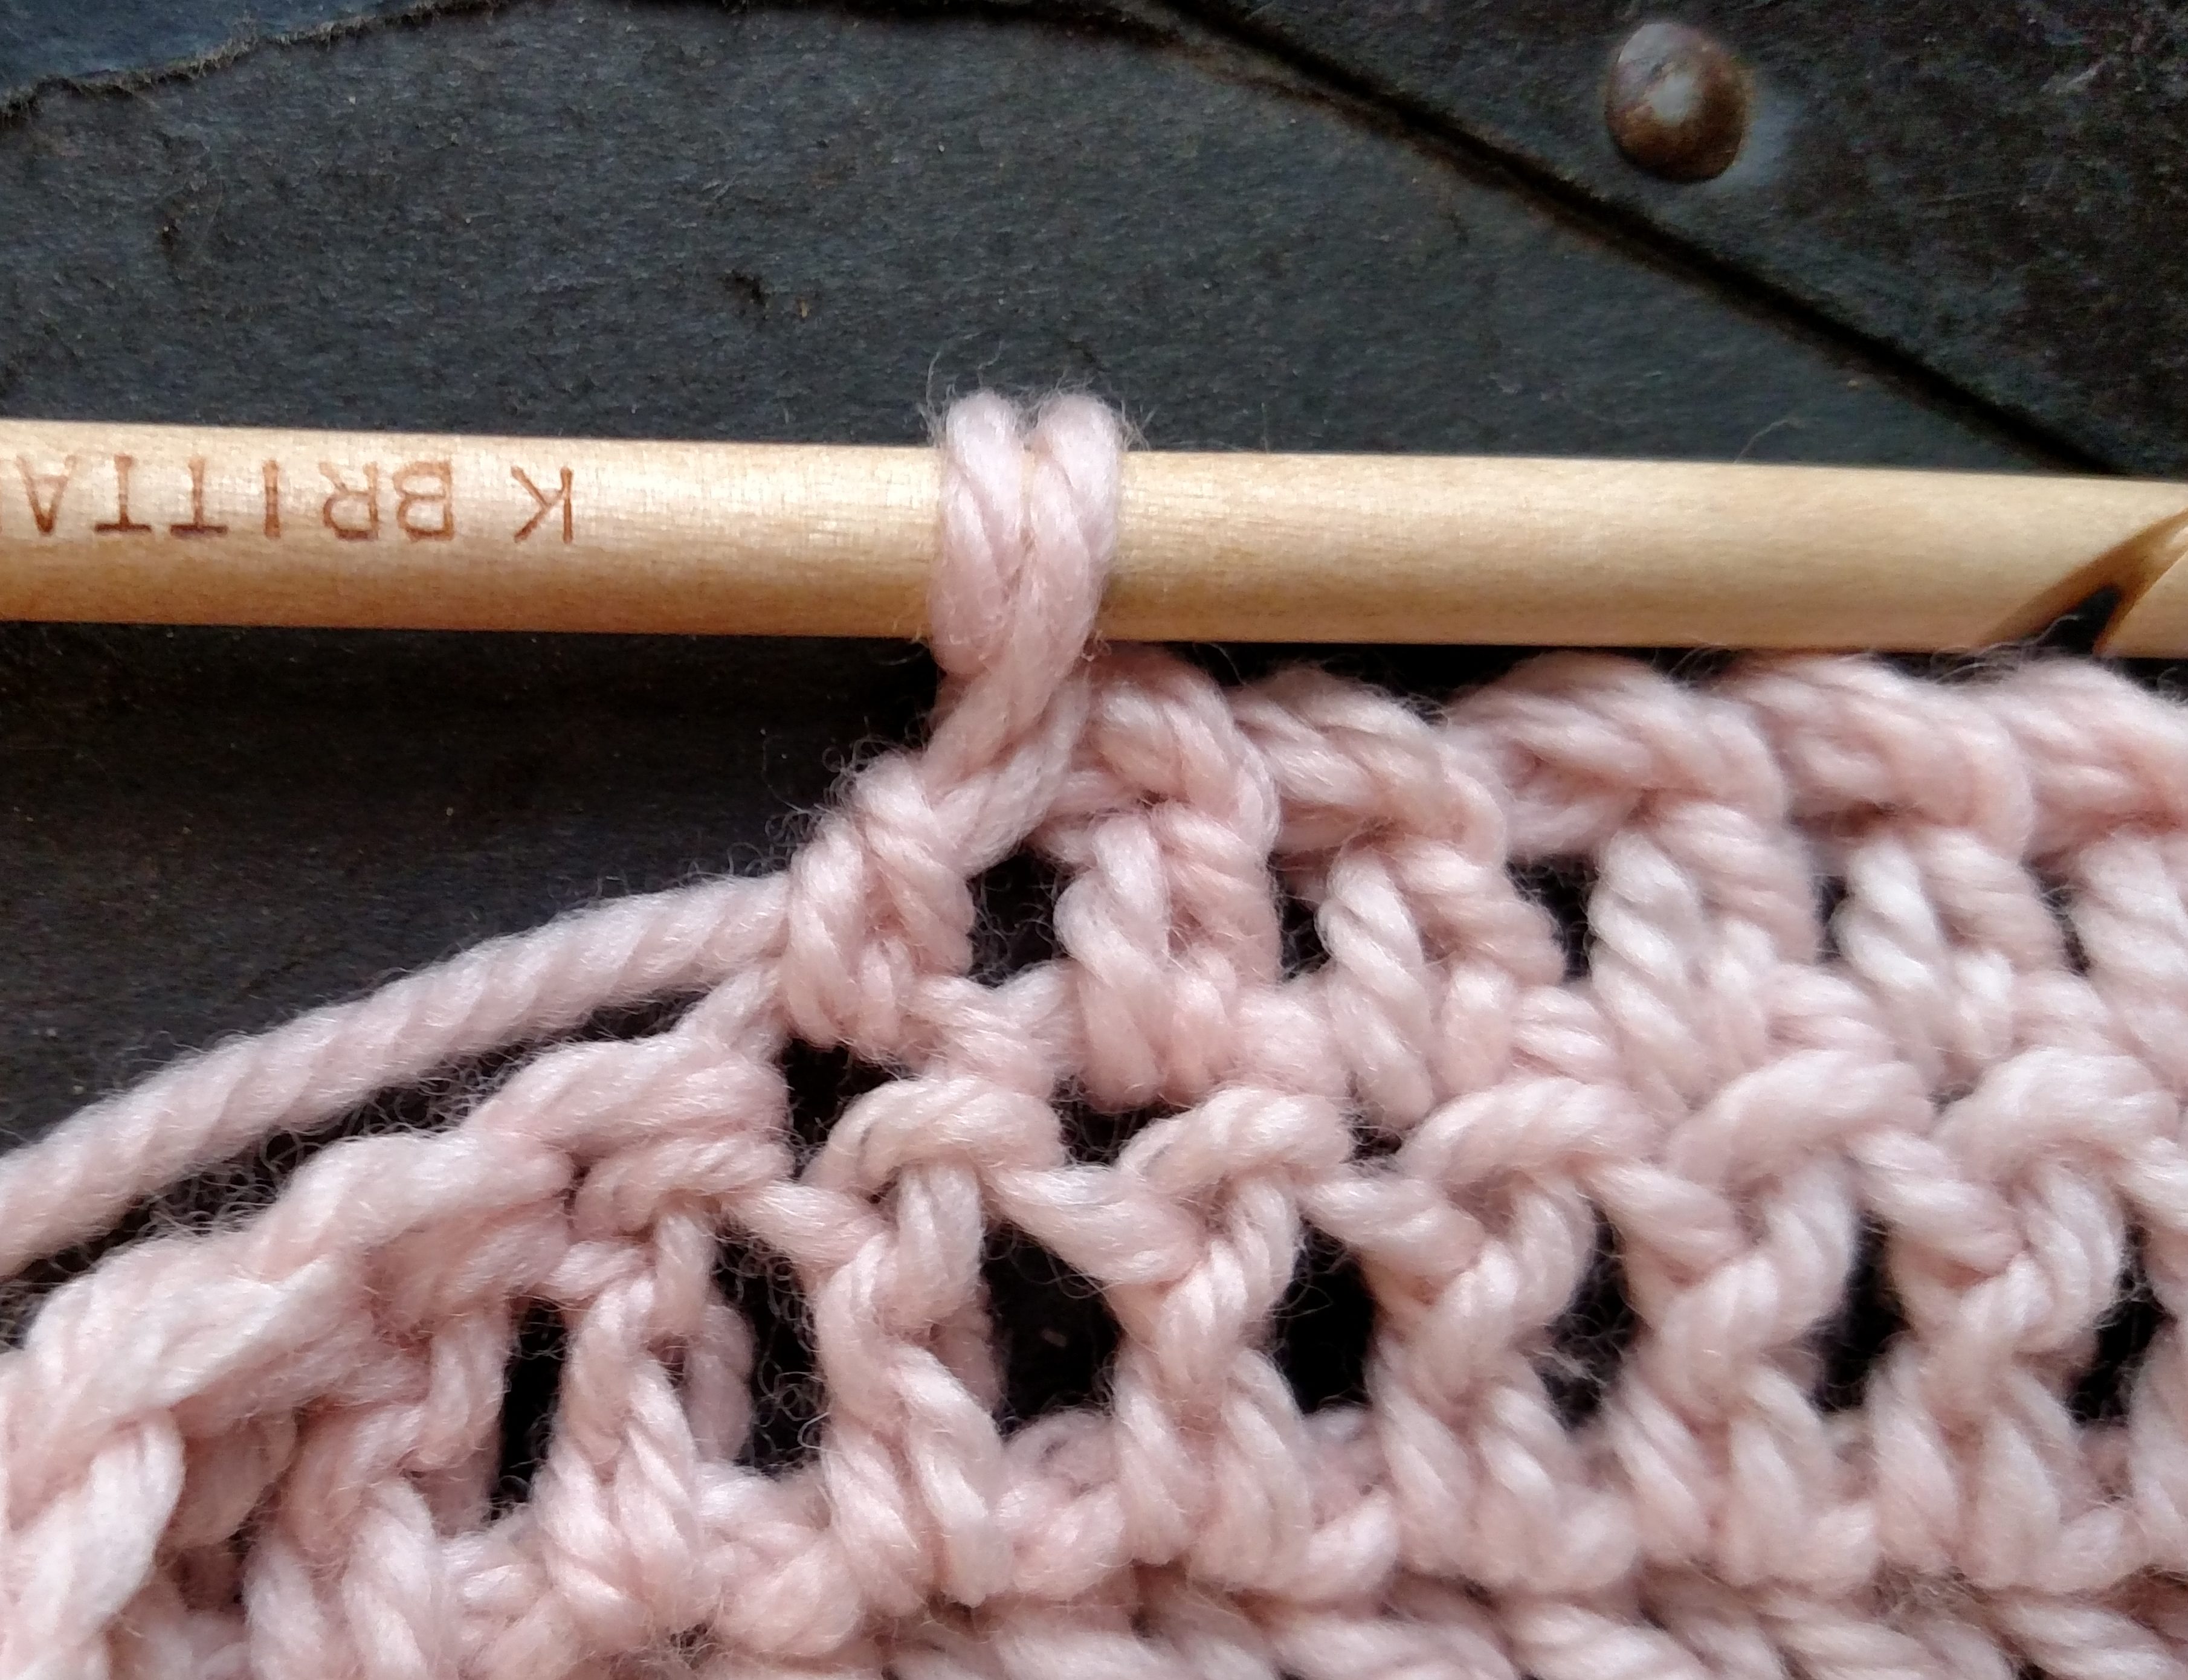
Now with the last 2 loops on the hook you rotate your hook 360 degrees, yarn over and pull through the 2 twisted loops.

It is pretty simple, yet results in an edge that is very finished.

Working the Opposite for Nice Edges

ScannedImageSometimes all the difference in a handmade piece is the finishing. One of my favorite ways to finish a piece is with edging, and one I really like is the reverse single crochet, sometimes known as the “crab stitch”.

1216161043

The Reverse Single Crochet Stitch

Crochet names, like “crab stitch” does not often tell you anything about the stitch, but at least “Reverse Single Crochet” gives you an idea…and it is pretty accurate. Essentially you are working a single crochet in the reverse direction.

1216161041

Insert your hook in the next stitch, from front to back, but in the Opposite direction from what you usually work.

You work the single crochet in the same manner, inserting your hook into the next stitch, yarn over, pull through a loop, yarn over and pull through two loops, but the difference is that instead of working in the normal direction of your crochet rows it is worked in the opposite stitches. So if you are right handed you will be working in the stitches located to the right of your work, and if you are left handed you will be working in the stitches to the left. This is in the opposite direction than you usually work.

1216161041a

After yarning over and pulling through a loop, yarn over again and pull through 2 loops

The most common error made when working this stitch is reversing the processes even further by inserting the hook from the wrong side of the fabric, this actually creates a single crochet stitch, but it is just a single crochet, just as if you had turned the work. So always insert the hook from the front of the fabric and complete the stitch.

1216161042

Relax your tension, and pull up your loops a little taller than usual.

Starting this stitch can feel very awkward, and the first couple of stitches may look a little odd, but after you work a few you will start to see a stich that looks almost like a rope. It is this twisted effect of the stitch that really allows it to be used only as an edging.

Not only do I use this stitch as an edging, I occasionally use it as a joining stitch. I place the fabrics I am joining together wrong side together and work this stitch through both fabrics. It creates a raised rope at the edges of the fabrics. I find that this creates a nice textural effect as well as visual interest.

There is one tip I can offer to working this stitch, relax with your tension and pull up your loop a little higher than usual, this makes it a little easier to work in this different direction.

New Again, at Least to Me- Clone Knots

ScannedImageSometimes we find inspiration for crochet in unusual places, sometimes it is just looking at a traditional method in a different light.

XIMG_6867

Clone Knots

For me the Clone Knot is one of those stitches that I never really knew existed until I took a thread crochet class from Kathy Earle at a CGOA conference/Knit & Crochet Show a couple of years ago. The class on Irish Crochet really expanded my knowledge, I usually do not work with thread and tiny hooks, however I really have a new level of respect for those that do. I took some of my new found skills and applied them to my yarn crochet, and the clone knot fit into this very well.

The clone knot is essentially a multiple of loops placed on the hook and worked together creating a bump of material in the middle of a set of chains. It creates a unique textural and visual impact to open fabric work, and in Irish crochet is often worked in between motifs during the joining process.

XIMG_6861

Bring the hook under the working yarn.

To create this stitch, begin by chaining a couple of chains, then place the hook under the working yarn, rotate the hook 360° and place in under the working yarn again. Placing the hook under the working yarn and rotating the hook causes a loop of yarn to be placed on the hook and twisted to stay in place.

XIMG_6853

Twist hook counter-clockwise 360 degrees

XIMG_6855

Bring hook under yarn again, and re twist clockwise 360 degrees.

After working this motion a few times or the number indicated in the pattern, yarn over and pull through all the loops. Then chain a couple of more times, now comes the part of securing the stitch. Pull the chain taught and push the loops toward the working end of the chains. You should feel or hear a small pop; this is essentially that you are sliding the loops over the adjacent chain causing it to become secure.

XIMG_6862

Yarn over and pull through all the loops on the hook.

This unique stitch does have a slight disadvantage to what you usually expect from crochet, it is difficult to rip back, as securing it makes the stitch more difficult, as it creates what its name implies, a knot.

XIMG_6866

Pull chain taught and push Clone Knot toward working end of the chain to secure it in place, you will feel or hear a “pop”.

I hope you give this embellishment a try, add it to an edging, an place of open work, any where you want something a little different.

Making the Sweater Work for Me

ScannedImageCooler weather reminds me of a learning experience I have had with crochet, something that I greatly appreciate and has changed my approach to my personal wardrobe; being able to create a sweater that actually fits.

DSCF0743.1

A sweater/tunic that I made a little longer than is written to customize to me.

Now I am not a seamstress, nor am I altering crochet patterns to a great degree to add bust darts or remove some extra fabric at the arms. That is a little more technical than I like to get. I was, at one time, very intimidated with even the idea of making a sweater, but once I realized that I was really only making fabric, it helped to remove the anxiety and allow me to expand my repute and create clothing. But when I finally undertook the challenge of making my own sweater, I could actually make them long enough to actually keep the chill off!

Now I am not a small petite little woman, not that there is anything wrong with that, but I come from a larger stock. As I remind my daughter, we have Viking heritage, and when you think of Vikings you do not readily think of tiny fragile women, you think of women that can make their presence known. A drawback to this body style is that standard clothing does not easily meet our needs. The biggest problem I have is a long waist; there is considerable distance between by last rib and my hips, yet most off-the-rack shirts have standard length that ends up resting just at the top of my hip bone. A little extra length creates a nicer appearance for me, in my opinion, and the more practical it keeps me covered better.

So how do I tie this to crochet? Well, it is relatively easy to add a little extra and make a sweater longer then is written; I just have to understand where to look. For a pattern written from the top down, this is pretty simple, I just continue working until I am happy with the length. For the more common bottom-up patterns, I have to do a little more planning. I have to pay attention to the gauge that is given and do a little math. It is not something to run away from, it is really not that hard. I simply figure out the number of rows per inch, and then figure the number of inches that I want to add to the final measurements provided in the pattern, and add the number of corresponding rows at the beginning of my stitching. To make my life easier when counting rows and knowing where I am in a pattern, I take a safety pin and insert it at the end of the last “added” row then I “begin” the actual pattern so now I start Row 1.

There is another way I can lengthen my sweater, but it is not my first or favorite choice, for a couple of reasons. This is adding an edging to the hem of the sweater; to begin with it takes away from the original design. I chose the pattern for a reason and attempting to add on an edging that actually compliments the overall design is more difficult than it sounds. This comes to the other problem I find with this approach, all of my attempts to do such, look like an afterthought. It does not flow like I would like, and therefore doesn’t end up as my favorite sweater to wear.

One thing I can say for adding some extra fabric to my sweaters, it has allowed me to take more pride in my stitching. Now not only can my loved ones enjoy the blankets I have made them, or keep warm with a hat, I can enjoy my own work and have something that feels more comfortable in the long run.