New Again, at Least to Me- Clone Knots

ScannedImageSometimes we find inspiration for crochet in unusual places, sometimes it is just looking at a traditional method in a different light.

XIMG_6867

Clone Knots

For me the Clone Knot is one of those stitches that I never really knew existed until I took a thread crochet class from Kathy Earle at a CGOA conference/Knit & Crochet Show a couple of years ago. The class on Irish Crochet really expanded my knowledge, I usually do not work with thread and tiny hooks, however I really have a new level of respect for those that do. I took some of my new found skills and applied them to my yarn crochet, and the clone knot fit into this very well.

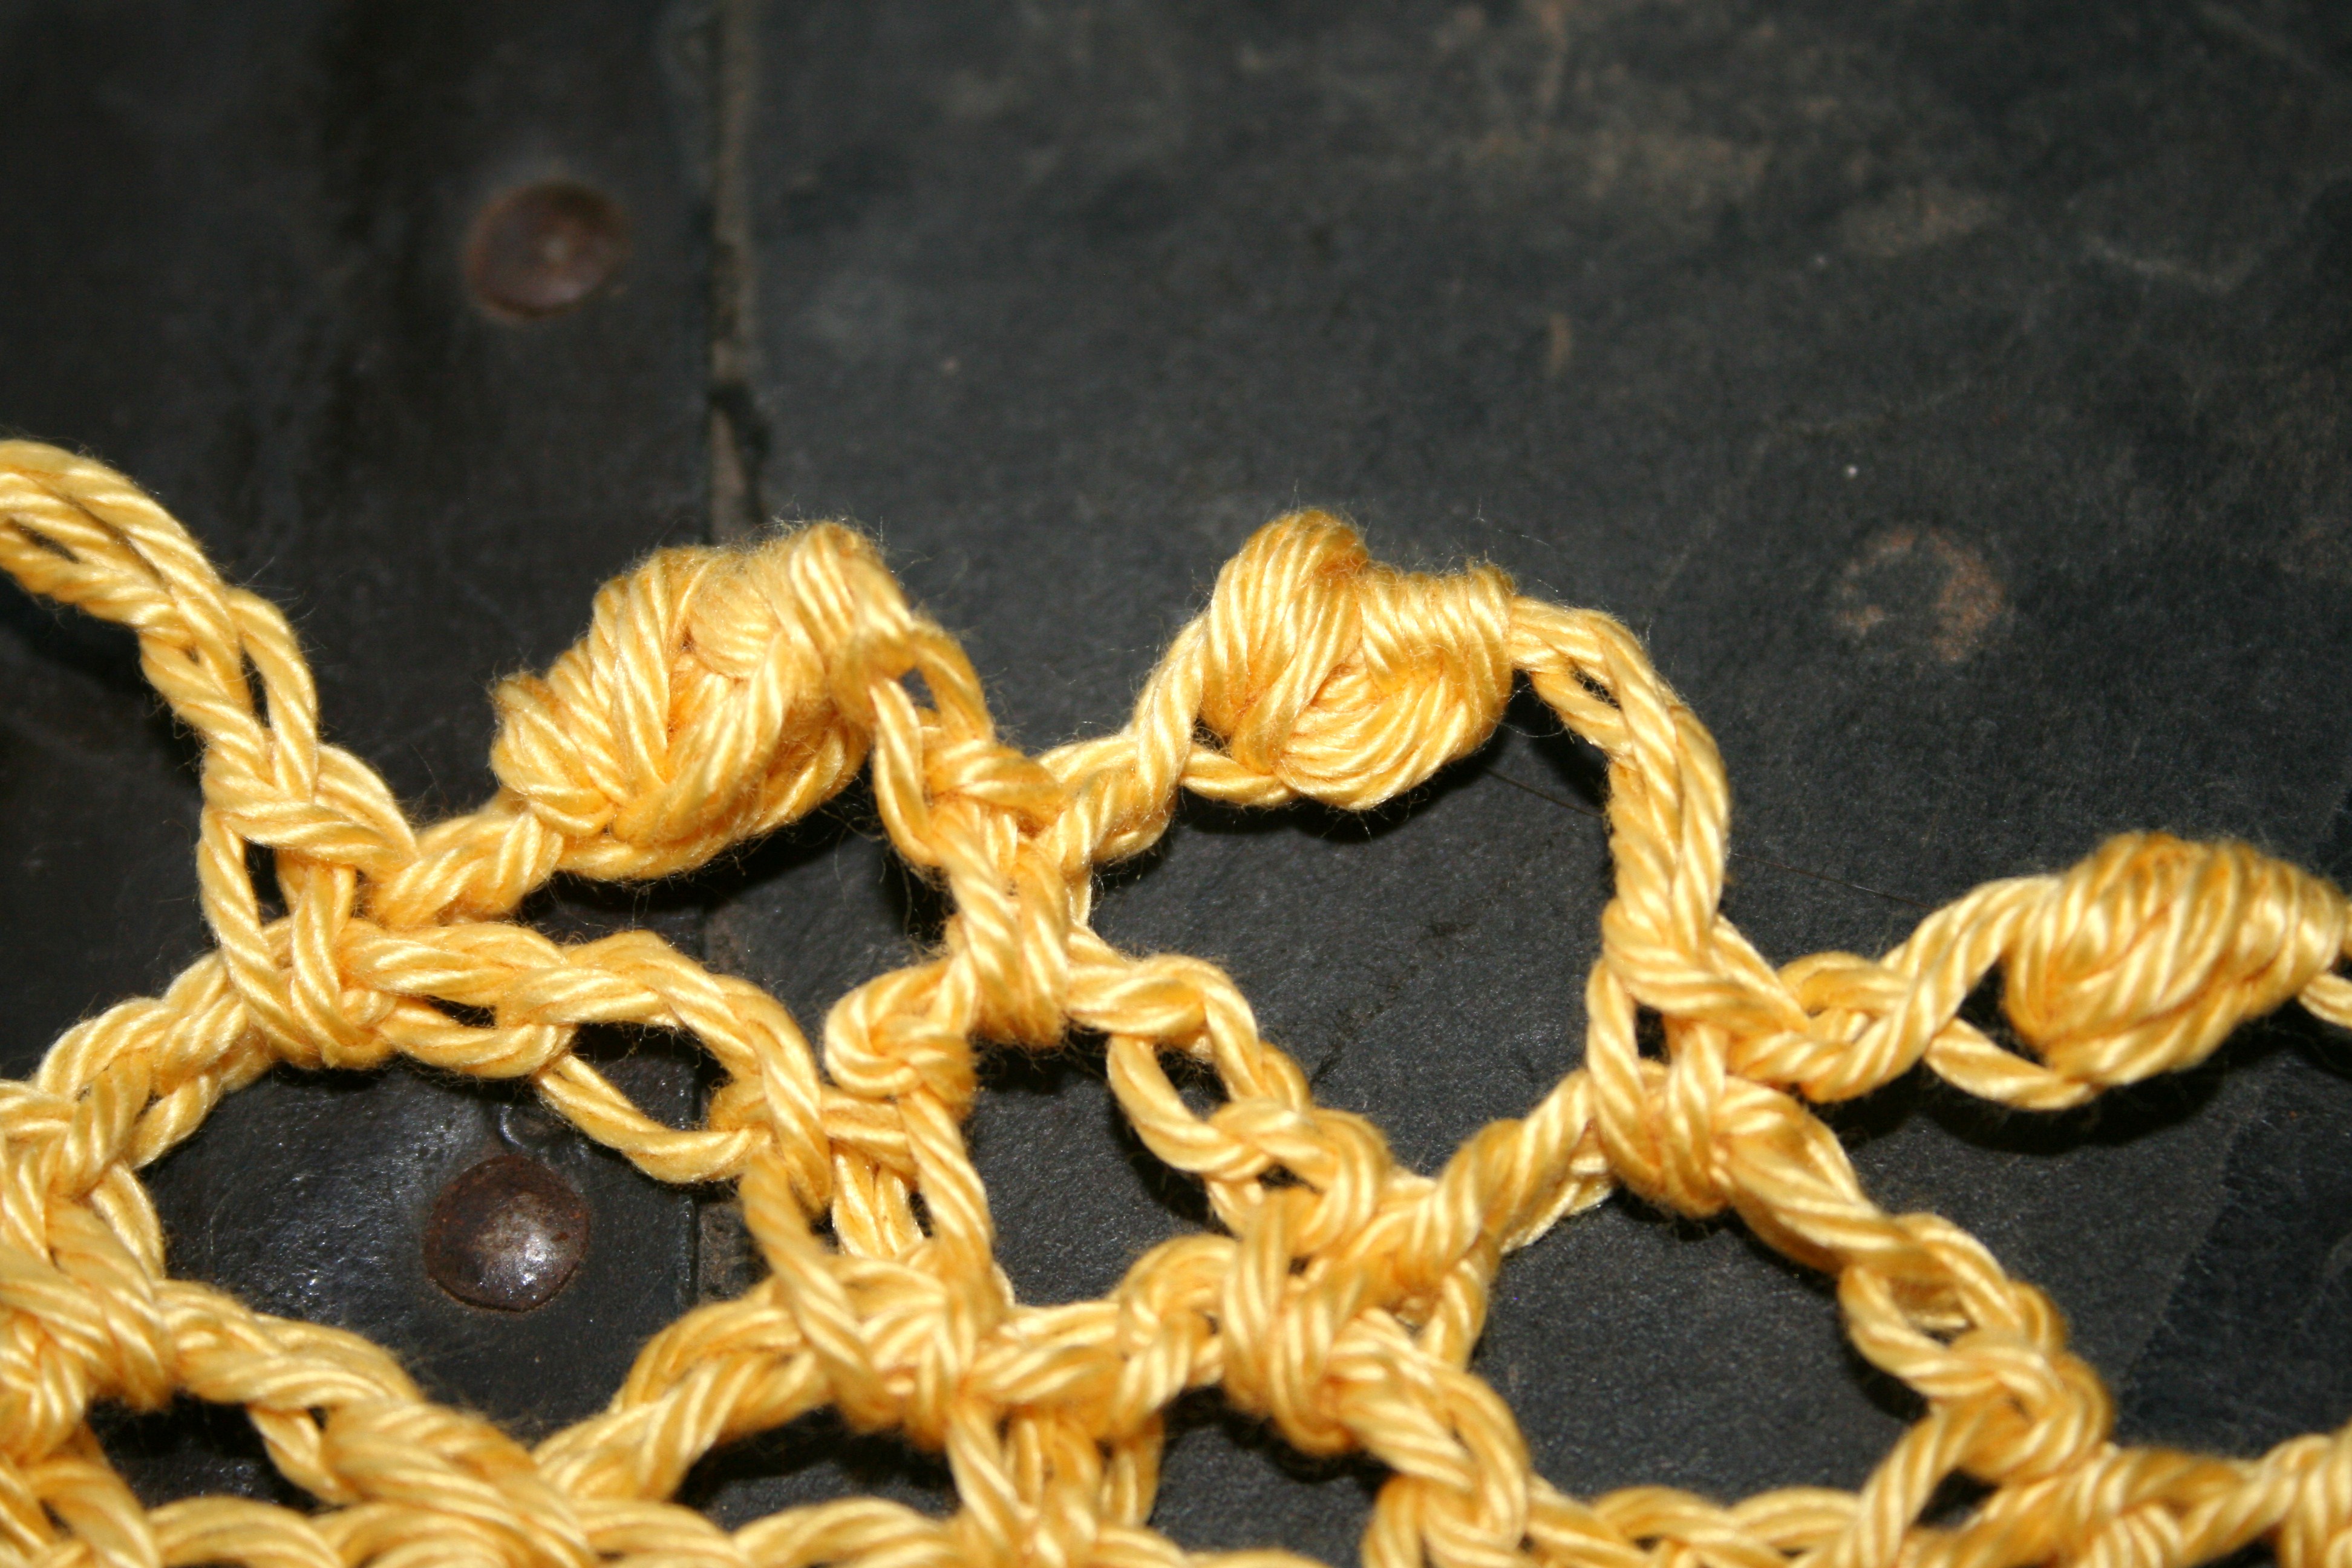
The clone knot is essentially a multiple of loops placed on the hook and worked together creating a bump of material in the middle of a set of chains. It creates a unique textural and visual impact to open fabric work, and in Irish crochet is often worked in between motifs during the joining process.

XIMG_6861

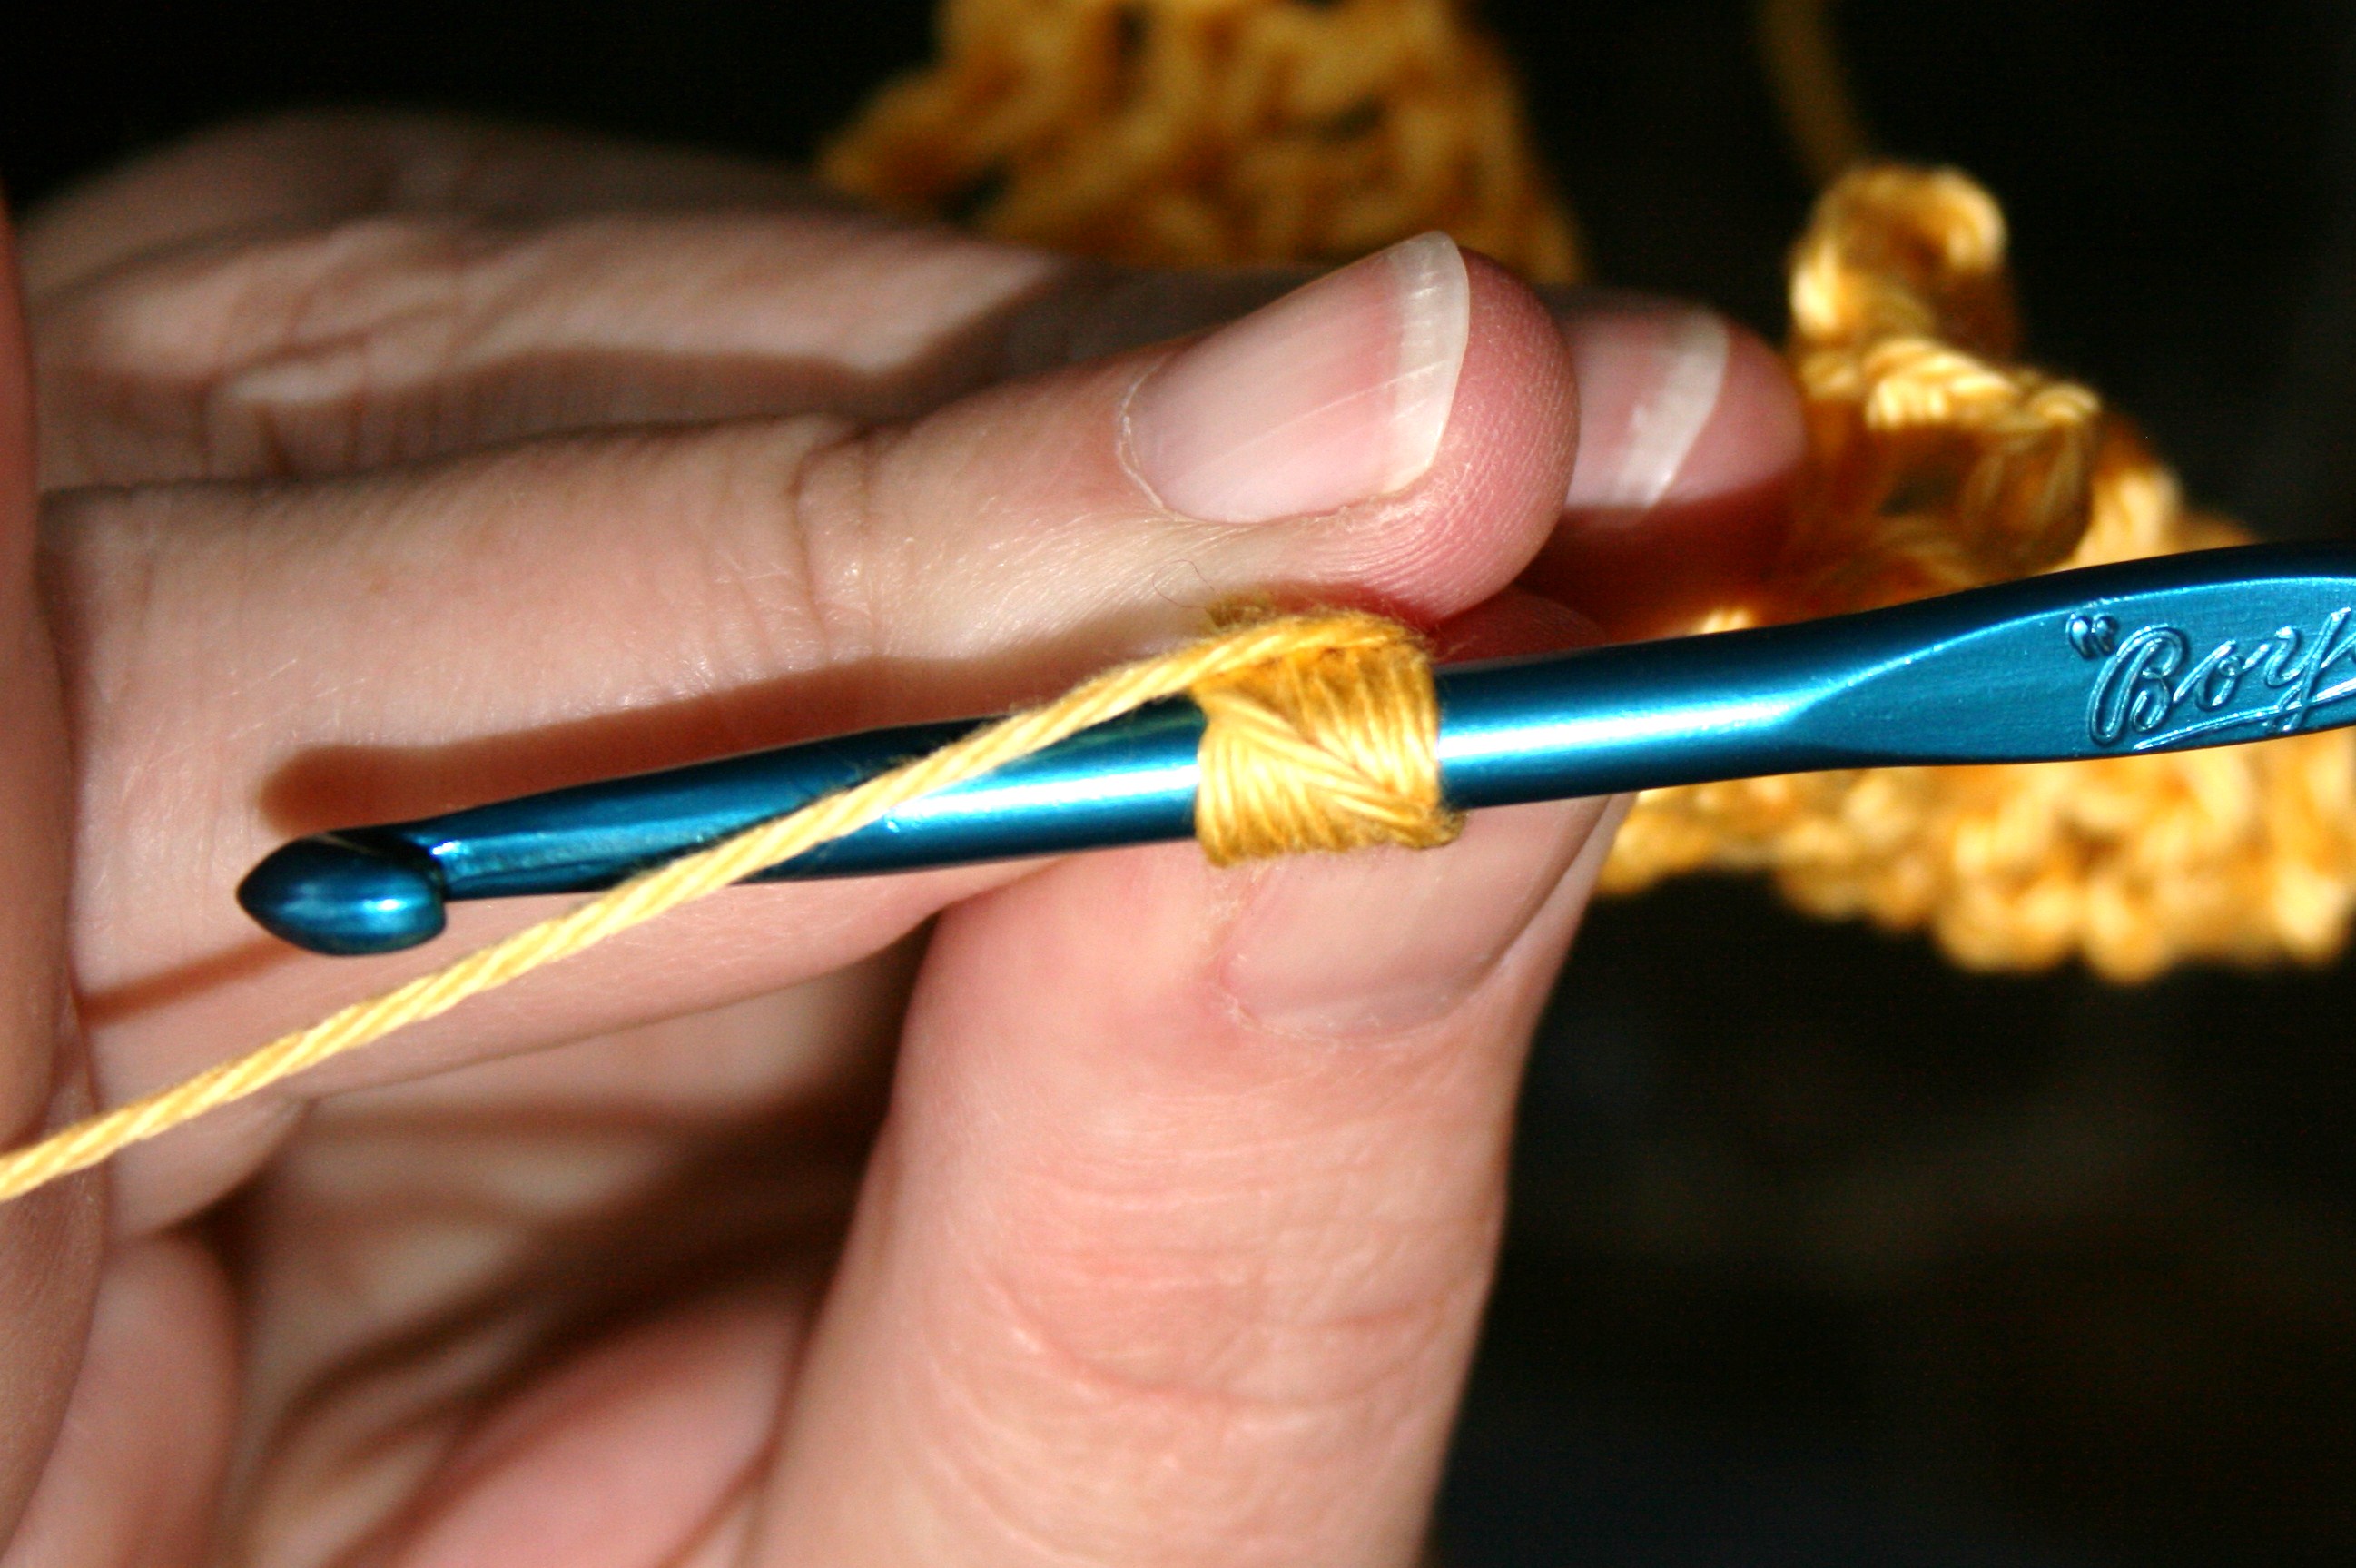
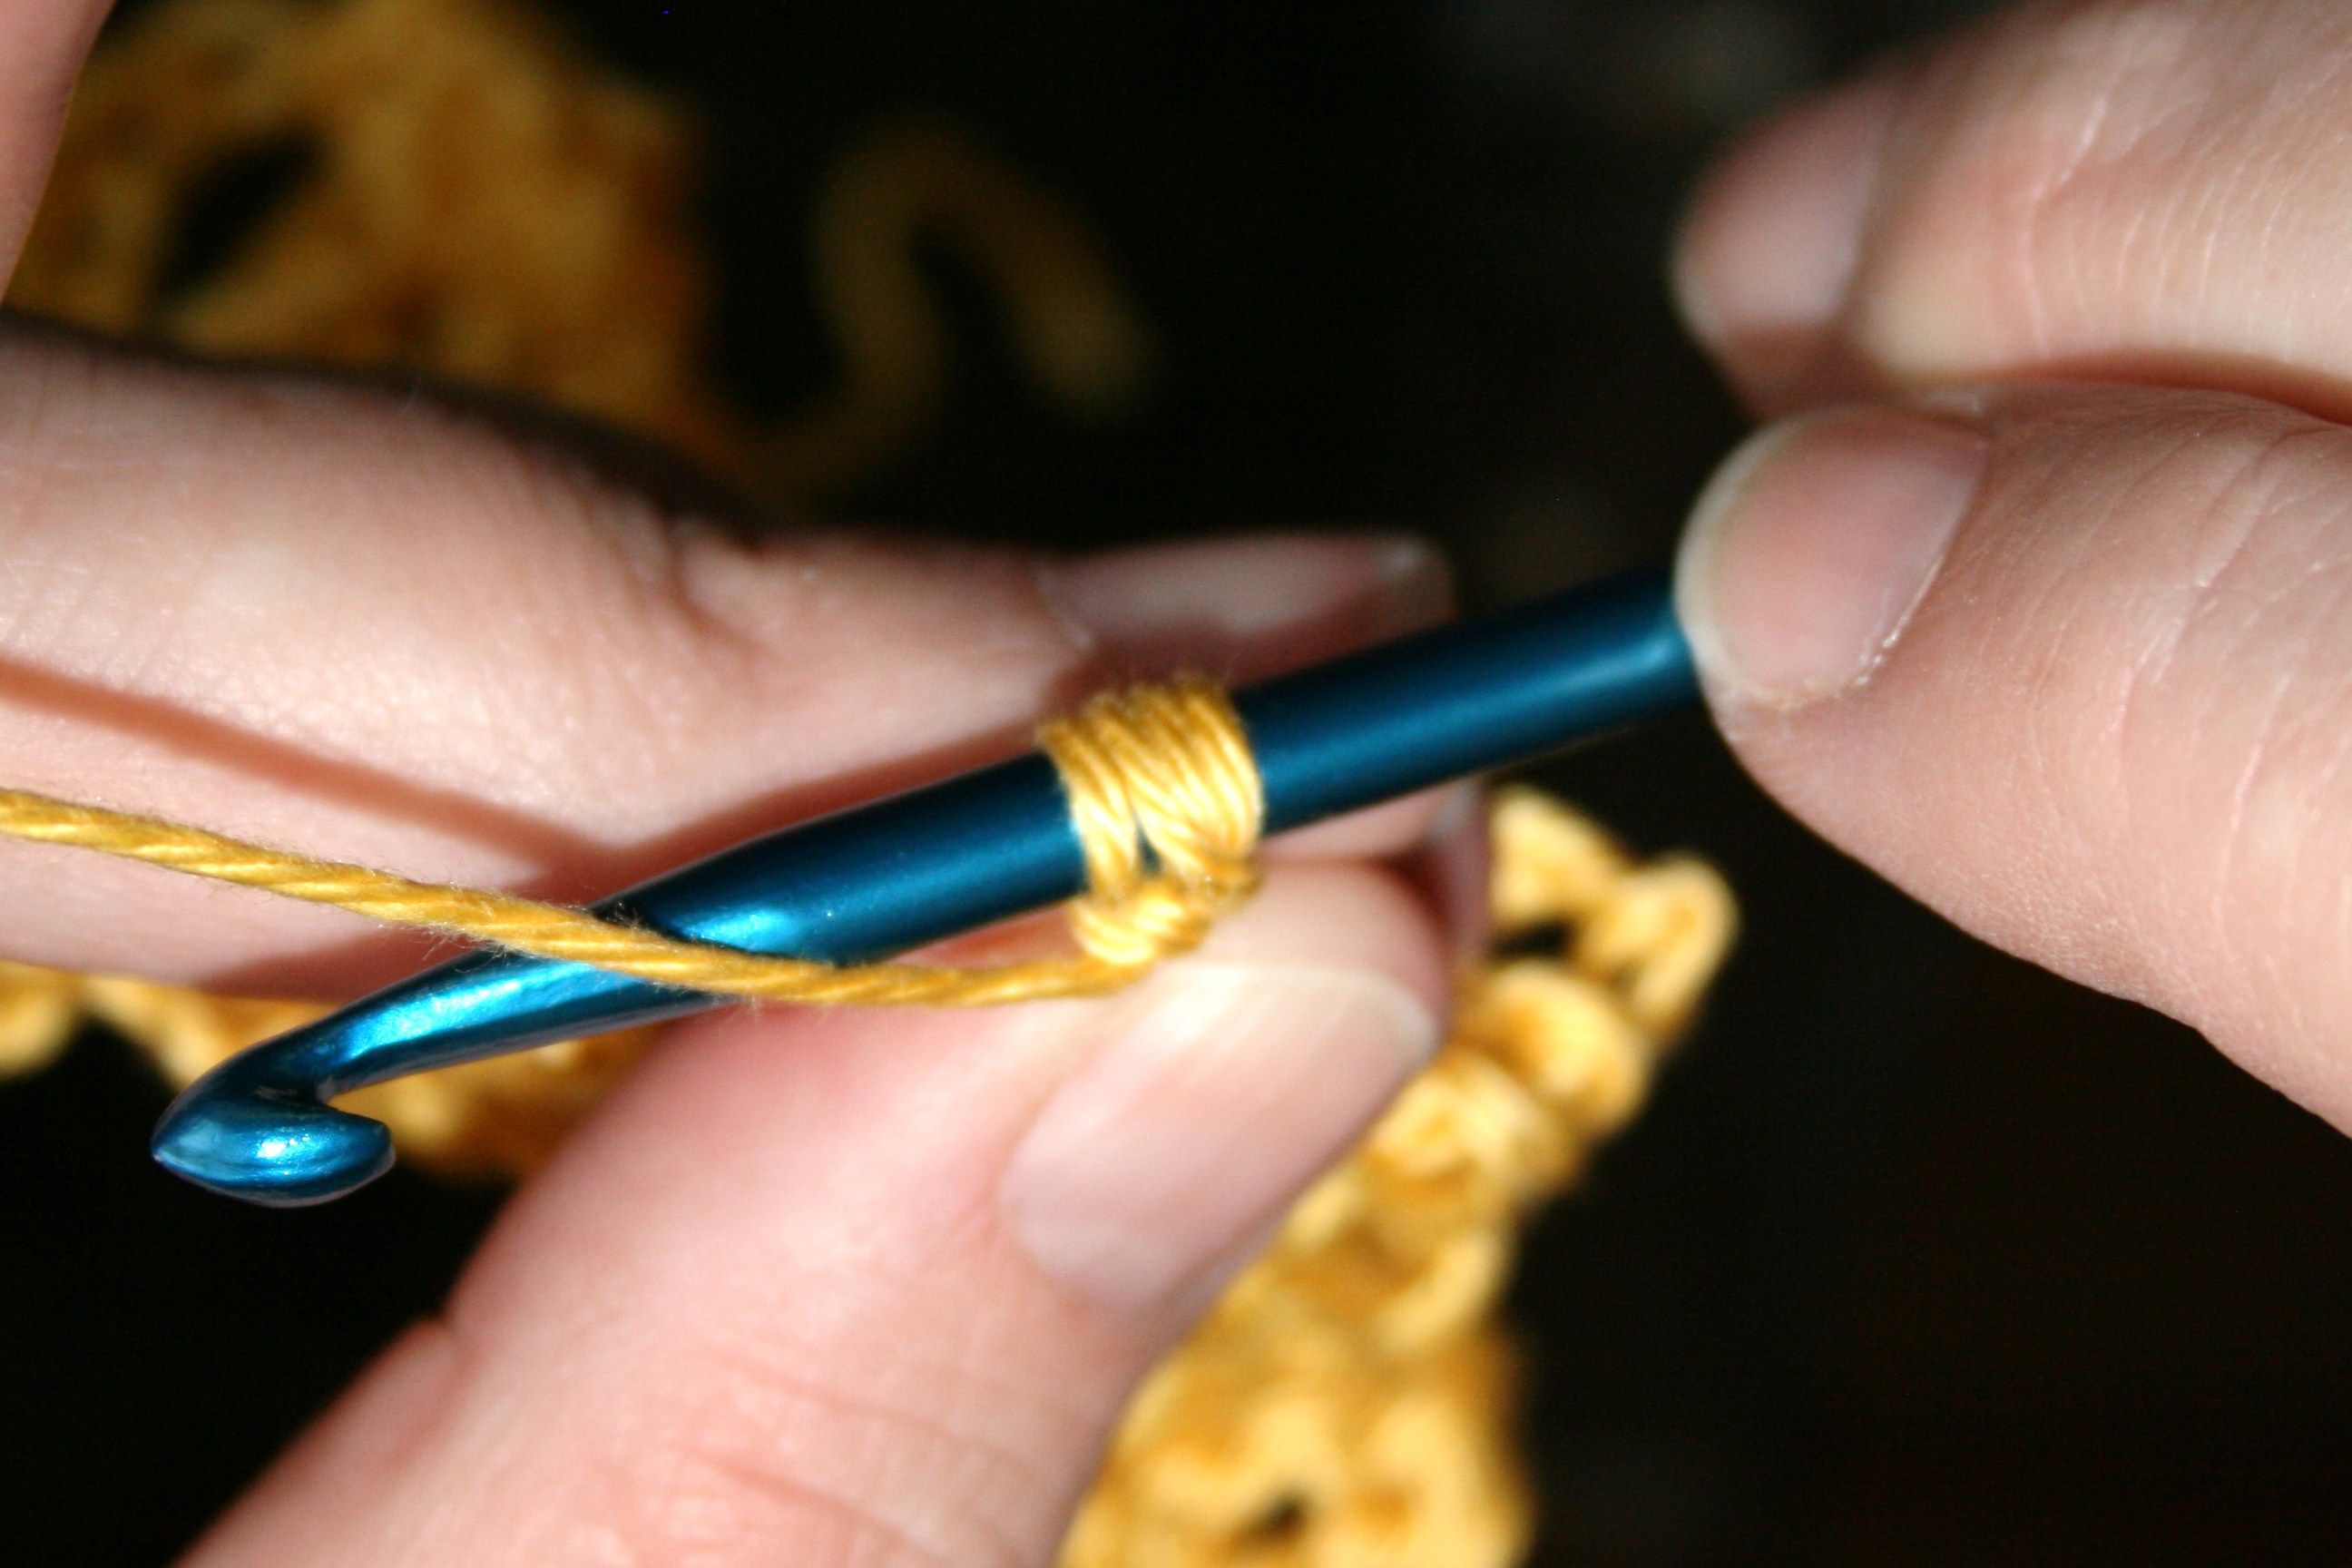
Bring the hook under the working yarn.

To create this stitch, begin by chaining a couple of chains, then place the hook under the working yarn, rotate the hook 360° and place in under the working yarn again. Placing the hook under the working yarn and rotating the hook causes a loop of yarn to be placed on the hook and twisted to stay in place.

XIMG_6853

Twist hook counter-clockwise 360 degrees

XIMG_6855

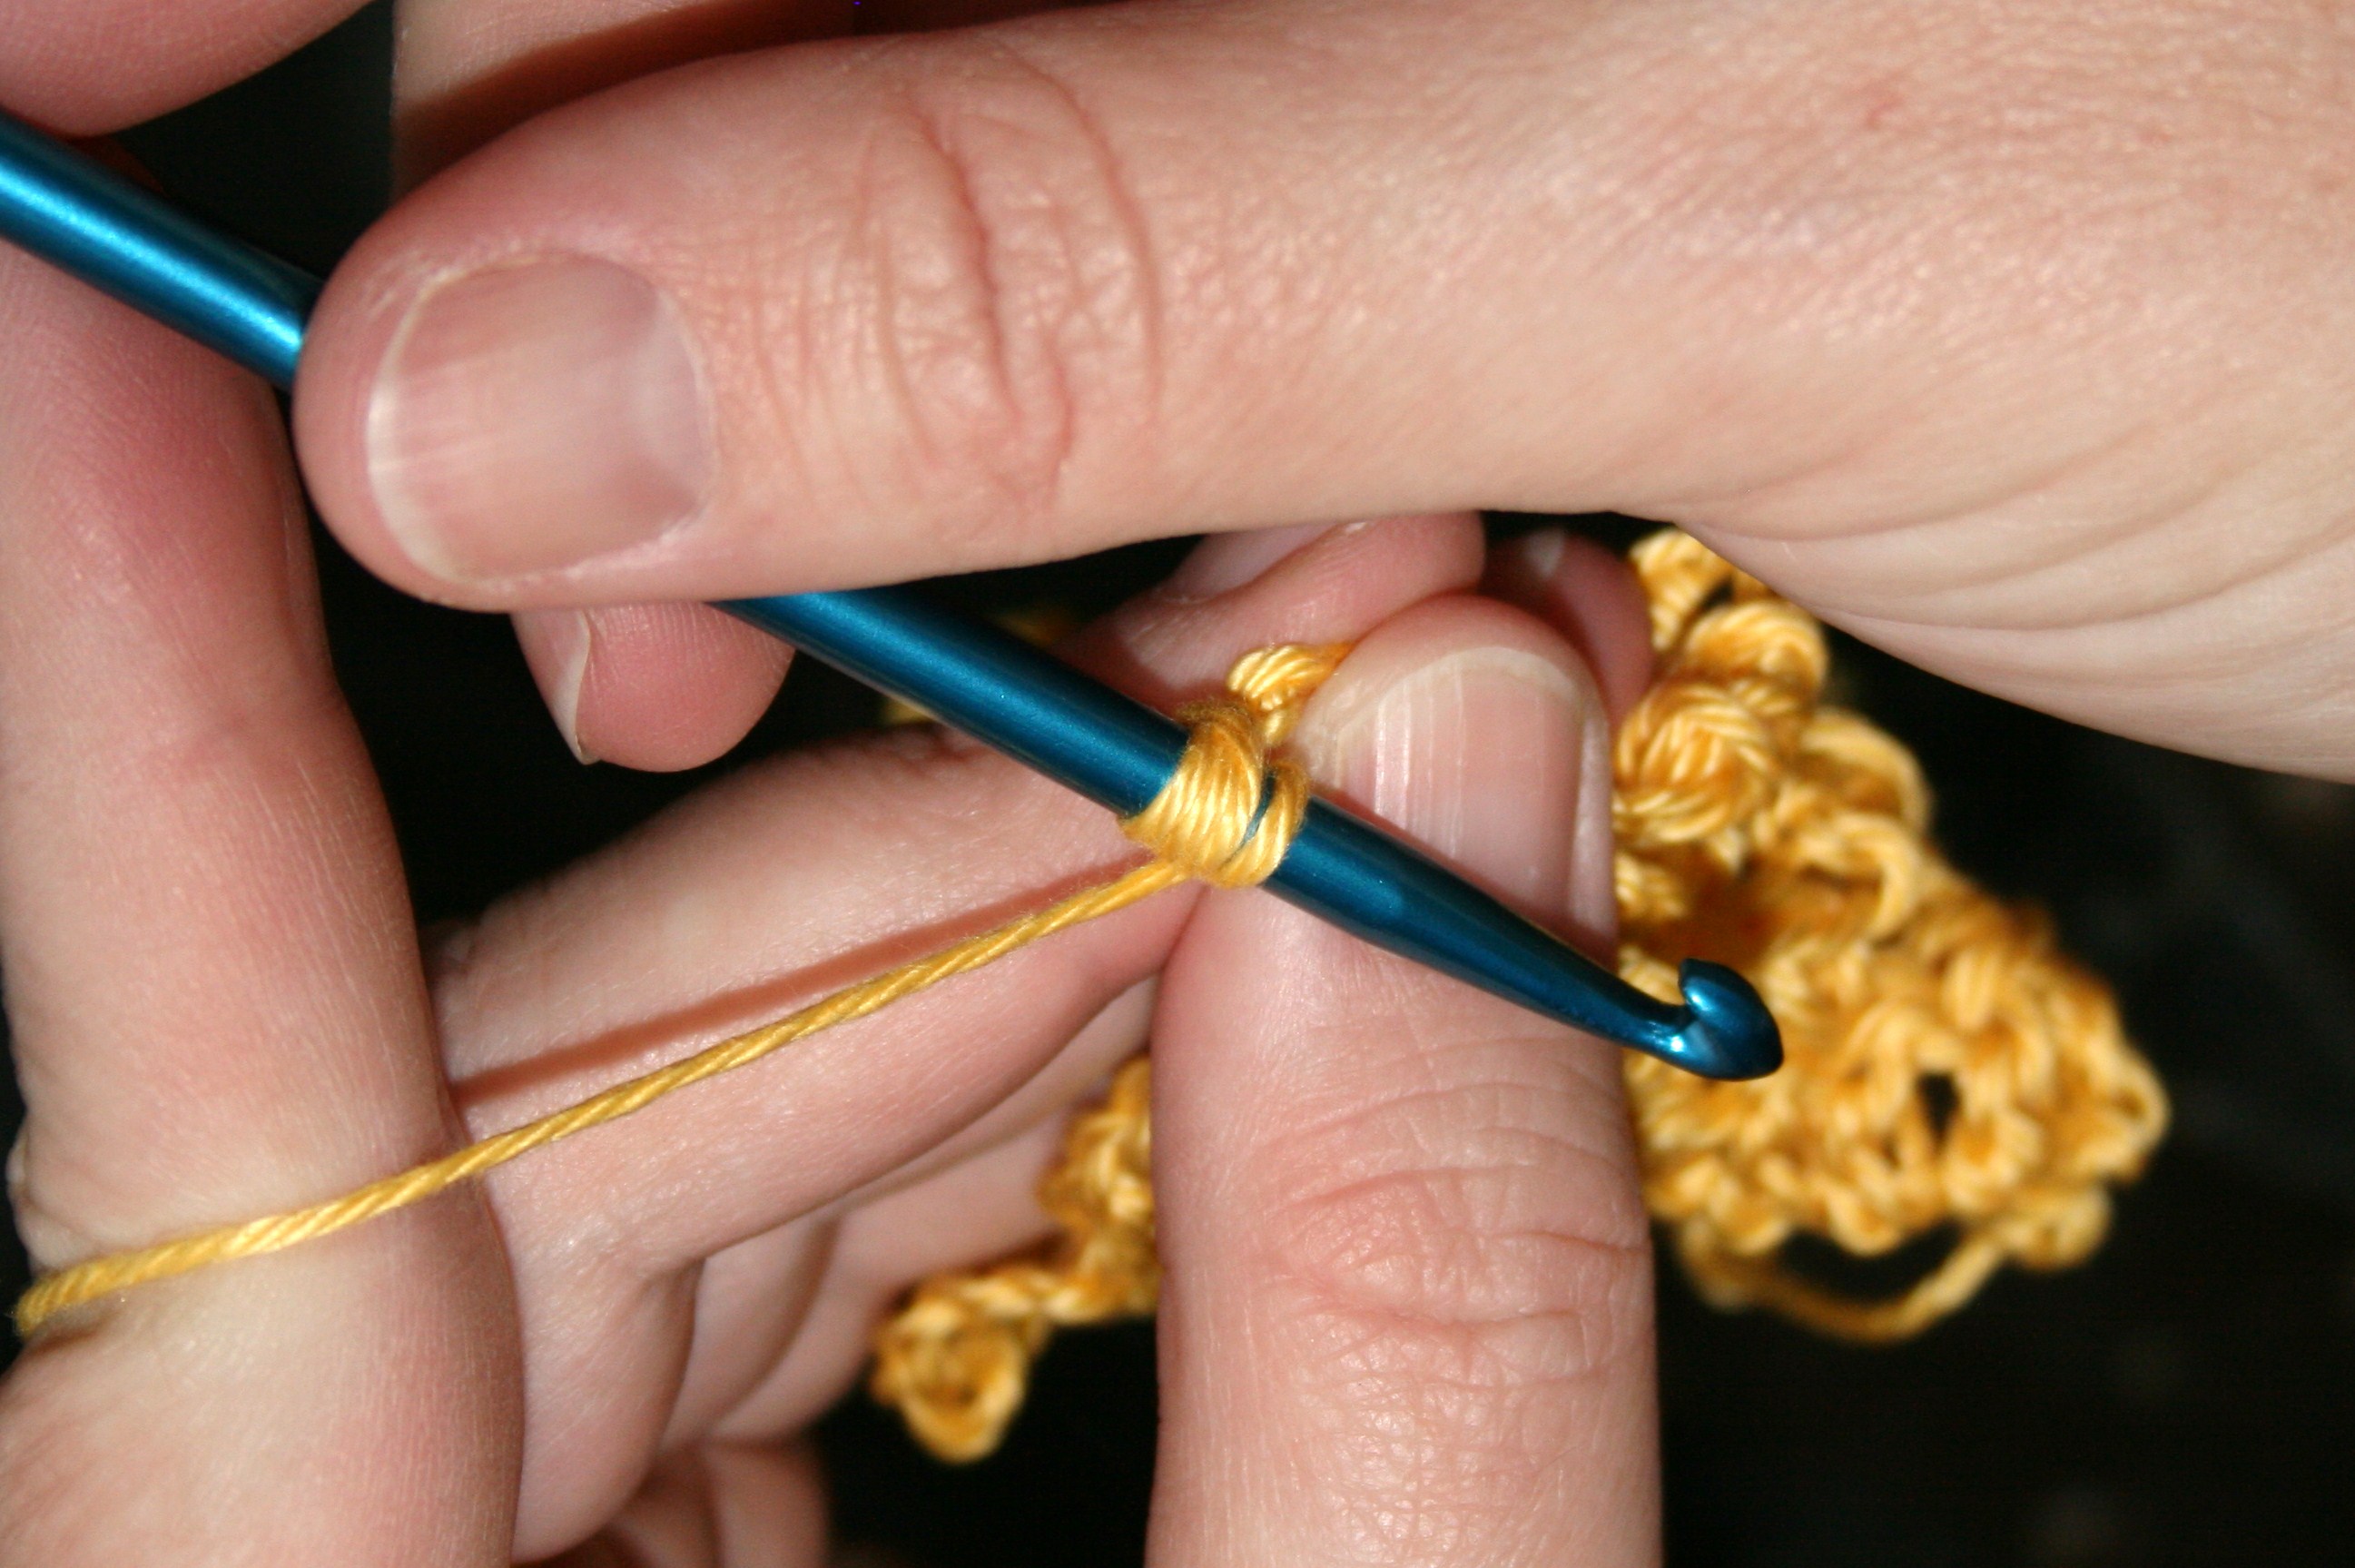
Bring hook under yarn again, and re twist clockwise 360 degrees.

After working this motion a few times or the number indicated in the pattern, yarn over and pull through all the loops. Then chain a couple of more times, now comes the part of securing the stitch. Pull the chain taught and push the loops toward the working end of the chains. You should feel or hear a small pop; this is essentially that you are sliding the loops over the adjacent chain causing it to become secure.

XIMG_6862

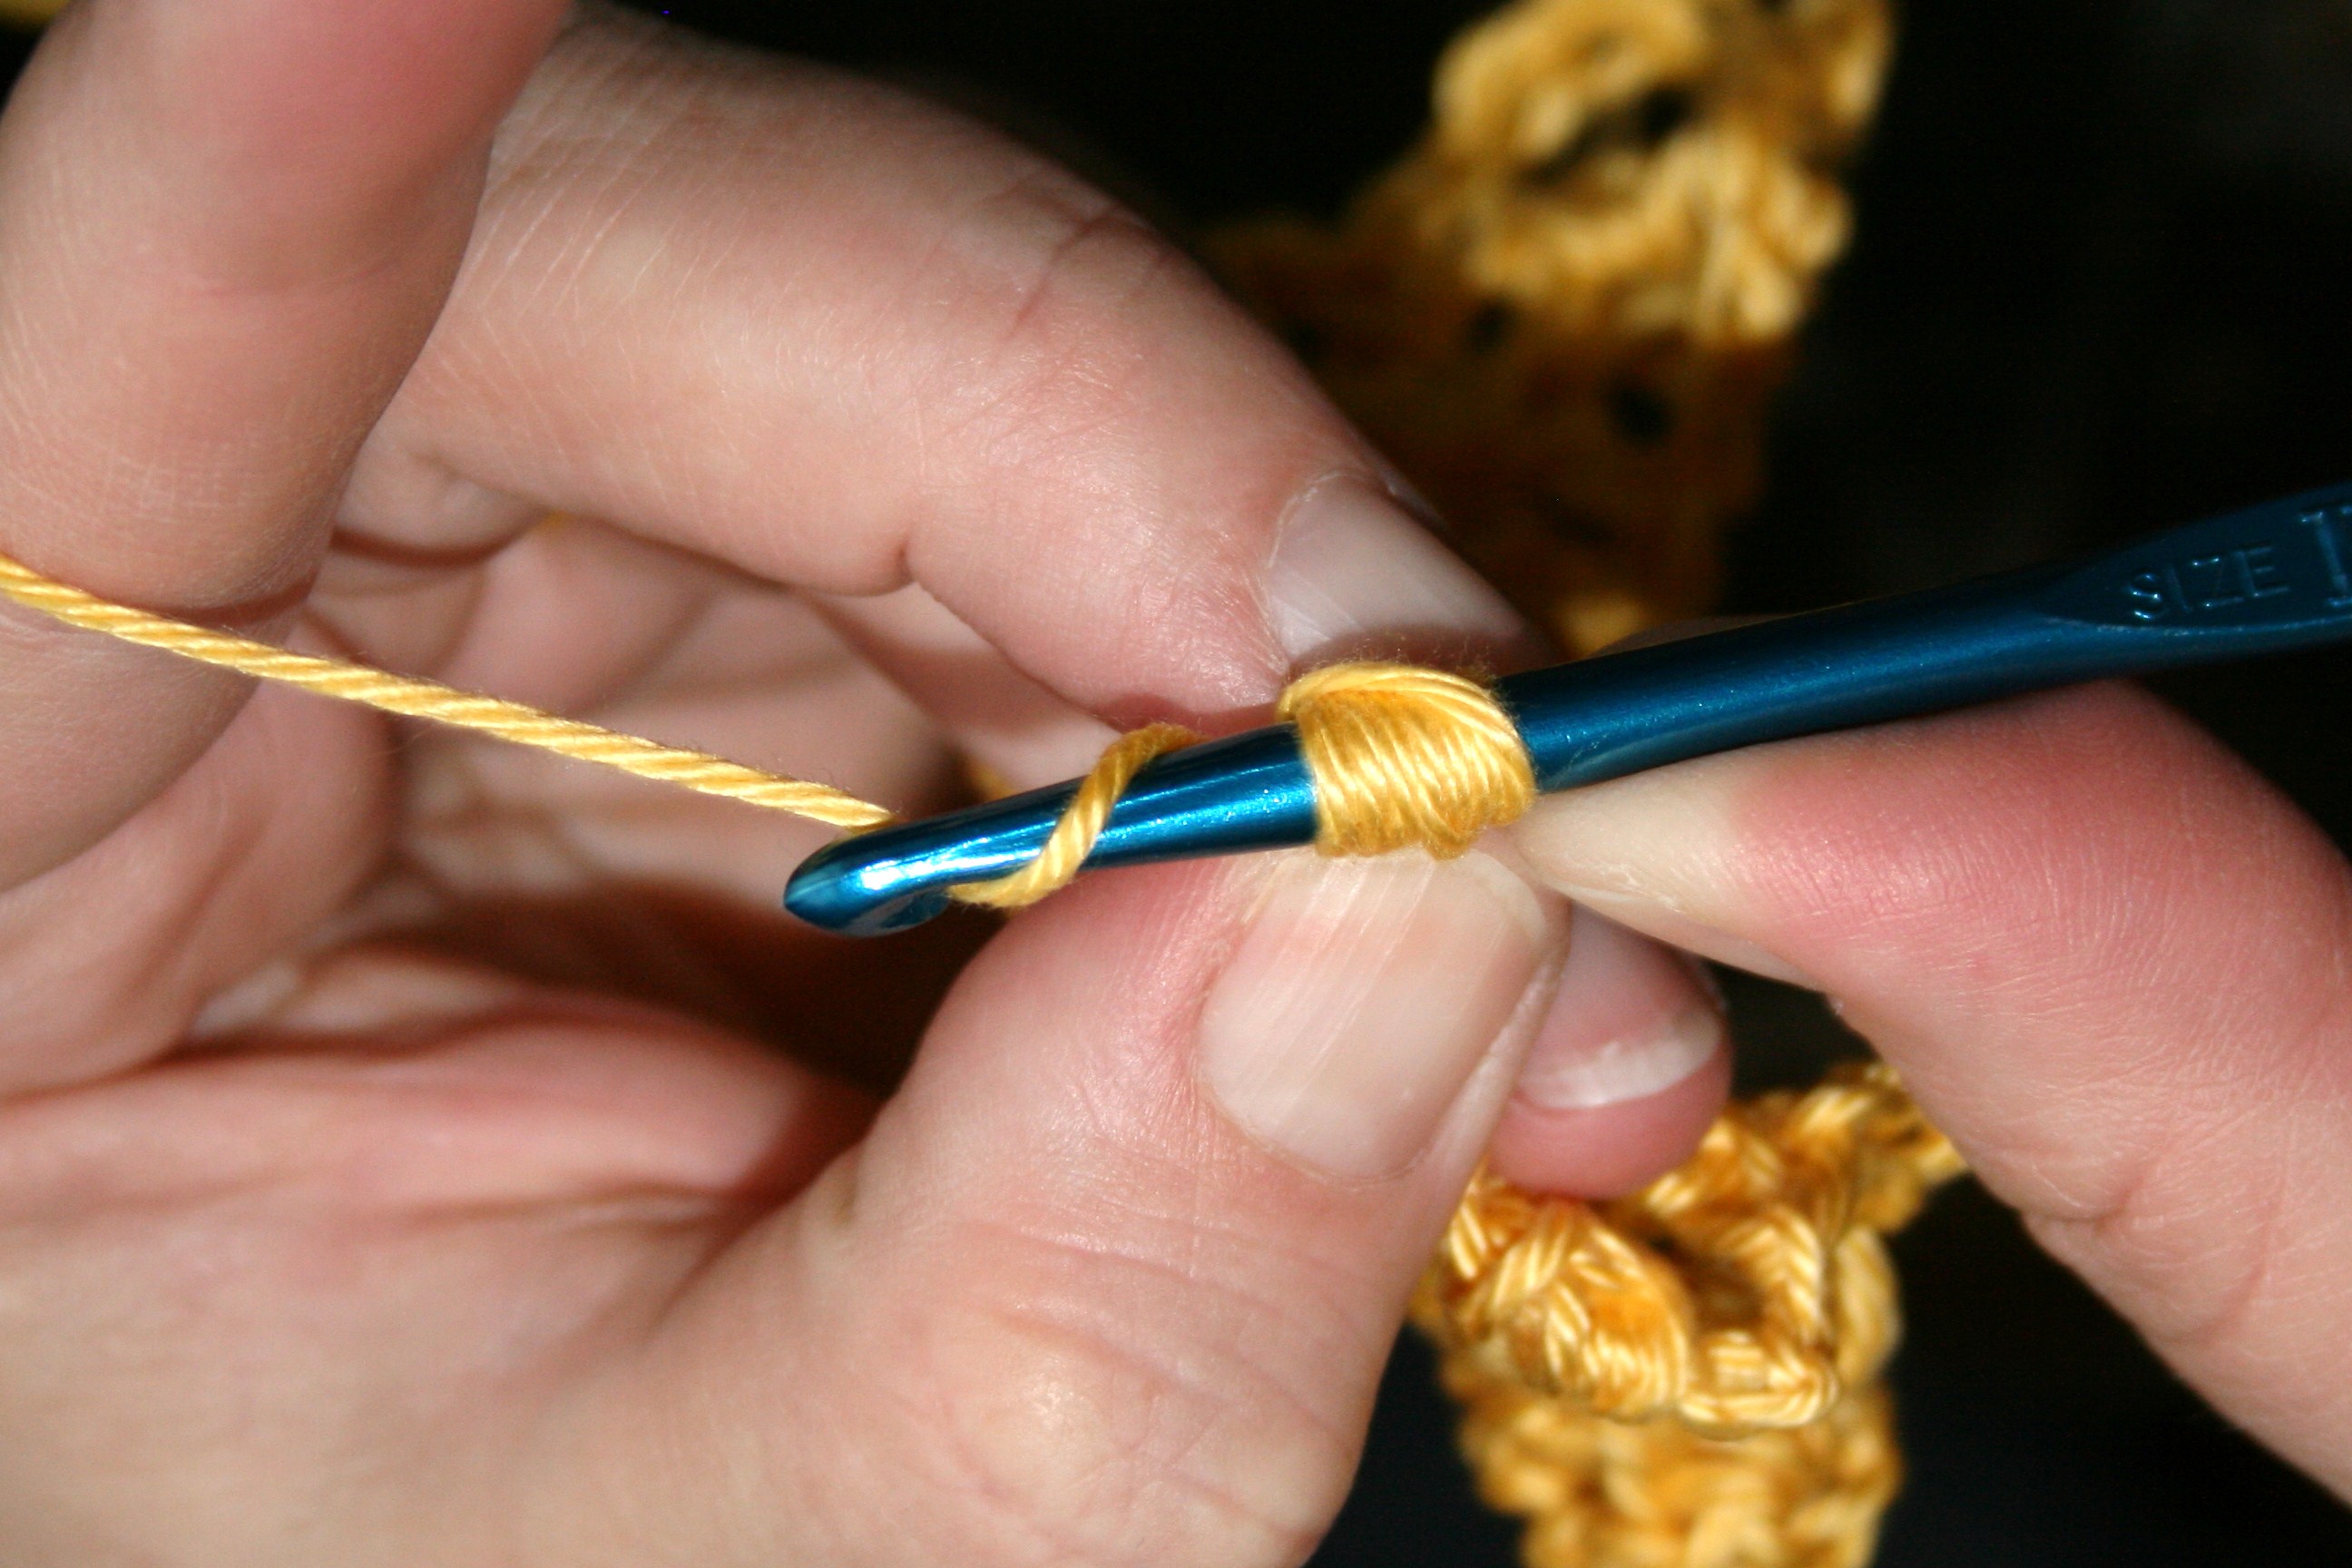
Yarn over and pull through all the loops on the hook.

This unique stitch does have a slight disadvantage to what you usually expect from crochet, it is difficult to rip back, as securing it makes the stitch more difficult, as it creates what its name implies, a knot.

XIMG_6866

Pull chain taught and push Clone Knot toward working end of the chain to secure it in place, you will feel or hear a “pop”.

I hope you give this embellishment a try, add it to an edging, an place of open work, any where you want something a little different.

The Visual Pattern or Paint by Numbers

ScannedImageAs you probably already know we all have different ways of learning. That is very apparent in the next form of pattern writing I’d like to talk about, called Crochet Charts or Symbols depended upon who you ask. This form of writing will cause you to basically do one of two things either you will scratch you head and feel like you need lessons, or the light will go off and the whole world will make sense (granted you can have a little bit of both too.) The charts make it easy to see what the next step is and how the stitches go together, visually; almost like looking at a close up photo of the item you are crocheting. To me it kind of reminds me of “Paint by Numbers”, except that you methodically work each cell directly to the side of the one you are on, instead of filling in all the “twos”. But you recognize the picture you are painting, and simply following the steps, instead of a written pattern that sometime requires you to work a couple of rows before the pattern repeat makes sense.

This pattern reading option is not always as available as the written versions (as I am writing in North America), but it is gaining in popularity and opening up options for crocheters to use foreign patterns as well, since the charts are pretty much universal. The new found availability of these charts is also reflective of the use of illustration software by designers and publishers, as drawing the symbols by hand can often be more labor intensive then writing six pages of pattern. On the other hand, one graphic can show six pages of pattern in one that small space.

Like traditional written patterns you need to understand the abbreviations. This simply is knowing what the symbol represents. Samples of the most common symbols are below, as found on the Craft Yarn Council website:

Charts

The chart will usually indicate the starting point, and many change colors for the rows, making the pattern even more recognizable (and in some instances a piece of art unto itself). A small sample of what a piece might look like is this:

T=dc, x=sc, 0=chain, .=beginning

0 T T  x x x x T T T

0x x x  T T T T x x x

.0 0 0 0 0 0 0 0 0 0 0

This is read from the bottom left (at the period) across to the right, (as I don’t have any fancy software, bear with me here), traditionally you would see three ovals stacked on top of each other to the beginning of the second row (so imaging one between the two already there), and works across to the left. If you are left handed, you simply flip the graphic in the mirror direction and every row will work in the direction you are working.

If this was written out it would appear as:

Row 1: Ch 11, sc in second ch from hook, sc in next 2 ch, dc in next 4 ch, sc in next 3 ch, turn,

Ro w2 Ch 3, dc in next two sc sts, sc in next 4 dc sts, dc in next 3 sc sts.

To keep you place in a pattern like this, you may want a highlighter, or marker of some sort, to physically mark the pattern, or get creative with some office supplies and see what might work for you. Another thing to note about this pattern method is that often the entire pattern is not there; meaning that you are given the graph for the main portion of the repeat of the pattern and not the entire thing. This is one reason that it is most commonly used of motifs, since it is usually a few rows and you can see the entire square, where as is it was a pattern for a sweater it would be more involved with many rows of repeat for only subtle changes at shaping points (not to mention it would be difficult to write multiple sizes into one chart). But charting can be seen as an edging, and it will show you the repeat of the pattern. To successfully complete this you need to do only a little math, and that is only for the number of times that you need to repeat the pattern charted before you to fit desired area.

This is a very favorable pattern to read if you are very visual, to see some beautiful charts simply enter “crochet charts” in any search engine on the internet and find charts that you might even want to frame. It is also another form of pattern writing that you can easily master and might even enjoy if you give it the opportunity. However if this style still doesn’t suit your taste there is yet another method to discuss, more about that next time.