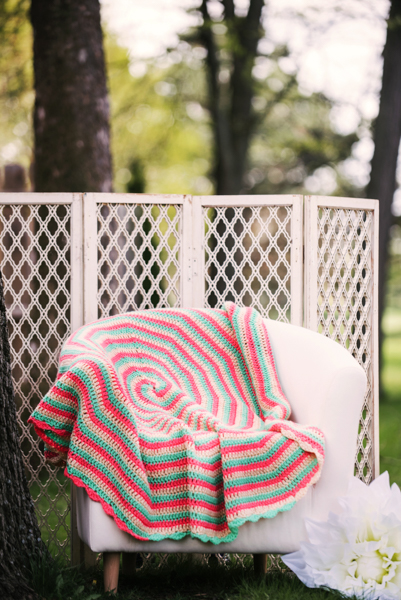
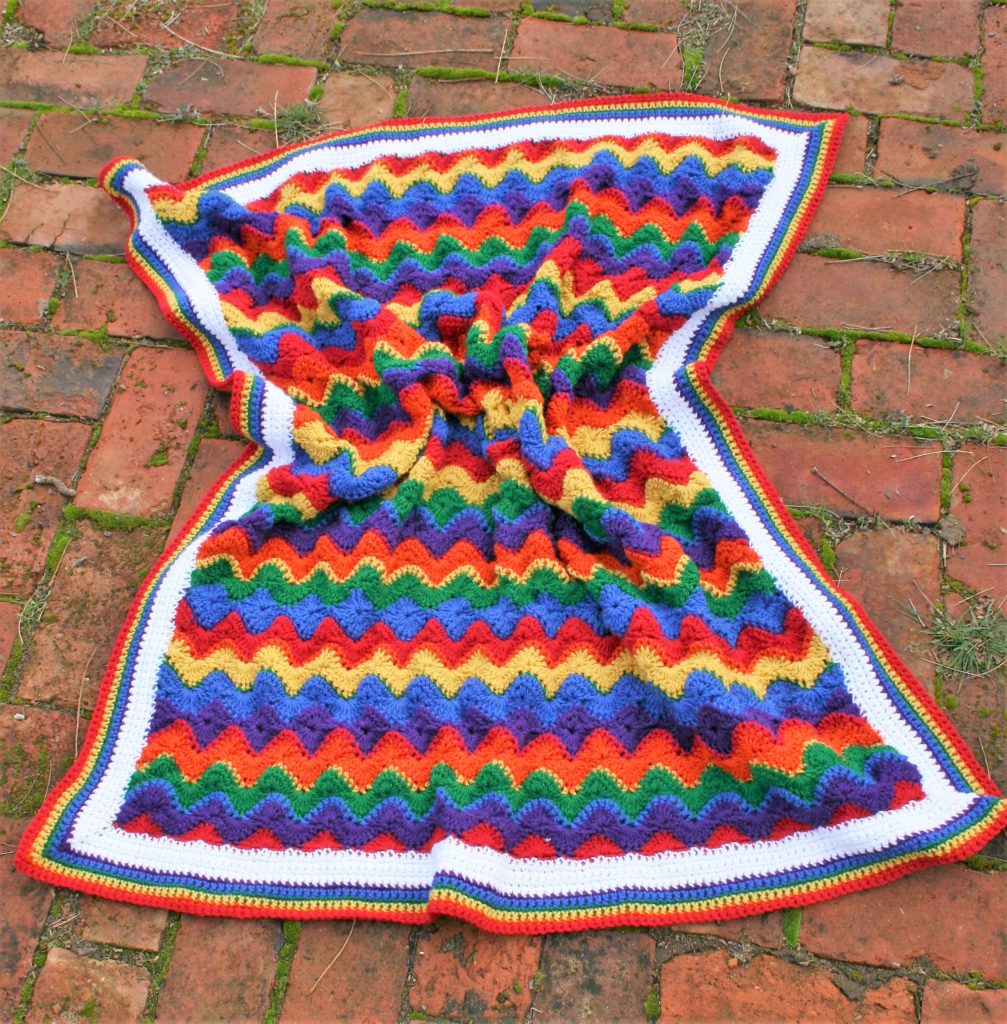
Every baby deserves something special, and I was asked to create something that unique, and it is a free pattern to you. The Energizing Rainbow is my creation inspired by a local Apple Orchard, Rainbow Orchards.
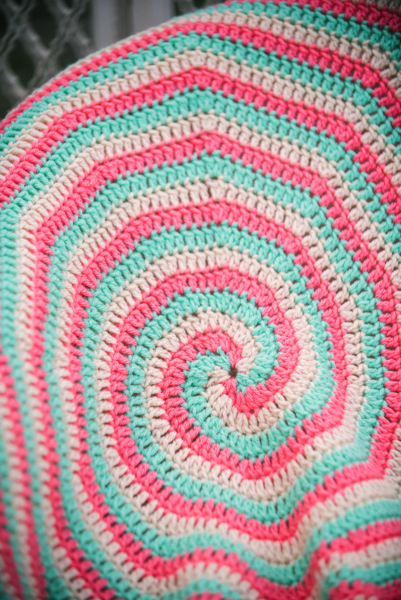
It is created using the Catherine Wheel technique of one row of shells, followed by another row of large decreases. In this approach, I offset the colors in some of the rows to create waves instead of circles. I then alter it back to circles periodically to create a shift in the direction of the wave.
If you want to explore more about the Catherine Wheel, I explain more here, while I explain working decreases here. I also framed the waves with a row of single crochet, so that there is a break in the color blocking.
If you find that you want to explore more with this stitch technique, check out my two additional free patterns, Rolling Along (to benefit Warm Up America), and Moorish Tiles (as part of the Moogly 2020 CAL)
This blanket measures about 36″x 48″.
Materials
- Hook: J/10/6.00mm
- Lion Brand Basic Stitch Premium medium weigh 100% premium acrylic yarn (219yd/200m/3.5oz/100g) 1 skein each: (X) #113 Garnet, (X1) #133 Cayenne, (X2) #158 Saffron, (X3) #172 Ivy, (X4) #110 Saltwater, (X5) #147 Blackberry, (X6) #100 Snow
Special Stiches
Double Crochet 4 Together (dc4tog): [Yo, insert hook into indicated stitch, yo, pull up a loop, yo pull through 2 loops] 4 times, yo, pull through all 5 loops on hook
Double Crochet 9 Together (dc9tog): [Yo, insert hook into indicated stitch, yo, pull up a loop, yo pull through 2 loops] 9 times, yo, pull through all 10 loops on hook
Beginning to Make Waves
Row 1: With X ch 114, sc in 2nd ch from hook, [sk 3 chs, 9 dc in next ch, sk 3 chs, sc in next ch] across, change to X1, turn. – (14) 9 dc groups, 15sc
Row 2: Ch 1, sc in each st across, change to X2, turn.
Row 3: Ch 3, dc4tog, [ch 3, sc in next st, ch 3, dc9tog] 13 times, ch 3, sc in next st, ch 3, dc5tog, turn.
Row 4: Ch 1, sc in same st, [9 dc in next sc, sc in center of dc9tog] 13 times, 9 dc in next sc, sc in turning ch, change to X3, turn.
Row 5: Ch 1, sc in each st across, change to X4, turn.
Rows 6 & 7: Rep Rows 3 & 4, changing to X5 at the end of Row 7.
Making a Full Circle
Row 8: Rep Row 3.
Row 9: Ch 3, 4 dc in same st, [sc in next sc, 9 dc in center of dc9tog] 13 times, sc in next sc, 5 dc in top of turning ch, change to X, turn.
Row 10: Ch 1, sc in each st across, change to X1.
Back to Waves
Row 11: Ch 1, sc in same st, [ch 3, dc9tog, ch 3, sc in next st] 14 times, turn.
Row 12: Ch 3, 4 dc in same st, [sc in center of dc9tog, 9 dc in sc] 13 times, sc in center of dc9tog, 5 dc in last sc, change to X2, turn.
Row 13: Ch 1, sc in each st across, change to X3, turn.
Rows 14 & 15: Rep Rows 11 & 12, changing to X4 at the end of Row 15.
Row 16: Ch 1, sc in each st across, change to X5, turn.
Rows 17 & 18: Rep Rows 11 & 12, changing to X at the end of Row 18.
Another Circle
Row 19: Rep Row 11.
Row 20: Ch 1, sc in same st, [9 dc in center of dc9tog, sc in next sc] 14 times, change to X1, turn.
Row 21: Ch 1, scv in each st across, change to X2, turn.
Back to Waves
Row 22: Ch 3, dc4tog, ch 3, [sc in next st, ch 3, dc9tog, ch 3] 13 times, sc in next st, dc5tog, turn.
Row 23: Ch 1, sc in same st, [9 dc in sc, sc in center of dc9tog] 13 times, 9 dc in next sc, sc in top of turning ch, change to X3, turn.
Row 24: Ch 1, sc in each st across, change to X4, turn.
Rows 25 & 26: Rep Rows 22 & 23, changing to X5 at end of Row 26, turn.
Row 27: Ch 1, sc in each st across, change to X, turn.
Rows 28 & 29: Rep Rows 22 & 23 changing to X1 at end of 29, turn.
Going Around Again
Row 30: Rep Row 22.
Row 31: Ch 3, 4 dc in same st, [sc in next sc, 9 dc in center of dc9tog] 13 times, sc in next sc, 5 dc in top of turning ch, change to X2, turn.
Row 32: Ch 1, sc in each st across, change to X3, turn.
Making it Wavy
Row 33: Ch 1, sc in same st, [ch 3, dc9tog, ch 3, sc in next st] 14 times, turn.
Row 34: Ch 3, 4 dc in same st, [sc in center of dc9tog, 9 dc in sc] 13 times, sc in center of dc9tog, 5 dc in last sc, change to X4, turn.
Row 35: Ch 1, sc in each st across, change to X5, turn.
Rows 36 & 37: Rep Rows 33 & 34 changing to X at the end of Row 37, turn.
Row 38: Ch 1, sc in each st across, change to X1, turn.
Rows 39 & 40: Rep Rows 33 & 34 changing to X2 at the end of Row 40, turn.
Circles, Circles, Circles
Row 41: Rep Row 33.
Row 42: Ch 1, sc in same st, [9 dc in center of dc9tog, sc in next sc] 14 times, change to X3, turn.
Row 43: Ch 1, sc in each st across, change to X4, turn.
Love Some More Waves
Row 44: Ch 4, dc4tog, ch 3, [sc in next st, ch 3, dc9tog, ch 3] 13 times, sc in next st, ch 3, dc5tog, turn.
Row 45: Ch 1, sc in same st, [9 dc in sc, sc in center of dc9tog] 13 times, 9 dc in sc, sc in turning ch, change to X5, turn.
Row 46: Ch 1, sc in each st across, change to X, turn.
Rows 47 & 48: Rep Rows 44 & 45, changing to X1 at the end of Row 48.
Row 49: Ch 1, sc in each st across, change to X2, turn.
Rows 50 & 51: Rep Rows 44 & 45, changing to X3 at the end of Row 51.
Around Again
Row 52: Rep Row 44.
Row 53: Ch 3, 4 dc in same st, [sc in sc, 9 dc in center of dc9tog] 13 times, sc in sc, 5 dc in turning ch, change to X4, turn.
Row 54: Ch 1, sc in each st across, change to X5, turn.
Lets make it Ripple
Row 55: Ch 1, sc in same st, [ch 3, dc9tog, ch 3, sc in next st] 14 times, turn.
Row 56: Ch 3, 4 dc in same st, [sc in center of dc9tog, 9 dc in sc] 13 times, sc in center of dc9tog, 5 dc in last st, change to X, turn.
Row 57: Ch 1, sc in each st across, change to X1, turn.
Rows 58 & 59: Rep Rows 55 & 56 changing to X2 at the end of Row 59, turn.
Row 60: Ch 1, sc in each st across, change to X3, turn.
Rows 61 & 62: Rep Rows 55 & 56 changing to X4 at the end of Row 62, turn.
Another Going Around
Row 63: Rep Row 55.
Row 64: Ch 1, sc in same st, [9 dc in center of dc9tog, sc in next sc] 14 times, change to X5, turn.
Row 65: Ch 1, sc in each st across, change to X, turn.
And Back to Up and Down
Row 66: Ch 3, dc4tog, ch 3, [sc in next st, ch 3, dc9tog, ch 3] 13 times, sc in next st, ch 3, dc5tog, turn.
Row 67: Ch 1, sc in same st, [9 dc in sc, sc in center of dc9tog] 13 times, 9 dc in sc, sc in last st, changing to X1, turn.
Row 68: Ch 1, sc in each st across, change to X2, turn.
Rows 69 & 70: Rep Rows 66 & 67 changing to X3 at the end of Row 70.
Row 71: Ch 1, sc in each st across, change to X4, turn.
Rows 72 & 73: Rep Rows 66 & 67 changing to X5 at the end of Row 73.
Getting Dizzy Yet…More circles
Row 74: Rep Row 66.
Row 75: Ch 3, 4 dc in same st, [sc in sc, 9 dc in center of dc9tog] 13 times, sc in sc, 5 dc in turning ch, change to X, turn.
Row 76: Ch 1, sc in each st across, change to X1, turn.
Up & Dow, Up & Down
Row 77: Ch 1, sc in same st, [ch 3, dc9tog, ch 3, sc in next st] 14 times, turn.
Row 78: Ch 3, 4 dc in same st, [sc in center of dc9tog, 9 dc in sc ] 13 times, sc in center of dc9tog, 5 dc last sc, change to X2, turn.
Row 79: Ch 1, sc in each st across, change to X3, turn.
Rows 80 & 81: Rep Rows 77 & 78 changing to X4 at the end of Row 81.
Row 82: Ch 1, sc in each st across, change to X5, turn.
Rows 83 & 84: Rep Rows 77 & 78, change to X at the end of Row 84.
Even Out to Finish
Row 85: Rep Row 77, fasten off.
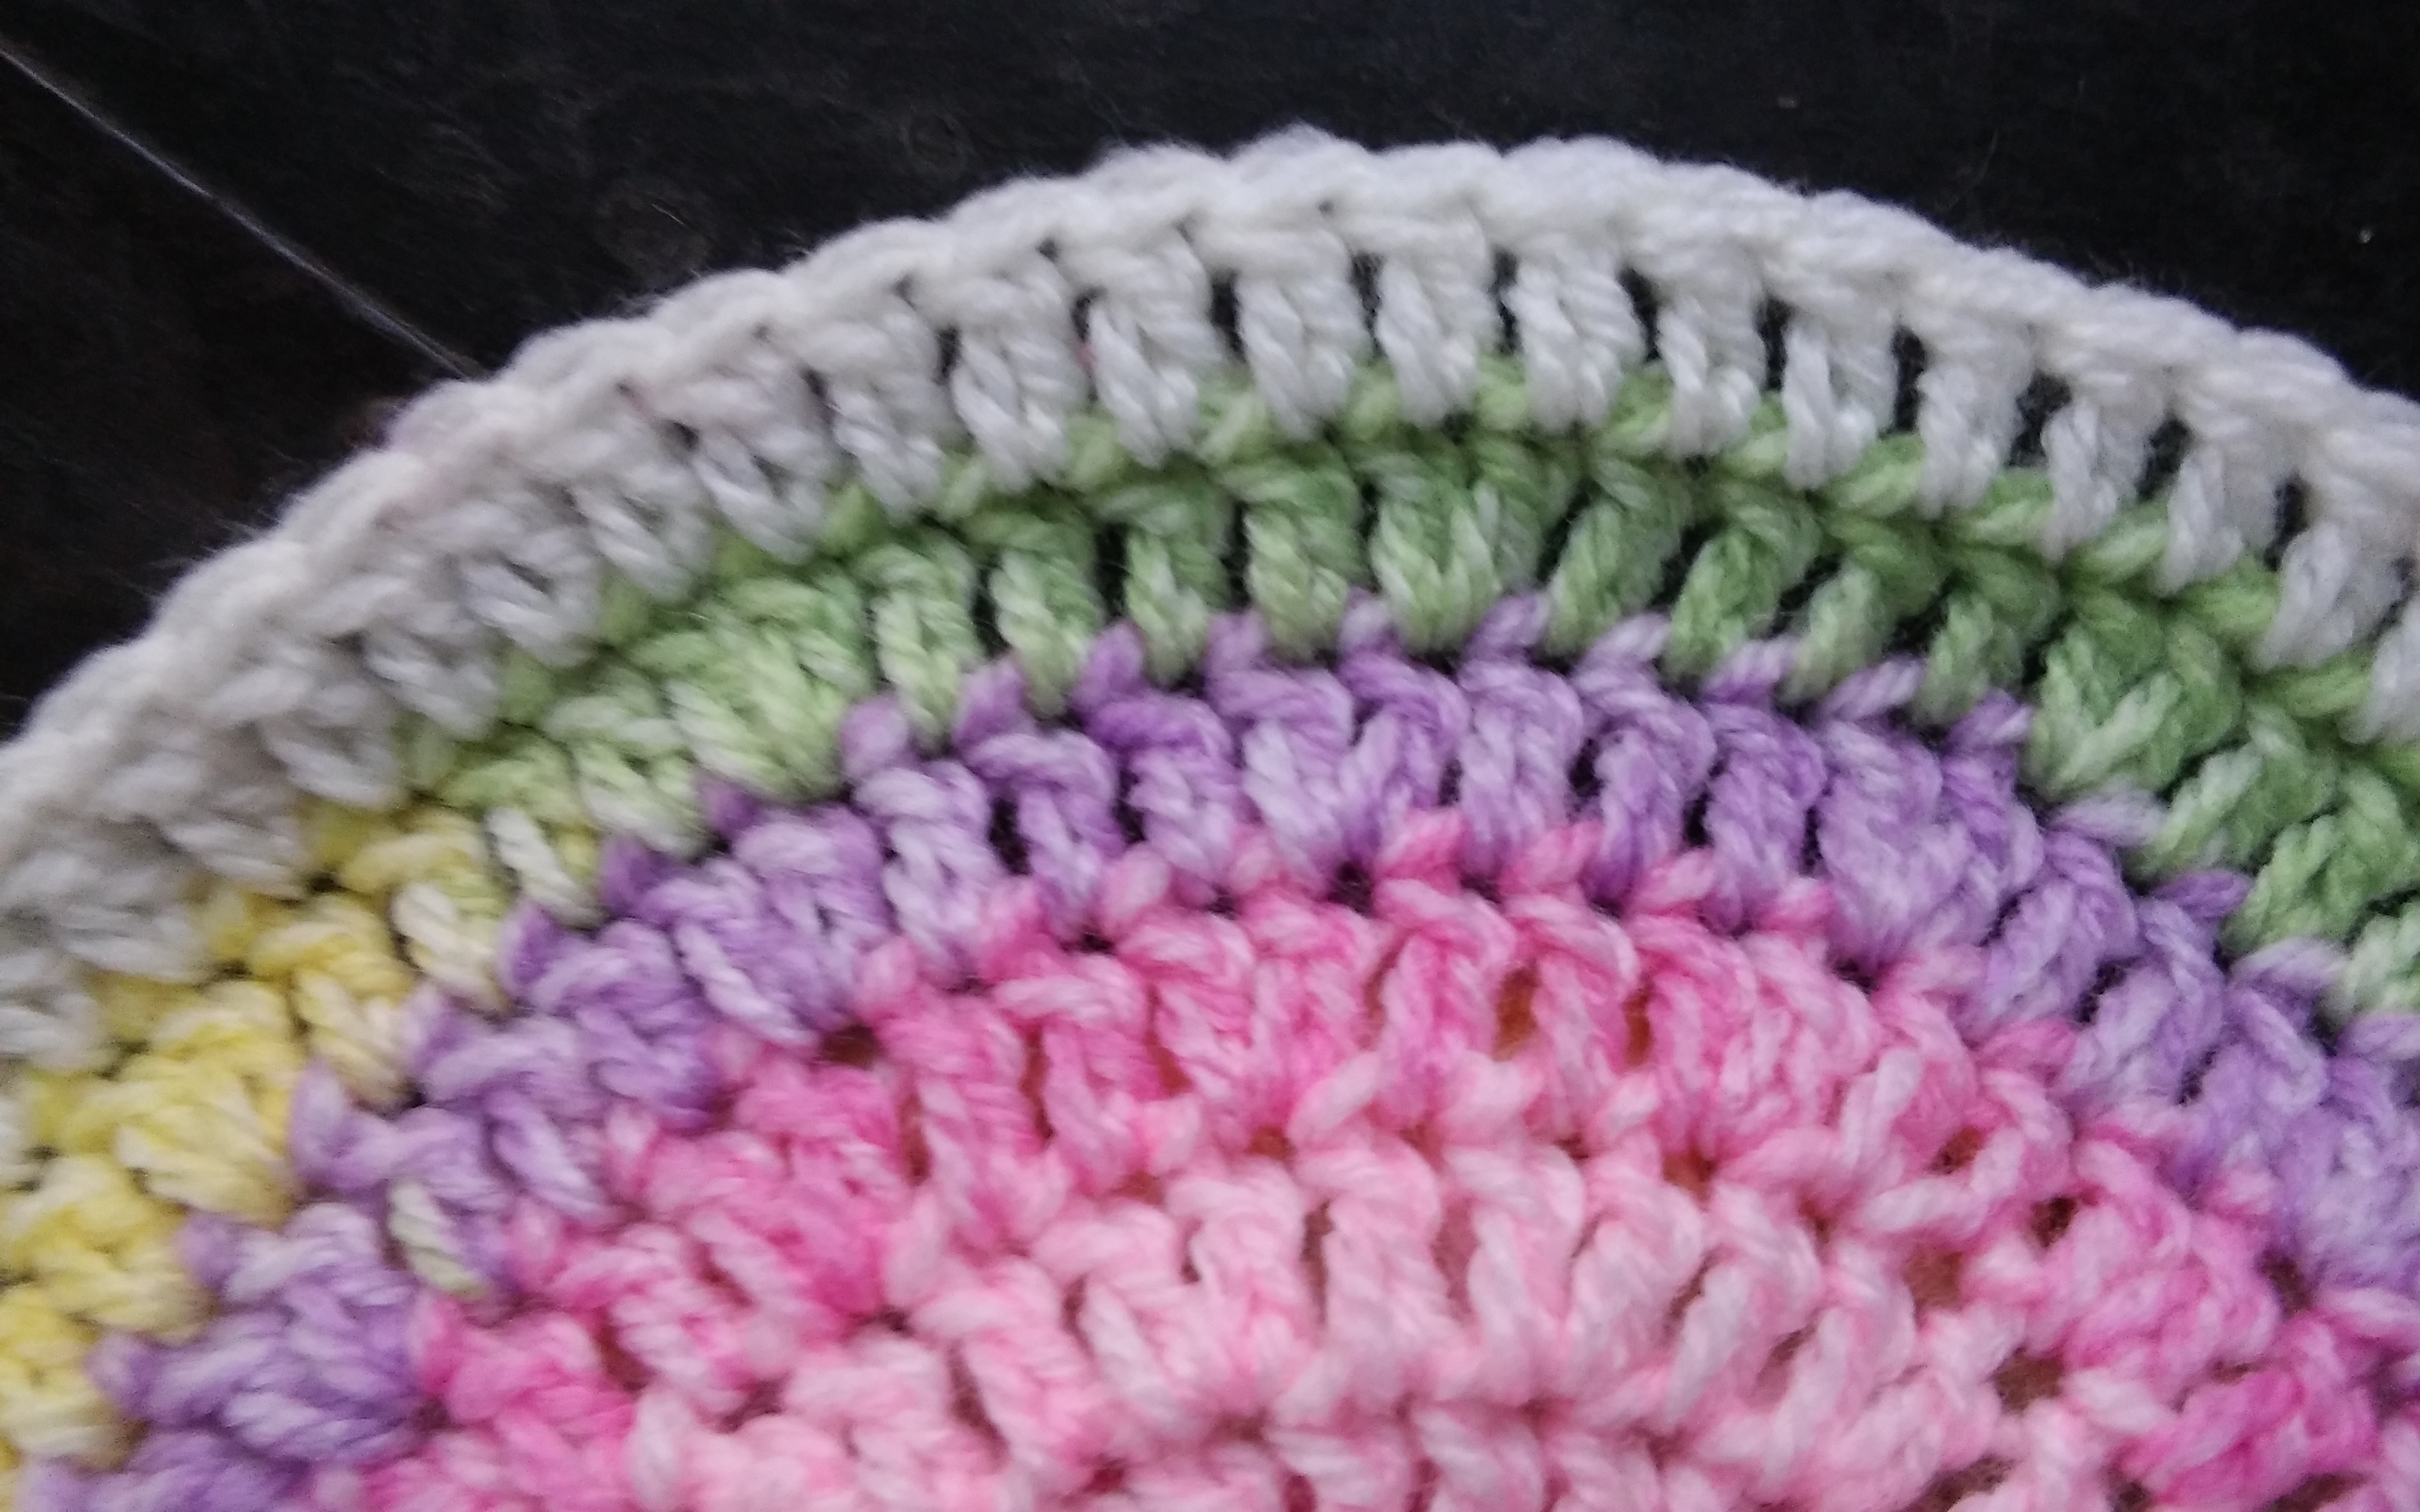
Edging
Rnd 1: With X6, join to any corner, ch 1, 3 sc in in same corner, sc evenly on side of afghan working 3 sc in each corner, sl st to join to first sc, turn.
Rnds 2-5: Ch 1, sc in same st, work sc in each stitch across to corner (the center sc of 3sc), working 3 sc in corner, sl st to join, turn. Fasten off.
Rnd 3: With X5, join to any corner, ch 1, 3sc in same corner, sc in each stitch across working 3 sc in corner, sl st to join, turn. Fasten off.
Rnd 4: With X4, join to any corner, ch 1, 3sc in same corner, sc in each stitch across working 3 sc in corner, sl st to join, turn. Fasten off.
Rnd 5: With X3, join to any corner, ch 1, 3sc in same corner, sc in each stitch across working 3 sc in corner, sl st to join, turn. Fasten off.
Rnd 6: With X2, join to any corner, ch 1, 3sc in same corner, sc in each stitch across working 3 sc in corner, sl st to join, turn. Fasten off.
Rnd 7: With X1, join to any corner, ch 1, 3sc in same corner, sc in each stitch across working 3 sc in corner, sl st to join, turn. Fasten off.
Rnd 8: With X, join to any corner, ch 1, 3sc in same corner, sc in each stitch across working 3 sc in corner, sl st to join. Fasten off.