Over the last several weeks I have been doing a lot of work creating new design blocks for charity. These blocks can be used as you see fit to benefit others.
Materials
Cascade Yarn Pacific medium weight yarn, 60% acrylic/40% superwash merino wool (100g/3.5oz/213 yrd/195 m)
Hook size I/9/5.5mm, unless otherwise specified
Block measures 7″ x7″
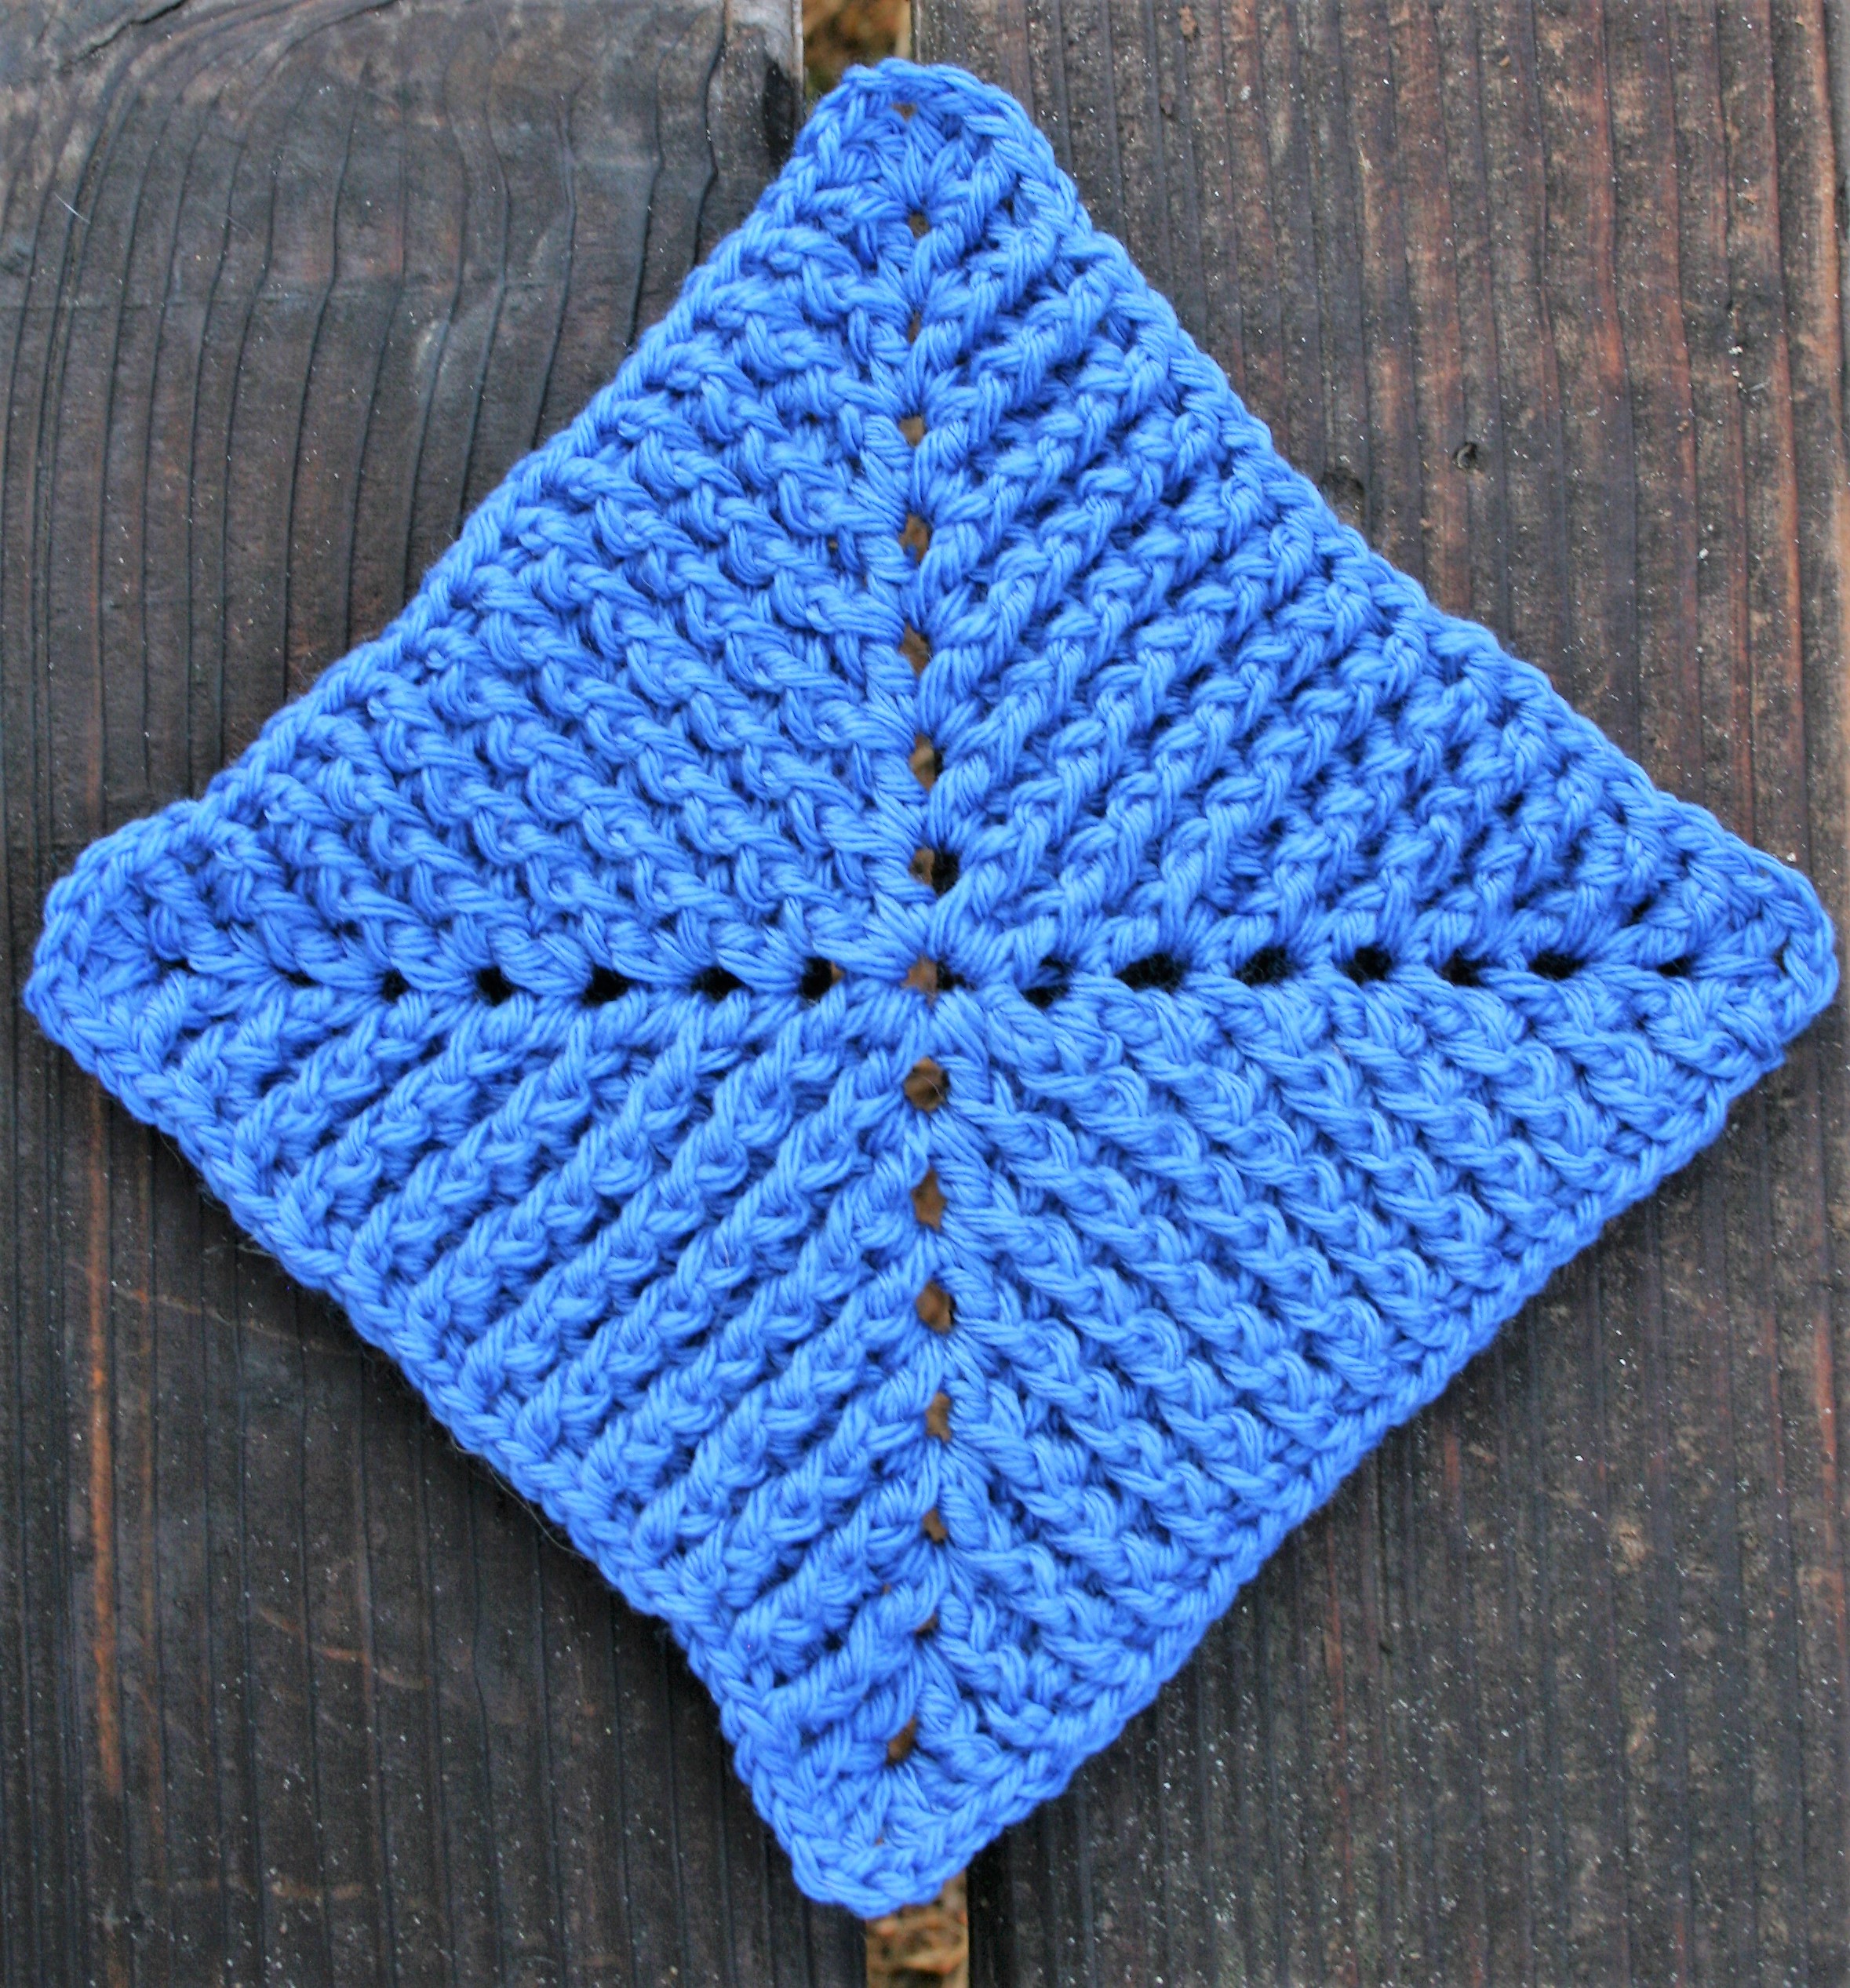
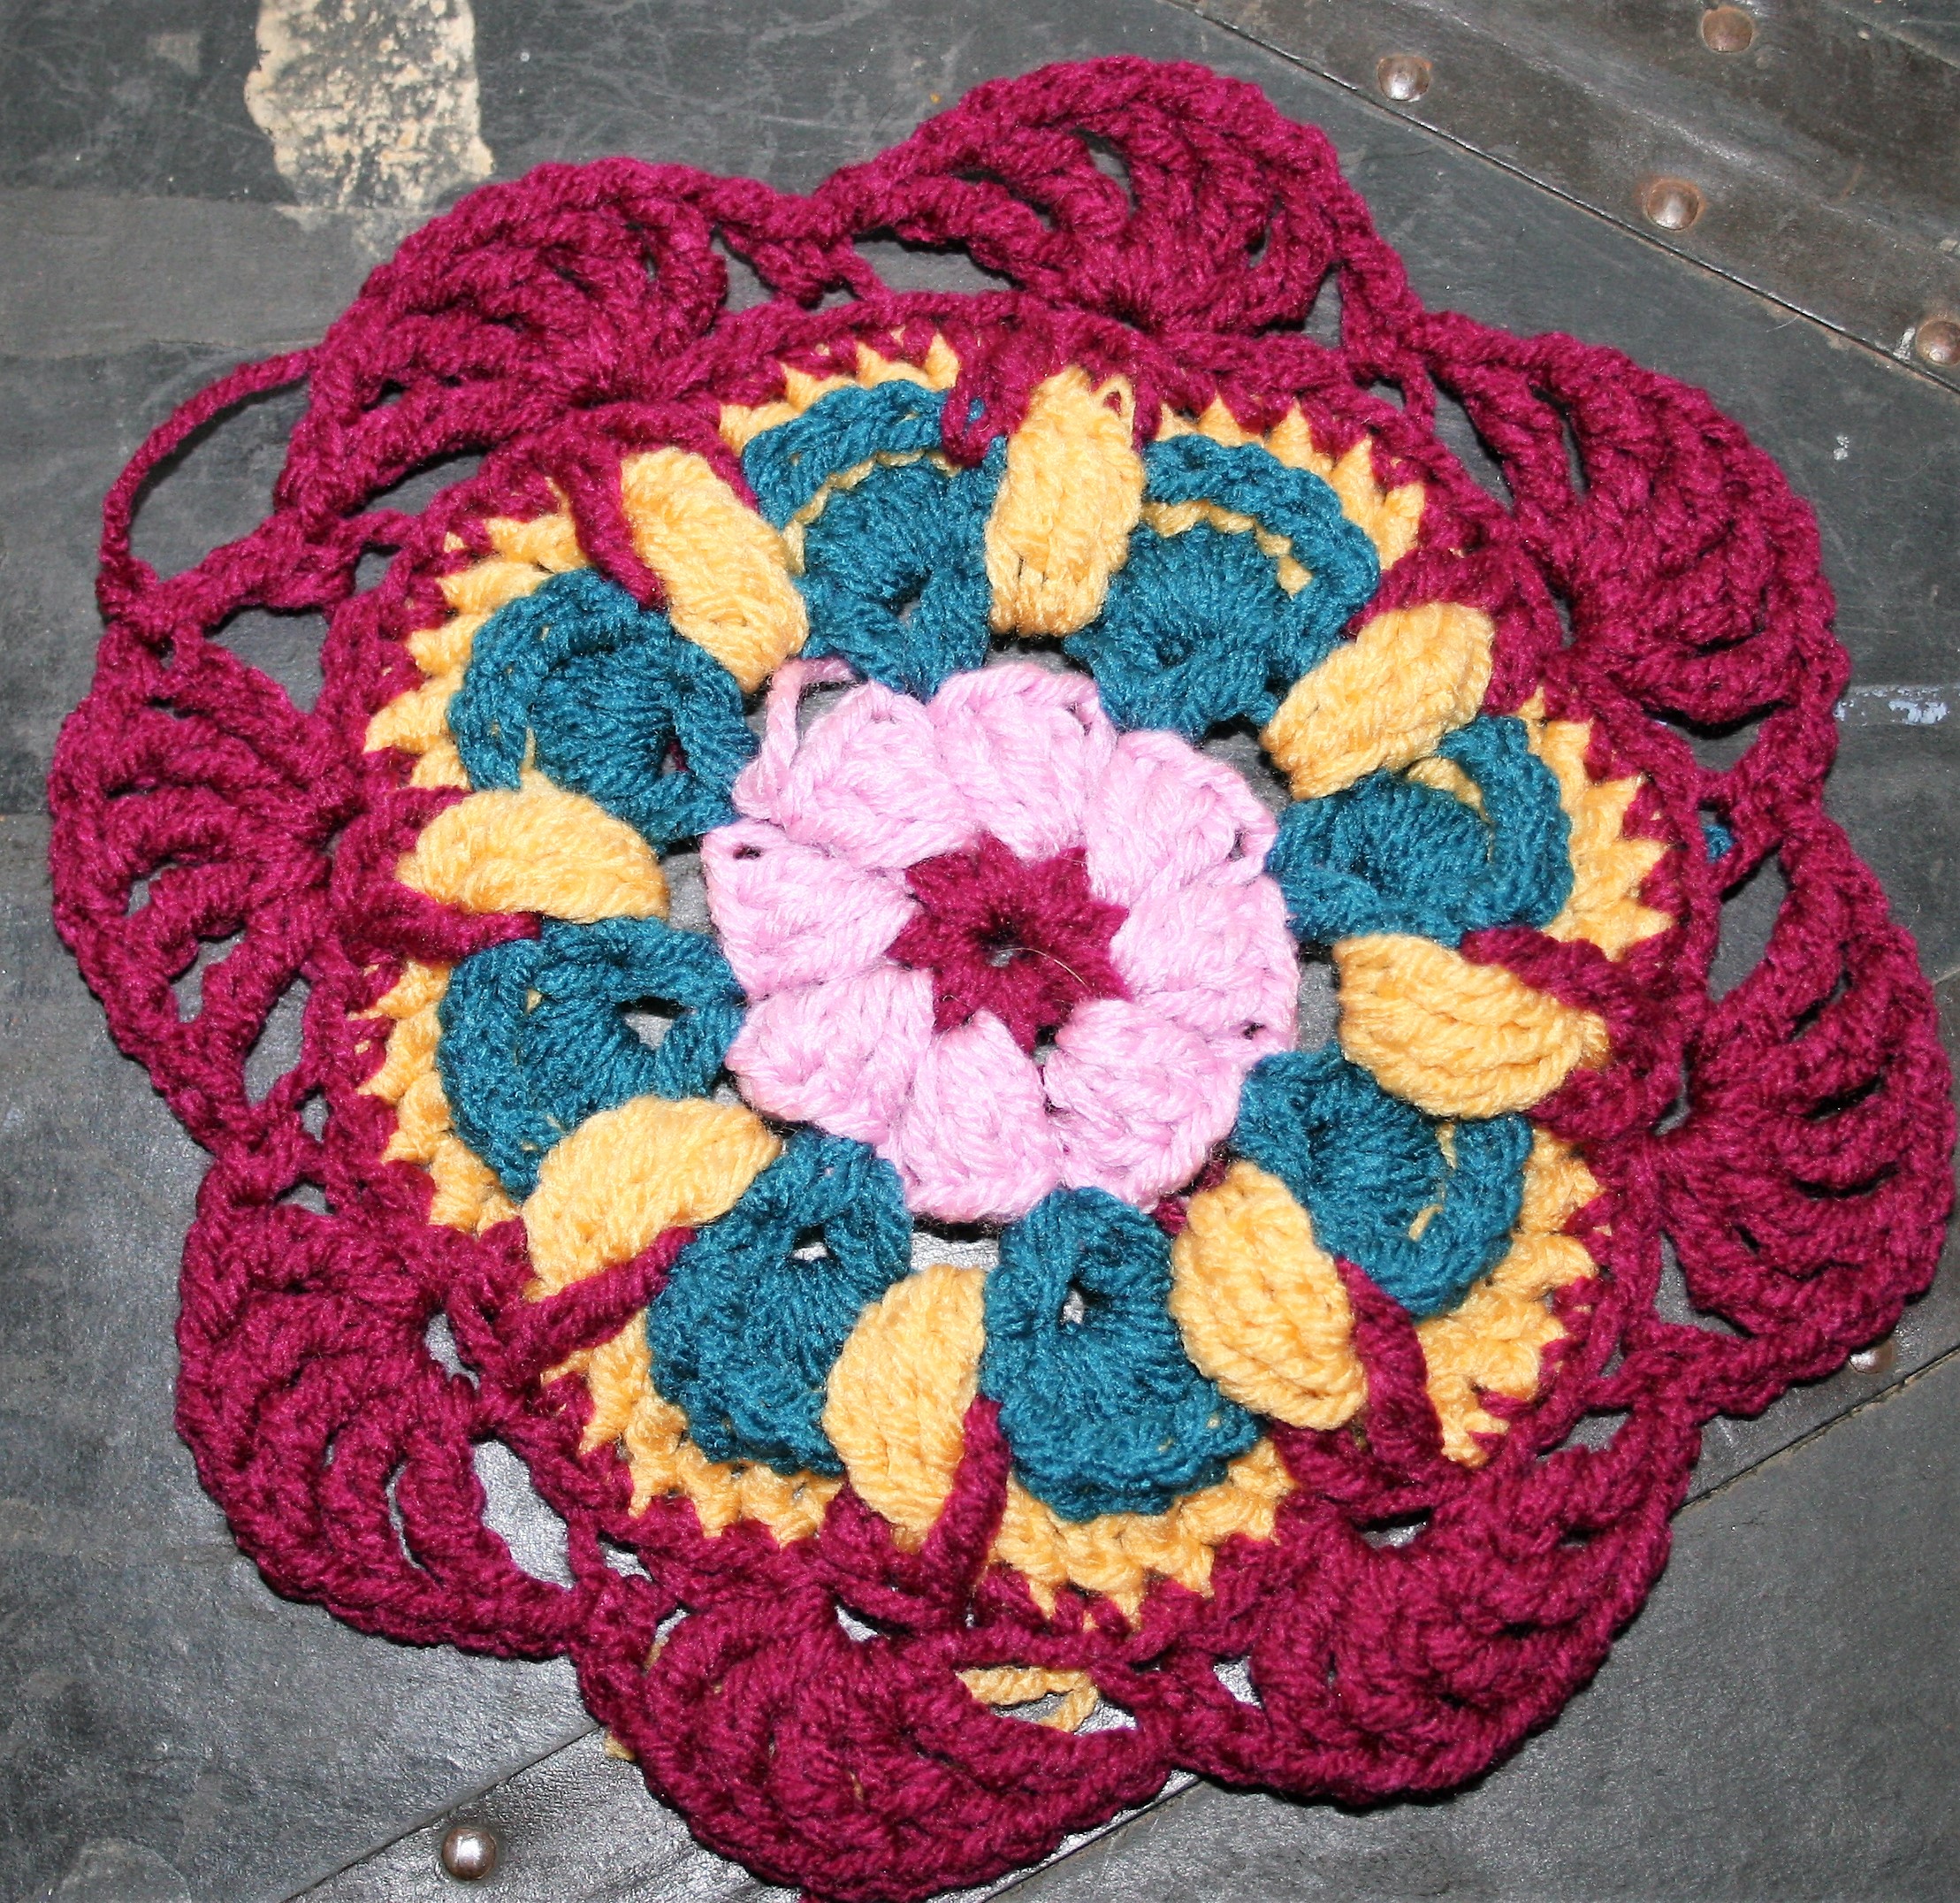
Columns Block for Charity
Columns Block
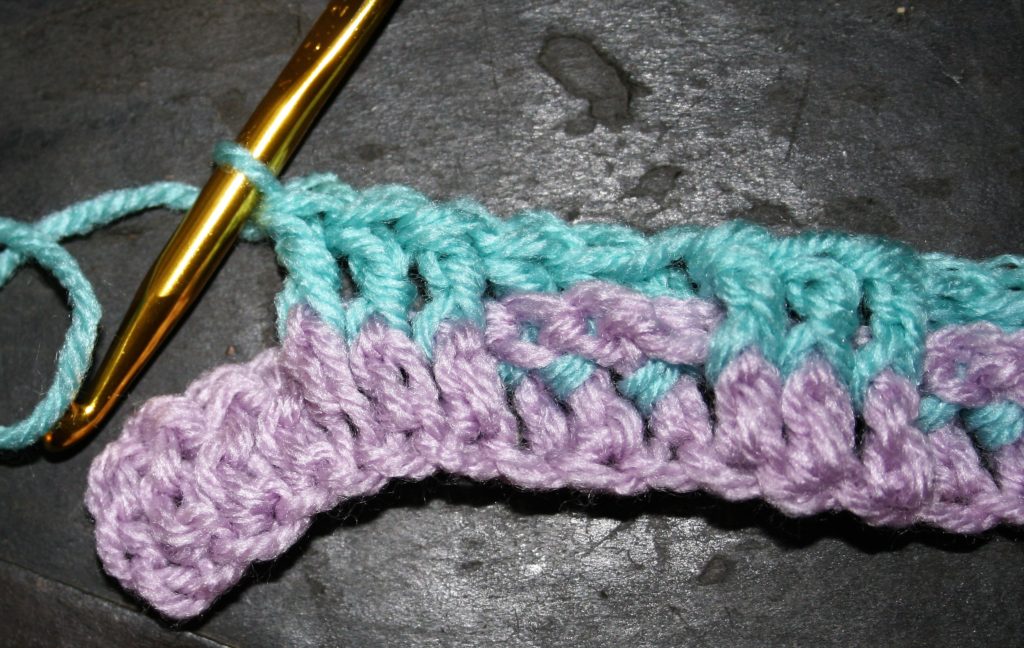
Rnd 1: Ch 4, sl st to first ch to create ring, ch 5 (counts as dc + ch 2), [3 dc in ring, ch 2] 3 times, 2 dc in ring, sl st in 3rd ch of beg ch-5 to join. –12 dc, 4 ch-2 sps
Rnd 2: Sl st in ch-2 sp, ch 3 (counts as dc), (dc, ch 2, 2 dc) in same sp, fpdc around next st, bpdc around next st, fpdc around next st, [(2 dc, ch 2, 2 dc) in ch-2 sp, fpdc around next st, bpdc around next st, fpdc around next st] 3 times, sl st in top of beg ch-3 to join. –16 dc, 4 ch-2 sps, 8 fpdc, 4 bpdc
Rnds 3-8: Sl st to ch-2 sp, ch 3, (dc, ch 2, 2 dc) in same sp, fpdc around next st, (bpdc around next st, fpdc around next st) across to next ch-2 sp, [(2 dc, ch 2, 2 dc) in ch-2 sp, fpdc around next st, (bpdc around next st, fpdc around next st) across to ch-2 sp] 3 times, sl st in top of beg ch-3 to join. –16 dc, 4 ch-2 sps, 56 fpdc, 52 bpdc
Wow! I am so excited to join you for another year of the Moogly CAL (check out all the squares here). This year my block has a few ends to weave in, and it uses more back post stitches than some may be accustom to. However I am happy with the results and I hope you like it too.
This block features texture work more than actual color work. Meaning if you want to work this block in only one color it will still be just as dramatic. Back Post Stitches are utilized as it really helps to add a great amount of textural and visual interest. The result of the stitch creates an raised affect that can be reminiscent of surface crochet. Tops of the stitches below become highlighted, adding the “chain” look on the surface of the fabric.
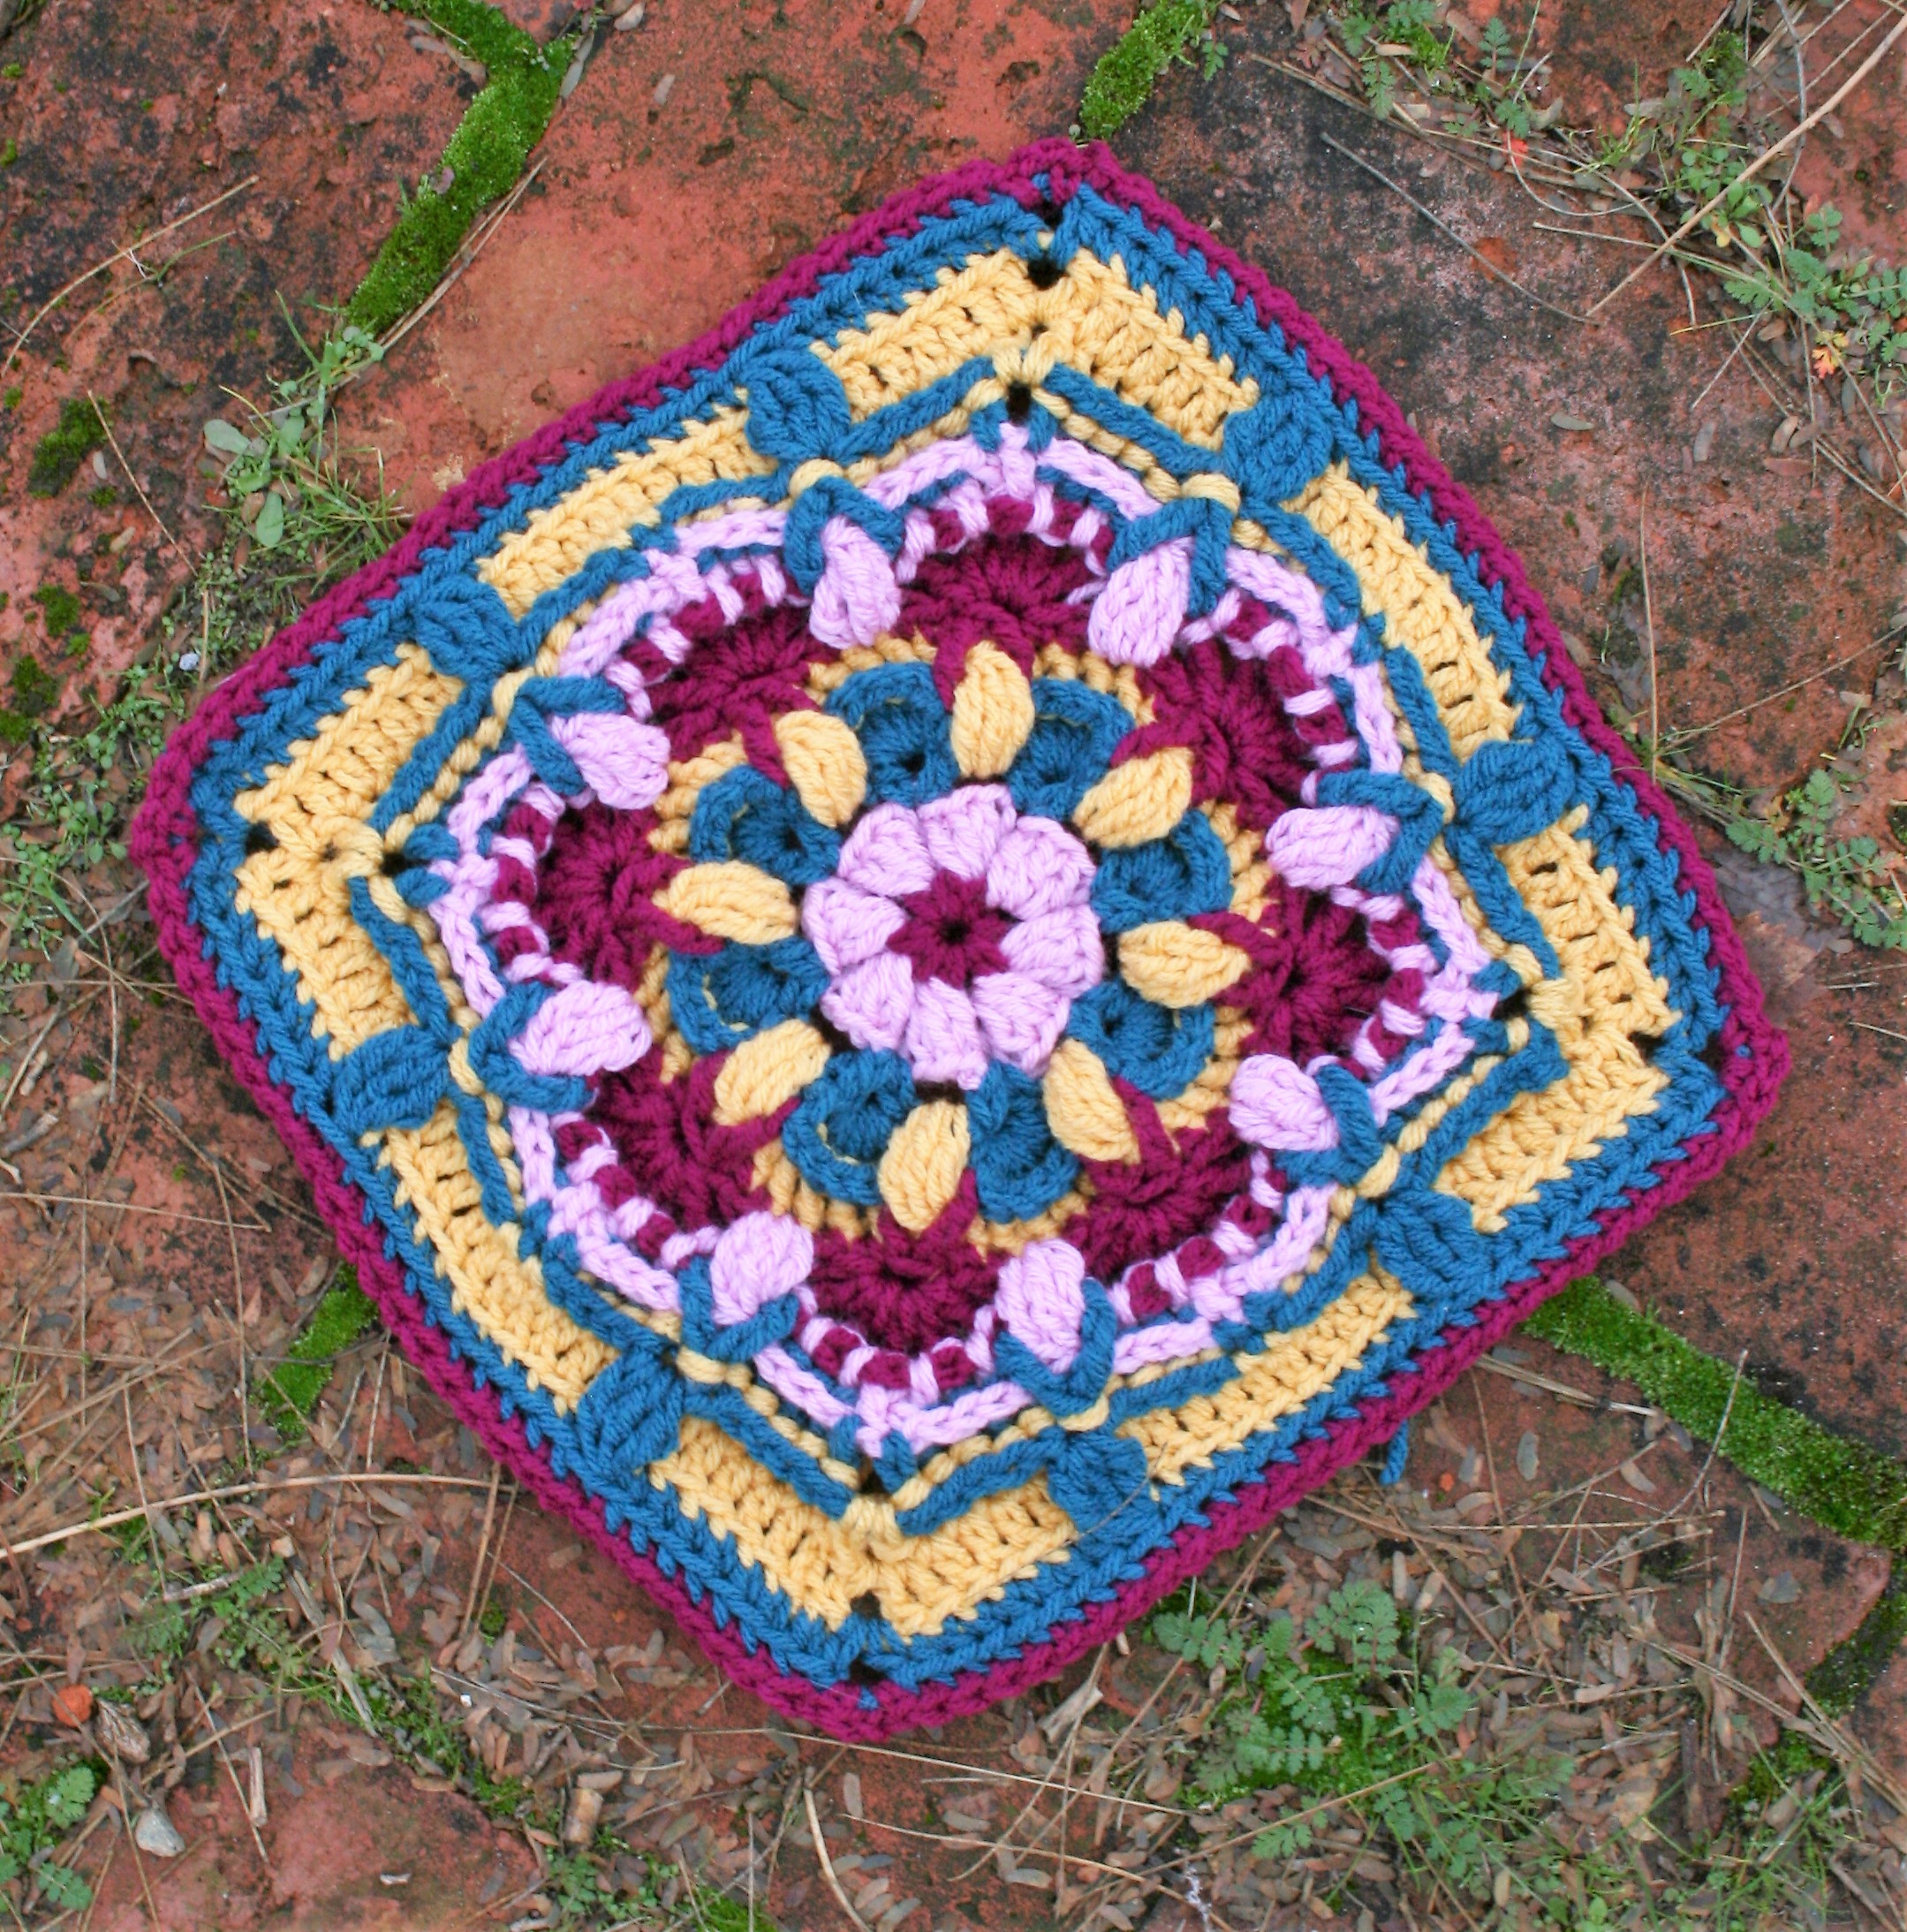
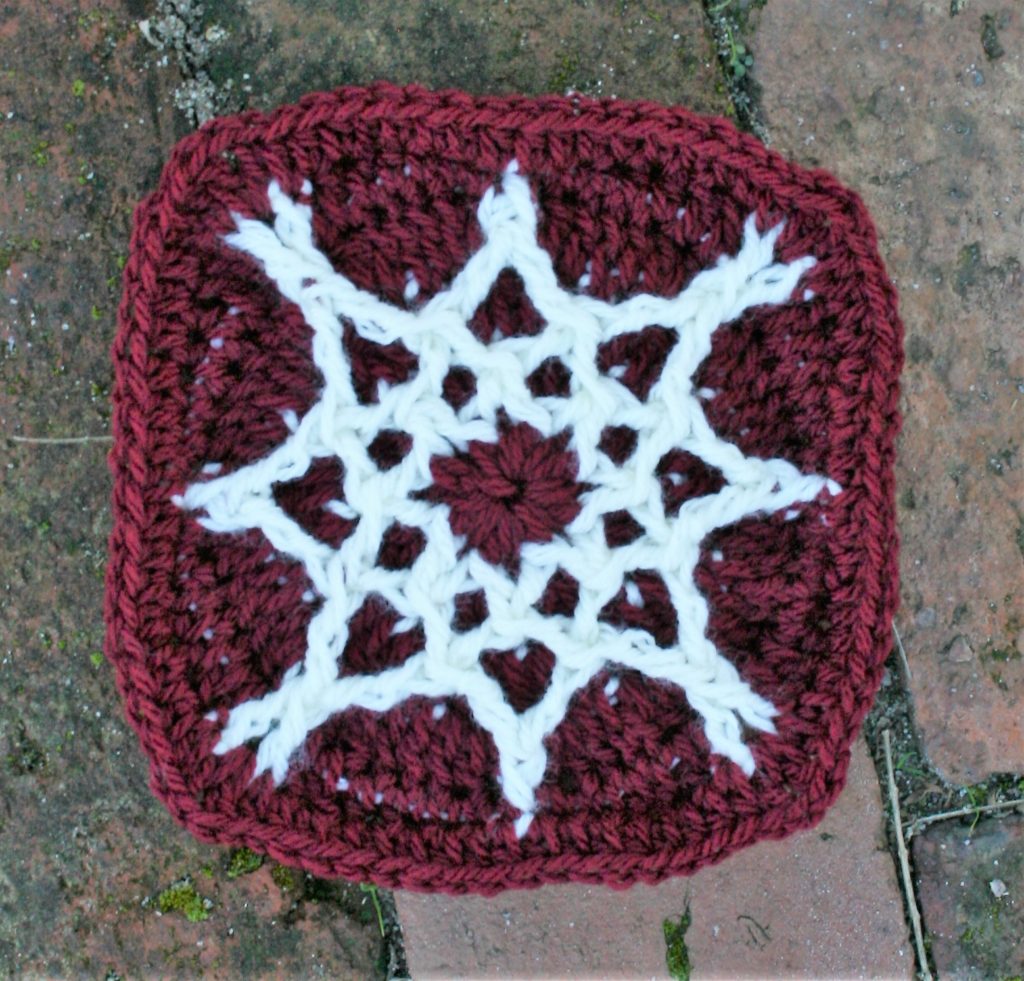
Jan’s Joy-Full Jamboree Block
Much of the remaining texture comes form working cluster stitches in places below the actual working round. I really love how this breaks up the visual rounds of the fabric and help add a continuous lines of texture. They almost act as “links” helping the eye dance along various “features”.
The block is named for two of my long time students, Jan and Joy. Both have had a trying year, yet crochet has continued to be an outlet. As many of us already realize crochet can be our therapy, just the movement of our hands help our mind. Fortunately it can do even more, by bringing people together. I look forward to seeing them at our weekly jamboree and helping them on their crochet journeys.
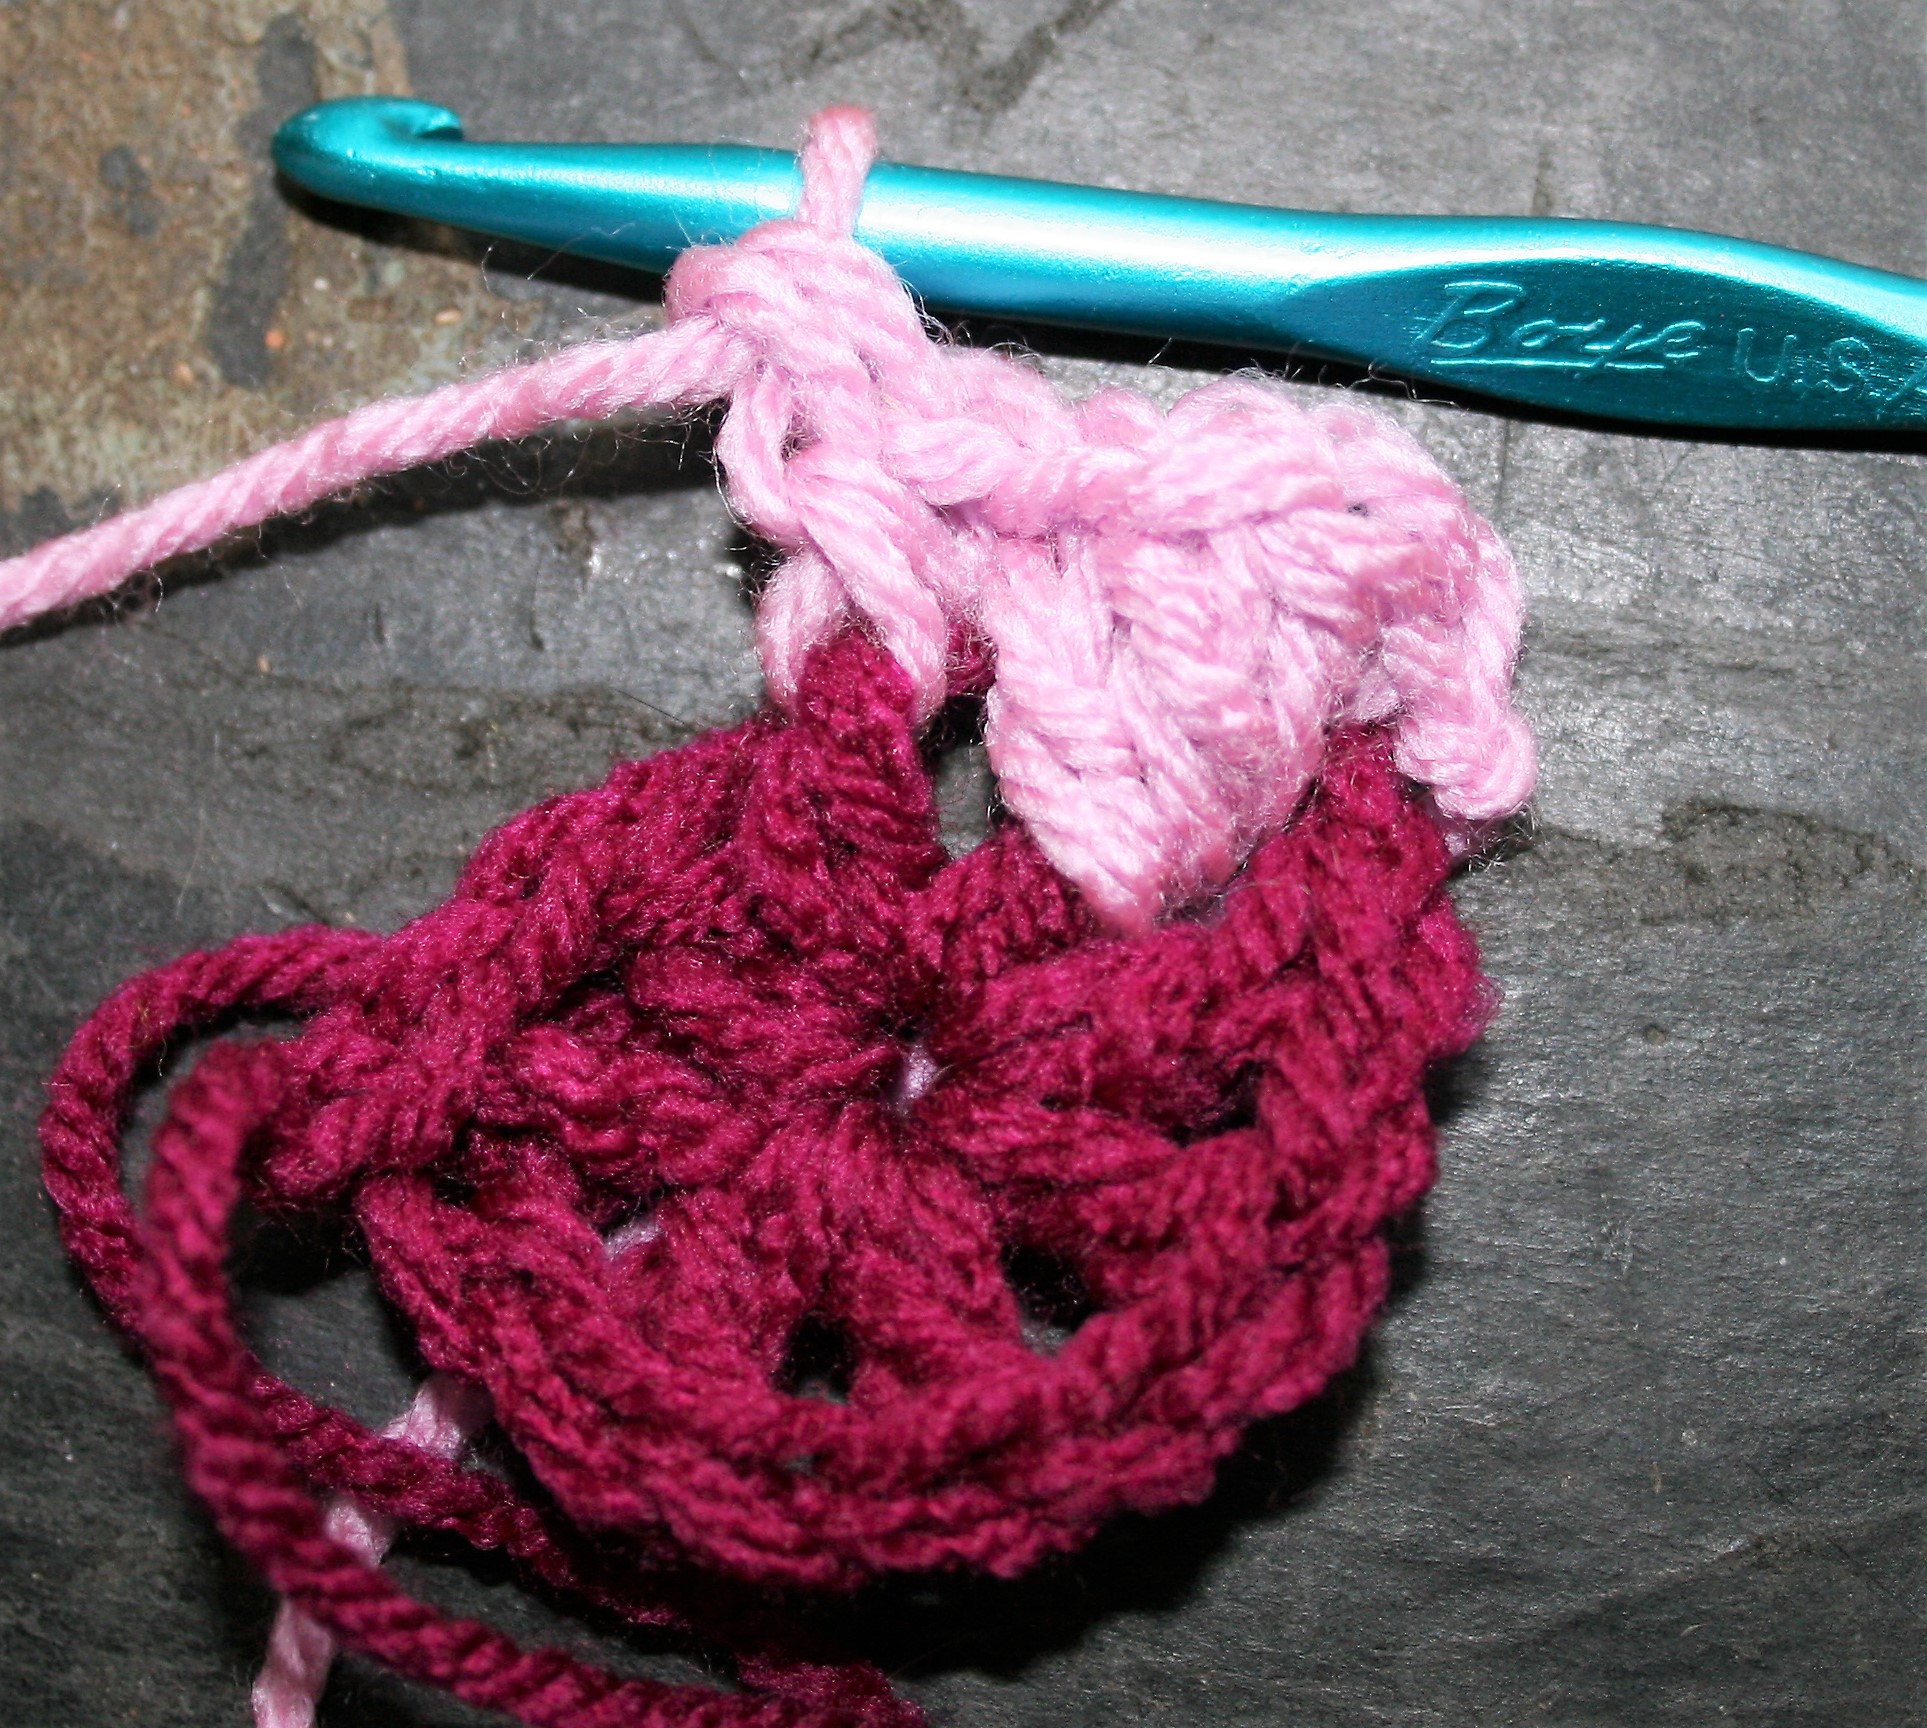
Treble Crochet 3 Cluster (tr3CL): Yo twice, insert hook into indicated st, yo, pull up a loop, (yo, pull through 2 loops) 2 times, yo twice, insert hook into same st, yo, pull up a loop, (yo, pull through 2 loops) 2 times, yo twice, insert hook into same st, yo pull up a loop, (yo, pull through 2 loops) 2 times, yo, pull through all 4 loops.
Treble Crochet 2 Together (tr2tog): Yo twice, insert hook into the first indicated stitch, yo pull up a loop, (yo, pull through 2 loops) 2 times, yo twice, insert hook into the next stitch indicated, yo, pull up a loop, (yo, pull through 2 loops) 2 times, yo, pull through all 3 loops.
If you do not feel comfortable with standing stitches, they can be substituted by simply slip stitching to the indicated stitch, and creating a chain equivalent to the turning chain for the indicated stitch type. But if you want to learn about them, I offer a photo tutorial here. And Moogly offers a video here.
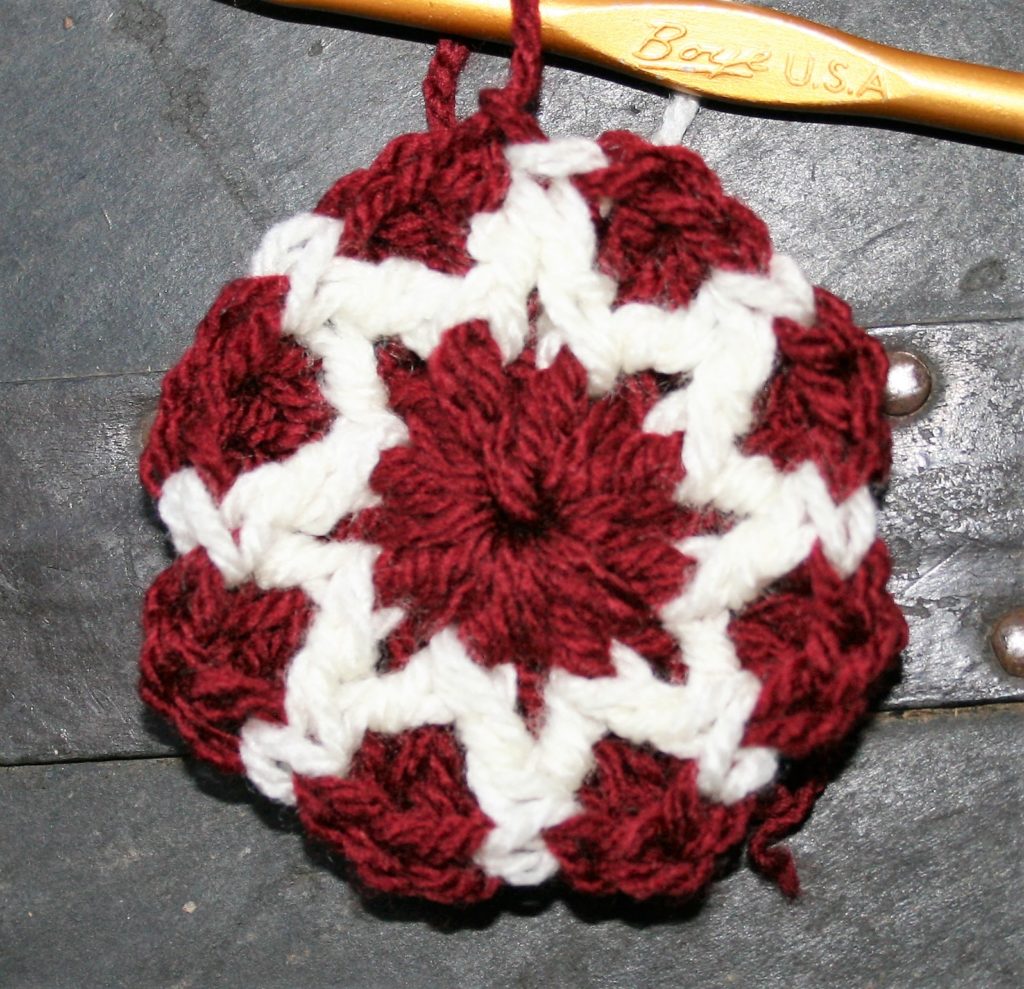
Pattern for this block of the Moogly CAL
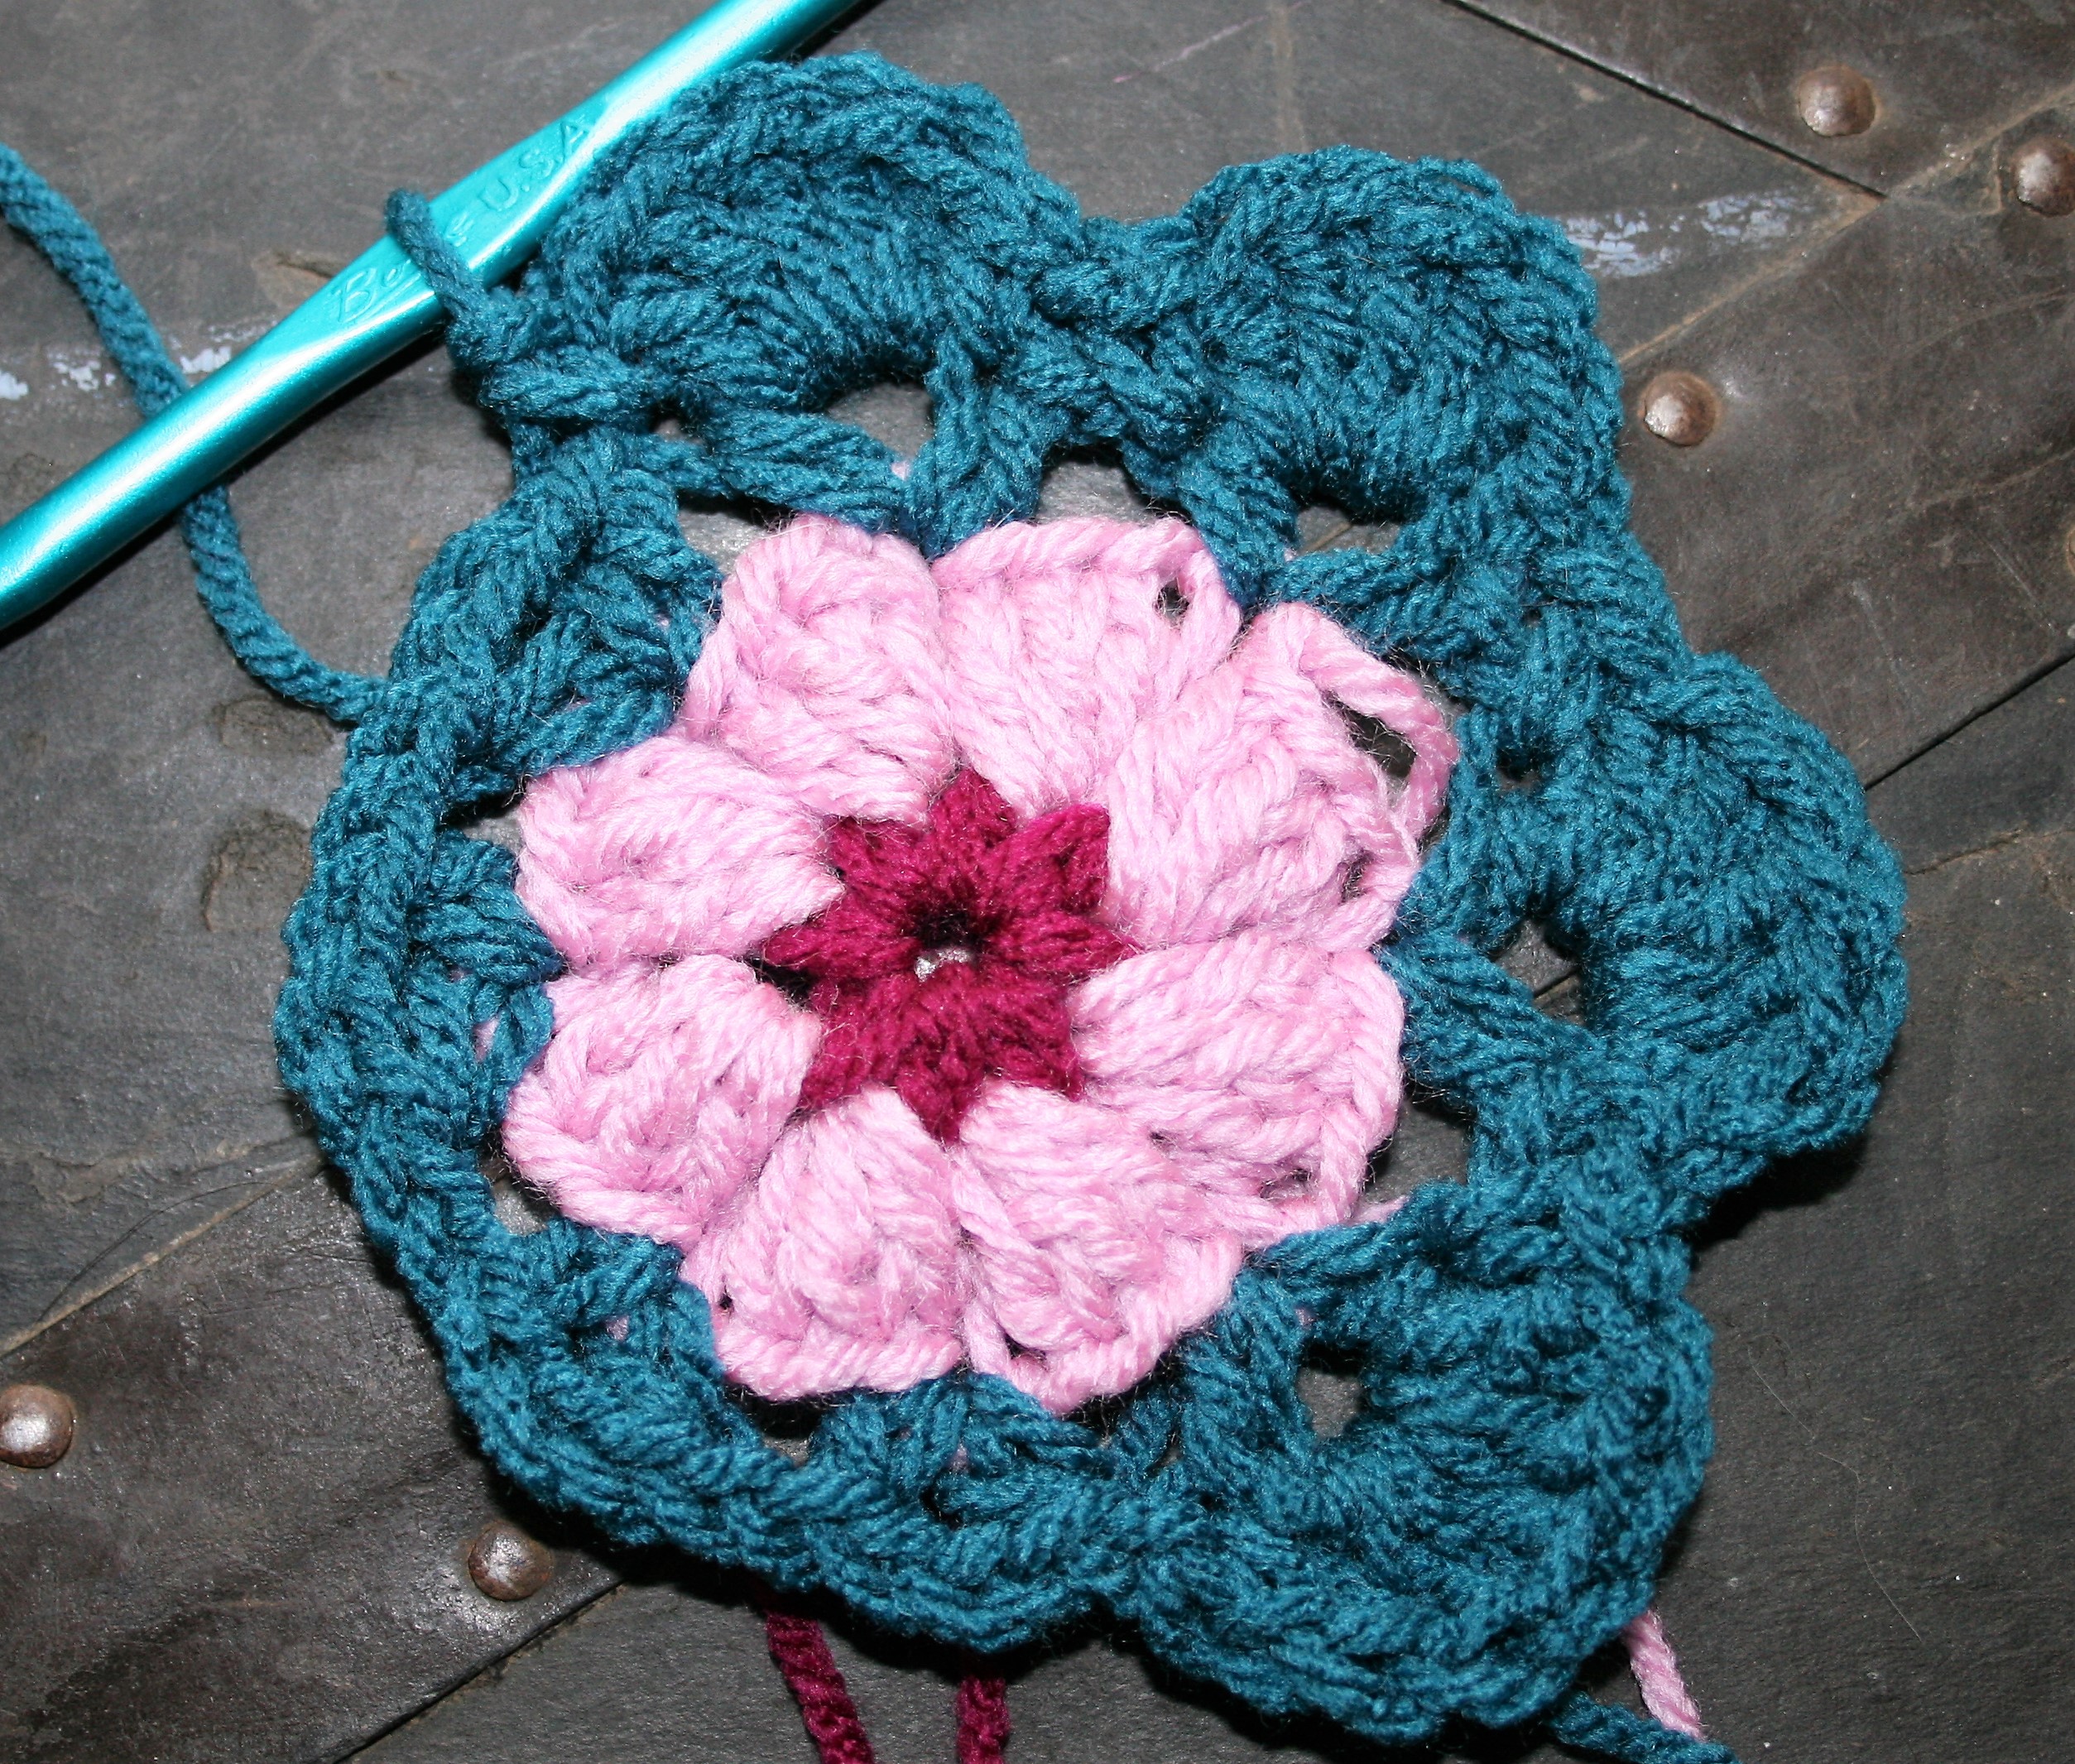
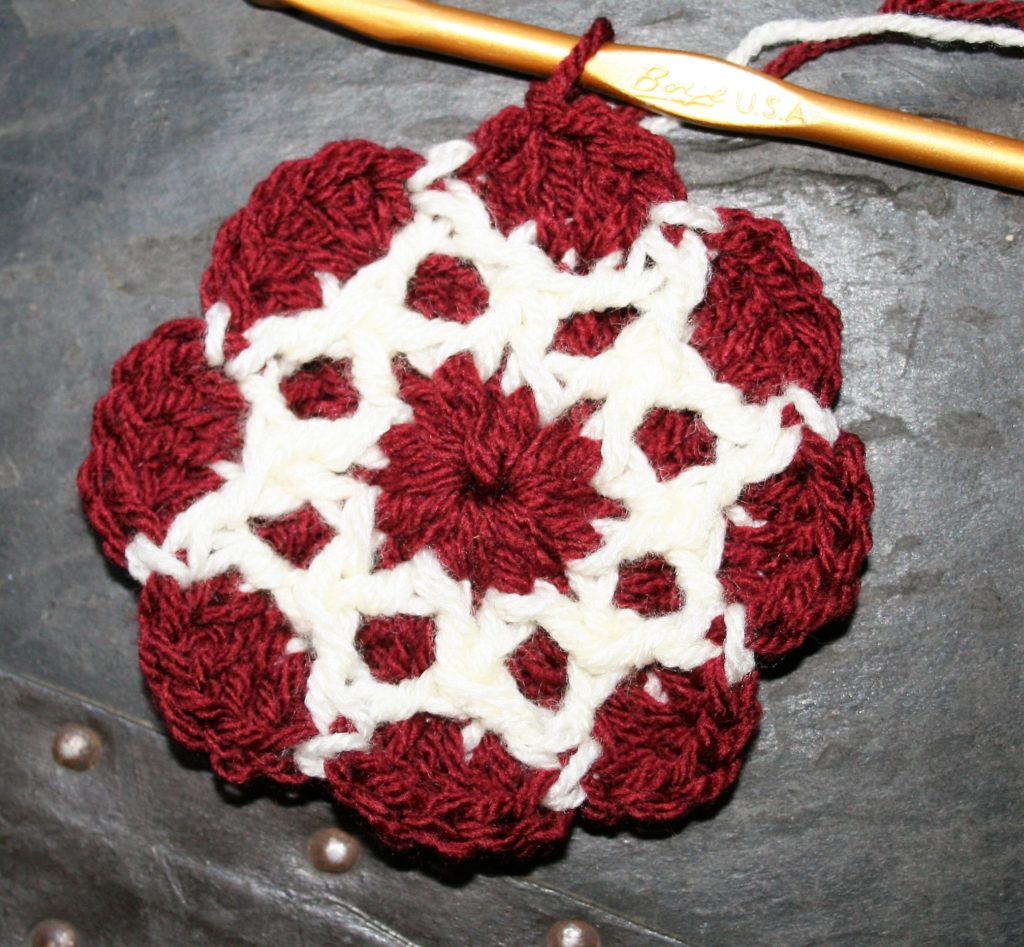
Rnd 1: With A, Ch 5, dc in 5th ch from hook, ch 1 (dc in same st, ch 1) 6 times, sl st to join, fasten off. – 8 dc, 8 ch-1 sps
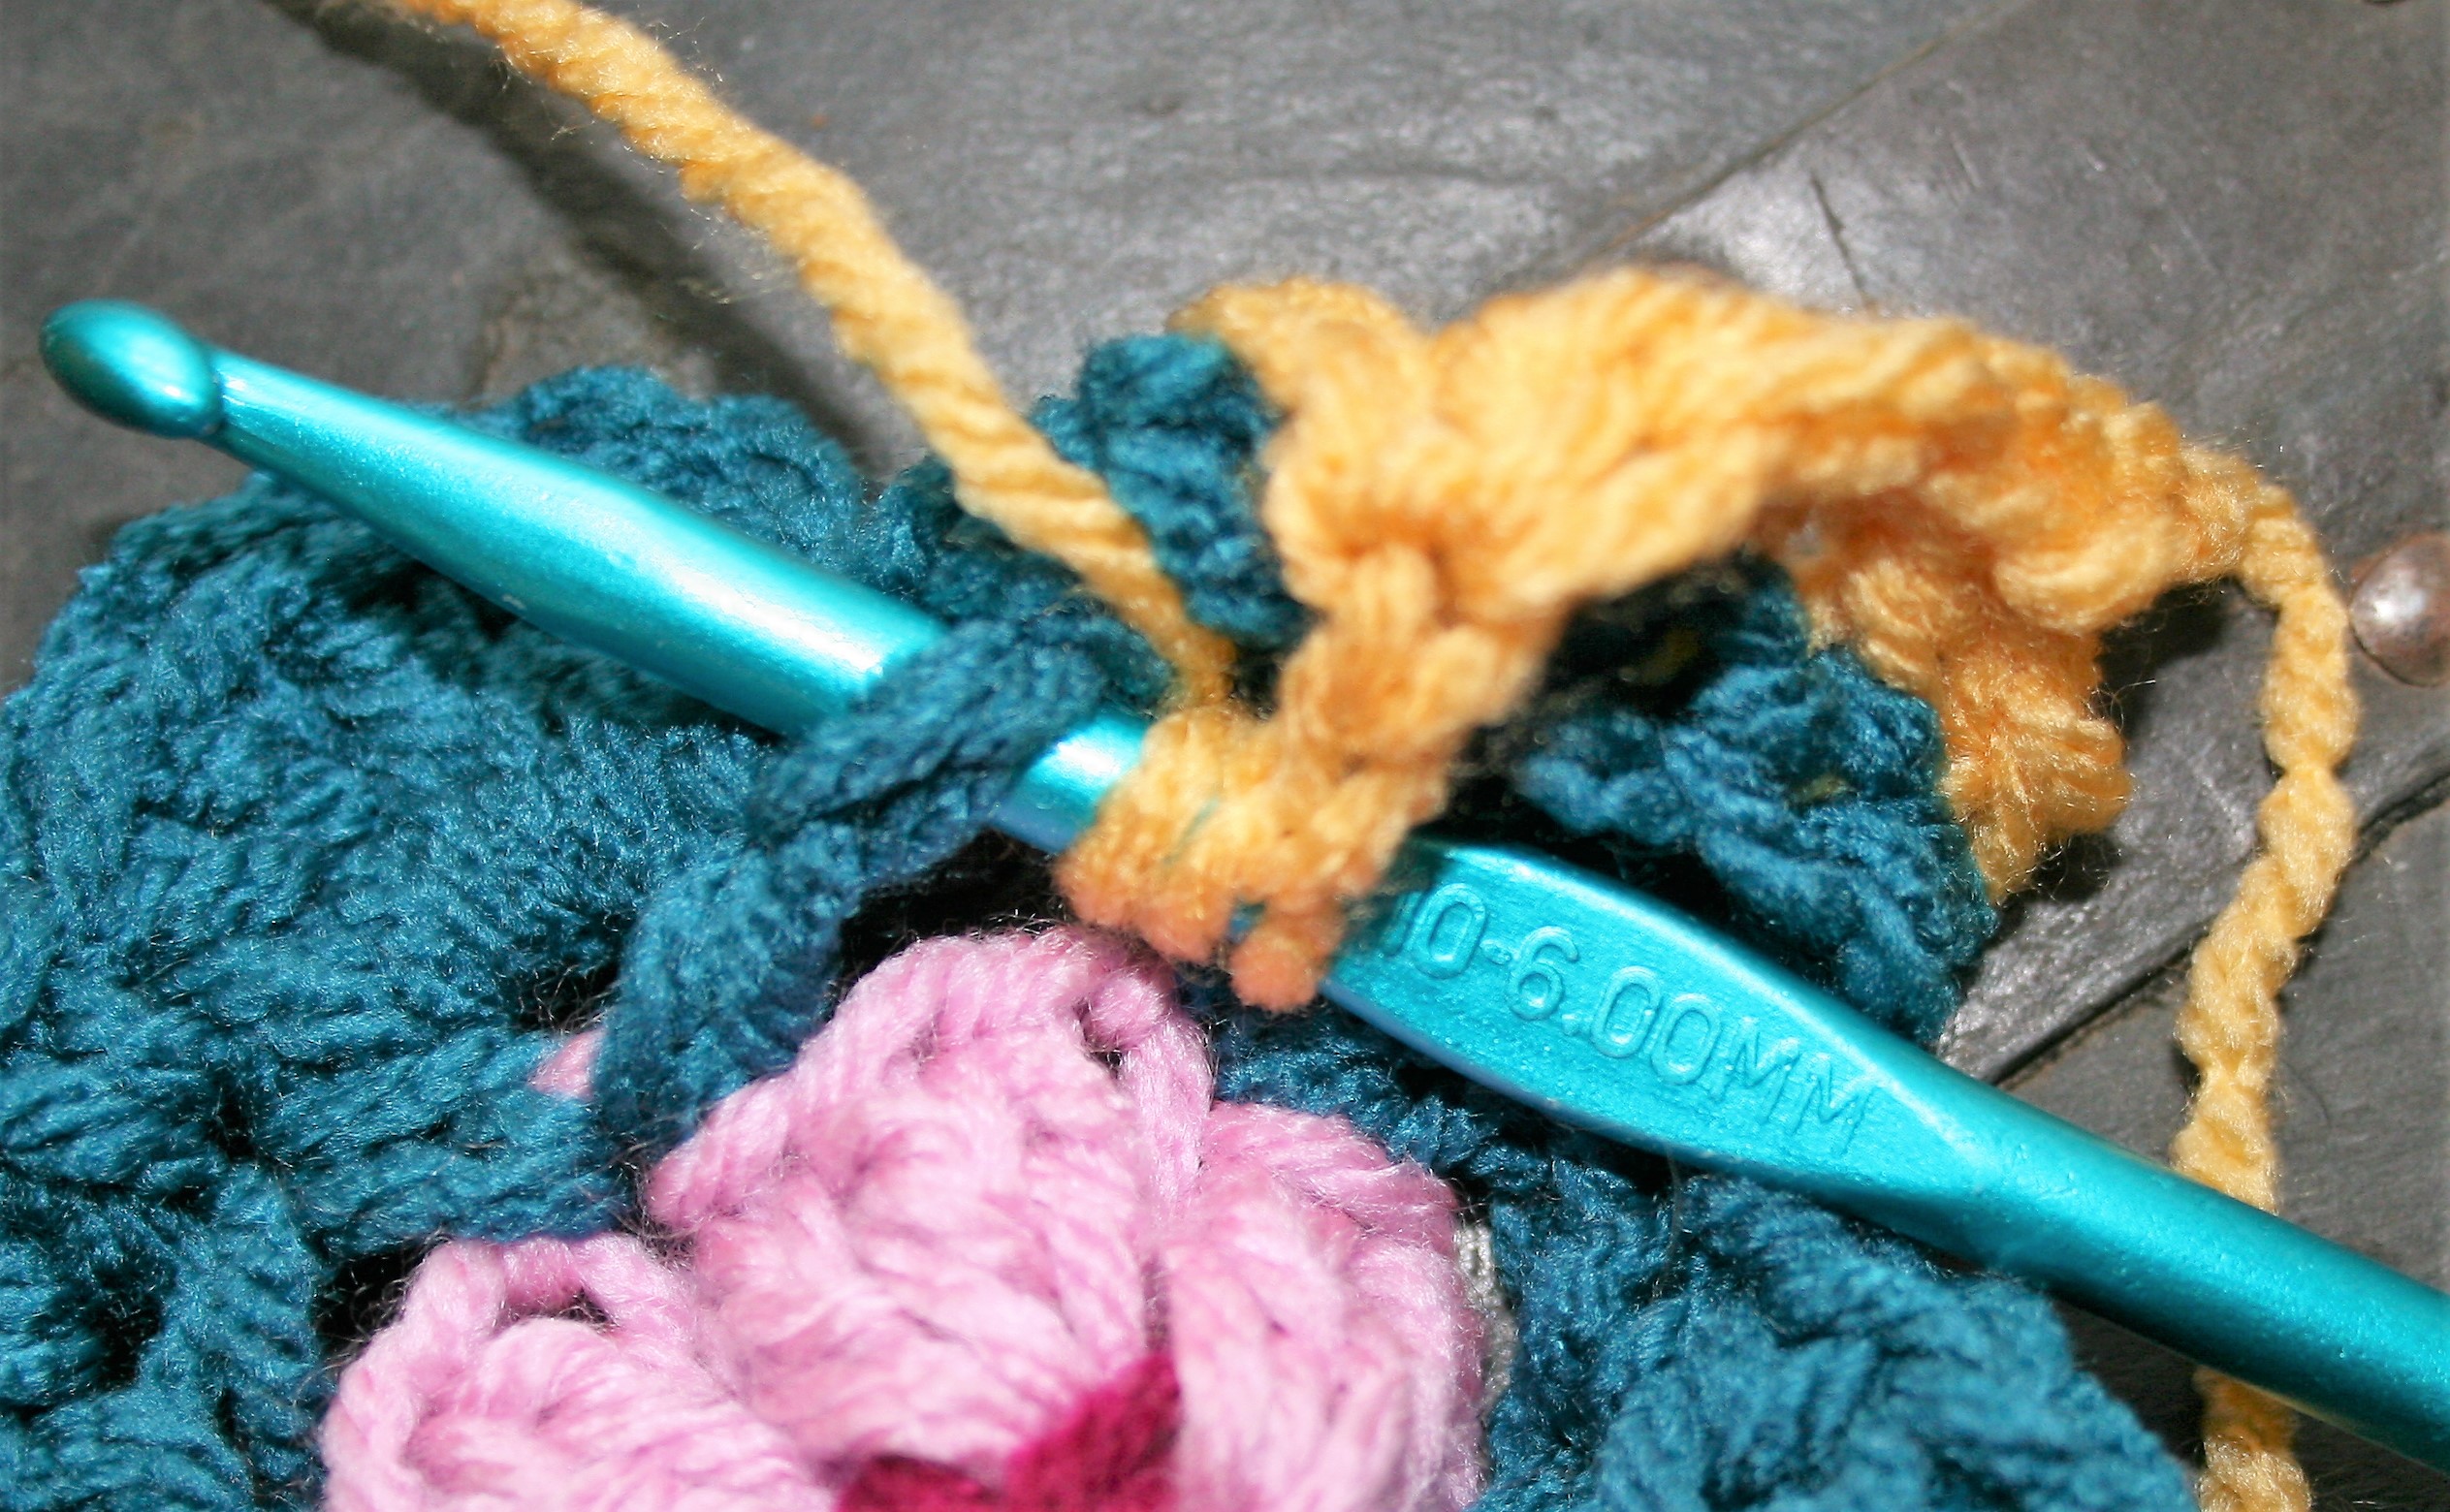
Rnd 2: With B, join to any dc with a ssc, 3fpdc in same dc, (sc, 3 fpdc in each dc around, sl st to join, fasten off. –8 sc, 24 fpdc
Rnd 2, work 3 front post double crochets around the same stitch
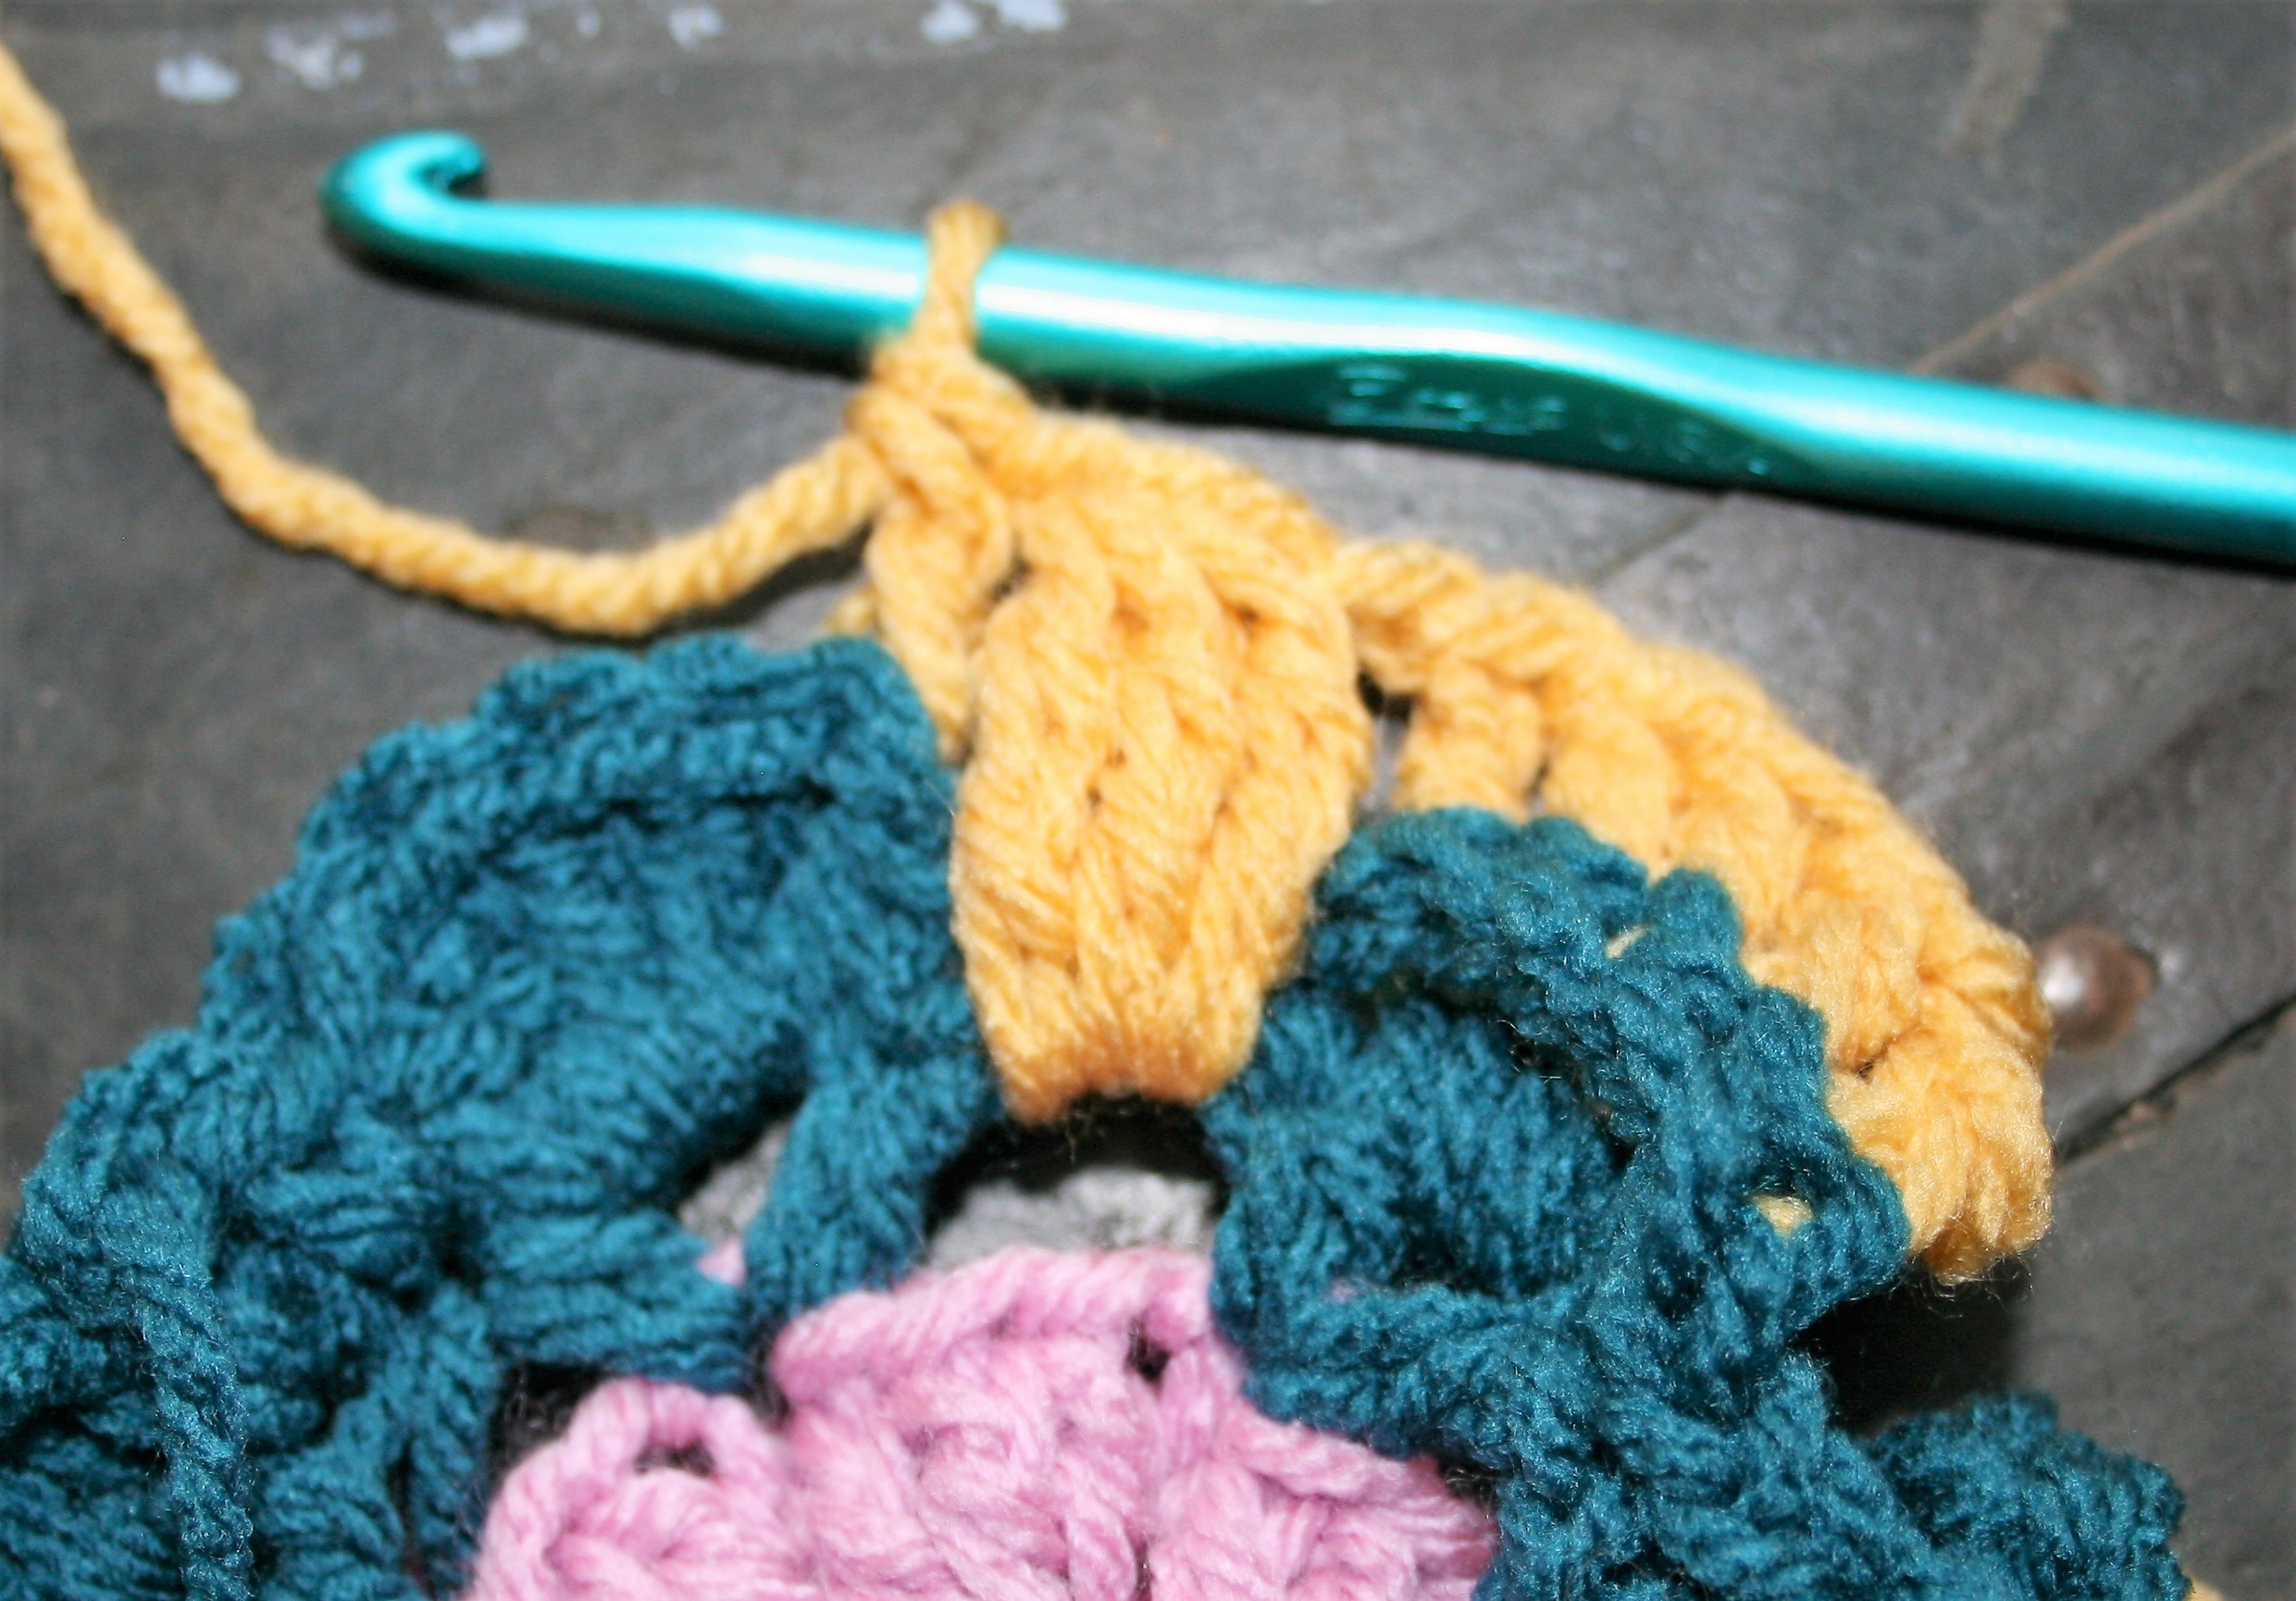
Rnd 3: With C, join to any sc with a shdc, ch 2, hdc in same st, ch 1, [(hdc, ch 2, hdc) in next sc, ch 1] around, sl st to join. – 8 (hdc, ch 2, hdc), 8 ch-1 sps
Rnd 4: Ch 1, sc in same sp, 5 dc in next ch-2 sp, sc in next hdc, ch 1, [sc in next hdc, 5 dc in next ch-2 sp, sc in next hdc, ch 1] rep around, sl st to join, fasten off. – 8 (5 dc shells), 8 ch-1 sps
Finished Round 3, and beginning of Round 4
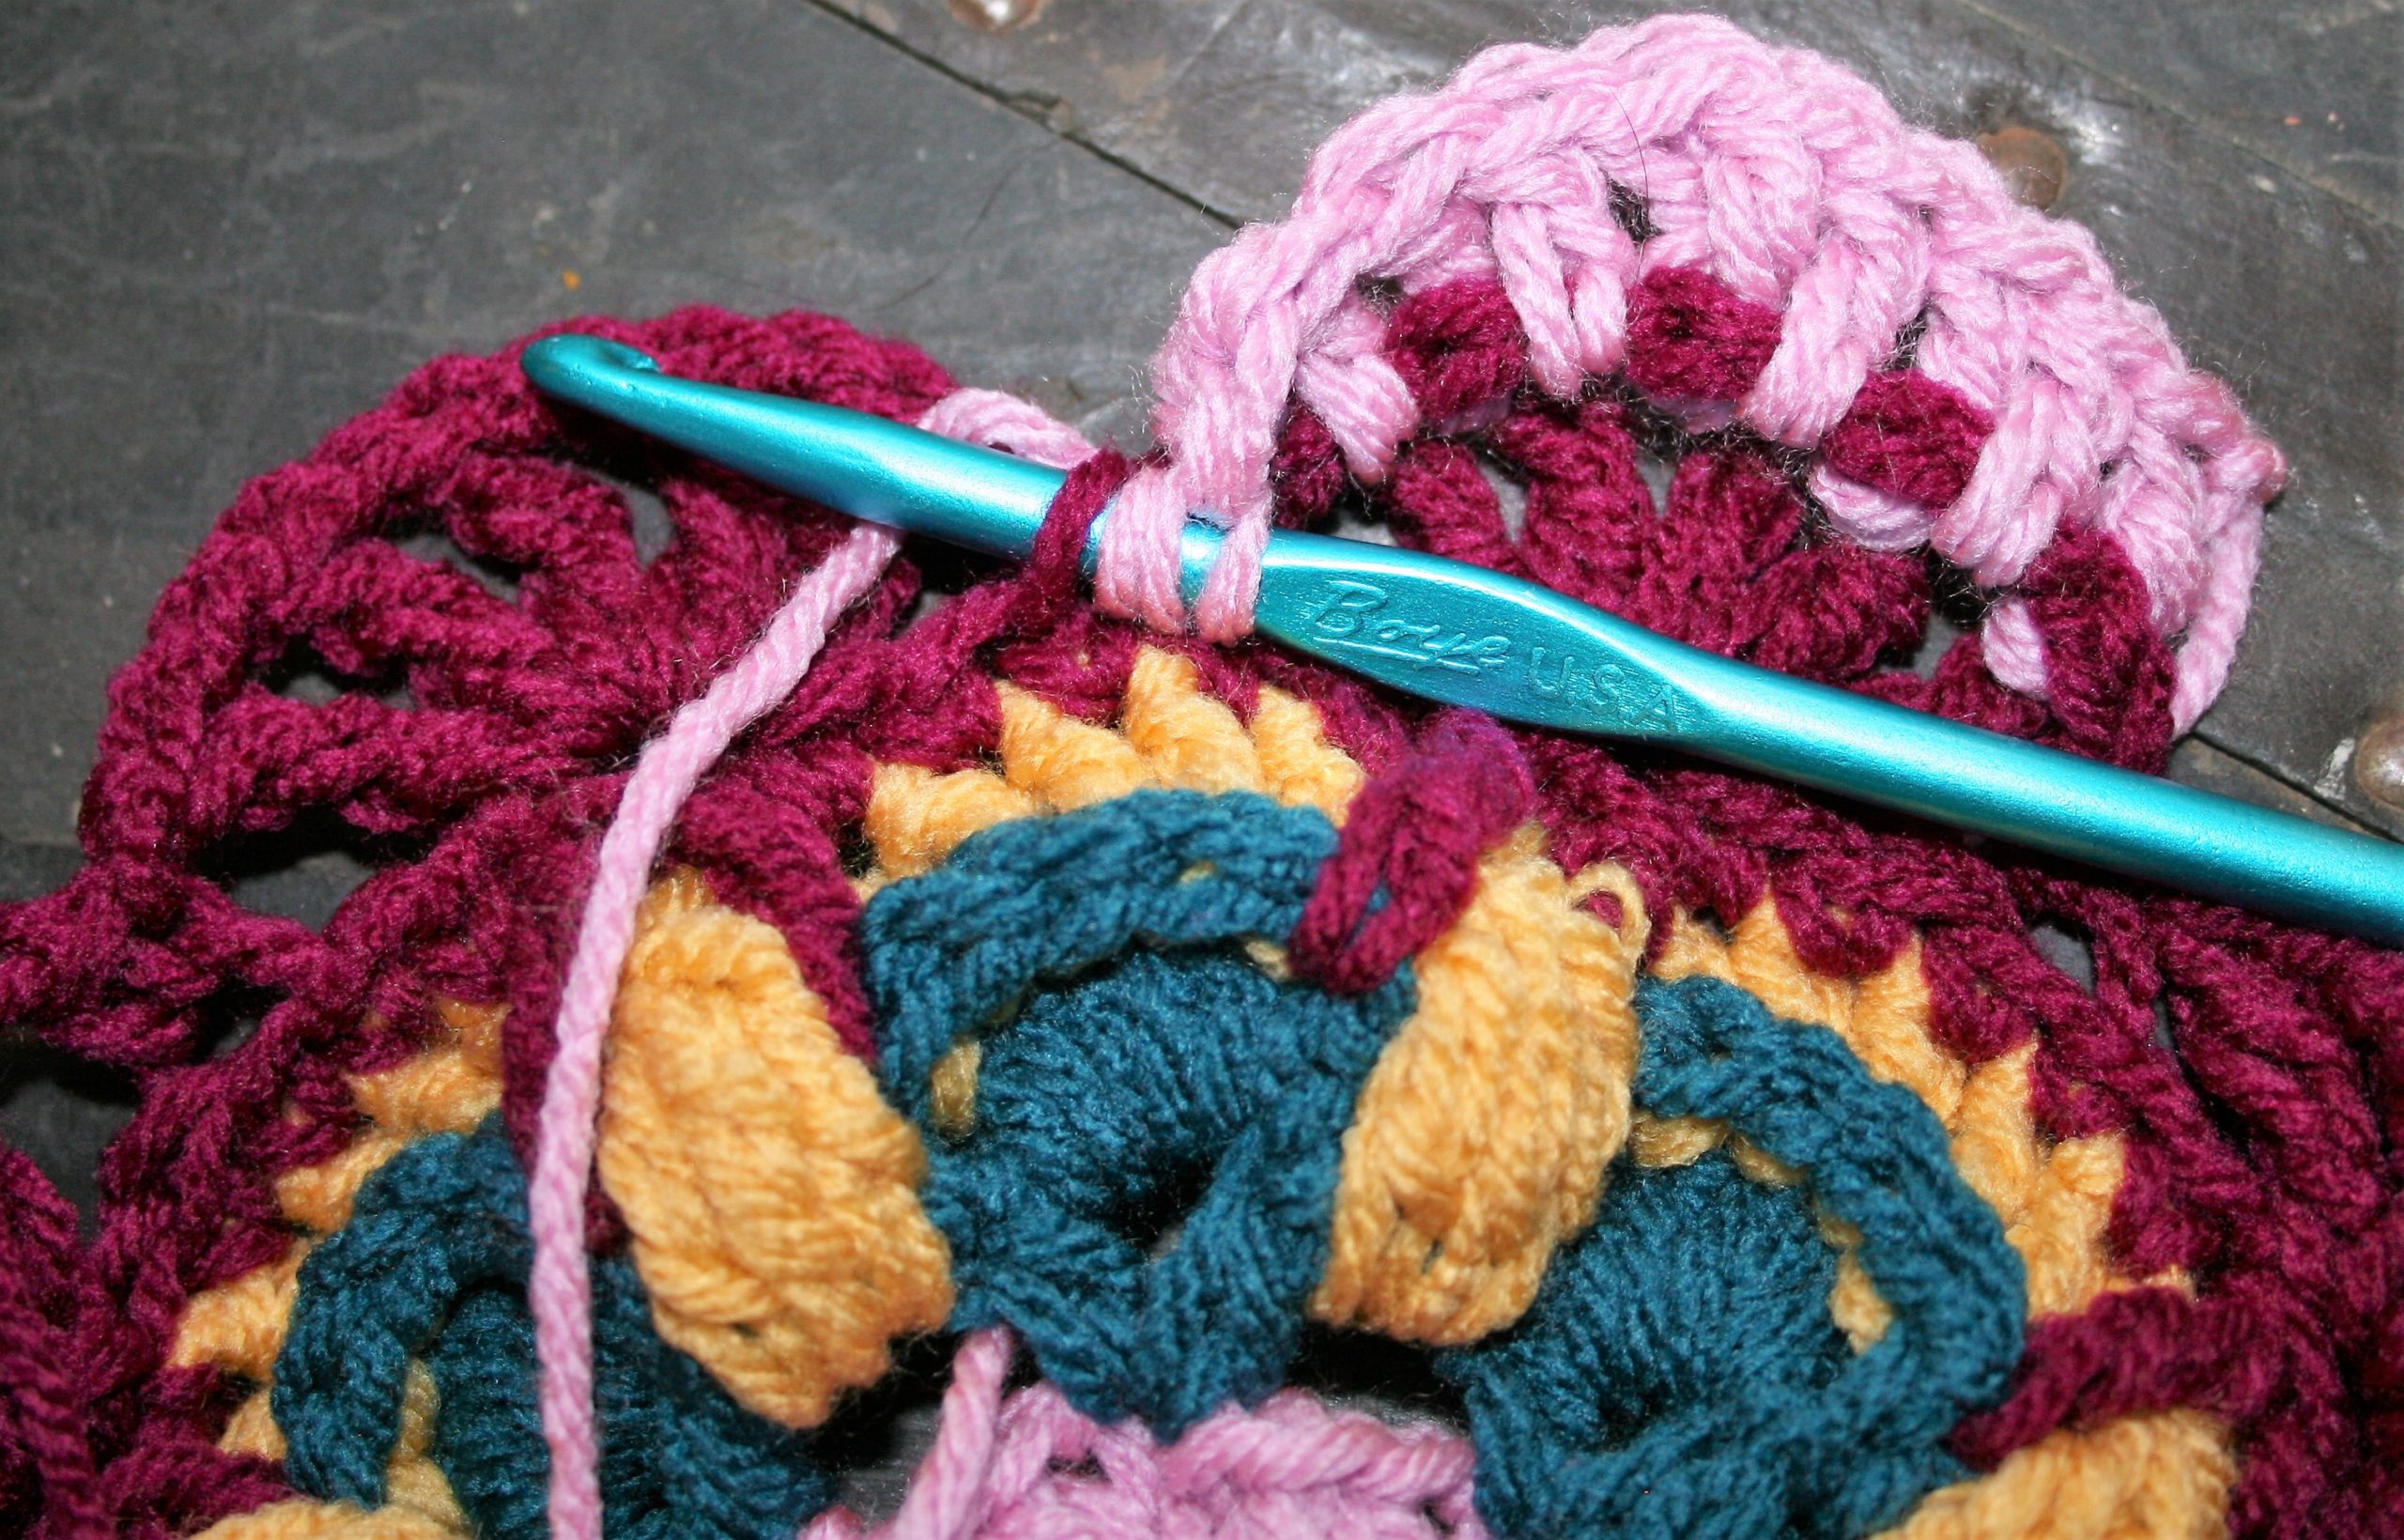
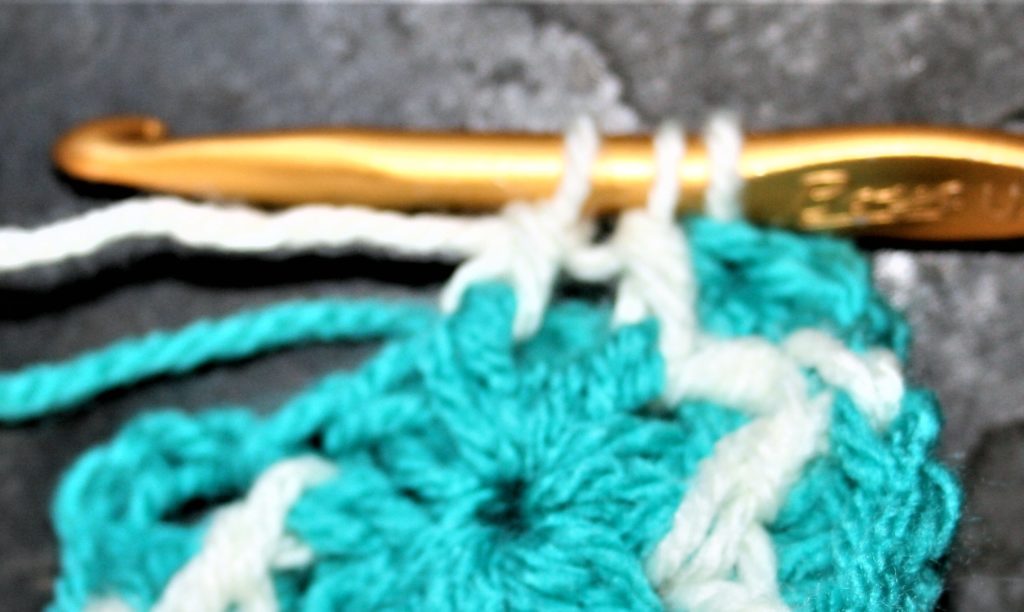
We work our first Clusters in this Moogly CAL
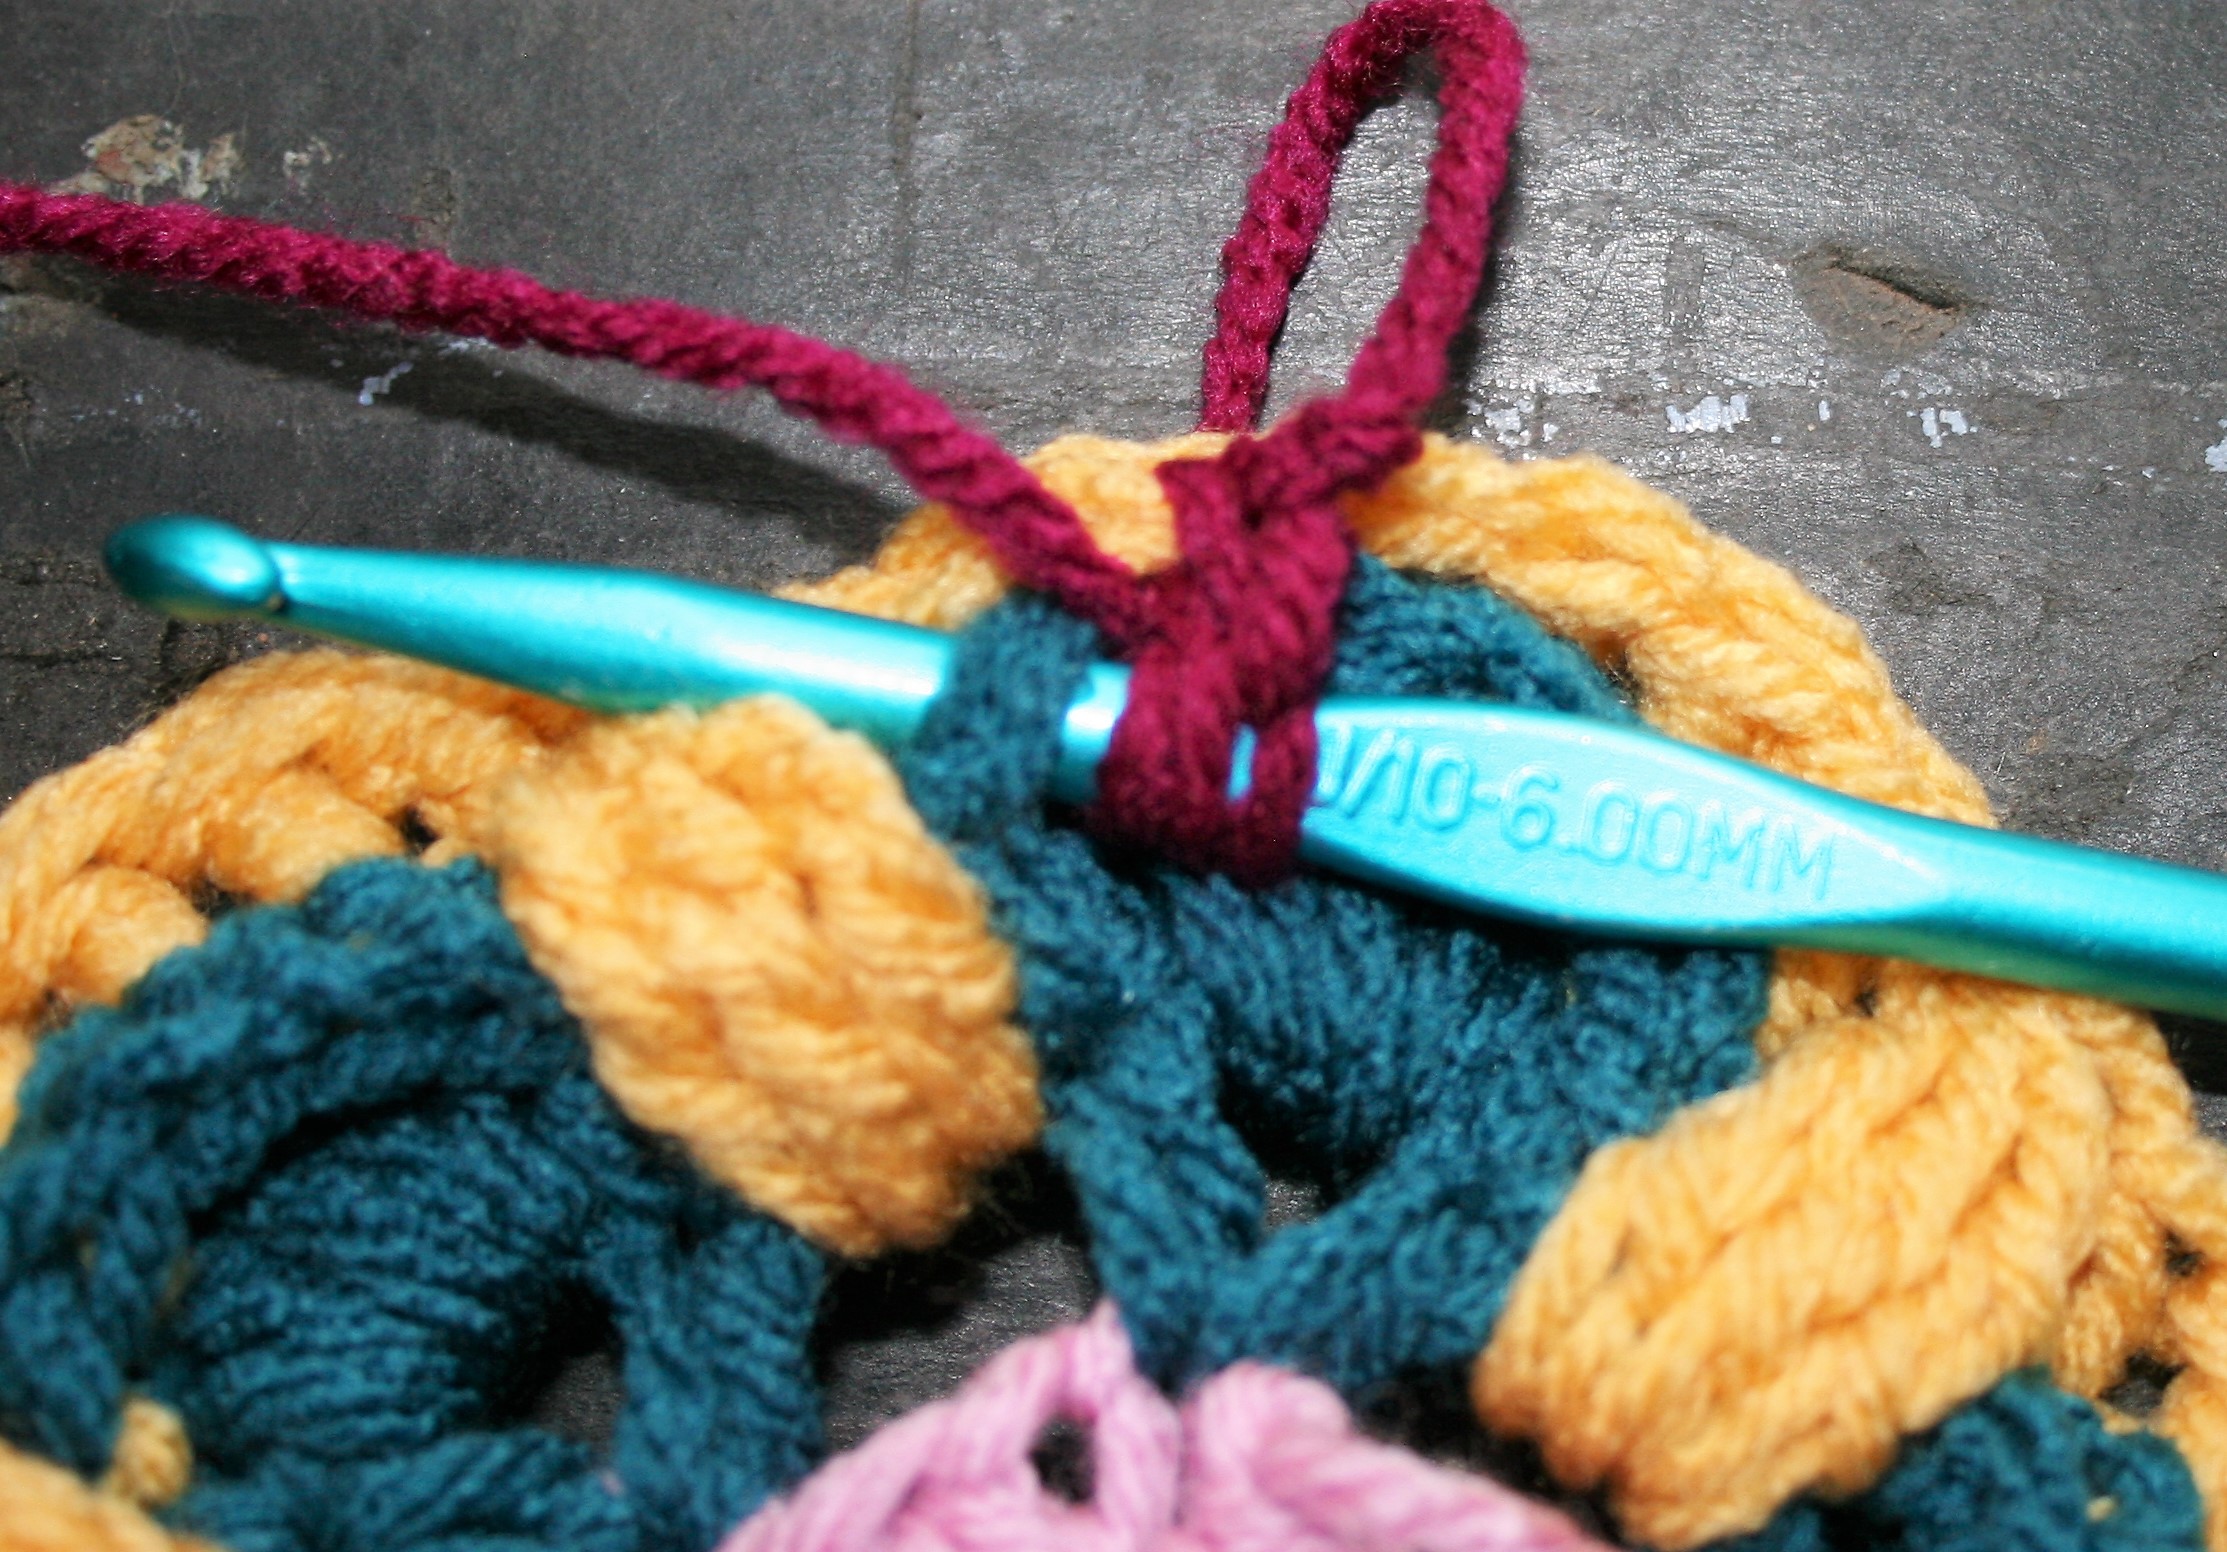
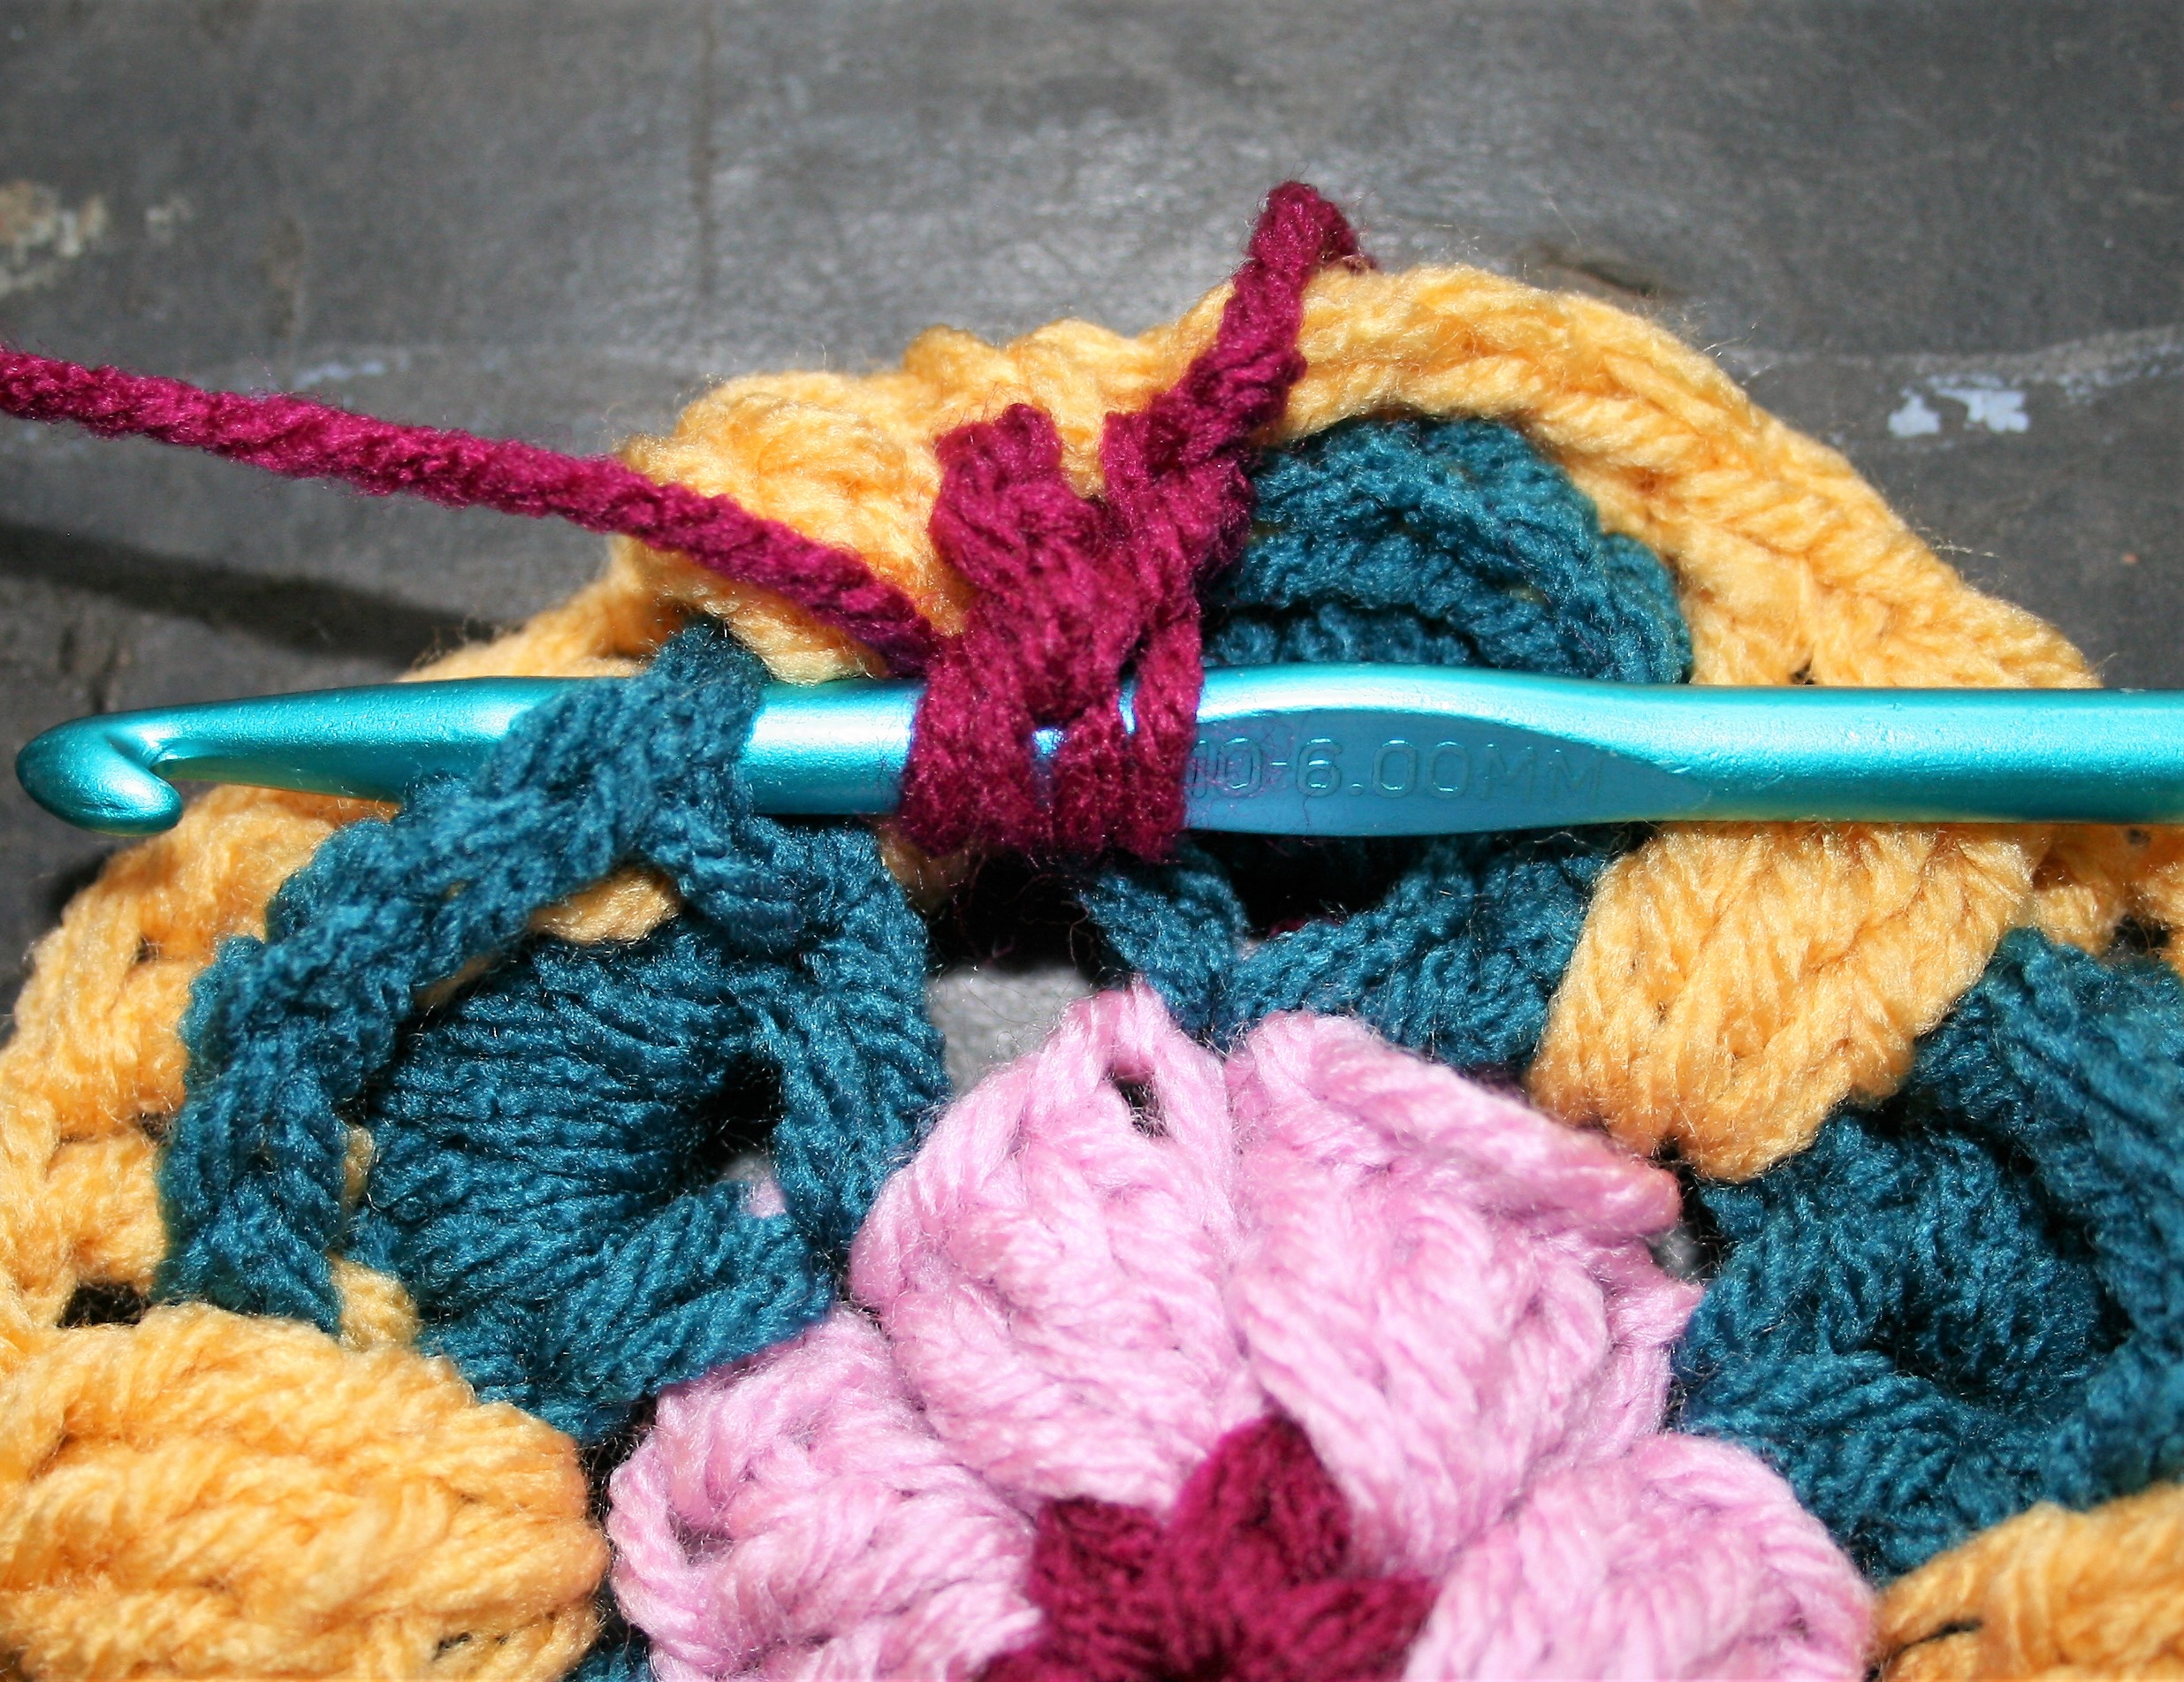
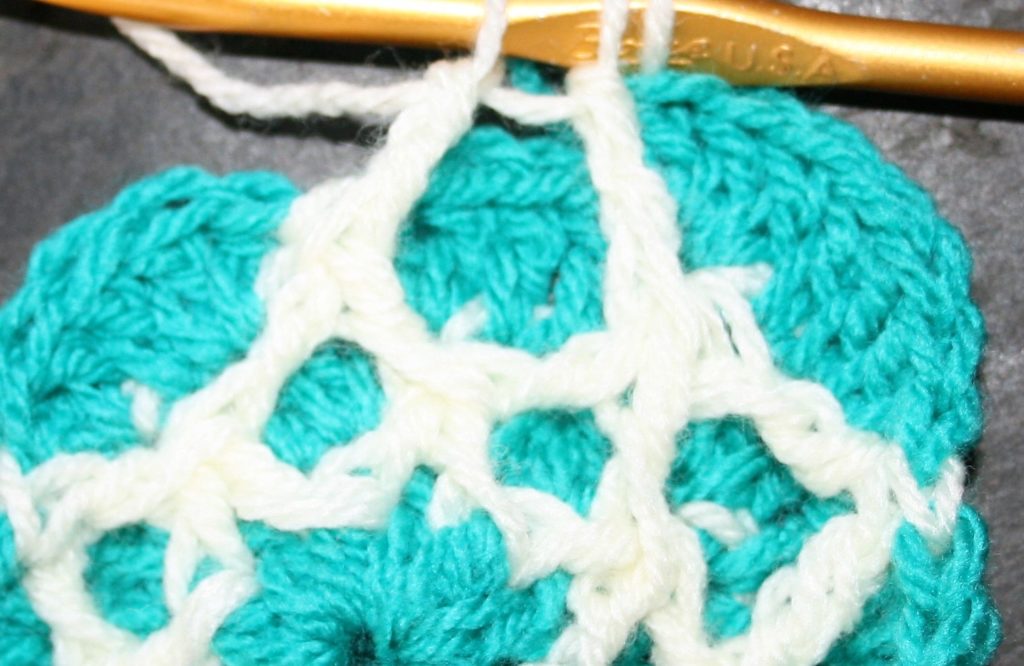
Rnd 5: With D, join with a sbpdc to the first dc of any 5-dc shell, bpdc in the next 4 dc sts, ch 1, tr3CL in the ch-1 sp 3 rows below (in Rnd 3), ch 1, [bpdc in each dc on next shell, ch 1, tr3CL in the ch-1 sp 3 rnds below (in Rnd 3), ch 1,] around, sl st to join, fasten off. – 8 tr3CL, 40 bpdc, 16 ch-1 sps
Working Rnd 5, the tr3CL works around the ch-1 sp in Rnd 3Finished the tr3CL and started the next bpdc
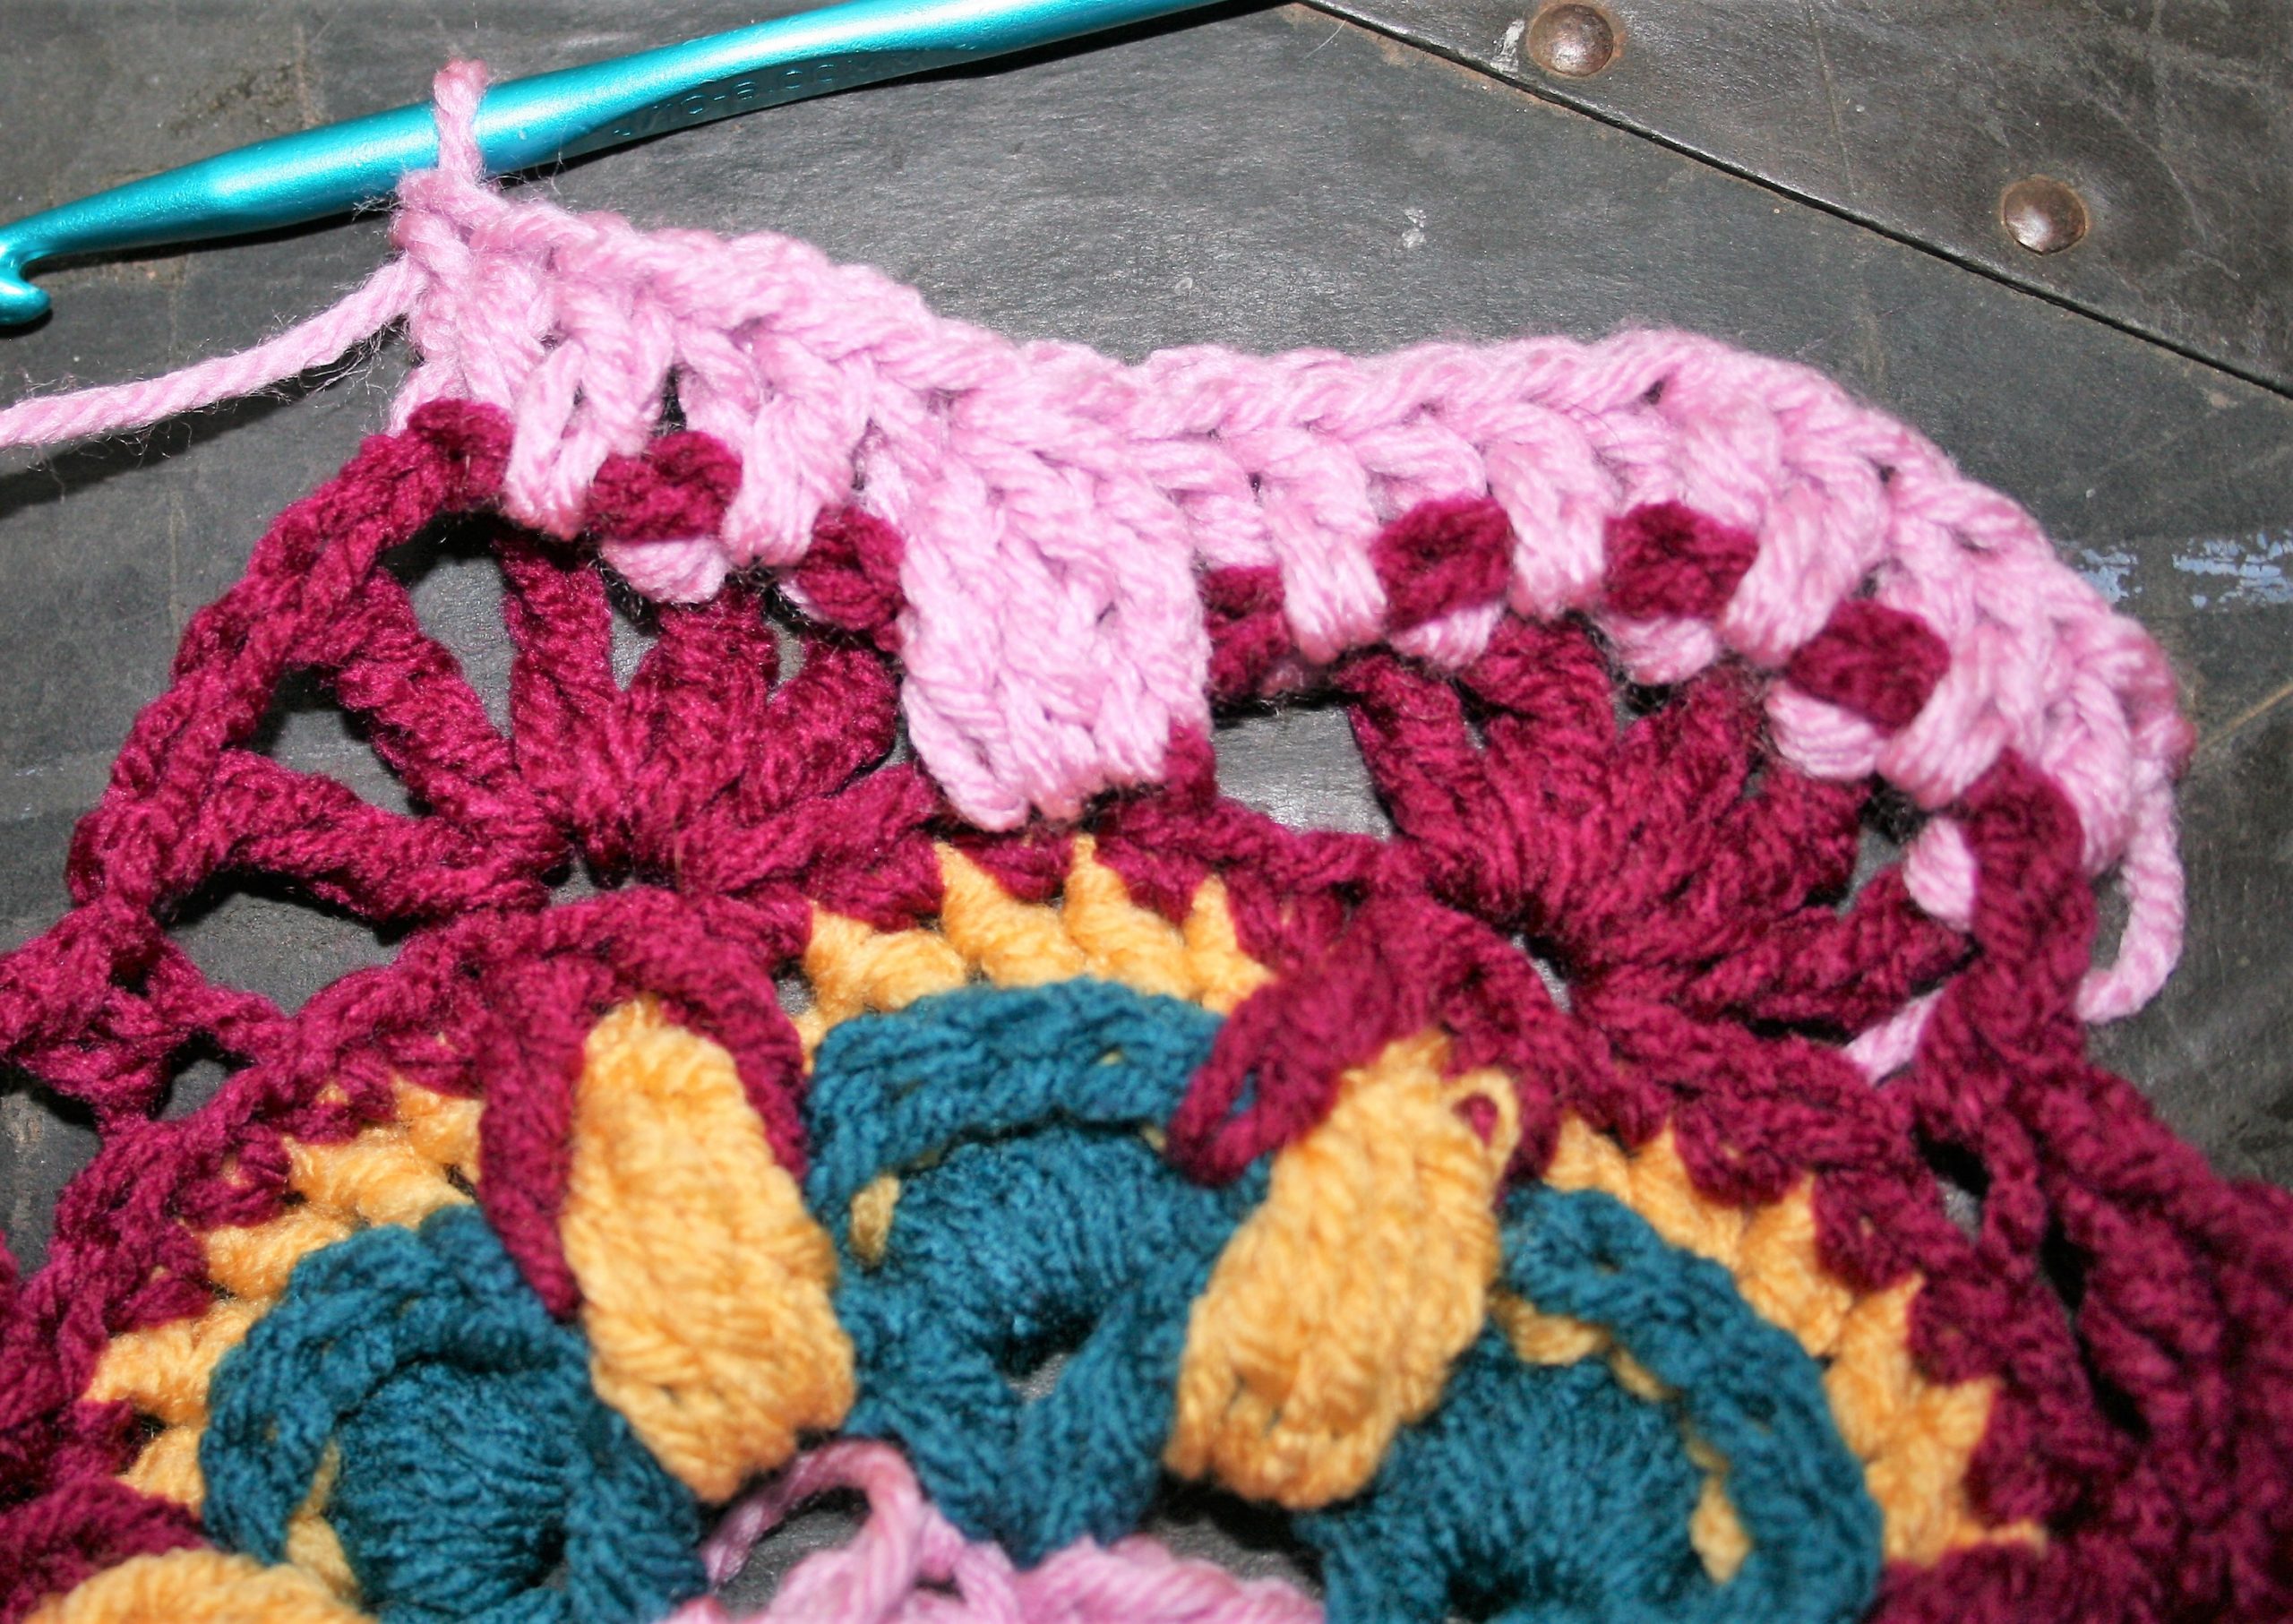
Rnd 6: With A, join with a ssc to a bpdc just before a tr3Cl, [tr2tog in the next sc 2 rows below (Rnd 4) and in the next sc 2 rnds below (on the other side of the tr3CL), sc in each bpdc] around, sl st to join. –8 tr2tod, 40 sc,
First insertion point for the tr2tog worked in rnd 4Second insertion point for the tr2togThe tr2tog
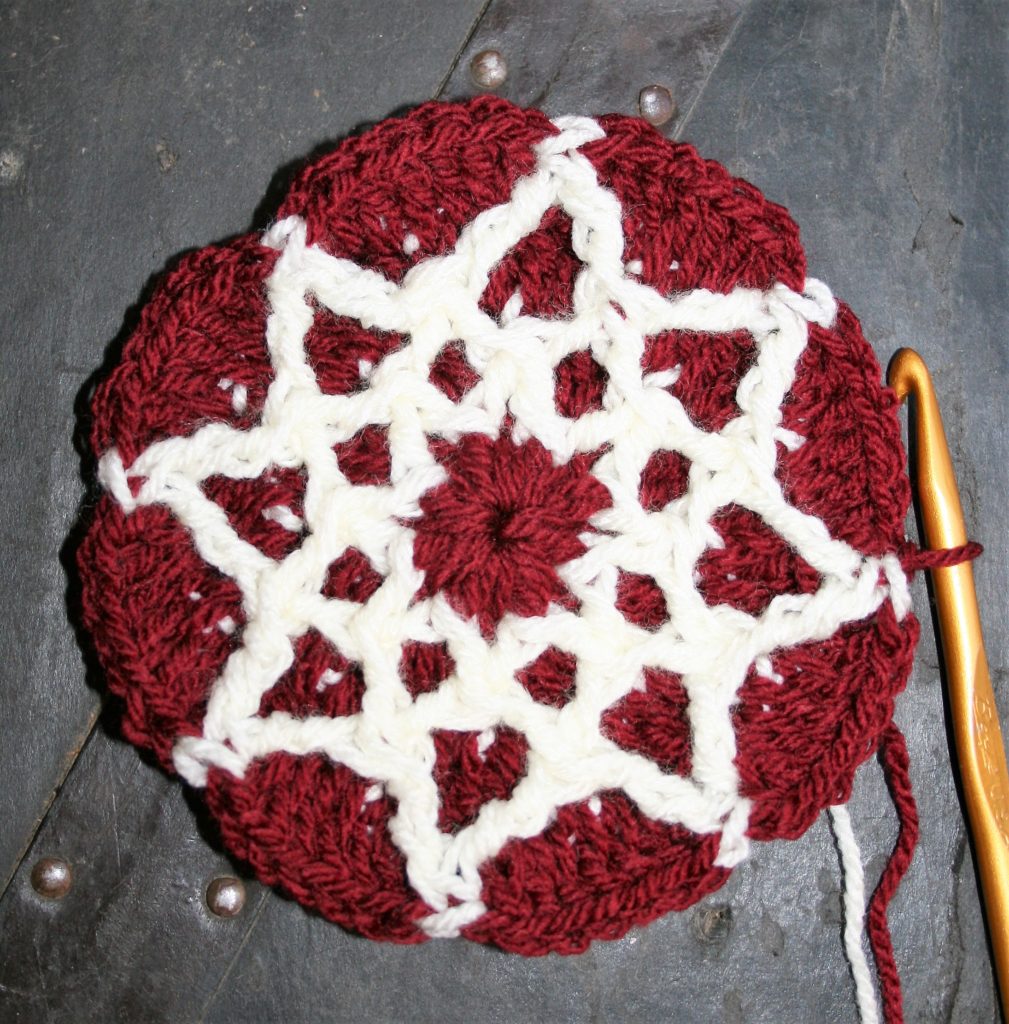
Rnd 7: Sl st in tr2tog st, ch 5, (tr, ch 1) 3 times in same st, tr in same st, ch 1, sk 2 sc, blsc in next sc, [ch, 1 (tr, ch 1) 4 times in next tr2tog, tr in same st, sk 2 sc, ch 1, blsc in next sc] around, ch 1, sl st to 4th ch of ch 5 to join, fasten off. –8 (tr, ch 1) fans, 8 sc
Finished Rnd 7
Back Post stitches create an interesting checker of color
Rnd 8: With B, join with a sbpdc to the 1st tr of any fan, dc in ch-1 sp, bpdc in next tr, dc in next ch-1 sp, 2 bpdc in next tr, dc in next ch- 1 sp, bpdc in next tr, dc in next ch-1 sp, bpdc in next tr, tr3Cl in unused front loop of sc 3 rnds below (Rnd 6), [bpdc in next tr, dc in next ch-1 sp, bpdc innext tr, dc in next ch-1 sp, 2 bpdc in next tr, dc in next ch- 1 sp, bpdc in next tr, dc in next ch-1 sp, bpdc in next tr, tr3Cl in unused front loop of sc 3 rnds below (Rnd 6)] around, sl st to join, fasten off. –8 tr3cl, 48 bpdc, 32 dc
Rnd 8, location of tr3CL in front loop of Rnd 6Rnd 8 after working the tr3Cl…don’t forget the 2 bpdc at the top of the fan
Lets Start Squaring Things Up
Rnd 9: With C, join with a sdc to any of the 1st bpdc of the center of fan (the 2 bpdc worked in the same st), ch 2, dc in next bpsc (corner made), bpdc in next 4 sts, tr2tog in the ch-1 sp 3 rows below (Rnd 7) and in the next ch-1 sp 3 rnds below (on the other side of the tr3CL), bpdc in next 2 sts, bphdc in the next 2 sts, sc in the next 2 sts, bphdc in the next 2 sts, bpdc in the next 2 sts,tr2tog in the ch-1 sp 3 rows below (Rnd 7) and in the next ch-1 sp 3 rnds below (on the other side of the tr3CL), bpdc in next 4 sts, [dc in next bpdc, ch 2, dc in next bpdc (corner made), bpdc in next 4 sts, tr2tog in the ch-1 sp 3 rows below (Rnd 7) and in the next ch-1 sp 3 rnds below (on the other side of the tr3CL), bpdc in next 2 sts, bphdc in the next 2 sts, sc in the next 2 sts, bphdc in the next 2 sts, bpdc in the next 2 sts,tr2tog in the ch-1 sp 3 rows below (Rnd 7) and in the next ch-1 sp 3 rnds below (on the other side of the tr3CL), bpdc in next 4 sts] 3 times, sl st to join, fasten off. –8 tr2tog, 8 sc
One side of the block! Working rnd 9
Watch the stitch changes, we are flattening out the sides
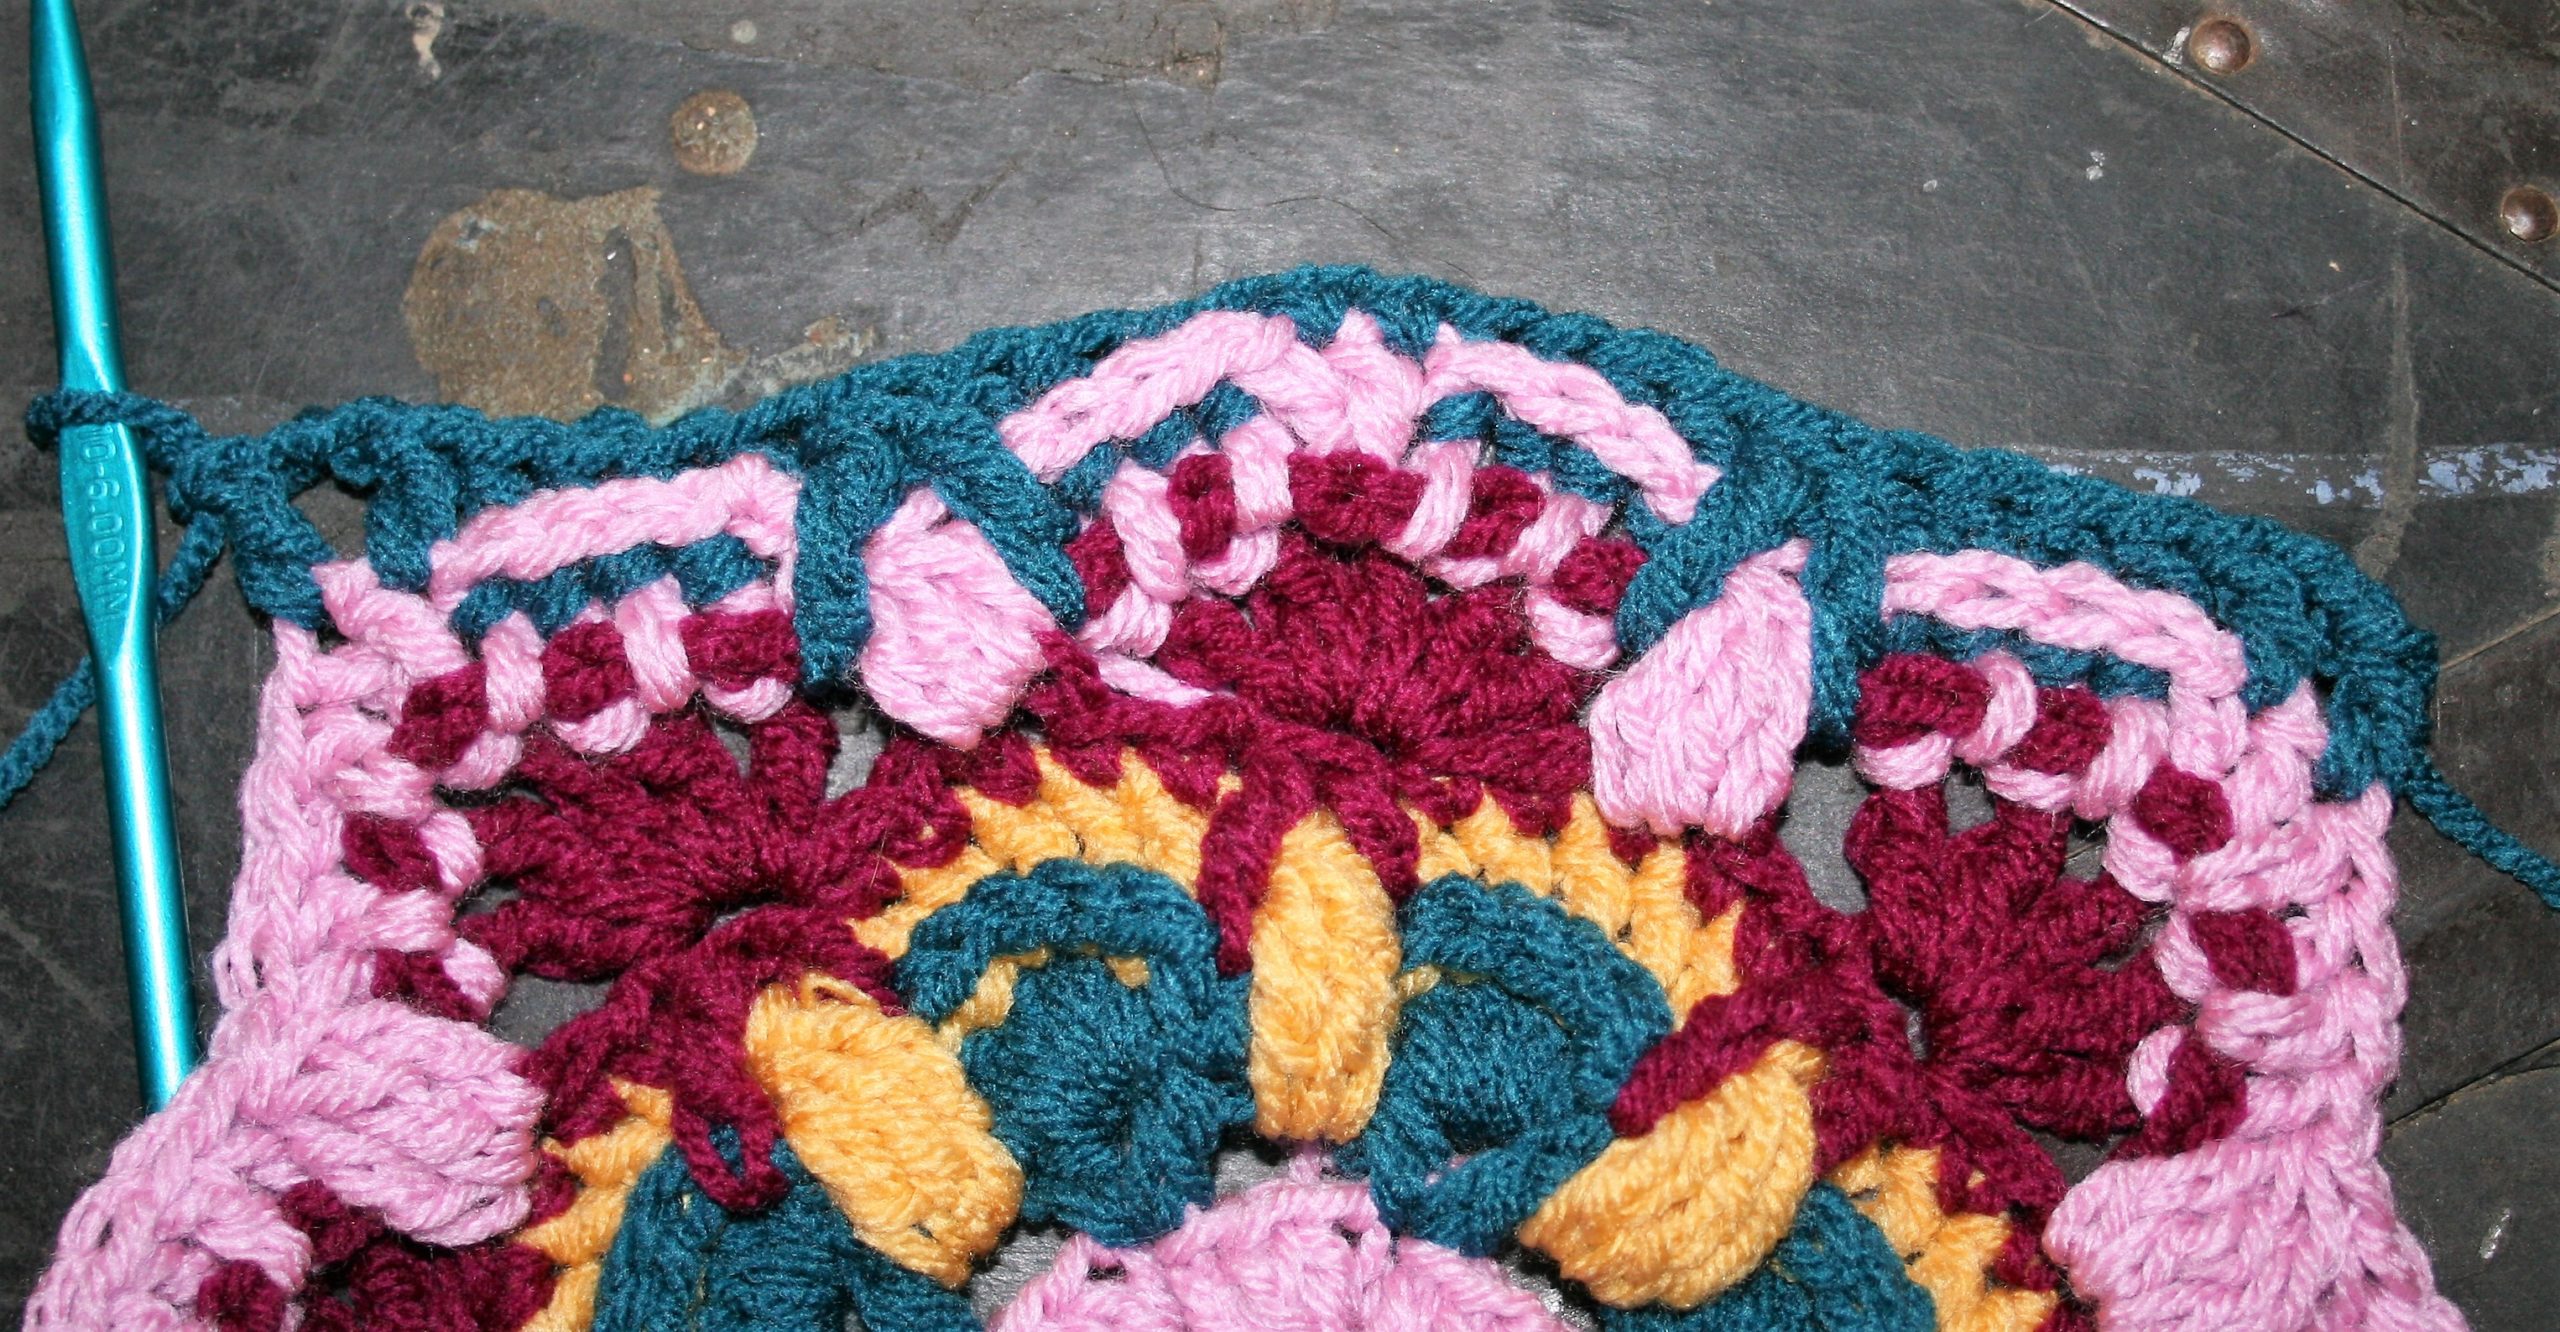
Rnd 10: With D, join with sdc in any corner ch-2 sp, ch 2, dc in same sp, [bpdc in next 6 sts, bphdc in next 2 sts, bpsc in next 2 sts, sc in next 2 sts, bpsc in next 2 sts, bphdc in next 2 sts, bpdc in next 6 sts, (dc, ch 2, dc) in ch-2 sp of corner] 3 times, bpdc in next 6 sts, bphdc in next 2 sts, bpsc in next 2 sts, sc in next 2 sts, bpsc in next 2 sts, bphdc in next 2 sts, bpdc in next 6 sts, sl st to join.
Rnd 11: Ch 3, (dc, ch 2, dc) in ch-2 corner, dc in each st across to corner, [(dc, ch 2, dc) in ch-2 corner sp, dc in each st across] around, sl st to join, fasten off. –104 dc (26 dc each side)
On the Home Stretch, the Moogly CAL block is almost done…
Rnd 12: With C, join with shdc in any corner ch-2 sp, ch 2, hdc in same st, [blhdc in next 7 sts, tr3Cl in the top of the tr2tog 4 rnds below (Rnd 9) (note: skip the stitch directly behind the cluster, here and throughout), blhdc in next 10 sts, tr3Cl in top of the tr2tog 4 rnds below (Rnd 9), blhdc in next 7 sts, (hdc, ch 2, hdc) in ch-2 corner sp] 3 times, blhdc in next 7 sts, tr3Cl in the top of the tr2tog 4 rnds below (Rnd 9), blhdc in next 10 sts, tr3Cl in top of the tr2tog 4 rnds below (Rnd 9), blhdc in next 7 sts, sl st to join, fasten off. –8 tr3Cl
Rnd 13: With A, join with ssc in any ch-2 corner, ch 2, sc in same sp, blsc in each st across, [(sc, ch 2, sc) in ch-2 corner sp, blsc in each st across] around, sl st to join, fasten off. –116 sc (29 sc each side)
Help me help local communities by creating blocks for Warm Up America,
by making a block for yourself and one for a community project with this free
pattern. I will be creating a new block every few weeks and sharing it with
you, I just ask that make one for donation.
Warm Up America is a nationwide organization that
encourages local donations, but will also except donations to be sent to their
office so that blocks can be assembled and then blankets can be donated through
the United States.
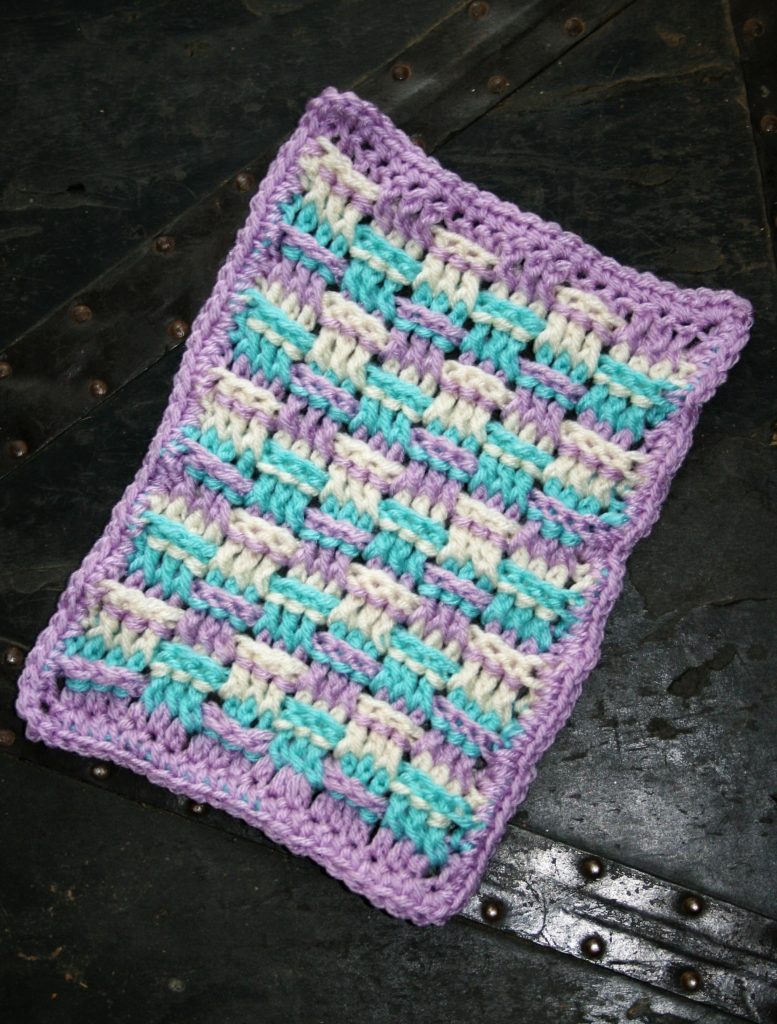
Quick Weave Block
Even if you do not want to participate with Warm Up America, please consider creating blocks, or
blankets for your local community. There are various places in every community
that accept donations.
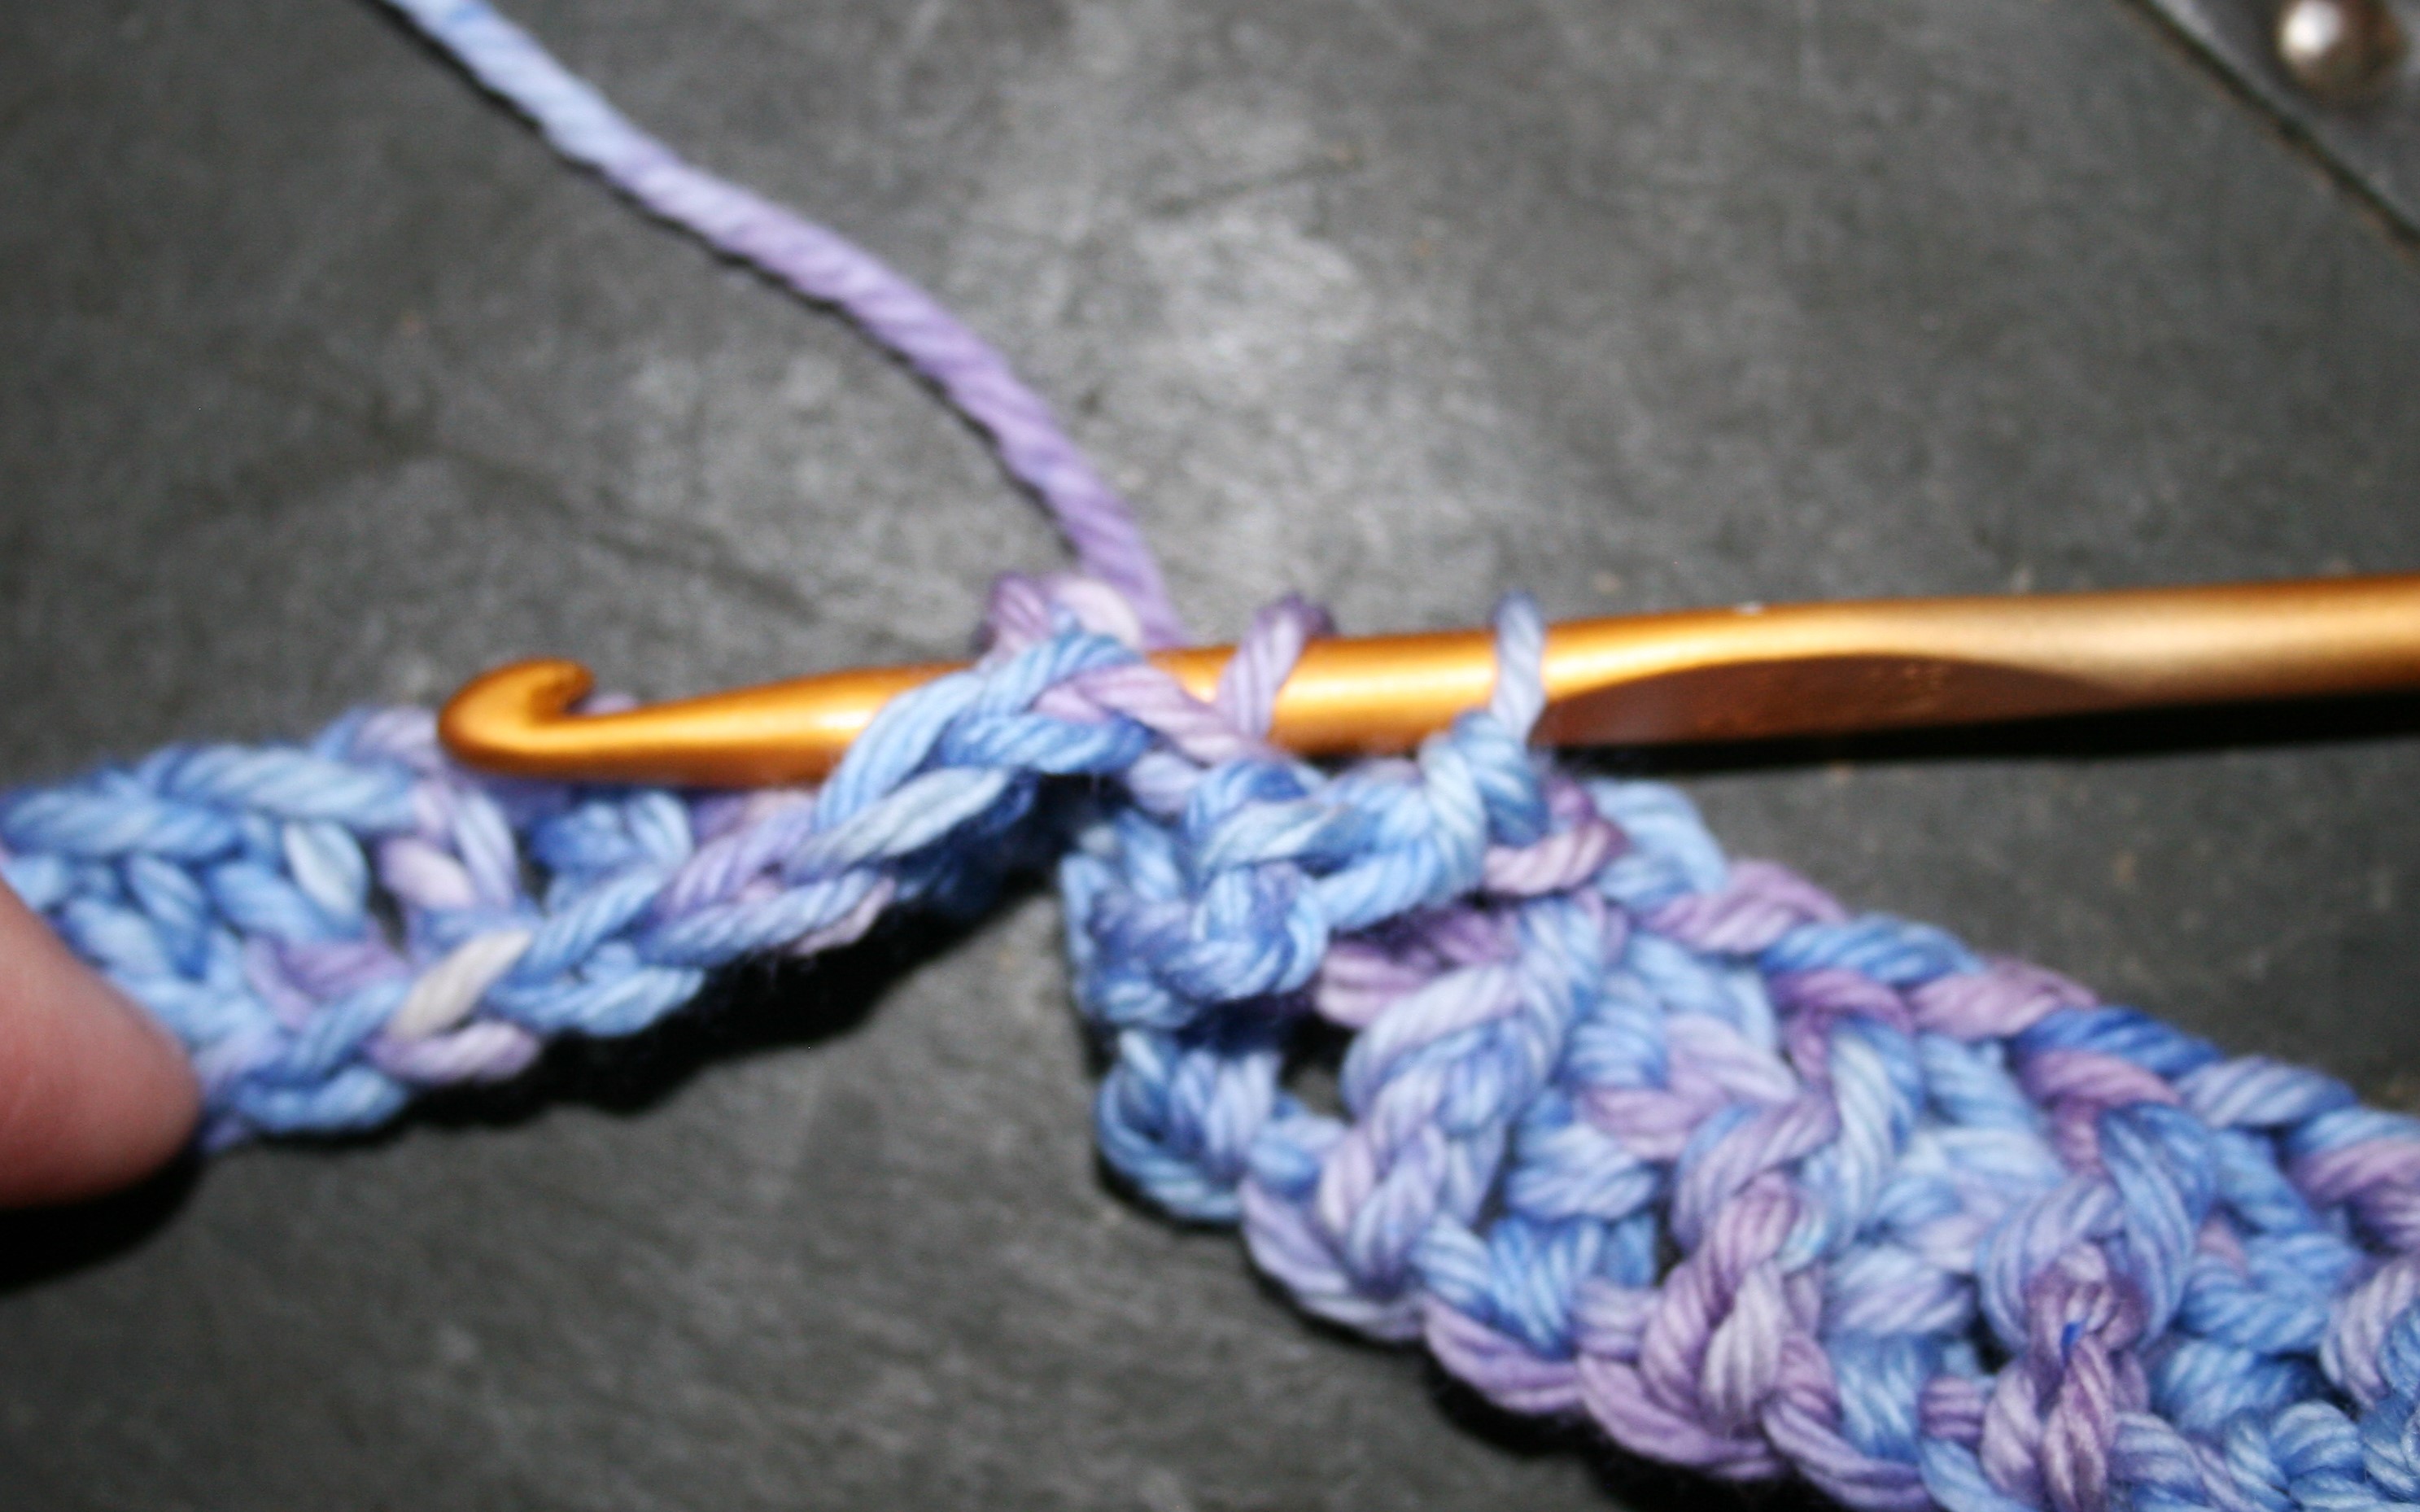
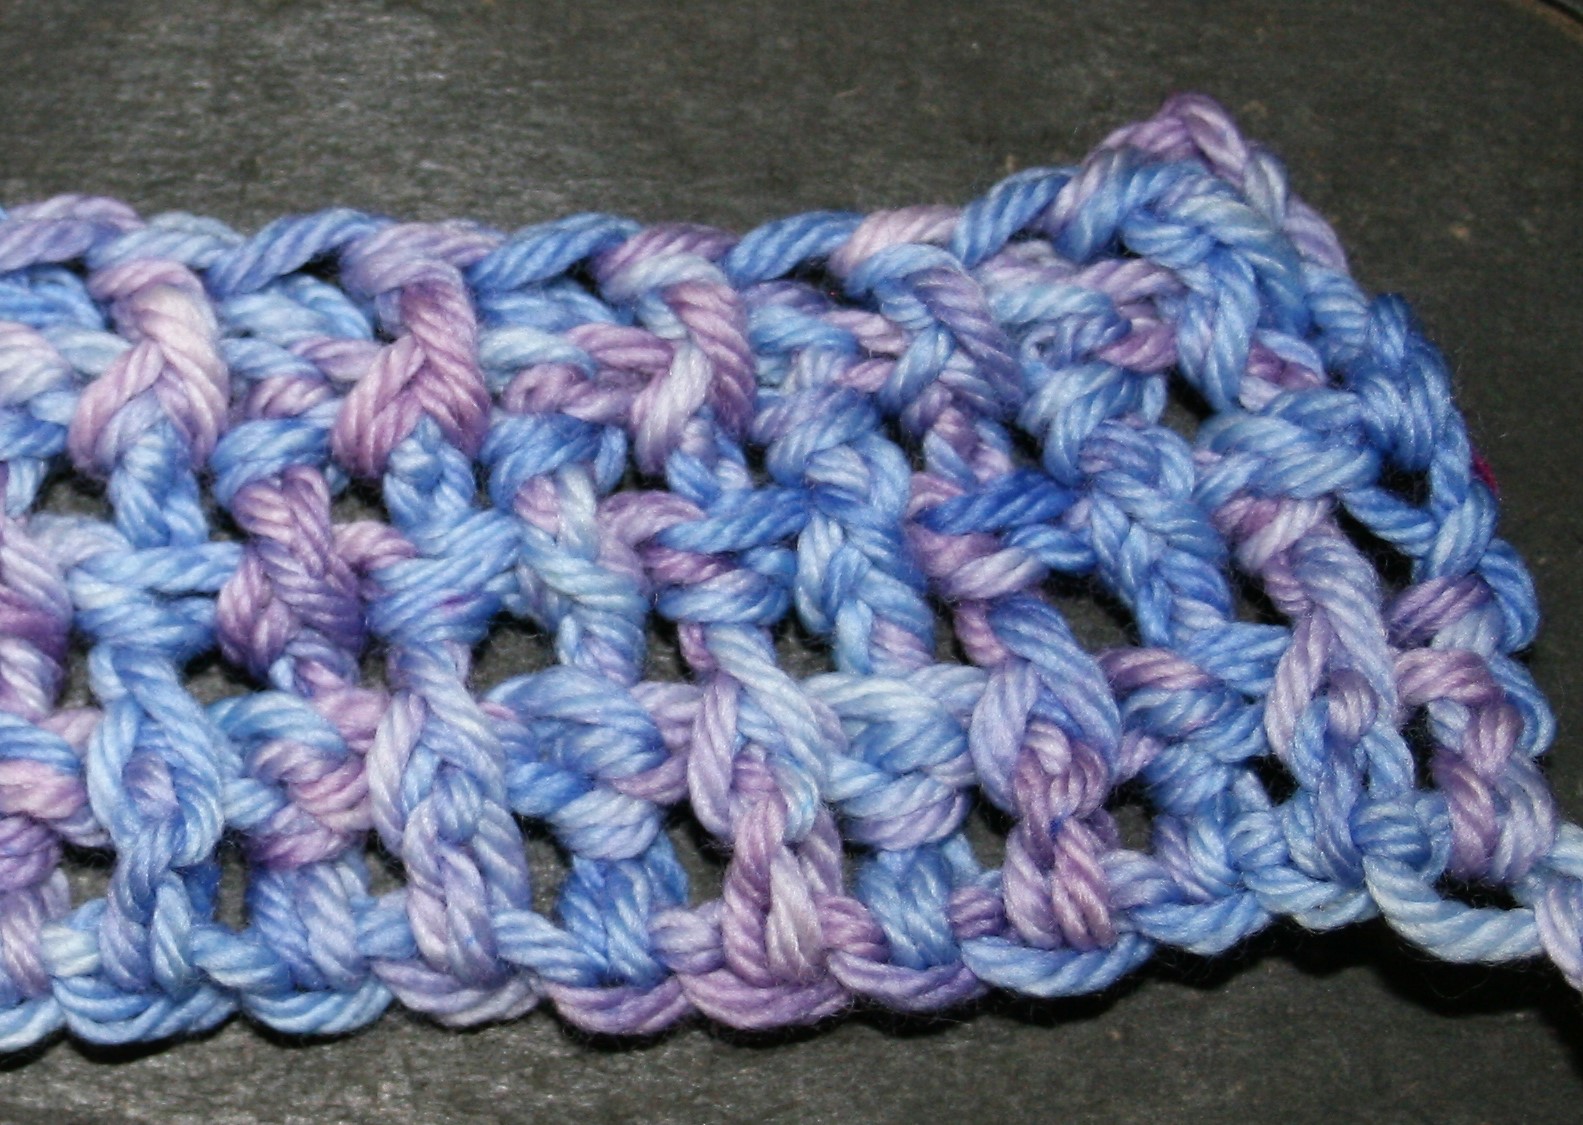
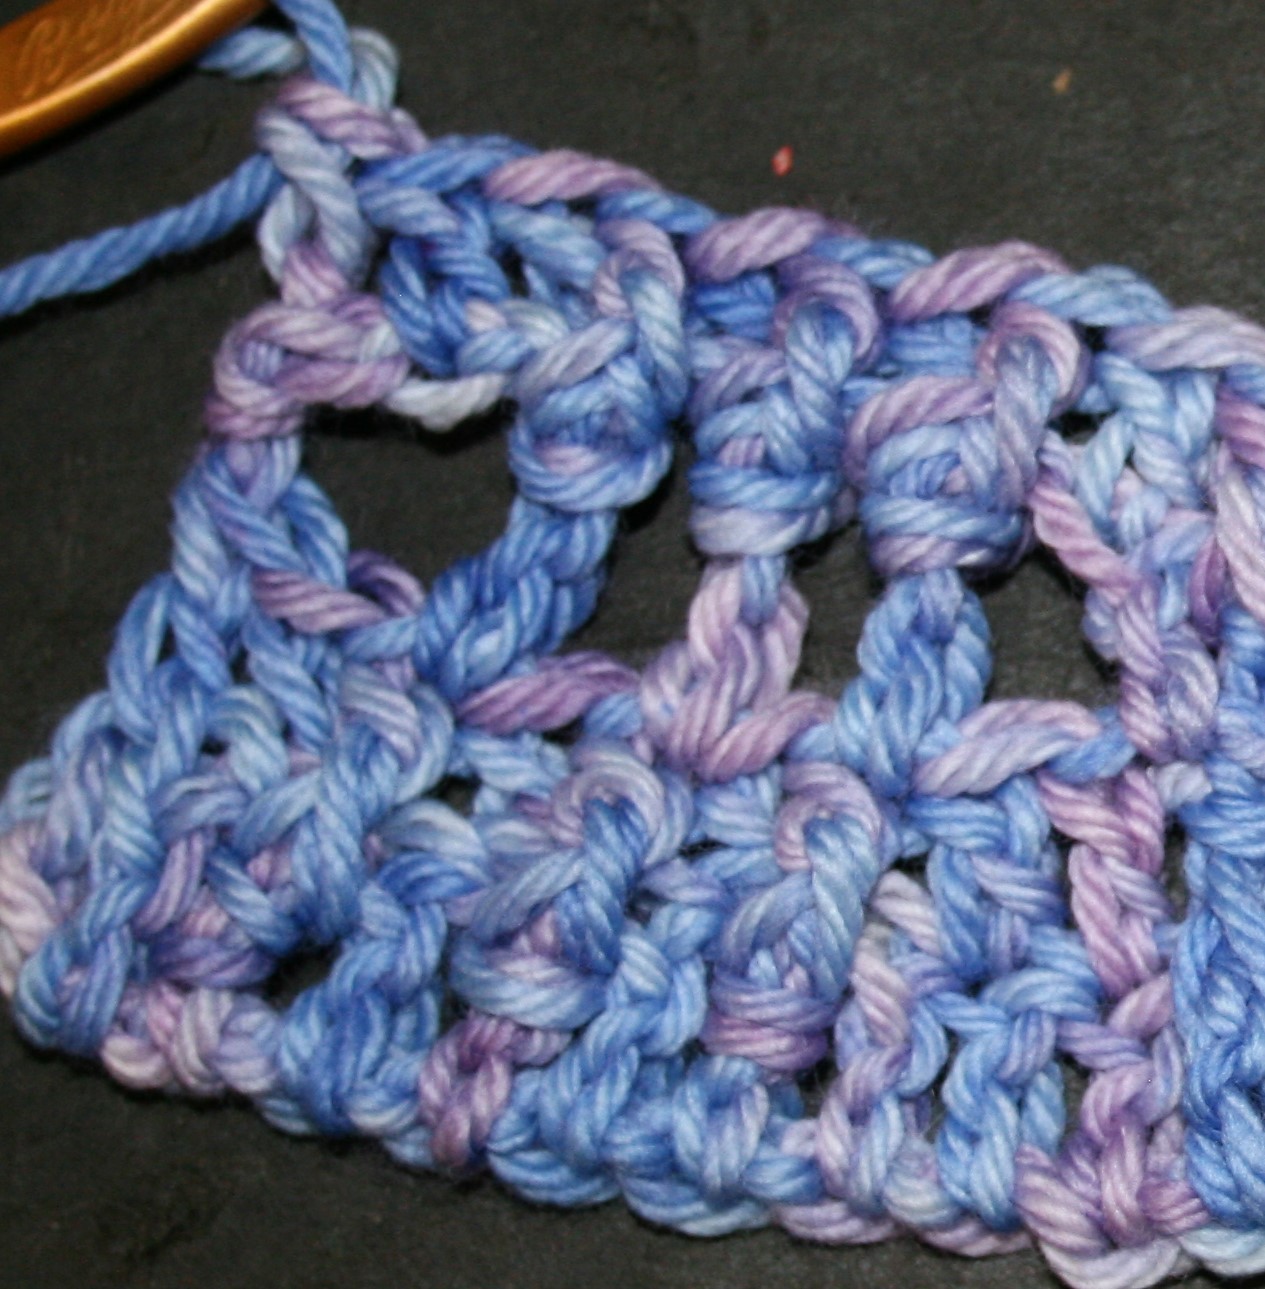
The Basket Weave Stitch
Utilizing stitch
placement is all that makes this pattern appear. It is essentially only a
double crochet stitch, however it is worked around the body or post of the
stitch a row below. There are two different stitches, the back post and the
front post.
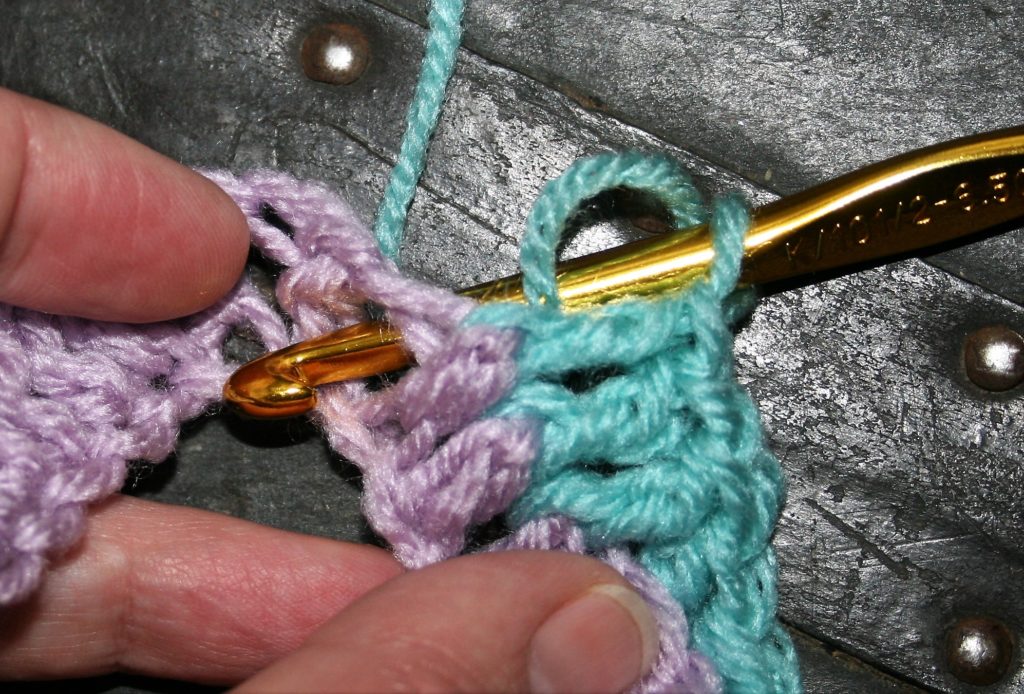
The back post pushes
the post away from the fabric facing. This is done by inserting the hook from
the back side of the fabric to the front, between the “post” or “body” of the
next stitch to be worked. Then push the hook from the front to the back of the
fabric on the other side of the “post” or “body”. I have found this easier to
view by shifting the fabric a bit and looking down at the top of the stitches,
as I can see the body being pushed backward.
Insert the Hook from the back of the fabricPush the hook to the back again. This image is looking down from the top of the fabric, note how the post is pushed to the back of the fabric.
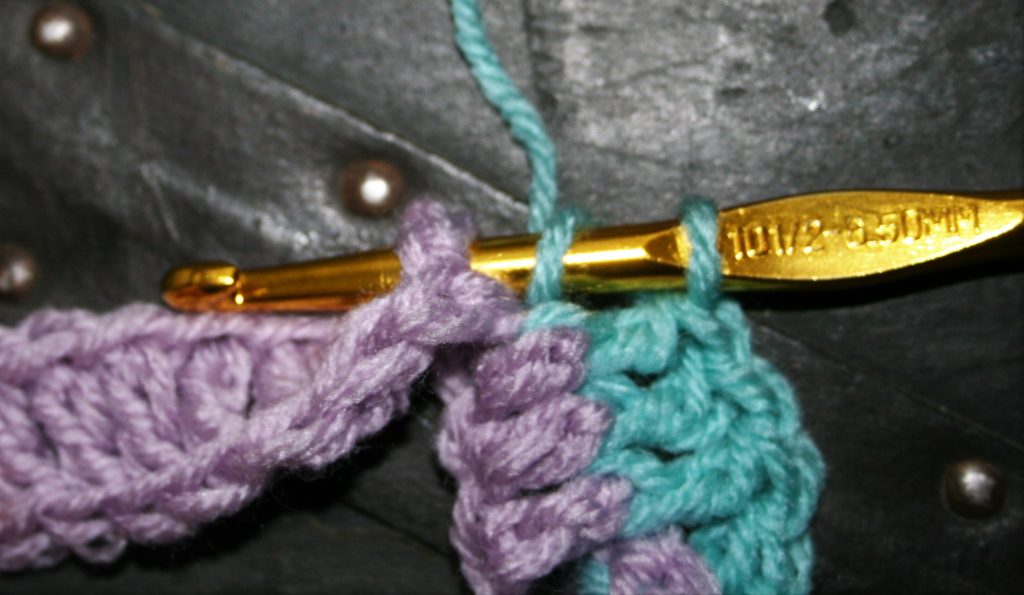
Front Post Location
The front post is
often easier to work, and pushes the post toward the front of the fabric. This
is done by inserting the hook from the front to the back of the fabric between
the “post” or “body” of the next stitch to be worked. Then re-insert the back
of the fabric to the front of the fabric on the other side of the “post” or “body”.
Hook location for the Front post
Gauge: 7”x9” rectangle
Materials
Medium weight yarn, in
3 colors MC (main color), CC1, CC2
K/10 ½/ 6.5mm hook
Notes
Back Post Double Crochet (bpdc): Yo, insert hook from back to front and then to back again around post of stitch, yo, pull up a loop, [yo, pull through 2 loops] twice.
Front Post Double Crochet (fpdc): Yo, insert hook from front to back and then to front again around post of stitch, yo, pull up a loop, [yo, pull through 2 loops] twice.
Front post double crochets are easily seen, the back post double crochets show a stripe of color in the row below and look like it is behind the row below.
Block Pattern
With MC Ch 22
Row 1: Dc in 4th ch from hook, dc in each ch across, change
to CC1, turn. – 20 dc
Row 2: Ch 3 (counts as dc now and throughout), [fpdc
in next 3 sts, bpdc in next 3 sts] 3 times, dc in last st, change to CC2, turn.
– 2 dc, 9 fpdc, 9 bpdc
Row 3: Ch 3 (counts as dc now and throughout), [bpdc
in next 3 sts, fpdc in next 3 sts] 3 times, dc in last st, change to MC, turn.
– 2 dc, 9 fpdc, 9 bpdc
The Beginning of the Repeat
Row 4: Ch 3 (counts as dc now and throughout), [fpdc
in next 3 sts, bpdc in next 3 sts] 3 times, dc in last st, change to CC1, turn.
– 2 dc, 9 fpdc, 9 bpdc
Row 5: Ch 3 (counts as dc now and throughout), [bpdc
in next 3 sts, fpdc in next 3 sts] 3 times, dc in last st, change to CC2, turn.
– 2 dc, 9 fpdc, 9 bpdc
Row 6: Ch 3 (counts as dc now and throughout), [fpdc
in next 3 sts, bpdc in next 3 sts] 3 times, dc in last st, change to MC, turn.
– 2 dc, 9 fpdc, 9 bpdc
Row 7: Ch 3 (counts as dc now and throughout), [bpdc
in next 3 sts, fpdc in next 3 sts] 3 times, dc in last st, change to CC1, turn.
– 2 dc, 9 fpdc, 9 bpdc
Row 8: Ch 3 (counts as dc now and throughout), [fpdc
in next 3 sts, bpdc in next 3 sts] 3 times, dc in last st, change to CC2, turn.
– 2 dc, 9 fpdc, 9 bpdc
Row 9: Ch 3 (counts as dc now and throughout), [bpdc
in next 3 sts, fpdc in next 3 sts] 3 times, dc in last st, change to MC, turn.
– 2 dc, 9 fpdc, 9 bpdc
Just Finished the Pattern Repeat
Rows 10-16: Rep Rows 4-9 once.
Edge
Rnd 1: Ch 1, sc in sc in same st, sc in each st
across until 1 st remains, 3 sc in last st, working over row ends evenly sc
across to beg ch, 3 sc in last st, working in unused loops of beg ch, sc in
each chain across, 3 sc in last st, working over row end evenly sc across, 2 sc
in last st, sl st to beg sc, fasten off.
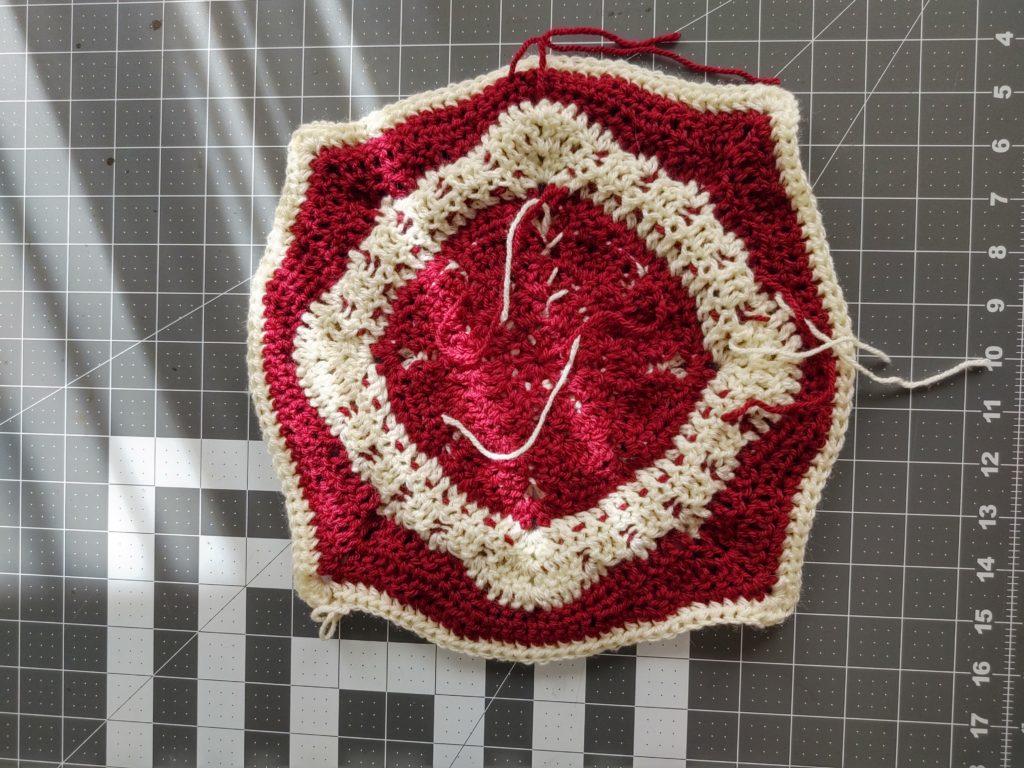
For my part I worked a square that utilizes carrying your throughout the project, crocheting over the color you are not working. This allows for some specialized color changes without having to weave in a bunch of ends.
After you complete the smaller 6″ square, you then really put this square on its head, by moving the corners to the sides. This causes the square to rest on its point.
Square measures 12” x 12” (at end of Round 6, square
measures 6” x 6”)
Materials
J/10/6.00mm crochet hook
Lion Brand Basic Stitch Premium medium weight 100% premium acrylic yarn (3.5 oz/100g/219yrds/200m) 1 skein each color #141 Plum (MC), #98 Cream (CC)
Abbreviations:
Beg: Beginning
Bpdc: back post double crochet
Bphdc: back post half double crochet
Bpsc: back post single crochet
CC: contrasting color
Ch: chain
Dc: double crochet
Fpdc: front post double crochet
Fphdc: front post half double crochet
Hdc: half double crochet
MC: main color
Rnd: round
Sc: single crochet
Sl st: slip stitch
Sp: space
St(s): Stitch(es)
Special Stitches
Front Post Double Crochet Two Together (Fpdc2tog): Yarn over, insert hook from front to back and then to front again around post of stitch last worked into (or around st indicated) on previous row, yarn over and pull up a loop, yarn over and draw through 2 loops on hook, skip next st on rnds 2 and yarn over, insert hook from front to back and then to front again around post of next stitch (or around st indicated), yarn over and pull up a loop, yarn over and draw through 2 loops on hook, yarn over and draw through all 3 loops on hook.
Front Post Treble Crochet Two Together (Fptr2tog): Yarn over twice, insert hook from front to back and then to front again around post of indicated stitch, yarn over and pull up a loop, [yarn over and draw through 2 loops on hook] twice, yarn over twice, insert hook from front to back and then to front again around post of indicated stitch, yarn over and pull up a loop, [yarn over and draw through 2 loops on hook] twice, yarn over and draw through all 3 loops on hook.
Notes
Leave unused color behind your work and work over unused
color when possible.
The Smaller Block
Rnd 1: With MC, ch
4 (last 3 chains count as dc), 15 dc
in 4th ch from hook, join to top of beg ch. -16 dc
Rnd 2: Ch 3 (counts
as tr here and throughout), dc in same st, dc in next st, change color to
CC, fpdc2tog, change color to MC, [2 dc in next st (behind fpdc2tog), 1 dc
in next st (used for 2nd leg of fpdc2tog), change color to
CC, fpdc2tog, change color to MC] repeat around, slip stitch in top of beg ch-3
to join. – 8 fpdc2tog, 24 dc
Working stitch location of “legs” of fpdc2togCompleted Round 2
Rnd 3: Ch 3, dc
in same st, change color to CC, fpdc2tog over last and first fpdc2tog, change
color to MC, skip next st, 2 dc in next st, dc in next fpdc2tog, [2 dc in next
st, change color to CC, fpdc2tog over last-used and next fpdc2tog, change color
to MC, sk next st, 2 dc in next st, dc in next fpdc2tog] repeat around, sl st in
top of beg ch-3 to join. -8 fpdc2tog, 40
dc
Completed Round 3
Rnd 4: Ch 3, dc
in same st, dc in next 3 sts, 2 dc in next st, change color to CC, fptr2tog
over last and first fpdc2tog of previous row, change color to MC, [skip next
st, 2 dc in next st, dc in next 3 sts, 2 dc in next st, change color to CC,
fptr2tog over last-used and next fpdc2tog, change color to MC] repeat around,
sl st in top of beg ch-3 to join. -8
fptr2tog, 56 dc
Working stitch location for “legs” of fptr2togCompleted Round 4
We start making corners
Rnd 5: Ch 3, dc
in next st, hdc in next 2 sts, sc in next 3 sts, change color to CC, fphdc
around fptr2tog, change color to MC, sc in next 3 sts, hdc in next 2 sts, dc in
next 2 sts, change color to CC, (fpdc, ch 1, fpdc) around fptr2tog (corner made), change color to MC, [dc
in next 2 sts, hdc in next 2 sts, sc in next 3 sts, change color to CC, fphdc
around fptr2tog, change color to MC, sc in next 3 sts, hdc in next 2 sts, dc in
next 2 sts, change color to CC, (fpdc, ch 1, fpdc) around fptr2tog, change
color to MC] repeat around, sl st in top of beg ch-3 to join. Fasten off CC. -4 fphdc, 4 (fpdc, ch 1, fpdc) corners, 16
dc, 16 hdc, 24 sc
Rnd 6: Ch 2 (counts as hdc), [hdc in each st across
to ch-1 sp, (dc, ch 1, dc) in ch-1 sp] repeat around, hdc in last st, sl st in
top of beg ch-2 to join. Fasten off. – 68
hdc, 4 (dc, ch 1, dc) corners, (19 sts on each side of square)
Making the Bigger Square
Rnd 7: With CC,
join to any ch-1 corner sp, ch 3, (dc, ch 1, 2 dc) in same sp as join, bpdc around
each st to next ch-1 sp, [(2dc, ch 1, 2 dc) in ch-1 sp, bpdc around each st to next
ch-1 sp] repeat around, sl st in top of beg ch-3 to join. -76 bpdc, 4 (2 dc, ch 1, 2 dc) corners
Rnd 8: Ch 3, dc
in next st, (dc, ch 1, dc) in ch-1 sp, [dc in next 3 sts, change color to MC,
fpdc2tog, change color to CC] five times, {dc in next 3 sts, (dc, ch 1, dc) in
ch-1 sp, [dc in next 3 sts, change color to MC, fpdc2tog, change color to CC] five
times} repeat around, dc in last st, sl st in top of beg ch-3 to join. -20 fpdc2tog, 72 dc, 4 (dc, ch 1, dc)
corners
Rnd 9: Ch 3, dc
in next 2 sts, {(dc, ch 1, dc) in ch-1 sp, dc in next 6 sts, [change color to
MC, fpdc2tog over previous and next fpdc2tog, change color to CC, sk next st, dc
in next 3 sts] 4 times, dc in next 3 sts} repeat around omitting last 3 dc on
last repeat, sl st in top of beg ch-3 to join. Fasten off both colors. -16 fpdc2tog, 84 dc, 4 (dc, ch 1, dc)
corners
We are moving the corner…
Rnd 10:Note corner location will shift in this round. With MC, join to any ch-1 sp, ch 1, sc in same sp, bpsc around next 4 sts, bphdc around next 4 sts, bpdc around next 5 sts, (dc, ch 1, dc) in next st, bpdc around next 5 sts, bphdc around next 4 sts, bpsc around next 4 sts, [sc in ch-1 sp, bpsc around next 4 sts, bphdc around next 4 sts, bpdc around next 5 sts, (dc, ch 1, dc) in next st, bpdc around next 5 sts, bphdc around next 4 sts, bpsc around next 4 sts] repeat around, sl st in first sc to join. –32 bpsc, 32 bphdc, 40bpdc, 4 sc, 4 (dc, ch 1, dc) corners
Rnd 11: Ch 1, sc
in same st, sc in next 4 sts, [hdc in next 5 sts, dc in next 5 sts, (dc, ch 1,
dc) in ch-1 sp, dc in next 5 sts, hdc in next 5 sts, sc in next 9 sts] 3 times,
hdc in next 5 sts, dc in next 5 sts, (dc, ch 1, dc) in ch-1 sp, dc in next 5
sts, hdc in next 5 sts, sc in last 4 sts, sl st in first sc to join. -36 sc, 40 hdc, 40 dc, 4 (dc, ch 1, dc)
corners
Rnd 12: Ch 1, sc
in same st, sc in next 10 sts, [hdc in next 5 sts, (dc, ch 1, dc) in ch-1 sp,
hdc in next 5 sts, sc in next 21 sts] 3 times, hdc in next 5 sts, (dc, ch 1,
dc) in ch-1 sp, hdc in next 5 sts, sc in next 10 sts, sl st in first sc to
join. Fasten off. -84 sc, 40 hdc, 4 (dc,
ch 1, dc) corners
Rnd 13: With CC,
join to any ch-1 sp, ch 2 (counts as hdc),
(hdc, ch 1, 2 hdc) in same sp as join, bphdc in each st across to next ch-sp,
[(2 hdc, ch 1, 2 hdc) in ch-1 sp, bphdc in each st across to next ch-sp] repeat
around, sl st to join. Fasten off. Block. –132
bphdc, 4 (2 hdc, ch 1, 2 hdc) corners (37 stitches on each side of square)
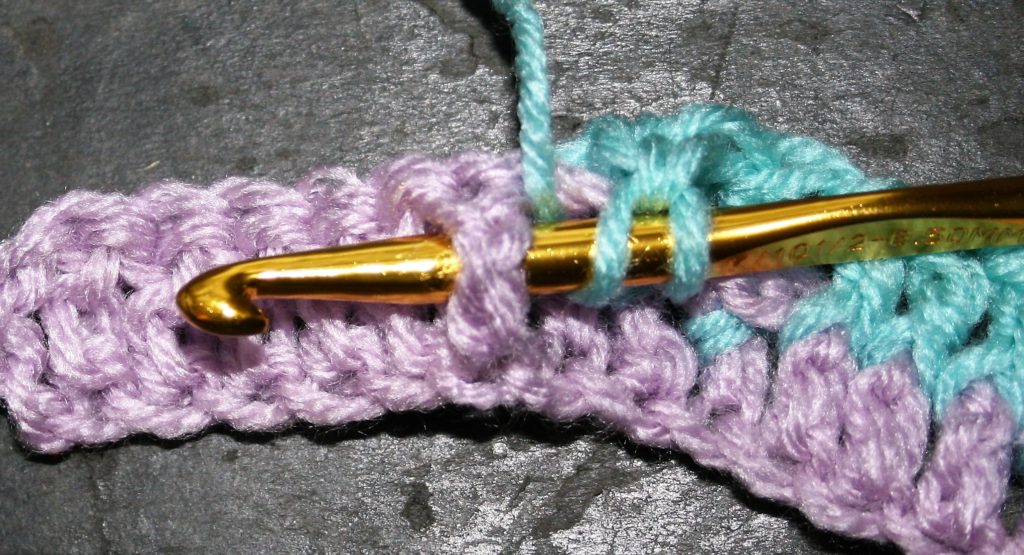
In crochet Post Stitches are all about where you put your hook. It really can be that simple, yet it can be intimidating. It is from post stitches that interesting textures and designs can be created. But first it helps to understand the basics.
To work a Front Post Stitch, the hook is inserted between the “body” of a stitch, from the front of the fabric to the back, then returned back to the front of the fabric. Causing a post (or “body”) of a stitch to be pushed forward. In all the examples I show here I am demonstrating with Double Crochet stitches (US Standard), but really any stitches can be utilized in this manner. Then the indicated stitch is completed as normal.
As for a Front Post Double Crochet -FPDC, (US Standard), you would yarn over first, insert the hook as indicated above, yarn over and pull through a loop to anchor the stitch, then yarn over pull through 2 loops, and repeat the yarn over pull through of the last 2 loops on the hook.
To work a Back Post Stitch the process is very similar, it is just placing the hook in the reverse order, pushing the post (or “body”) of the stitch toward the back of the fabric. Essentially inserting the hook between the “body” of the stitch, from the back of the fabric to the front, then returning the hook to the back of the fabric. Once again you complete the stitch as indicated.
When working a Back Post Double Crochet -BPDC, (US Standard), you would yarn over first, insert the hook around the post of the stitch from back to front, then front to back as described above, yarn over and pull through a loop to anchor the stitch, then yarn over and pull through 2 loops two times.
Knowing these stitch positions opens up many different stitch texture opportunities, such as basket-weave and cables, I have displayed here a simple basket-weave of alternating front and back posts, as well as working a front and back post stitch around the same stitch. Working around the same stitch you will have to skip a stitch between or work the stitches over a mesh base. Using the same stitches, and in this case even in the same order (alternating front and back post stitches), you can get very different effects. Try this stitch placement out for your self.