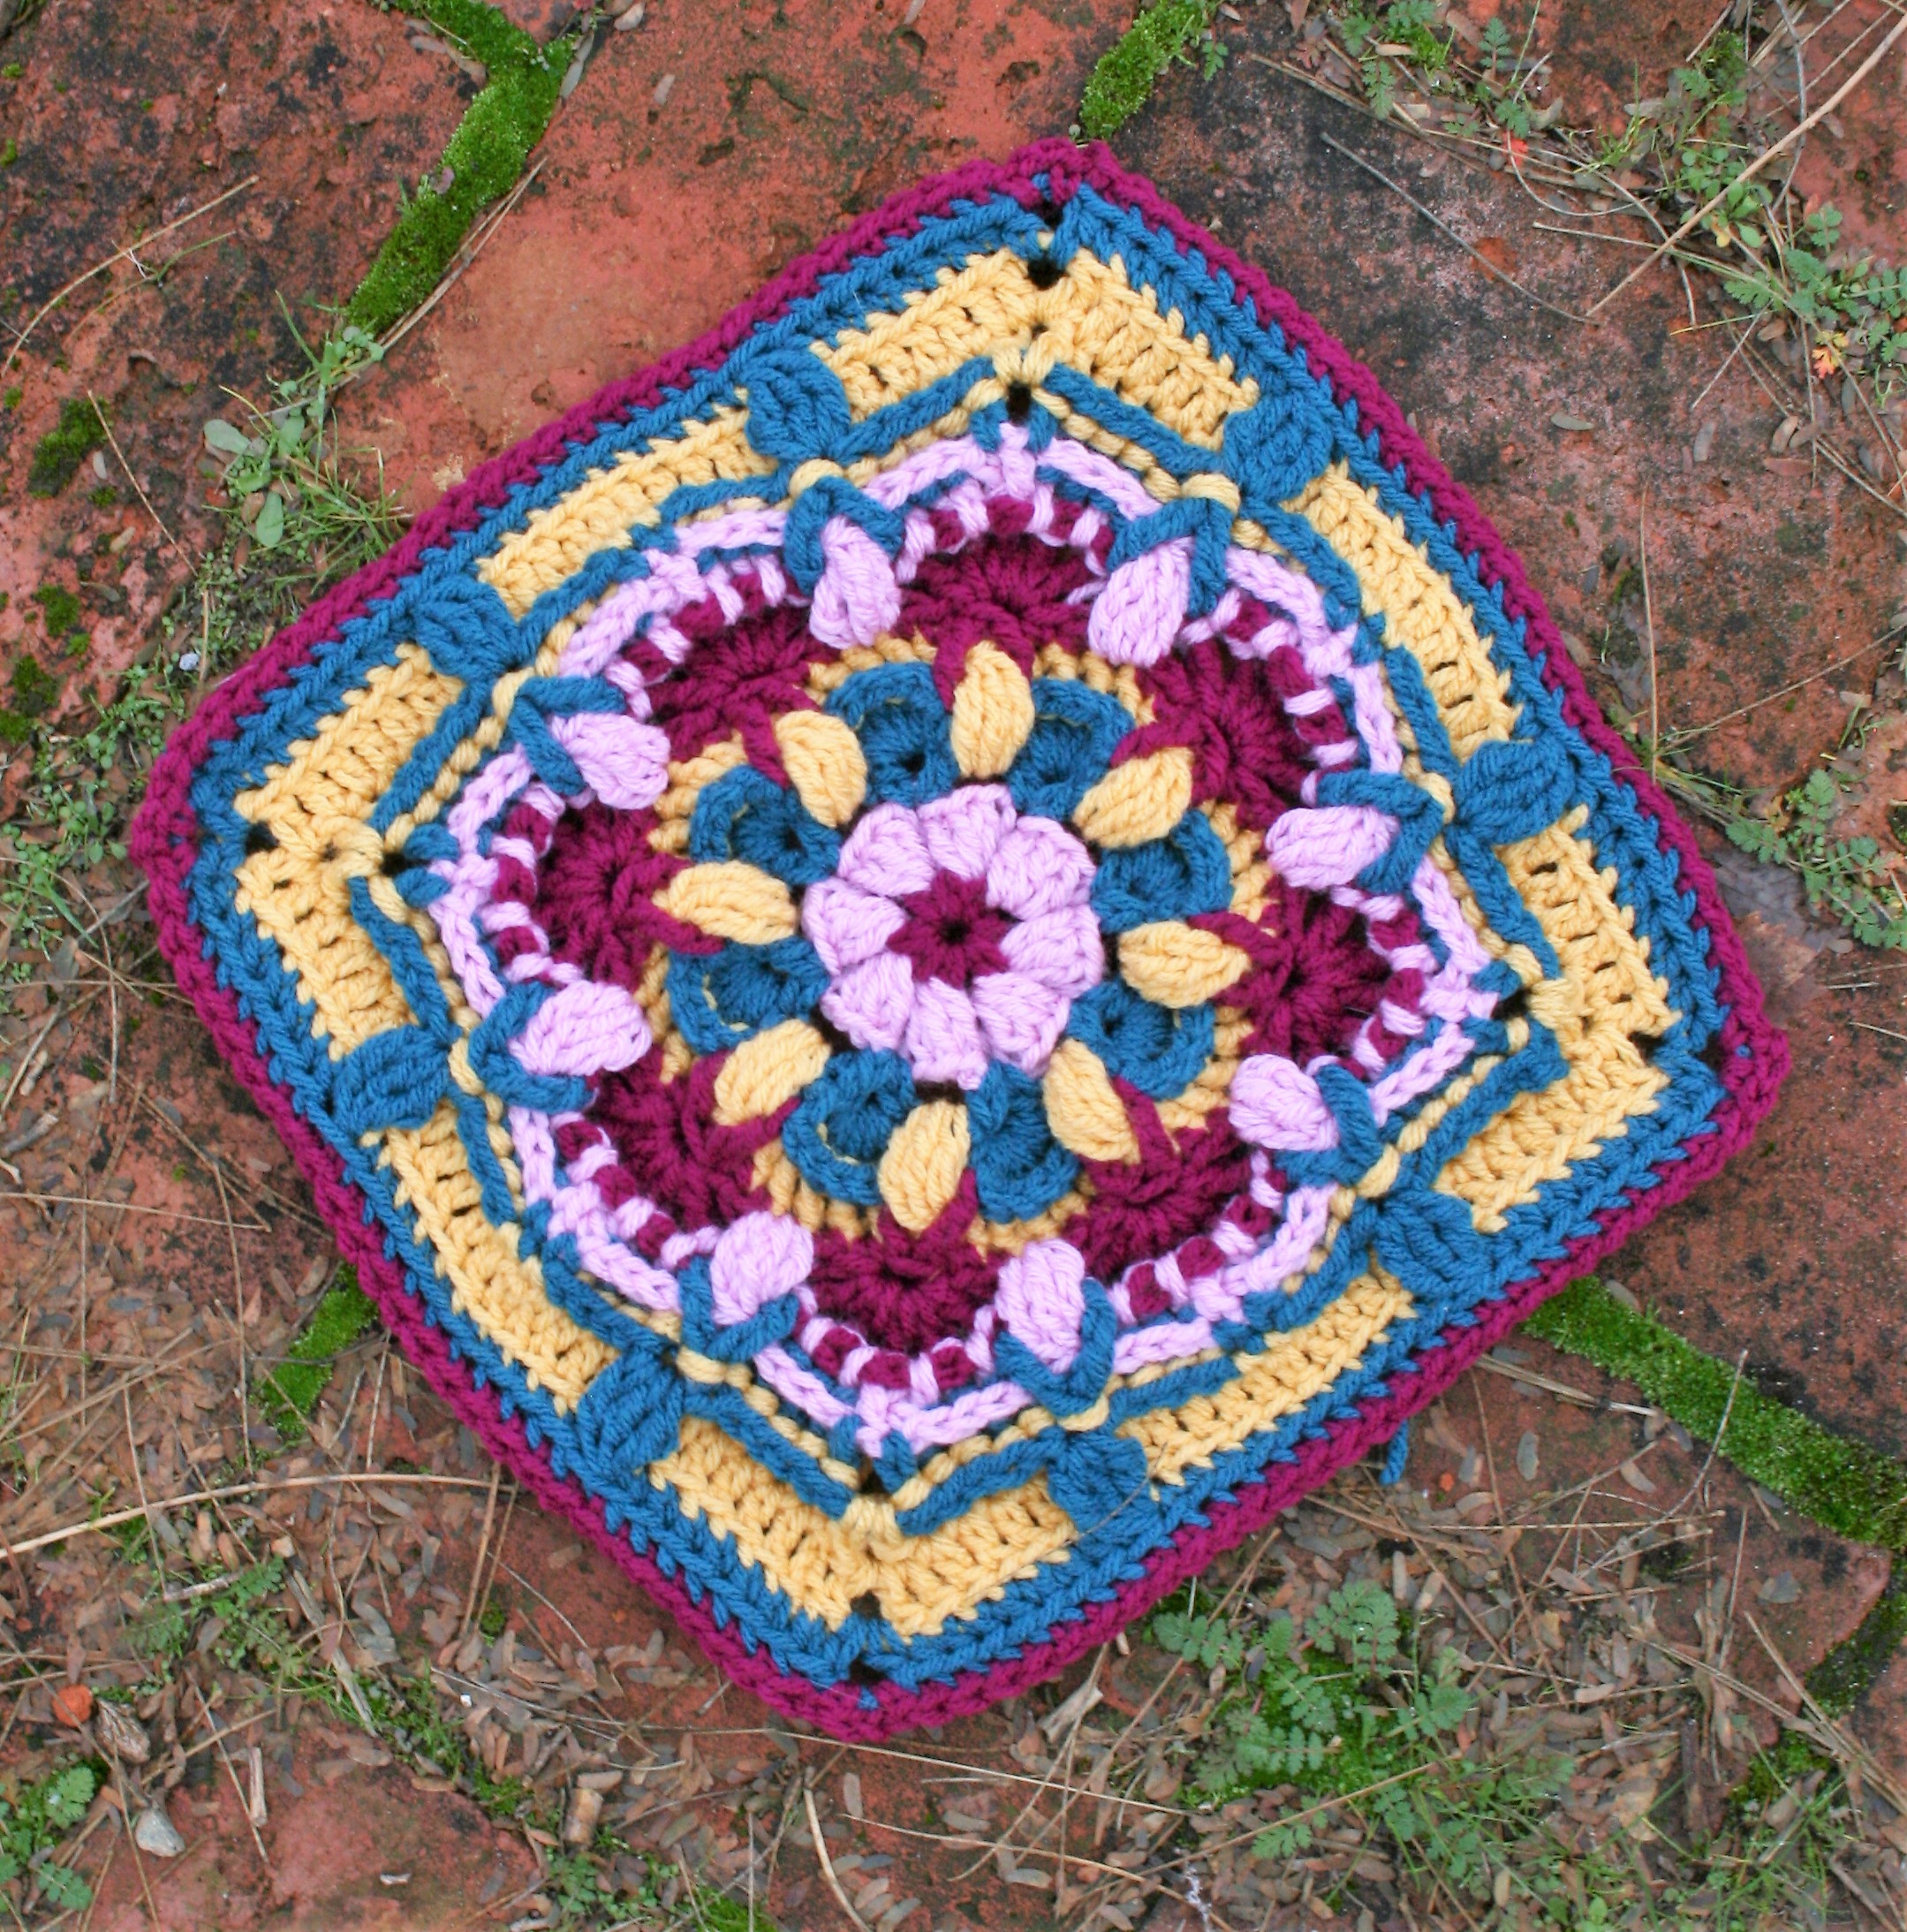
I am honored to be part of the Moogly CAL 2026, and thank you for joining along. The Radiate Champion block is in recognition of all the people that have helped champion me in the last year.
I have been fortunate enough to find many friends in the classes I teach. Friends from various walks of life that encourage and support one another, myself included.
I hope that you reach out and find a “tribe” in your community. The tribe can take many forms and include people that upon first glance may not appear to fit into your life, but if you give them an opportunity you might just discover that they are your biggest cheerleader.
If you want to join my tribe, consider joining my newsletter to keep up on my happenings, or join me in person at one of my various classes around the country and world.
Also, don’t miss any of the Moogly CAL 2026 blocks, they can all be found here.
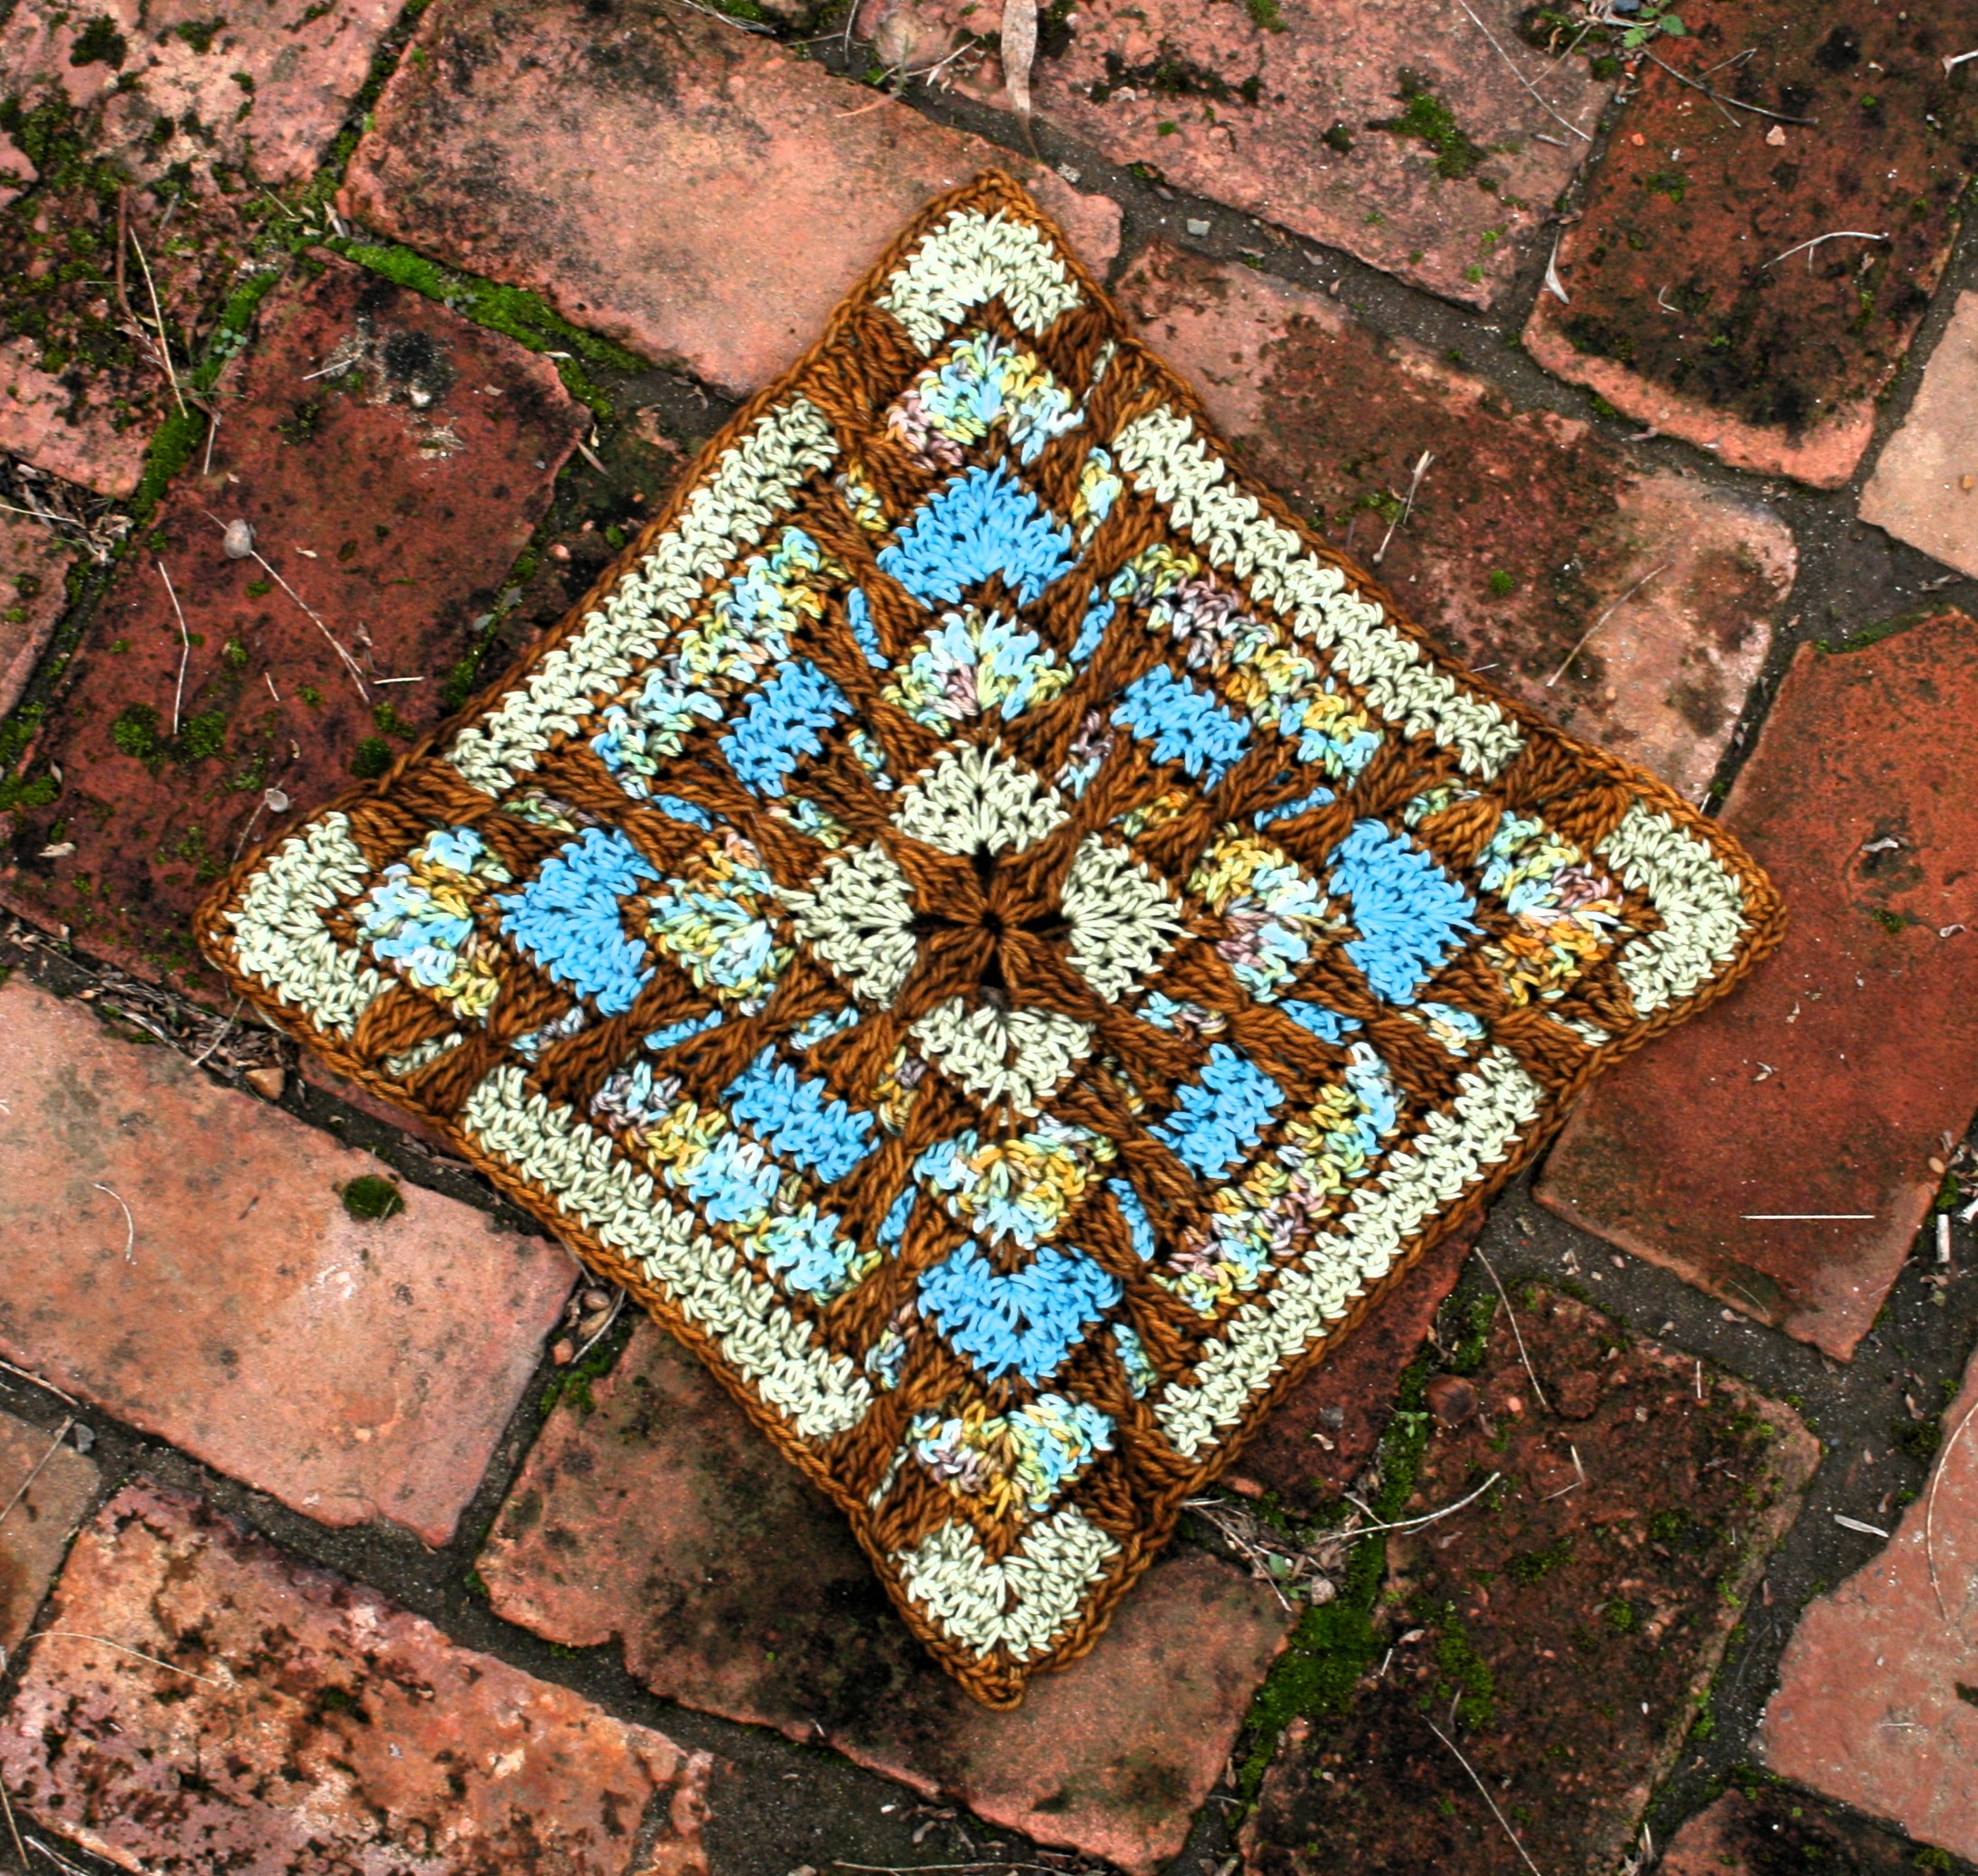
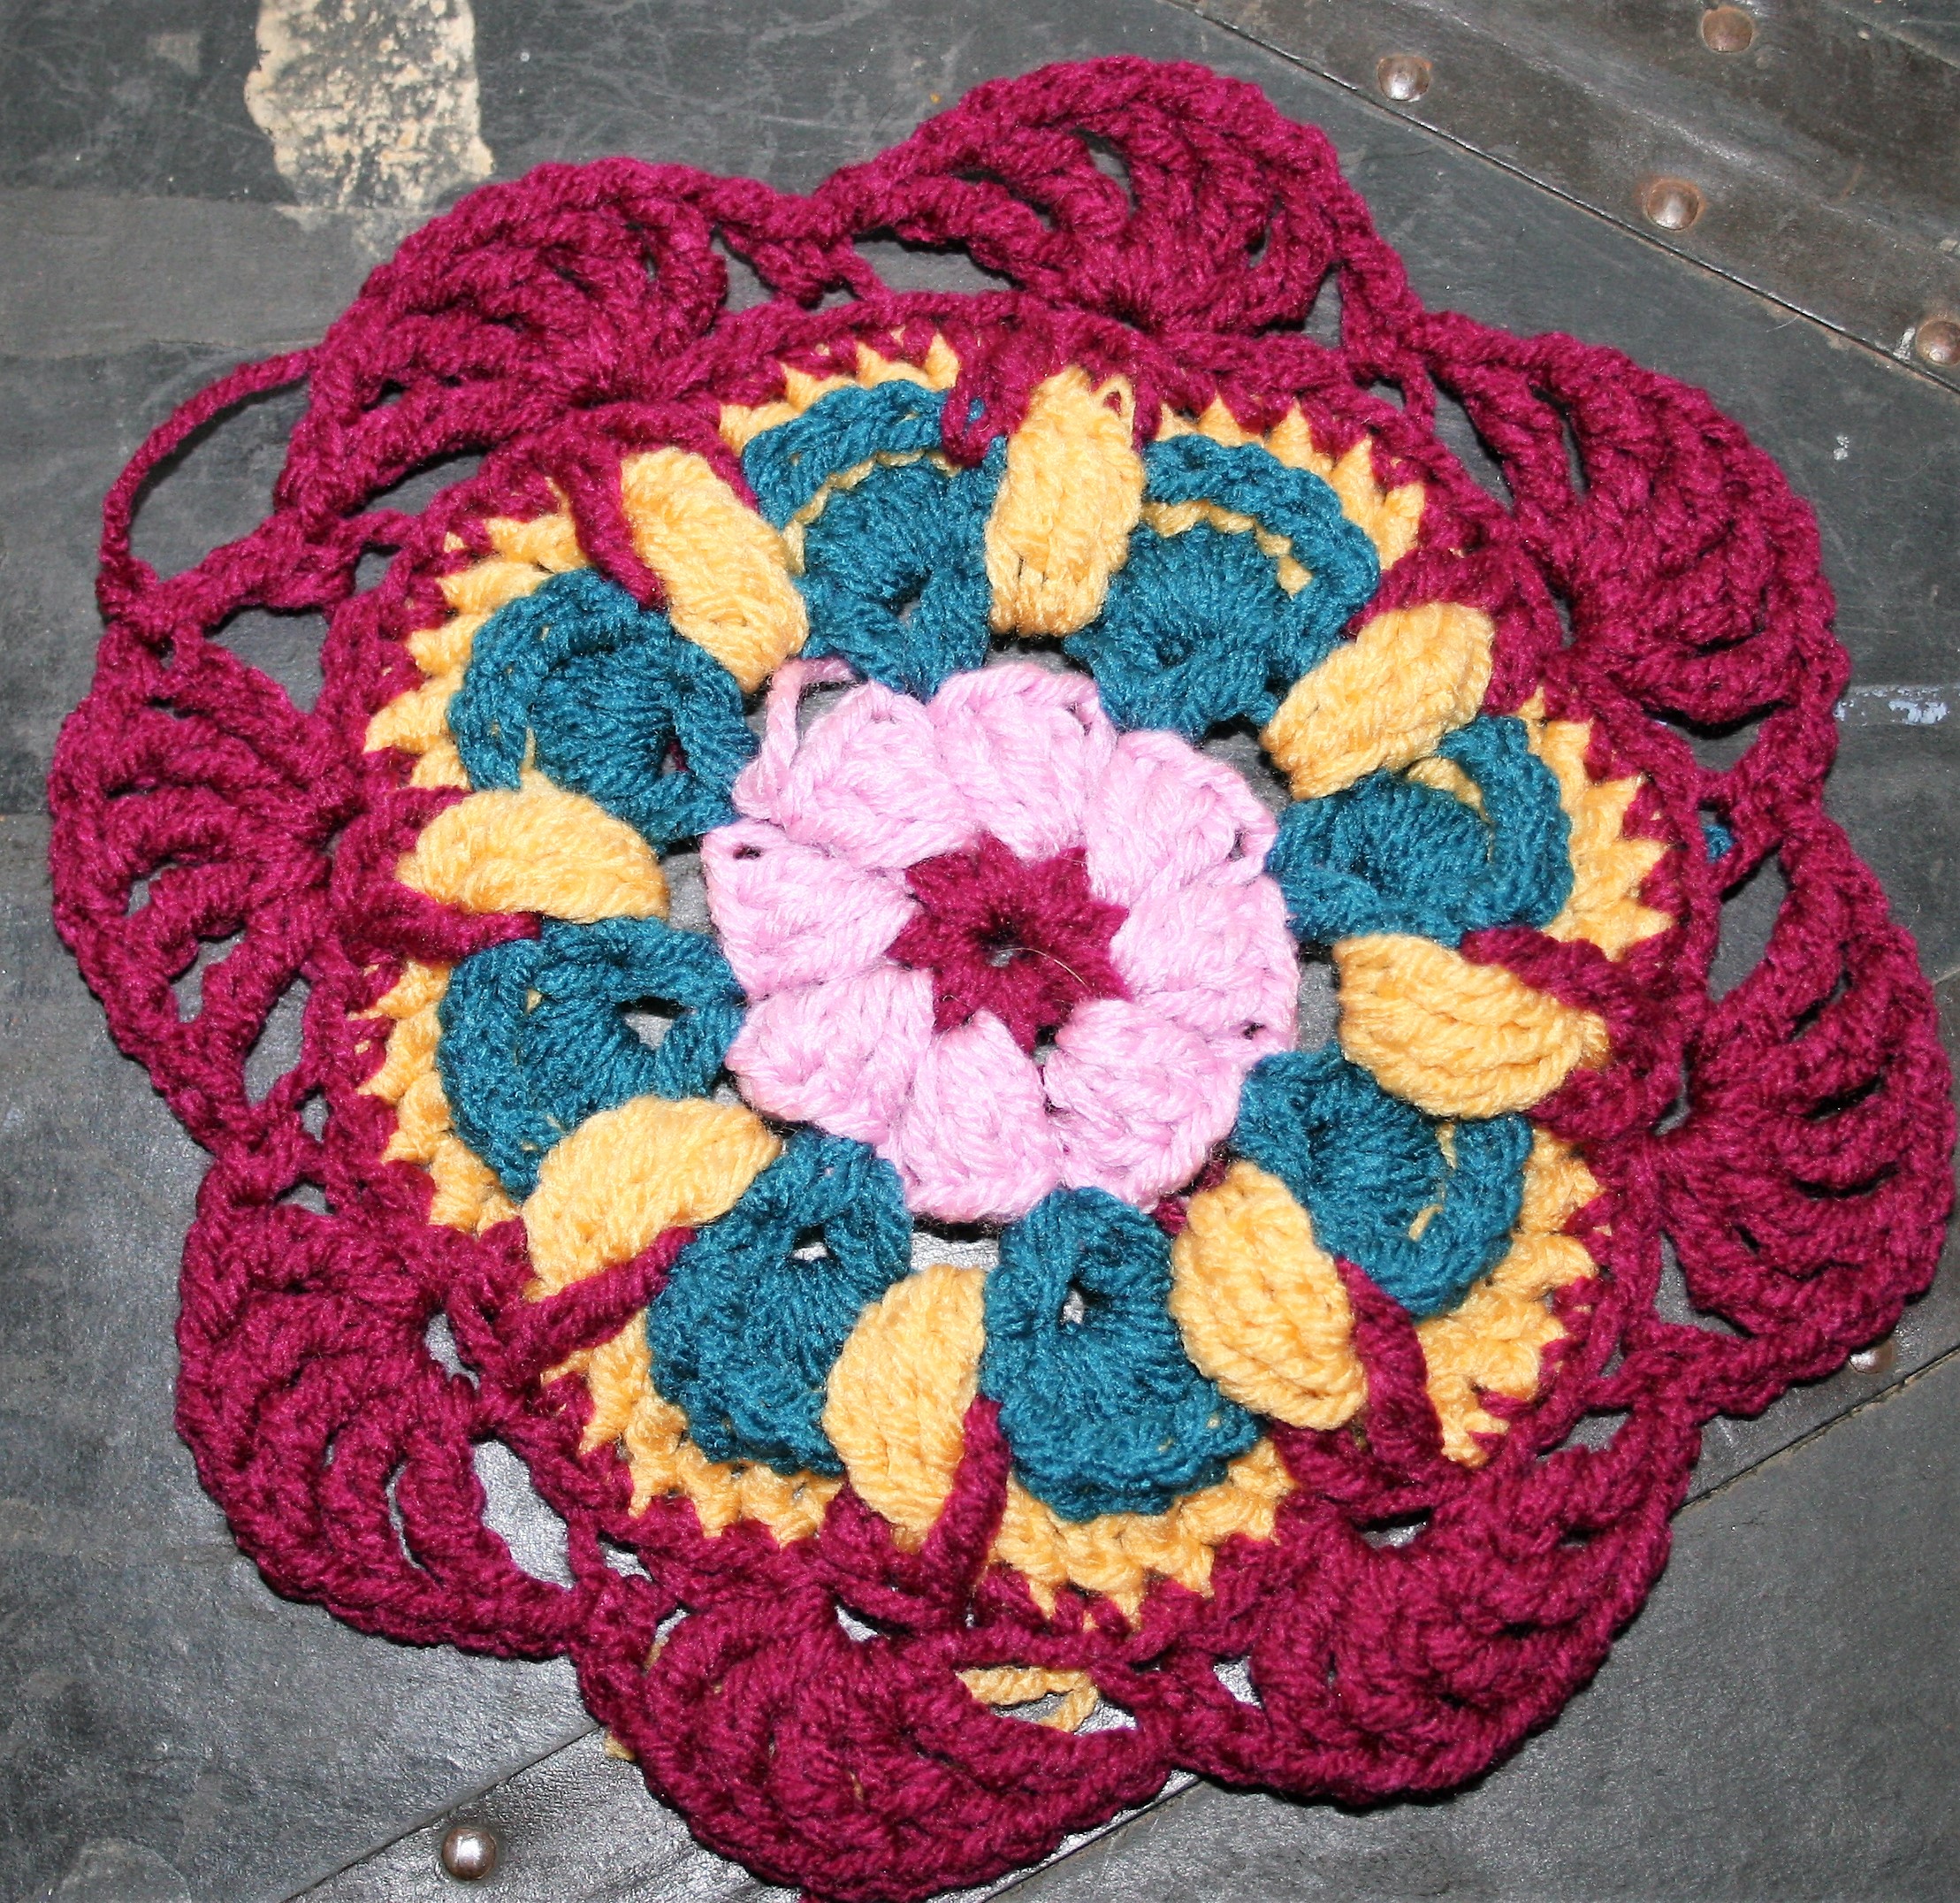
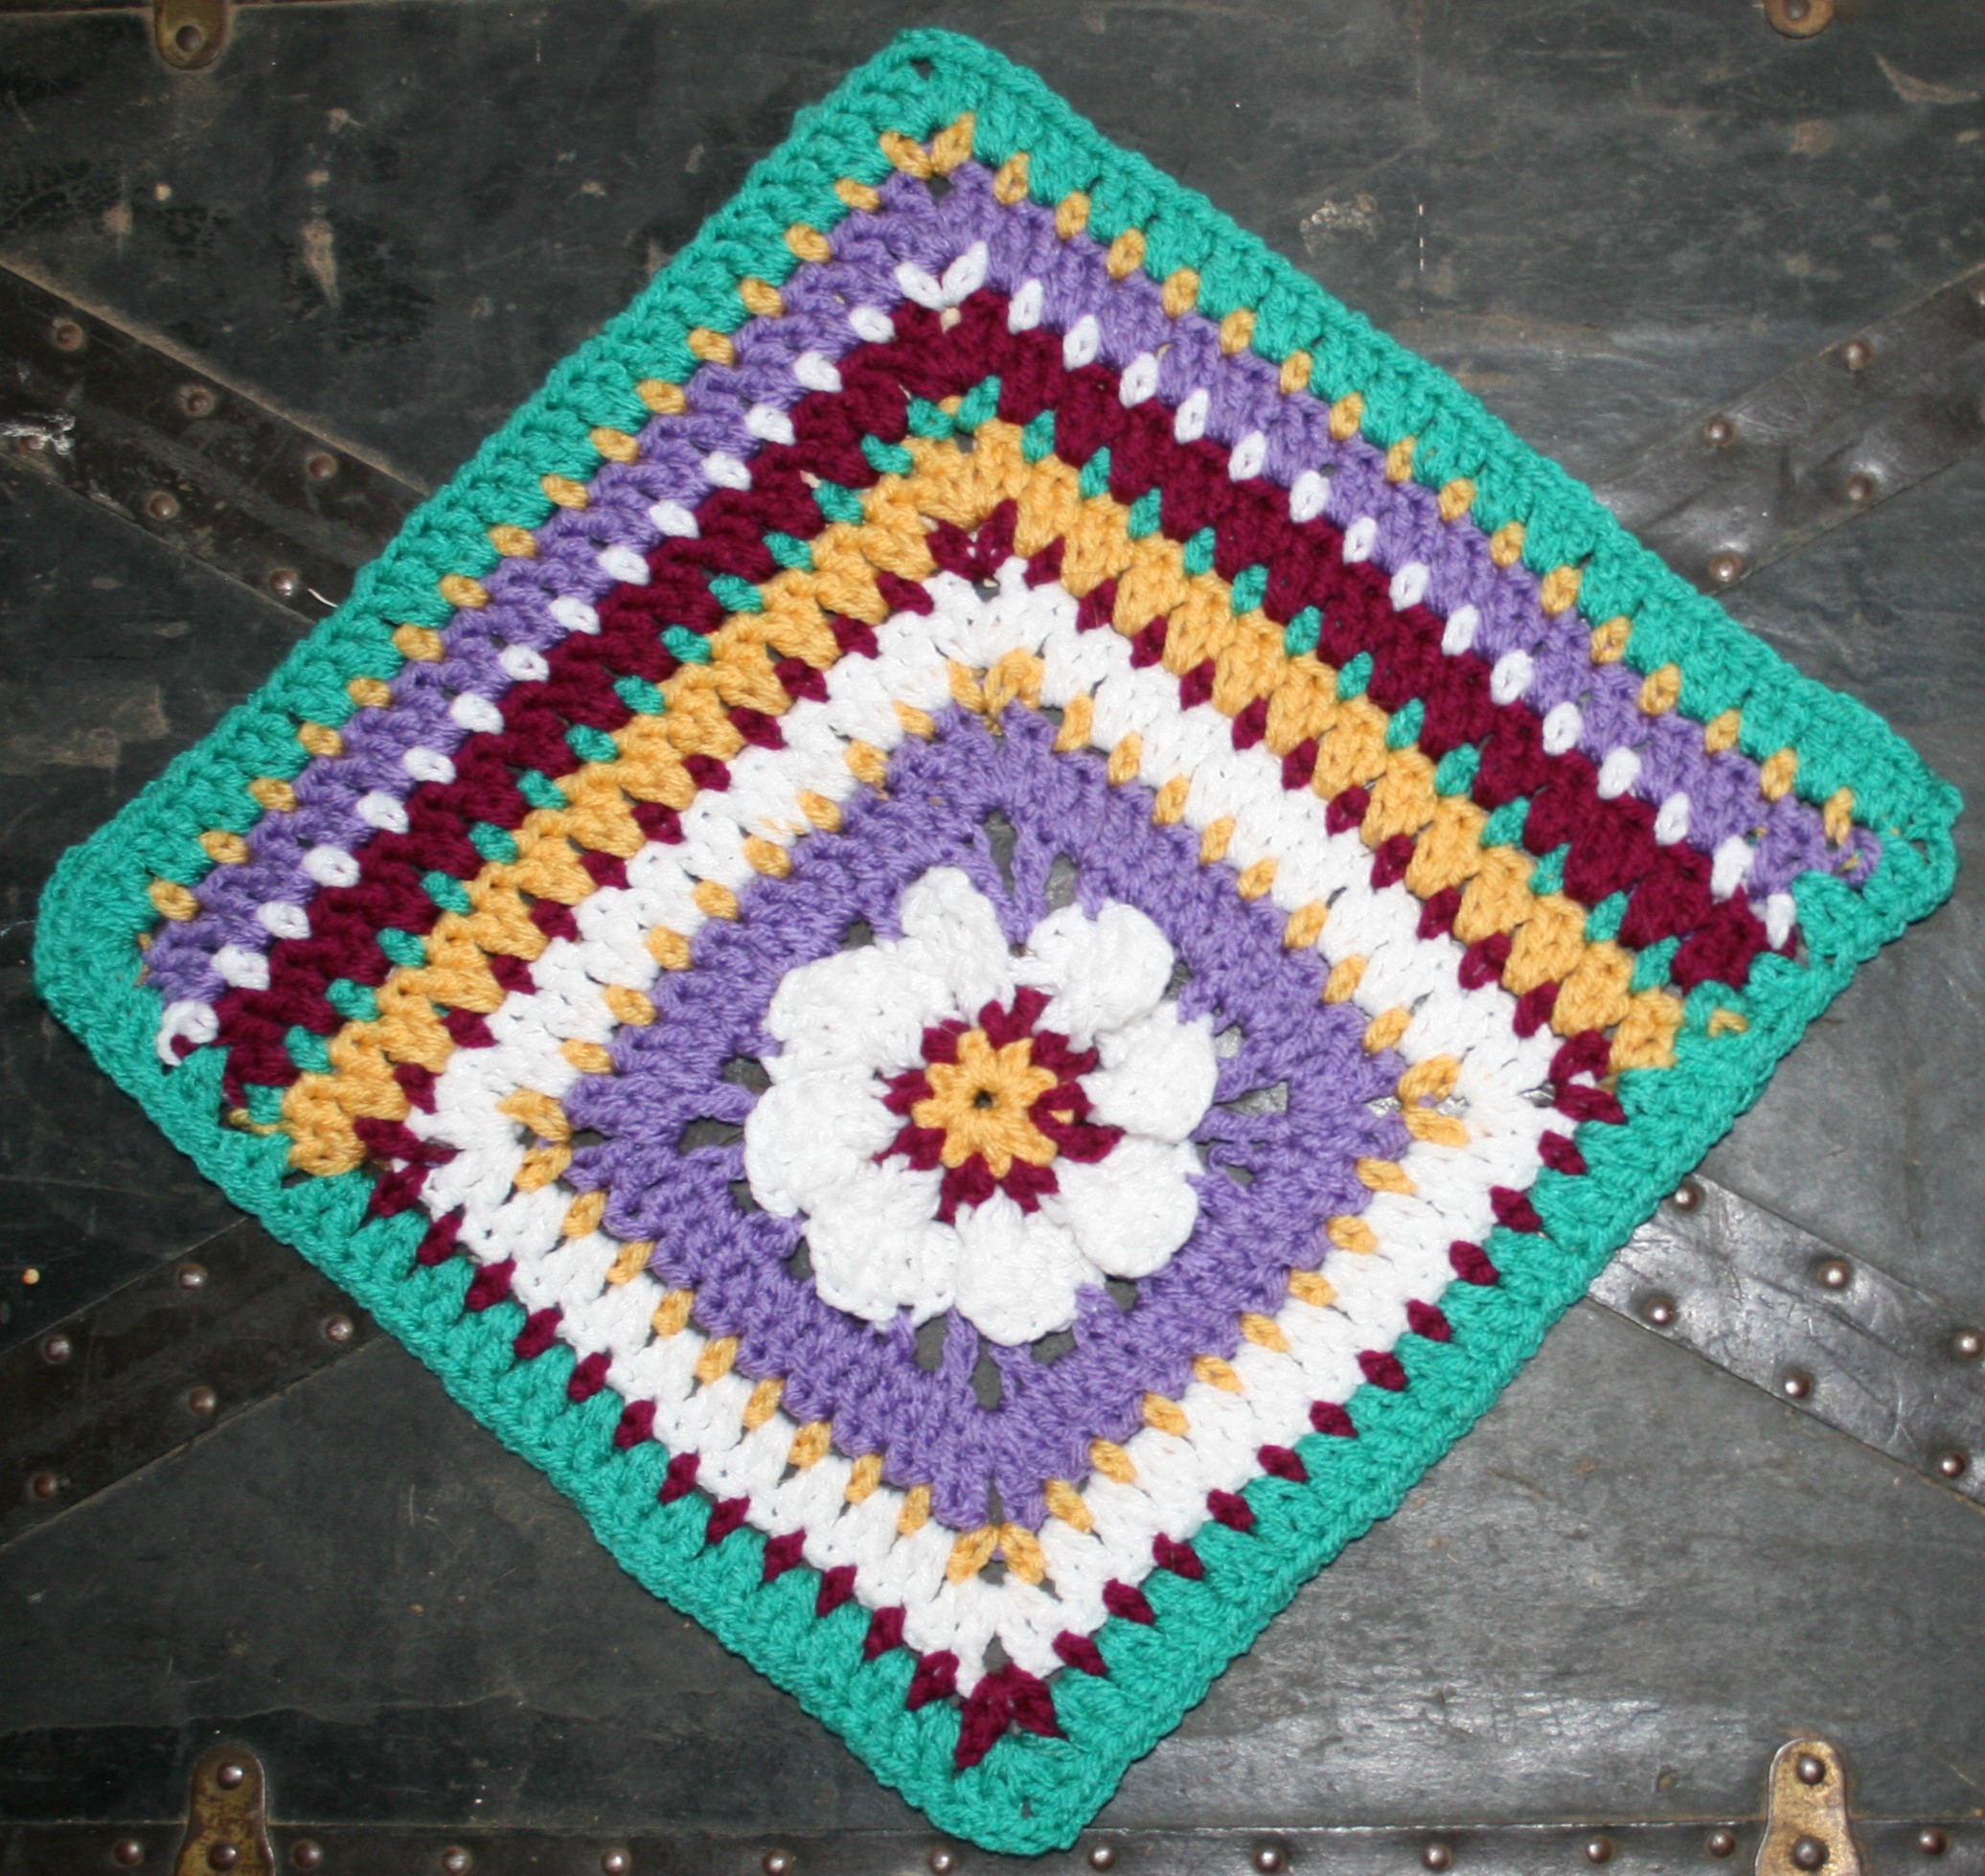
Radiate Champion Block
- Madeline Tosh Vintage medium weight 100% superwash merino yarn colors: (A) Carbon Dating, (B) Thyme, (C) Schnitzelfaced, (D) Translation
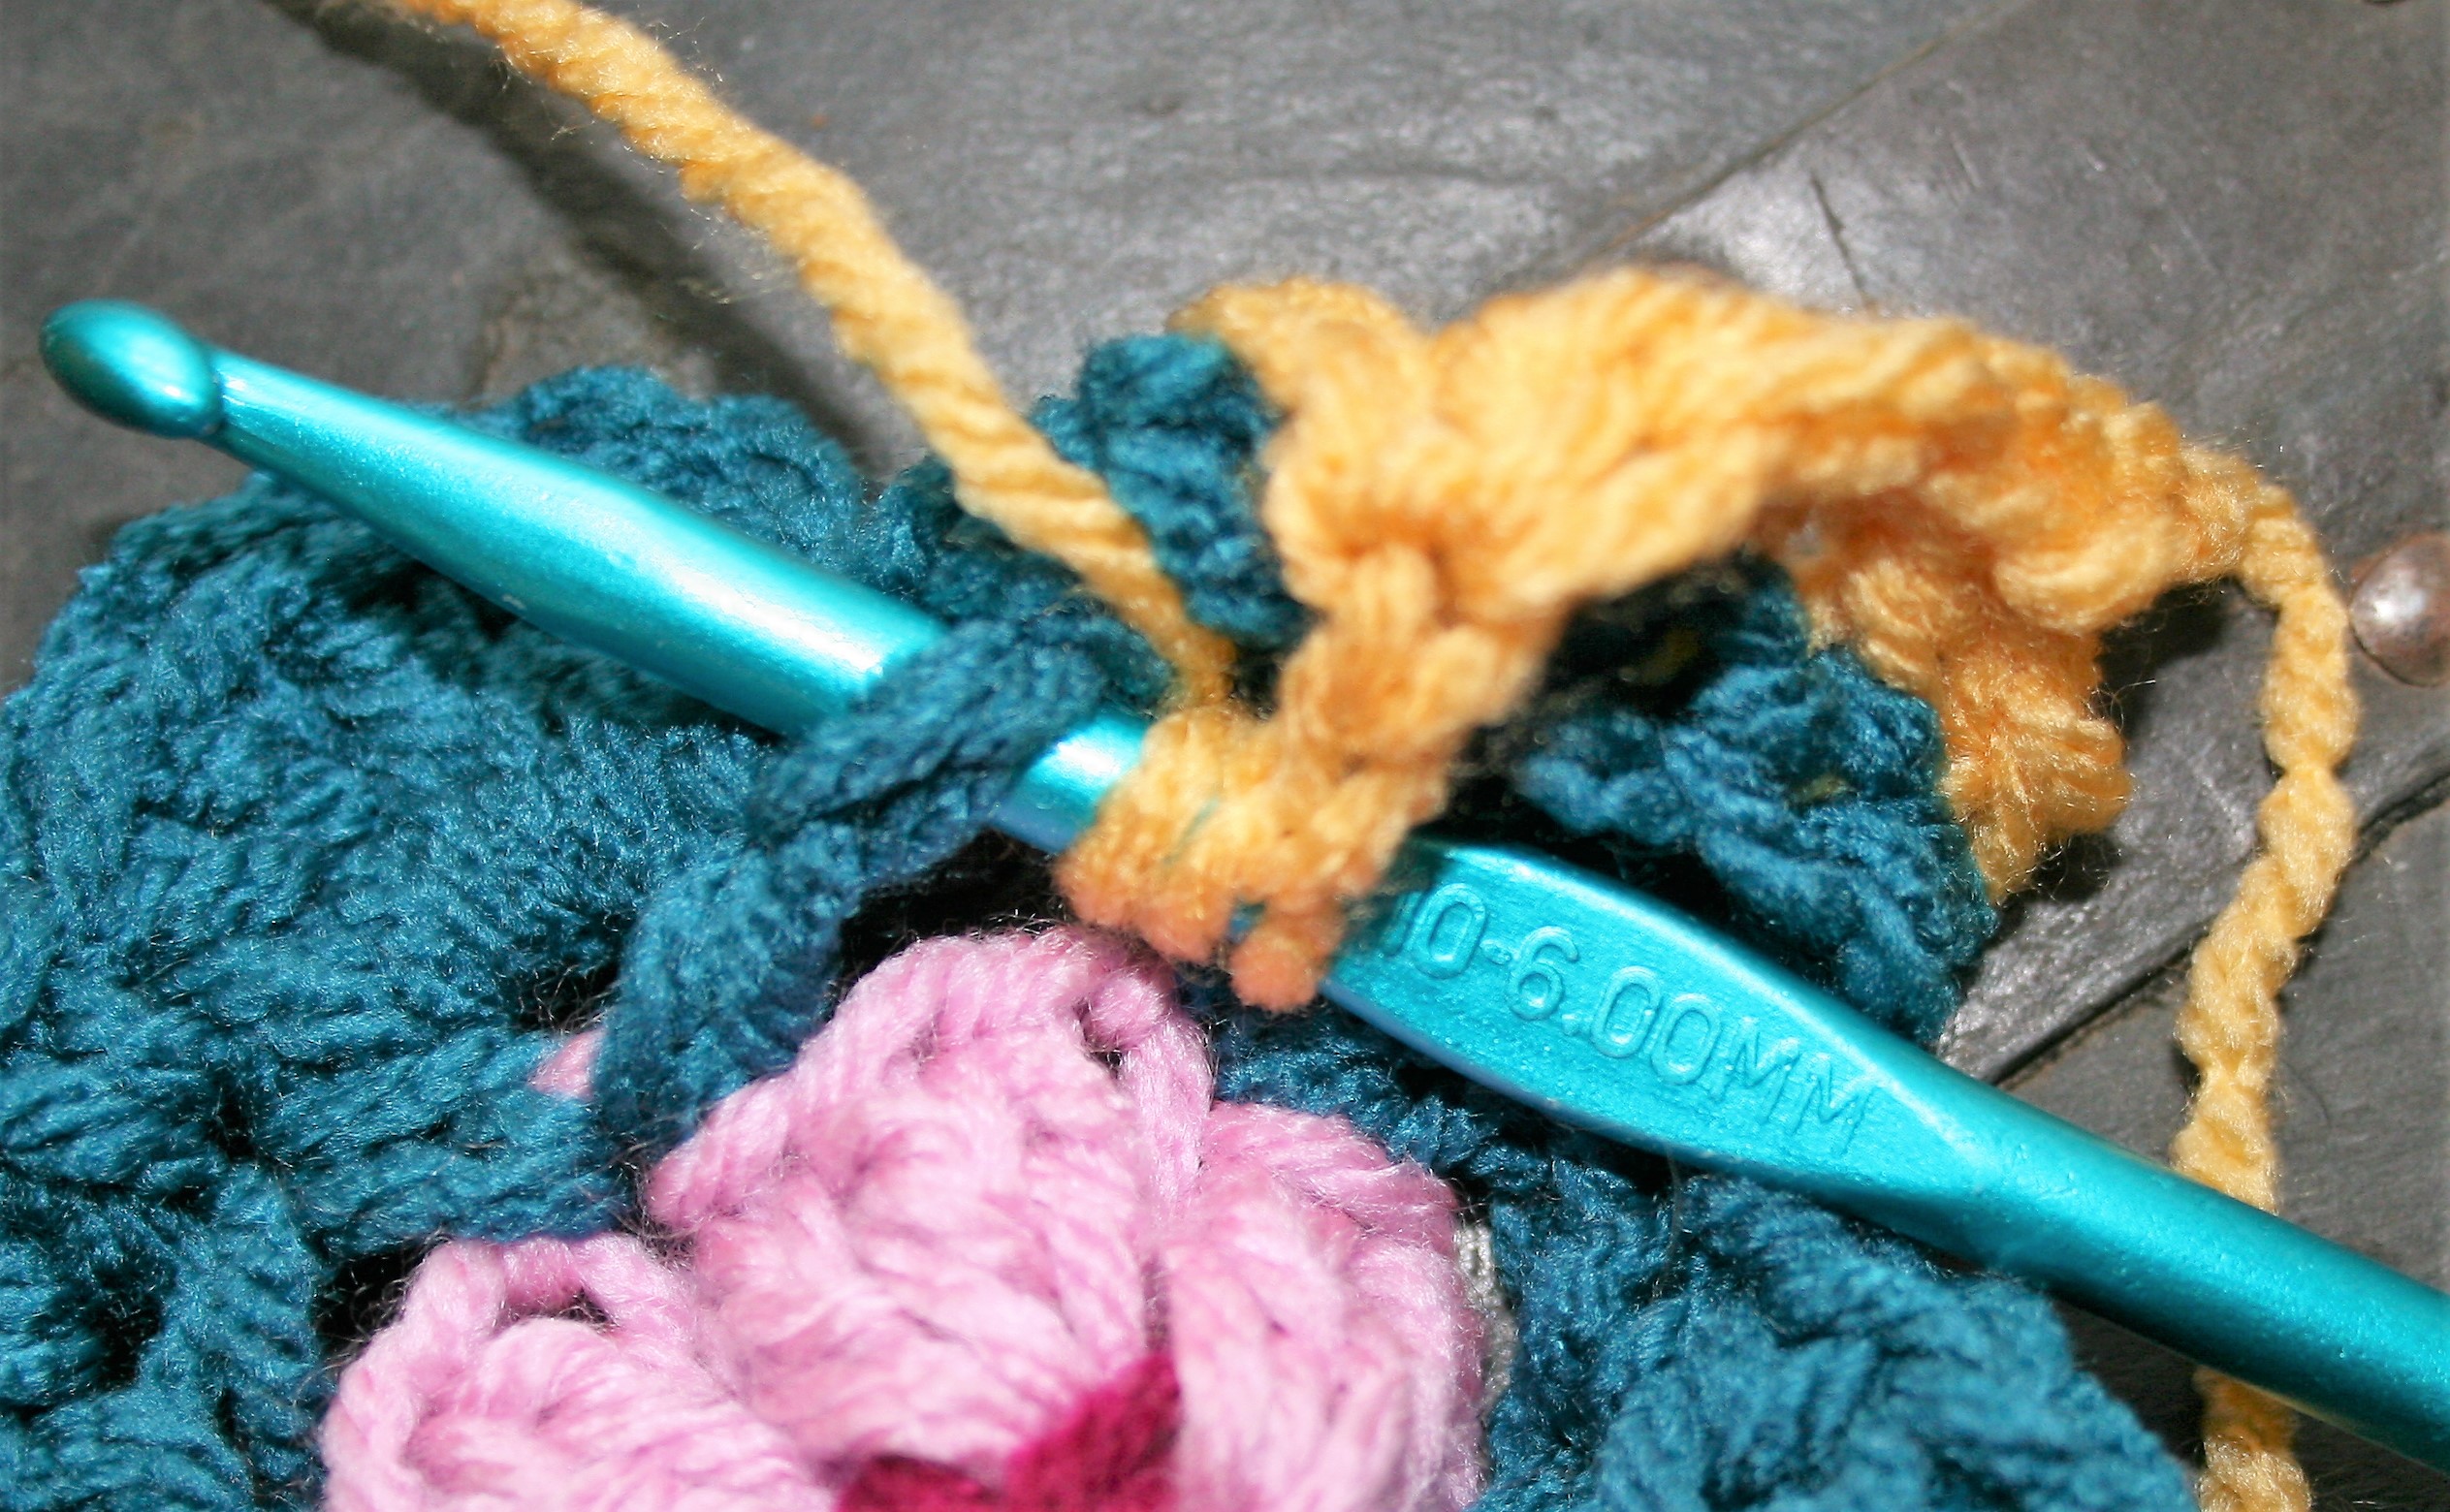
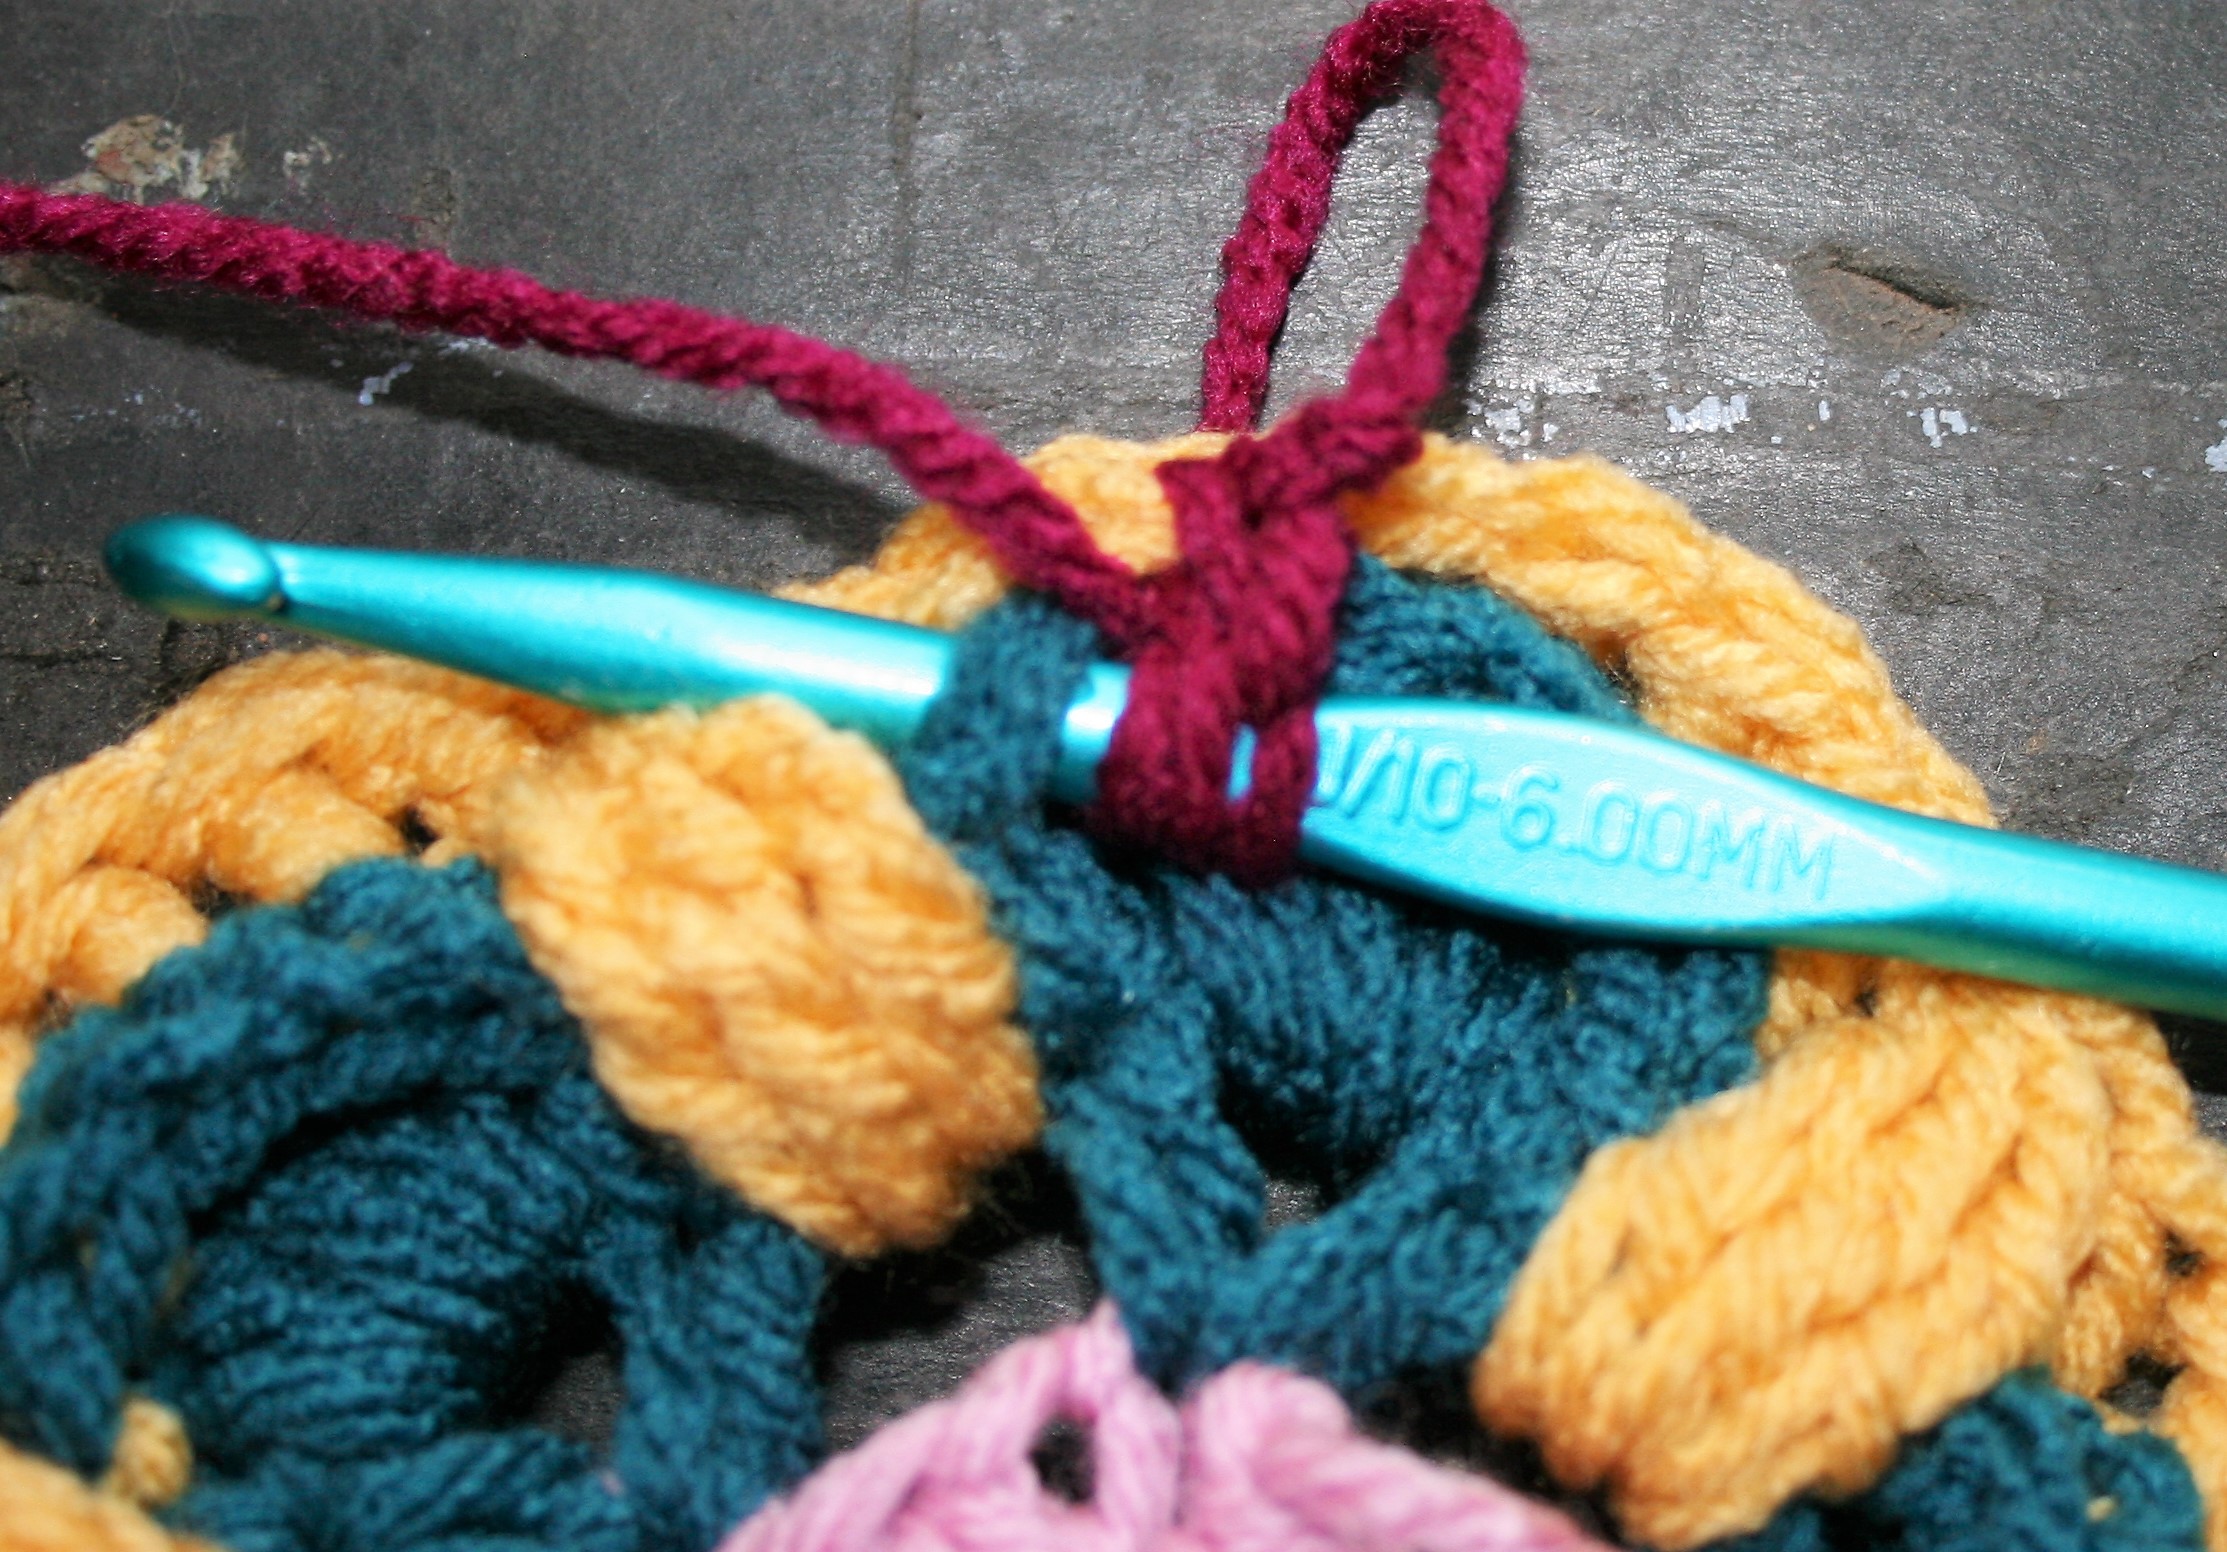
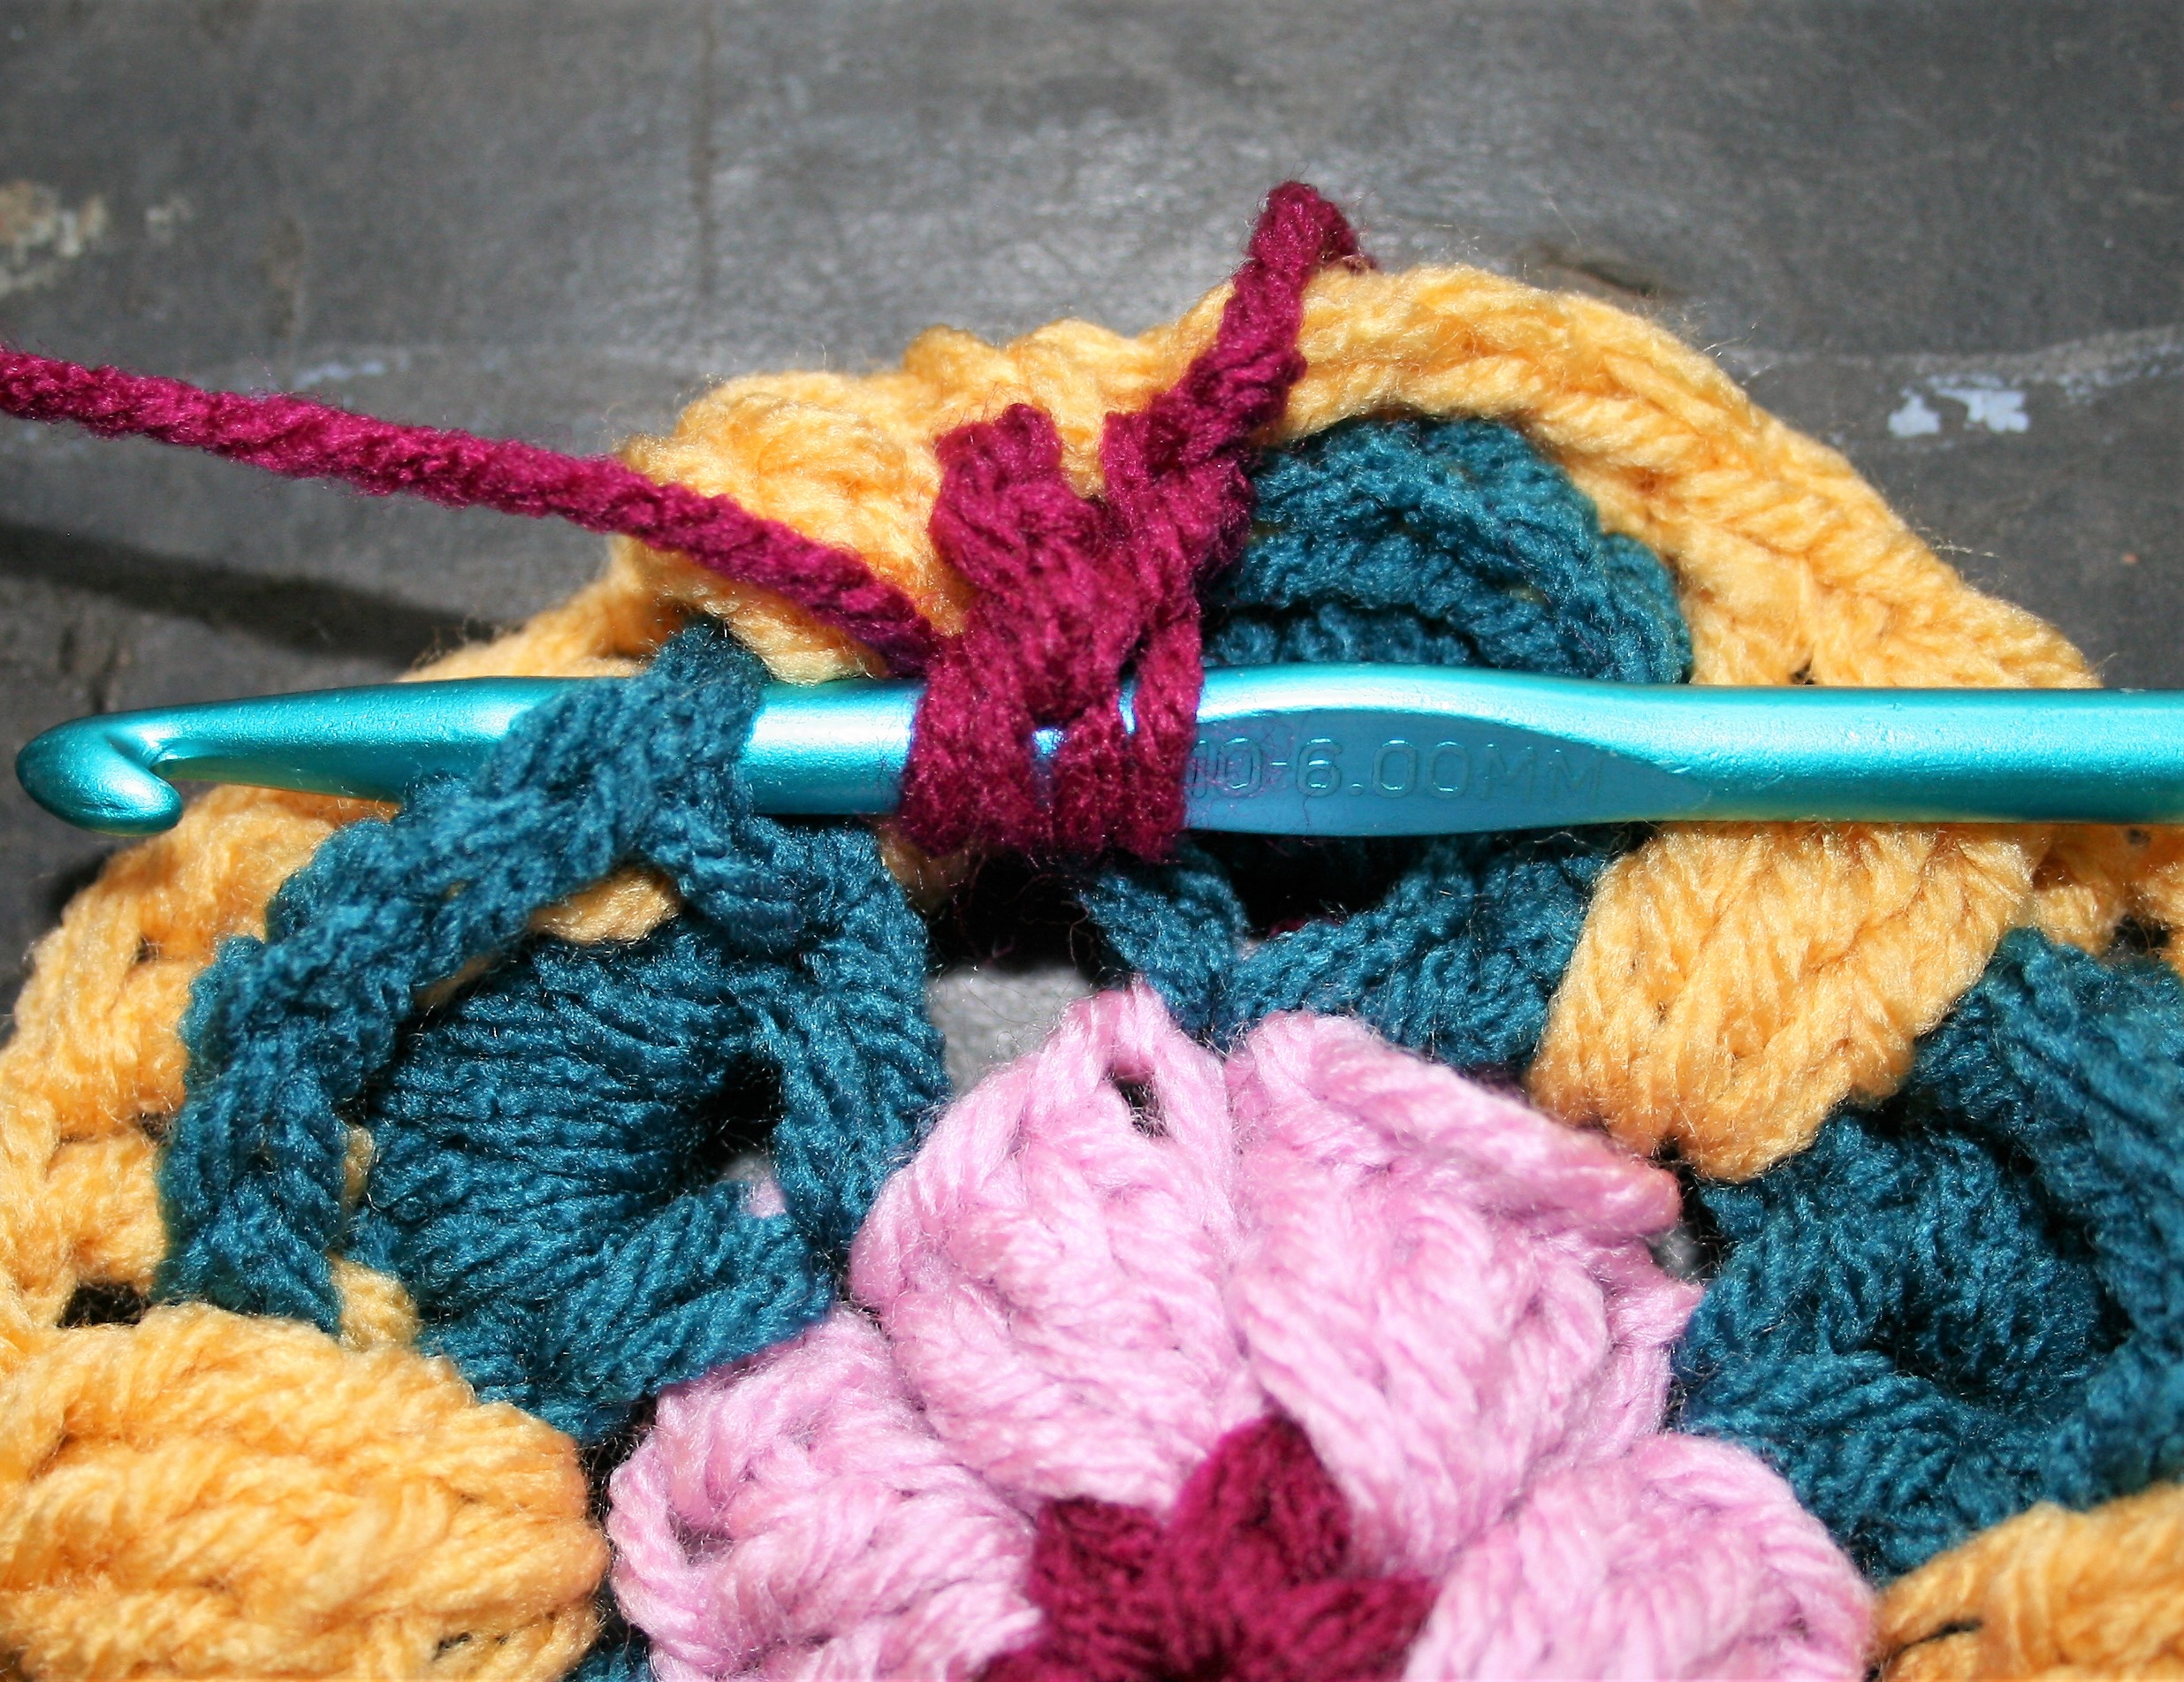
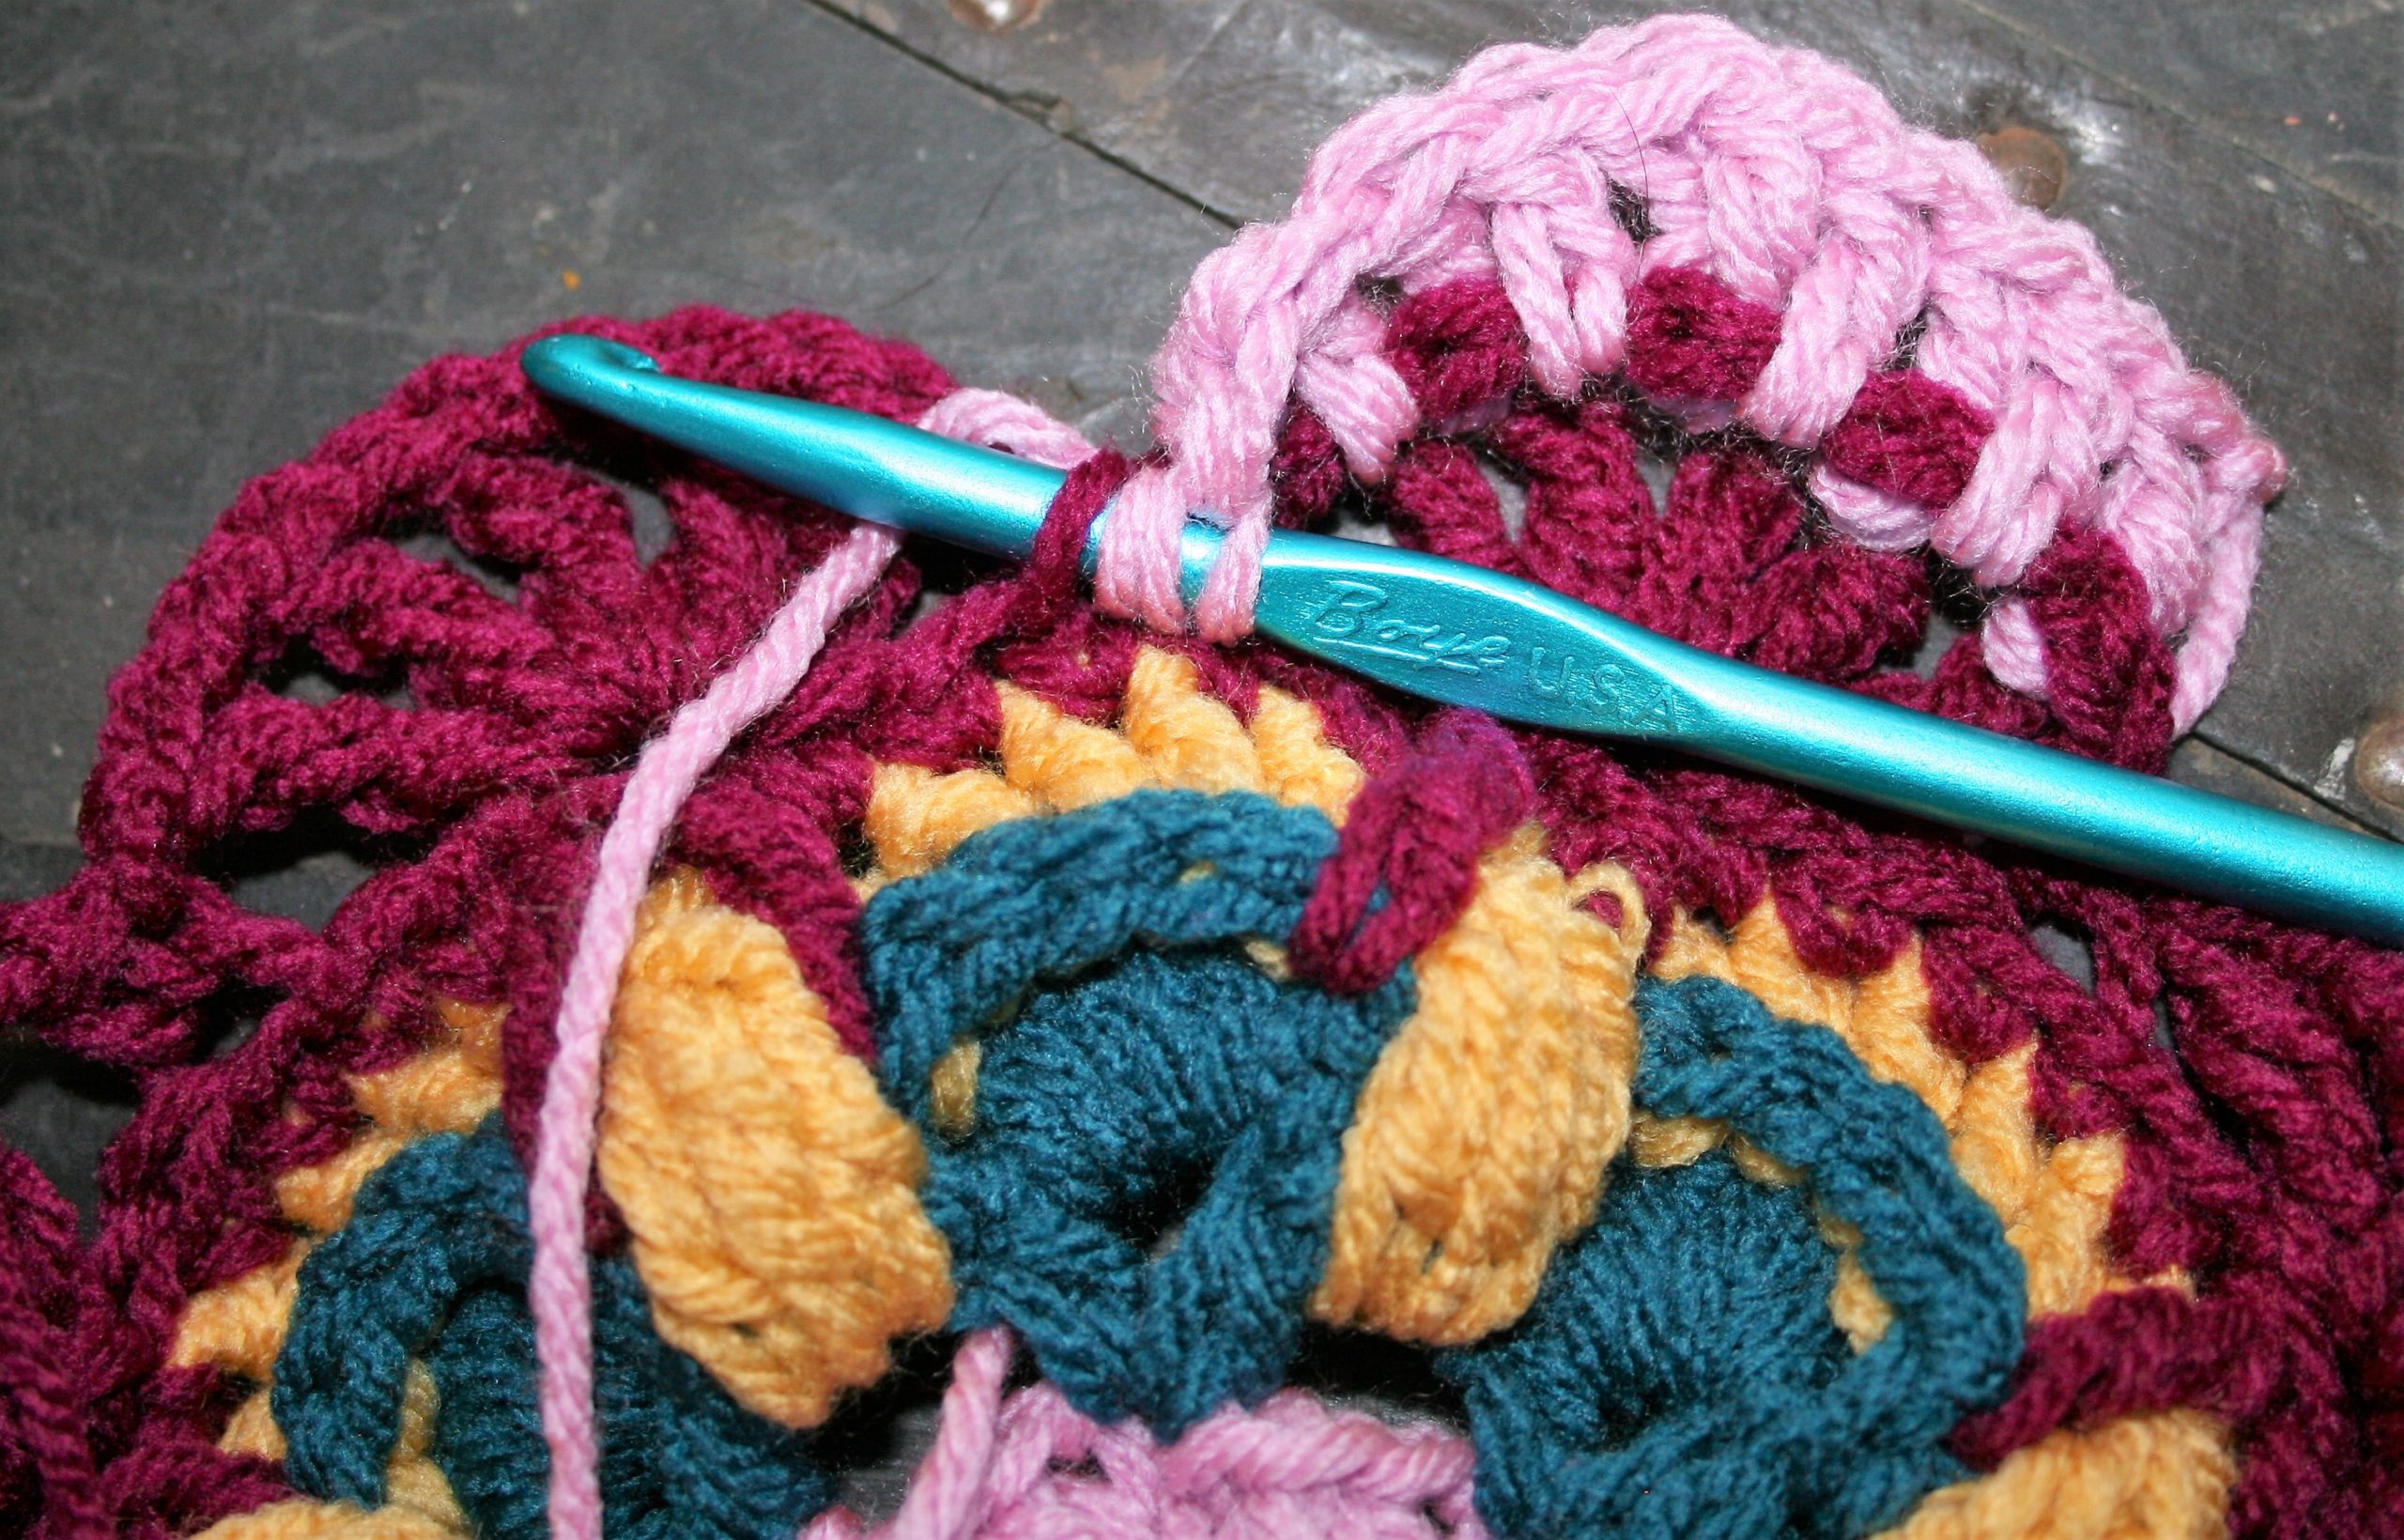
- J/10/6.mm crochet hook
Abbreviations
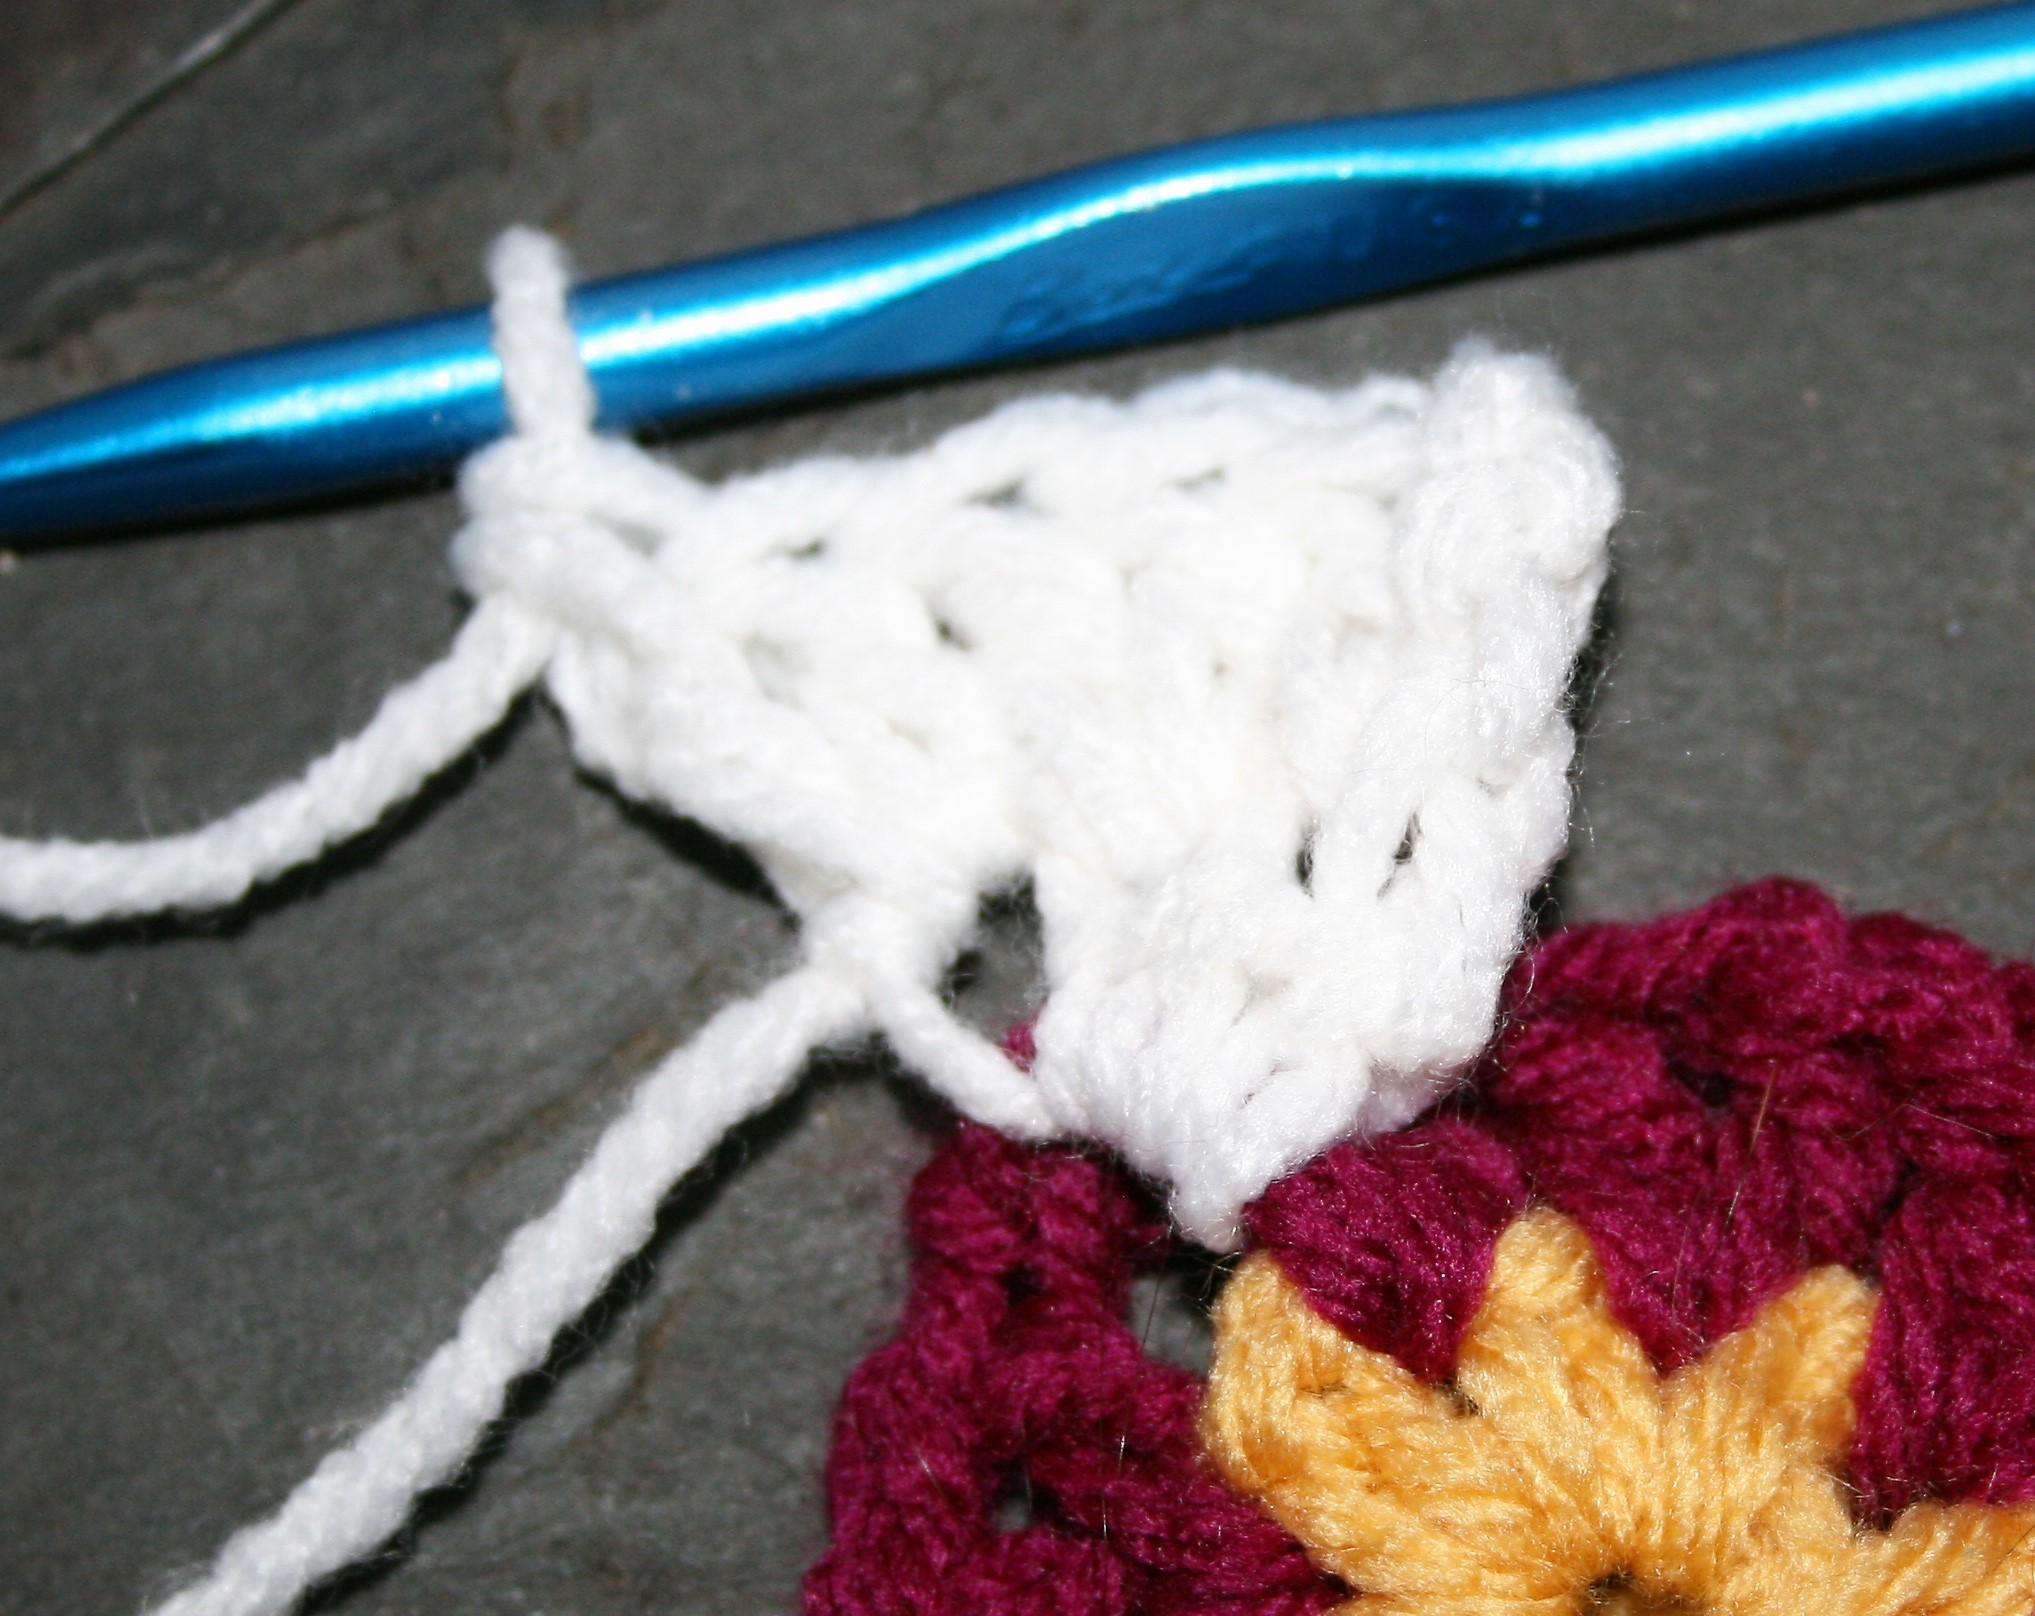
Ssc= Standing single crochet
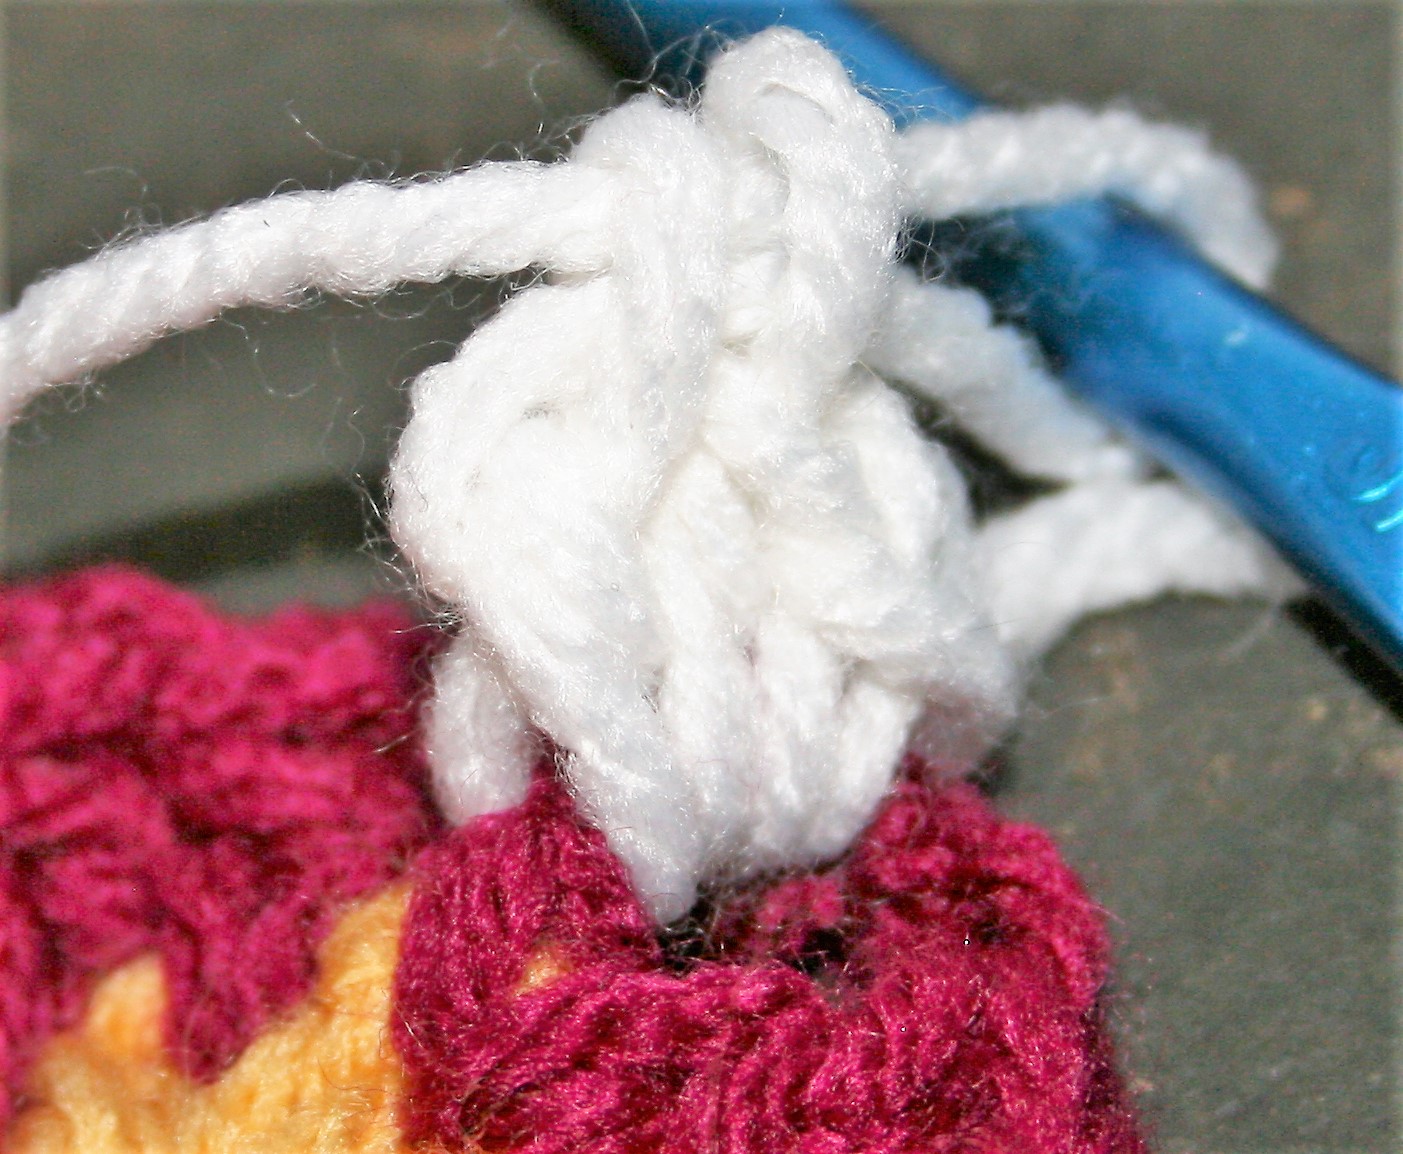
Cluster (CL)- YO twice, insert hook as if a Front post around first indicated st, YO, pull up a loop, YO, pull through 2 loops (3 loops on hook), YO twice, insert hook as if Front post around next indicated st, YO, pull up a loop, YO, pull through 2 loops (5 loops on hook), YO twice, insert hook as if Front Post around last indicated st, YO, pull up a loop, YO, pull through 2 loops (7 loops on hook), YO, pull through 6 loops, YO, pull through last 2 loops.
Notes
Not every row is turned, however, there is a turn at the end or each rnd 2 and 3 rep.
All CL and FPtr sts are worked in color A, into rows that are color A.
The CL stitch can cause the fabric to not lay flat, blocking helps. If it seems like there is a lot of puckering, pull the YO loops up higher for the CL sts.
Let’s Get Started!
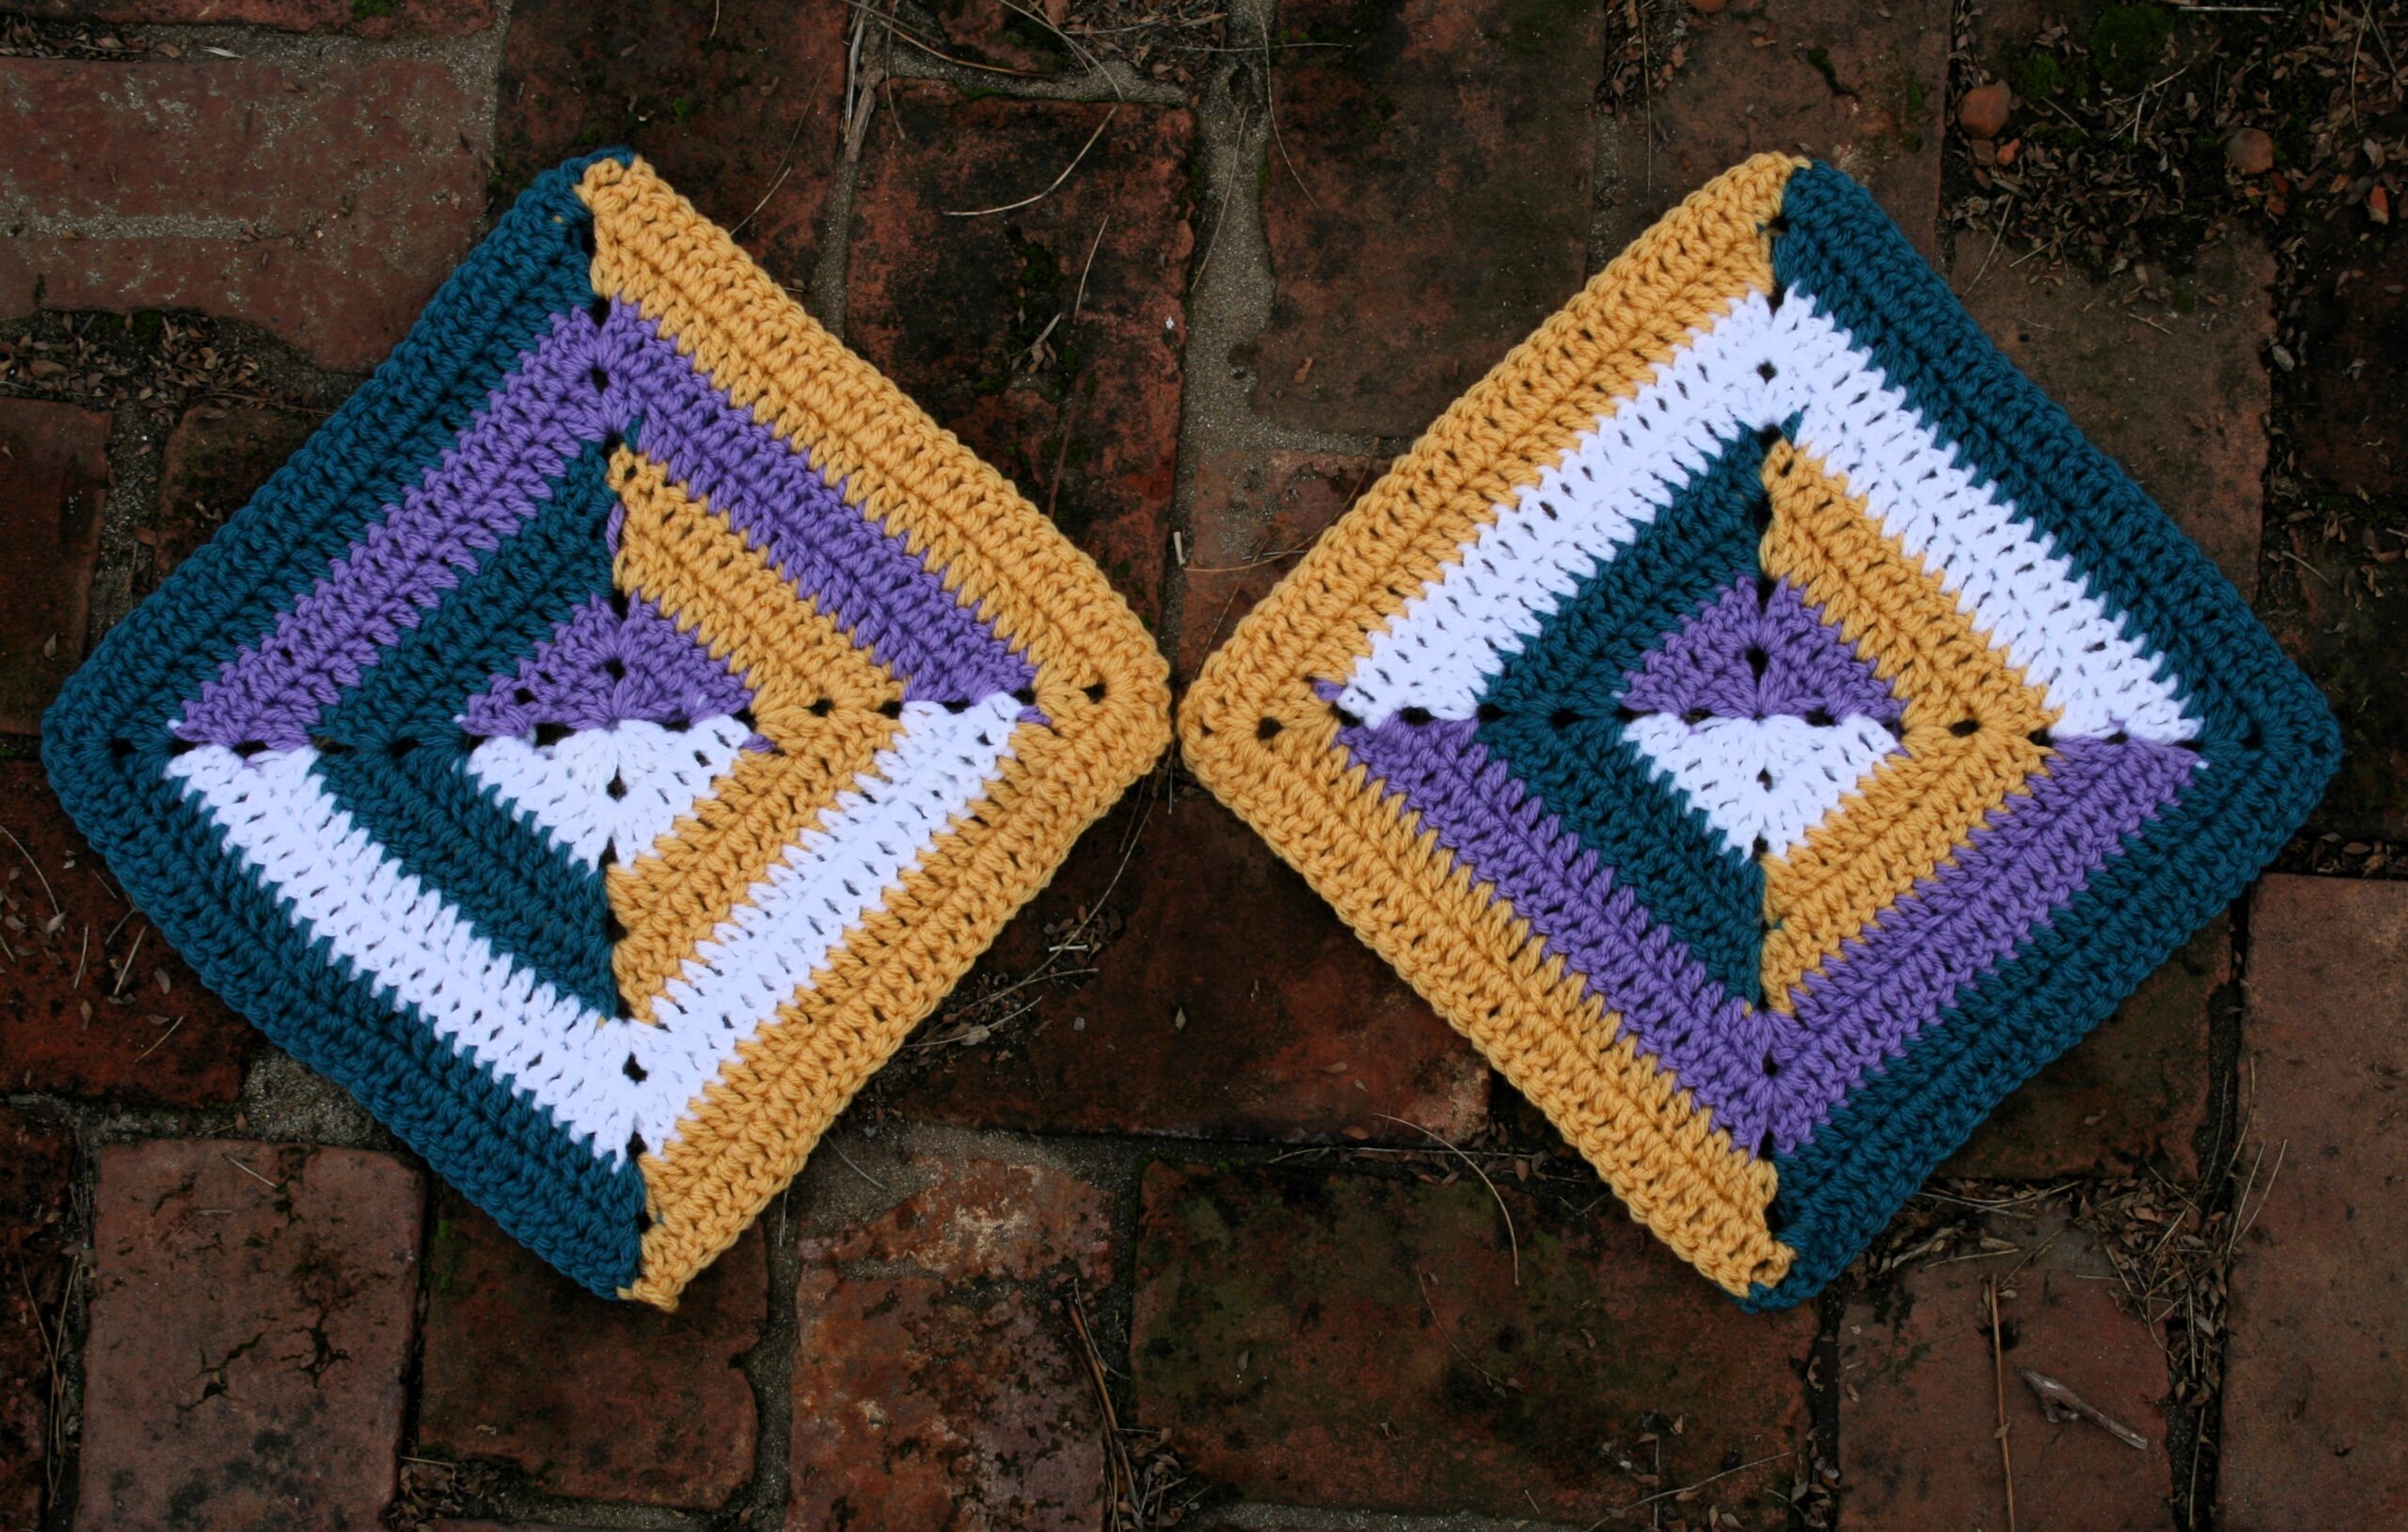
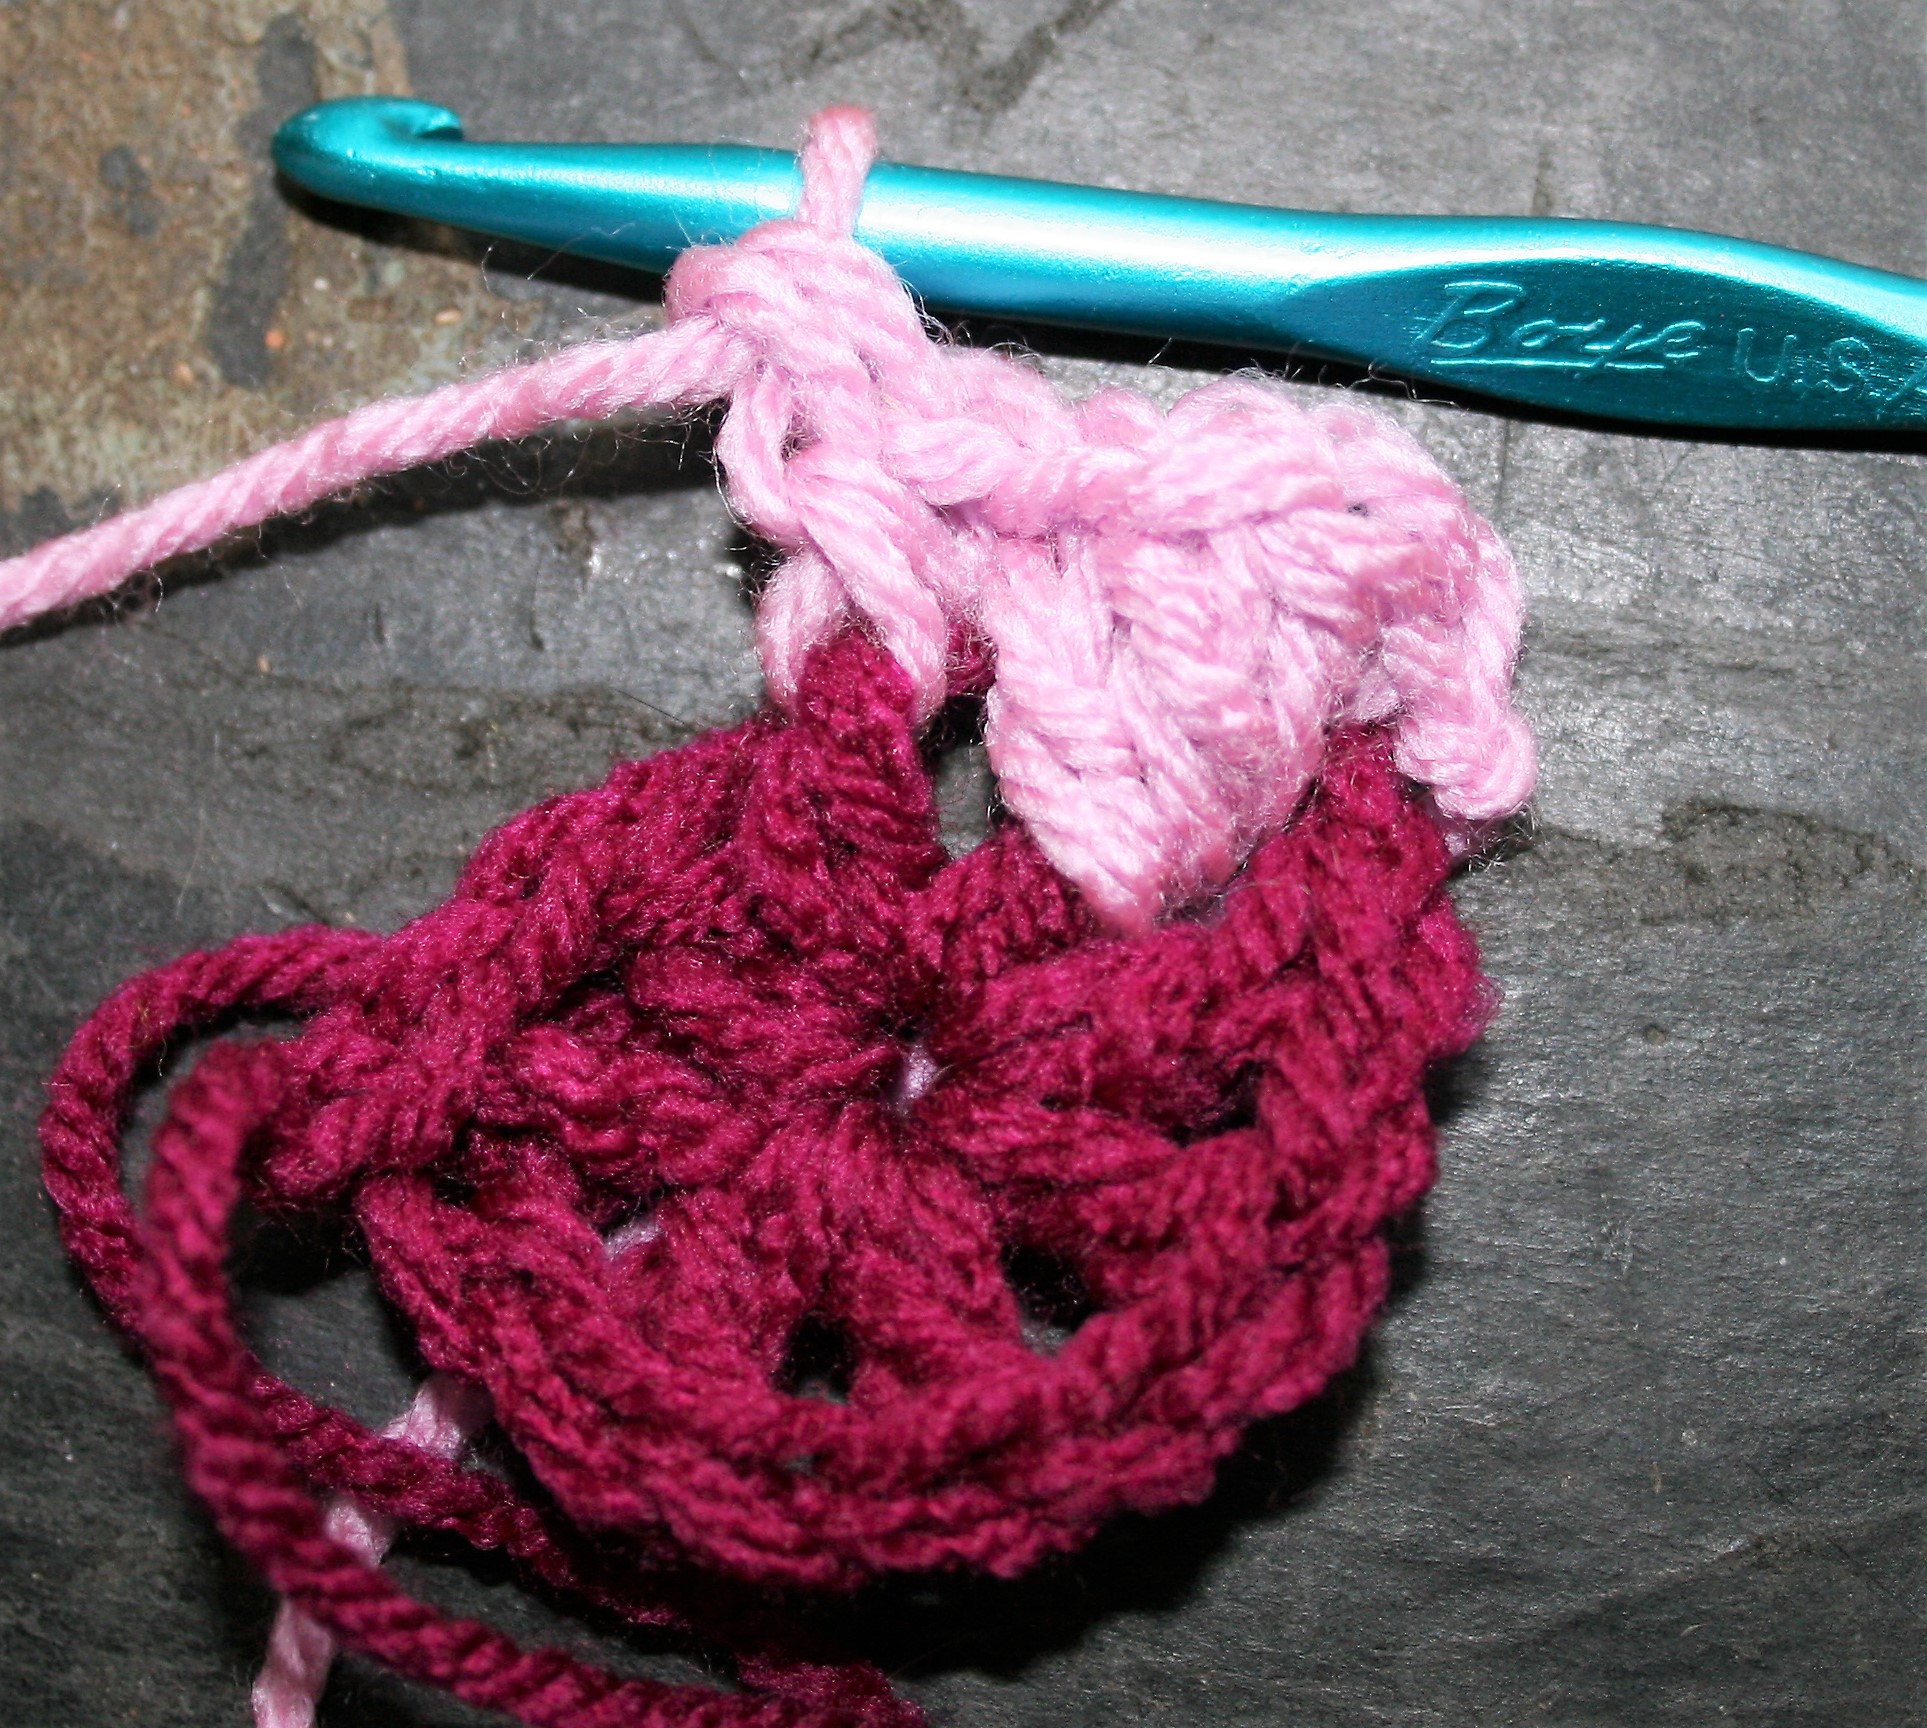
Rnd 1 (WS): With A, Ch 4, 2 dc in 4th ch from hook, [ch 2, 3 dc in same ch] rep 3 times, ch 2, join. Fasten off. – 12 dc (3 dc per side), 4 ch-2 sps
Rnd 2: With B, ssc in any ch-2 sp, dc in same sp,{ [sc in next st, dc in next st] across until 1 st rem, sc in last st, (dc, sc, ch 2, sc, dc) in ch-2 sp} rep 3 times, [sc in next st, dc in next st] across until 1 st rem, sc in last st, (dc, sc, ch 2) in ch-2 sp, join, turn . – 7 sts per side, 4 ch-2 sps
Don’t miss the turn…
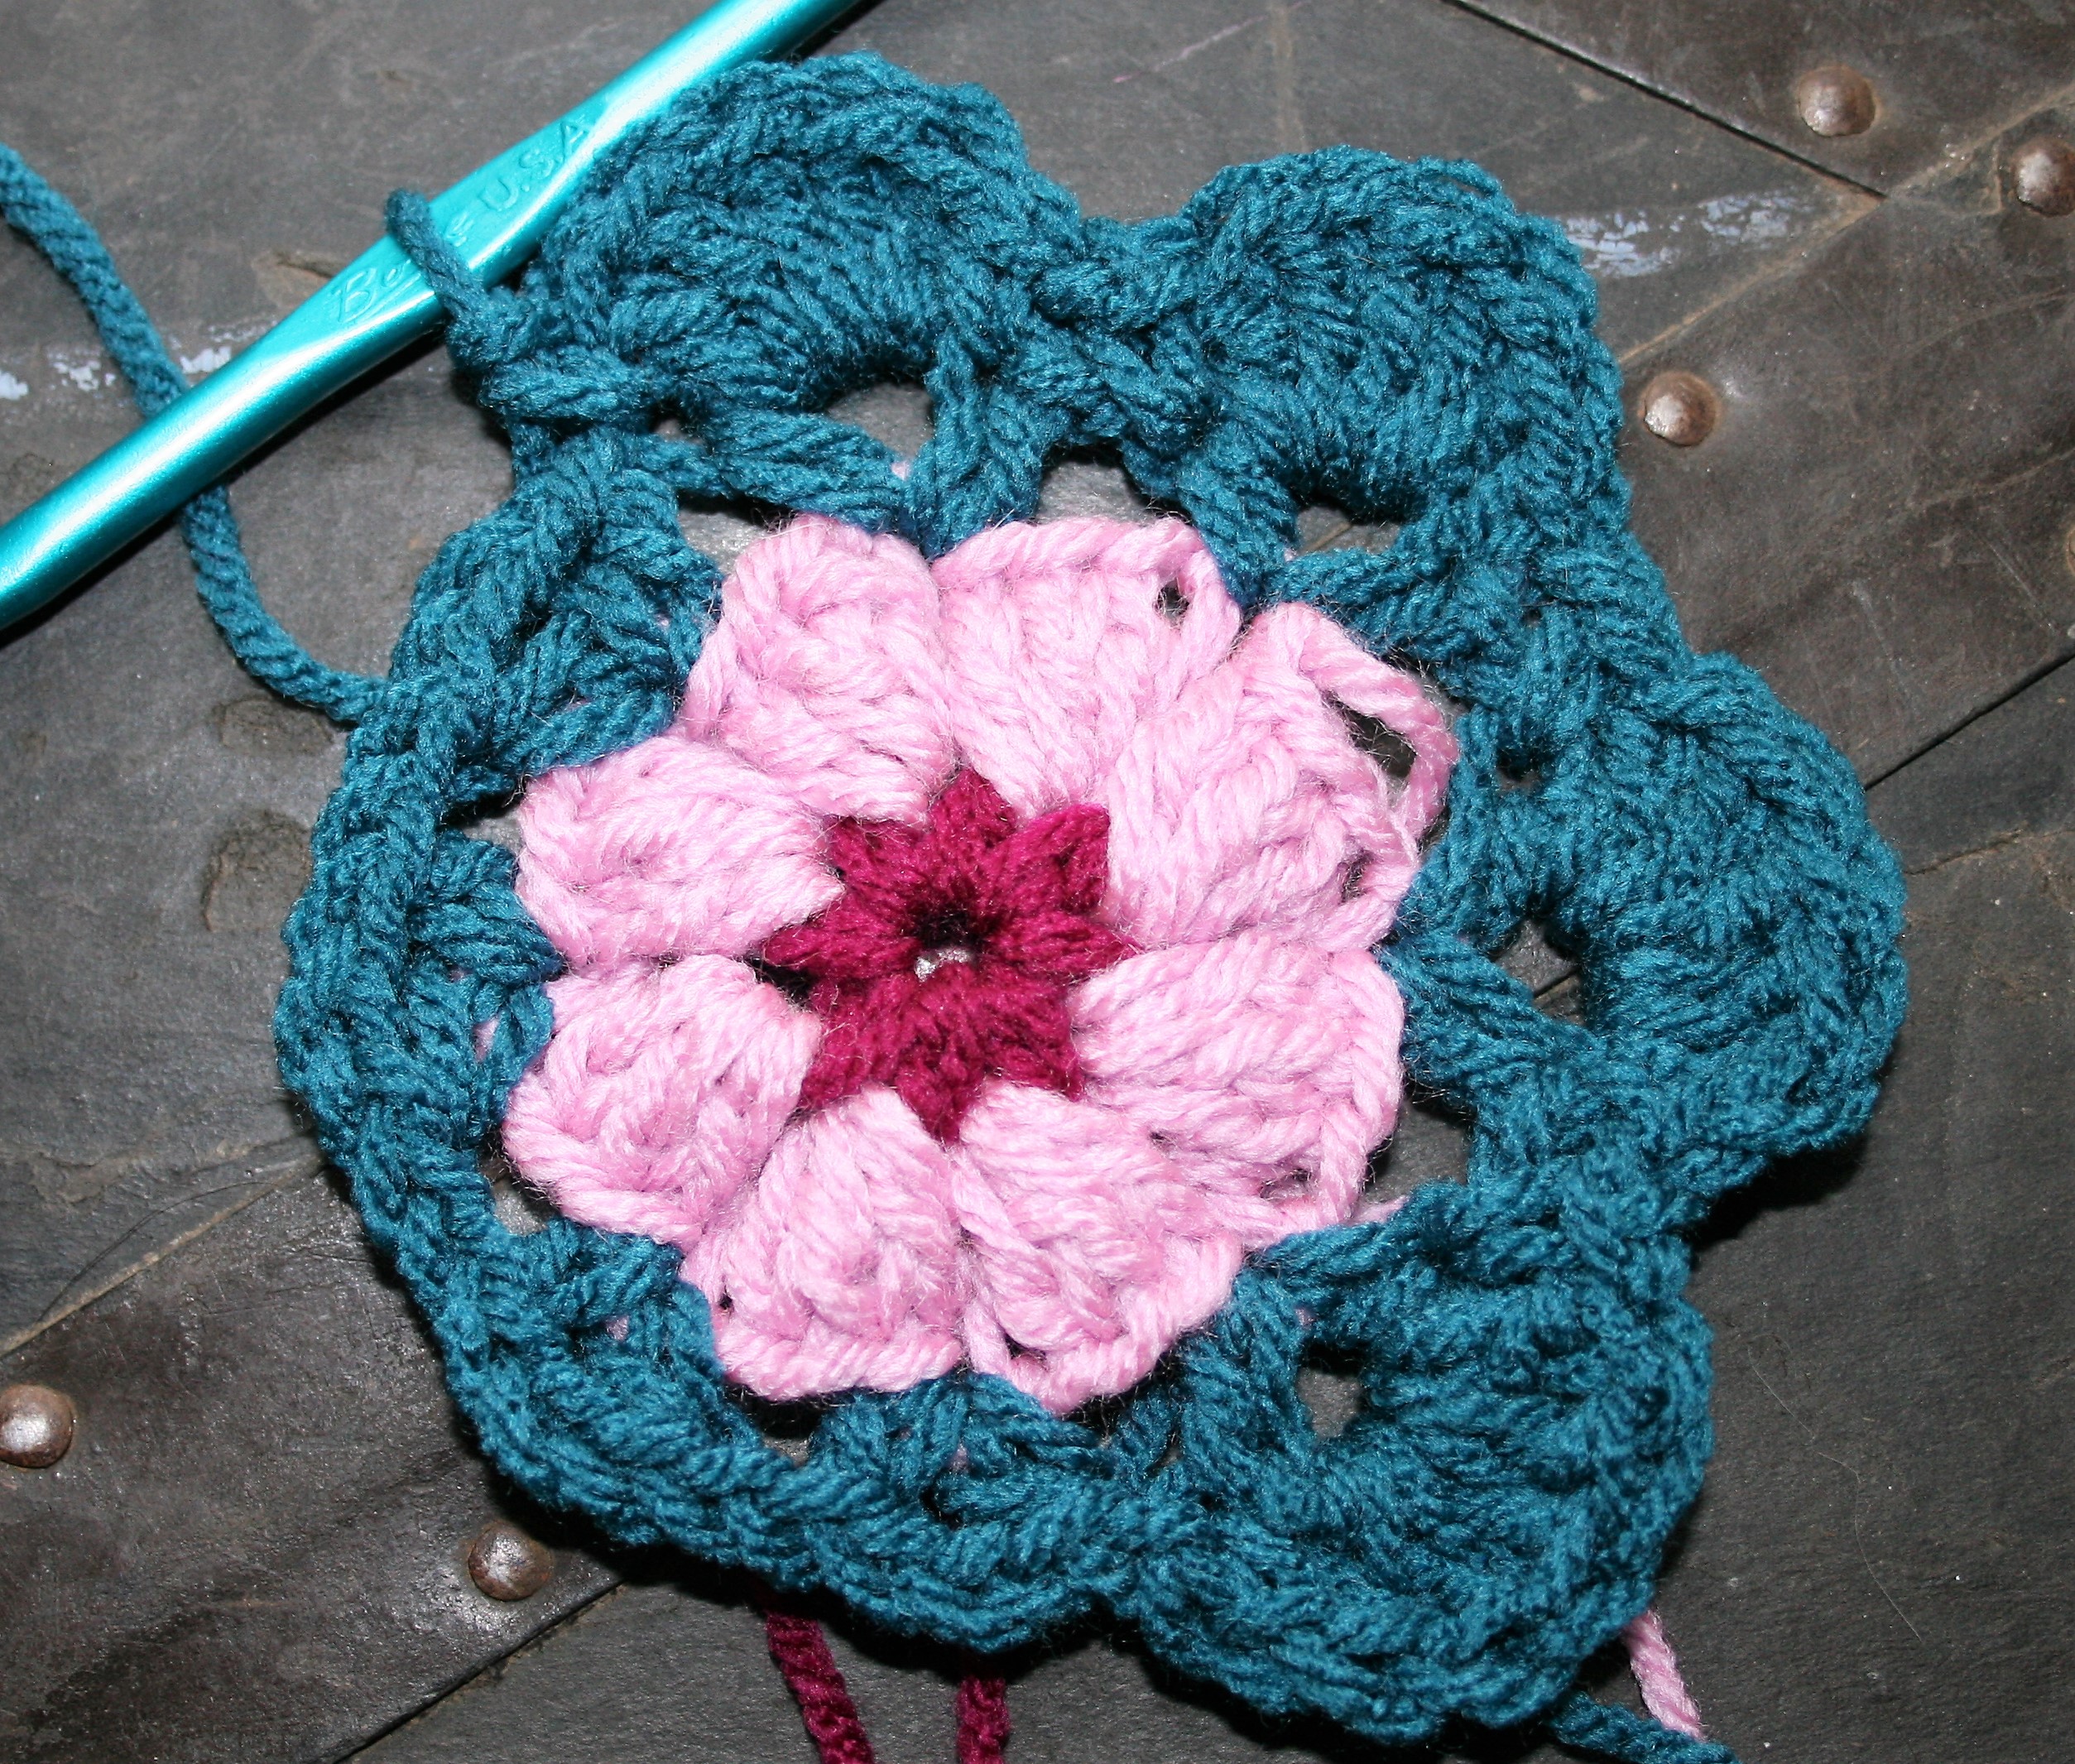
Rnd 3: Ch 1, sc in ch-2 sp, {[dc in next sc, sc in next dc] across until 1 st rem, dc in last st, (sc, ch 2, sc) in ch-2 sp} rep 3 times, [dc in next sc, sc in next dc] until 1 st rem, dc in last st, sc in ch-2 sp, ch 2, join, fasten off, turn. –9 sts per side, 4 ch-2 sps
Now turn back….
Rnd 4: With A, ssc in any ch-2 sp, [sc in next 4 sts, CL around 3 dc of Row 1, skip st directly behind CL, sc in last 4 sts, (sc, ch 2, sc) in ch-2 sp] rep 3 times, sc in next 4 sts, CL around 3 dc of Row 1, skip st directly behind CL, sc in last 4 sts, sc in ch-2 sp, ch 2, join. Fasten off. –11 sts per side (1 CL per side), 4 ch-2 sps
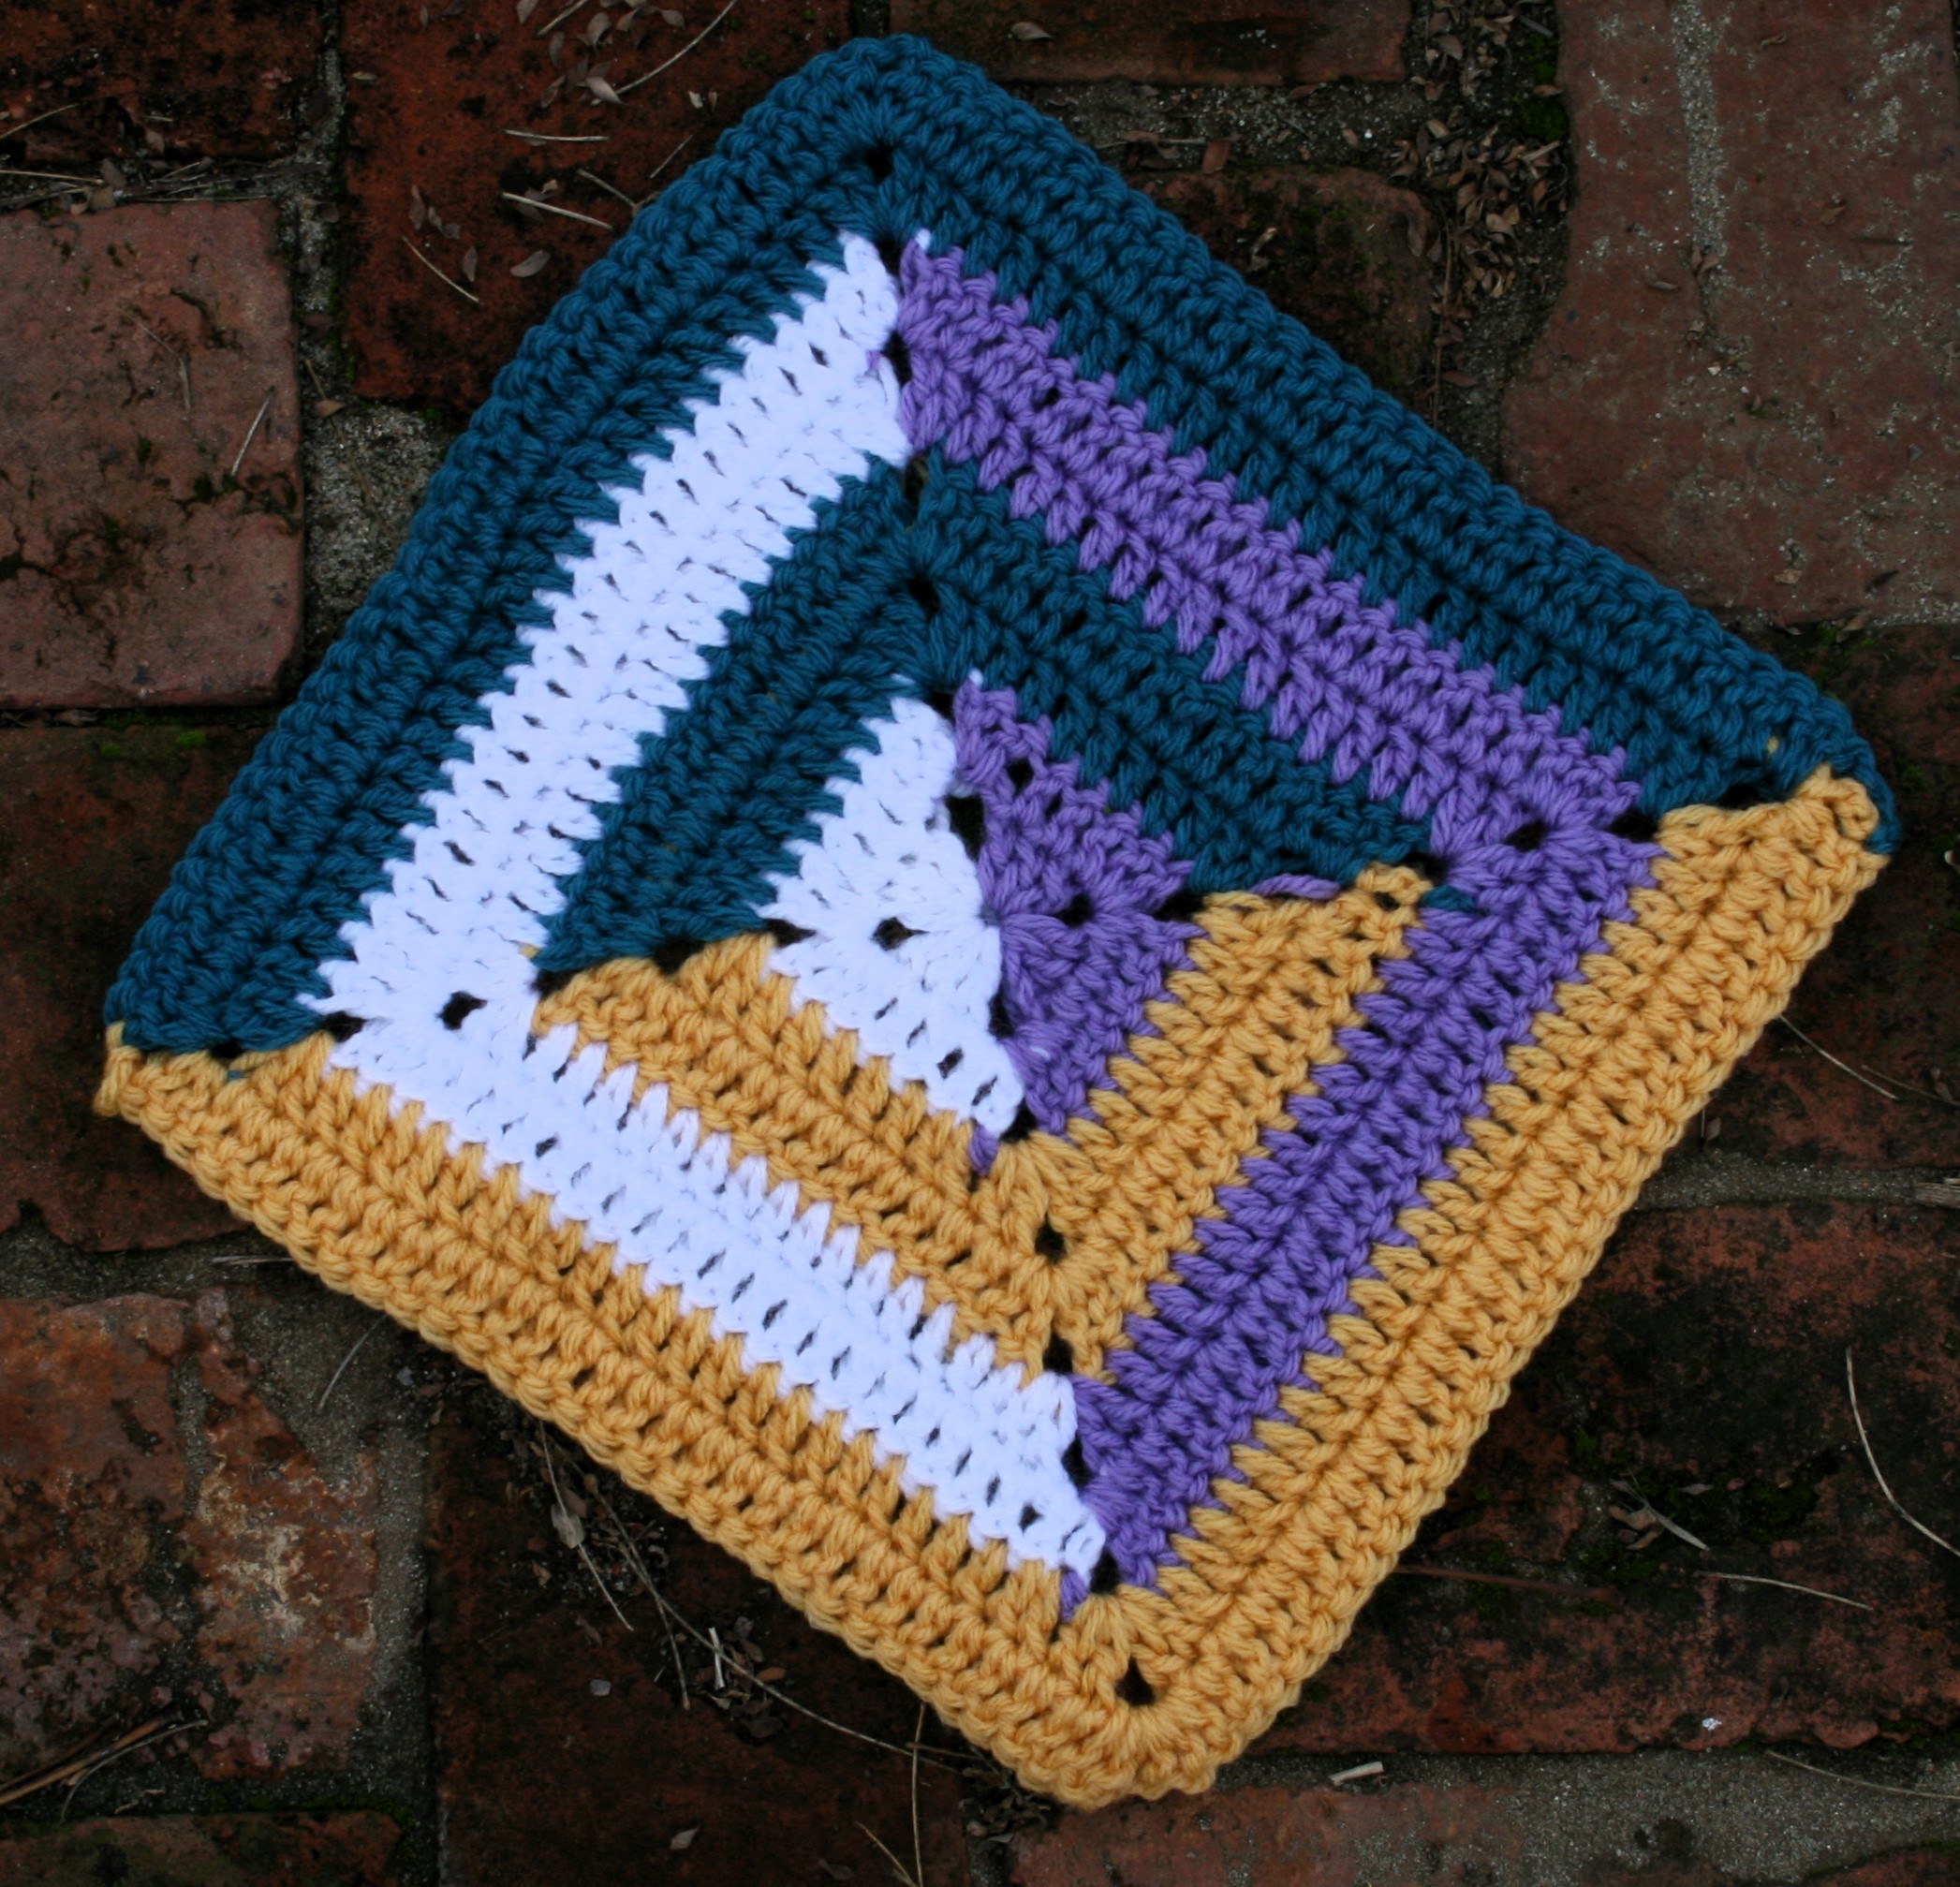
Rnds 5-6: With C, Rep Rnds 2 & 3. –17 sts per side, 4 ch-2 sps
Time for some Front Posts to create some inverted triangles
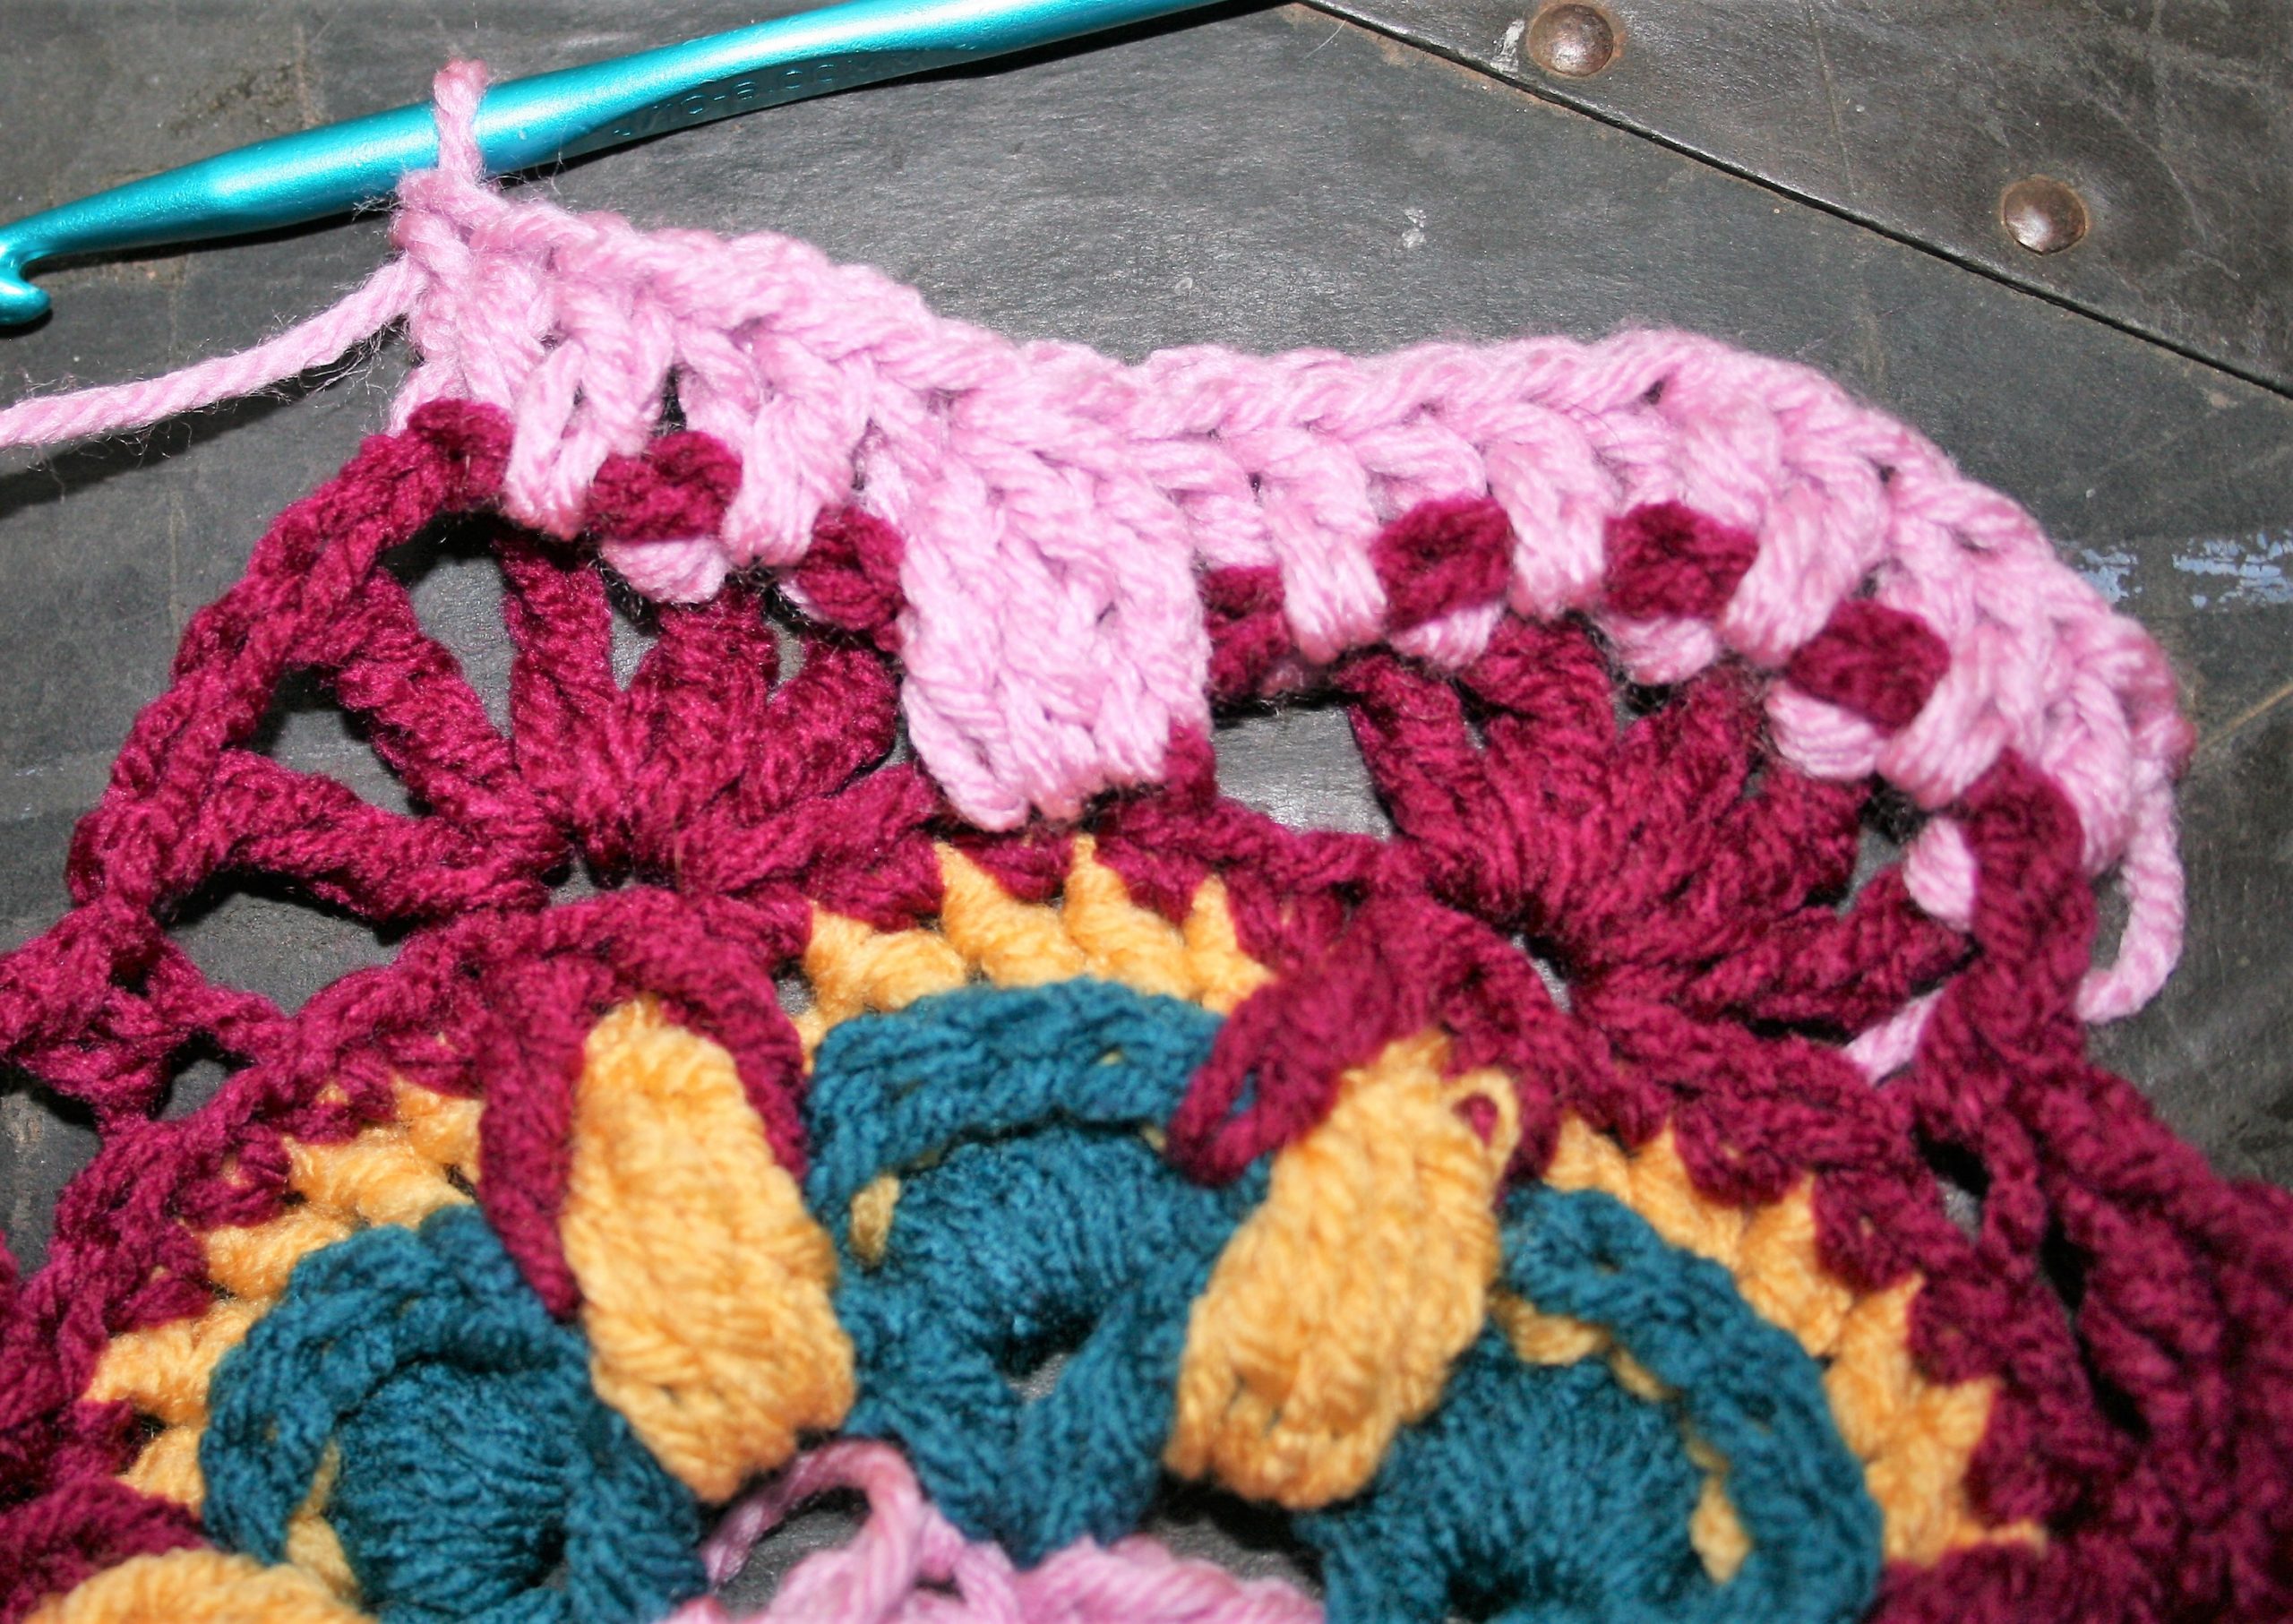
Rnd 7: With A, ssc in any ch-2 sp, [sc in next 5 sts, skip the first sc of Row 4, CL over next 3 sc sts of Row 4, skip st directly behind CL, sc in next st, 3FPtr around CL of Row 4, skip 3 sts directly behind post sts, sc in next st, skip next sc of Row 4 CL over next 3 sc of Row 4, skip st directly behind CL, sc in last 5 sts, (sc, ch 2, sc) in ch-2 sp] rep 3 times, sc in next 4 sts, skip the first sc of Row 4 CL over next 3 sc sts of Row 4, skip st directly behind CL, sc in next st, 3FPtr around CL of Row 4, skip 3 sts directly behind post sts, sc in next st, skip next sc of Row 4 CL over next 3 sc of Row 4, skip st directly behind CL, sc in last 5 sts, sc in ch-2 sp, ch 2, join, fasten off. –19 sts per side (2 CL, 3 FPtr per side), 4 ch-2 sps
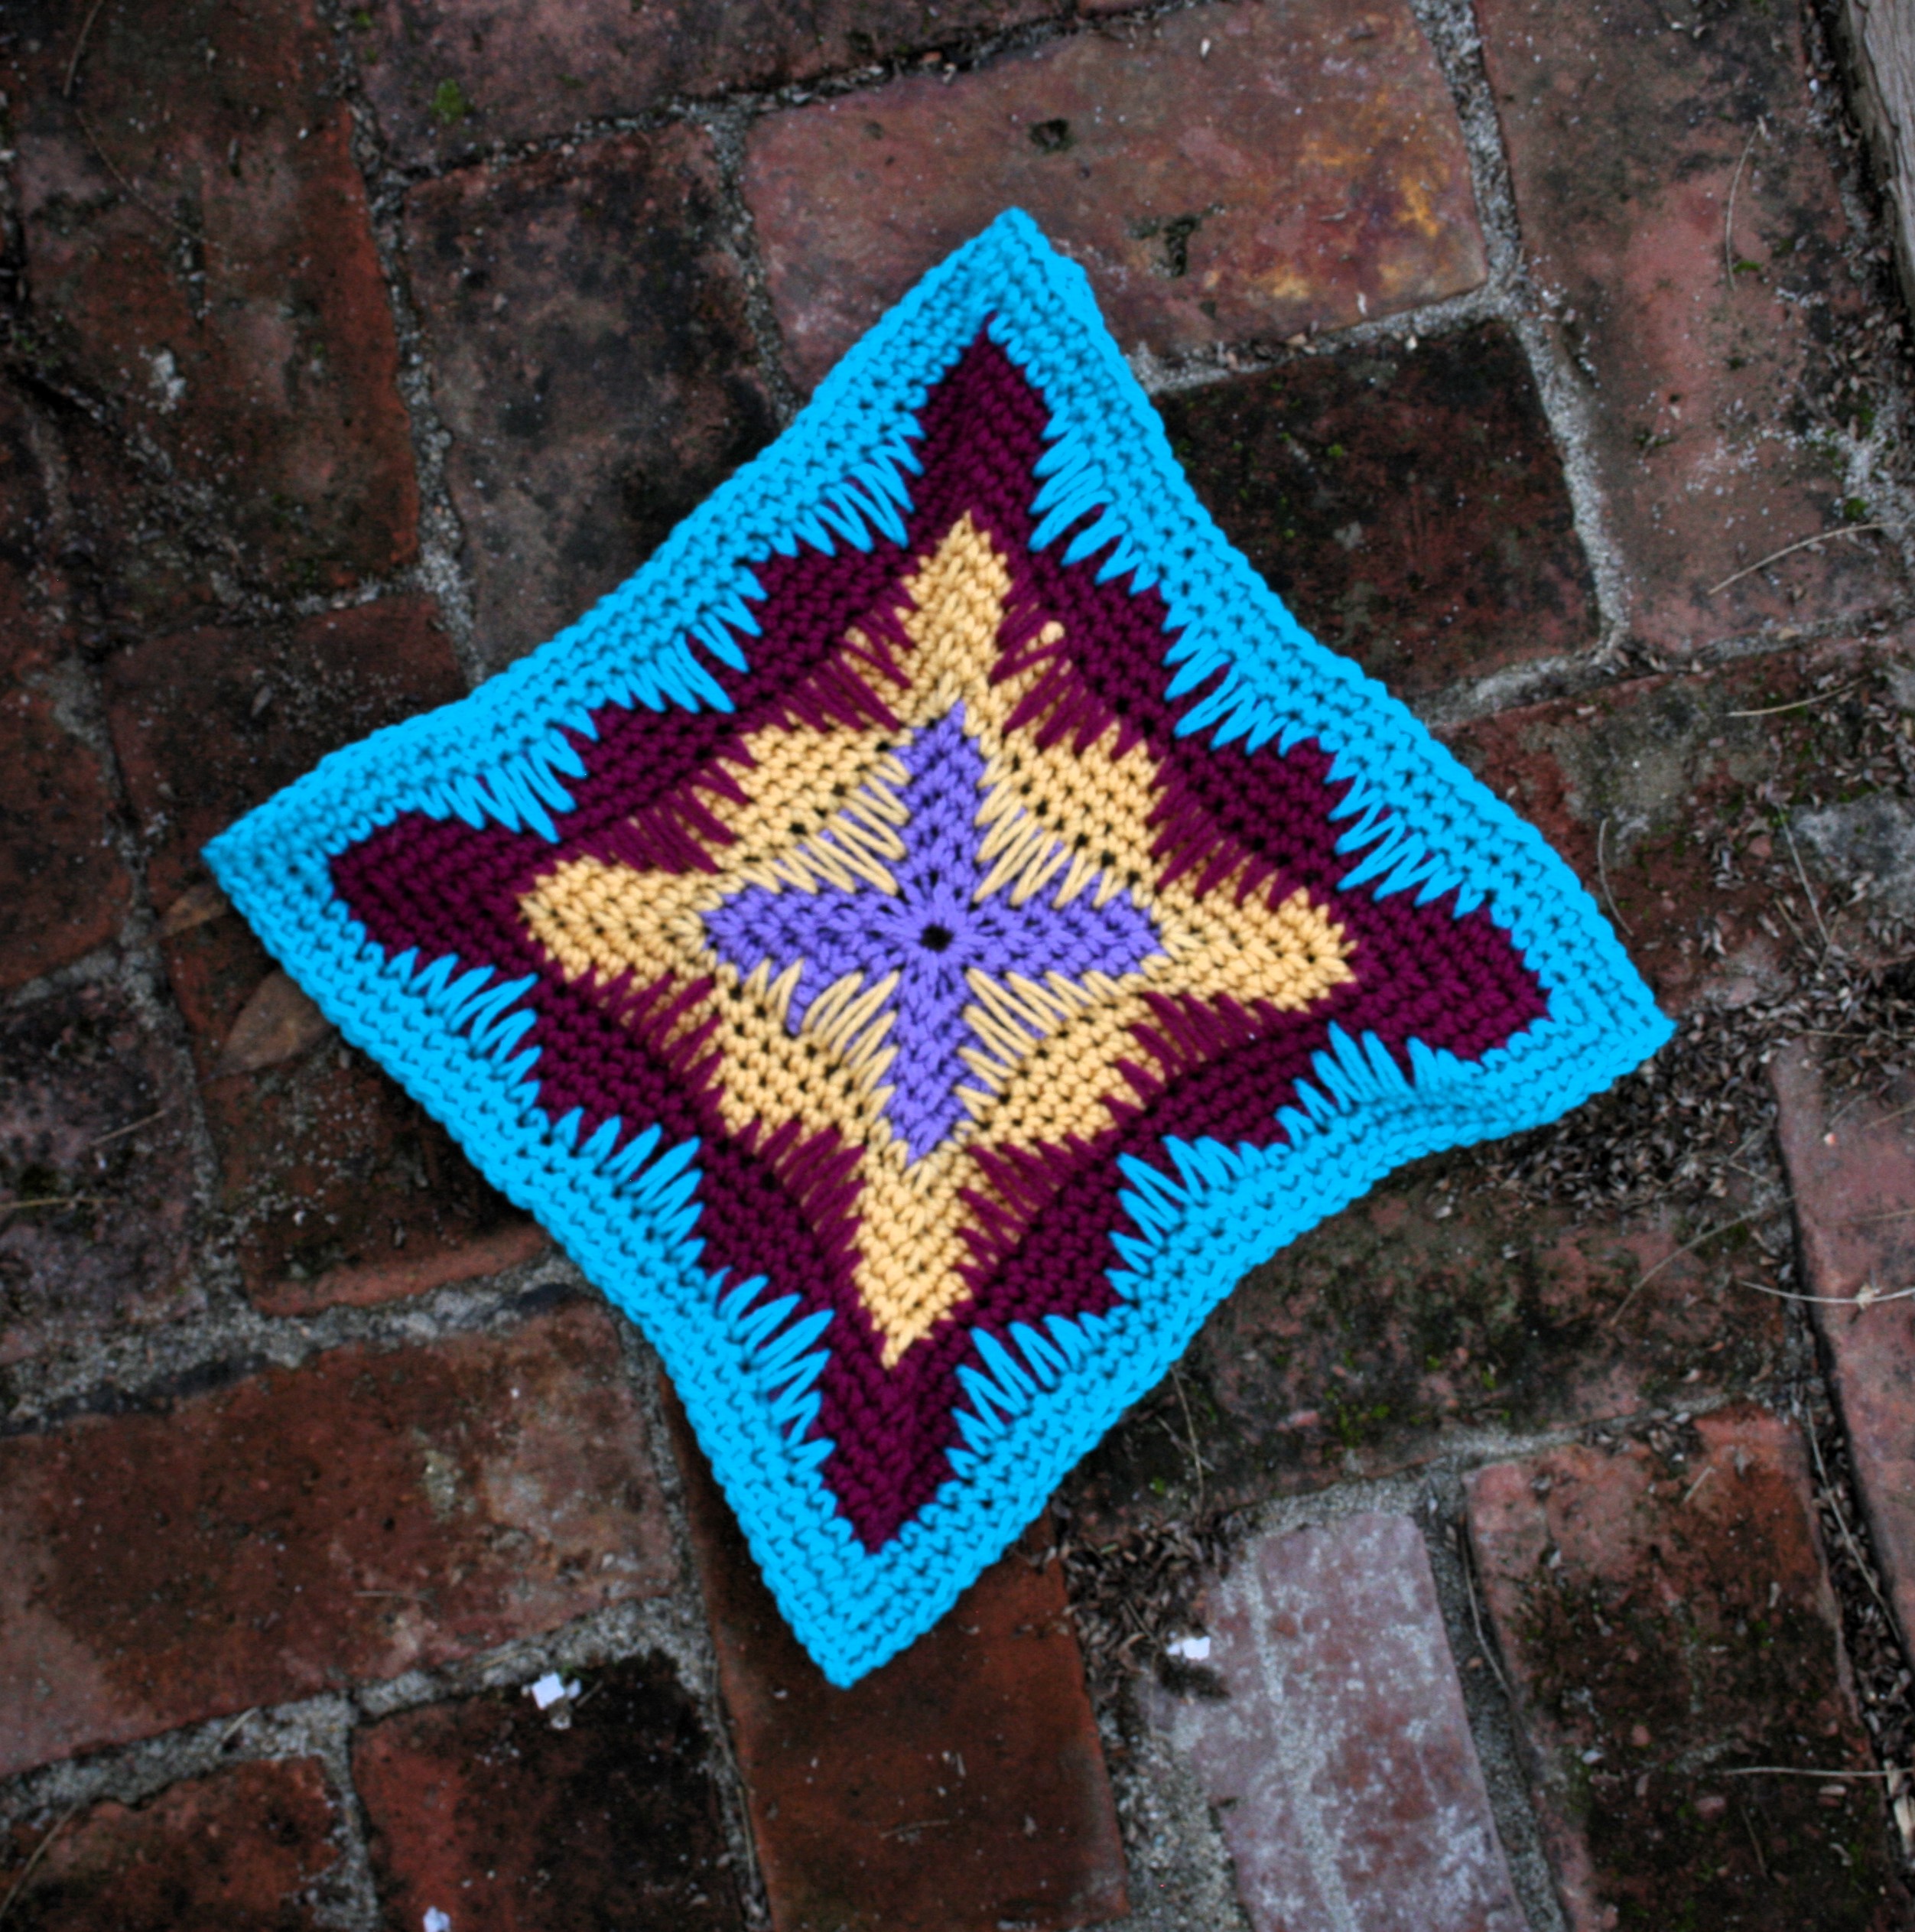
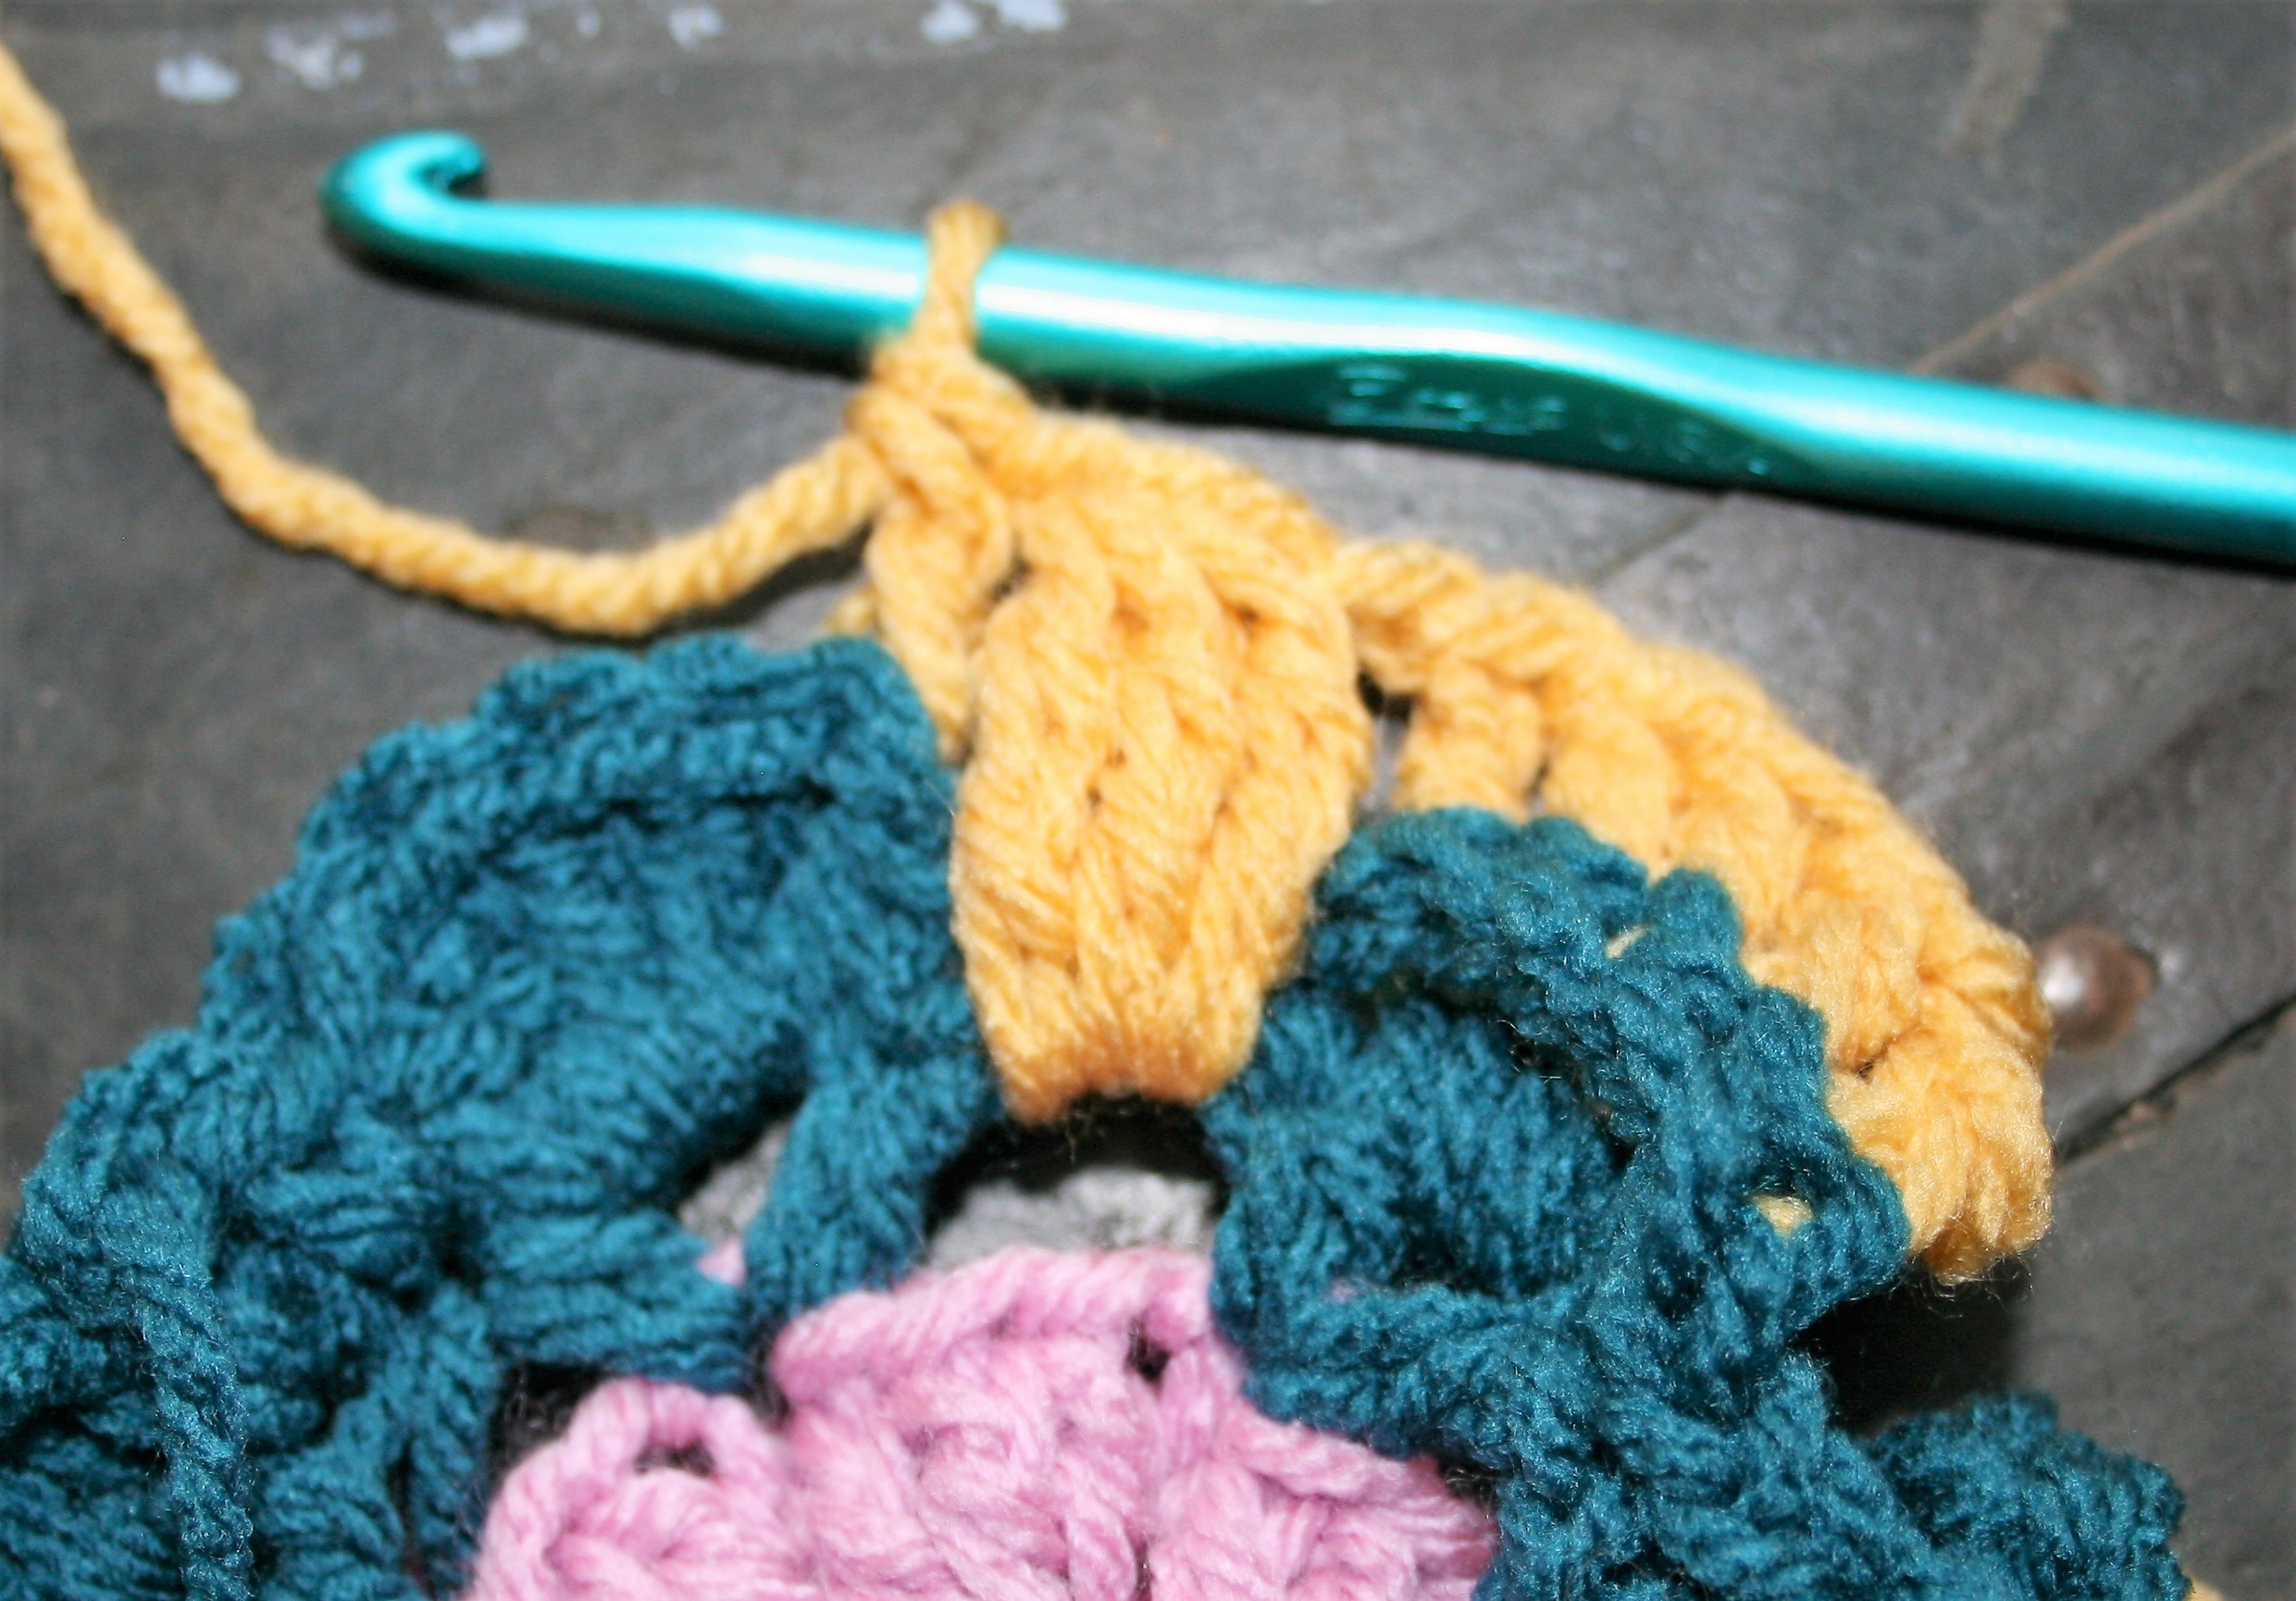
Rnds 8-9: With D, Rep Rnds 2 & 3. -25 sts per side, 4 ch-2 sps
Back to some Radiate Champion Clusters
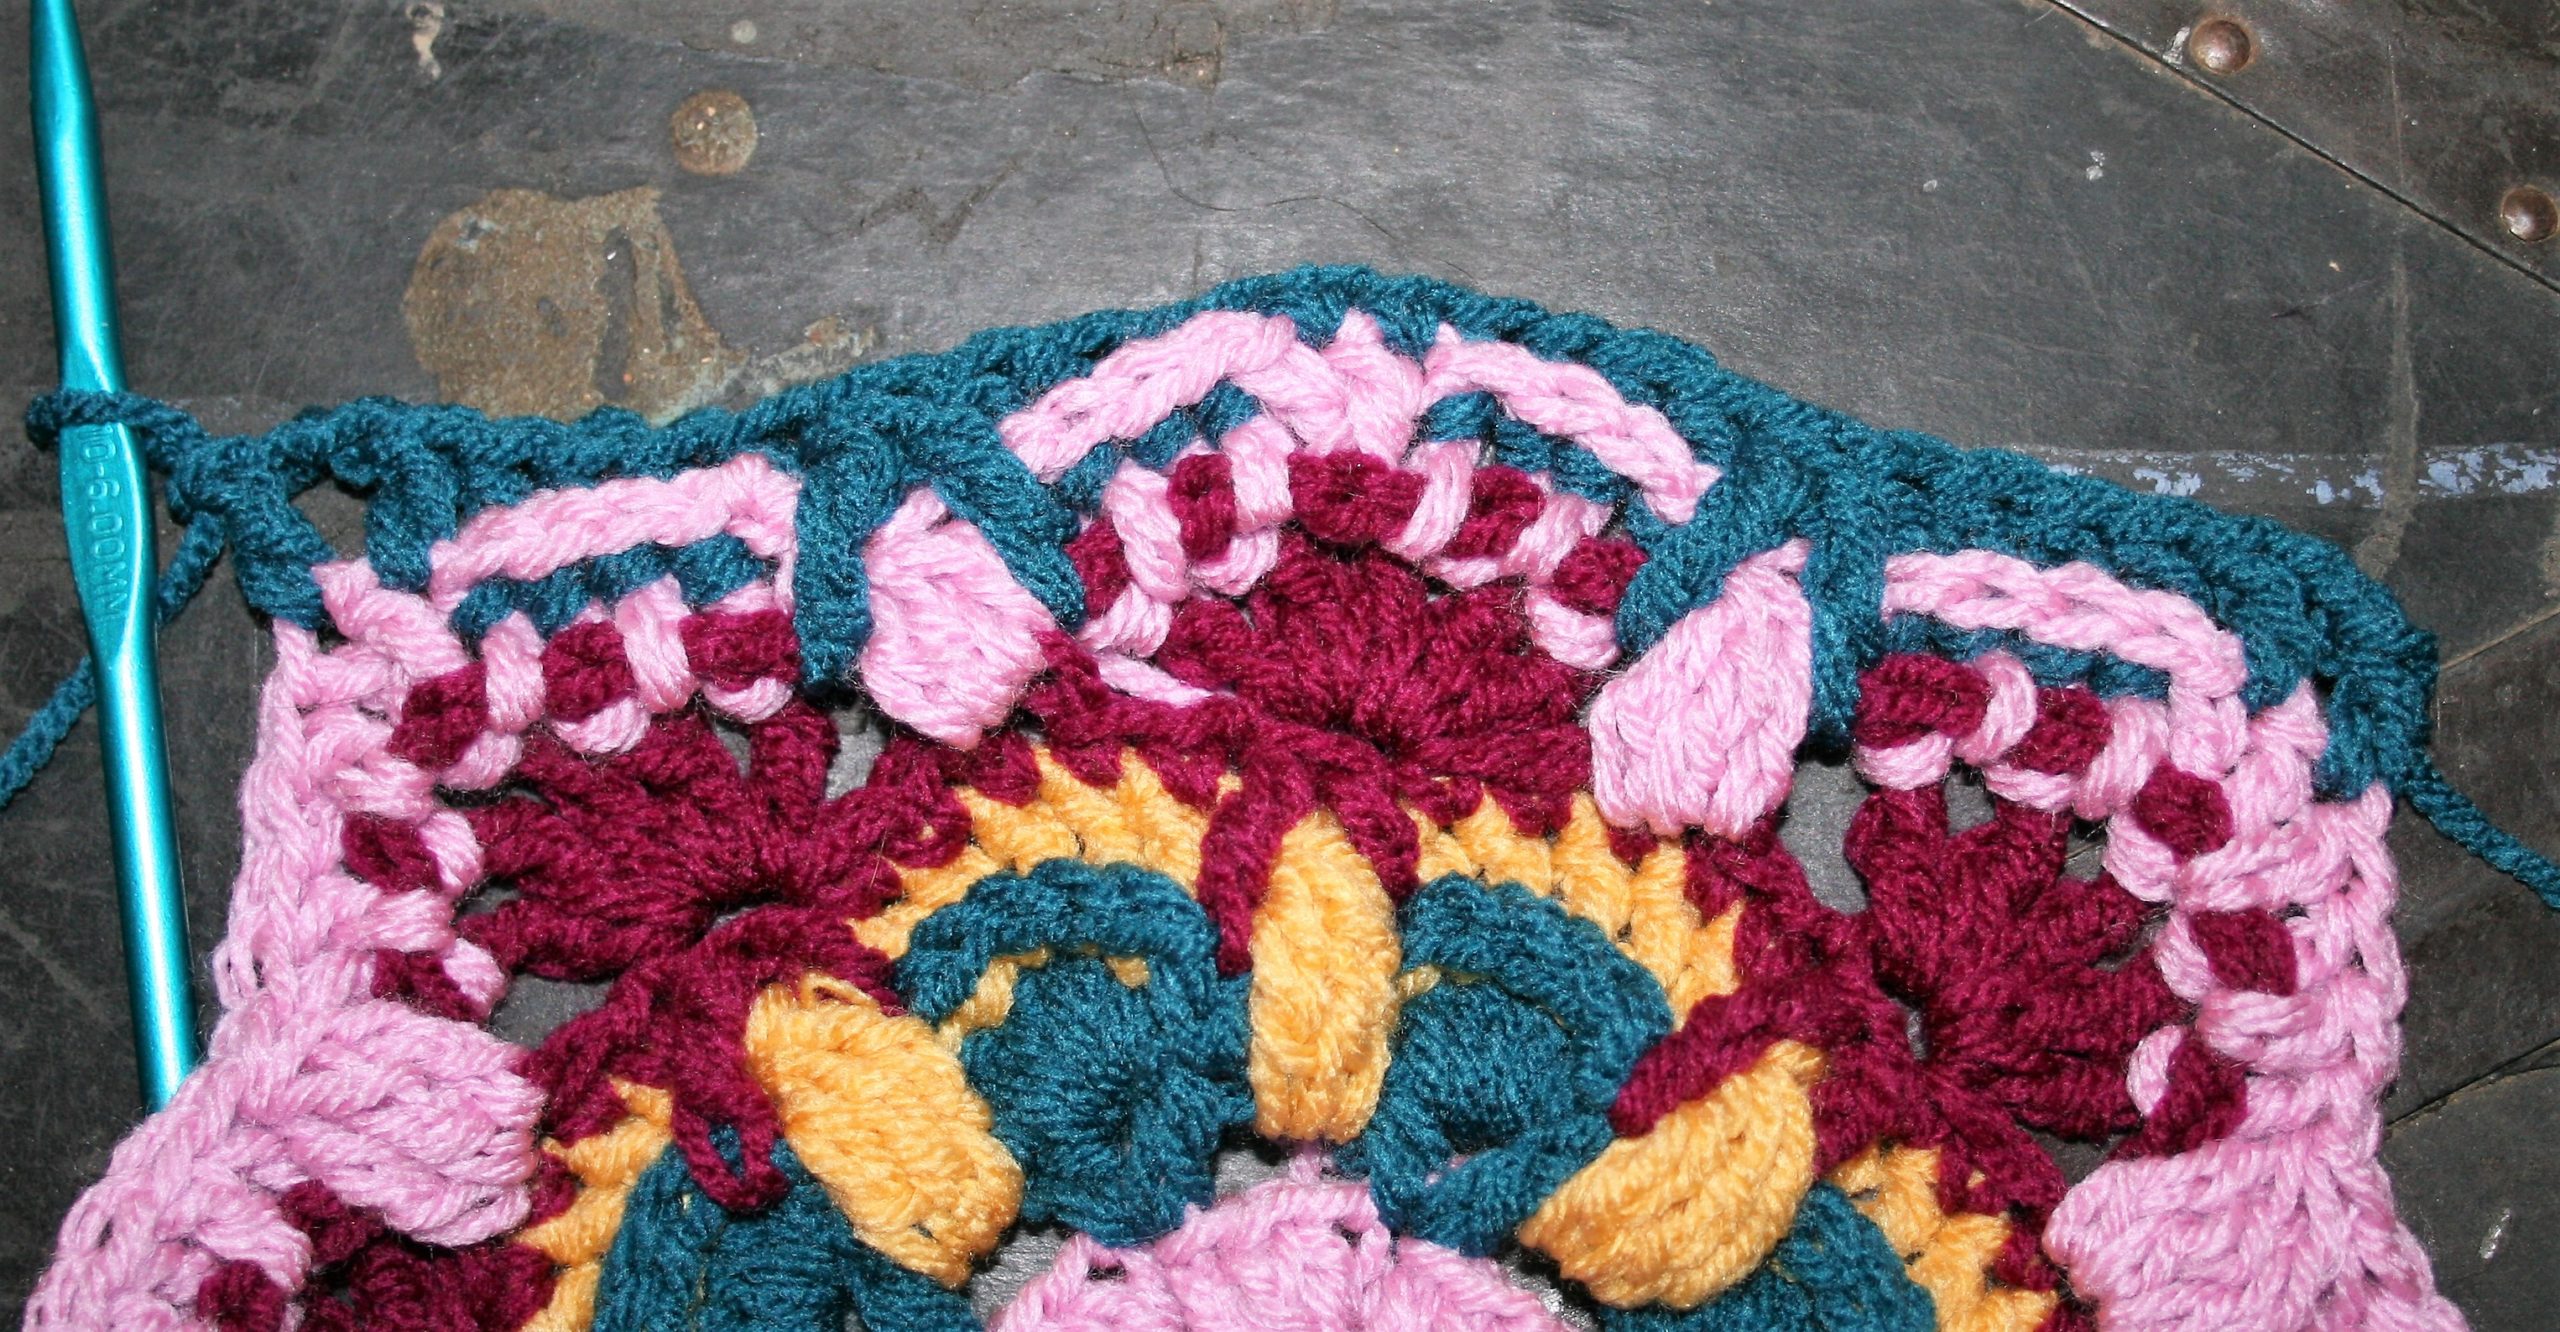
Rnd 10: With A, ssc in any ch-2 sp, [sc in next 5 sts, skip the first two sc of Row 7, CL over next 3 sc of Row 7, skip st directly behind CL, sc in next st, 3 FPtr around CL of Row 7, skip 3 sts behind post st, sc in next 5 sts, 3 FPtr around next CL st of Row 7, skip 3 sts behind post sts, sc in next st, skip the next sc of Row 7, CL over the next 3 sc of Row 7, skip st directly behind CL, sc in next 5 sts, (sc, ch-2, sc) in ch-2 sp] rep 3 times, sc in next 5 sts, skip the first two sc of Row 7, CL over next 3 sc of Row 7, skip st directly behind CL, sc in next st, 3 FPtr around CL of Row 7, skip 3 sts behind post st, sc in next 5 sts, 3 FPtr around next CL st of Row 7, skip 3 sts behind post sts, sc in next st, skip the next sc of Row 7, CL over the next 3 sc of Row 7, skip st directly behind CL, sc in next 5 sts, sc in ch-2 sp, ch 2, join, fasten off. –27sts per side (2 CL, 6 FPtr per side), 4 ch-2 sps
Rnds 11-12: With C, rep Rnds 2 & 3. – 33 sts per side, 4 ch-2 sps
Do you see the back and forth yet?
Rnd 13: With A, ssc in any ch-2 sp, [sc in next 6 sts, skip the first 2 sc of Rnd 10, CL over next 3 sc of Rnd 10, skip st directly behind CL, sc in next st, 3 FPtr around CL of Rnd 10, skip 3 sts behind post st, sc in next 11 sts, 3 FPtr around CL of Rnd 10, skip 3 sts directly behind post sts, sc in next st, sk 1 sc of Row 10, CL over next 3 sc sts of Rnd 10, skip st directly behind CL, sc in last 6 sts, (sc, ch 2, sc) in ch-2 sp] rep 3 times, sc in next 6 sts, skip the first 2 sc of Rnd 10, CL over next 3 sc of Rnd 10, skip st direcly behind CL, sc in next st, 3 FPtr around CL of Rnd 10, skip 3 sts behind post st, sc in next 11 sts, 3 FPtr around CL of Rnd 10, skip 3 sts direcly behind post sts, sc in next st, sk 1 sc of Rnd 10, CL over next 3 sc sts of Rnd 10, skip st directly behind CL, sc in last 6 sts, sc in ch-2 sp, ch 2, join, fasten off. – 35 sts per side (2 CL, 6 FPtr per side), 4 ch-2 sps
Rnds 14-15: With B rep Rows 2 & 3. –41 sts per side, 4 ch-2 sps
Let’s finish up!
Rnd 16: With A, ssc in any ch-2 sp, [sc in next 6 sts, skip the first 3 sc of Rnd 13, CL over next 3 sc of Rnd 13, skip st directly behind CL, sc in next st, 3 FPtr around CL of Rnd 13, skip 3 sts directly behind post sts, sc in next 19 sts, 3 Fptr around CL of Rnd 13, skip 3 sts behind post st, sc in next st, skip next sc of Rnd 13, CL over next 3 sc of Rnd 13, skip st directly behind CL, sc in next 6 sts, (sc, ch 2, sc) in ch-2 sp] rep 3 times, sc in next 6 sts, skip the first 3 sc of Rnd 13, CL over next 3 sc of Rnd 13, skip st directly behind CL, sc in next st, 3 FPtr around CL of Rnd 13, skip 3 sts directly behind post sts, sc in next 19 sts, 3 Fptr around CL of Rnd 13, skip 3 sts behind post st, sc in next st, skip next sc of Rnd 13, CL over next 3 sc of Rnd 13, skip st directly behind CL, sc in next 6 sts, sc in ch-2 sp, ch 2, join, fasten off. – 43 sts per side (2 CL, 6 FPtr per side), 4 ch-2 sps
Weave in ends, block.