What fun to be part of the You’ve Got Options CAL! This is a project that actually has 2 different squares, different sizes, but built upon each other. If you have missed any of them, please check out all the opportunities here.
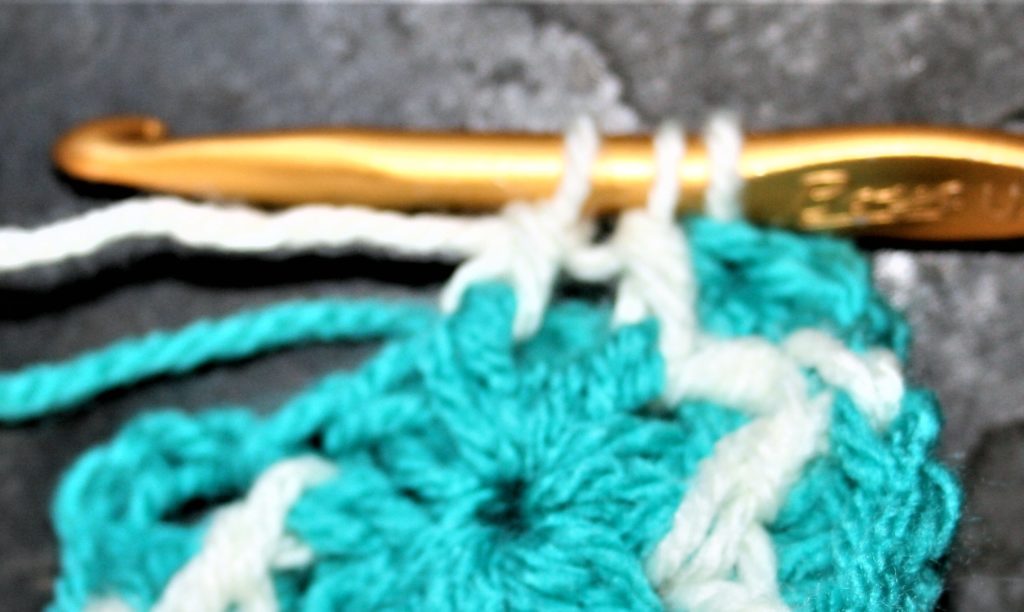
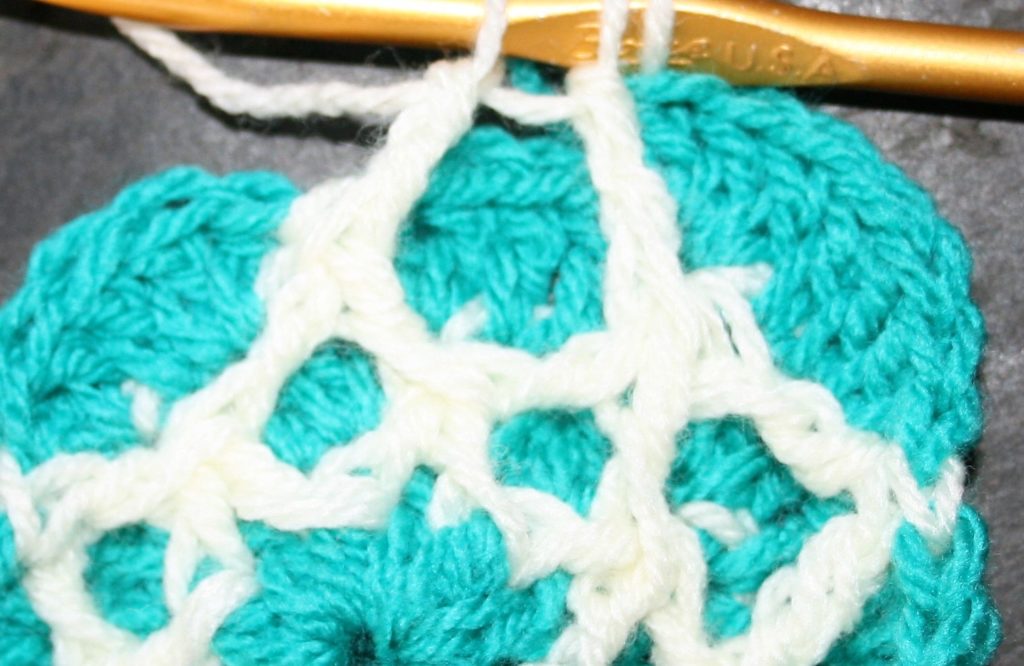
For my part I worked a square that utilizes carrying your throughout the project, crocheting over the color you are not working. This allows for some specialized color changes without having to weave in a bunch of ends.
A little insight
It also uses a process that creates inverted V’s, by using front post double crochet stitches that are worked together. These may be new techniques for you, or stitches you may not work often, so I offer some detailed information about them, and recommend reviewing it before beginning the squares. If you want to understand more about post stitches, both front and back are used in this design, I share some insight here. To understand more about how to work decrease stitches, I share some tips here.
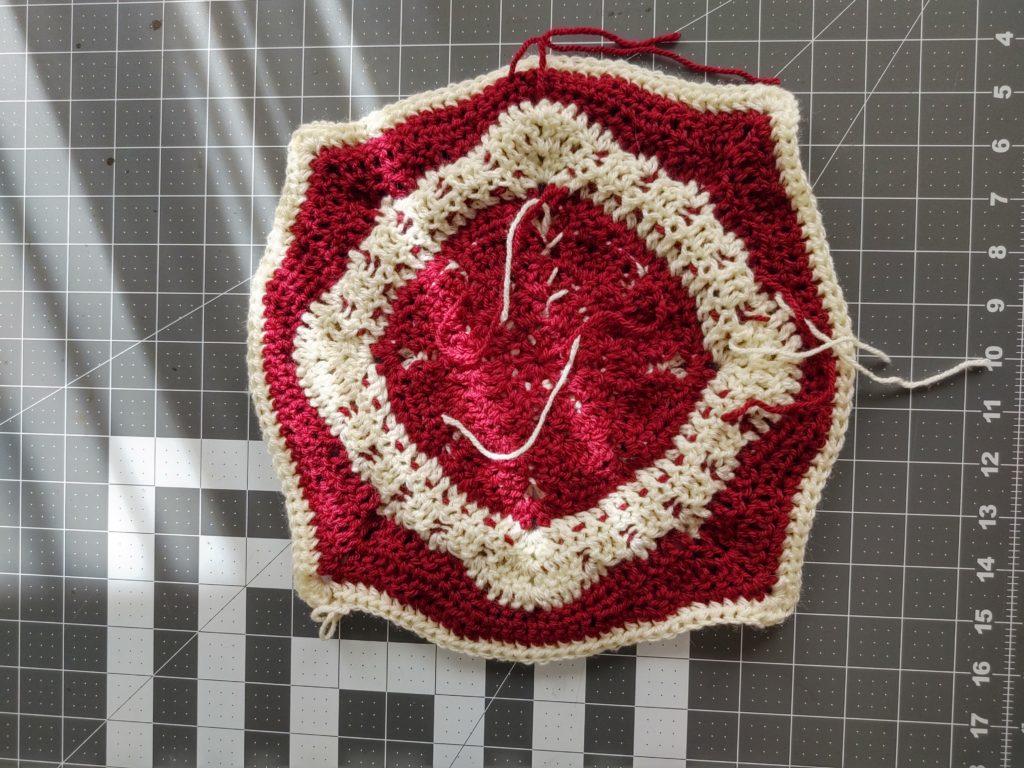
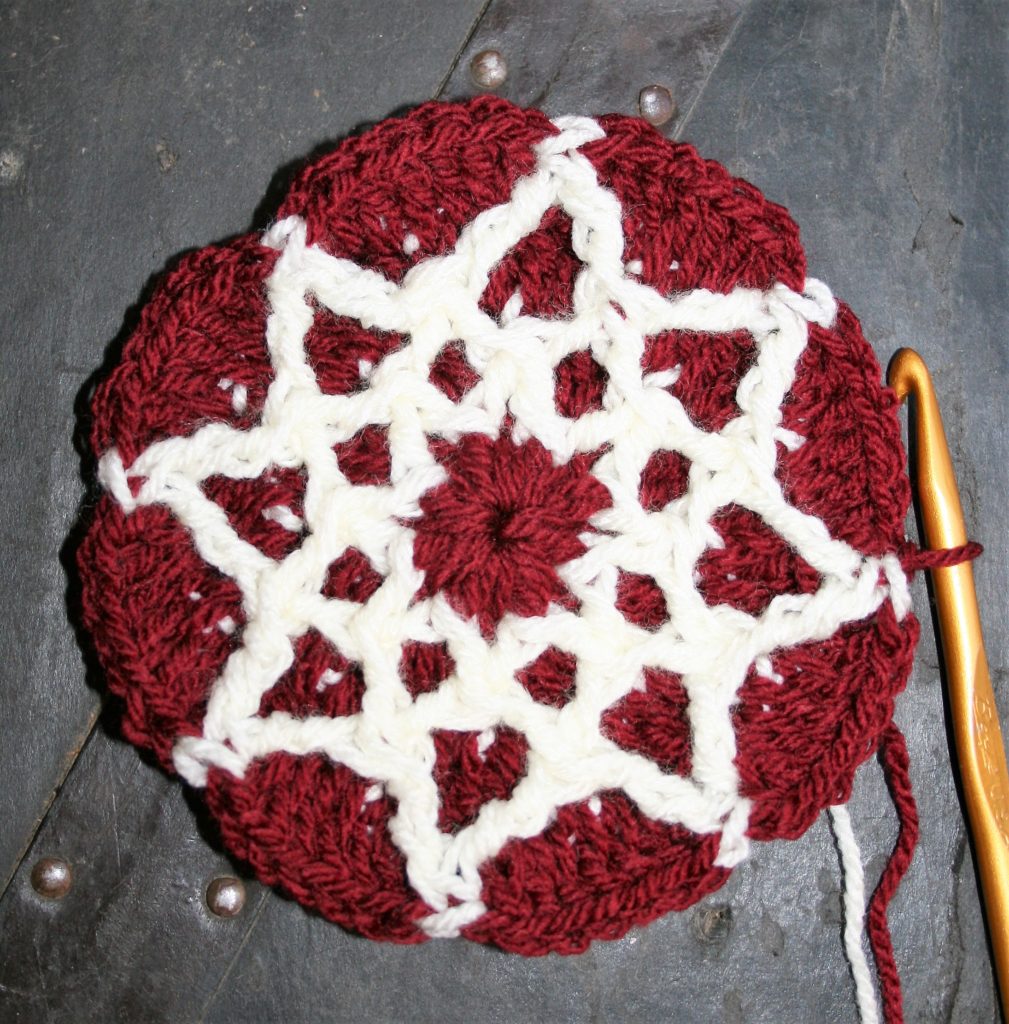
After you complete the smaller 6″ square, you then really put this square on its head, by moving the corners to the sides. This causes the square to rest on its point.
Square measures 12” x 12” (at end of Round 6, square measures 6” x 6”)
Materials
- J/10/6.00mm crochet hook
- Lion Brand Basic Stitch Premium medium weight 100% premium acrylic yarn (3.5 oz/100g/219yrds/200m) 1 skein each color #141 Plum (MC), #98 Cream (CC)
Abbreviations:
- Beg: Beginning
- Bpdc: back post double crochet
- Bphdc: back post half double crochet
- Bpsc: back post single crochet
- CC: contrasting color
- Ch: chain
- Dc: double crochet
- Fpdc: front post double crochet
- Fphdc: front post half double crochet
- Hdc: half double crochet
- MC: main color
- Rnd: round
- Sc: single crochet
- Sl st: slip stitch
- Sp: space
- St(s): Stitch(es)
Special Stitches
Front Post Double Crochet Two Together (Fpdc2tog): Yarn over, insert hook from front to back and then to front again around post of stitch last worked into (or around st indicated) on previous row, yarn over and pull up a loop, yarn over and draw through 2 loops on hook, skip next st on rnds 2 and yarn over, insert hook from front to back and then to front again around post of next stitch (or around st indicated), yarn over and pull up a loop, yarn over and draw through 2 loops on hook, yarn over and draw through all 3 loops on hook.
Front Post Treble Crochet Two Together (Fptr2tog): Yarn over twice, insert hook from front to back and then to front again around post of indicated stitch, yarn over and pull up a loop, [yarn over and draw through 2 loops on hook] twice, yarn over twice, insert hook from front to back and then to front again around post of indicated stitch, yarn over and pull up a loop, [yarn over and draw through 2 loops on hook] twice, yarn over and draw through all 3 loops on hook.
Notes
Leave unused color behind your work and work over unused color when possible.
The Smaller Block
Rnd 1: With MC, ch 4 (last 3 chains count as dc), 15 dc in 4th ch from hook, join to top of beg ch. -16 dc
Rnd 2: Ch 3 (counts as tr here and throughout), dc in same st, dc in next st, change color to CC, fpdc2tog, change color to MC, [2 dc in next st (behind fpdc2tog), 1 dc in next st (used for 2nd leg of fpdc2tog), change color to CC, fpdc2tog, change color to MC] repeat around, slip stitch in top of beg ch-3 to join. – 8 fpdc2tog, 24 dc
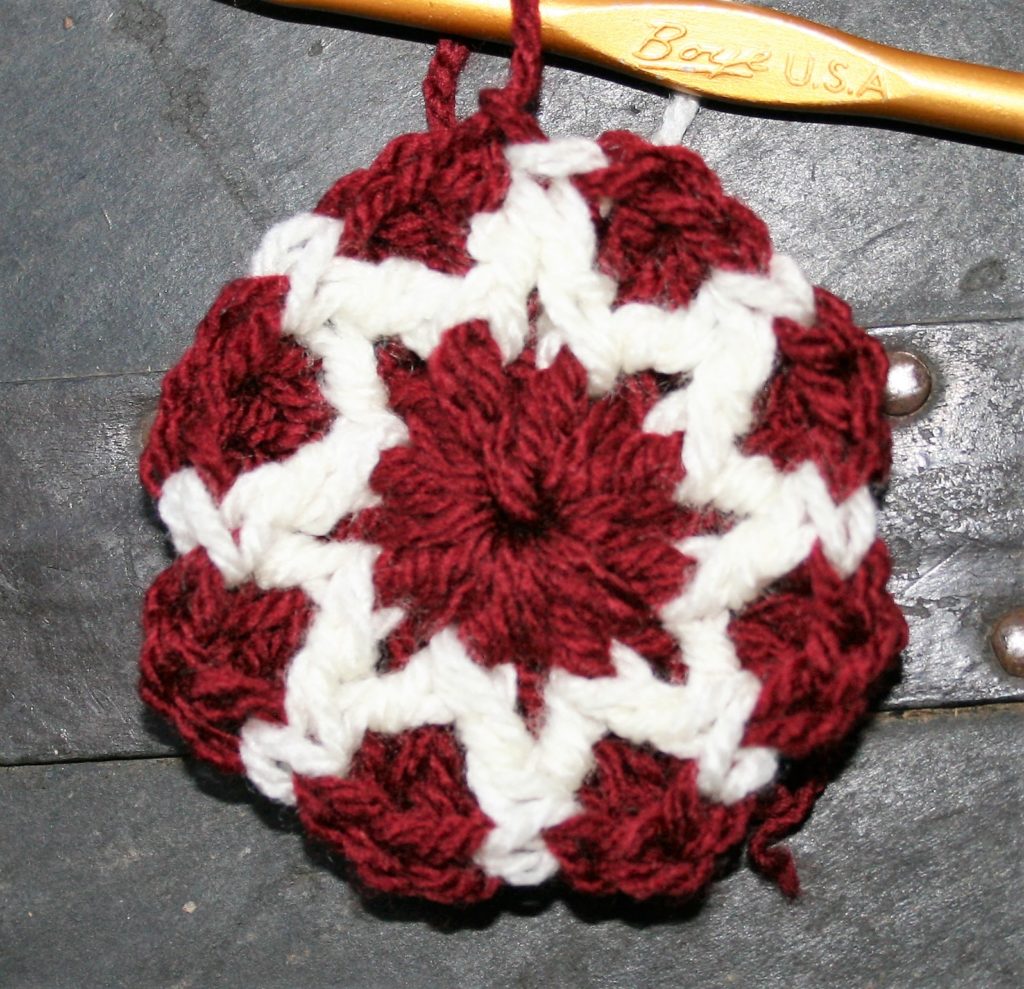
Rnd 3: Ch 3, dc in same st, change color to CC, fpdc2tog over last and first fpdc2tog, change color to MC, skip next st, 2 dc in next st, dc in next fpdc2tog, [2 dc in next st, change color to CC, fpdc2tog over last-used and next fpdc2tog, change color to MC, sk next st, 2 dc in next st, dc in next fpdc2tog] repeat around, sl st in top of beg ch-3 to join. -8 fpdc2tog, 40 dc
Rnd 4: Ch 3, dc in same st, dc in next 3 sts, 2 dc in next st, change color to CC, fptr2tog over last and first fpdc2tog of previous row, change color to MC, [skip next st, 2 dc in next st, dc in next 3 sts, 2 dc in next st, change color to CC, fptr2tog over last-used and next fpdc2tog, change color to MC] repeat around, sl st in top of beg ch-3 to join. -8 fptr2tog, 56 dc
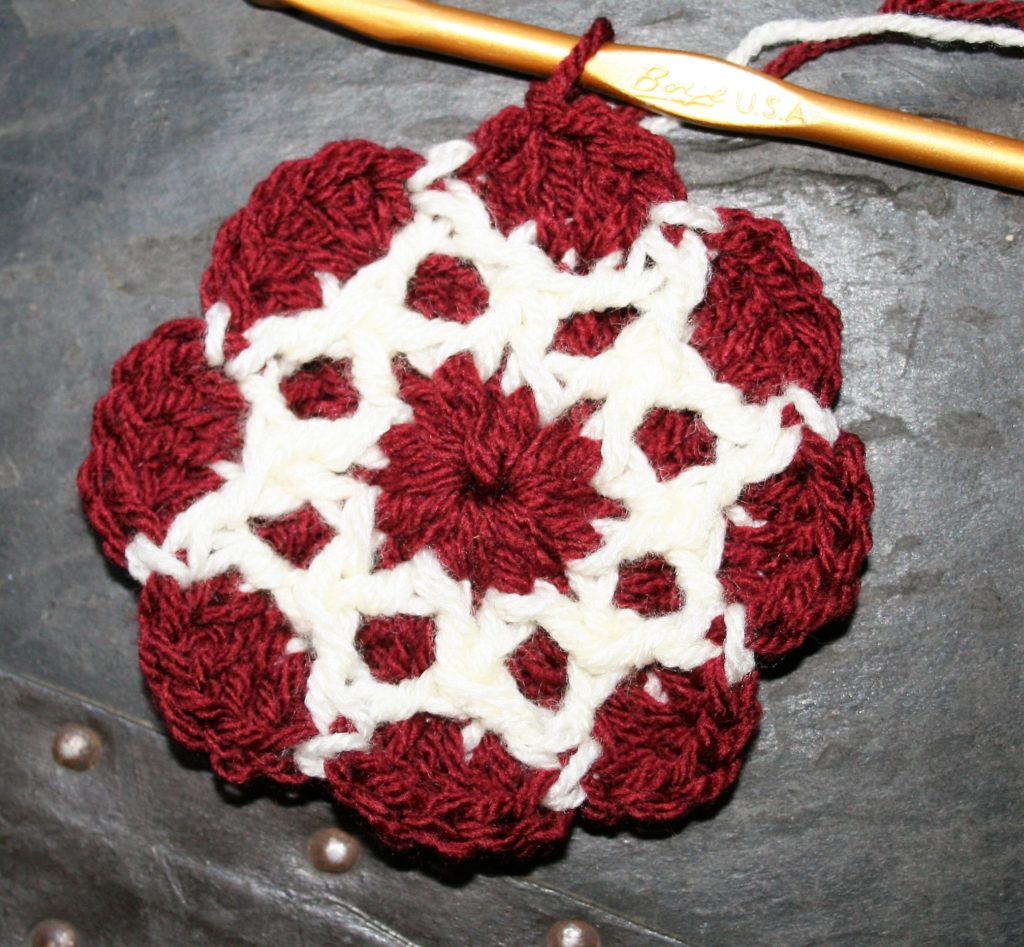
We start making corners
Rnd 5: Ch 3, dc in next st, hdc in next 2 sts, sc in next 3 sts, change color to CC, fphdc around fptr2tog, change color to MC, sc in next 3 sts, hdc in next 2 sts, dc in next 2 sts, change color to CC, (fpdc, ch 1, fpdc) around fptr2tog (corner made), change color to MC, [dc in next 2 sts, hdc in next 2 sts, sc in next 3 sts, change color to CC, fphdc around fptr2tog, change color to MC, sc in next 3 sts, hdc in next 2 sts, dc in next 2 sts, change color to CC, (fpdc, ch 1, fpdc) around fptr2tog, change color to MC] repeat around, sl st in top of beg ch-3 to join. Fasten off CC. -4 fphdc, 4 (fpdc, ch 1, fpdc) corners, 16 dc, 16 hdc, 24 sc
Rnd 6: Ch 2 (counts as hdc), [hdc in each st across to ch-1 sp, (dc, ch 1, dc) in ch-1 sp] repeat around, hdc in last st, sl st in top of beg ch-2 to join. Fasten off. – 68 hdc, 4 (dc, ch 1, dc) corners, (19 sts on each side of square)
Making the Bigger Square
Rnd 7: With CC, join to any ch-1 corner sp, ch 3, (dc, ch 1, 2 dc) in same sp as join, bpdc around each st to next ch-1 sp, [(2dc, ch 1, 2 dc) in ch-1 sp, bpdc around each st to next ch-1 sp] repeat around, sl st in top of beg ch-3 to join. -76 bpdc, 4 (2 dc, ch 1, 2 dc) corners
Rnd 8: Ch 3, dc in next st, (dc, ch 1, dc) in ch-1 sp, [dc in next 3 sts, change color to MC, fpdc2tog, change color to CC] five times, {dc in next 3 sts, (dc, ch 1, dc) in ch-1 sp, [dc in next 3 sts, change color to MC, fpdc2tog, change color to CC] five times} repeat around, dc in last st, sl st in top of beg ch-3 to join. -20 fpdc2tog, 72 dc, 4 (dc, ch 1, dc) corners
Rnd 9: Ch 3, dc in next 2 sts, {(dc, ch 1, dc) in ch-1 sp, dc in next 6 sts, [change color to MC, fpdc2tog over previous and next fpdc2tog, change color to CC, sk next st, dc in next 3 sts] 4 times, dc in next 3 sts} repeat around omitting last 3 dc on last repeat, sl st in top of beg ch-3 to join. Fasten off both colors. -16 fpdc2tog, 84 dc, 4 (dc, ch 1, dc) corners
We are moving the corner…
Rnd 10: Note corner location will shift in this round. With MC, join to any ch-1 sp, ch 1, sc in same sp, bpsc around next 4 sts, bphdc around next 4 sts, bpdc around next 5 sts, (dc, ch 1, dc) in next st, bpdc around next 5 sts, bphdc around next 4 sts, bpsc around next 4 sts, [sc in ch-1 sp, bpsc around next 4 sts, bphdc around next 4 sts, bpdc around next 5 sts, (dc, ch 1, dc) in next st, bpdc around next 5 sts, bphdc around next 4 sts, bpsc around next 4 sts] repeat around, sl st in first sc to join. –32 bpsc, 32 bphdc, 40bpdc, 4 sc, 4 (dc, ch 1, dc) corners
Rnd 11: Ch 1, sc in same st, sc in next 4 sts, [hdc in next 5 sts, dc in next 5 sts, (dc, ch 1, dc) in ch-1 sp, dc in next 5 sts, hdc in next 5 sts, sc in next 9 sts] 3 times, hdc in next 5 sts, dc in next 5 sts, (dc, ch 1, dc) in ch-1 sp, dc in next 5 sts, hdc in next 5 sts, sc in last 4 sts, sl st in first sc to join. -36 sc, 40 hdc, 40 dc, 4 (dc, ch 1, dc) corners
Rnd 12: Ch 1, sc in same st, sc in next 10 sts, [hdc in next 5 sts, (dc, ch 1, dc) in ch-1 sp, hdc in next 5 sts, sc in next 21 sts] 3 times, hdc in next 5 sts, (dc, ch 1, dc) in ch-1 sp, hdc in next 5 sts, sc in next 10 sts, sl st in first sc to join. Fasten off. -84 sc, 40 hdc, 4 (dc, ch 1, dc) corners
Rnd 13: With CC, join to any ch-1 sp, ch 2 (counts as hdc), (hdc, ch 1, 2 hdc) in same sp as join, bphdc in each st across to next ch-sp, [(2 hdc, ch 1, 2 hdc) in ch-1 sp, bphdc in each st across to next ch-sp] repeat around, sl st to join. Fasten off. Block. –132 bphdc, 4 (2 hdc, ch 1, 2 hdc) corners (37 stitches on each side of square)