Understand Crochet Post Stitches

In crochet Post Stitches are all about where you put your hook. It really can be that simple, yet it can be intimidating. It is from post stitches that interesting textures and designs can be created. But first it helps to understand the basics.

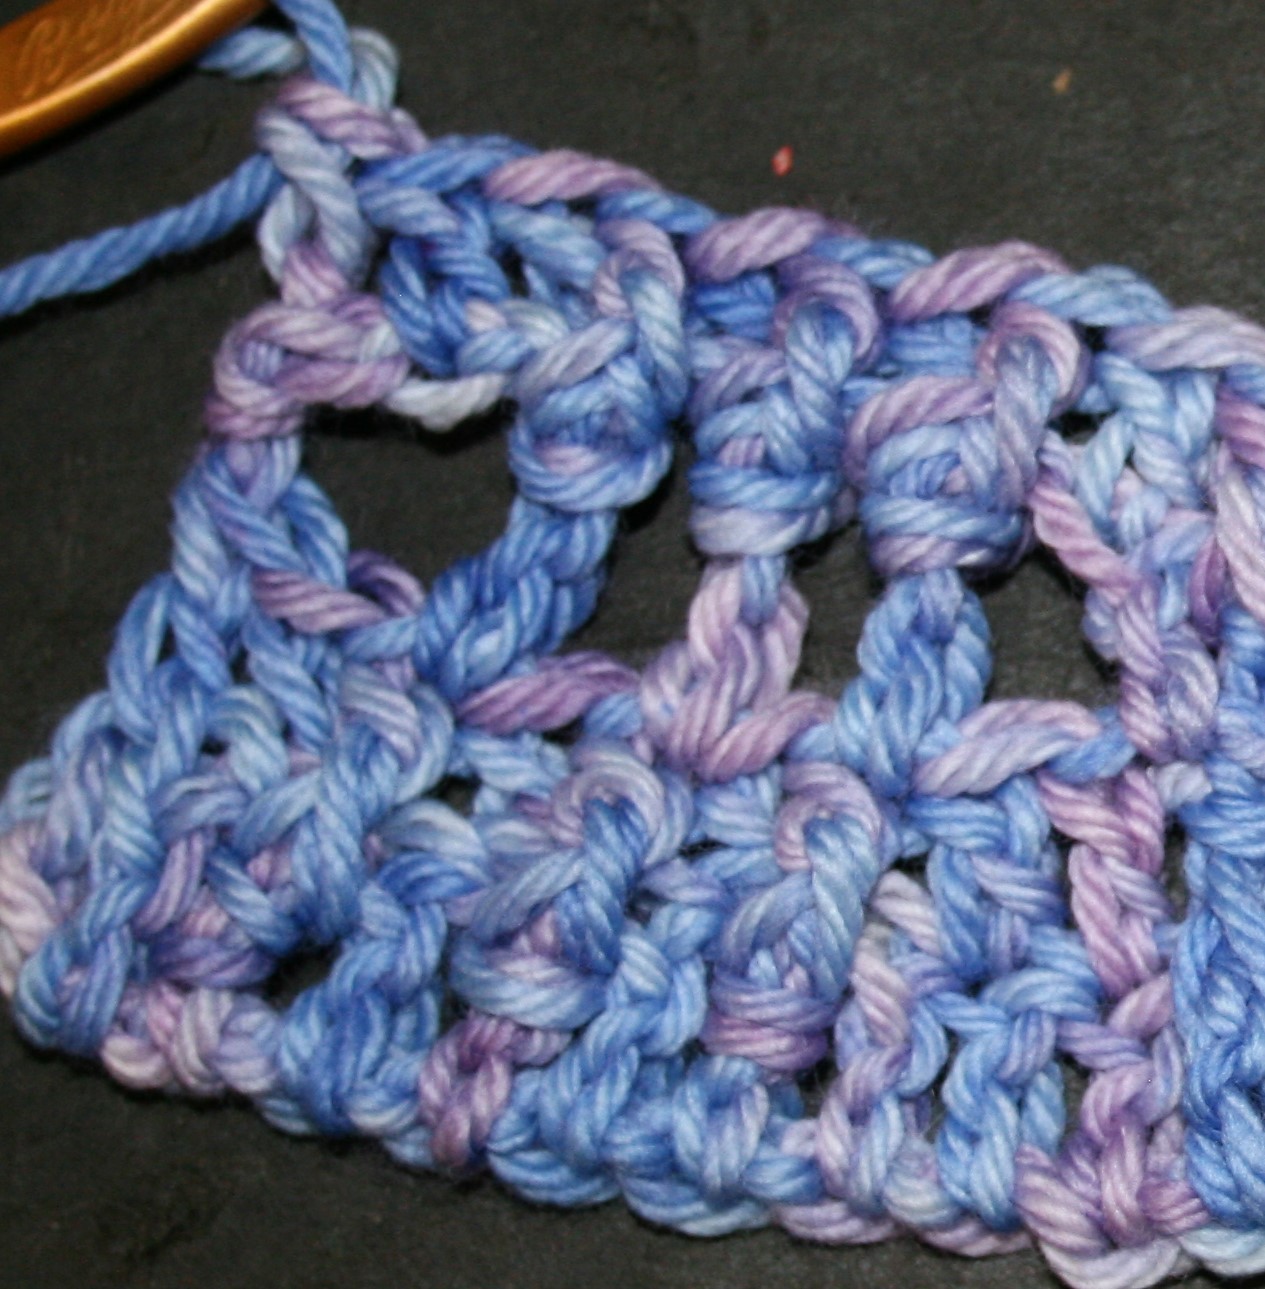
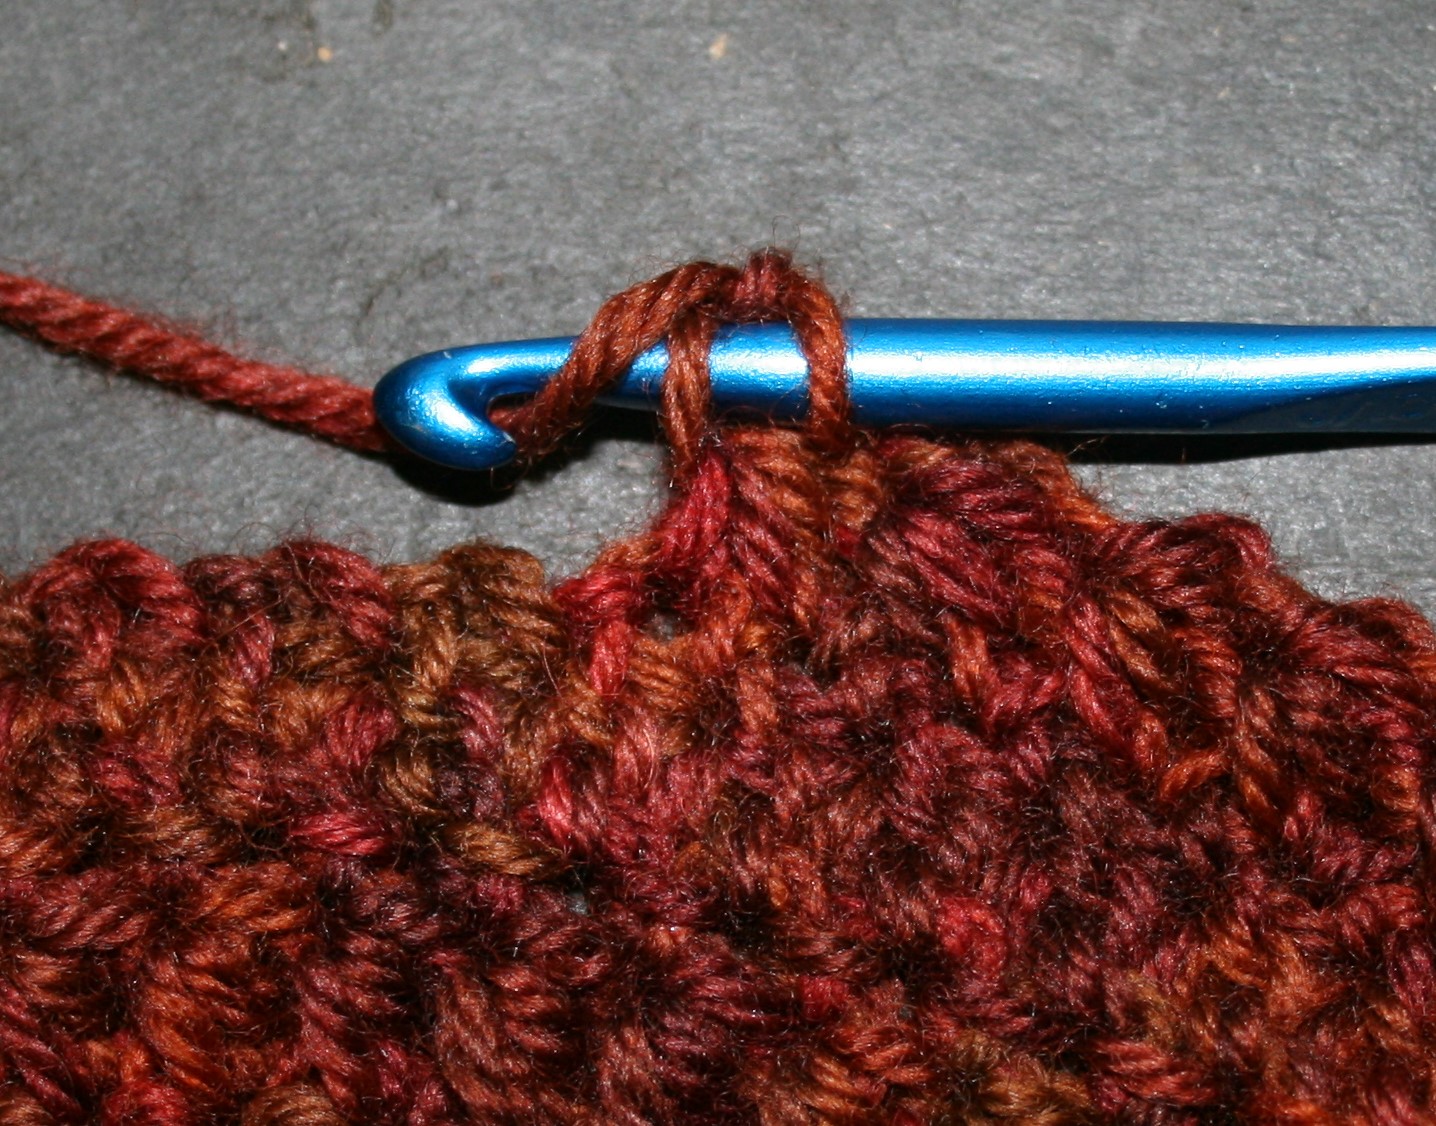
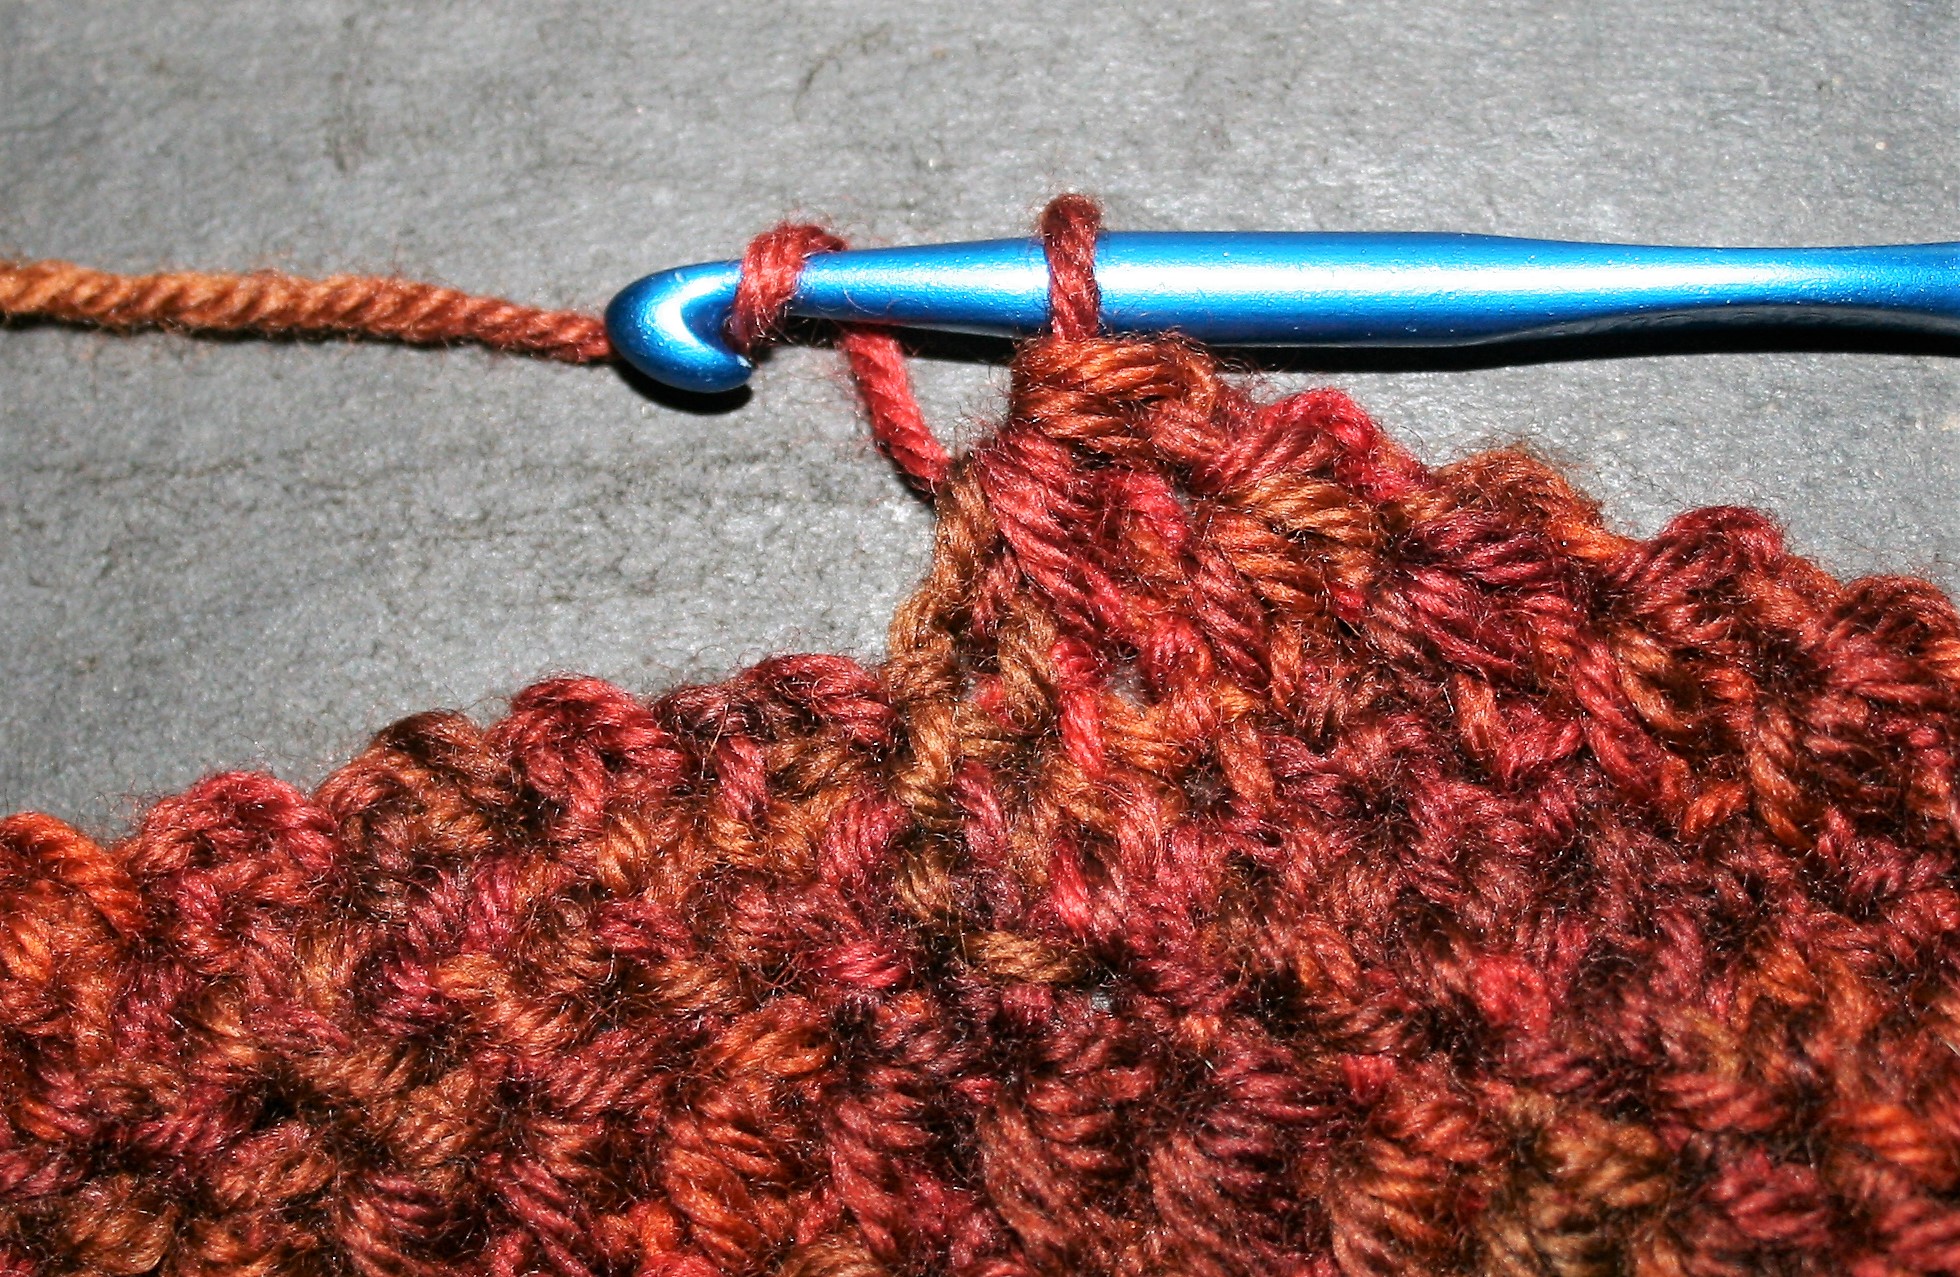
To work a Front Post Stitch, the hook is inserted between the “body” of a stitch, from the front of the fabric to the back, then returned back to the front of the fabric. Causing a post (or “body”) of a stitch to be pushed forward. In all the examples I show here I am demonstrating with Double Crochet stitches (US Standard), but really any stitches can be utilized in this manner. Then the indicated stitch is completed as normal.

As for a Front Post Double Crochet -FPDC, (US Standard), you would yarn over first, insert the hook as indicated above, yarn over and pull through a loop to anchor the stitch, then yarn over pull through 2 loops, and repeat the yarn over pull through of the last 2 loops on the hook.

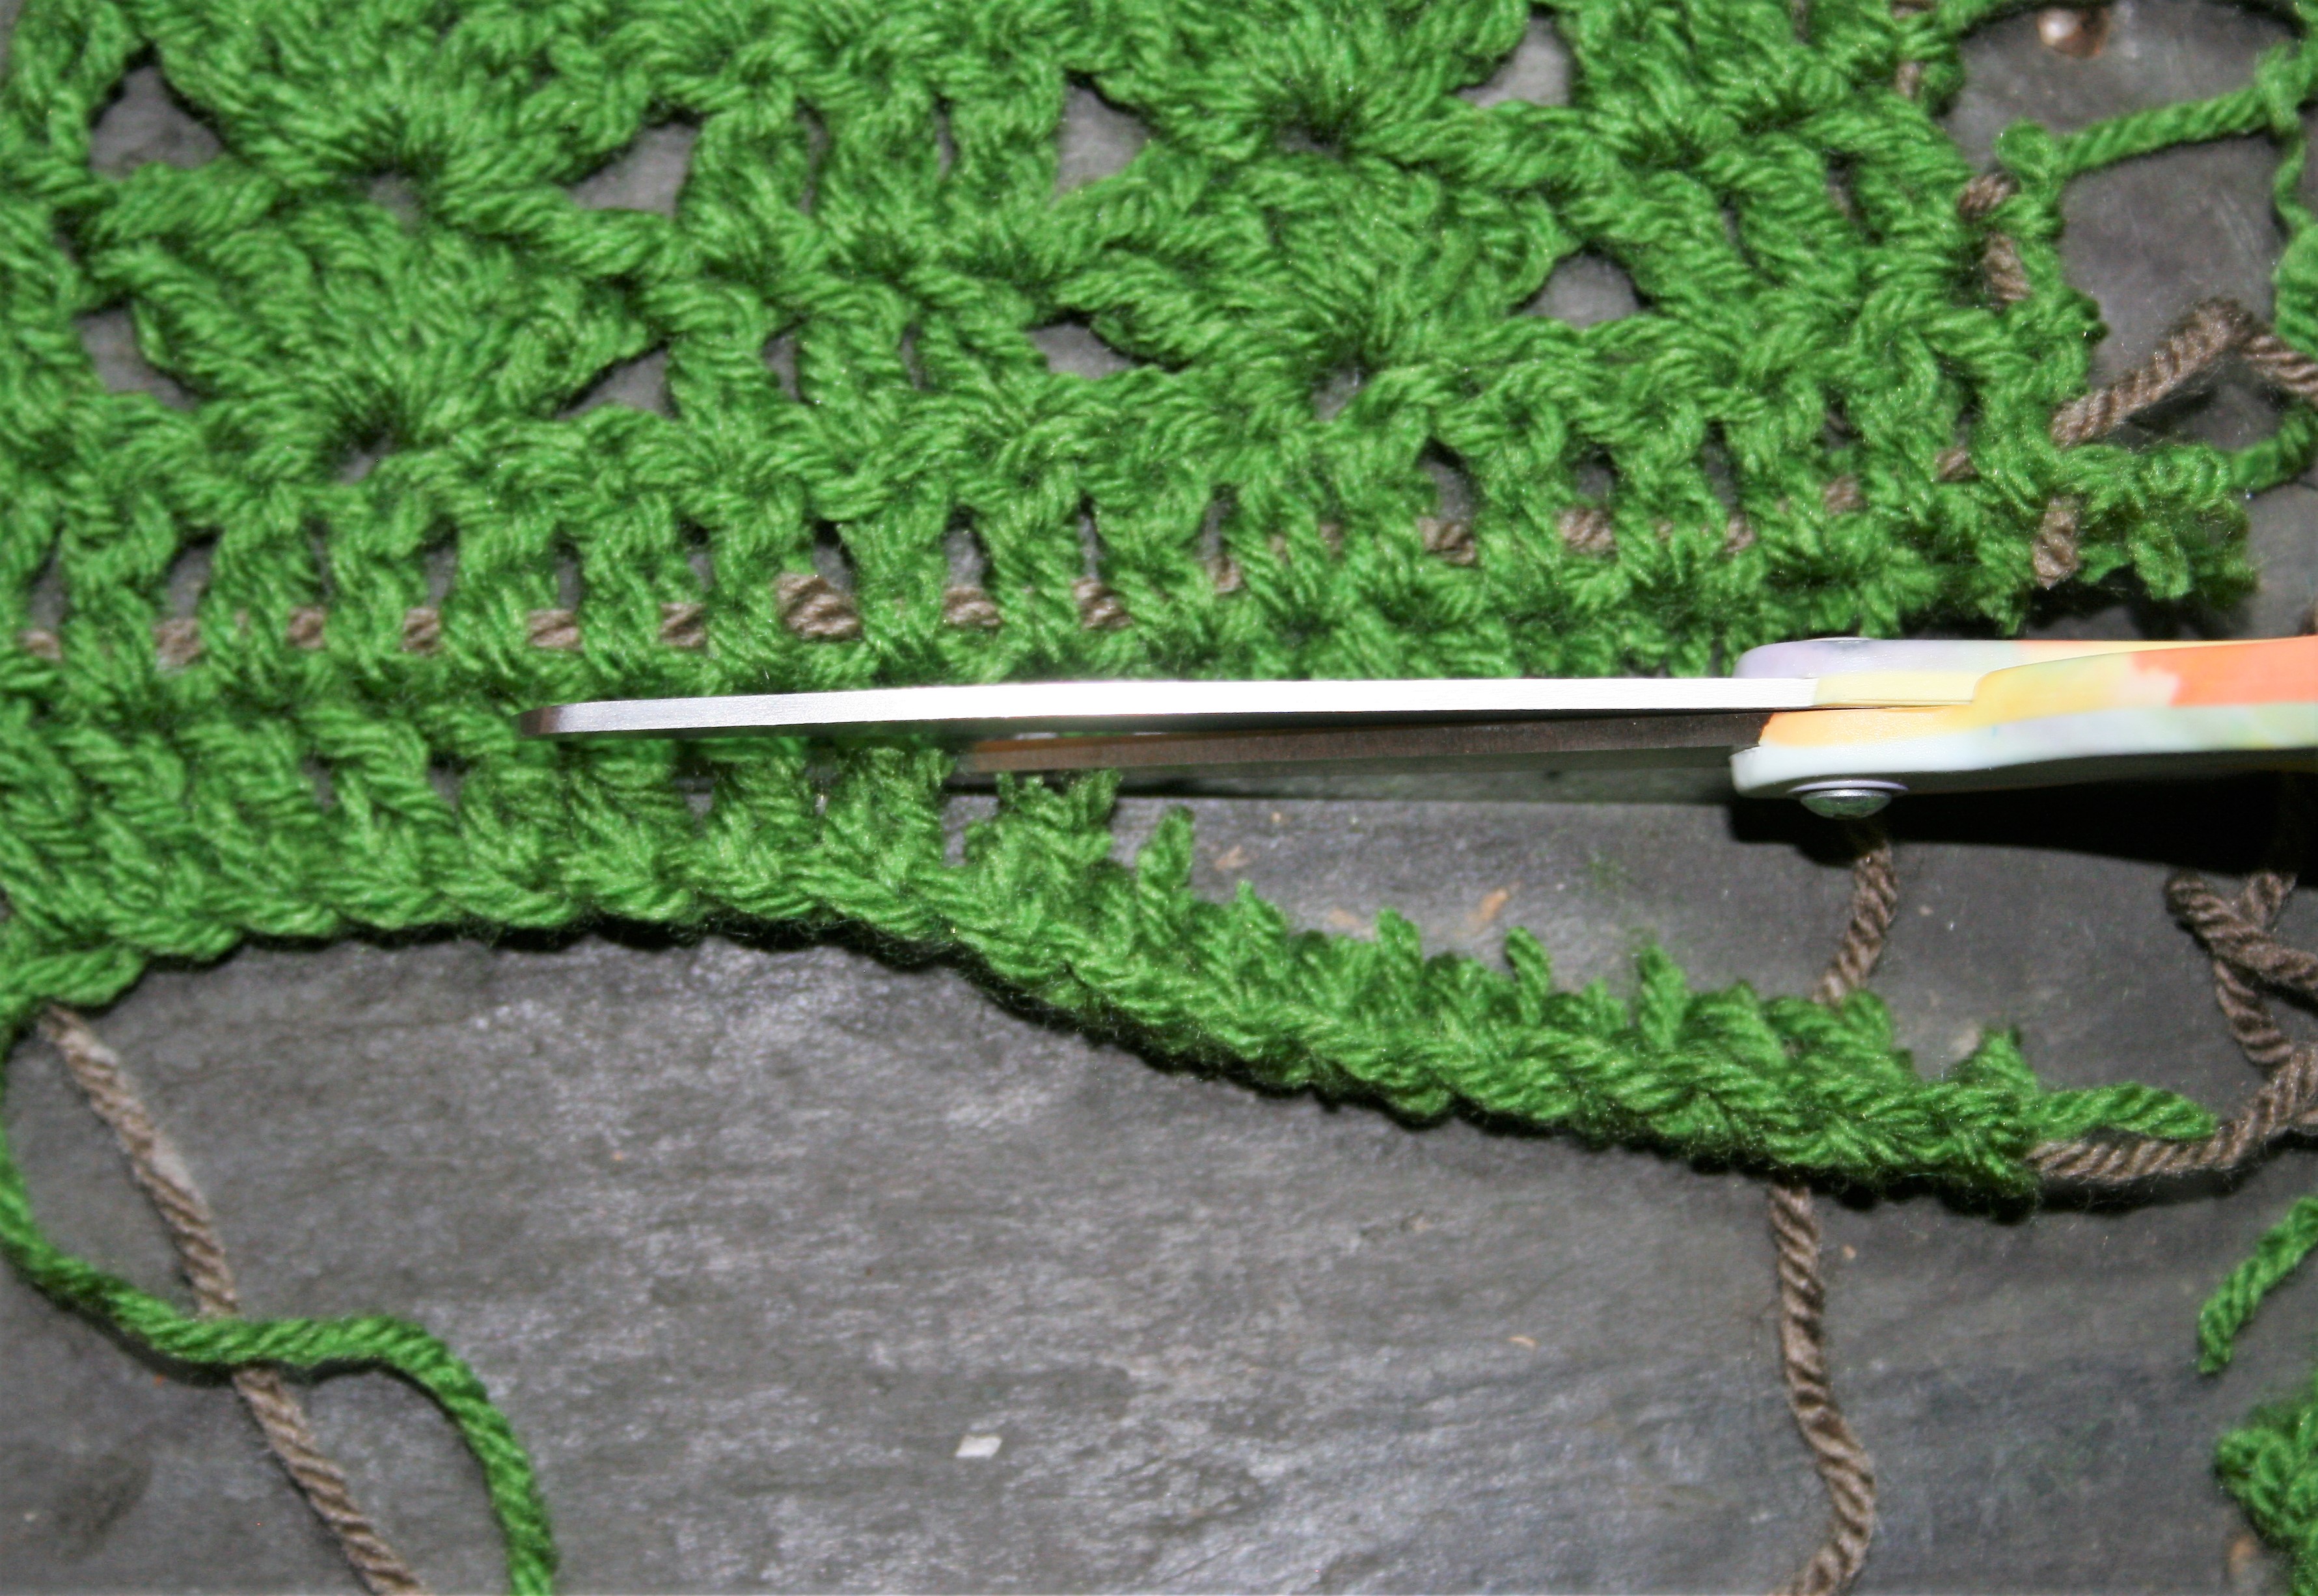
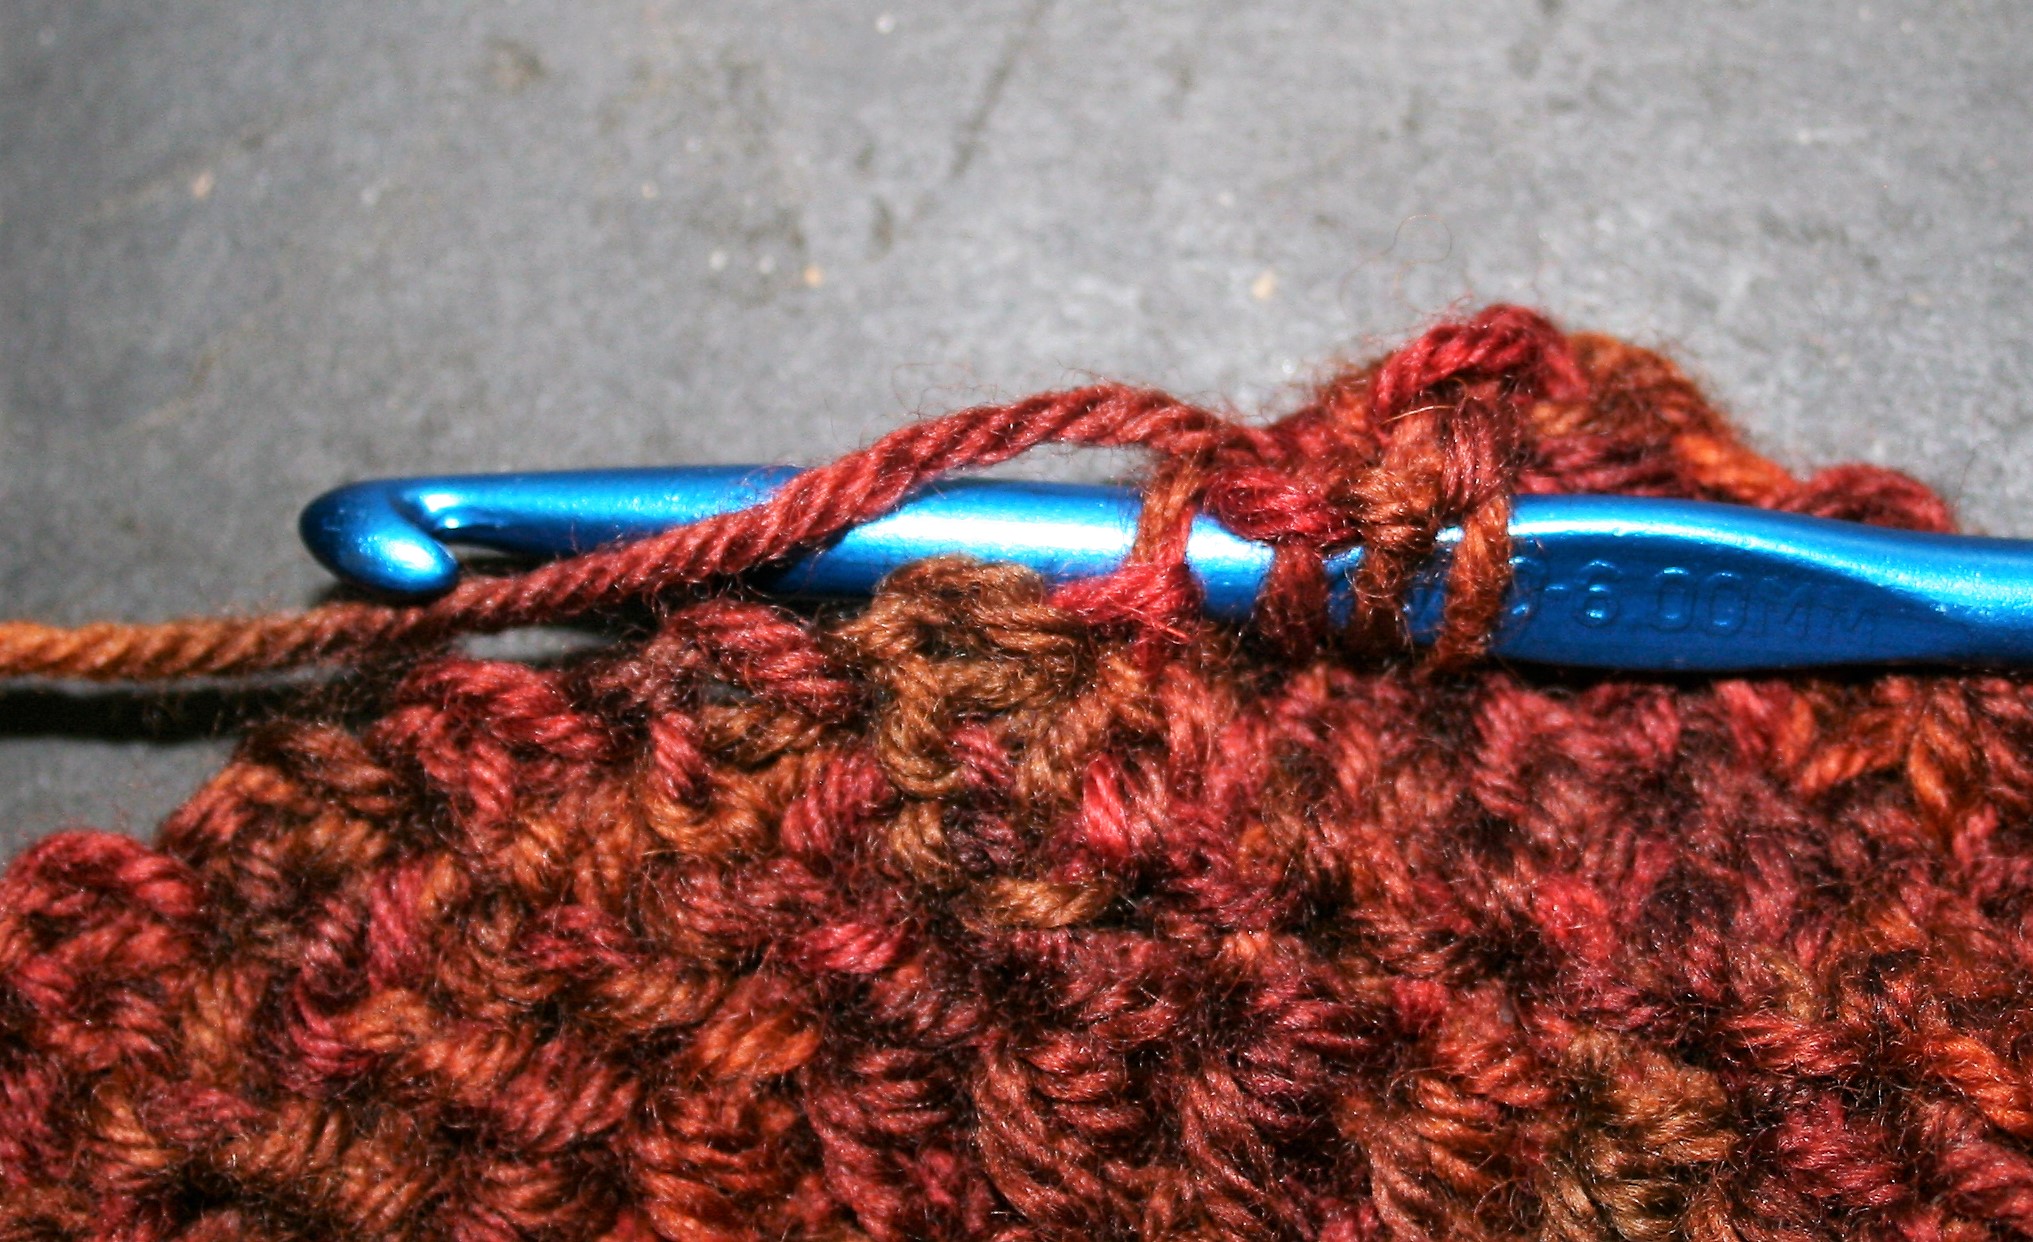
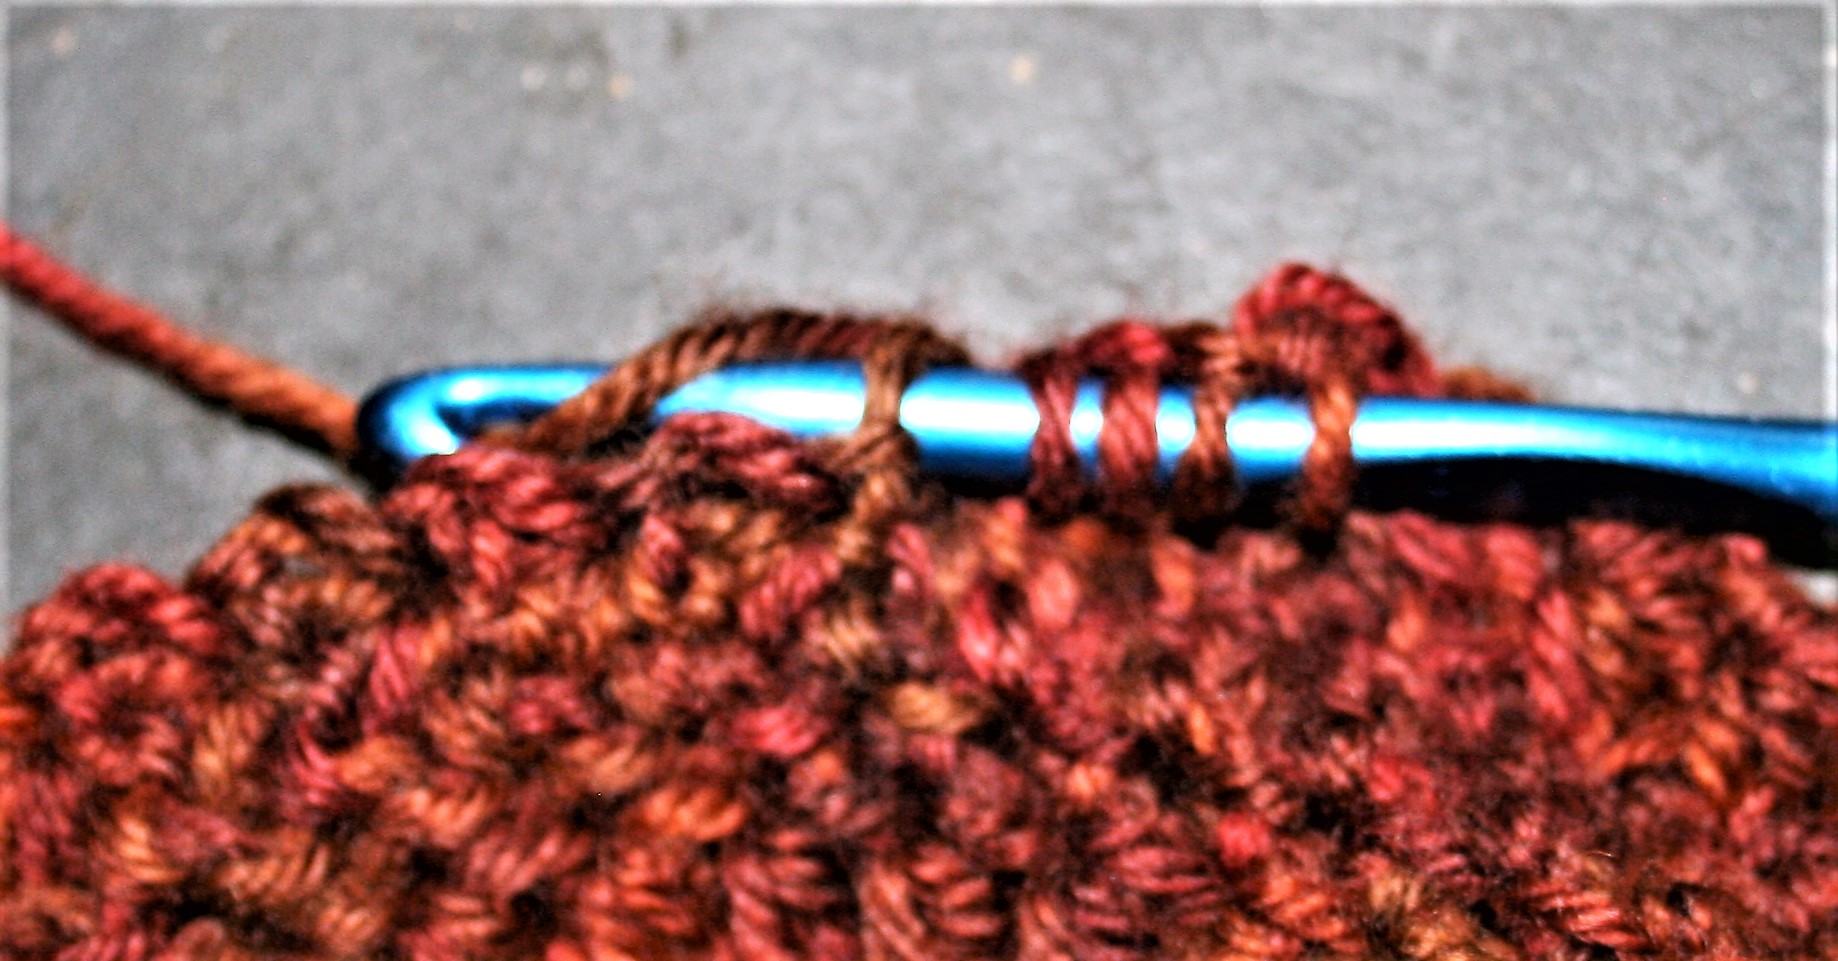
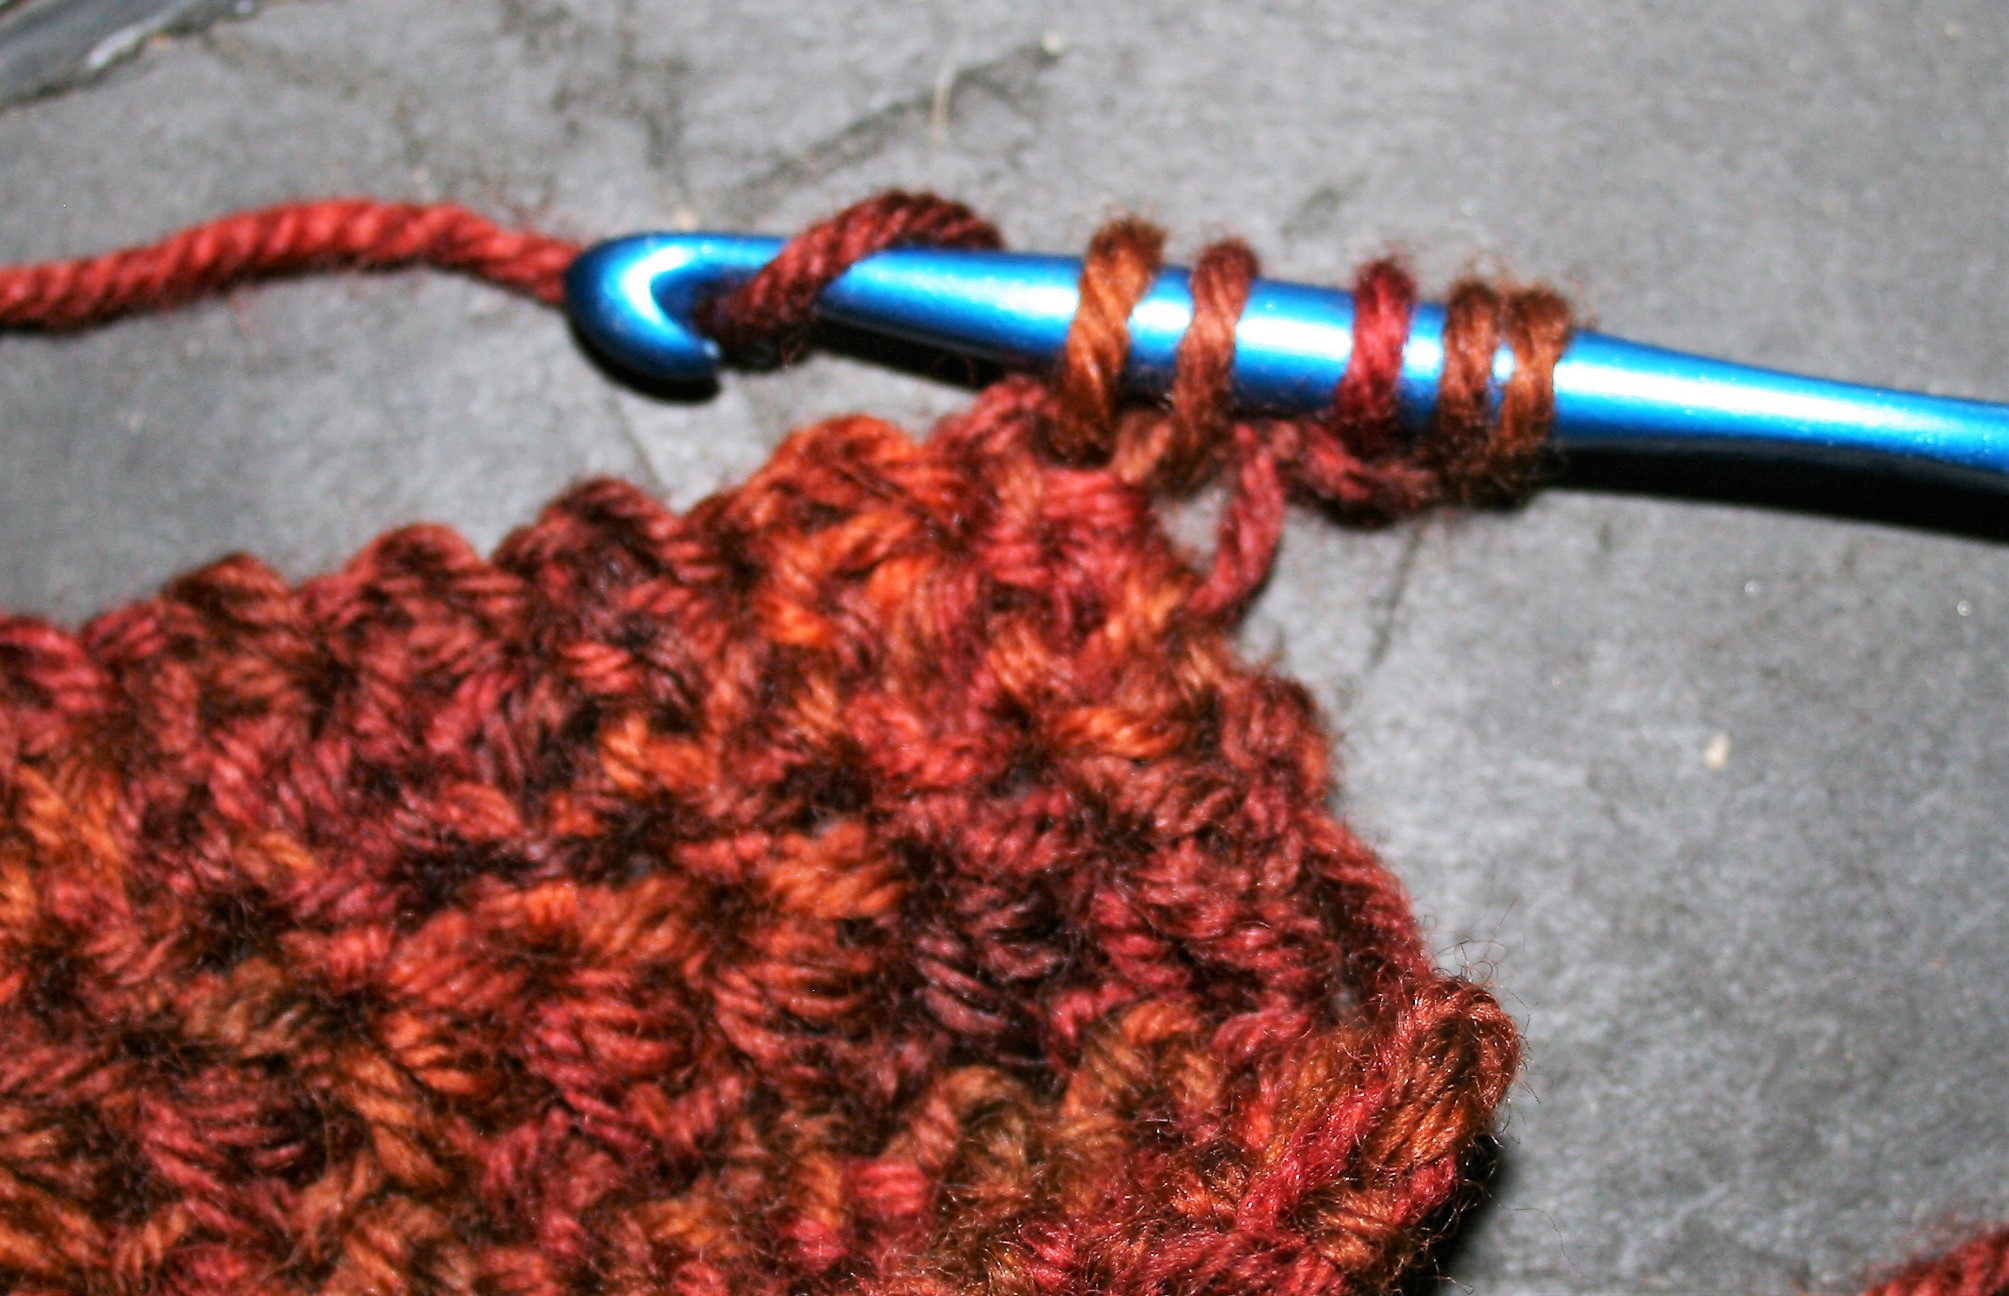
To work a Back Post Stitch the process is very similar, it is just placing the hook in the reverse order, pushing the post (or “body”) of the stitch toward the back of the fabric. Essentially inserting the hook between the “body” of the stitch, from the back of the fabric to the front, then returning the hook to the back of the fabric. Once again you complete the stitch as indicated.

When working a Back Post Double Crochet -BPDC, (US Standard), you would yarn over first, insert the hook around the post of the stitch from back to front, then front to back as described above, yarn over and pull through a loop to anchor the stitch, then yarn over and pull through 2 loops two times.

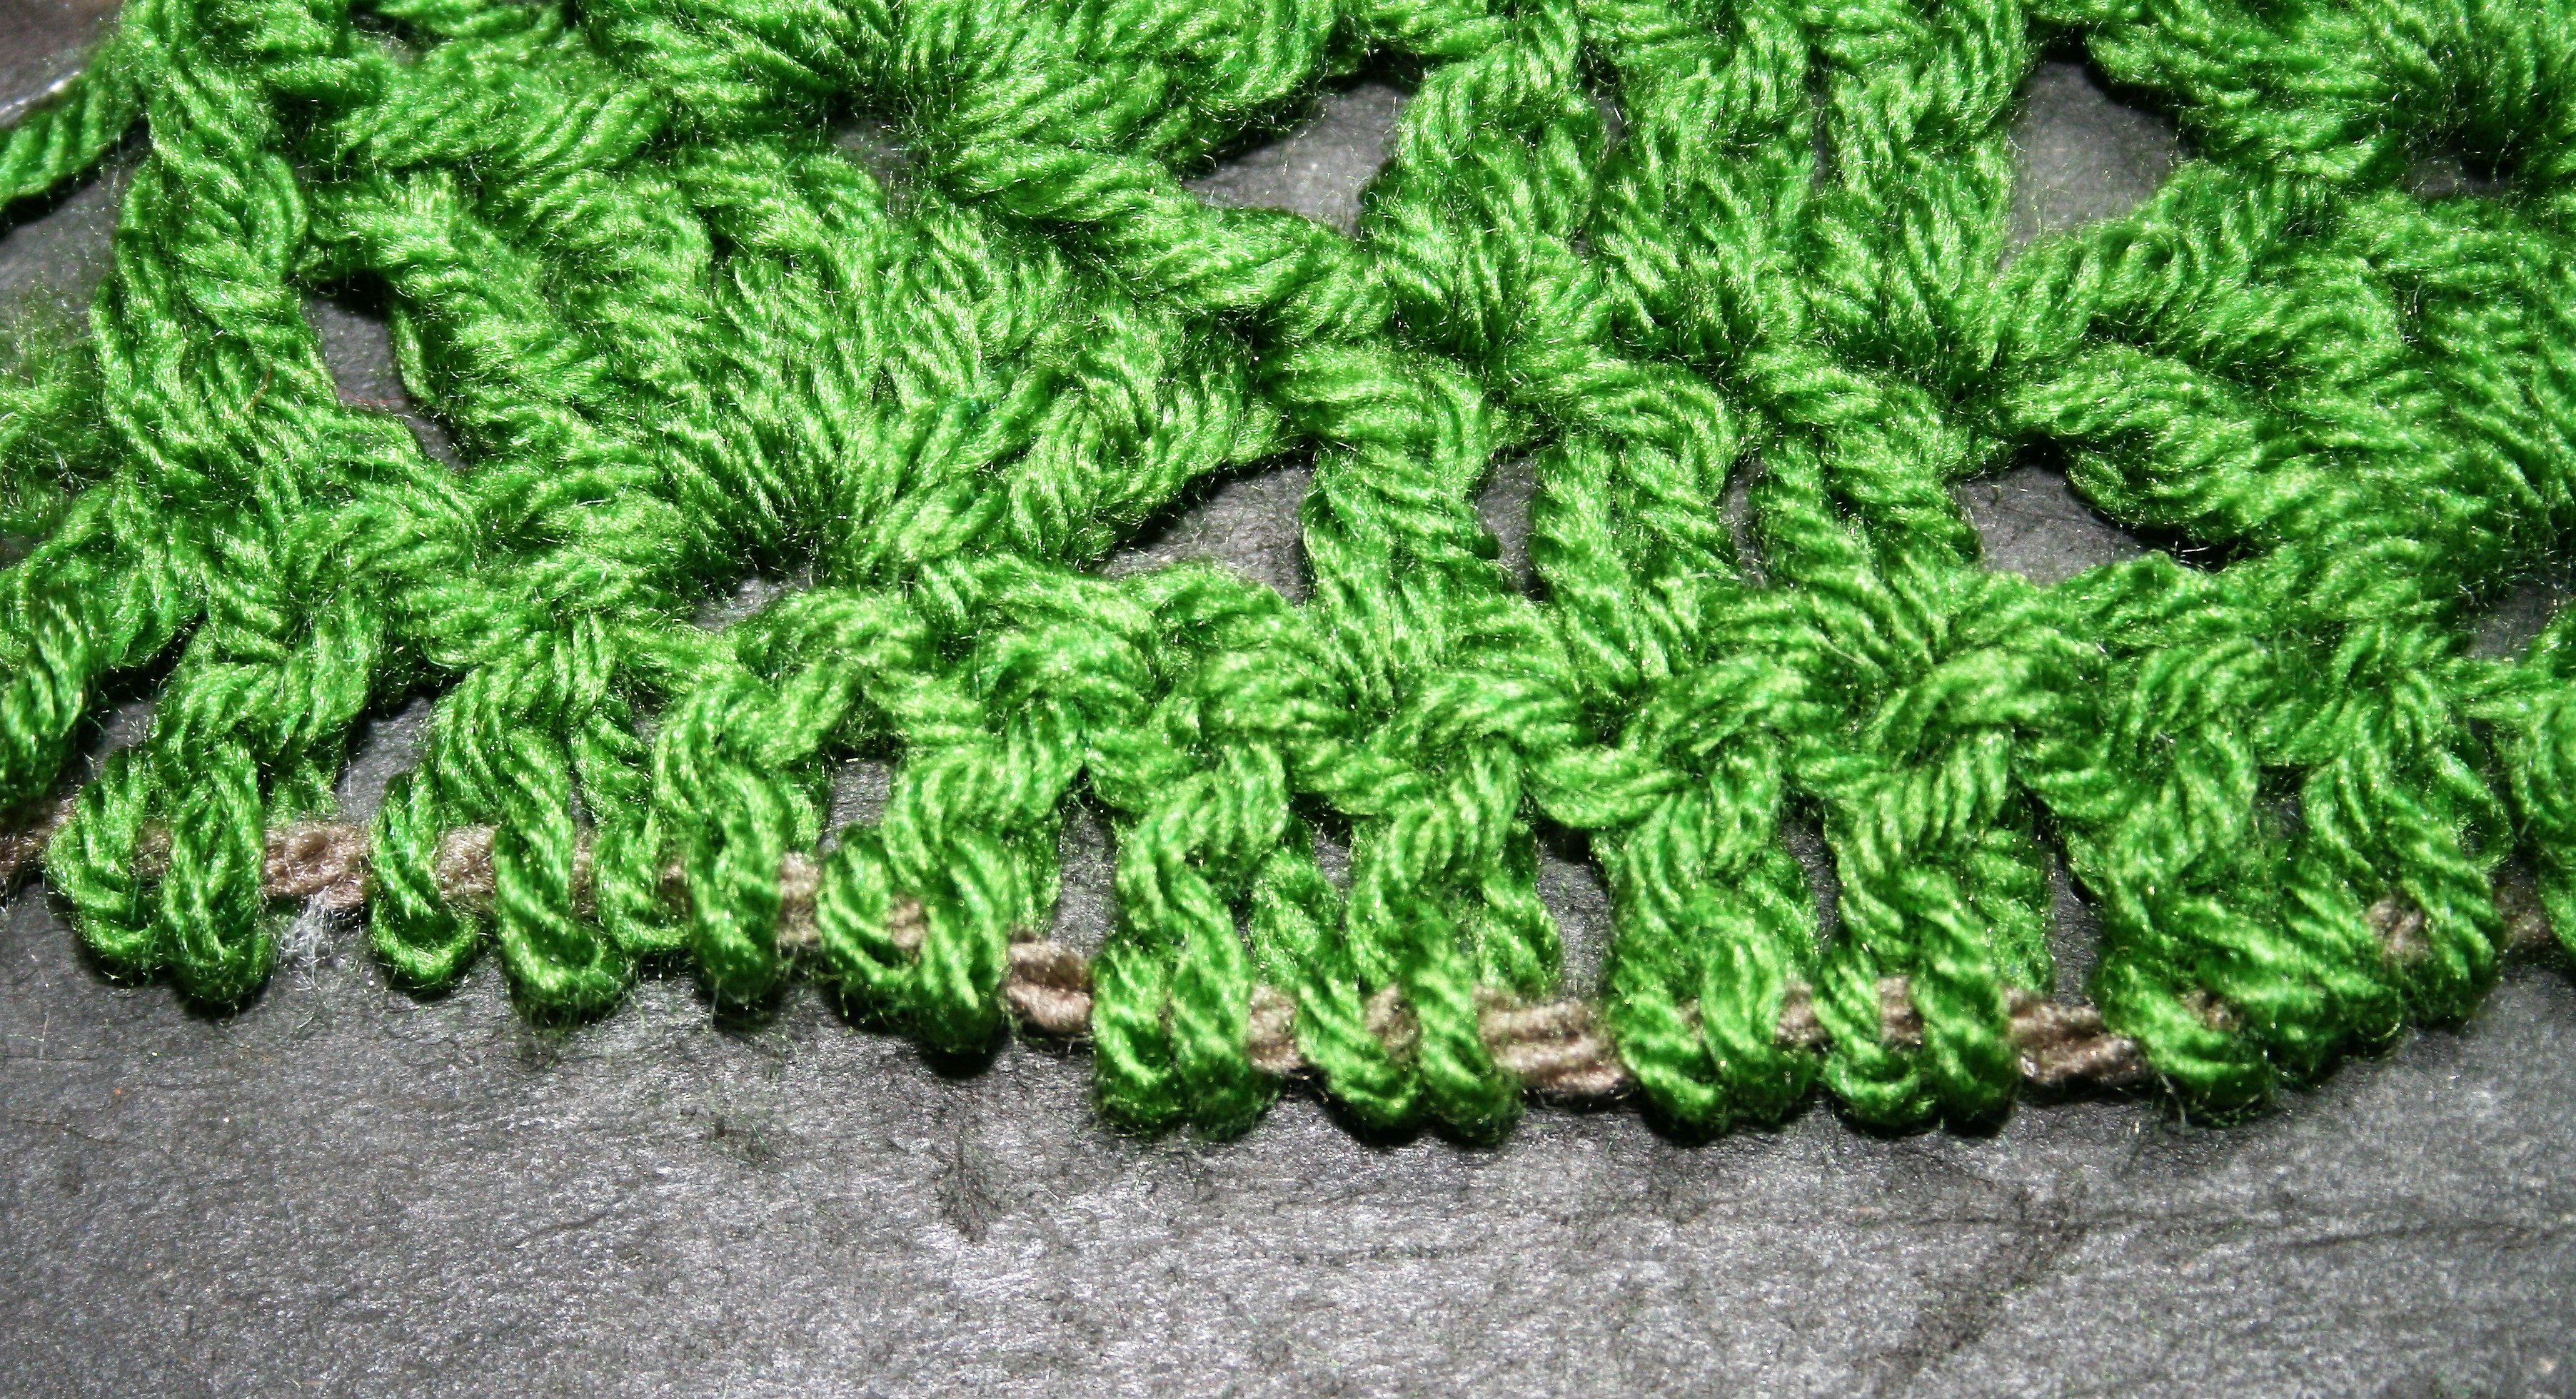
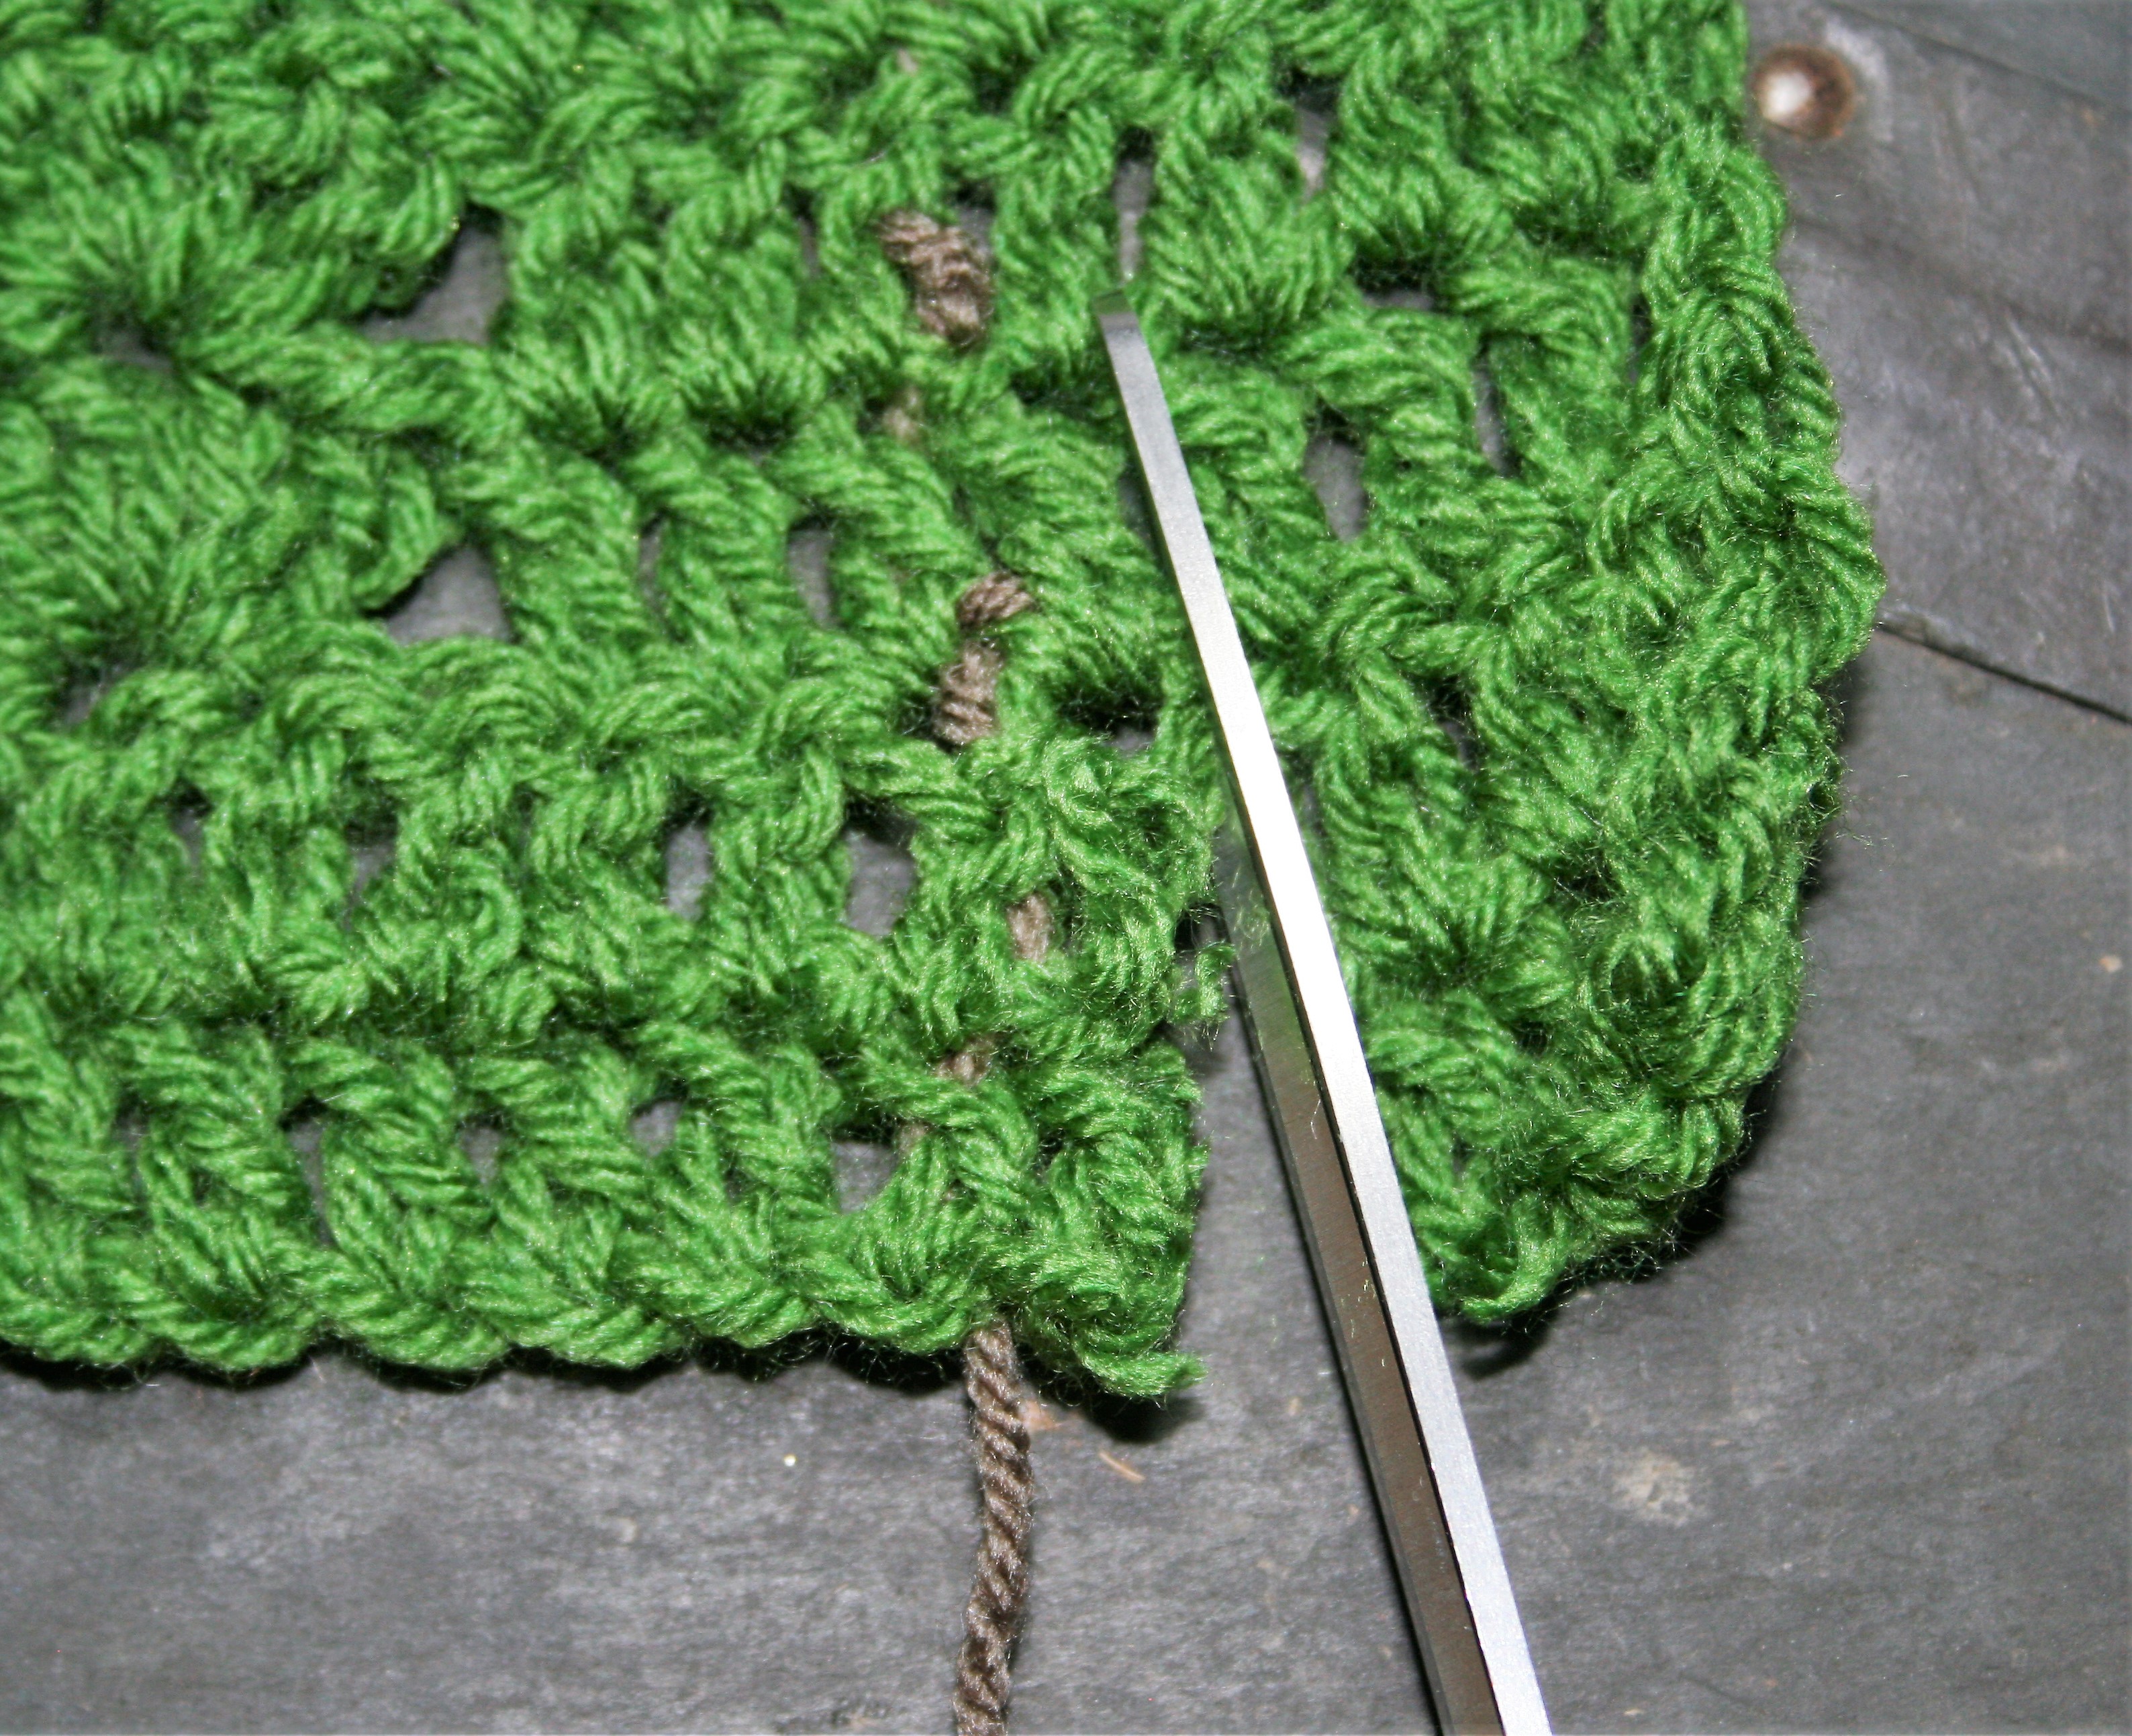
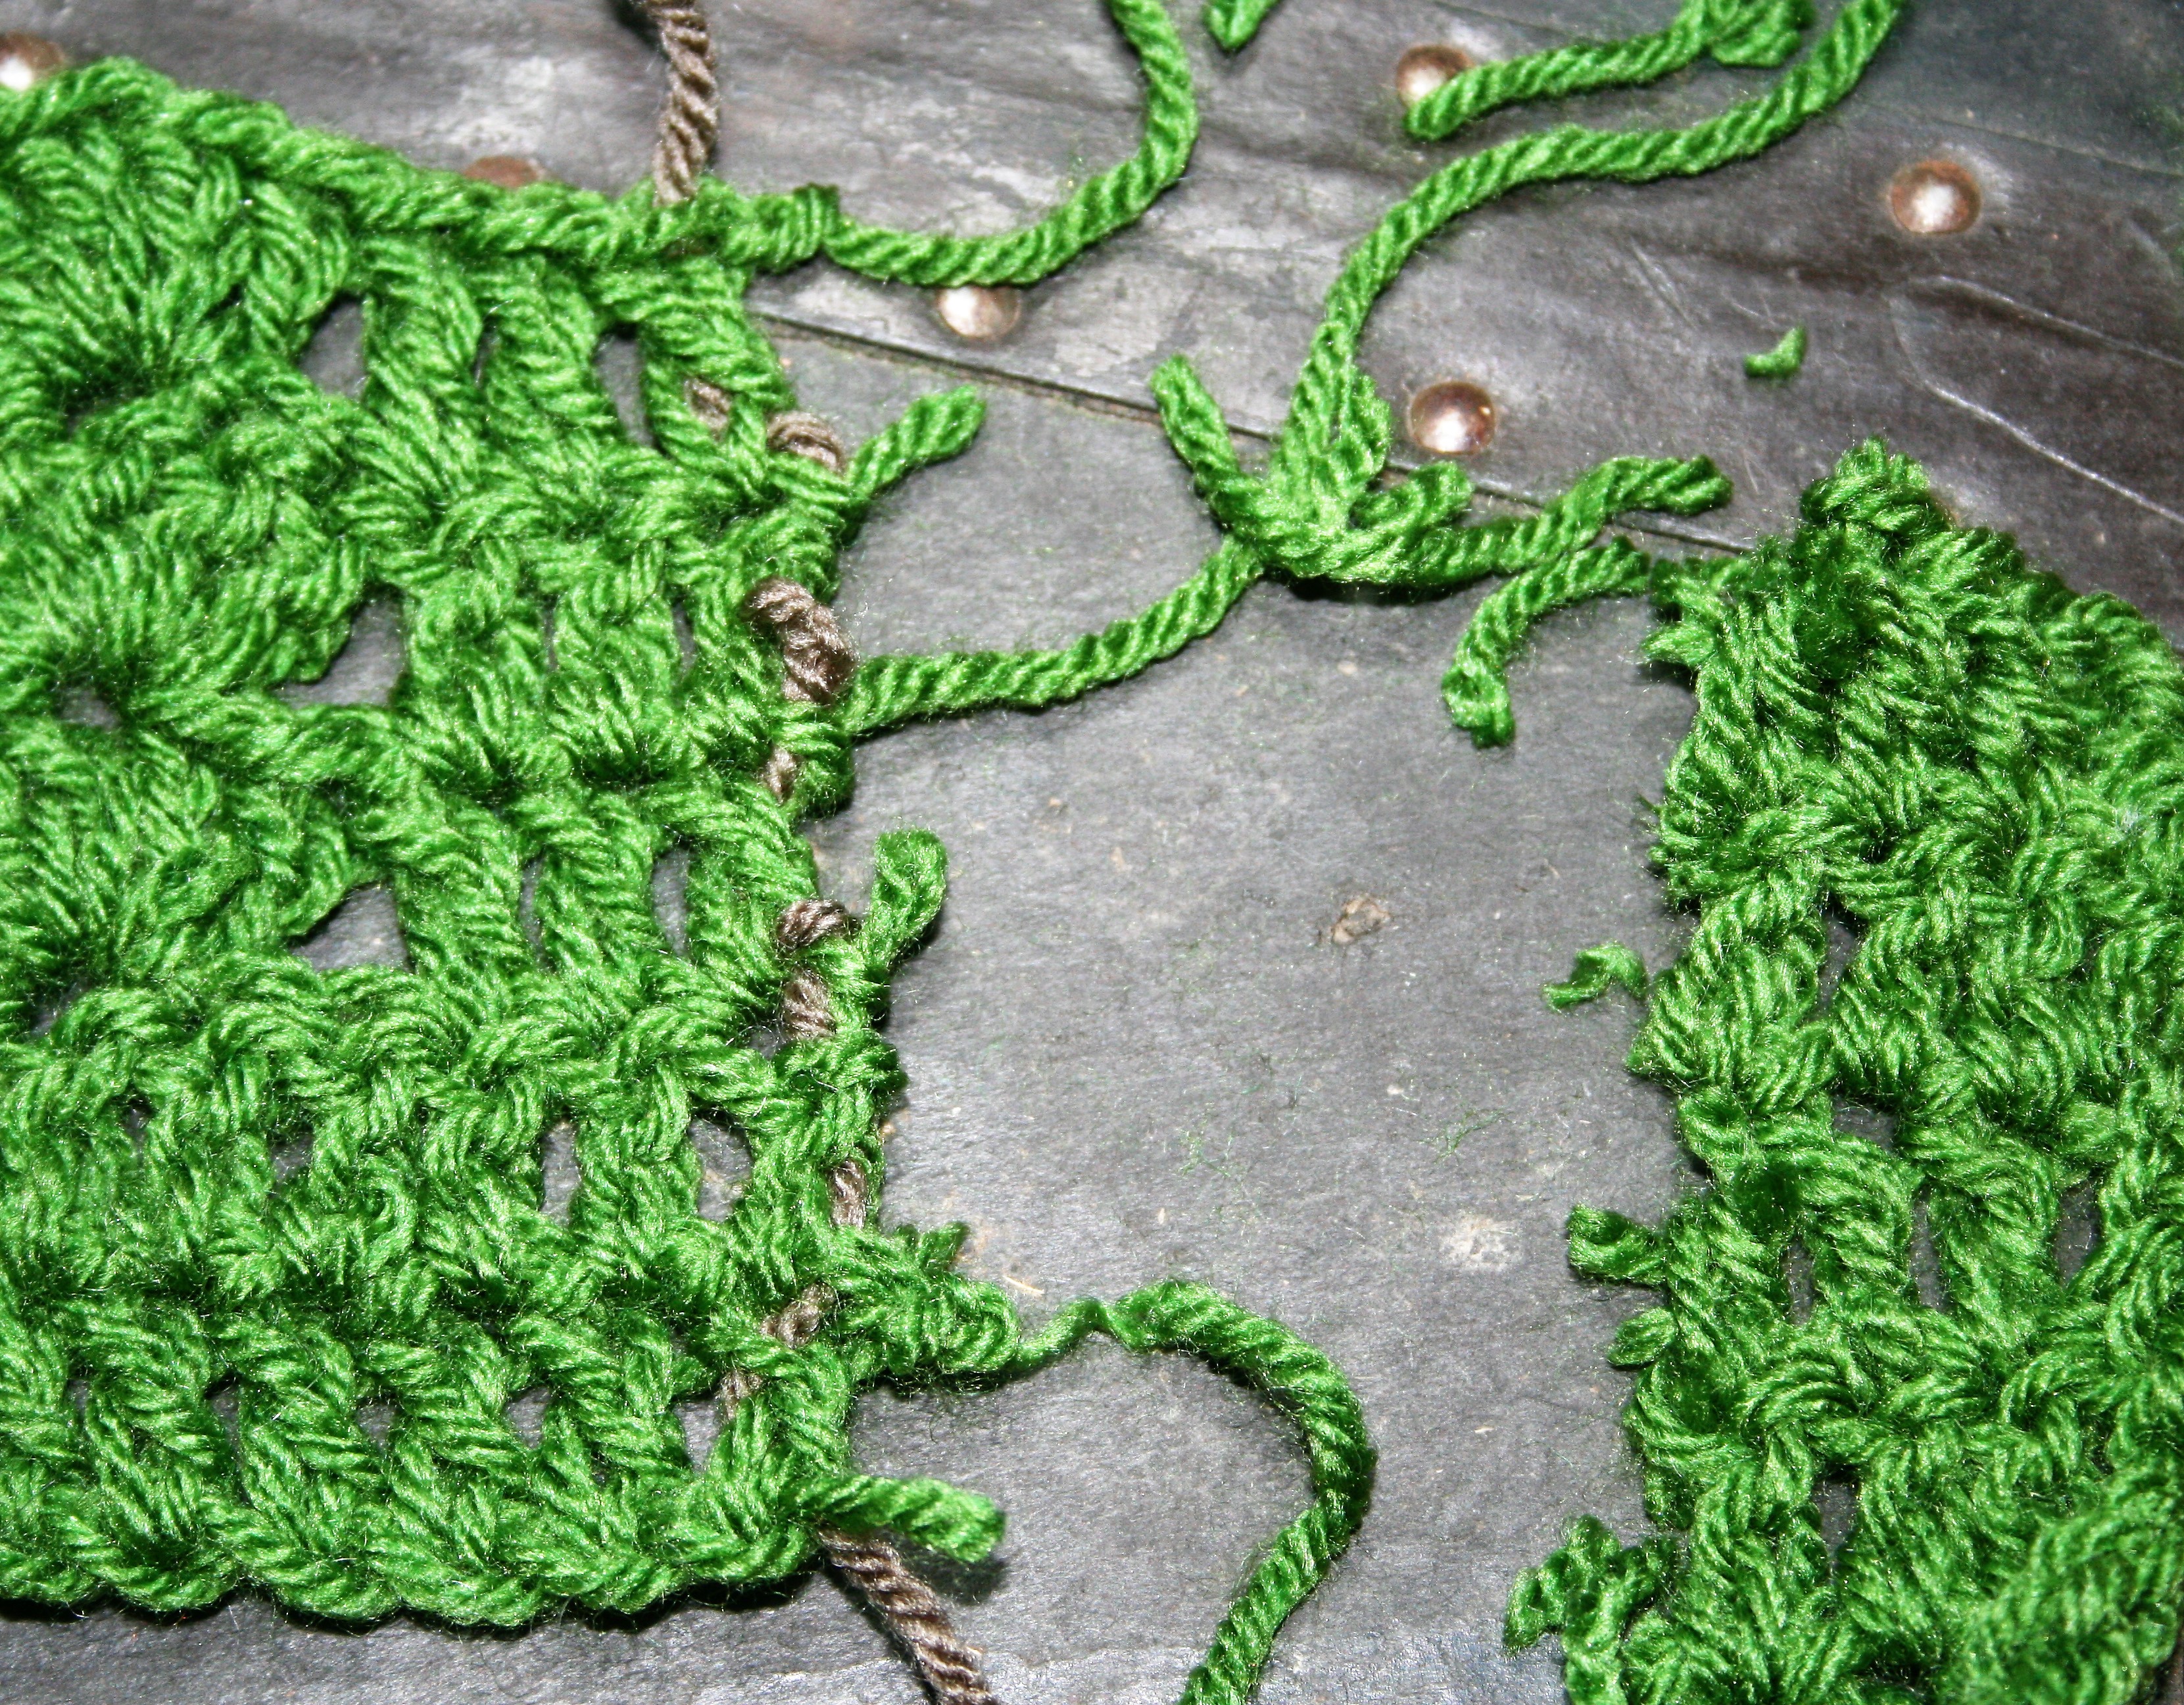
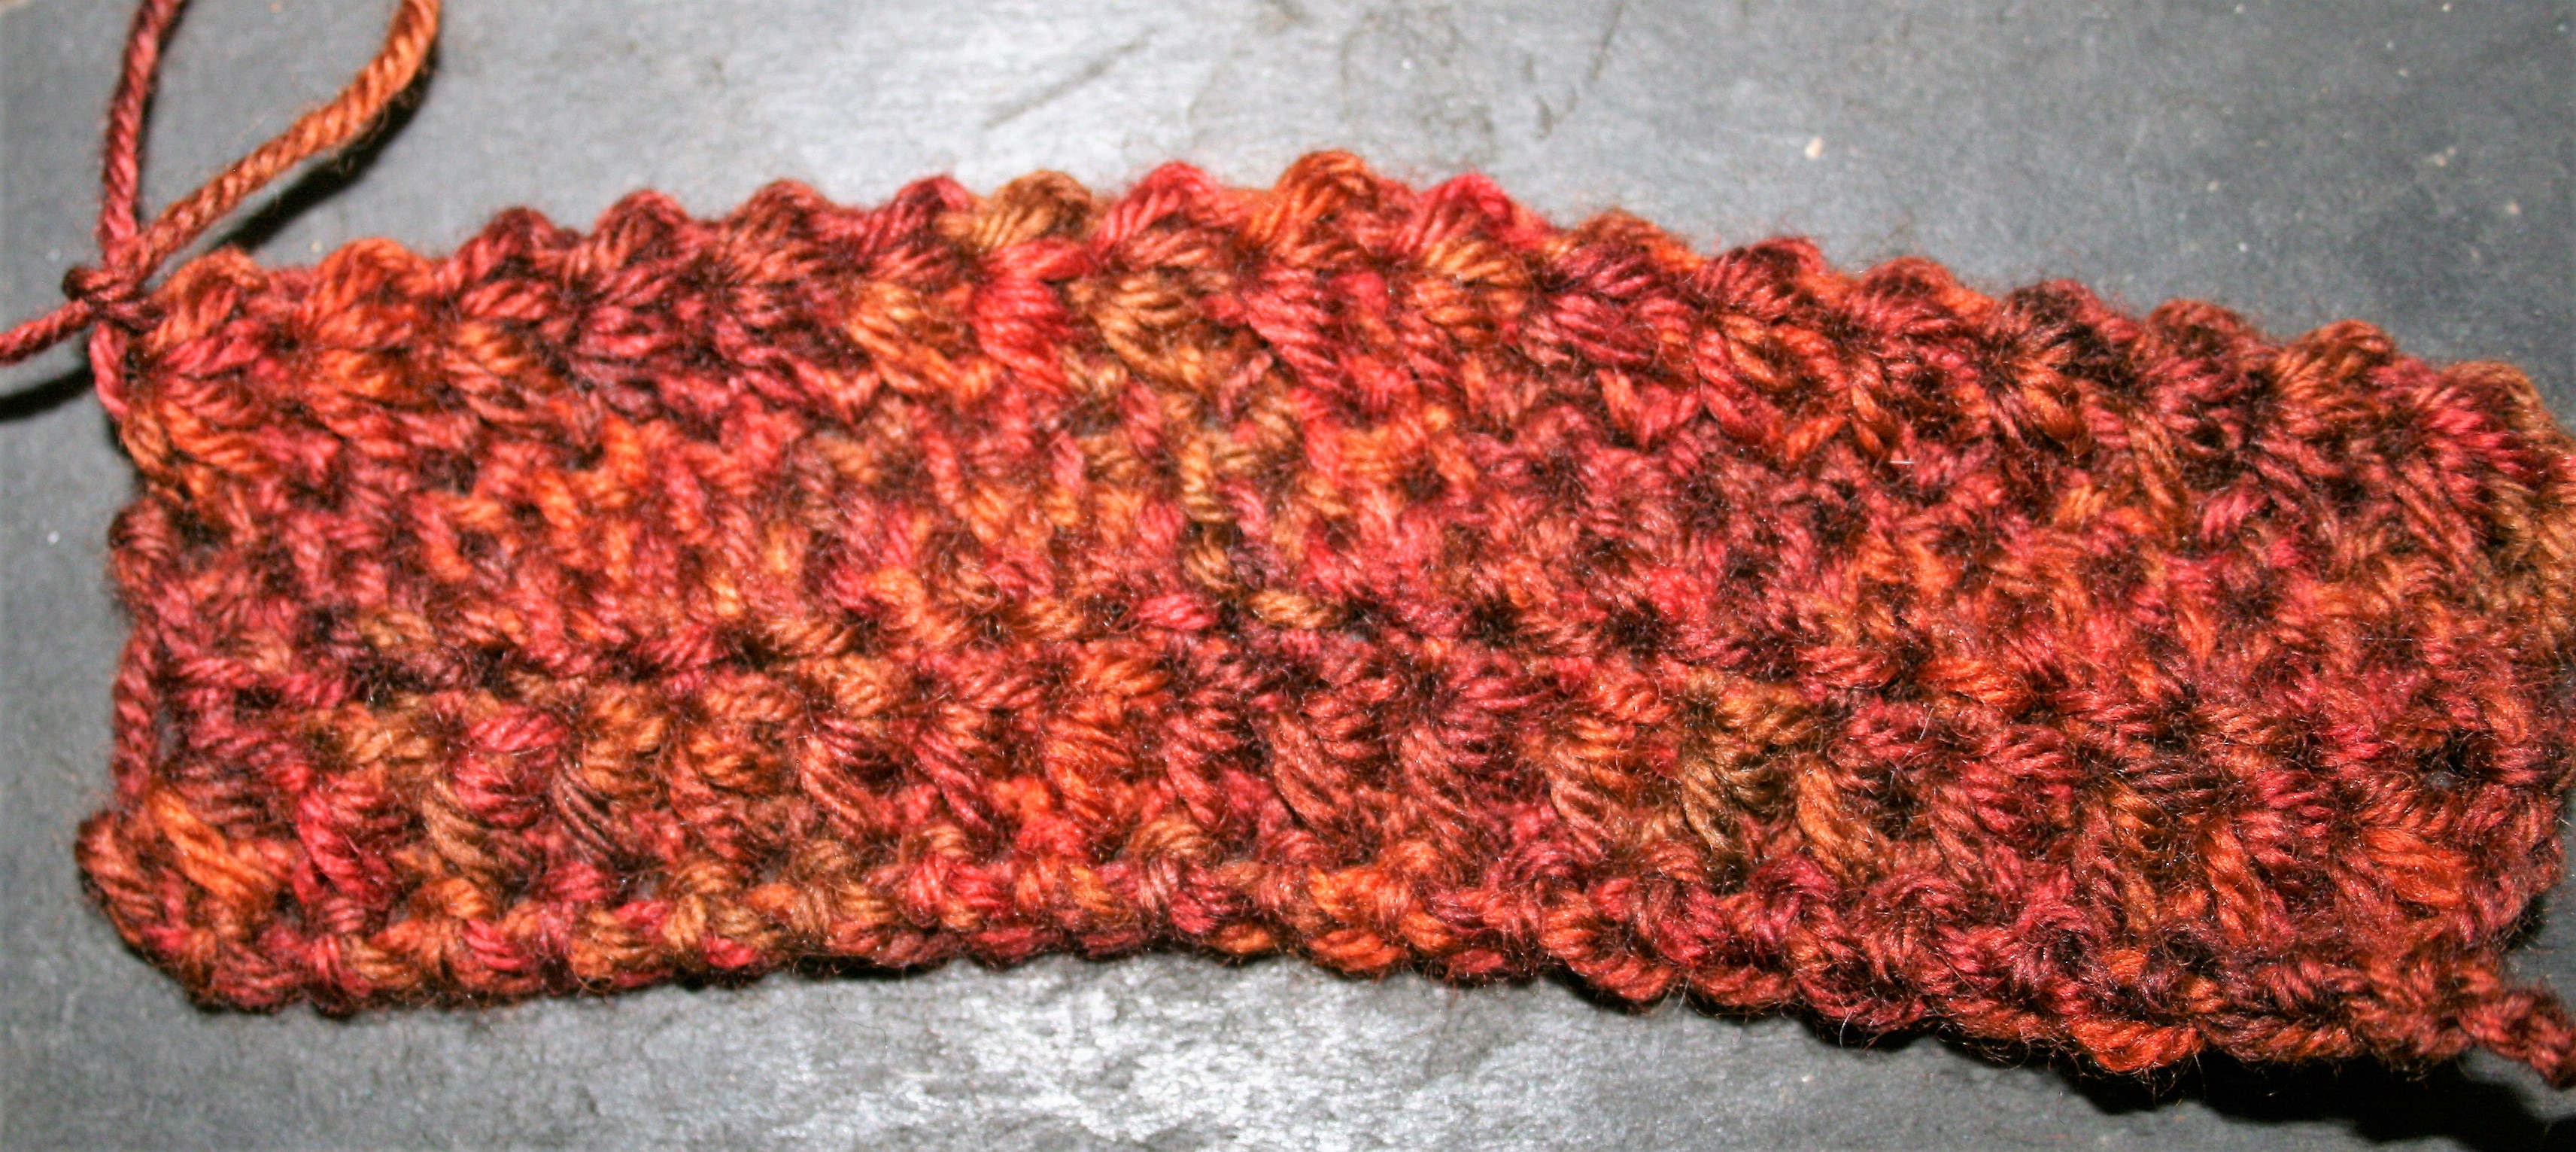
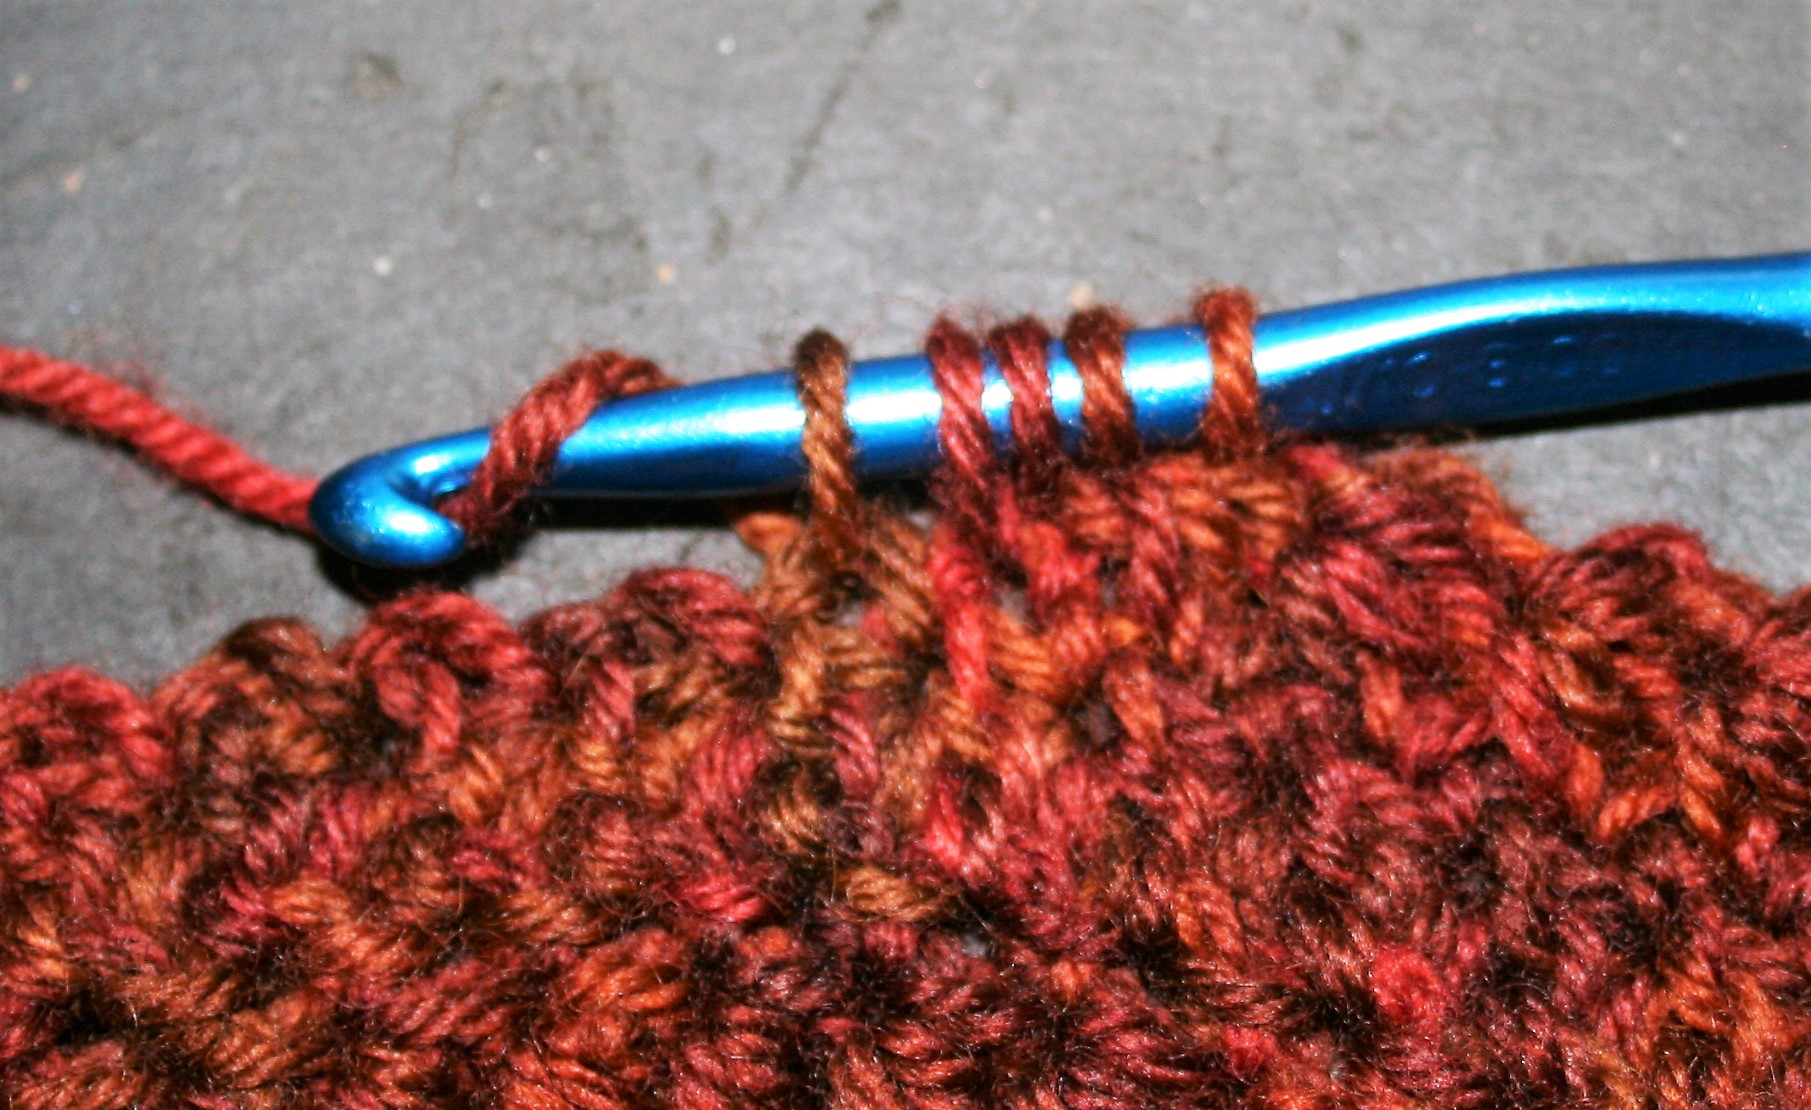
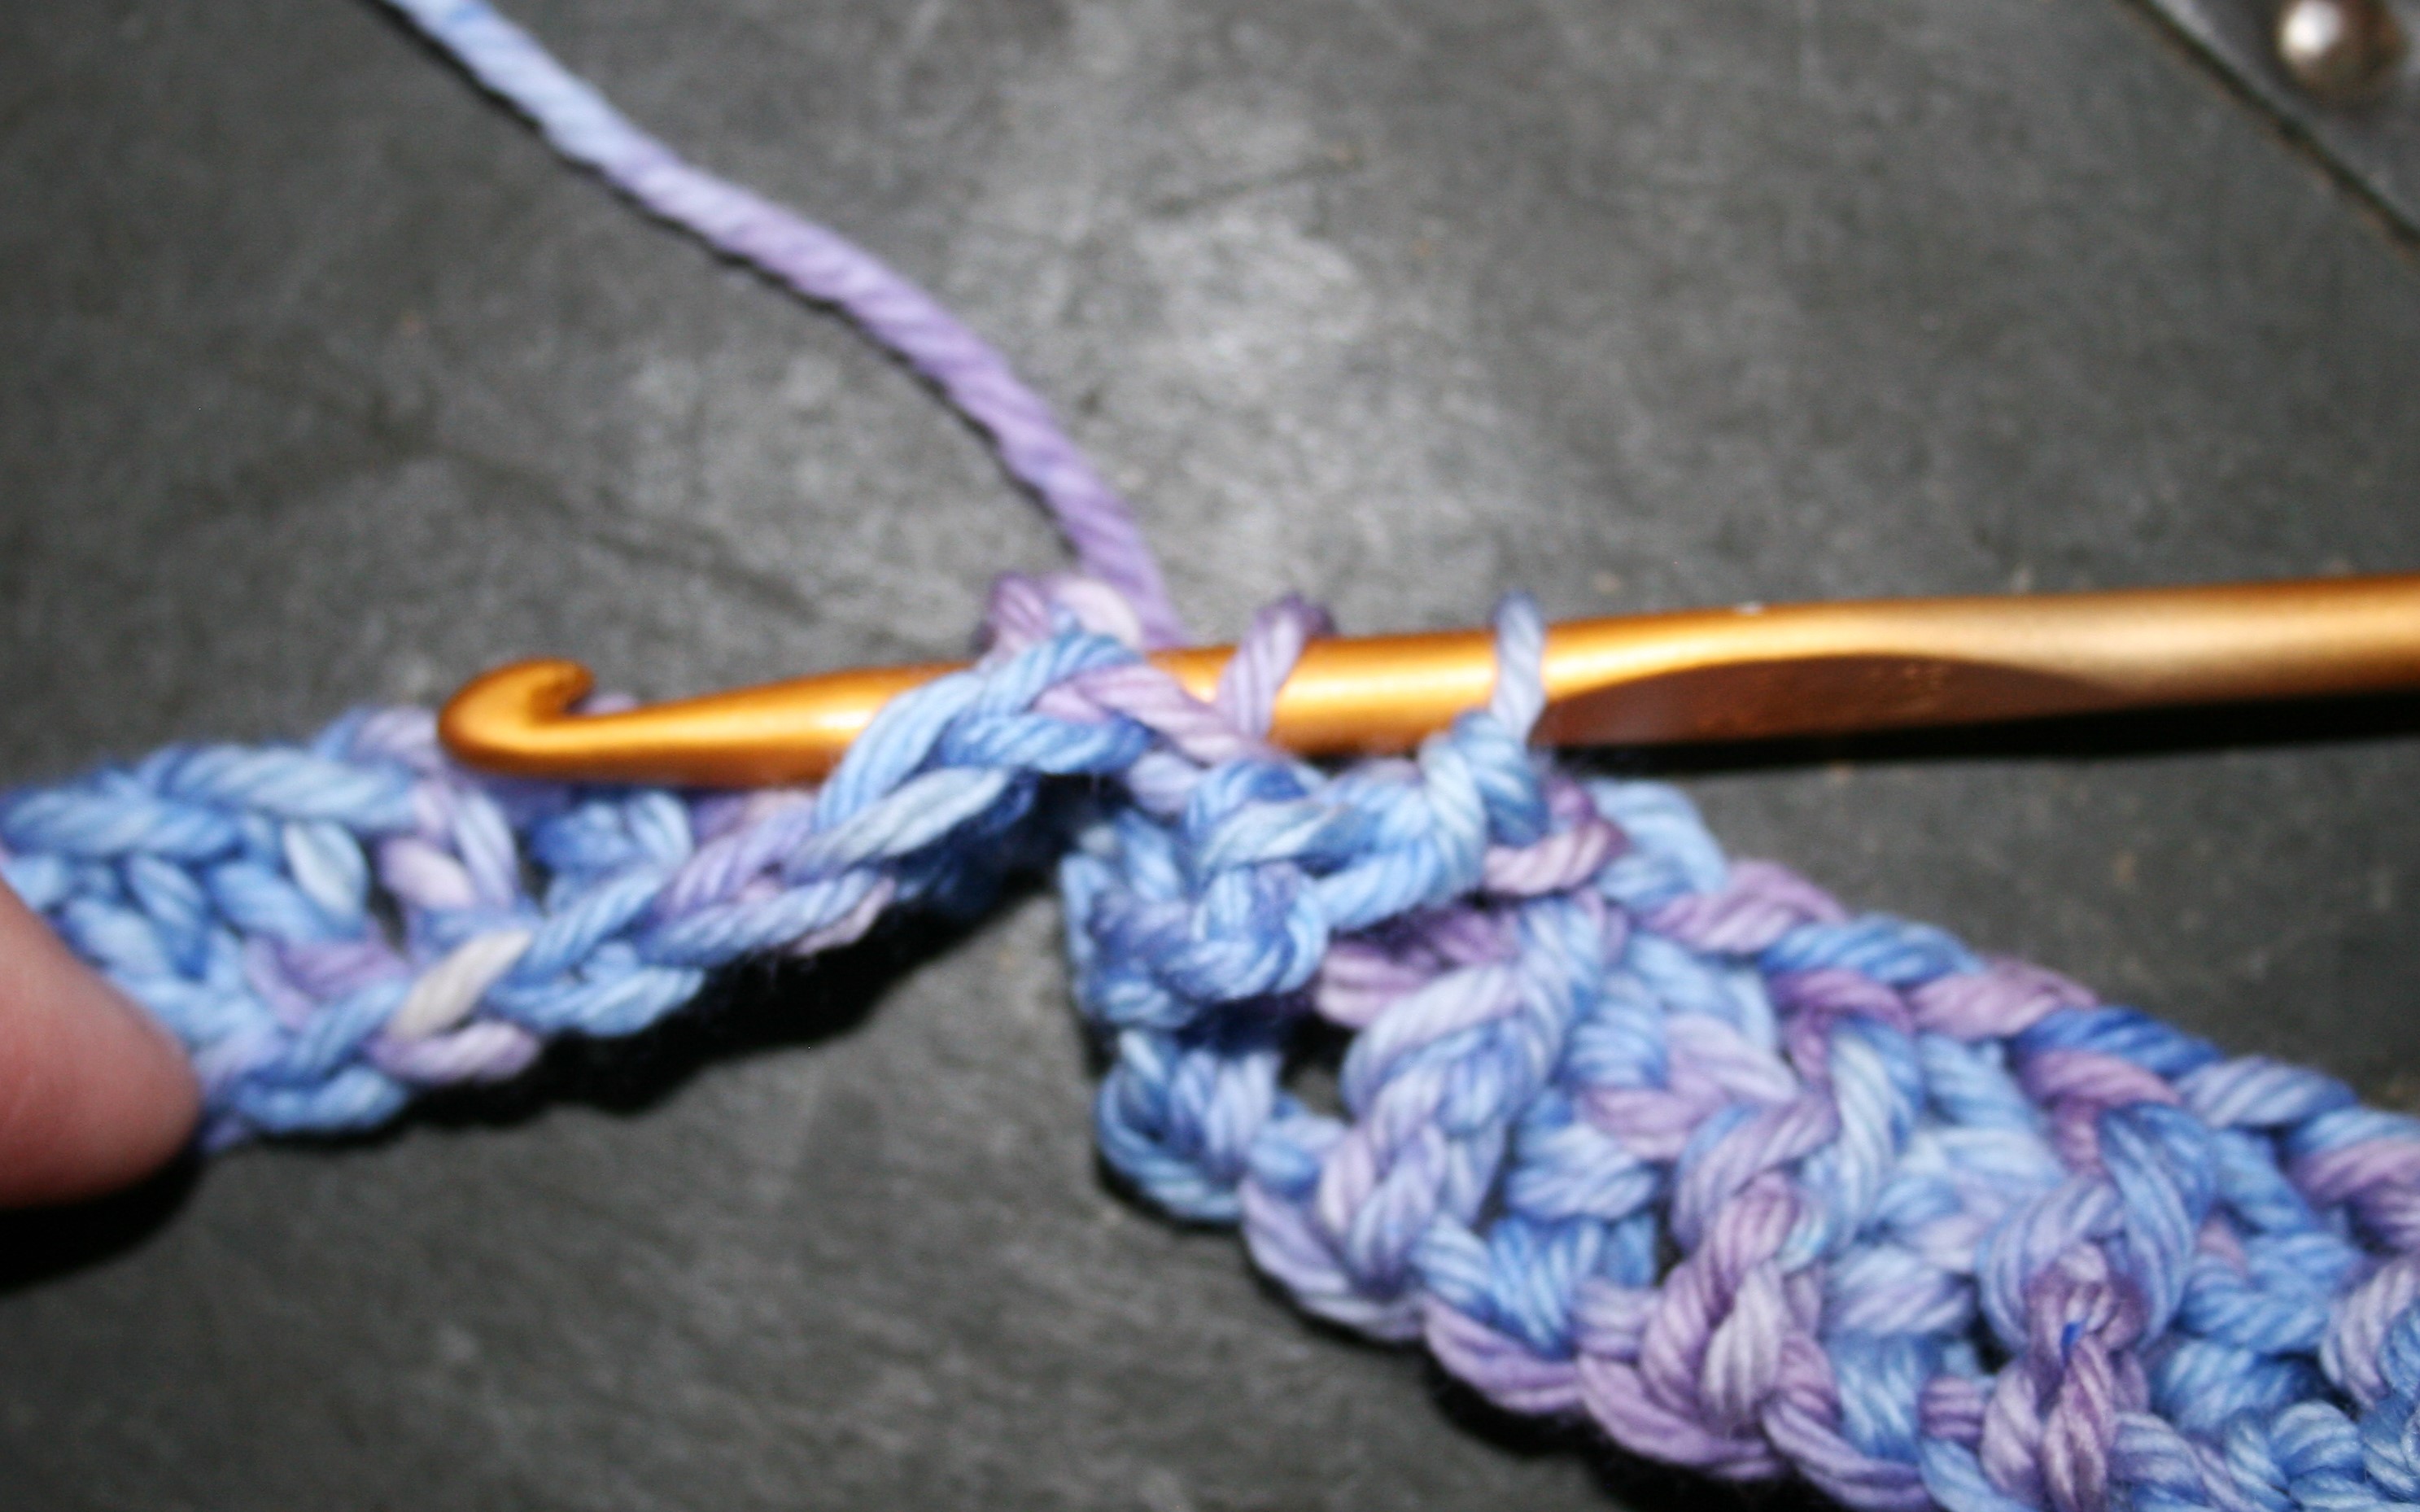
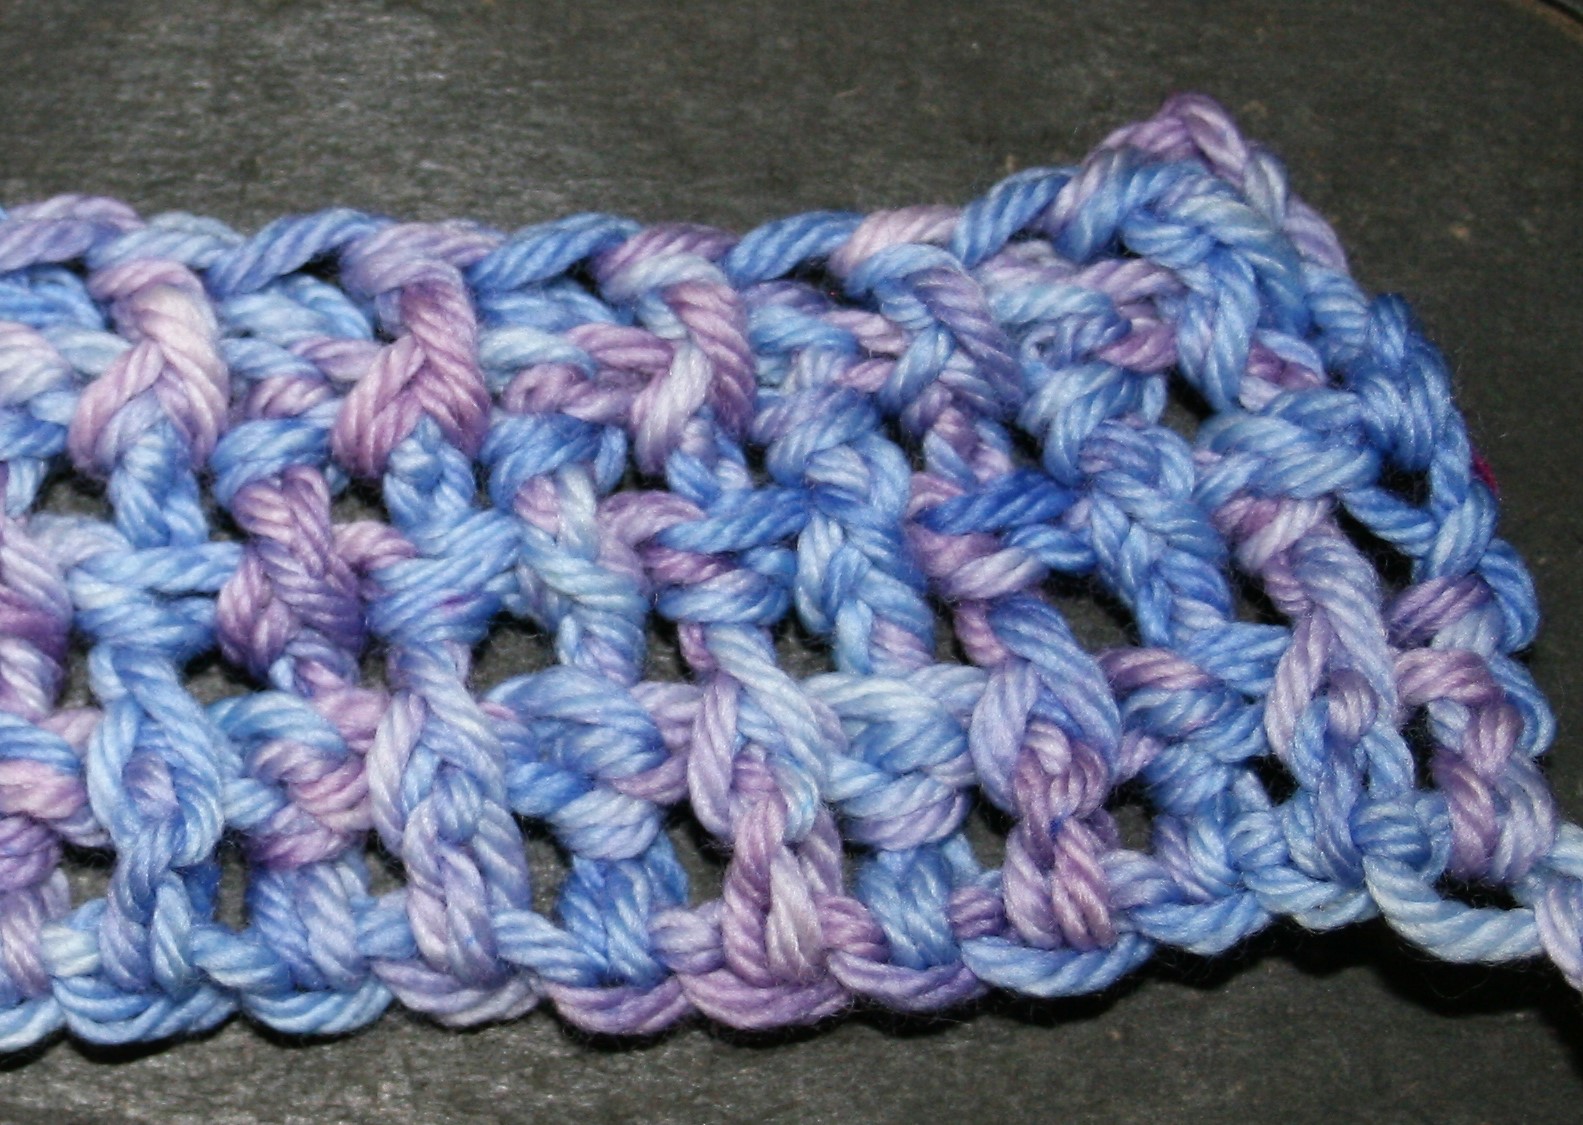
Knowing these stitch positions opens up many different stitch texture opportunities, such as basket-weave and cables, I have displayed here a simple basket-weave of alternating front and back posts, as well as working a front and back post stitch around the same stitch. Working around the same stitch you will have to skip a stitch between or work the stitches over a mesh base. Using the same stitches, and in this case even in the same order (alternating front and back post stitches), you can get very different effects. Try this stitch placement out for your self. 


Cutting Crochet- It is Possible

I have been quite a few questions lately about how to cut crochet. Granted it is not a simple process, but it is a skill you can acquire, with some simple understanding about your fabric.

First what do you want to cut your fabric? Maybe the beginning chain is way too tight in comparison with the rest of the fabric, and you would love it fixed. Maybe you made the something the wrong size, an afghan you made to wide, a sweater you made too long. The reasons can be vast.

To begin with cutting crochet fabric is unique and different almost every time you do it. The approaches to cutting across rows for fabric (horizontally) and cutting through stitches (vertically) might be similar, but horizontally is a bit easier. So let’s start there.

Before cutting through a row of stitches you want to run a thread through the bases or “feet” or the stitches that are being worked into the row to be cut. This thread will help prevent the fabric from unraveling.

Once the thread is in place, cut the row off. Now remove all the excess yarn bits. You should have crochet stitches that are now worked on a thread. It is relatively simple to finish this fabric off by a new fabric to the base of the stitches on the thread and crochet into the “bottoms” of each stitch. Once all the stitches are worked into, you can remove the thread.

To cut vertically in the fabric, the approach is similar to run a thread through the stitches adjacent to those being cut, but it can be more difficult to ensure that each loop that encompass a stitch is secure in this process, so I add an extra stitch. After running a thread through the stitches, you can cut the fabric (note, if you want to save both sides of the fabric from the cut you will need to run a thread on either side of the cut to ensure that neither piece of fabric unravels).

Once the fabric is cut, gently remove the excess yarn form the fabric at the cut, being careful to watch each row and ensure that no yarn is unraveling past your thread. If it is, as you have missed a loop, place a removable stitch marker in the “uncaught” loop. This removable stitch marker can be as simple as a paper clip. After removing the excess yarn and determining unsecured loops on the edge you will need to join with yarn and crochet over the edge, making sure to incorporate the unsecured loops into the new stitches you are creating. This will assist in preventing them from unraveling. After you have successfully crocheted the edge you can remove the thread. You may find that the edge still looks a bit shaggy, so you may have to weave in assorted ends throughout the edge to ensure a tidy finish.

Like I said it is not a project for the faint of heart, but it can be done. If you want to progress in further in cutting your crochet fabrics, I would suggest checking out teh work by Vashti Braha of Designing Vashti….she went down the rabbit hole with Self Healing Stitches and such….find them here. Why Self Healing Stitches, Self Healing Stitches Resources, 

I am A #HumansThatYarn

Humans that yarn. Sounds like an interesting caption, but to the Craft Yarn Council it is a bit more than that.

The Craft Yarn Council is a nonprofit organization that is designed to promote all things yarn that includes certifying knitting and crochet instructors….it is an interesting course that I completed of crochet in 2012, and really has helped me to teach crochet more effectively. (You can find information about the program here). The Humans that Yarn campaign is an effort by this organization to hear the voices of those that craft with yarn.

Often as crocheters it seems like we are defined by the fact that we are not knitters, and this campaign gives us an opportunity to talk about who we are and what yarn means to us, so I thought I would share my thoughts.

For me I really do not remember a time in my life without yarn somewhere around. As I have talked about in the past I taught myself to crochet at the age 10 from a book, but it wasn’t from a true desire to crochet as much as it was to learn and create. It just happened that I had access to yarn, hooks and the book.

Most of my yarn came from others. Other people would give me there left over scraps and partial skeins. There was a time when I finally committed to creating my first afghan that I convinced my mom to allow me to purchase some yarn. I remember spending time going over patterns finding the one that I wanted to create. I remember standing in the aisle of the store putting various combinations of yarn together to find the perfect colors. I remember asking my mom’s advice on the color selection, she after all as in many different art classes at the time.

Yet yarn is not just a memory for me. It is a way of moving my hands and keeping my mind flowing it is being productive in even the most likely of times.

It might be that I tend to want to do or experience things that no one would quite expect to look at me. No one in grade school would expect me to be crocheting, I had many friends in high school look at me like I was crazy when they found out…although many still have the afghan I made them. I guess I liked a bit of the awe factor. Not fitting into any particular mold…I still find it appealing.

People that know me are no longer surprised by the crocheting, but they tell me they are inspired by my designing, teaching and taking it on as a business. The title “Crochet Designers” does garner surprise from people I meet, as they never thought of any career like it.

So I guess, my easiest summation for Who am I? when considering Humans that Yarn, I am contrite wanting to be different and a bit surprising while utilizing a common craft.

Share your #HumasthatYarn story, Who are You?

Crochet Craftvent- Sugar Plum Fairy

It is hard to believe that the holiday season is fast approaching. I already have students working on crochet gifts, and have friends making holiday plans; I am in awe of this organization. I really use to be on top of the calendar many years ago, but somehow have lost this skill as I have gotten older.

Fortunately this year I have an easy count down, I designed the first Crochet Craftvent for Jimmy Beans Wool, Sugar Plum Fairy. So, if you are like me the first question is …what is Craftvent? Well in a nut shell it is like an advent calendar but with yarn and yarn related treats!

The shawl is broken up to manageable sizes and the yarn is balled up in just the right size amount so that you can open a new square on the countdown to Christmas. Just like when you were a kids and had the little boxes with pieces of chocolate; okay, my sweet tooth usually meant that I would break into several day ahead, but it was still a treat.

There are 8 different yarns highlighted in this shawl, as a result it becomes a bit of a “yarn taste” treat for the user. You get to play with many different yarn that may not be in your everyday stash of yarns. There are yarns with sparkle, yarns with great stitch definition, yarns with beautiful colors, it is a special gift with every day supply of yarn.

In addition Jimmy Beans Wool has “extra” notion treats placed throughout the calendar. What a great gift for yourself, or your favorite crocheter.

The shawl itself begins at the narrow points and increases along one edge. It is an essentially 2 different sets of patterns, one a bit lacy, one with a bit of texture. Both patterns are simple row repeats, and it is the combination of these with the color changes that creates such a dynamic piece.

Once you wrap this shawl around your shoulders it really comes to life, it really frames the face well with the colors and texture. It is stunning on everyone.

Get yours HERE! Quantities are limited!

Working the Star Stitch

There are various ways to create a stitch in crochet, and one that can turn peoples head a bit is one that is often referred to as the star stitch. I am not completely sure where this stitch gets its name, to me it does not really look like a star unless I count the middle of the night squinting I do at the little light on the smoke detector and wonder if I need glasses. It has the light radiating in a couple of directions, a bit like light through a prism.

Some find this stitch intimidating, as it looks more difficult than it is. Essentially this stitch is worked very similar to a single crochet decrease over multiple stitches, but instead of working it over several stitches you are working it with the parts and components of just one stitch. This makes really the only difficult part of this stitch is knowing where to place your hook.

I find it easiest to work a row of basic crochet stitches, either a row of single or double crochet, then working the star stitch in subsequent rows. This does not mean that you cannot work the start stitch directly into a foundation chain, it is simply my preference to have a little more fabric to hold on to.

The stitch is worked by first inserting the hook into the “eye” or hole of that was created by the last yarn over and pull through of the adjacent stitch, you then yarn over and pull up a loop.

Next insert the hook around the last “leg” of the adjacent stitch. I tend to only pick up the front portion of the “leg” and do not worry about putting the hook all of the way through the fabric. Yarn over and pull up a loop.

For the third insertion point (fourth loop on your hook) you insert your hook into the stitch in the row below, which has already been worked into by the adjacent stitch, once again yarn over and pull up a loop.

The final insertion point is to insert your hook into the next stitch, and pull up a loop.

You will now have 5 loops on you hook, yarn over and pull through all 5 loops. Now chain 1, this will create the “eye” that the next star stitch will begin being worked into.


If you are beginning a new row, there is no adjacent stitch to work into, so you pick up loops in the turning chain in the same manner as you would for the stitch. The turning chain is typically a chain 2 to match the height of the stitch, you then simply insert your hook into each chain and pull up a loop in each chain, insert the hook in the base of the chain and pull up a loop, then insert the hook in the next stitch and pull up a loop.

This stitch can create a dense fabric, so prepare to use a large hook if you want a bit more drape. Also, this stitch has a very different look if it is worked in the round, without turning every row. If you like this look, yet need a flat fabric there are people that cut the yarn at the end of every row and then reattach and work with only the right side of the fabric ever facing forward. This is a really nice look, I am just not a fan of weaving in that many ends.

So give this stitch a try, it does share interesting texture and appearance, something not every stitch can garner.