I always like to create a personal challenge for myself, and in this case it is knitting. I know, I am a crocheter, so why am I challenging myself with knitting? Working with Lisa Souza’s Yarn I have found it interesting how knitters have stopped by her booth over the years, admired my crochet samples, yet upon hearing it is crochet, immediately set it down and walk away stating the “I don’t know how to crochet”. I explain that there are lessons, and they can learn, but they like many others are already happy with the hobbies they have and are not wanting to add additional ones.
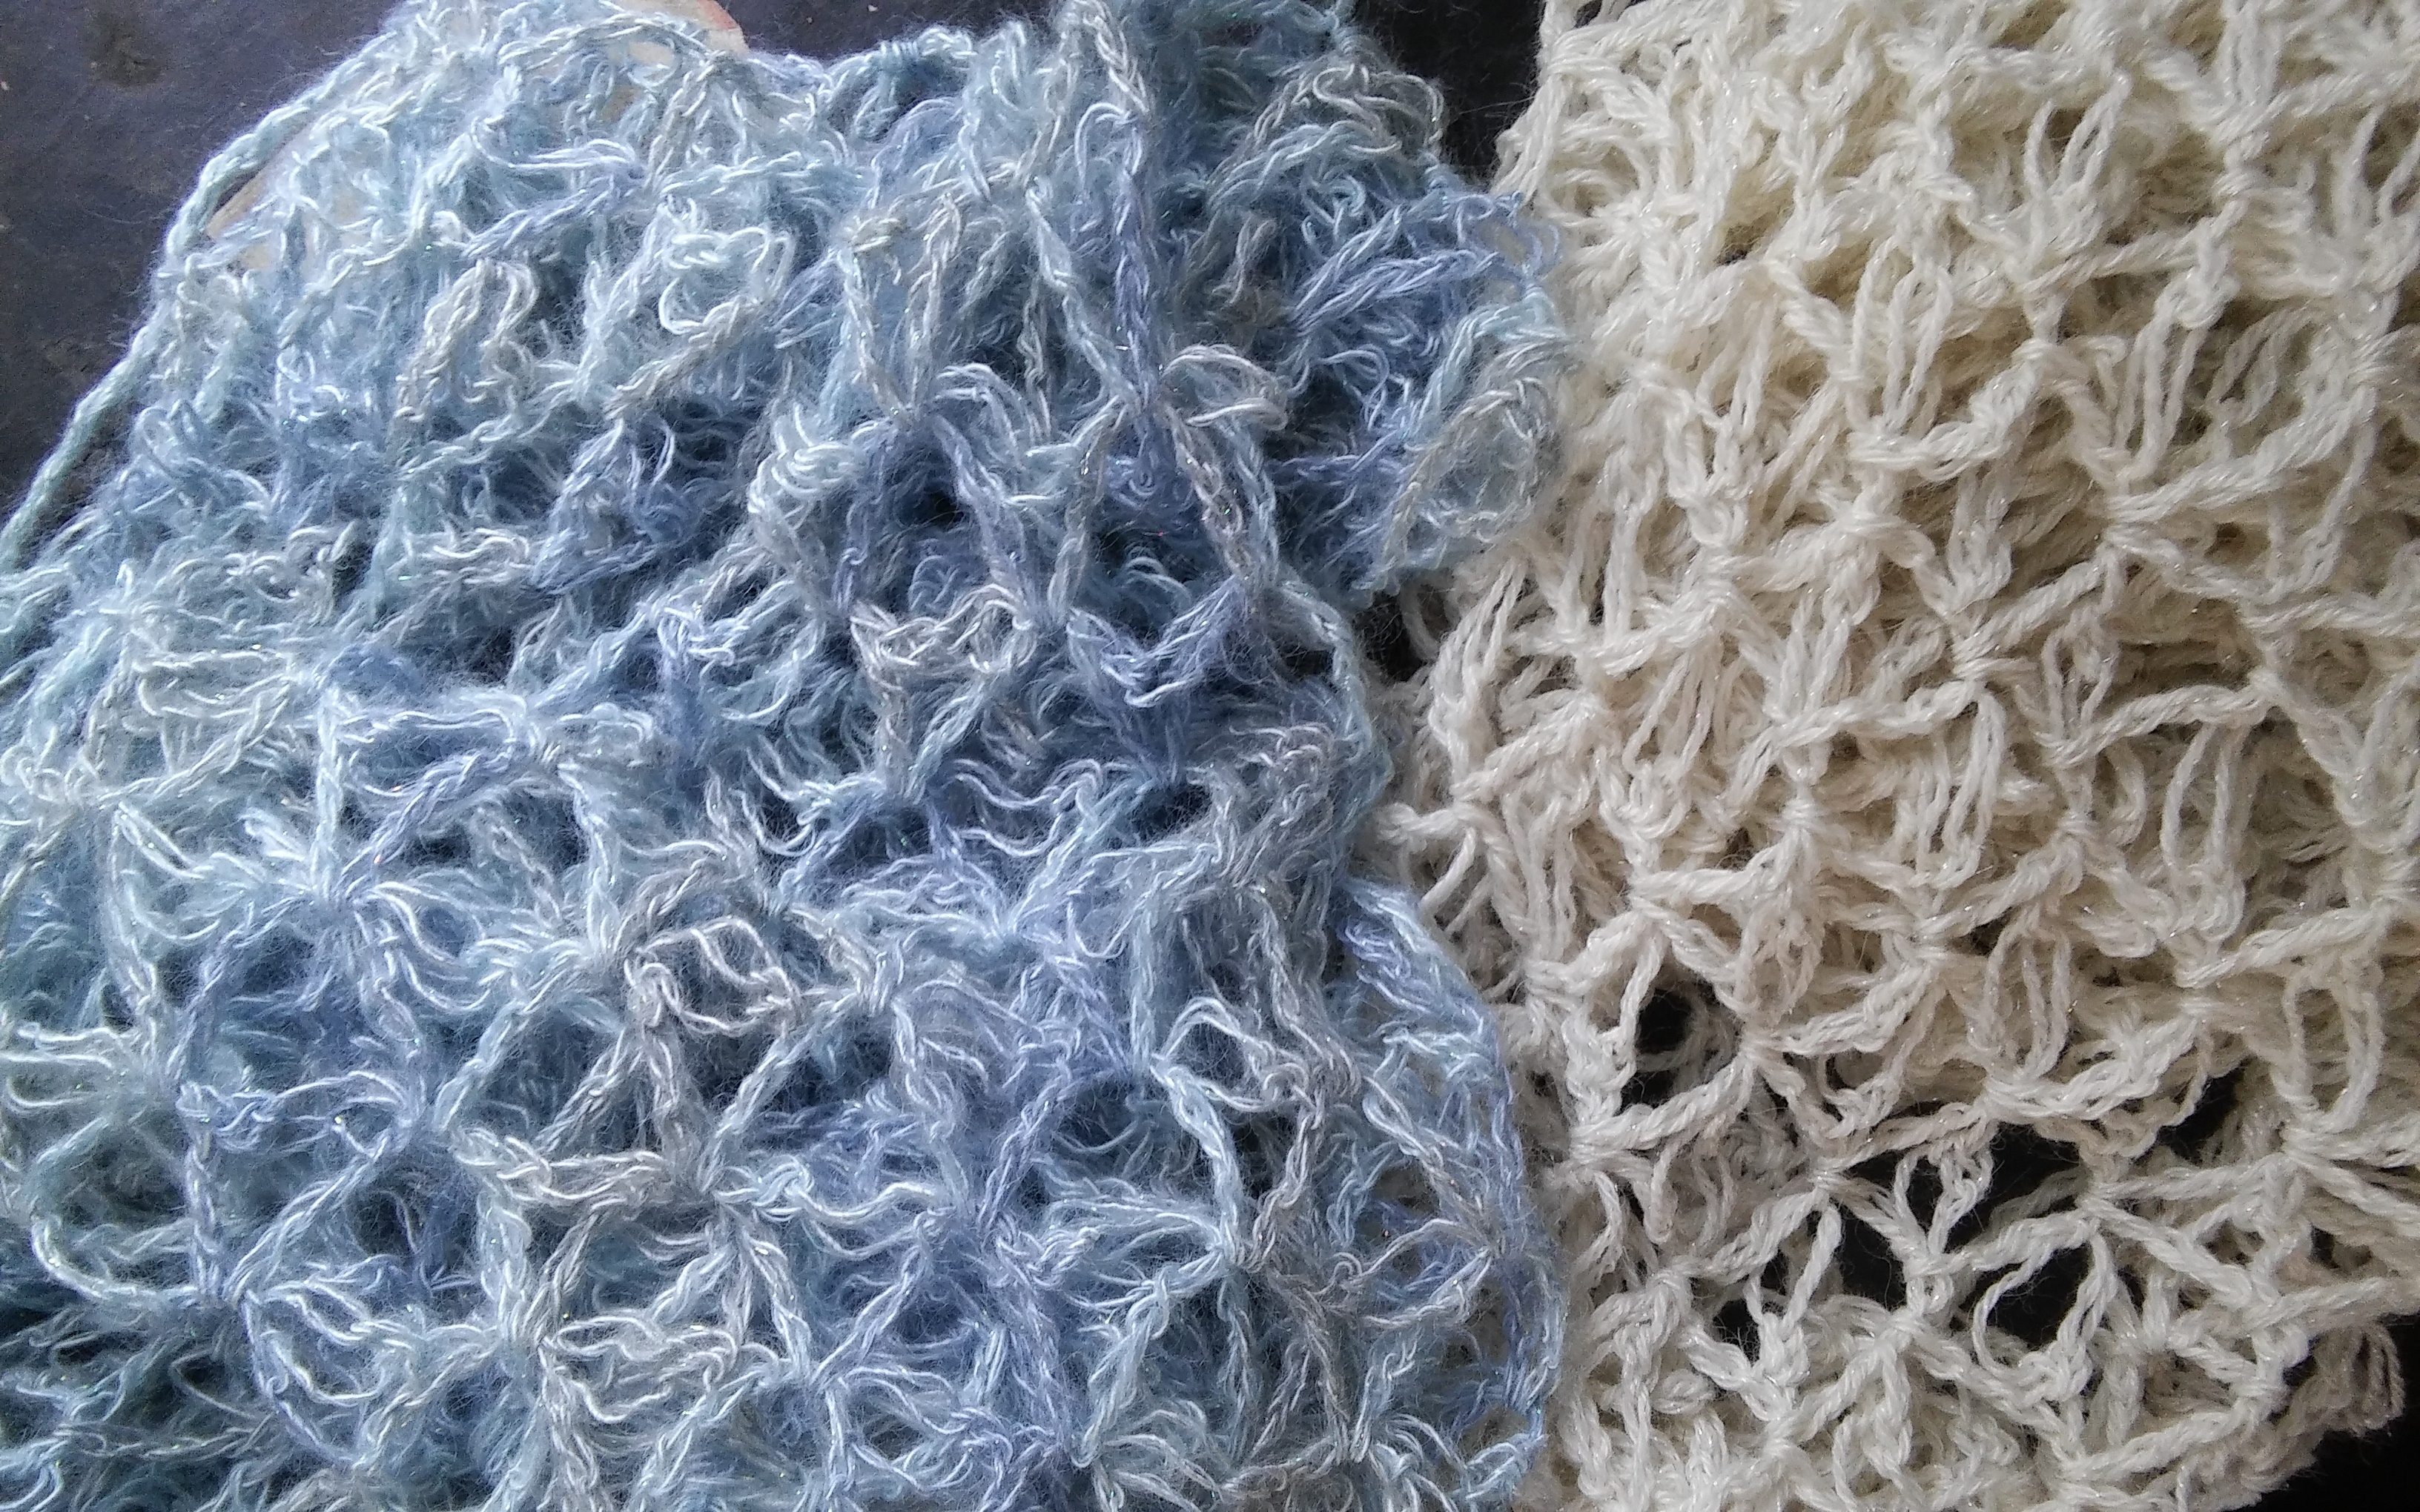
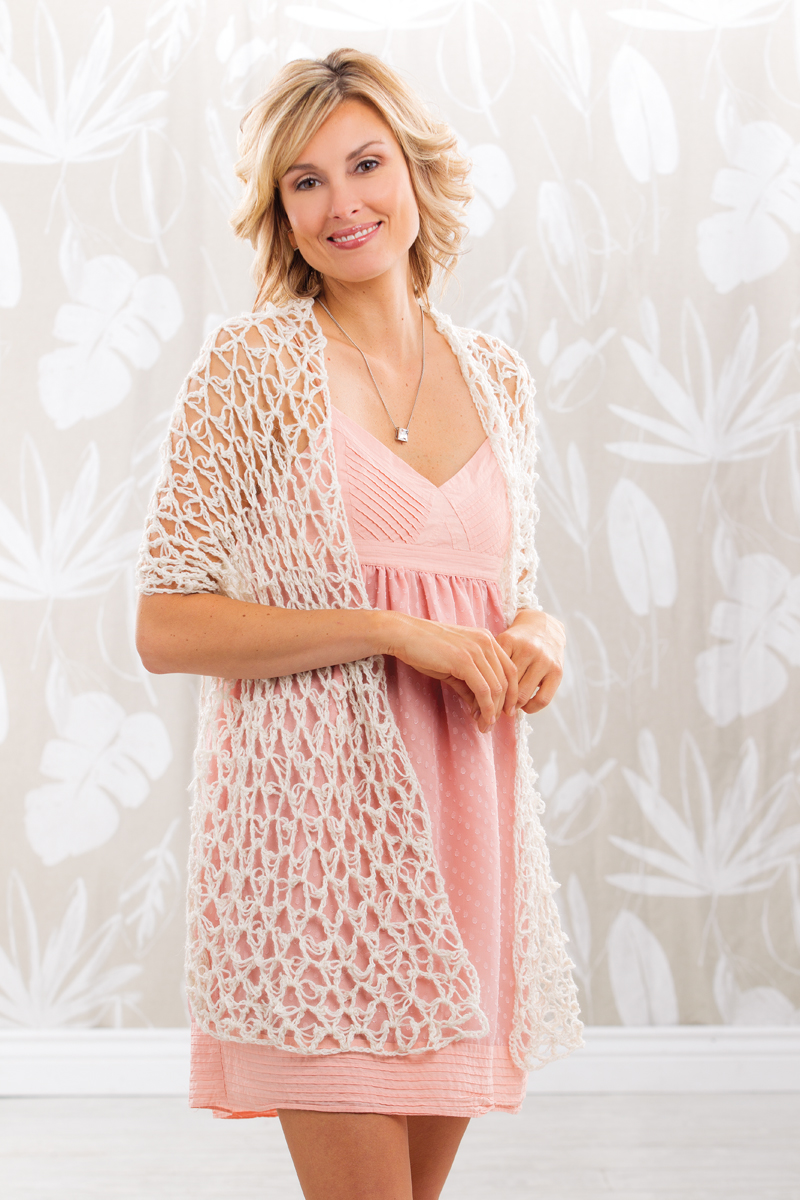
Cross-Hatch Crochet Wrap
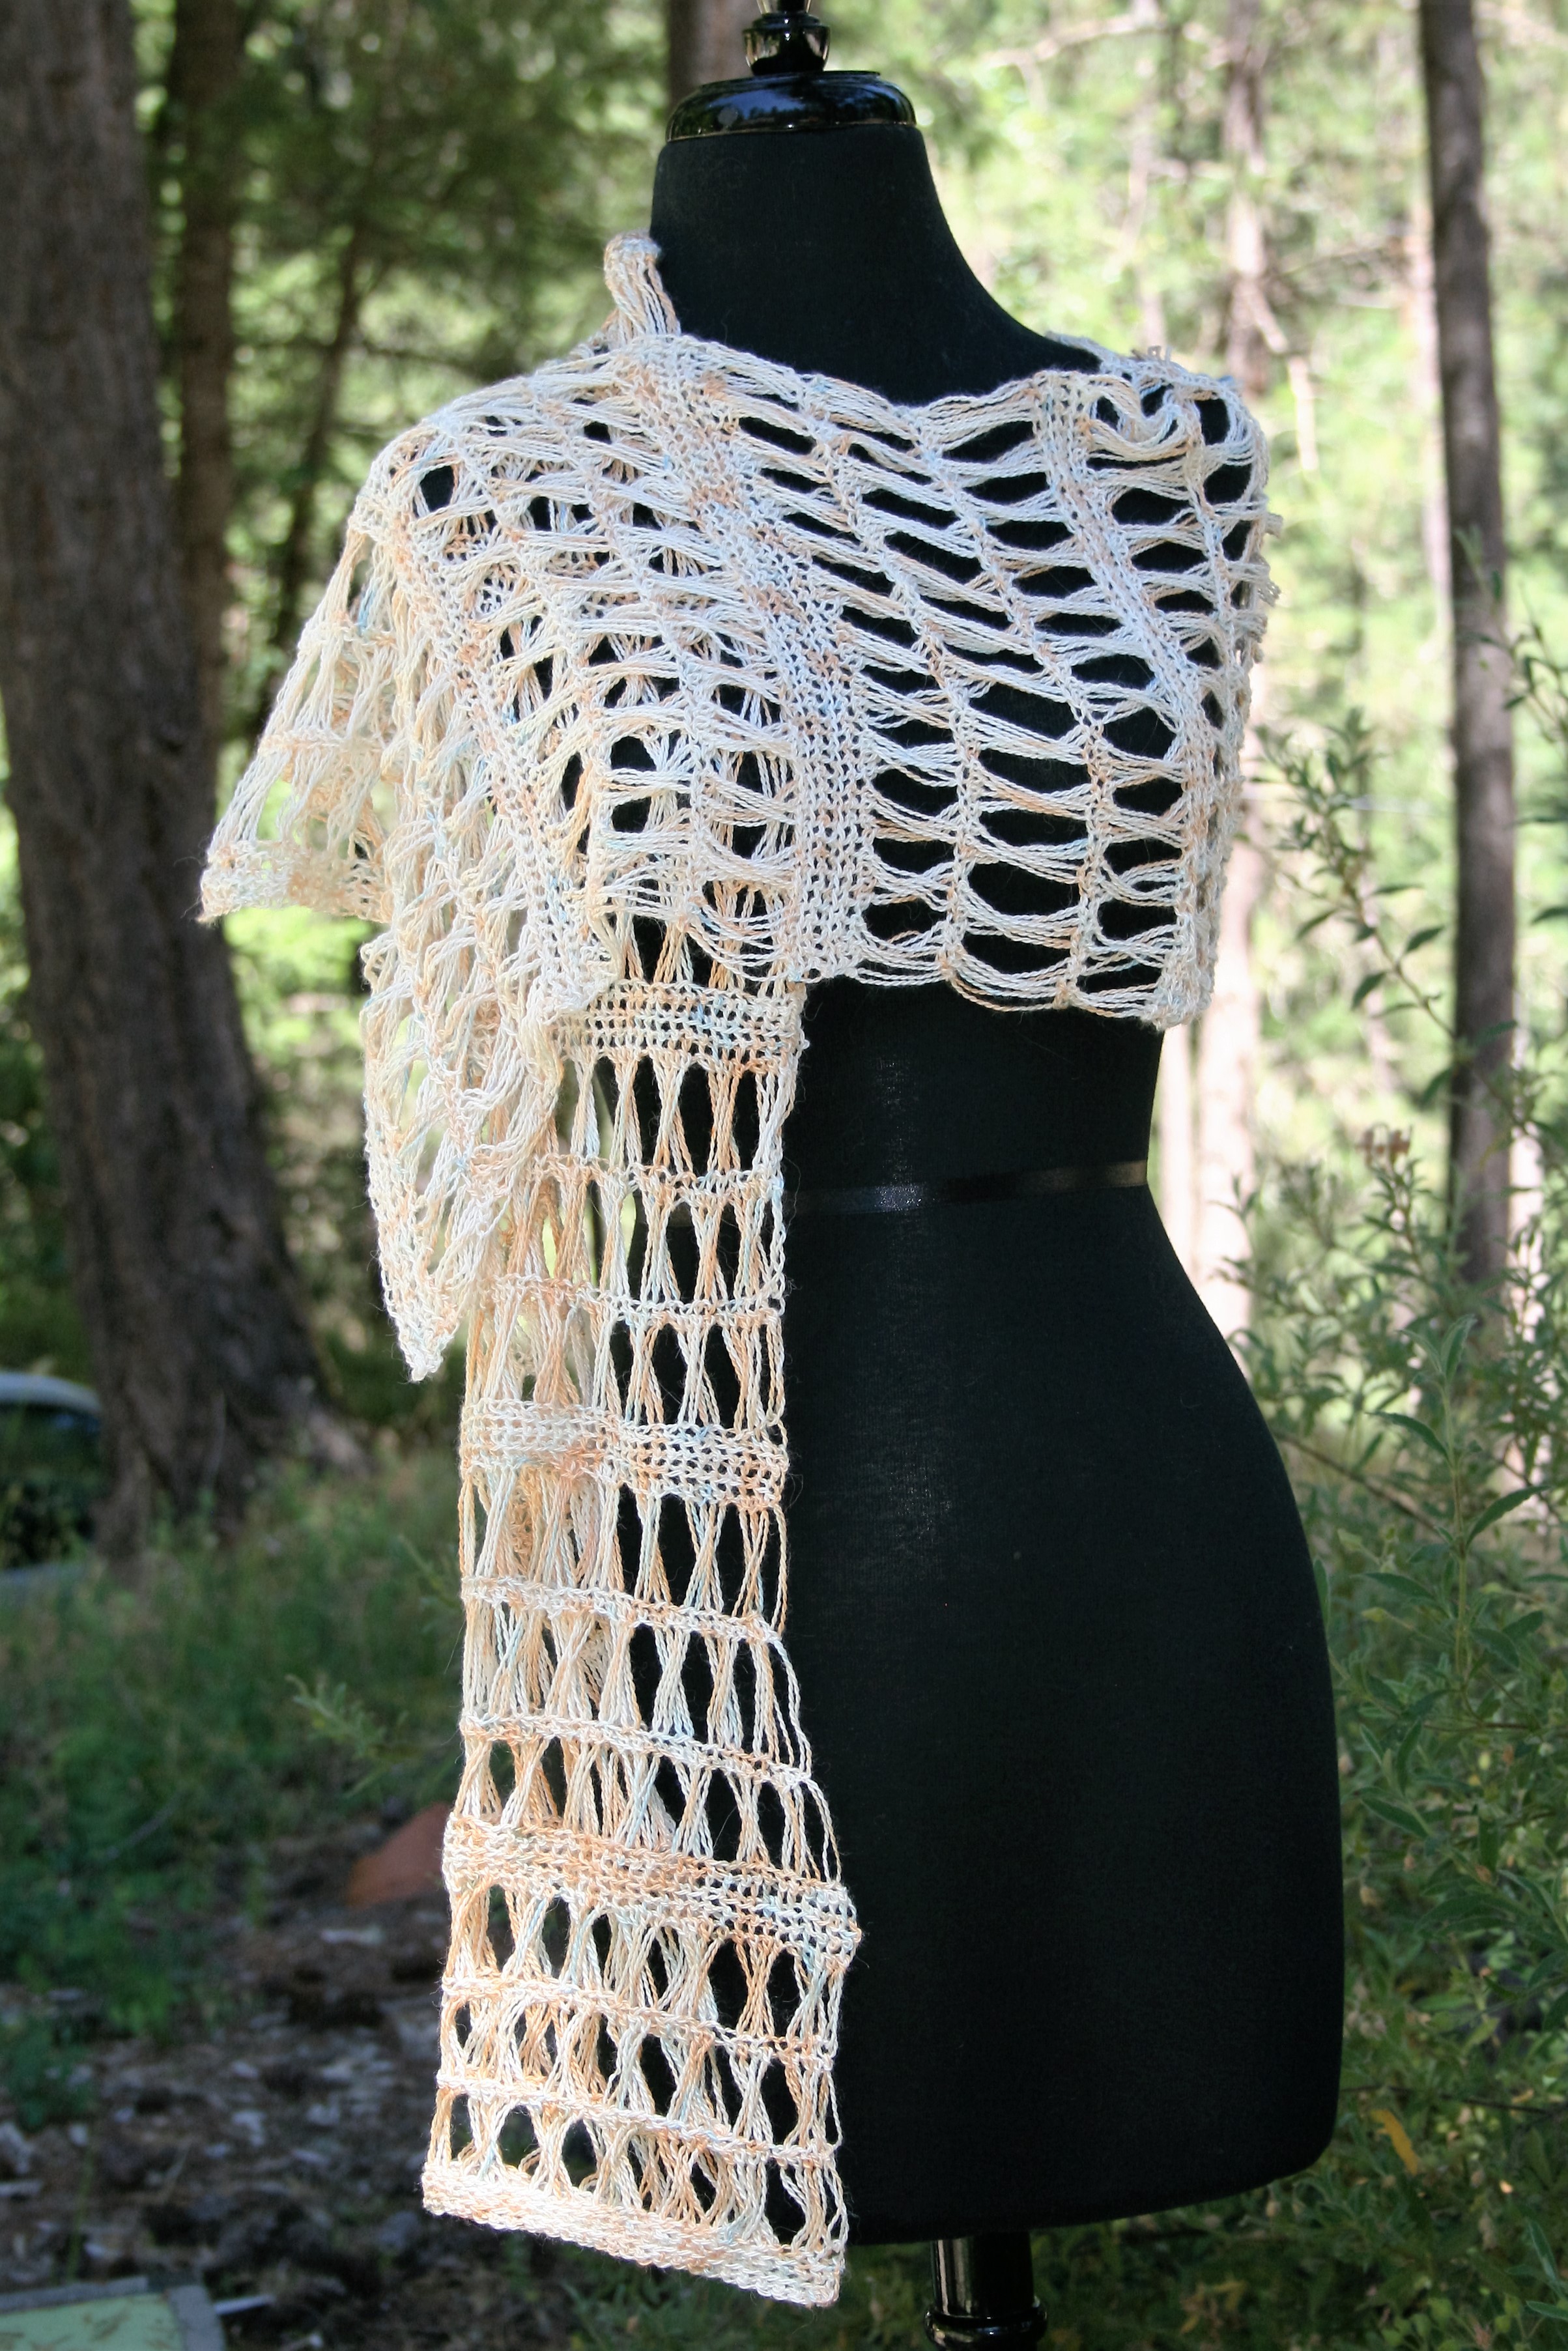
So, I decided to show how both art forms could produce a fun project. Cross-Hatch Wrap is the second design I have released that has 2 patterns in one. There is a knit version and a crochet version pattern together. The designs look very similar, yet are created by different methods, and always using only 1 skein of yarn.
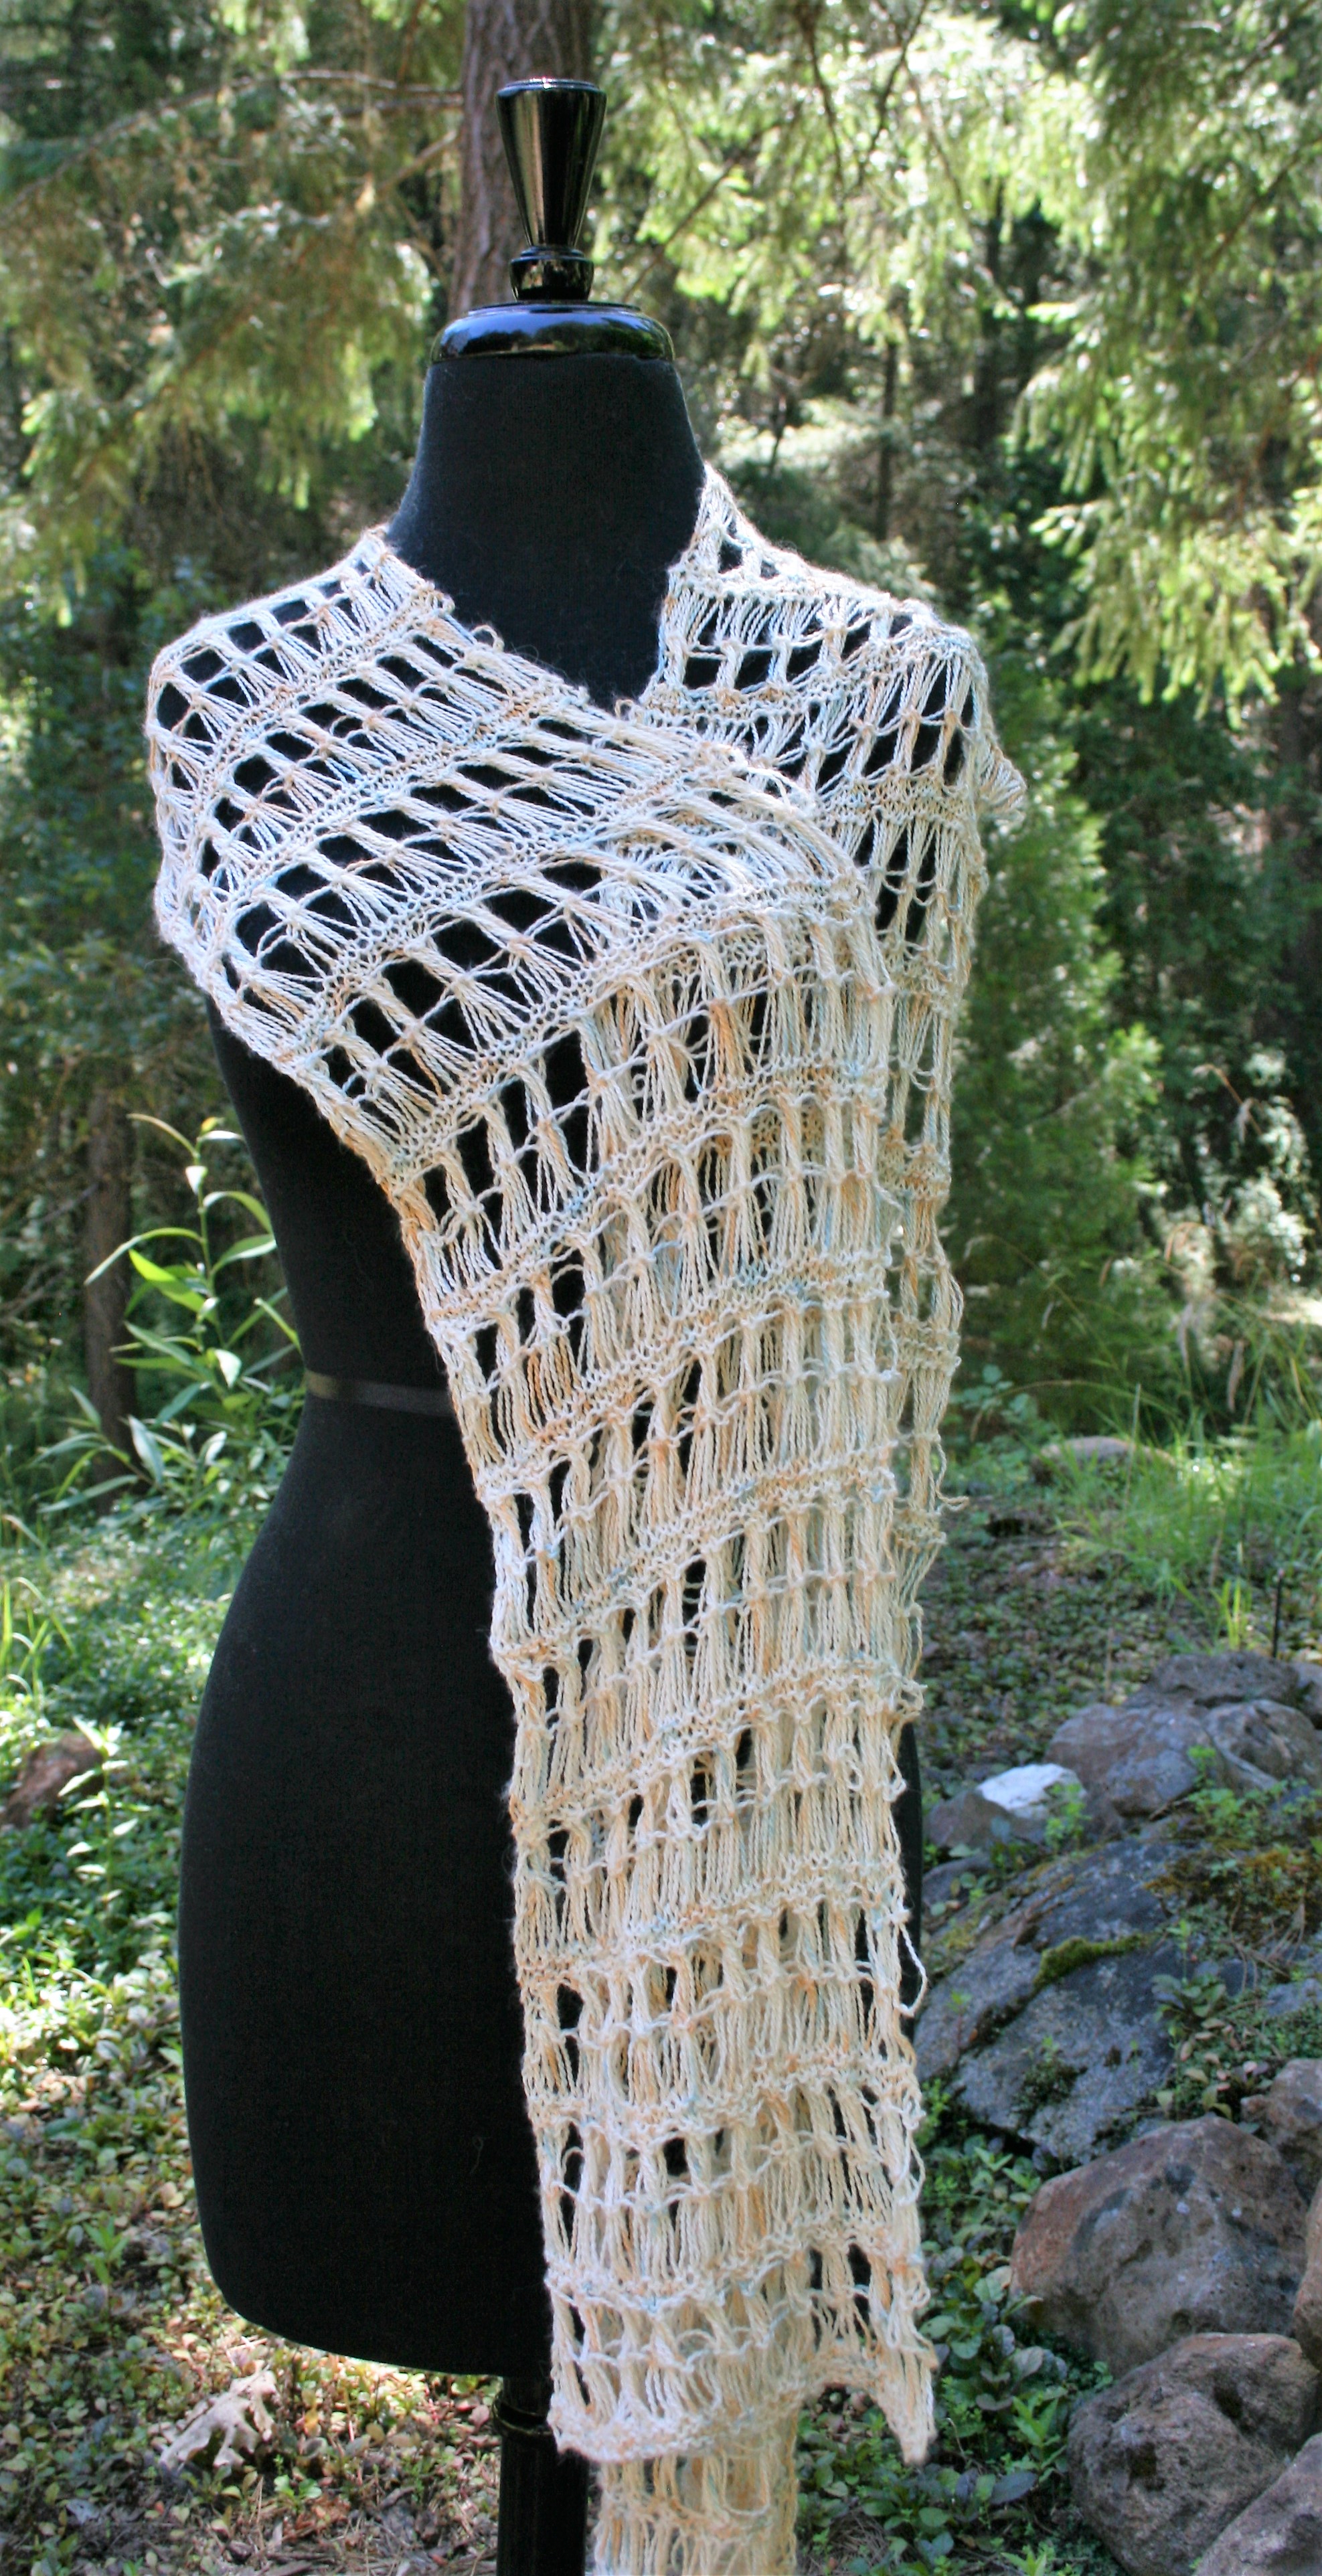
Cross-Hatch Knit Wrap
I will admit that this creates an interesting challenge for me, as I am a very fast crocheter and a very slow knitter. So Lisa Souza has agreed to help by knitting a version for me. It also gives me the opportunity to get some insight into the mind of a knitter. Lisa tells me that I take her out of her comfort zone, and have her looking at her knitting a little differently. I think this is a good thing for anyone. A fresh perspective brings a new understanding, and a burst of growth to the work that you do.
Cross-Hatch Wrap is worked with crossed drop stitches, creating a subtle and alluring effect. The one skein of Baby Alpaca Silk Petite is incredibly soft, and so light that it almost feels like nothing but air. If you either knit or crochet, or need a gift for someone that loves yarn, this design will hopefully have you looking at your own work a little differently, and take you out of your comfort zone, just a bit.