Award Winning Design! Book Club Afghan

There are somethings that really take me by surprise. A really pleasant surprise is finding out that one of your designs has been chosen as one of the Top 50 Patterns of 2017 by I Like Crochet Magazine! That is one of the Best of 2017!

Of the thousands of patterns and designs that come out every year, I Like Crochet Magazine felt that my Book Club Afghan was among the cream of the crop.  It takes me back a bit.

Honestly, I am never sure how to assess my designs. I just make the idea that comes to me.

I have found over the years that the more I over think an idea, the less I really like it. So I try and keep things simple, and focus on the approach of what it takes to make the design. Maybe it is the fundamental crocheter in me, but my end thought really falls to if I enjoy making it.

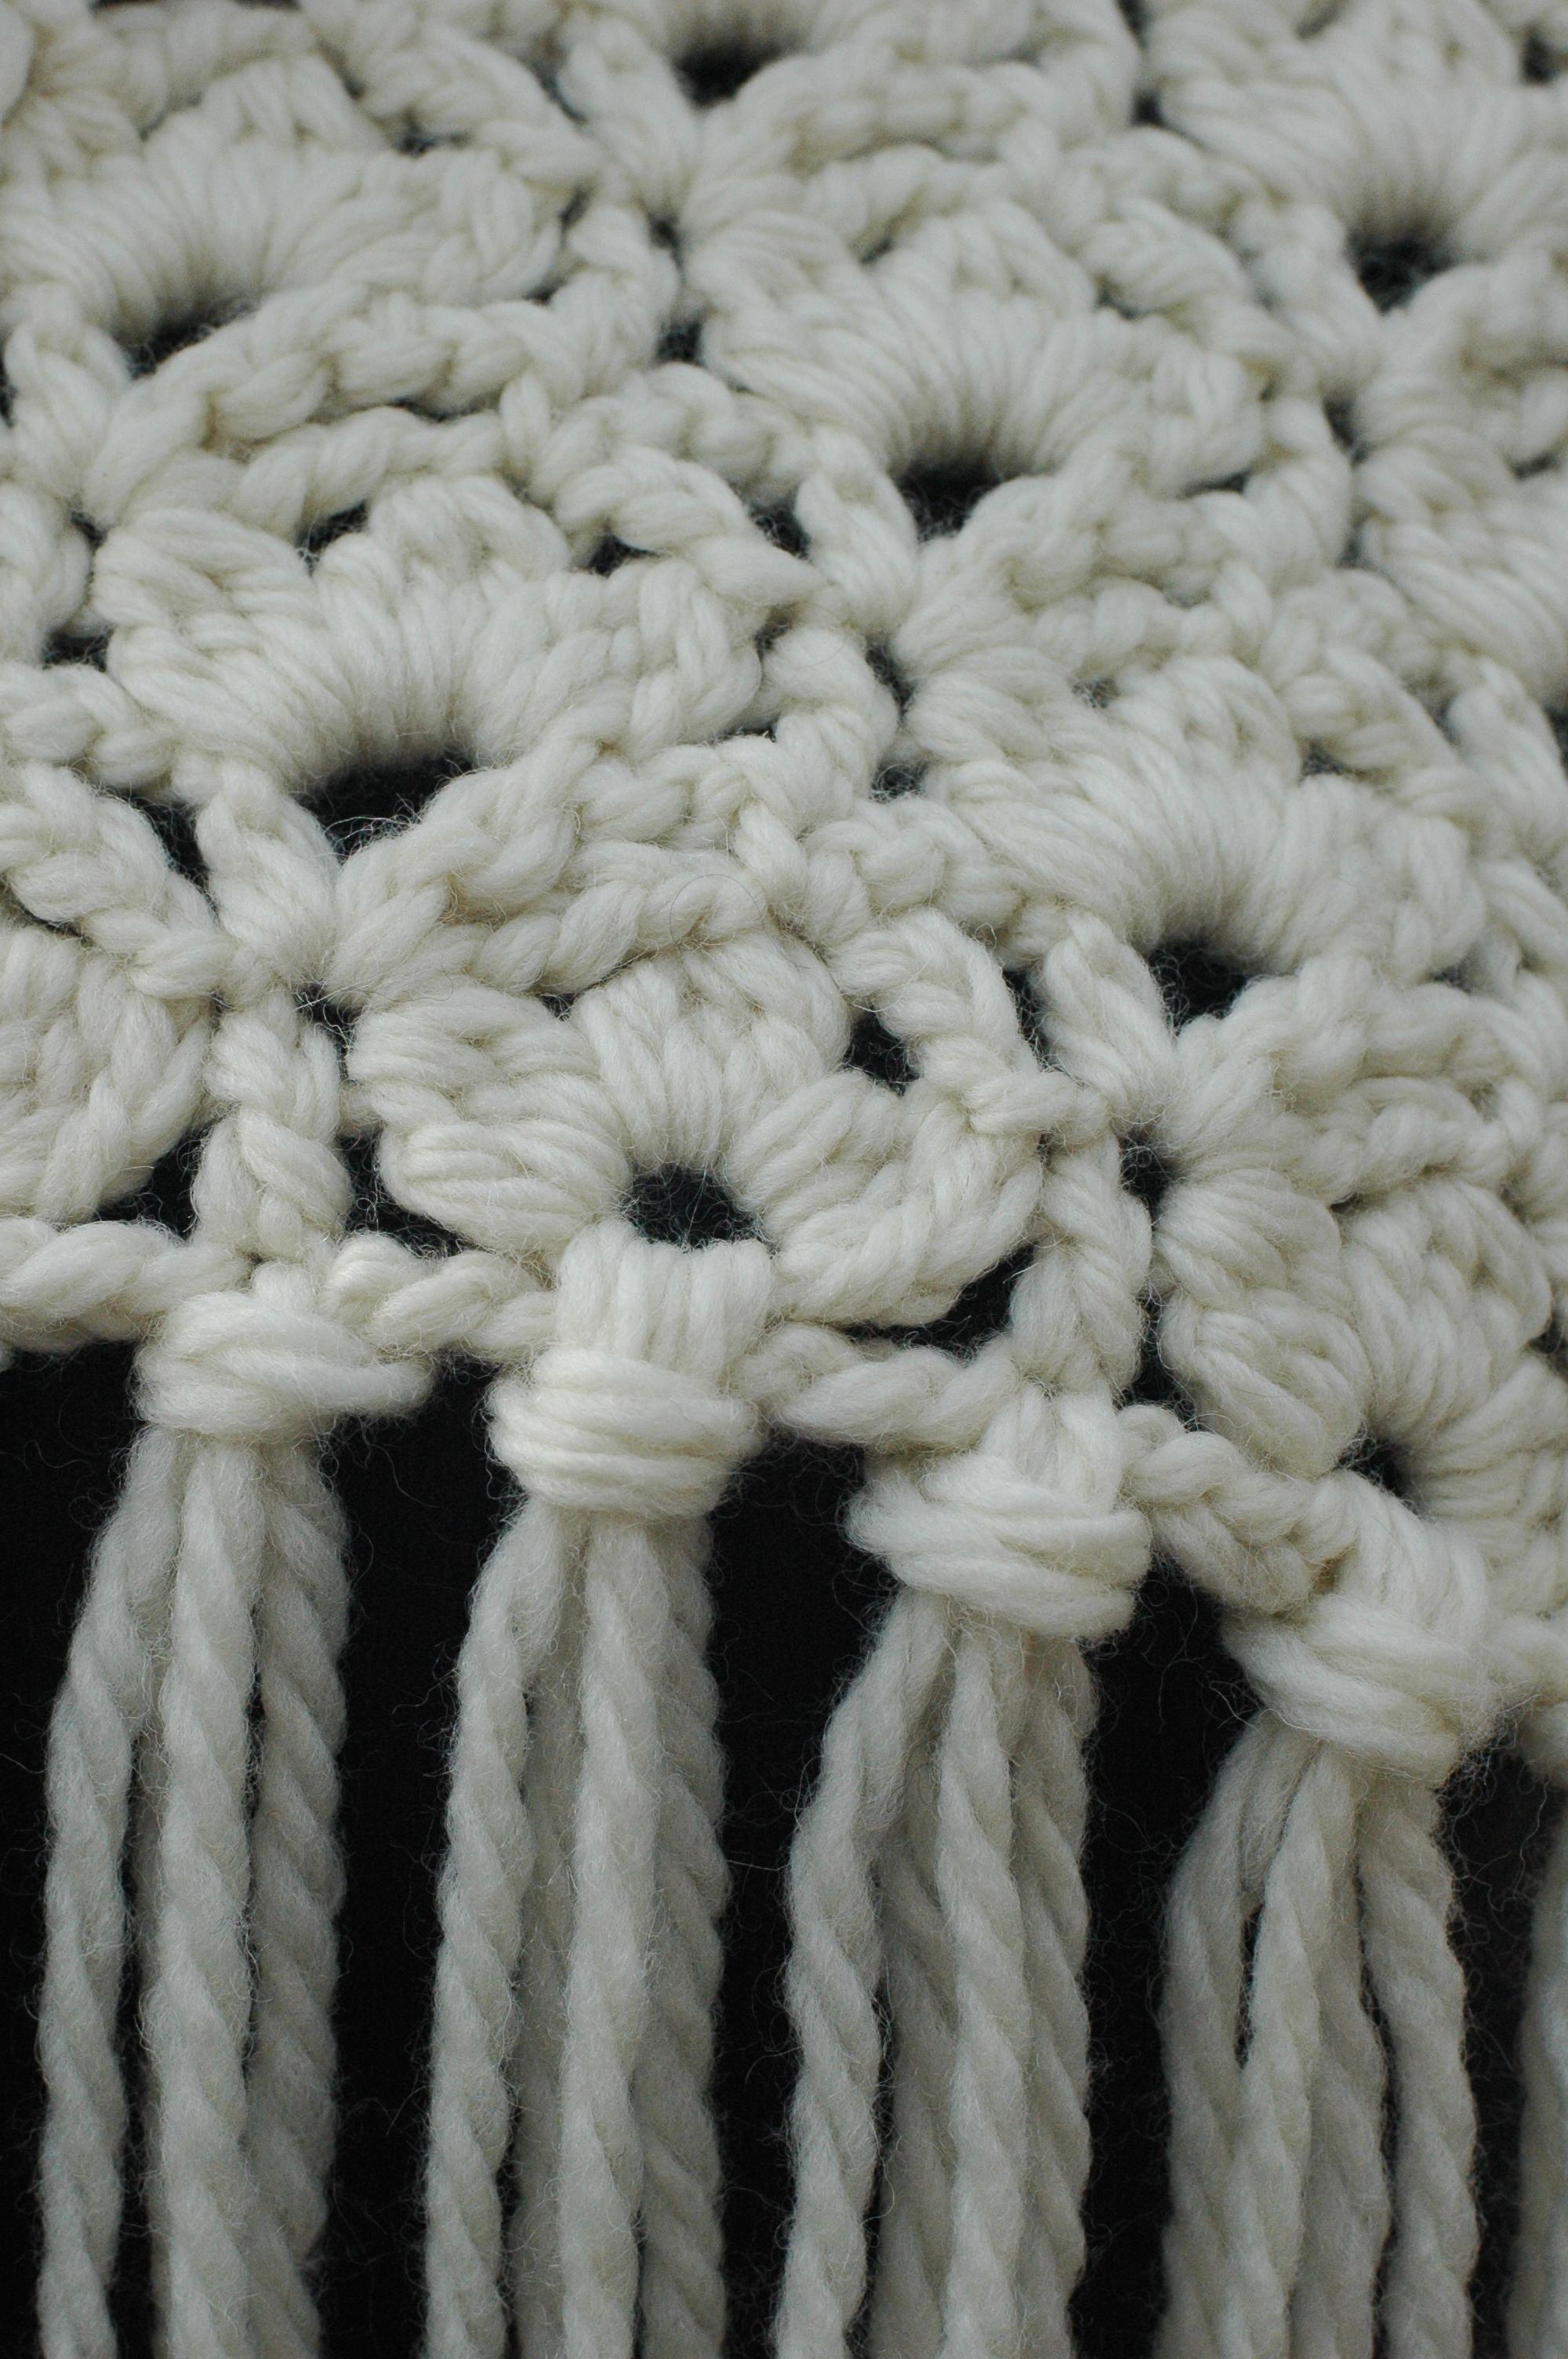
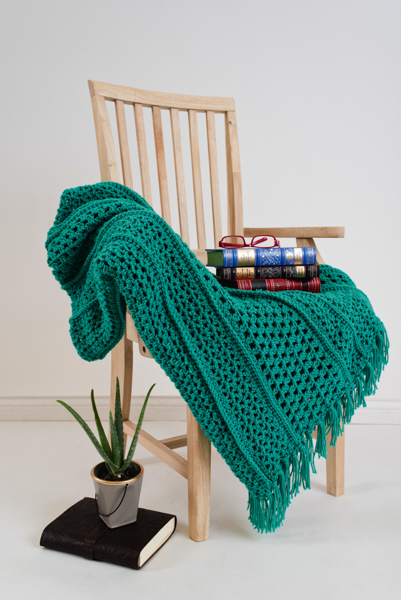
This is the practice that went into making the Book Club Afghan, just enough stitch change to keep things interesting, just enough repeat to keep the design something that you can relax doing. This is how the lacy panels are worked, in a lengthwise direction with solid stitches between them. The three styles of lace make just enough visual interest, and are just different enough from one another that it is a joy to work.

The fringe on this design I fell really helps it stand out, as it offers just a bit of a classic flair. Overall this design has always reminded me of a classic fisherman’s afghan with a modern update, something classic made more current.

I know that there are many fabulous designs accepted every year by the publication, and I am honored that one of mine was selected. I guess a truer statement might be that I am humbled.


Don’t Under Estimate What You Don’t Understand- Pom-Poms

There are many ways to embellish with yarn, such as tassels and fringe, and then there is pom-poms. In my years of crocheting pom-poms have probably been my least liked of the three noted above. This is because I found they were a bit labor intensive and yarn consuming, and I could never replicate one…each looked very individual.

As a kid I understood pom-poms as short strands of yarn that were all tied together in the middle. There are supposed to be enough strands to push outward and create a sphere. I would wrap yarn around a ruler, or small book; much in the same manner I would create fringe only smaller. I attempted to tie these together to create the sphere. I found that that had a lot of trimming to do to make this item look like a ball, and this left yarn scraps everywhere. With my hand trimming no two balls ever looked alike.

I had found some other directions in books, about making cardboard rings, two that matched, and wrapping the yarn around the ring to create a pom-pom. Honestly, I never completely tried it. The cardboard I had access to was pretty light weight, as from a cereal box, and this did not lend itself well to having yarn wrapped around it. Also, I did not fully understand what the directions were asking me to do. I thought that maybe this was just one of those novelty things. As a result, I rarely made or worked with these little balls of fluff.

Recently I had a student that had purchased a pom-pom maker, and was attempting to put it to use. I was skeptical. I thought “another novelty idea”, but then we played with it and all the concepts I didn’t understand before came into clarity. By working over these two pieces of plastic, shaped in a ring like the cardboard directions had suggested, I understood that the two pieces were to help you cut and tie the pom-pom. The reason for the circular shape was that the yarn was evenly placed in the tie, unlike my wrap of a ruler where the yarn was more focused at a point. This rounding at the tie helped form the sphere shape, and also used a lot less yarn! By using a template, use as this tool, it is much easier to make more than one and have them come out the same size.

Having helped my student understand this tool, I gained a filling in my knowledge void, and started to think of ways I could use these balls; maybe some garland, tops of hats, edges of scarves. I must remember, never dismiss anything as a novelty until I actually understand it.

Spanish Combs Scarf with Erika Knight Yarn = A Great Effect

ScannedImageSo at my home it already feels like summer. I would really like to experience spring, but I guess since winter skipped California this year that summer is due. However that only means that I can starting wishing it was fall all that much earlier!
So it makes it fitting that I am releasing a new” 2 in 1” pattern this week. Often when we see a photo of a pattern we do not think about how the yarn choice really affects the finished item, but this pattern capitalizes upon it. I had the pleasure of working with some gorgeous Erika Knight Yarns to create a scarf, Spanish Combs Scarf, which has two very different effects depending on the yarn used.

Spanish - V2..

Vintage Spanish Combs Scarf Photo courtesy Blue Water Fibers

The stitch technique itself was inspired by the ornate combs that adorned the hair of women in Spain during the centuries gone by. These “combs” nestle together and form an interesting dance of positive and negative space.

Spanish - M2..

Maxi Spanish Combs Scarf Photo courtesy of Blue Water Fibers

The Vintage Yarn creates a scarf that has a soft drape and nice open stitch work for a smooth edged classic look, while the Maxi Yarn has a warm chunky image. The fringe gives it a very retro look (it is a version that I have already been asked to make up as holiday gifts). These two scarves essentially share the same pattern, with the only difference being the finished sizes, the materials and the gauge.

Spanish - M3..

Maxi Spanish Combs Scarf Photo courtesy of Blue Water Fibers

If you get the opportunity, please check it out (available at Craftsy & Ravelry), and if you have the opportunity to play with some of Erika Knights Yarn, do it. You won’t be disappointed.