It is so inspiring to share a concept with a student and see the spark in their eyes, and then see them make it their own. This has happened to me recently with an introduction discussion on Broomstick Lace.
I teach an informal crochet class at my local yarn shop, and keep it student driven, meaning that every student works on projects that they want to create and I teach them the parts they need to learn in an individual/group setting. I find that the students really get inspired from one another, and have such varied ideas for project that they want to create, this makes for a class that is different everyday highlights the beauty of how crochet can be some much to so many. The one constant is that I open every class with a new technique or skill.
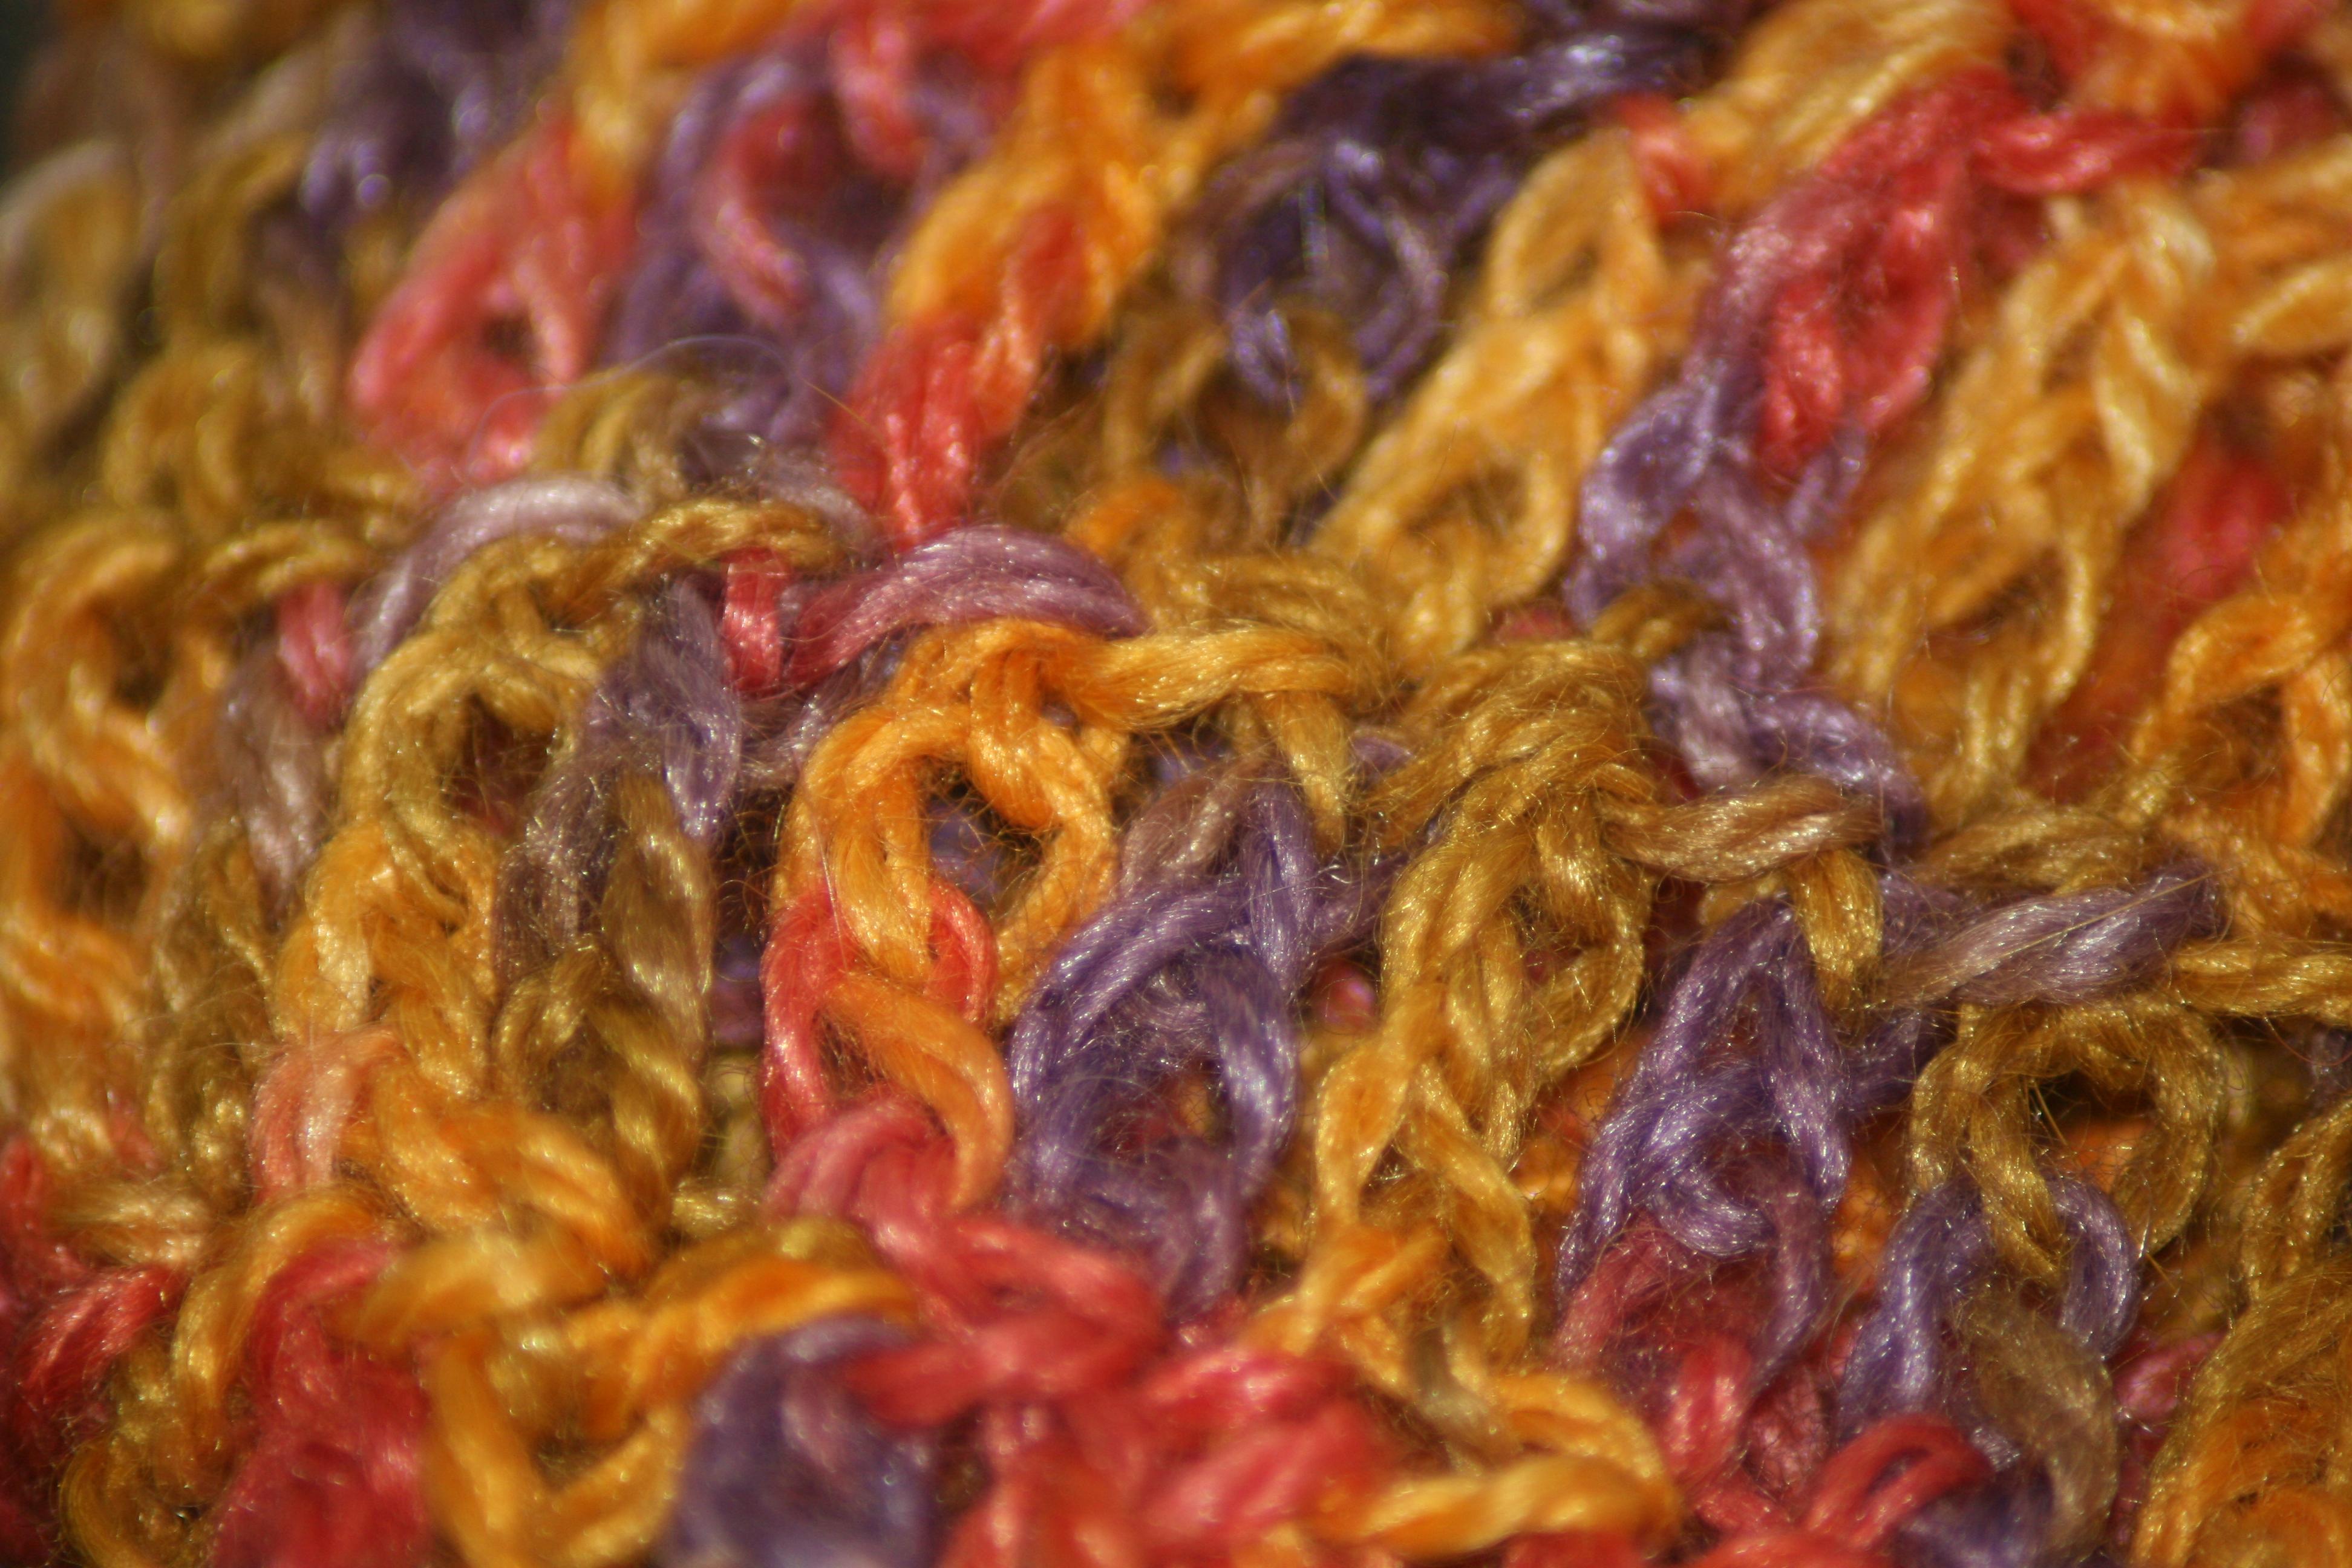
one simple row of Broomstick LAce
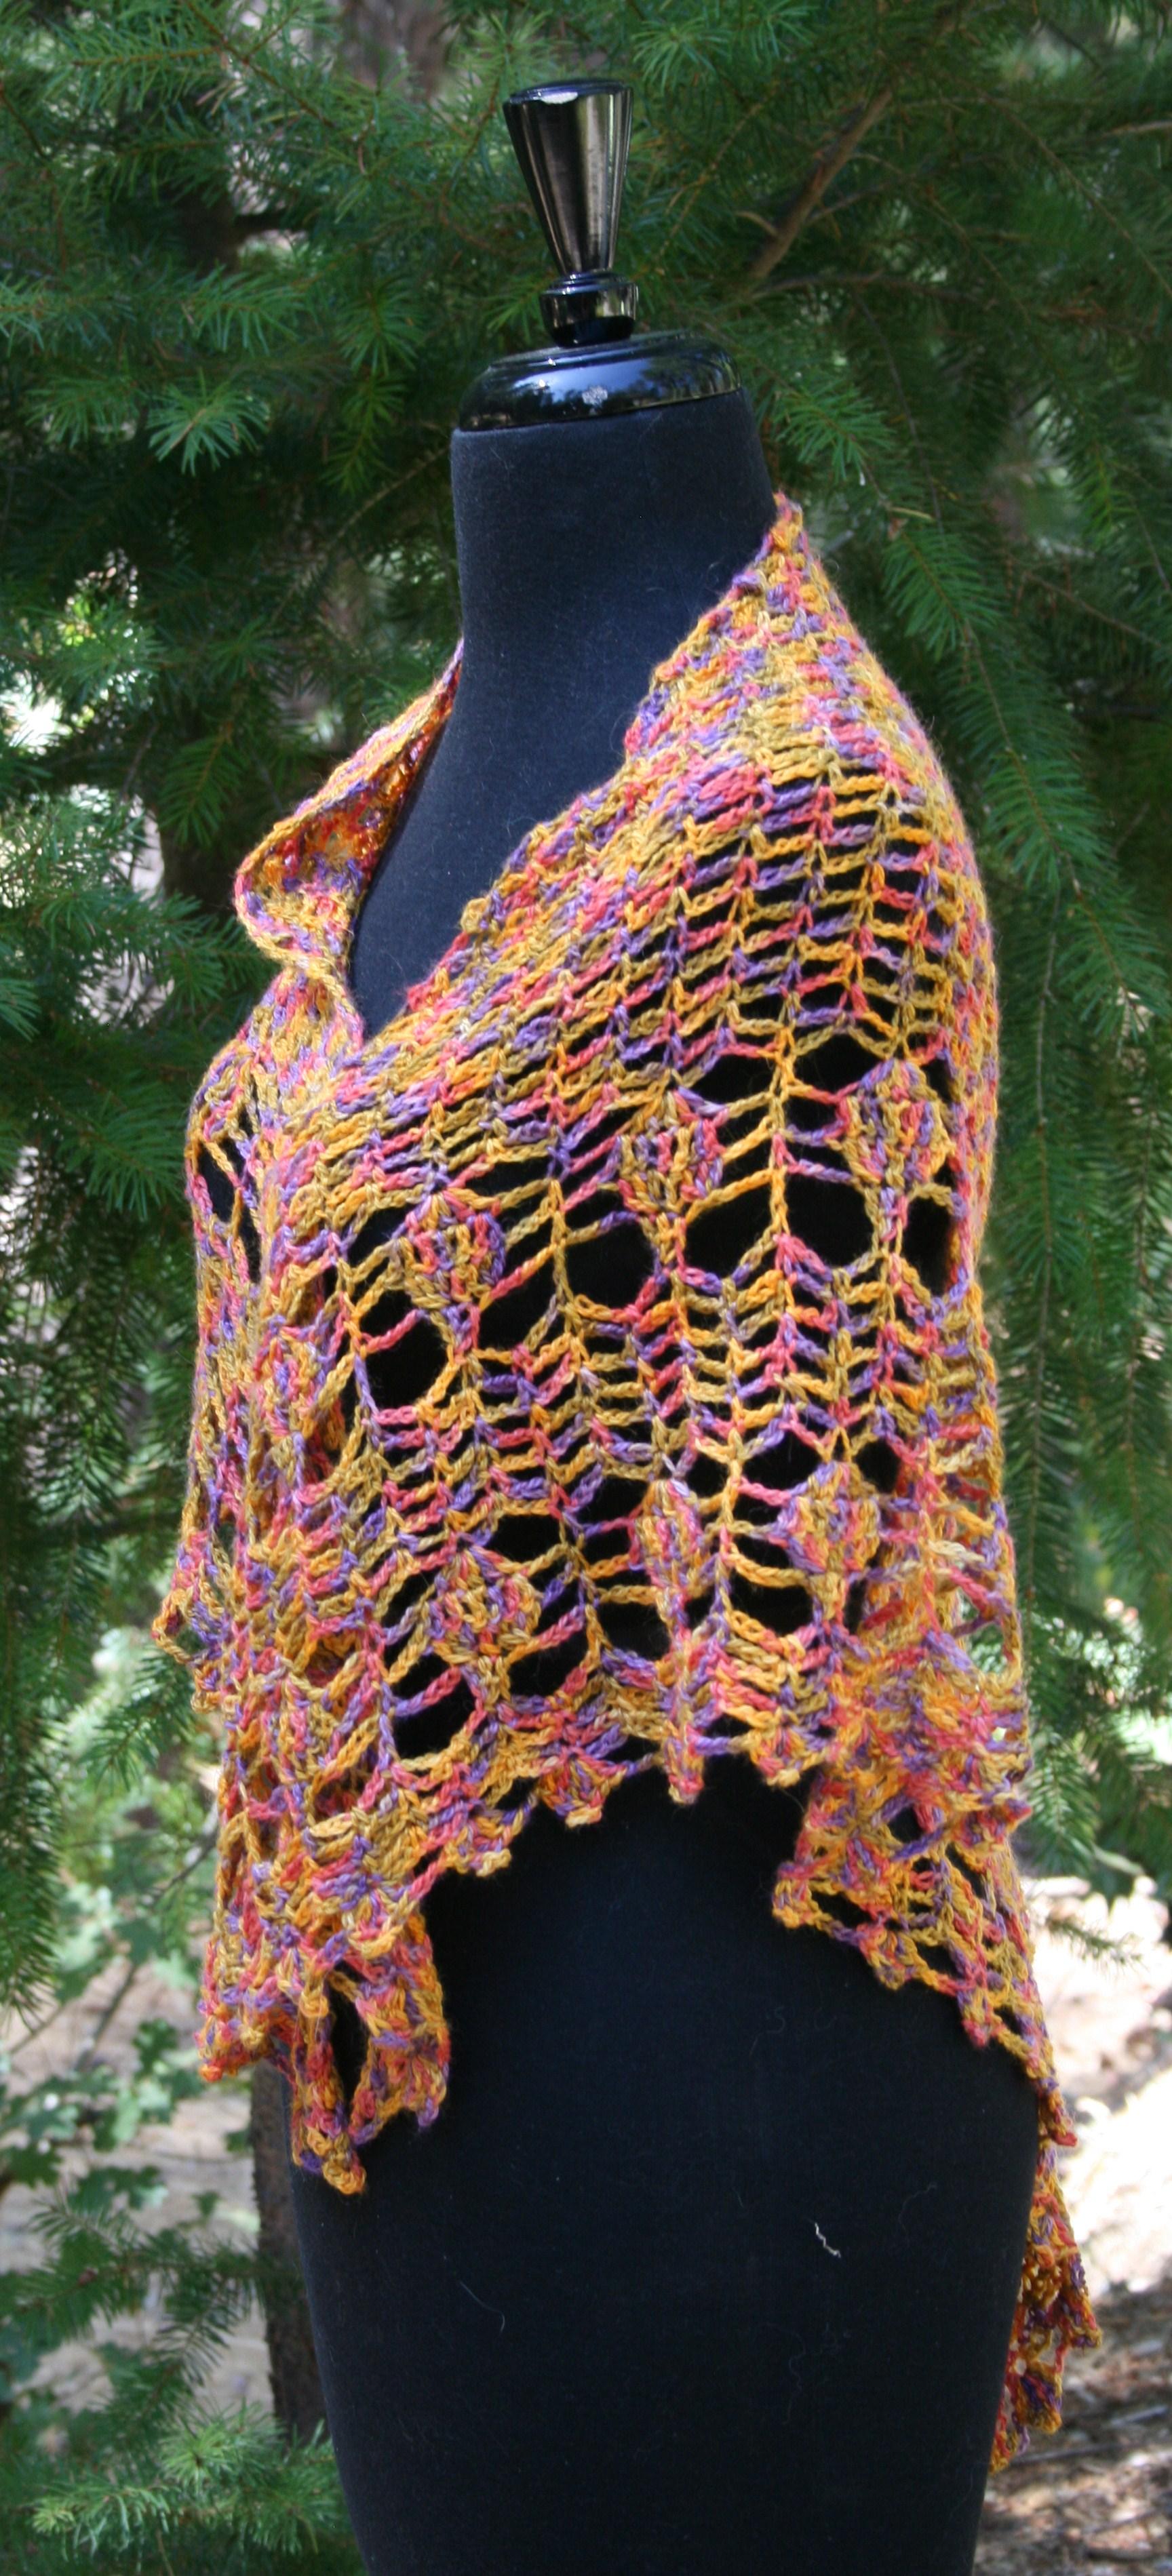
Last week I shared how to create Broomstick Lace, one student was inspired enough by this concept that she took it home and began working a row of it in her latest baby afghan. I love how she did not feel intimated by it, or feeling that she needed to find a pattern, she jumped right into how she could apply it to her latest project.
With this inspiration fresh in my heart, I wanted to share with you the basics to this traditional technique.
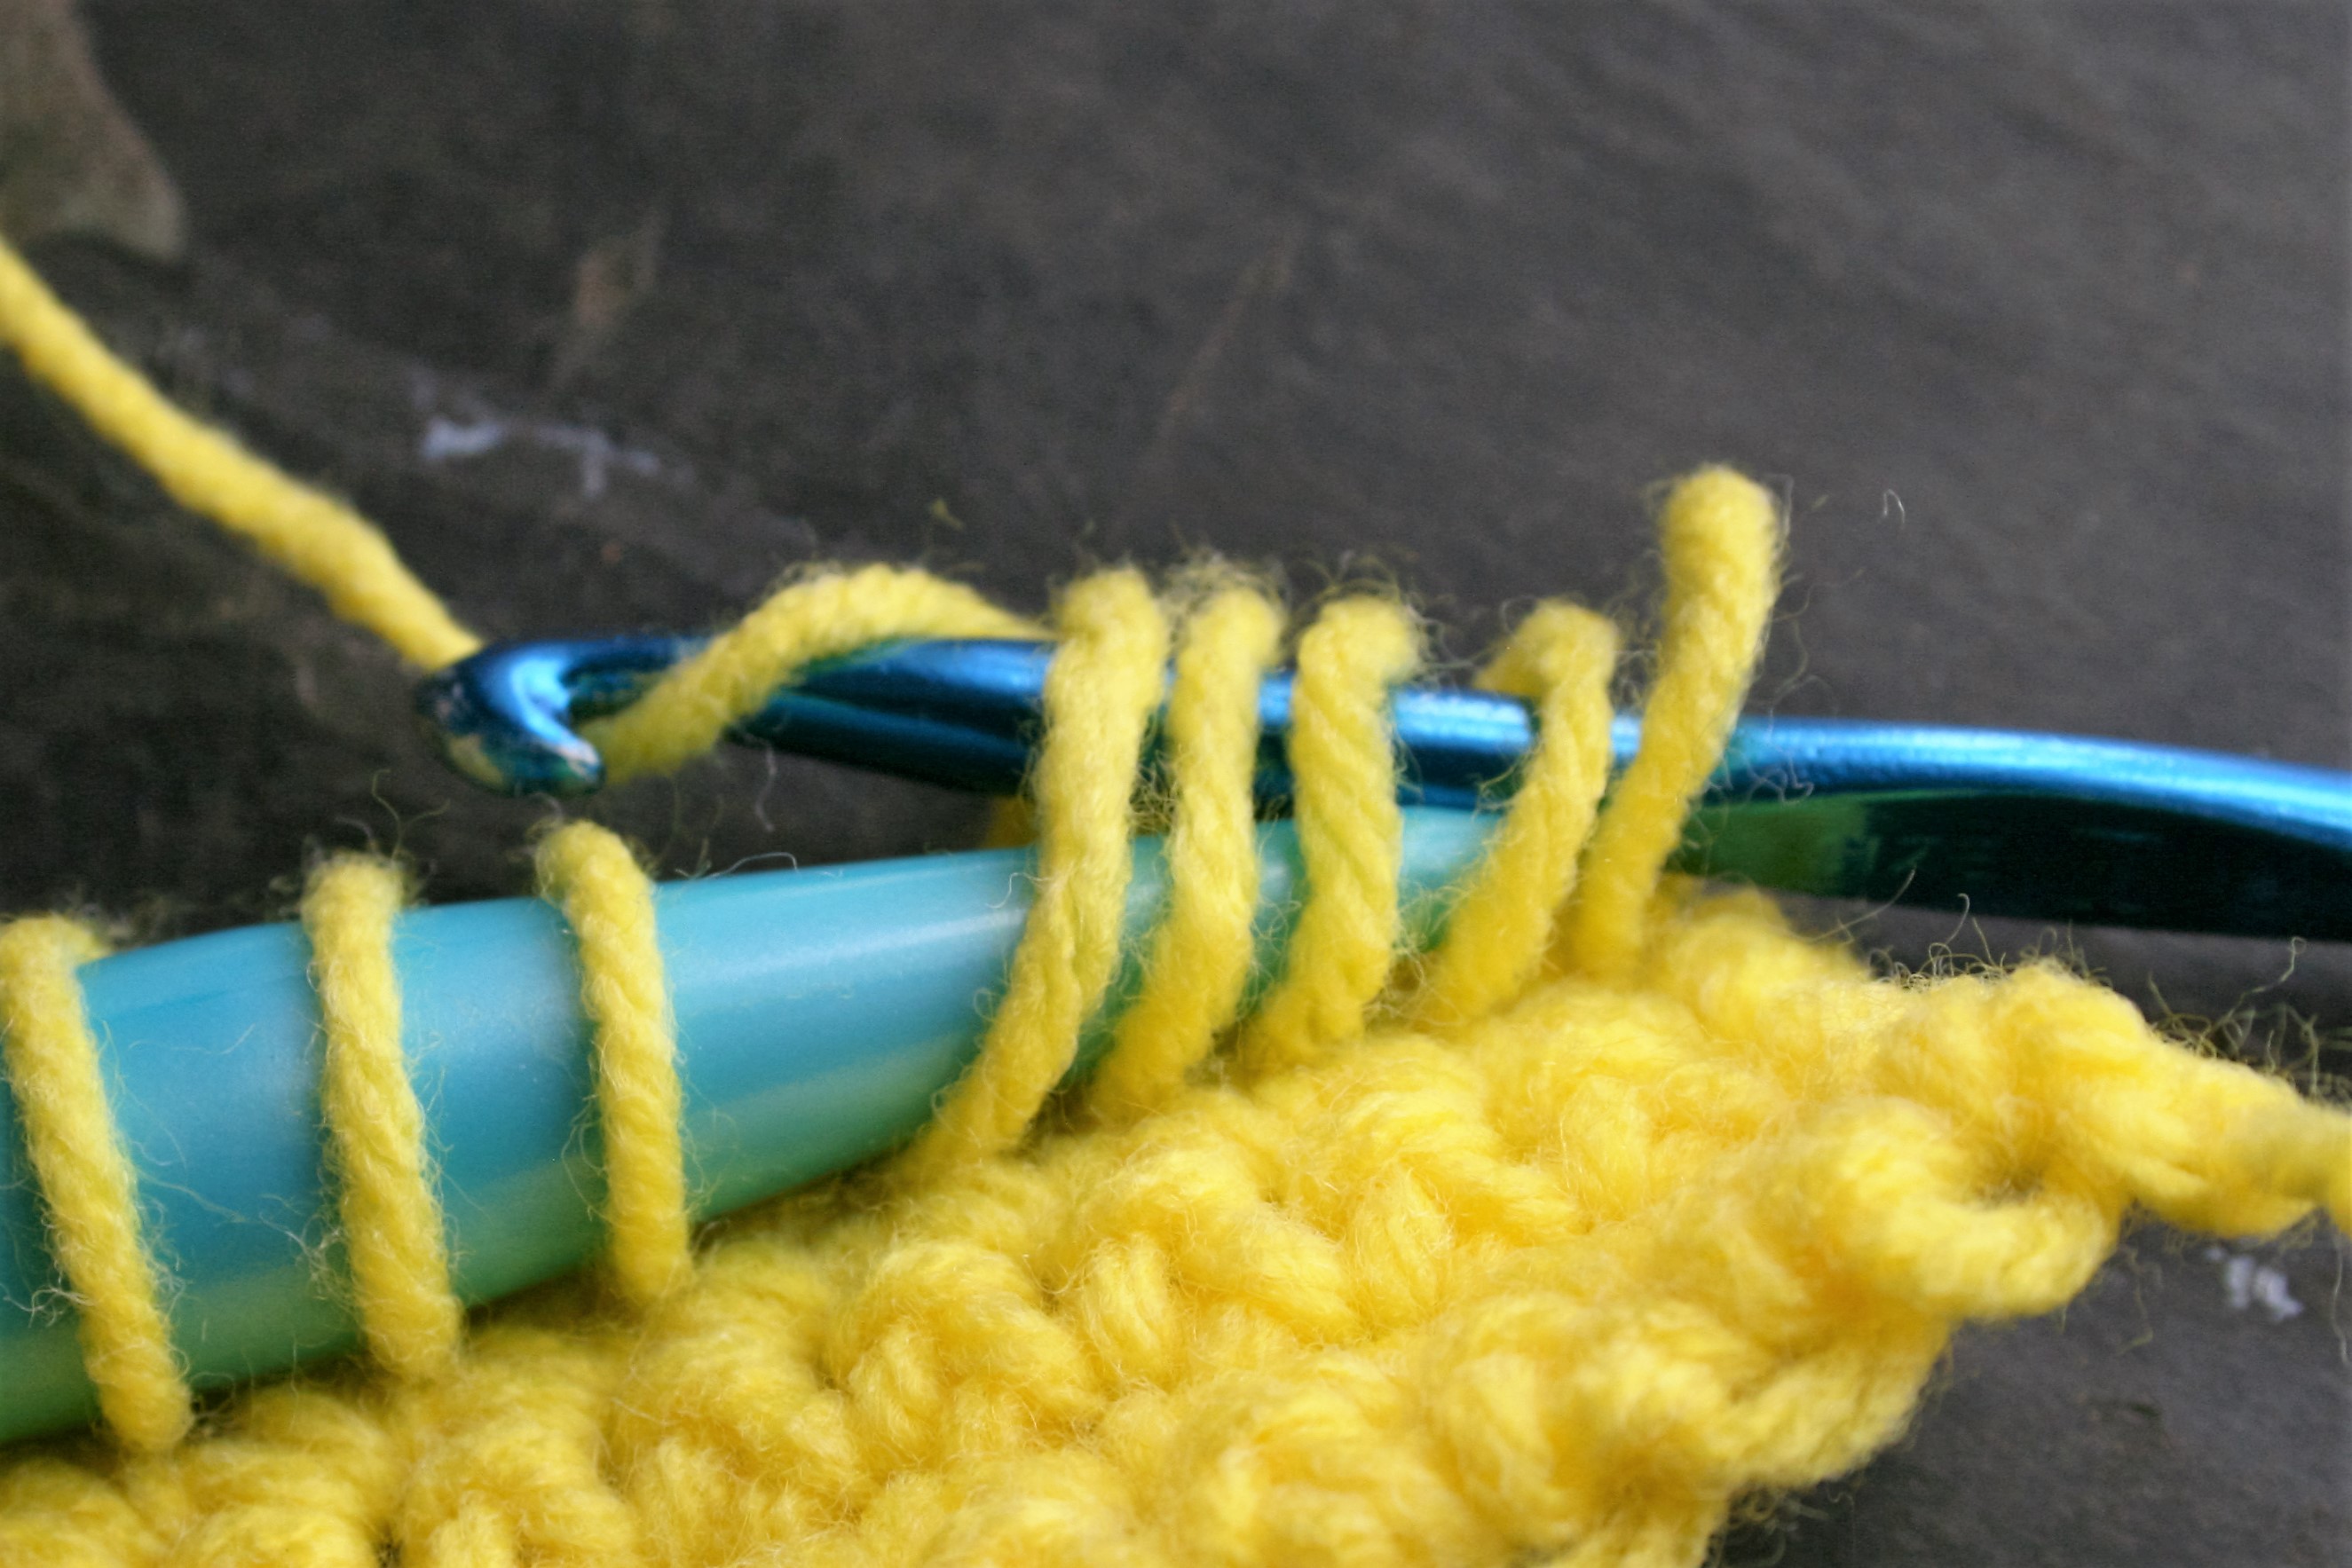
You can begin this stitch on a base of any fabric, you can even start it in a foundation chain, and it is really versatile. You use a large knitting needle, I typical do not use a needle smaller than a US 19 (15 mm) when using a light or medium weight yarn, the thing to keep in mind is that the larger the needle in relationship to the yarn the larger the “eye” of the stitch.
Pull loops through base stitches and over a large knitting needle
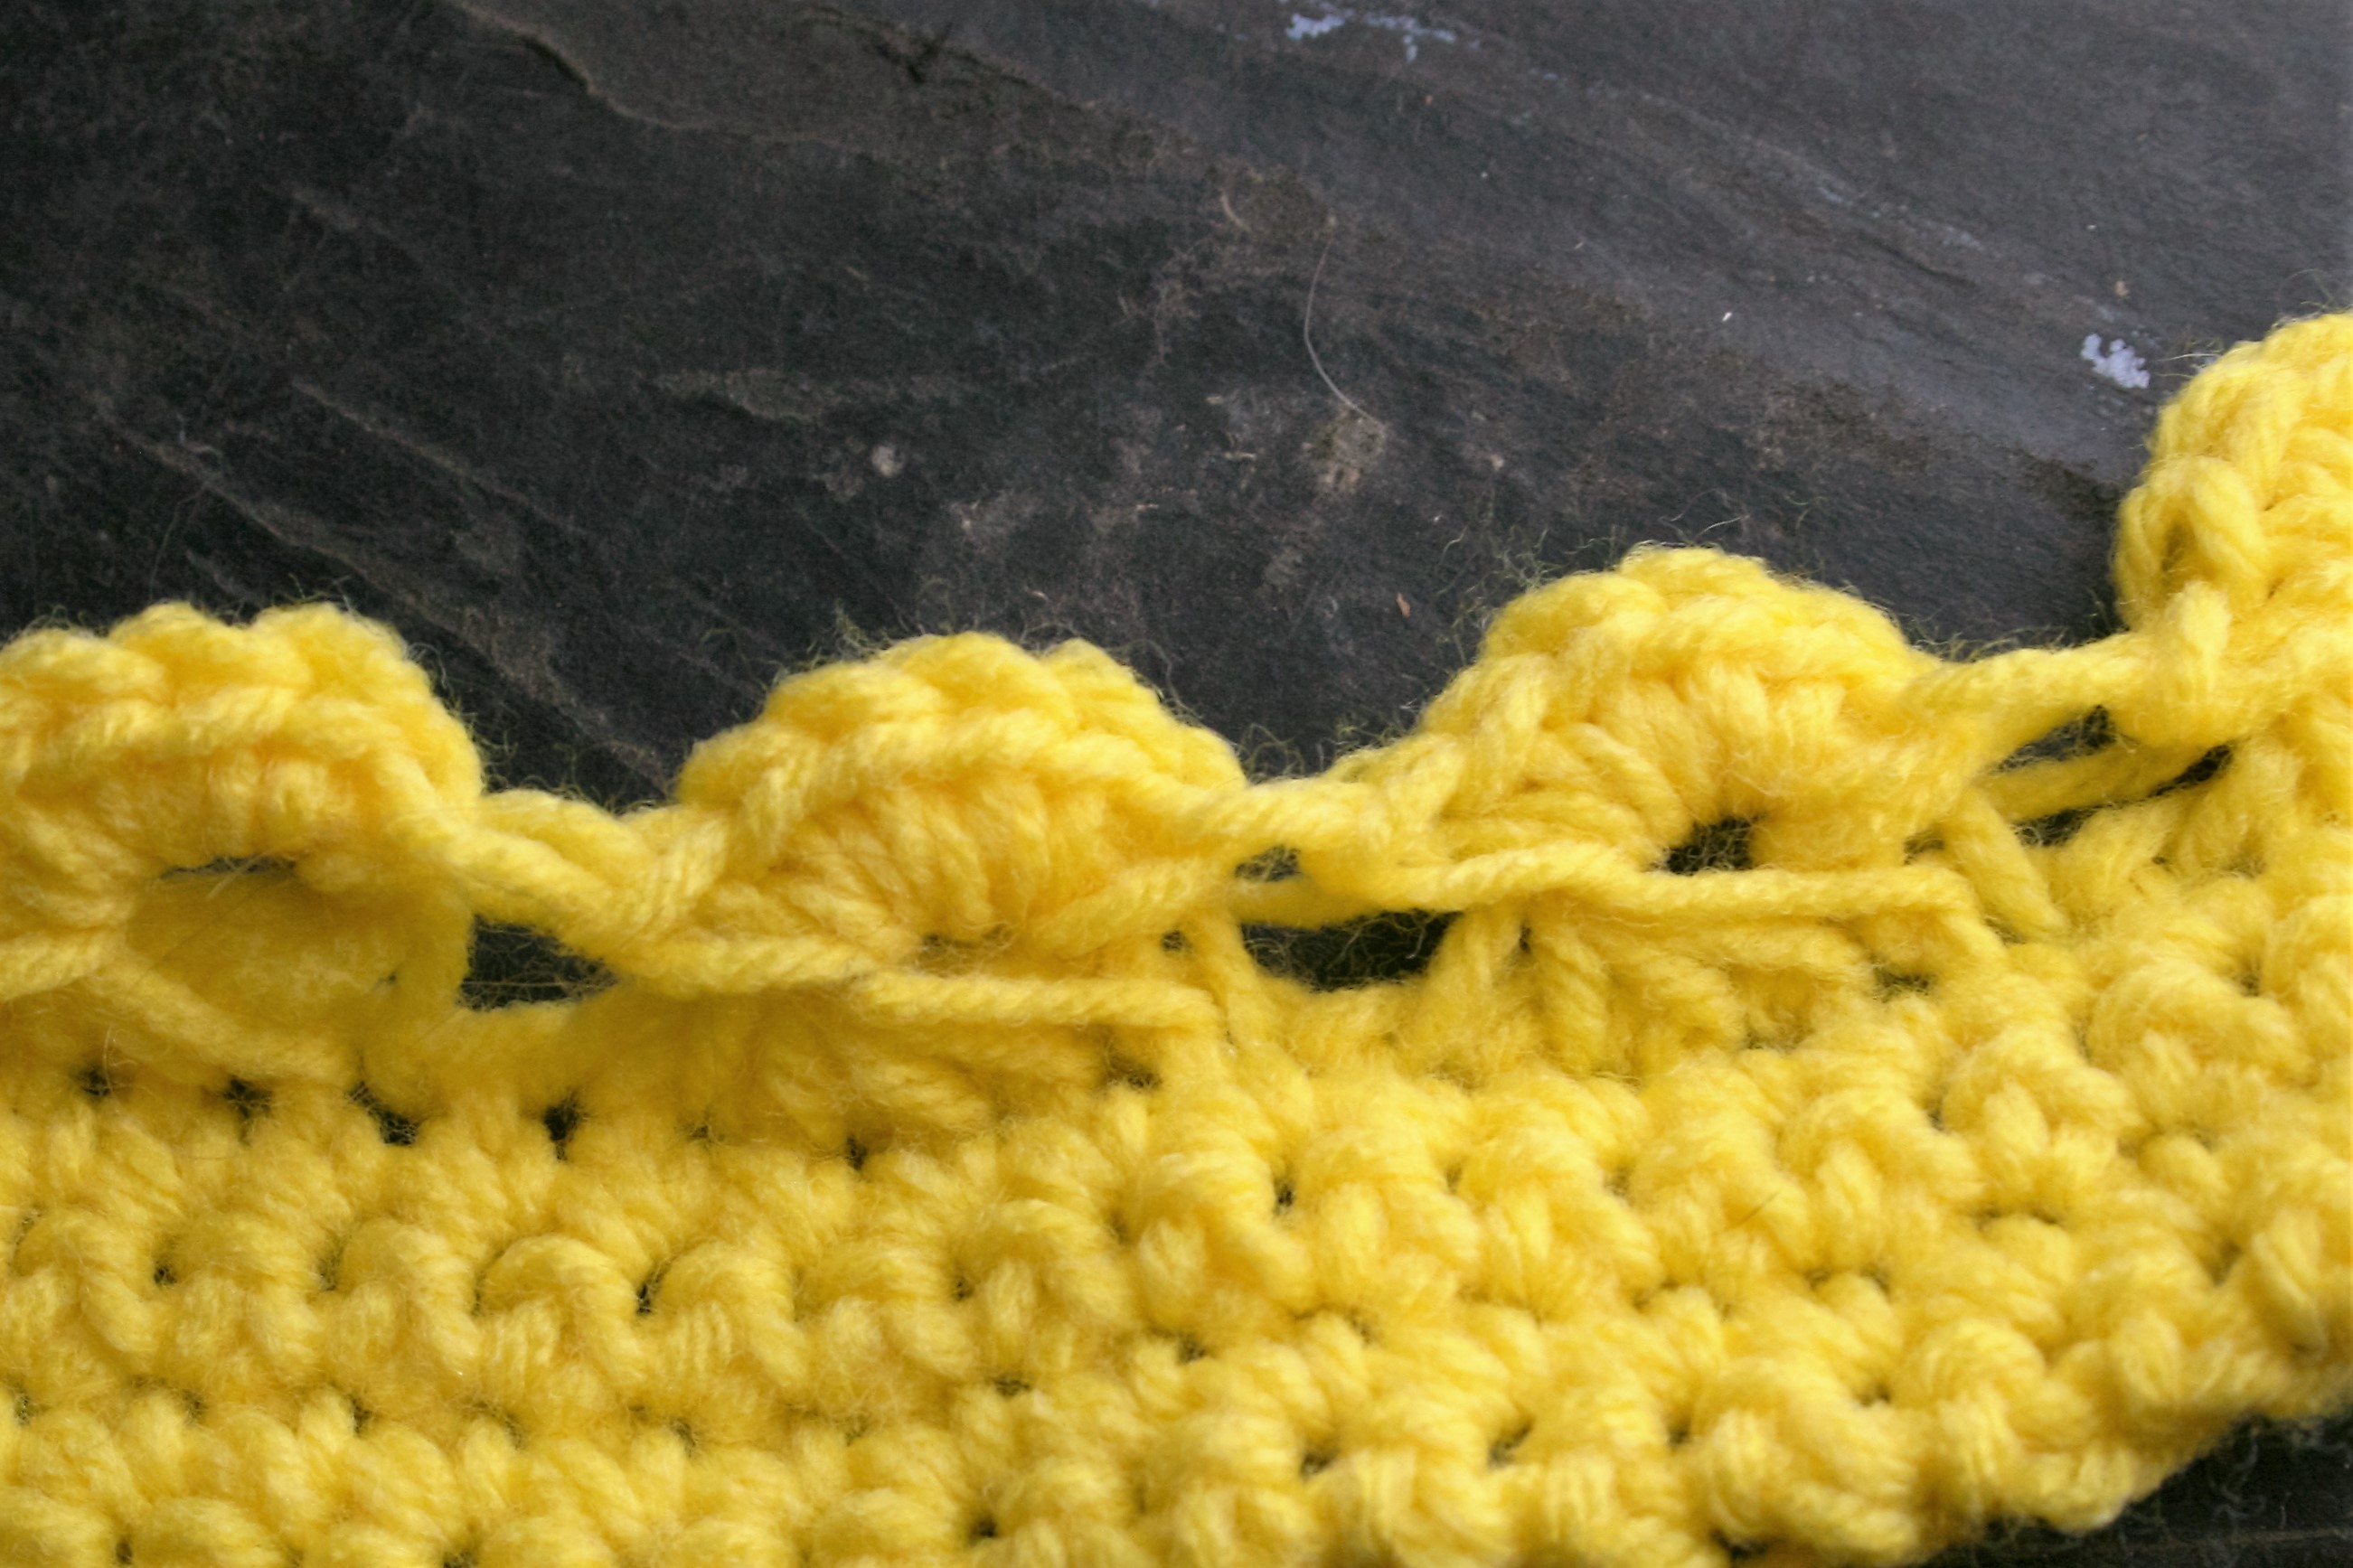
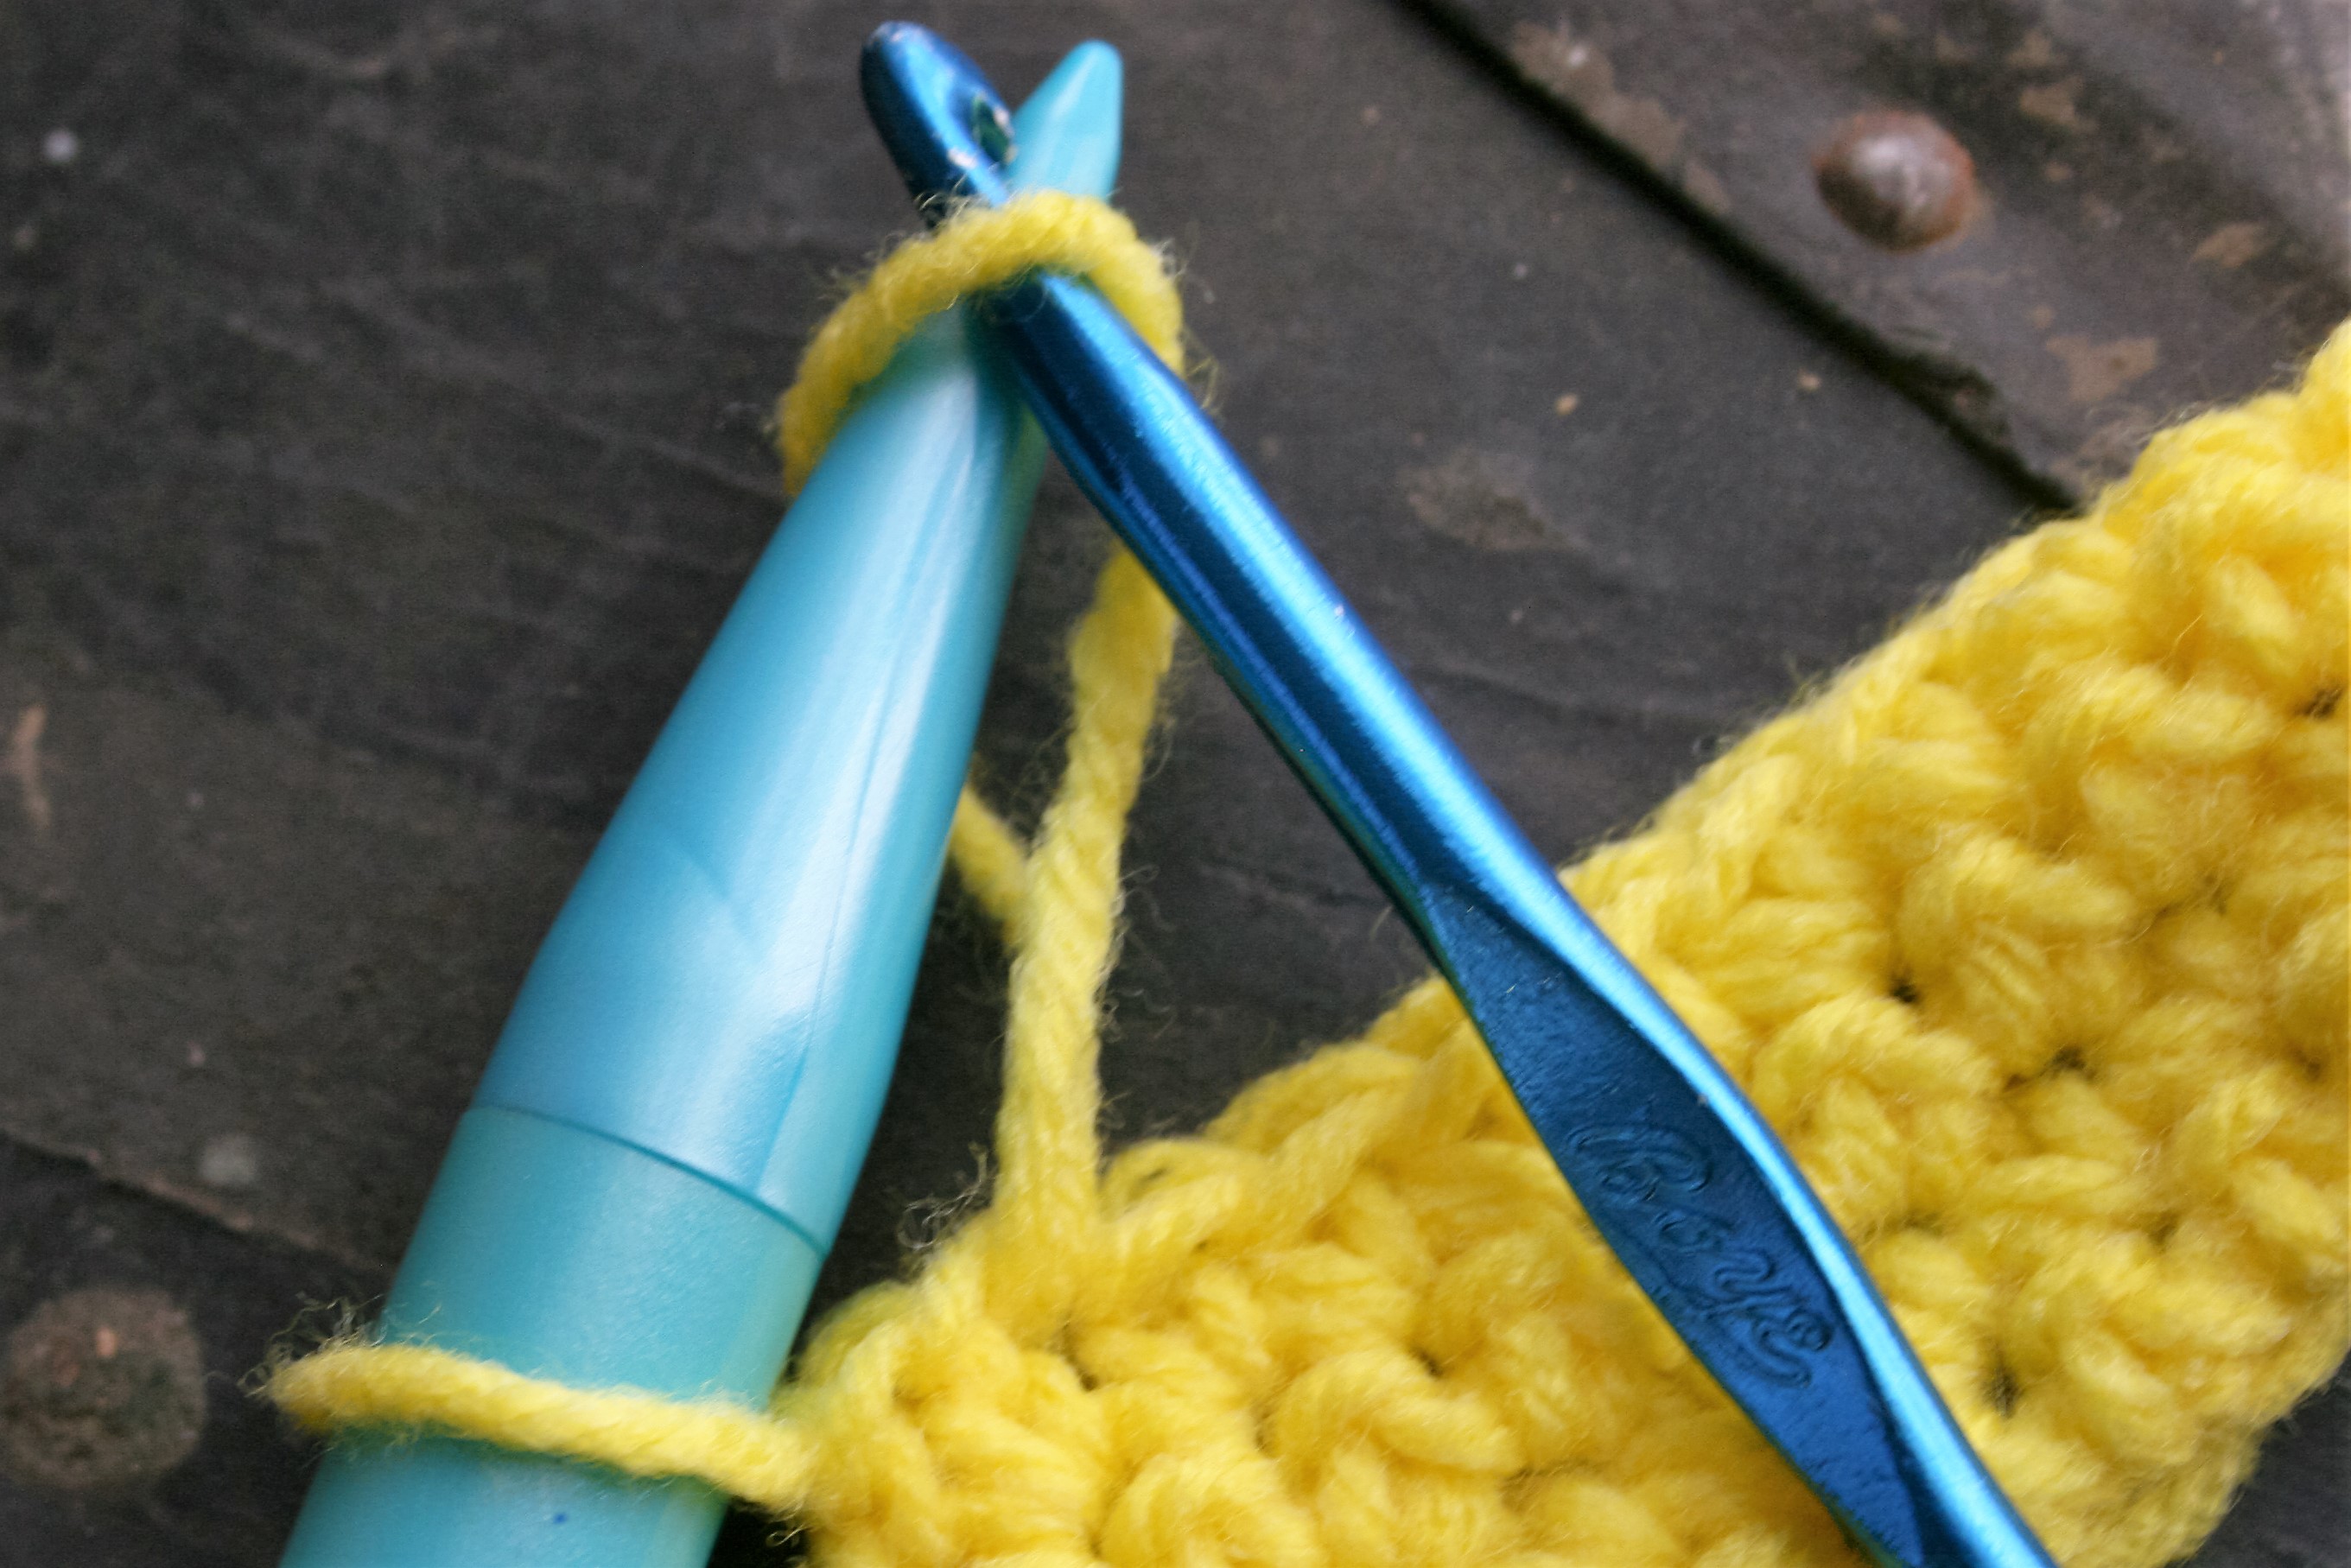
Pull the working yarn over the needle, then insert your hook in the next stitch and pull up a loop, place this loop over the needle until you have pulled a loop through all the stitches in the row. Then you turn the work, and begin working the loops off the needle. This is done by inserting the hook through a number of loops on the needle (this number can vary, it can be as little as one, or as great as you like, often you see somewhere between 3 to 6 loops), yarn over, and pull a loop through these loops on the needle, chain 1, and work the either single or double crochet stitches in the space that the needle once sat, essentially in the loops. To maintain an even stitch count you want to add the same number of stitches as loops in the same stitches, for instance, if you are working in 5 loops, you want to place 5 stitches in the top of the loops. This process is continued across the needle.
After loading the needle with loops, turn the fabric and work the loops off in groups, insert hook through loops, yarn over and pull through a loop, then chain 1
This is actually a very forgiving stitch, as if you somehow end up with too many or to little loops, you can correct the pattern by adding the number of stitches you should have in the top of the loops, so if you have 4 loops, but should have 5, work 5 stitches in the top of the loops and you have made corrections for the next row, while creating a piece that visually shows not difference.
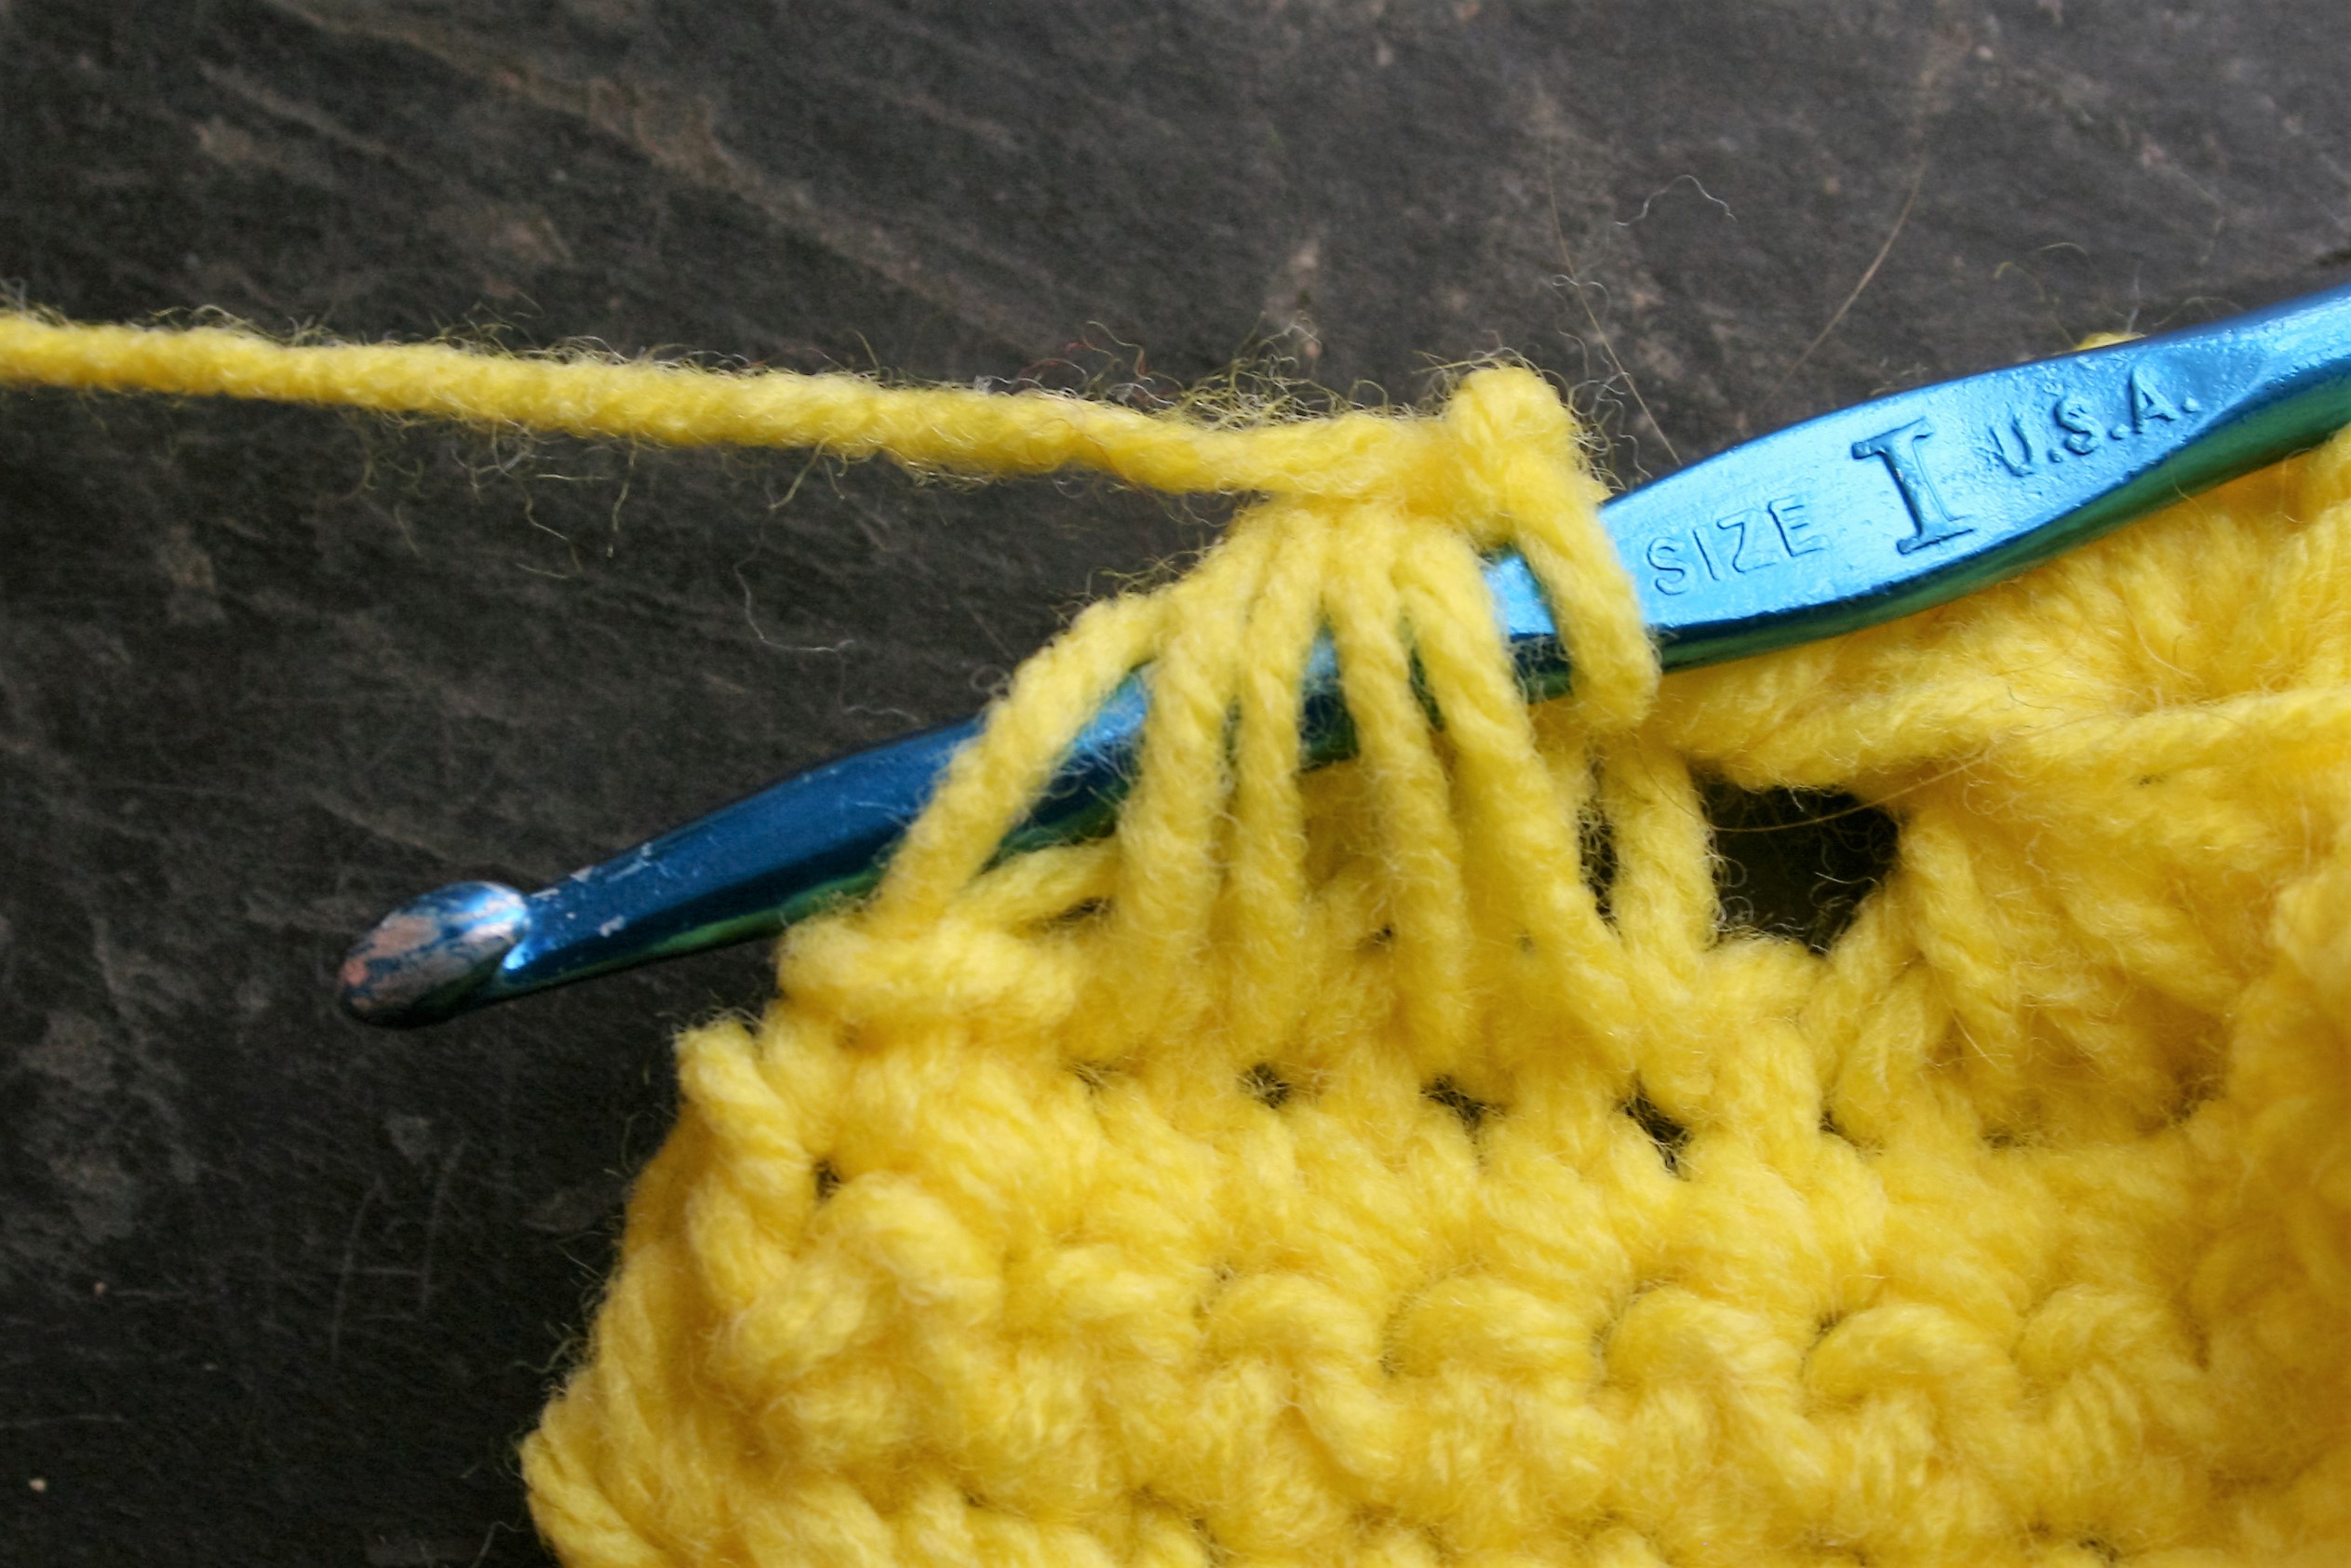
Working through the same space that the needle was located, work the same number stitches as there are loops into this space
This stitch may have originally received its name as being worked over a broomstick instead of a knitting needle, but has a reminiscent feel to Tunisian crochet and even Drop stitch crochet. These long loops pulled through stitches may be worked in different ways, but they create something uniquely crochet, and it is heart lifting to see them breathe new life.I can see them as rows of fabric, or used as an edging, they have great possibilities and are finding a new audience.