The Wine Country Throw Comes Alive

ScannedImageI love simple stitch patterns that really look much more difficult than they are. My latest design the Wine Country Throw in the October 2016 issue of Crochet World Magazine fits this description.

M01232_19_medium

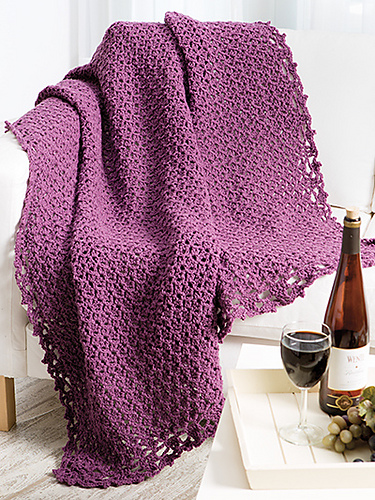
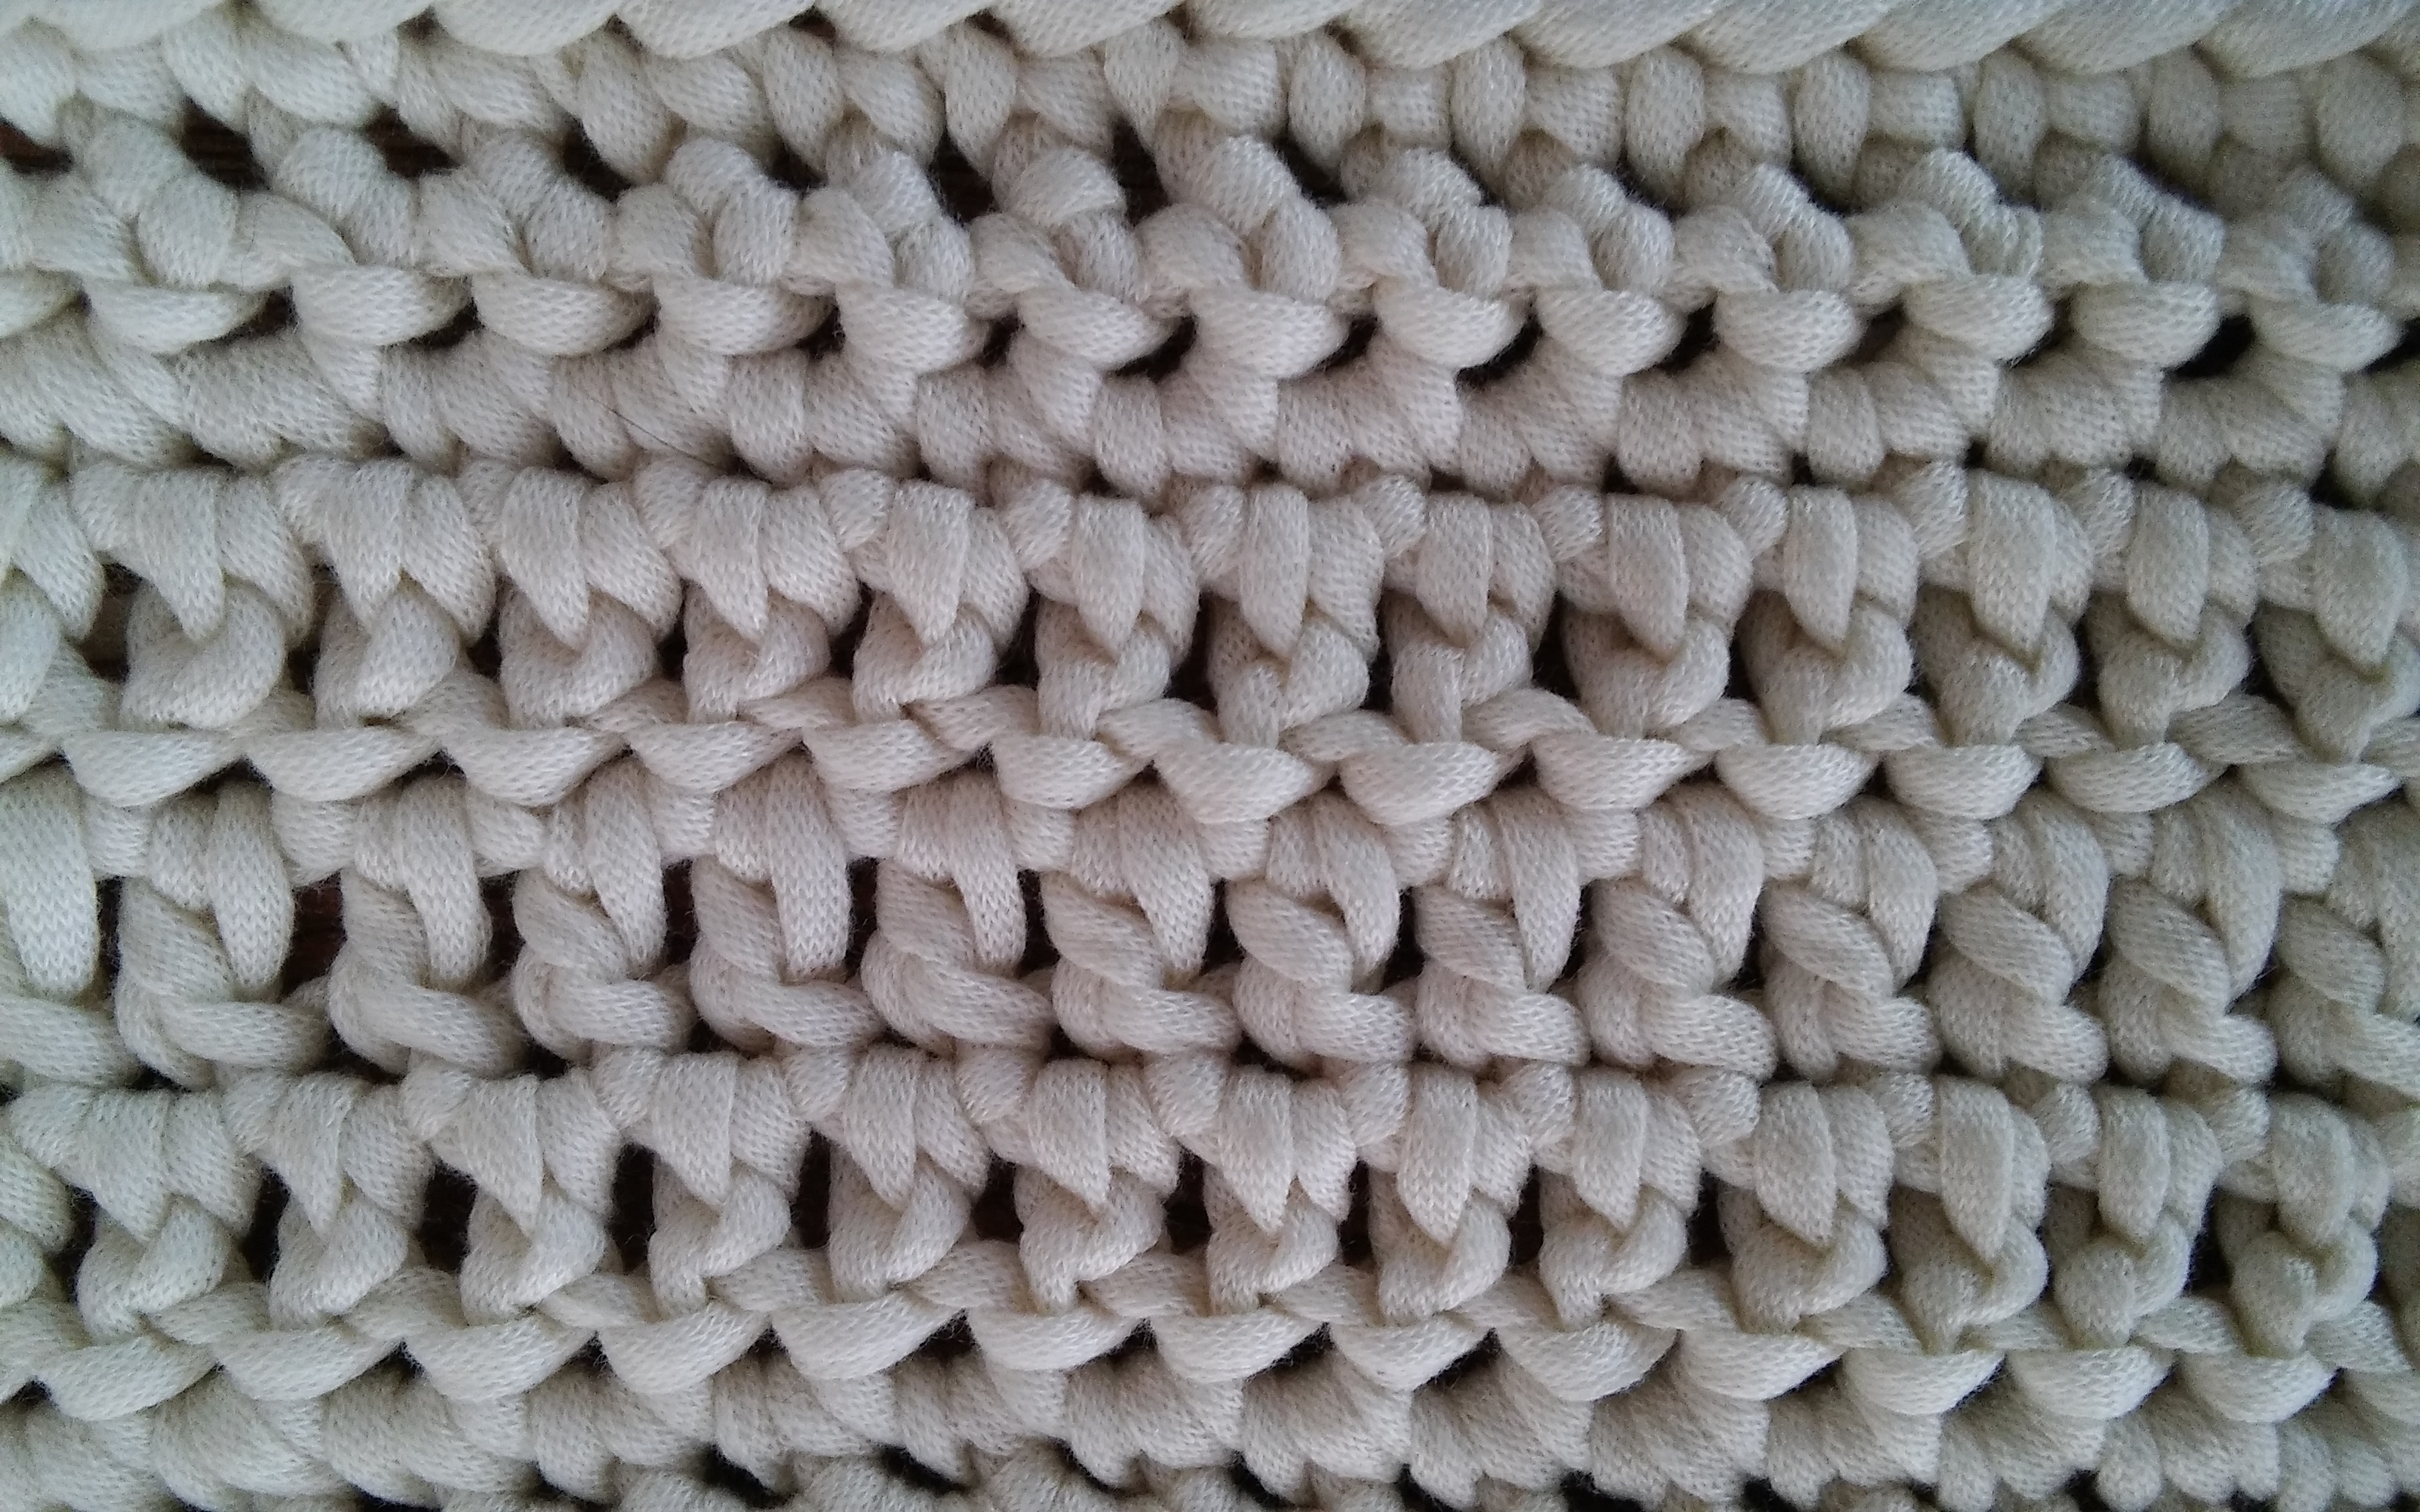
Wine Country Throw Photo courtesy of Annie’s

When I originally came up with this design I referred to it as “Titter Tat” because the stitches had such a back and forth feel to it that was like seesaw, but the current name of Wine Country is pretty fitting since I am surrounded vineyards. Even as I type this the harvest known as the “crush” is happening as the wine making process is beginning. Sitting back on my screened porch wrapped in this throw is now a great way to end the fall day.

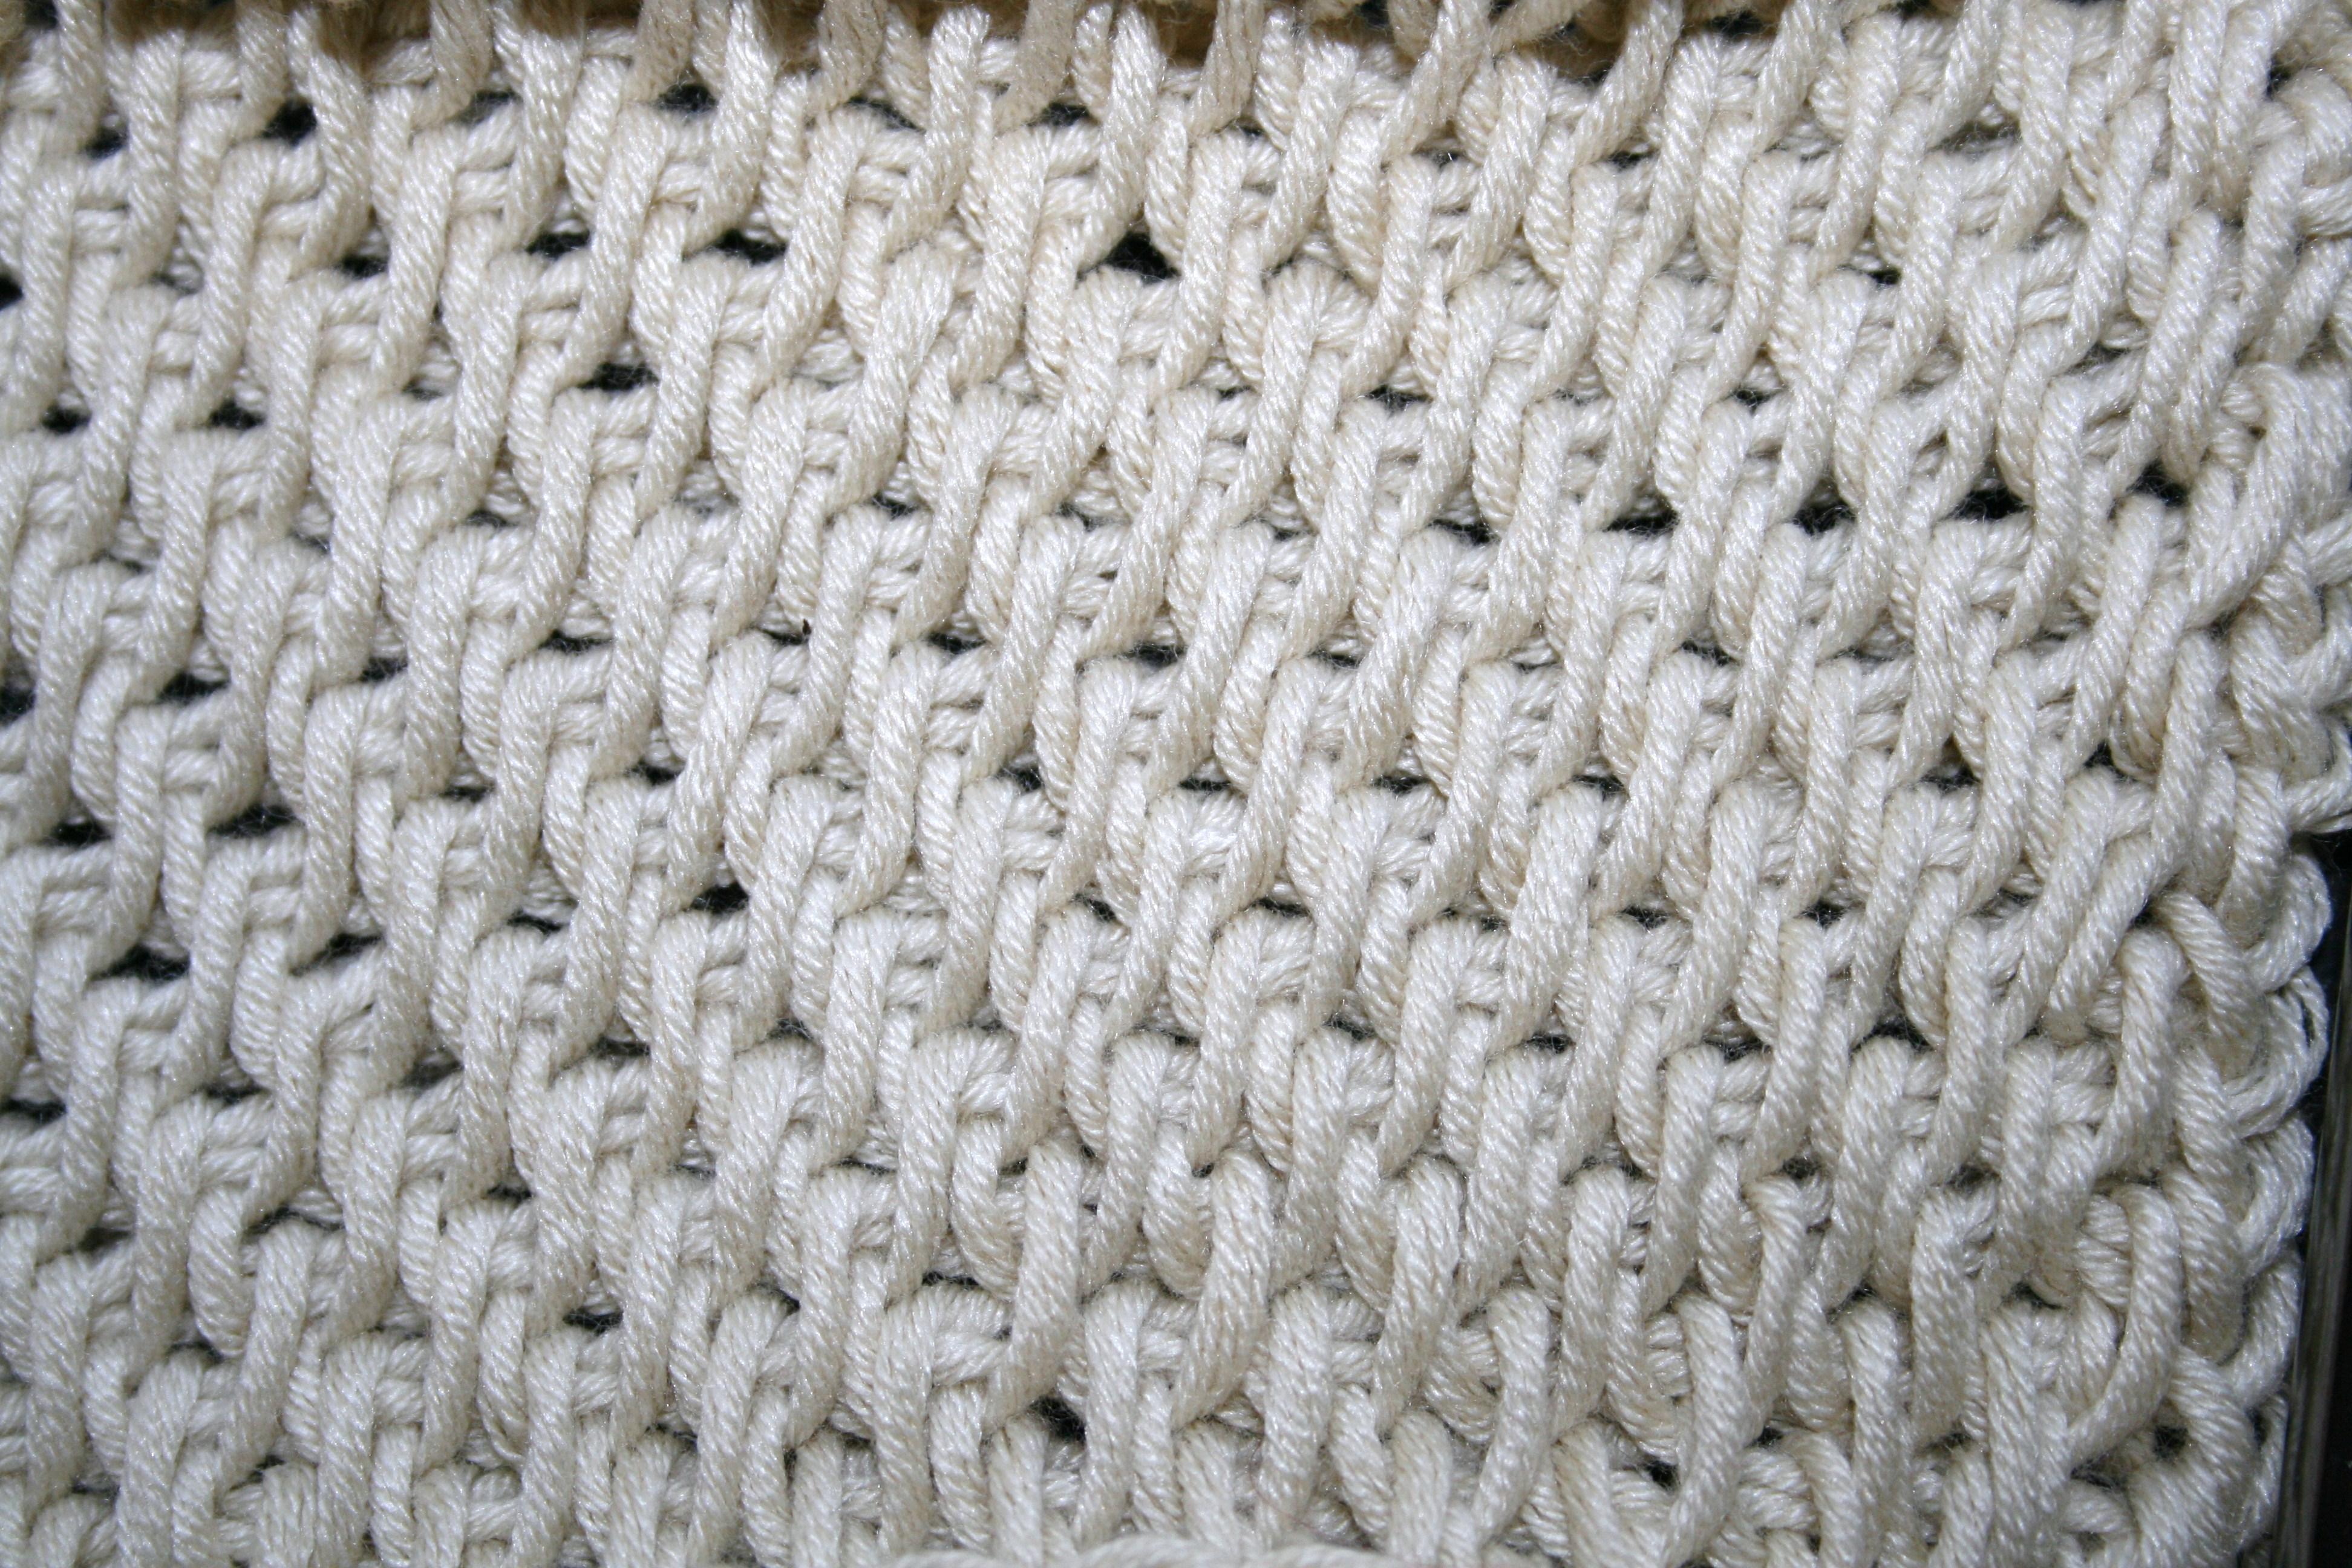
The way the stitches come together, almost has you believing that they are working in opposite direction yet it is simply where the stitches are worked. This also causes the fabric to have an incredible amount stretch.  The edging is what ultimately creates a bit of drama to this piece, as it adds a lace quality and feminine charm, by changing the border to something more solid, such as a couple of rounds of double crochets and this throw has a completely different feel, something a little more masculine, a little more modern.

133005_small2
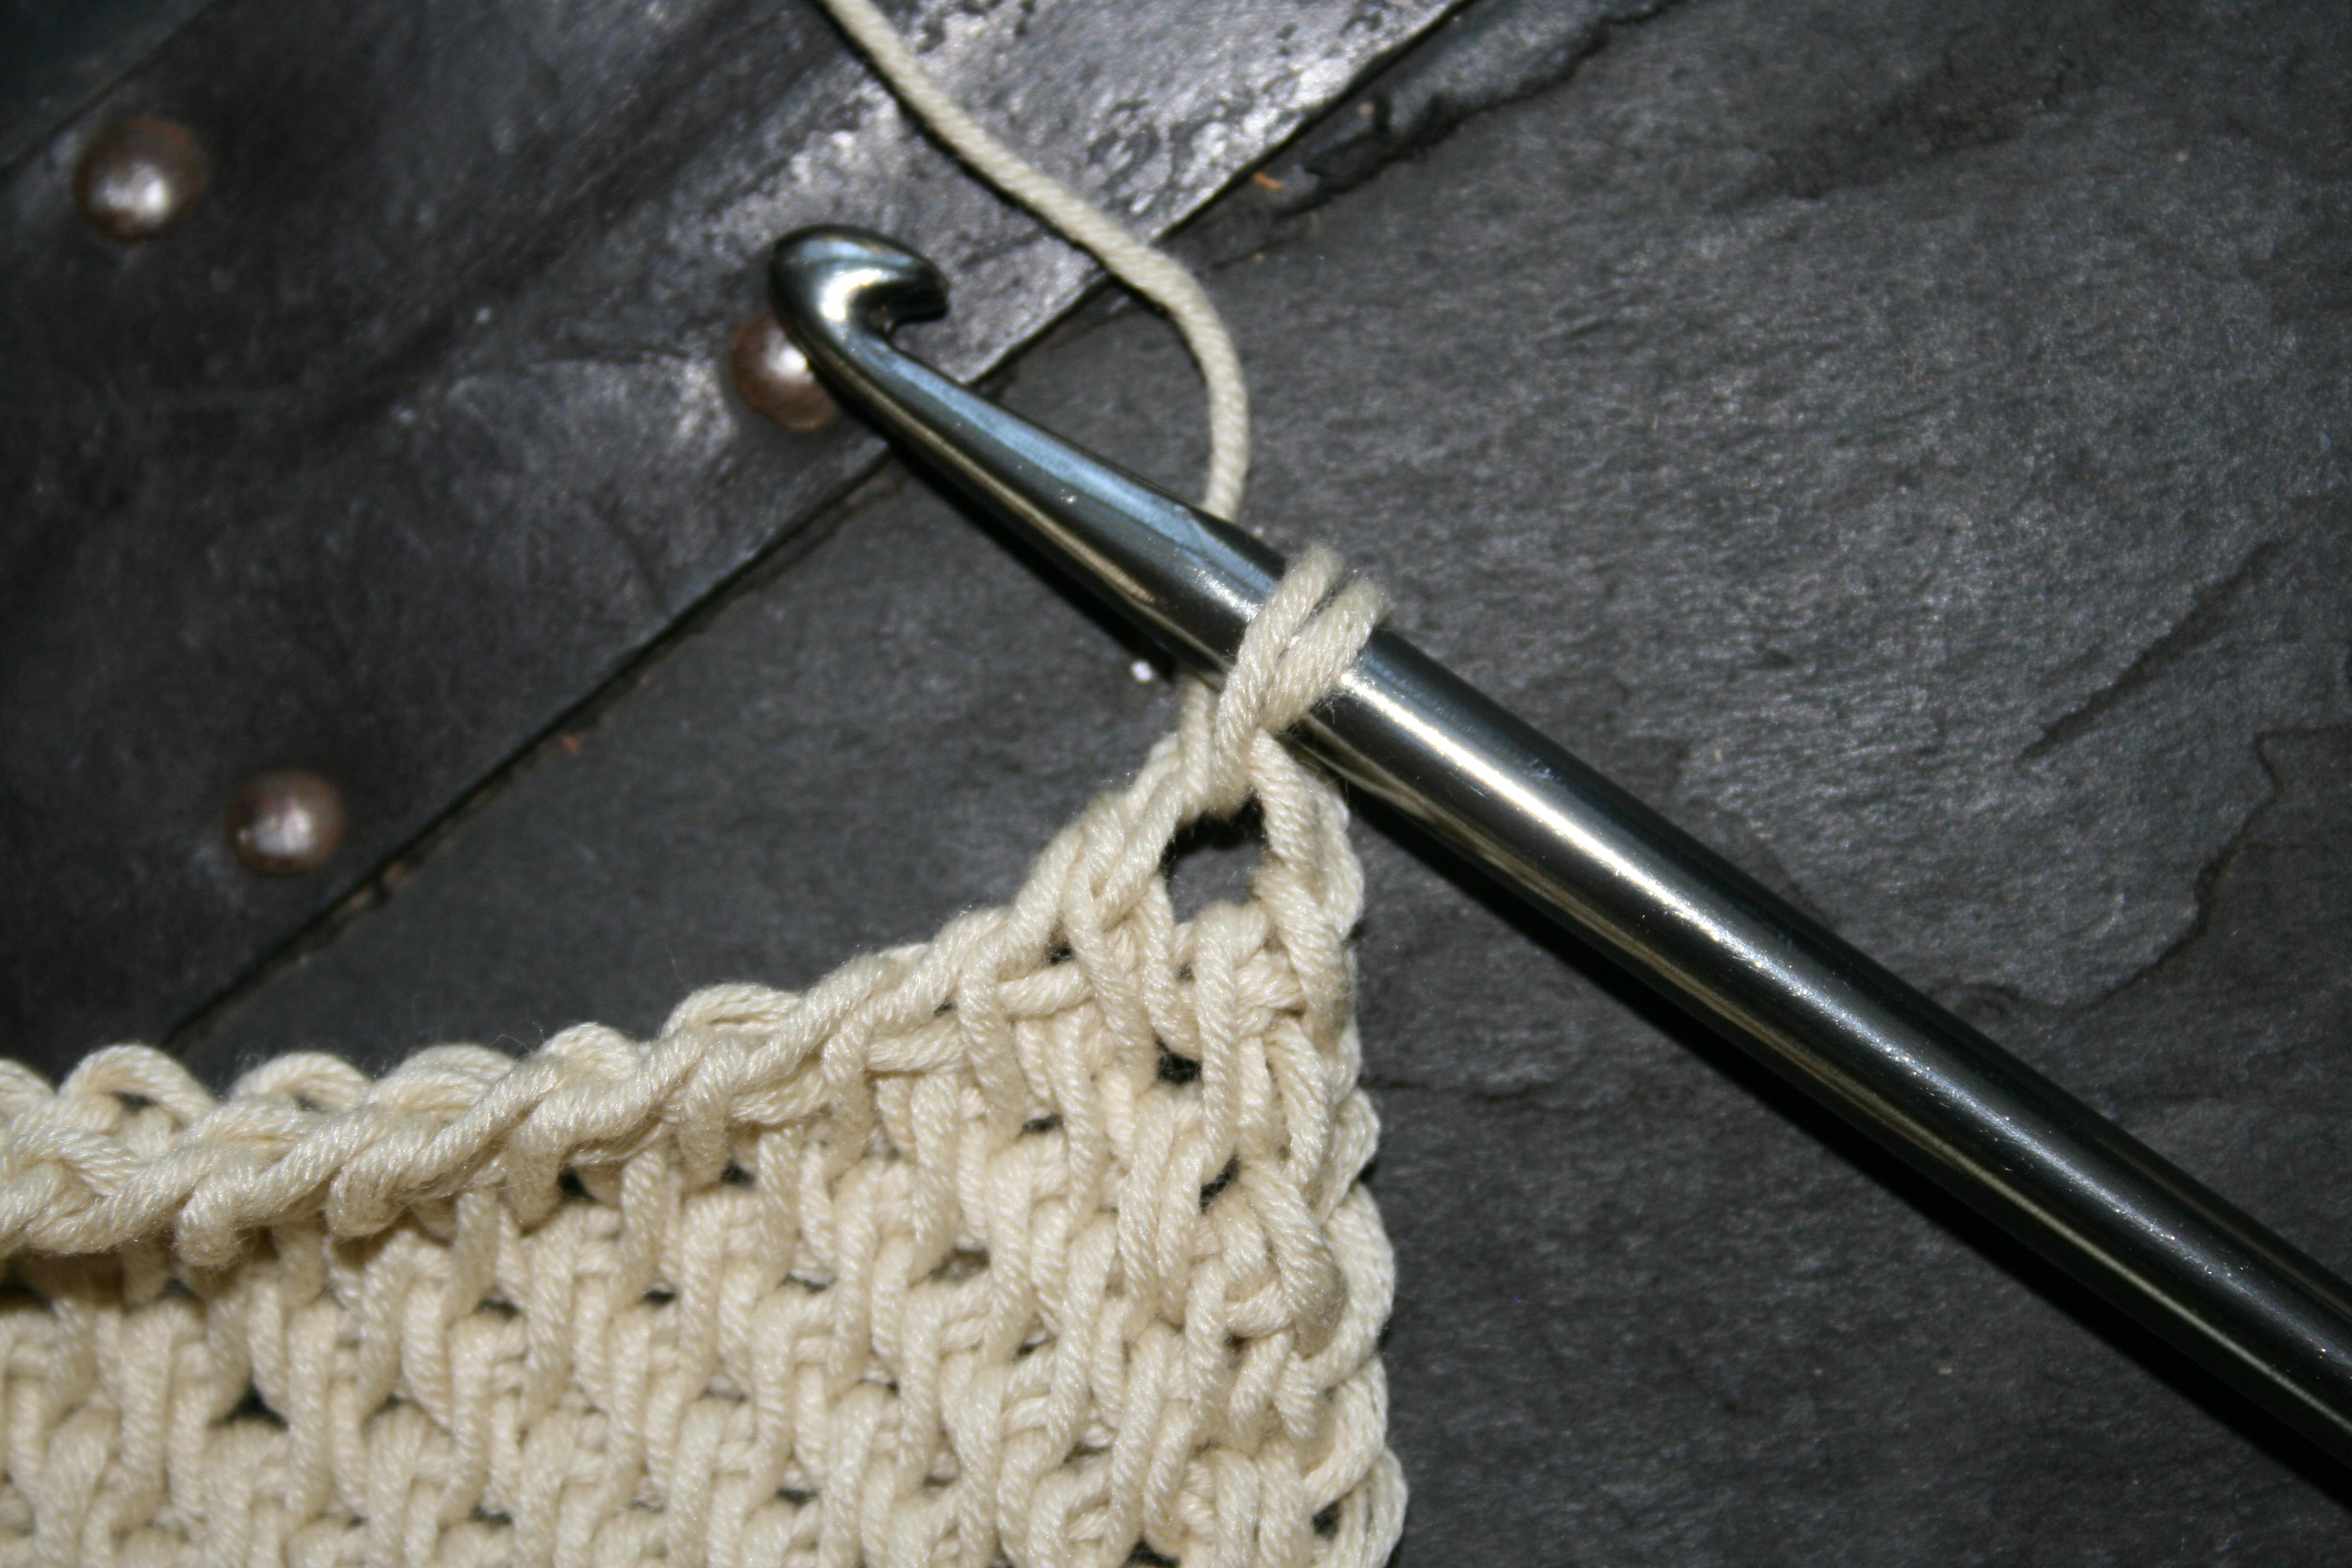
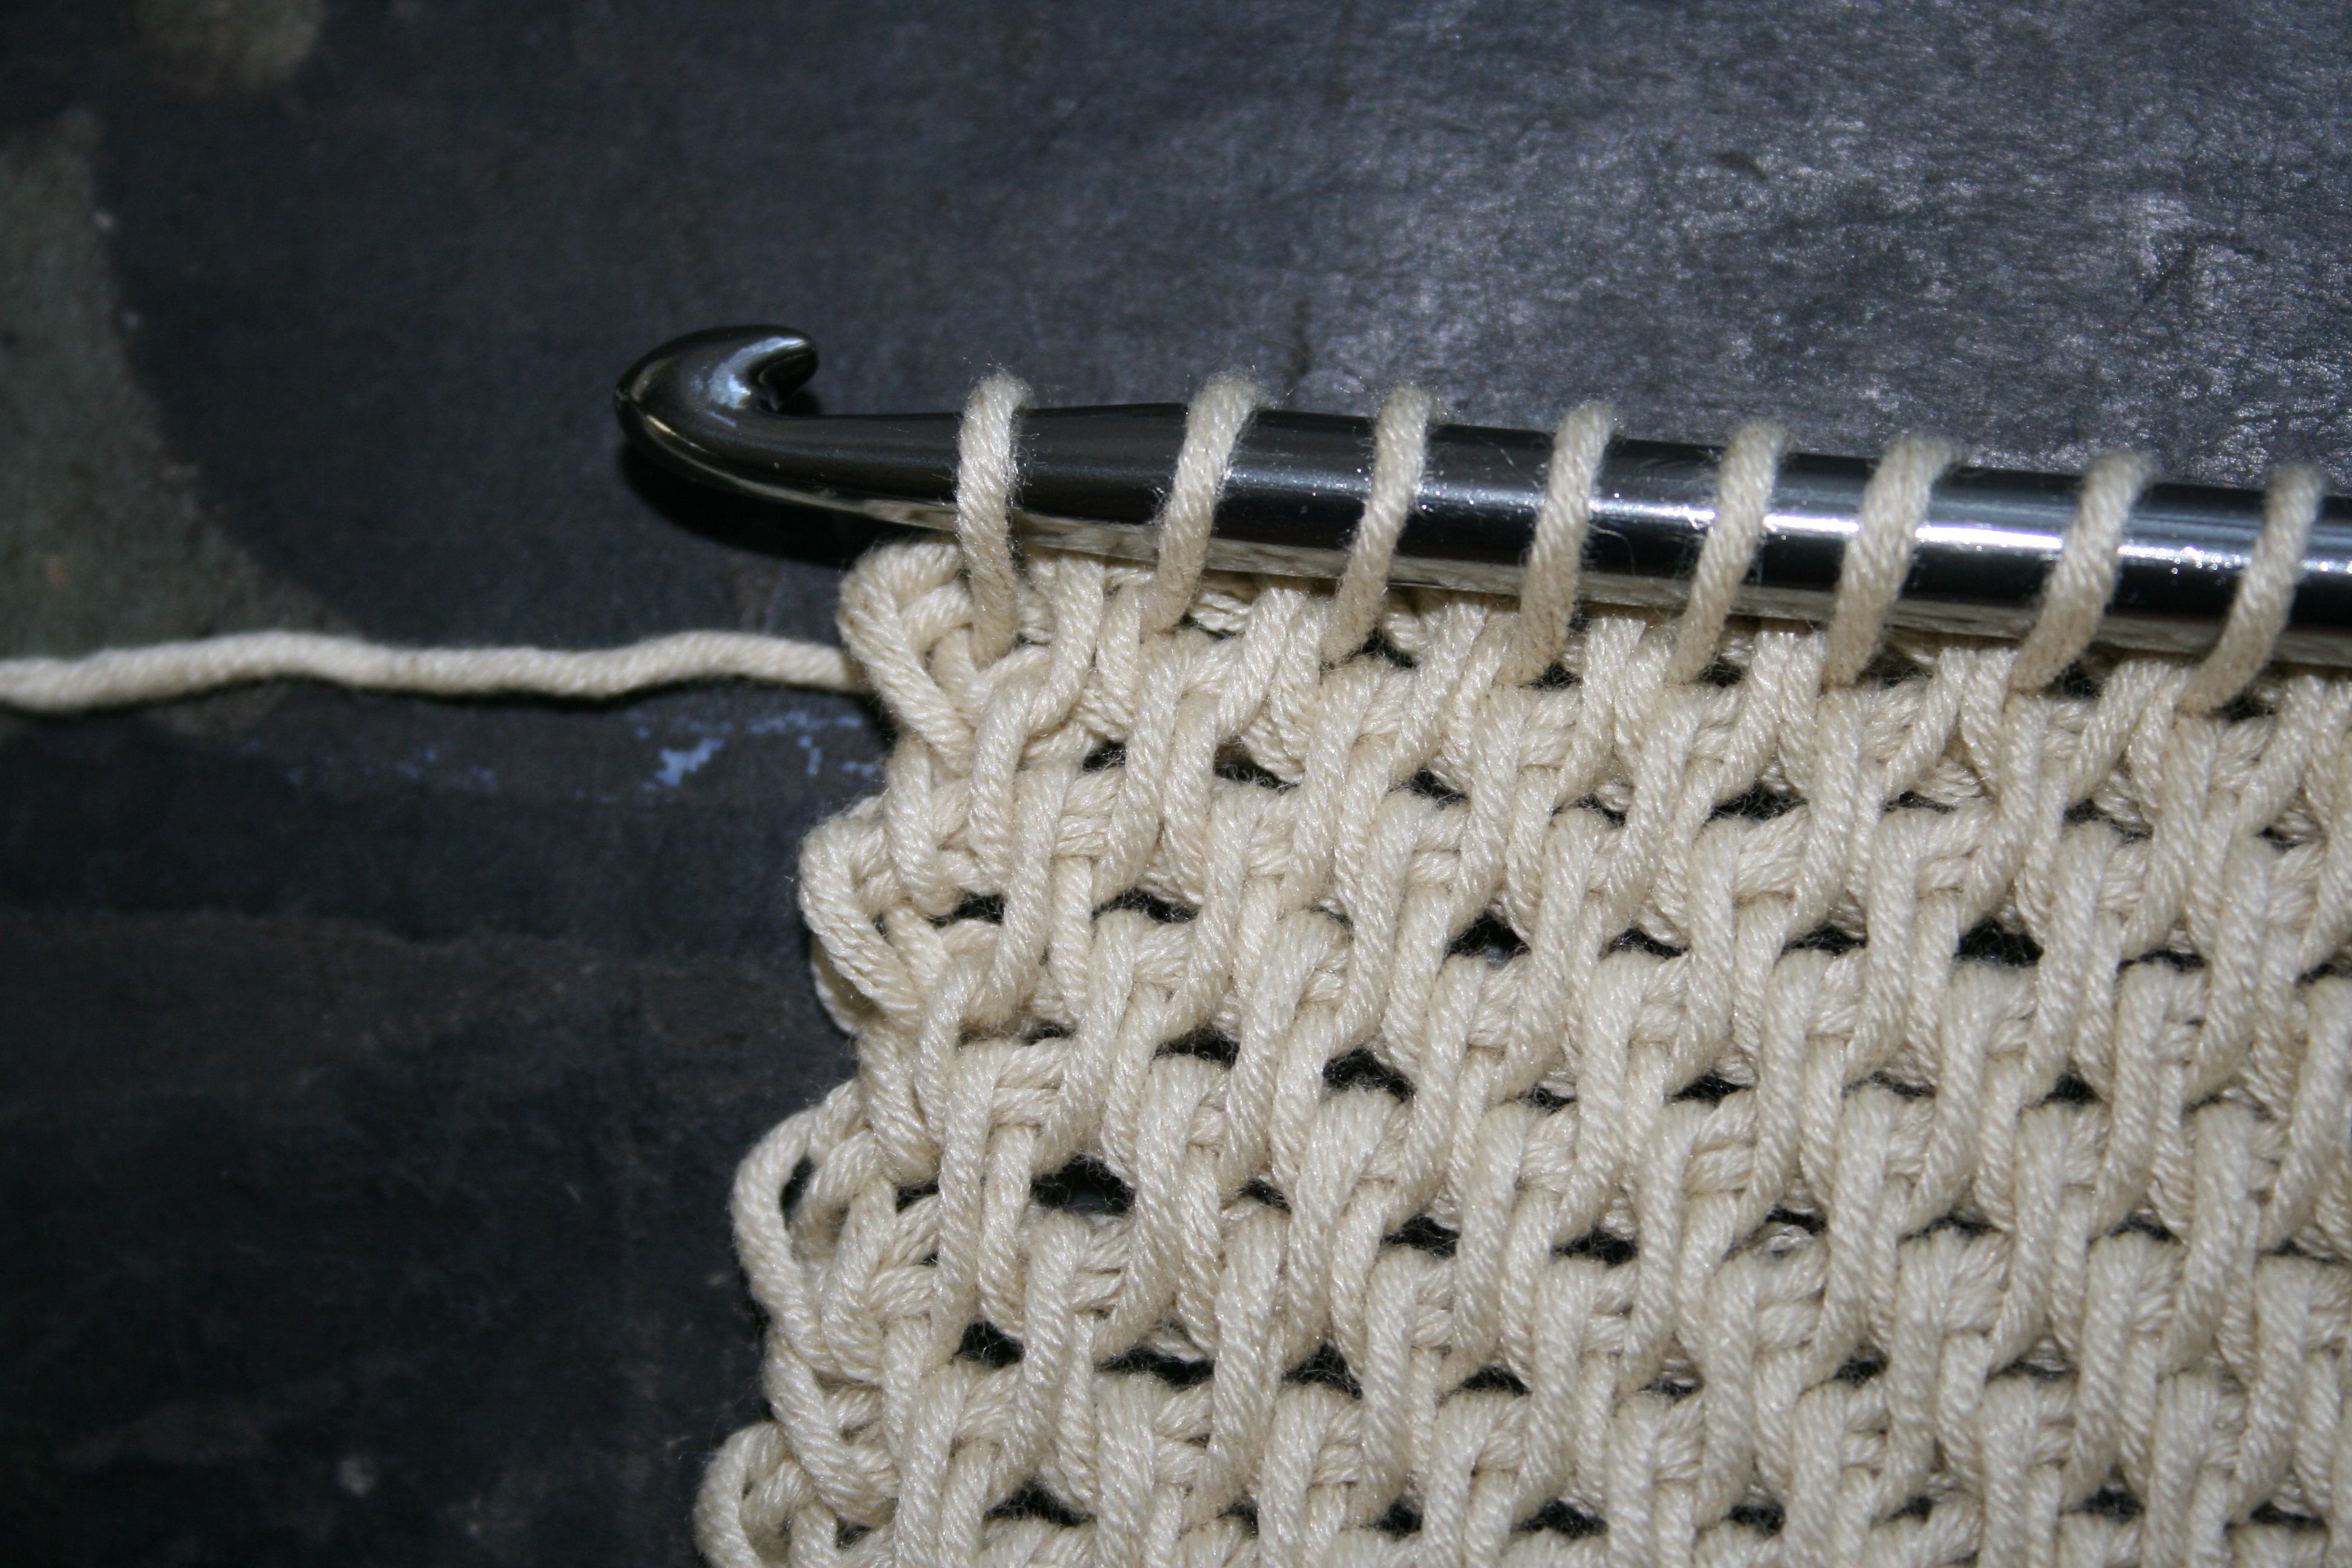
I have to admit that this project works up pretty fast, as it is a worsted weight yarn with a relatively large hook. I know this first hand as I had to rework the pattern a couple of time to ensure the correct size of the finished sample. The stretch of the fabric was misleading my gauge, and thus had me creating throws that were a bit too small. I tore it back and reworked it at least three times before it became what I had envisioned, but in doing so it helped me understand the stitches more, and I am think the end result is definitely a good one.

Knitted Yarn that Allows Crochet Stitches to Shine!

ScannedImageLooking for something different to crochet with? Want something with a little stretch and great stitch definition? Well Red Heart Strata comes to mind.

0805161034

Single and Double Crochet in Red Heart Strata yarn, every part of the stitch is highlighted.

This 76% acrylic, 24% nylon…well for lack of a better term….yarn, can fit the build. Strata is actually a more like a knit fabric, but it is not any cut strips like some T-Shirt yarns, it is a knit tube around a soft fill. This tube filled with fluff, creates a “yarn” that has some body and does not lay flat on itself when used. As the encasing is knit in what appears to be the fashion of an I-cord, there is no seam, no fray edges, just a smooth round pliable material.

The stitch definition with Strata is very impressive. The unique structure of this “yarn” with the soft roundness of the strand allows parts of your stitches to become more visible in a sense, causing a different appearance with even every day stitches. By this I mean that even a fabric of just simple or double crochet will look like there is great texture. It allows every yarn over and every pull through an opportunity to stand out on their own, and almost seem separate from the overall body of the stitch. I think this gives crochet a fun opportunity, as with minimal effort you can get a fabric that has a textured feel.

This is definitely a “yarn” to be worked on large hooks and needles, as even through it feels like a more medium weight, it works up as a bulky. This allows for fast projects, however with the small yardage per ball, just 95yrds/86m, you may require more skeins that first imagined to complete a desired project.

I can easily envision household items with is “yarn”, like towels or trivets, potholders or mats, maybe even a nice bath robe or pool side cover up. With the overall tendency of this “yarn” to seem heavy, and stretch, I would caution garment construction in most cases.

Overall though an interesting “yarn” that can offer a lot to the imagination.

Fronts & Backs, the Confusion, the Difference

ScannedImageSometimes it can be the simplest things that trip us up; this is even true in crochet. Sometimes, it is just because we are overthinking things. This can be true when utilizing the front and back loops of a stitch. In crochet the standard fall back for all stitches is to work through both loops that are created at the top of a stitch, so if a pattern does not specify anything you are assumed to work through both loops, however there are times you do get a noted distinction….front loops and back loops.

DSCF1093

Working in the front loop, notice how the hook comes from the bottom of the loop upward.

It almost sounds too easy. Working in the front loops across….working in the back loops across….But I will admit, my brain sometimes holds onto the prior position of the loop, instead of where it really is right now. I think we have all had these moments. Our brain is a little groggy, a little overloaded, and a little set in its ways, so it just almost quits processing the information. By this I mean, when you work a stitch, the loop on the top closest to you is the front loop, and the on top furthest away is the back loop; when you turn your work, these same principles still apply, but now the names you just recognized for the loops to row before has switches. 

The position of the loops applies to the row you are currently working into, not the position of the loops on the stitch just being created.

DSCF1095

Working in the back loop, notice how the hook comes down from the top through this loop.

This does become an important distinction, as it gives the fabric a different look and structure. Working in the back loops of a row give a more textured feel to the fabric as well as creating a little more stretch. While working in the front loops adds a simple decorative element and a little extra height to the fabric overall. The reason for these differences is actually the nature of crochet stitches. If you really look at a row of stitches, you will find that they actually are a little tapered, with the right side facing you the back of a stitch will be a little taller than the front. It is this slant that creates the ribbing effects of some stitches, and the decorative effect of others.

DSCF1089

The standard method of beginning a stitch, if not otherwise stated, working under both loops.

Just keep in mind, that we all have those days, so if your fabric doesn’t look how you have expected, revisit if you are placing your stitch in the right location; it can make all the difference. 


Tunisian Full Stitch….How I Found It for Myself

ScannedImageMany years ago I taught myself to crochet, I remember seeing the “Afghan Stitch” in the book I was using, but I was never interested in doing cross stitch embroidery, so I never looked at it too long. Then several years later I was taking a free form class and the teacher mentioned using some Tunisian Simple Stitch in the piece for fun.

IMG_6555.1

Tunisian Full Stitch

Well what I remembered of the stitch, insert you hook, pull up a loop, repeat, and then work them all off, so I proceeded to do just that. What I was not paying attention to was working behind the vertical bar; instead I worked between the vertical bars, you know that space that somewhat reminds me of chain space, and pulled a loop up. Later I realized my error, but I was sure that I was just doing a different stitch, however when I began looking around for the name, I couldn’t quite find it.

I searched on-line and through various books, and found some different names for it. Some called it “net stitch”, others “Basic Stitch”, and as Tunisian Crochet is becoming more mainstream and the terms more universal I have finally found it; the “Tunisian Full Stitch”.

IMG_6558.1

Working in the space Immediately next to the current loop on the hook

As I stated earlier there the stitch is worked between the vertical bars, but there are a couple of things to keep in mind. Since the stitch staggers on either side of the stitches below, you need to make adjustments at one side or the other of the fabric, or you will be making a piece that is not square. To make this adjustment on the beginning of one row you work a stitch immediately in front of the loop already on your hook, and end that row pulling up a loop in the last space between vertical bars. Then work the usual Return Pass (Chain 1, *YO, pull through 2 loops; rep from * across, until 1 loop remains). On the next row, you skip the space immediately next to the loop on the hook, and work in the rest of the spaces between vertical bars to the end of the row, insert hook in the chain-1 of the Return Pass below, YO and pull up a loop, then work the Return Pass again. Alternate these rows throughout the fabric. You will notice that the side that the Return Pass is begun, the edge will not be perfectly straight and this is normal, as you are adjusting a stitch to the last stitches every other row.

IMG_6560.1

Working the last stitch in the last space between vertical bars. This is the row ending to working the first loop in the space immediately next to the hook.

I personally really like this Tunisian Stitch, I am not sure if it is because it is the stitch I stumbled upon early on, or if it is because it does not give you a set straight line appearance but pulls the eye diagonally instead. The fabric does have a lot of stretch with this stitch and I find that useful in many designs, not to mention it is a fairly forgiving technique.