Tunisian Simple Stitch….Yes, It Is That Simple

ScannedImage
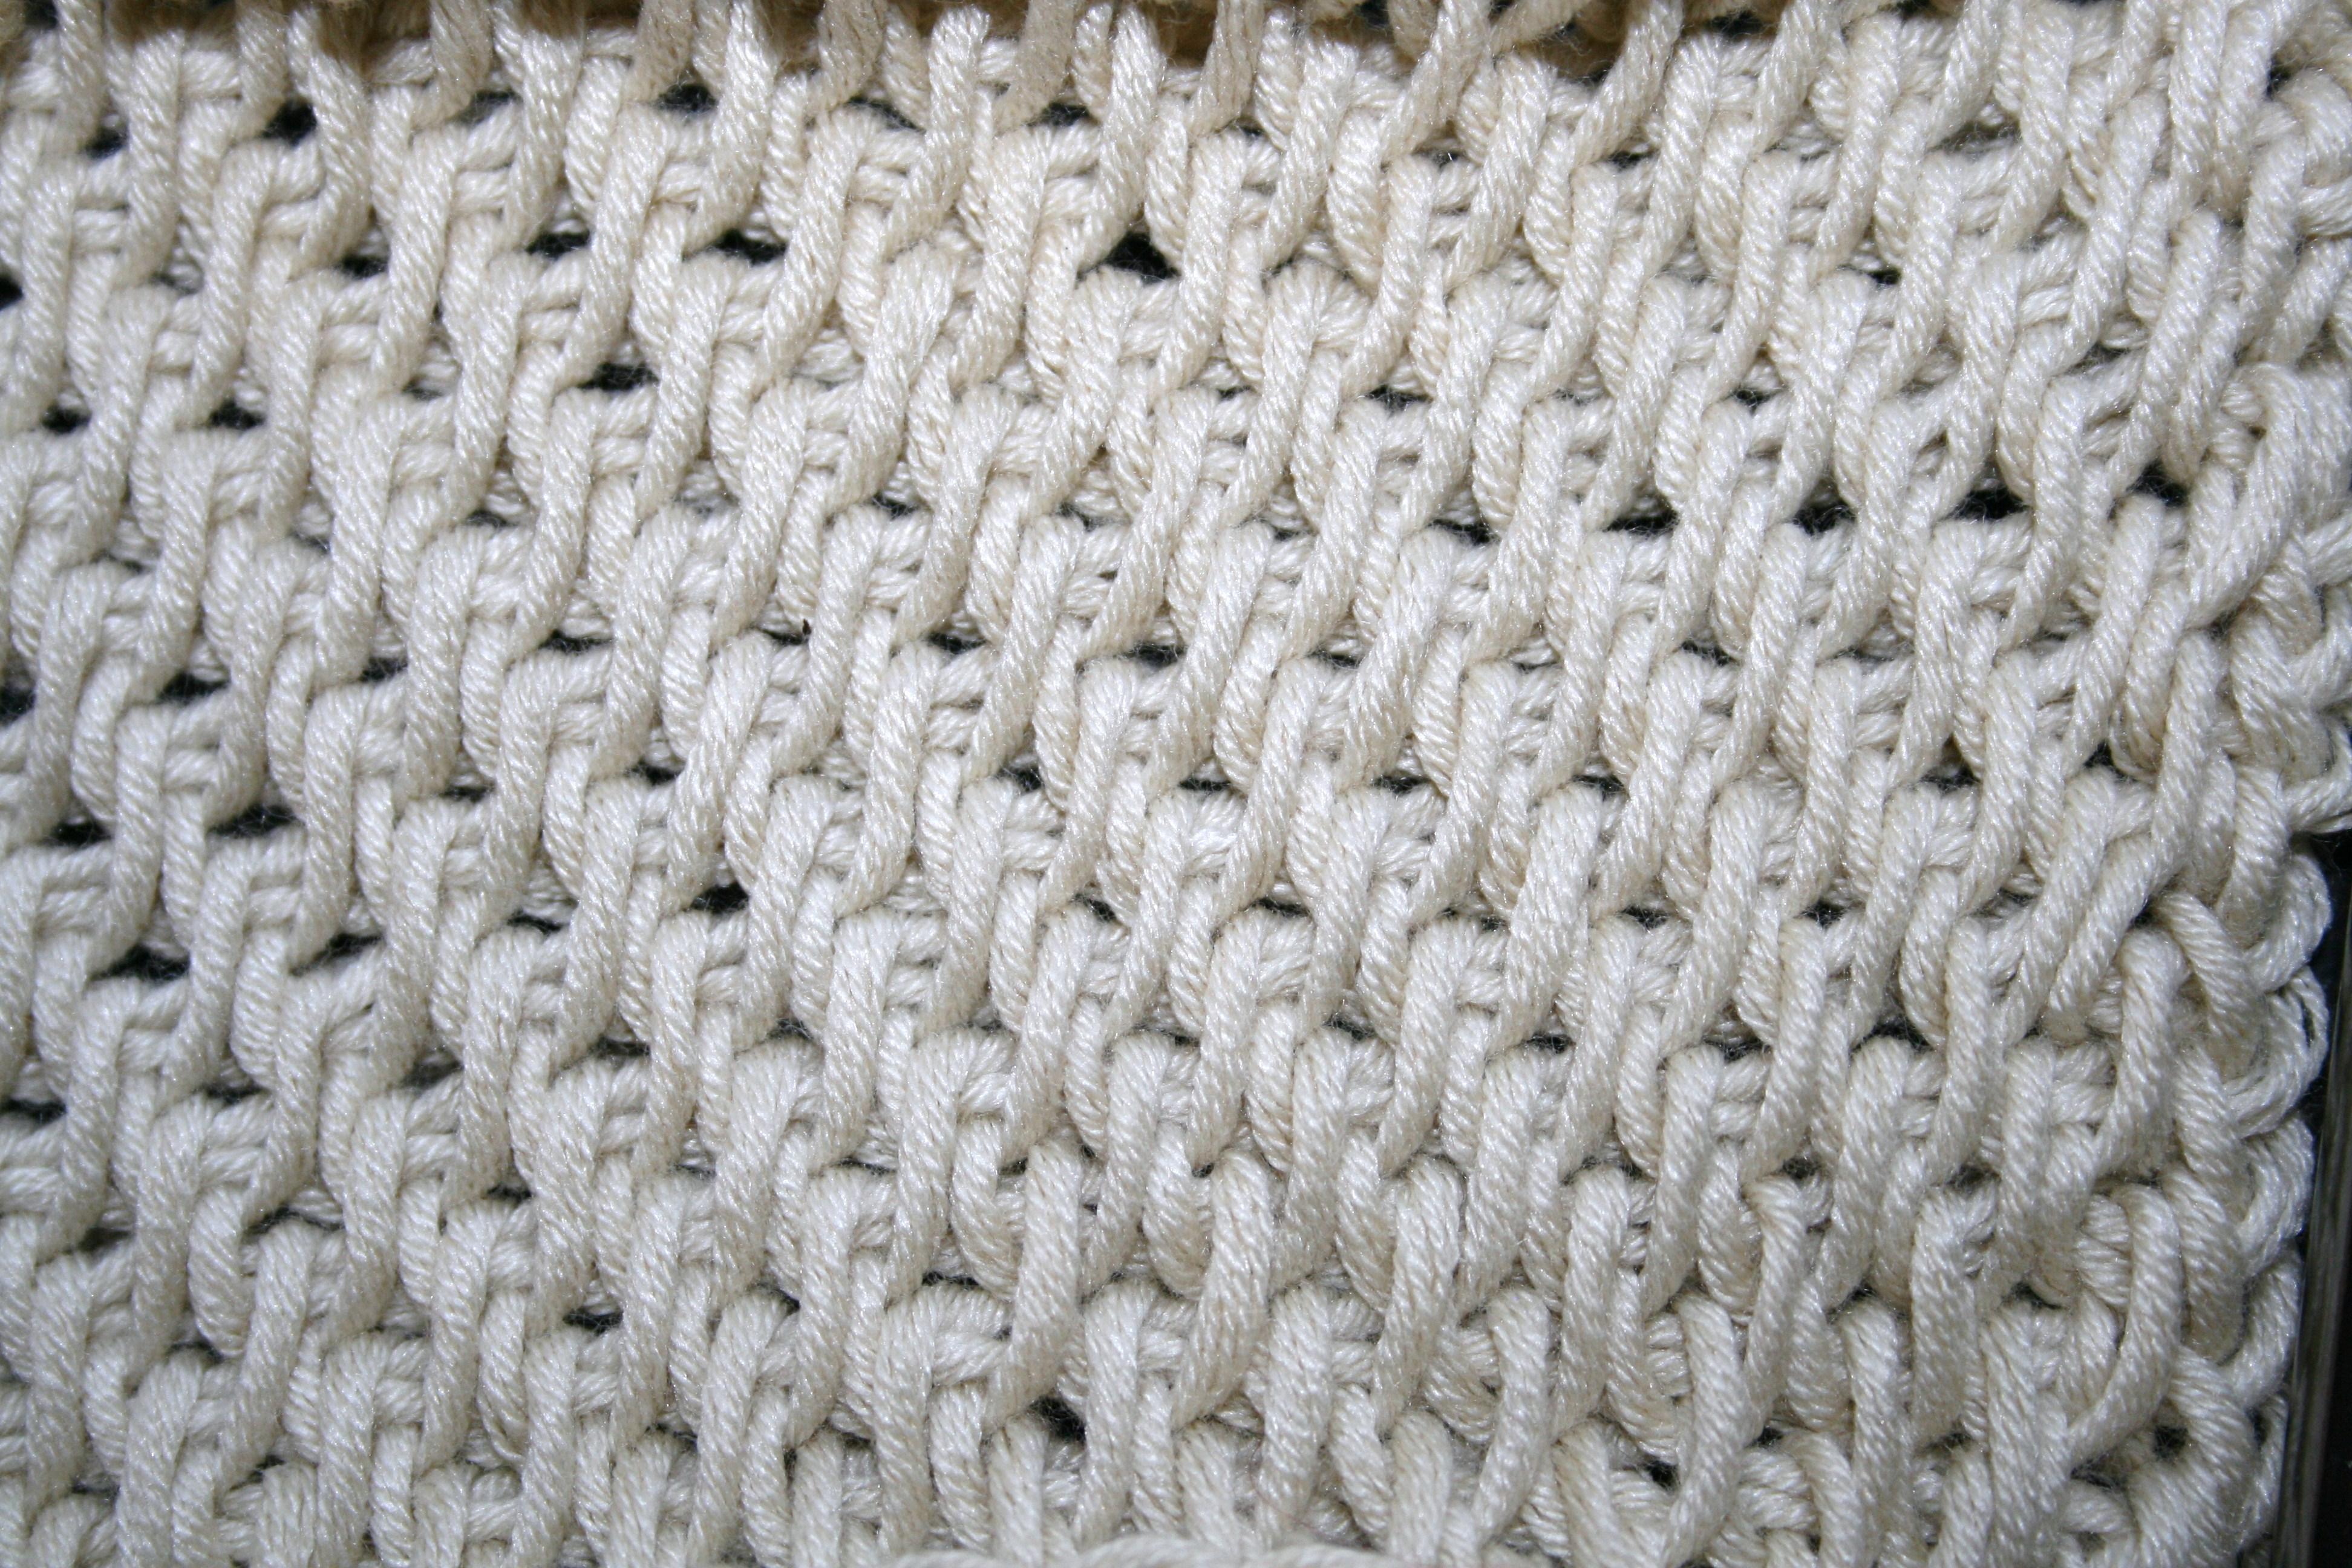
Tunisian stitches are unique in crochet as they are worked by “loading” your hook with live loops across the row then working a Return Pass to work all the loops back off. So every row has a two part process, load up the loops, and then work the loops back off. It is also unique as you do not turn your work, but work back and forth on the same side. Tunisian Simple Stitch is a classic stitch in Tunisian crochet, it was one called the “afghan stitch” and creates a vertical line where the stitches stack up upon one another.

Before beginning Tunisian crochet, you need to select the correct size hook, this technique can create a dense fabric if the hook size is too small. My standard rule of thumb is that whatever stand size crochet hook I would use with the chosen yarn, I go up at least 2 sizes in Tunisian. Meaning if with standard crochet I would use a size H/8/5.00mm with a yarn I would choose a Tunisian hook of K/10 ½/6.5mm to get the same drape and feel of the fabric.

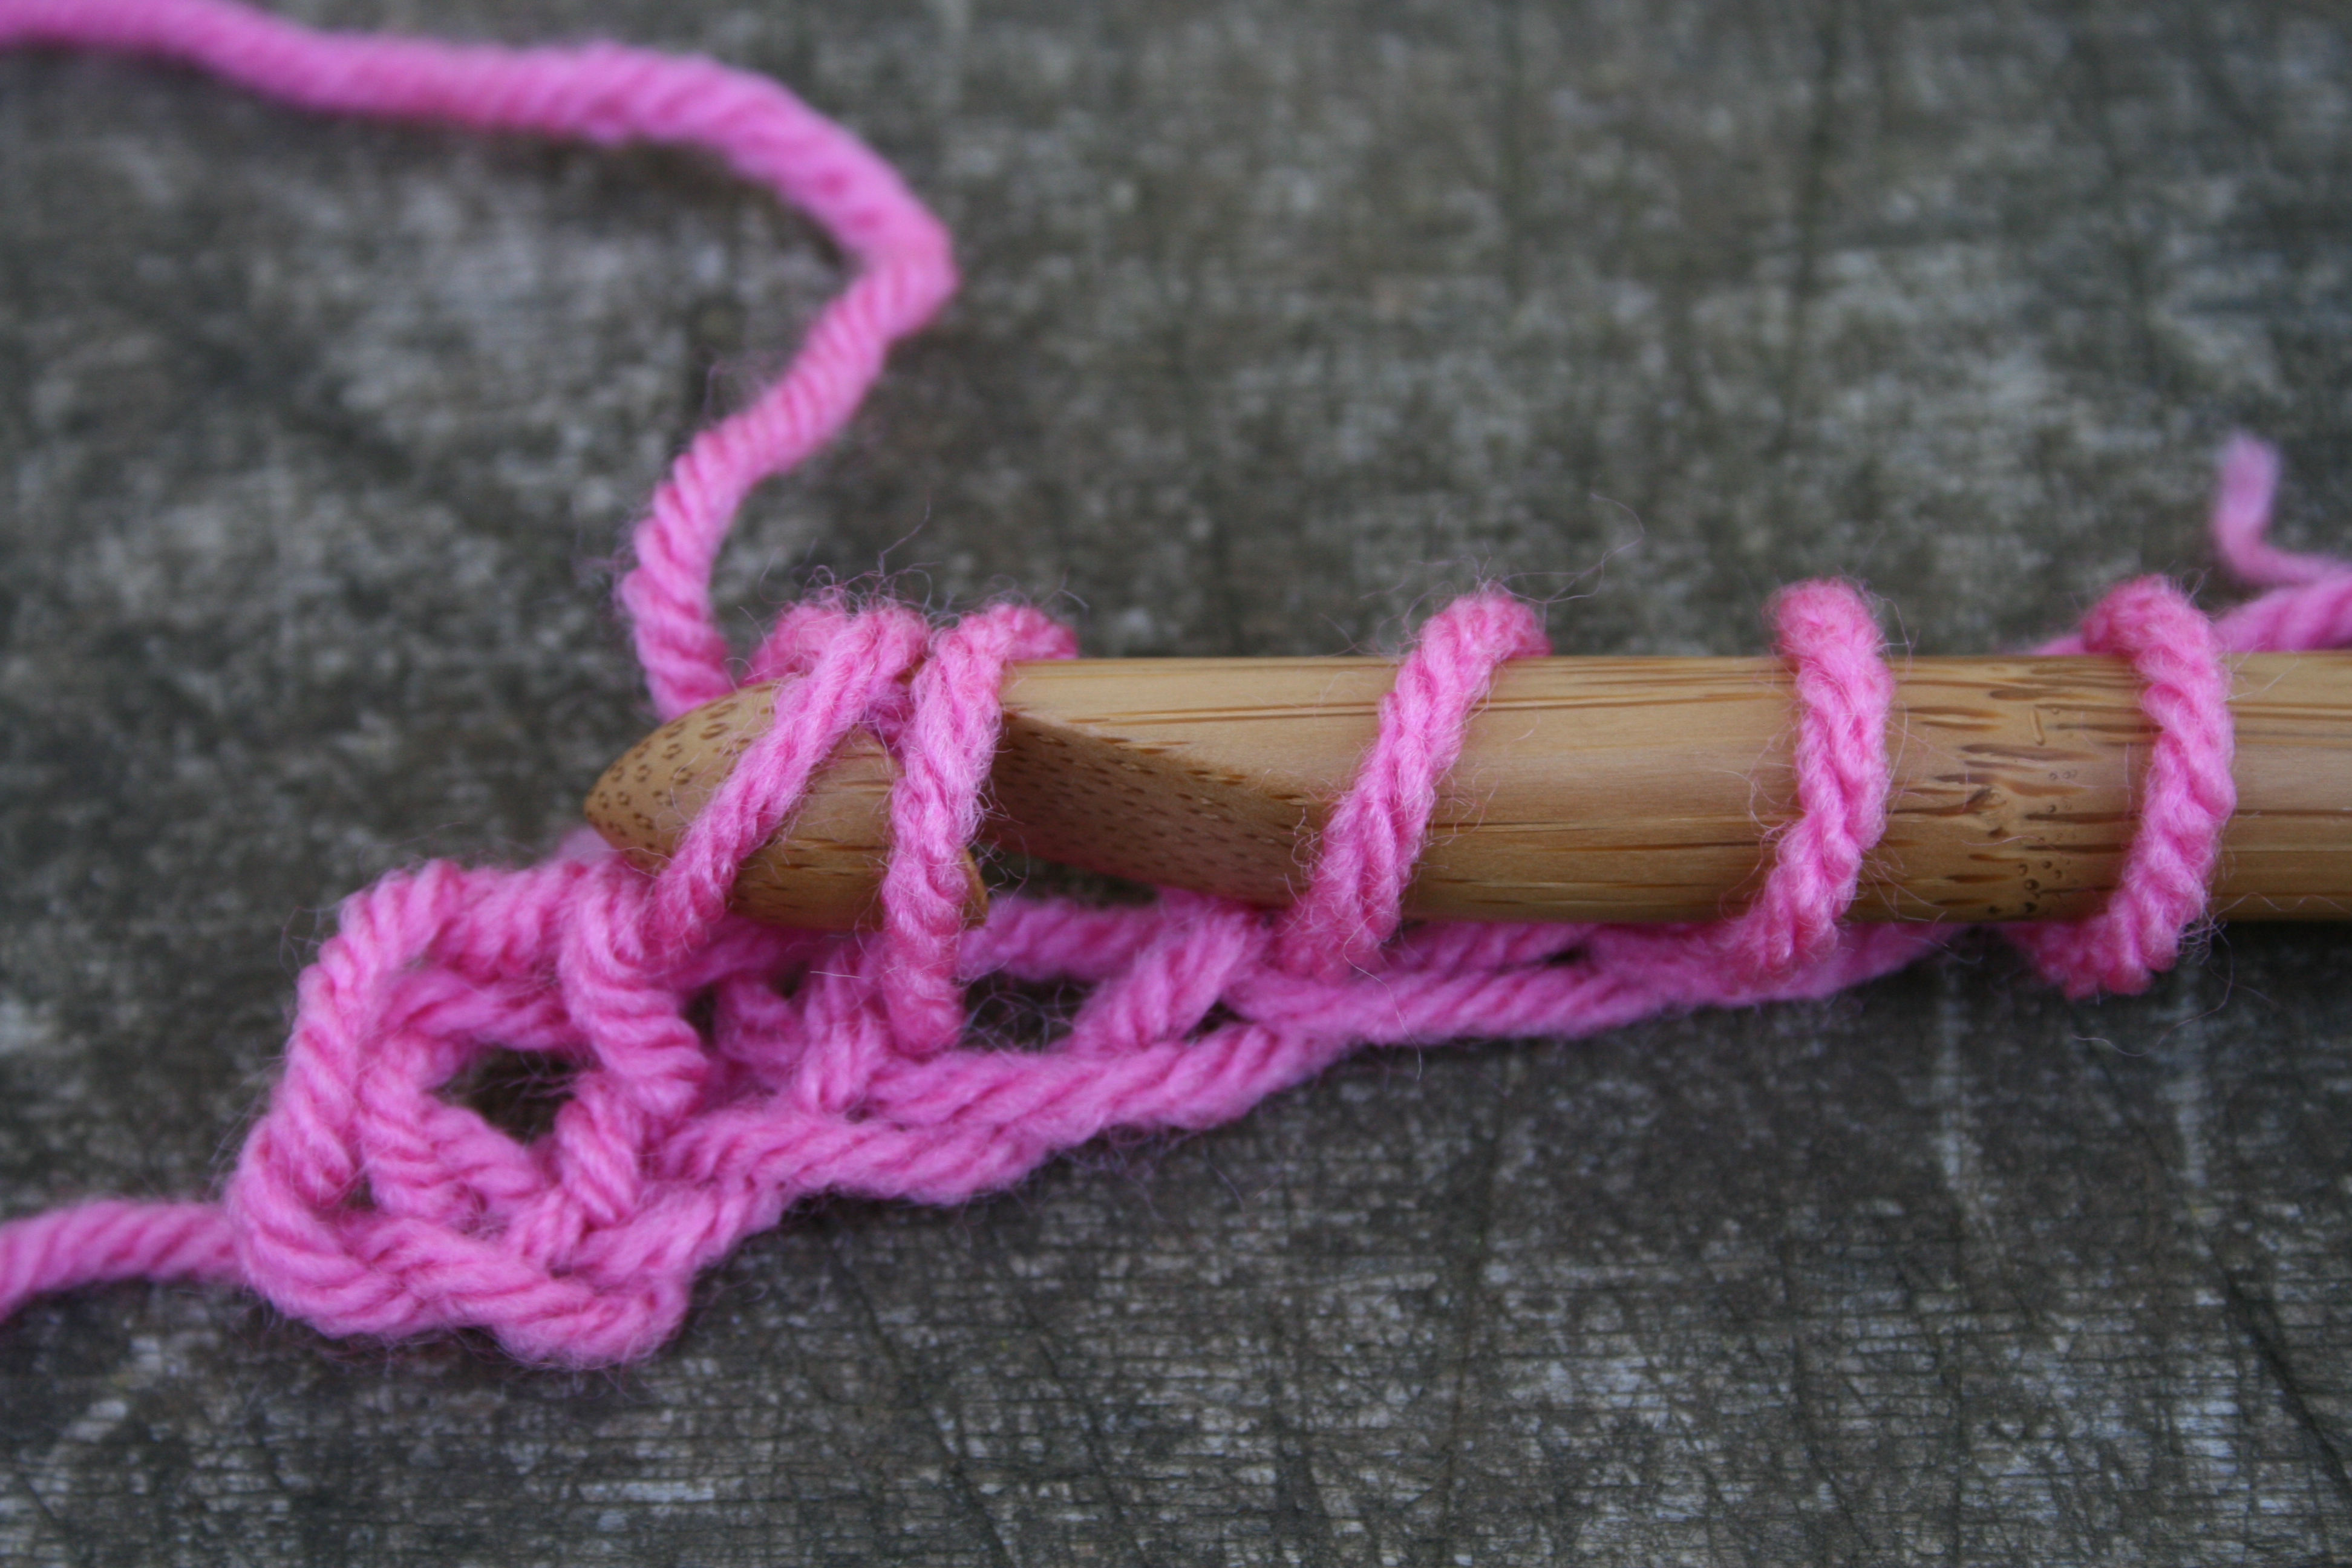
To work this stitch, you begin with a chain, insert your hook into the second chain from the hook and pull through a loop, insert your hook into the next chain and pull through a loop, continue this insert hook and pull up a loop until you have worked all the chains have been worked. You will have the same number of loops on the hook as the number of chains you began with. Now you work a Return Pass.

img_5582

Insert hook into chain stitch, yarn over, pull through a loop. Repeat this process in all chain stitches across.

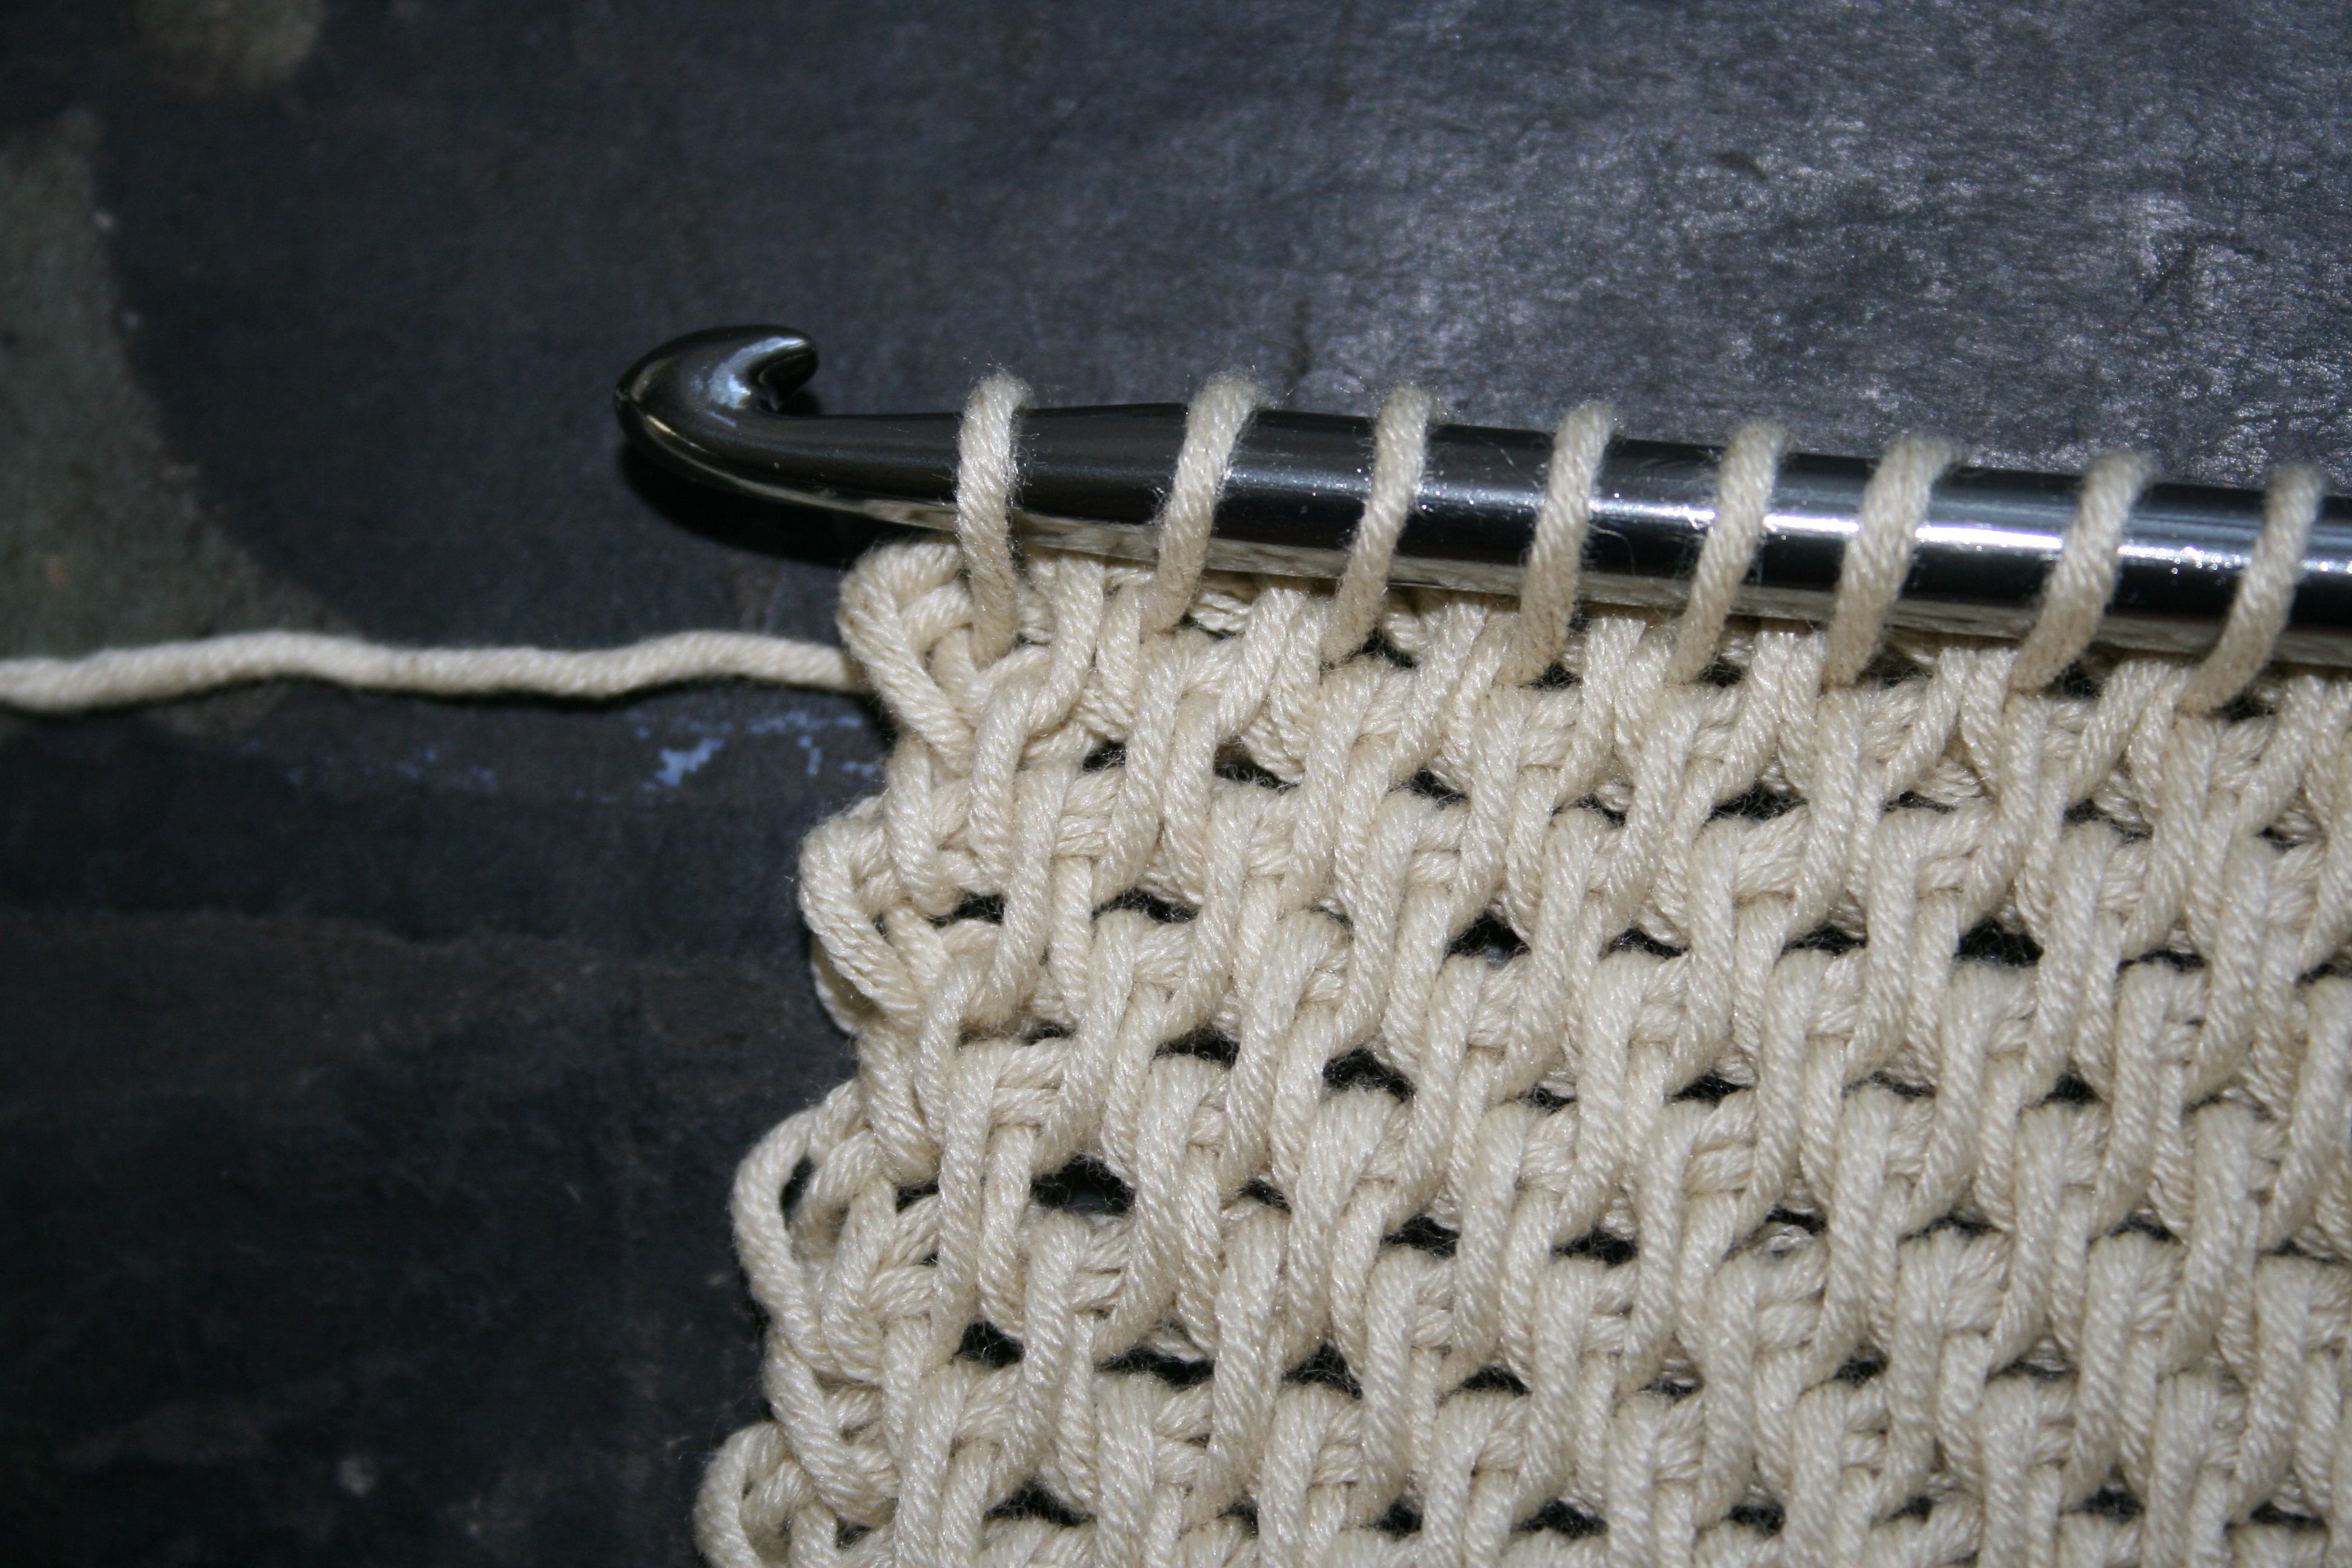
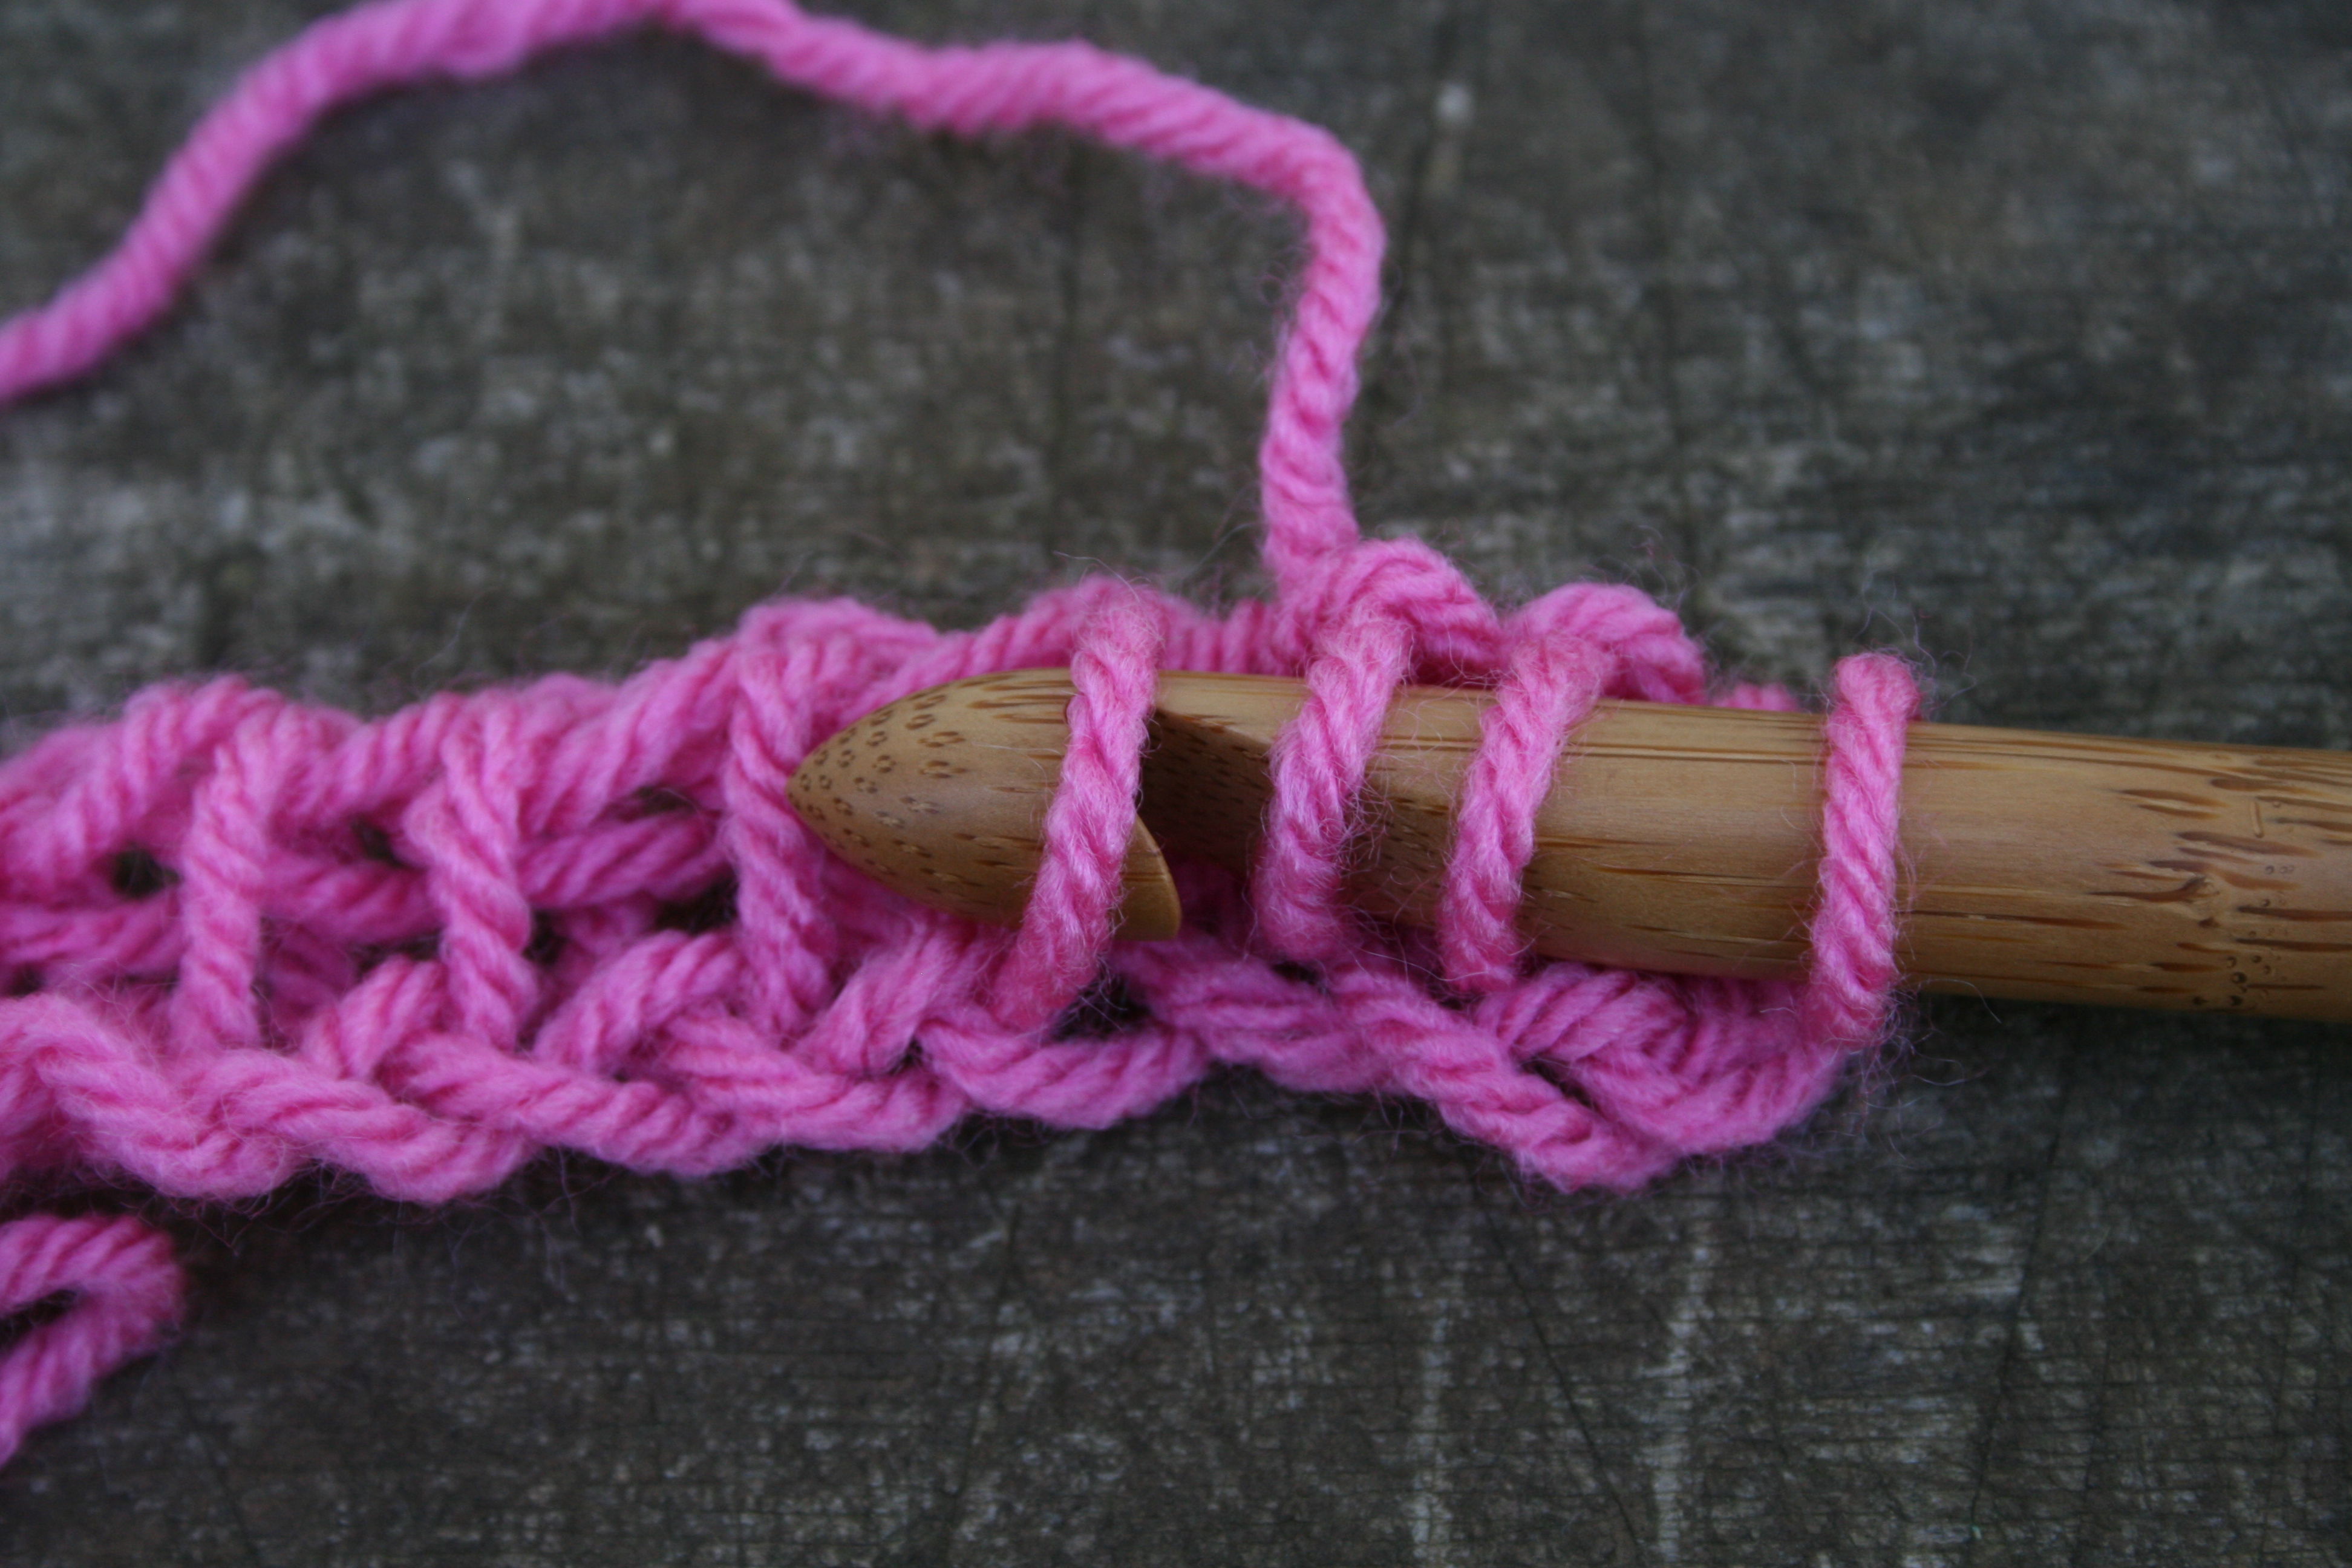
The Return Pass is always the same regardless of the Tunisian stitch, unless otherwise stated. You begin with working a chain 1 with the first loop on the hook, then yarn over and pull through 2 loops, yarn over and pull through 2 loops across the loops until 1 loop remains. Now you are ready to begin the next row.

img_5586

Return Pass….Chain 1 (with the first loop only, this creates the last stitch), yarn over and pull through 2 loops, repeat the yarn over, pull through 2 loops until 1 loop remains on the hook.

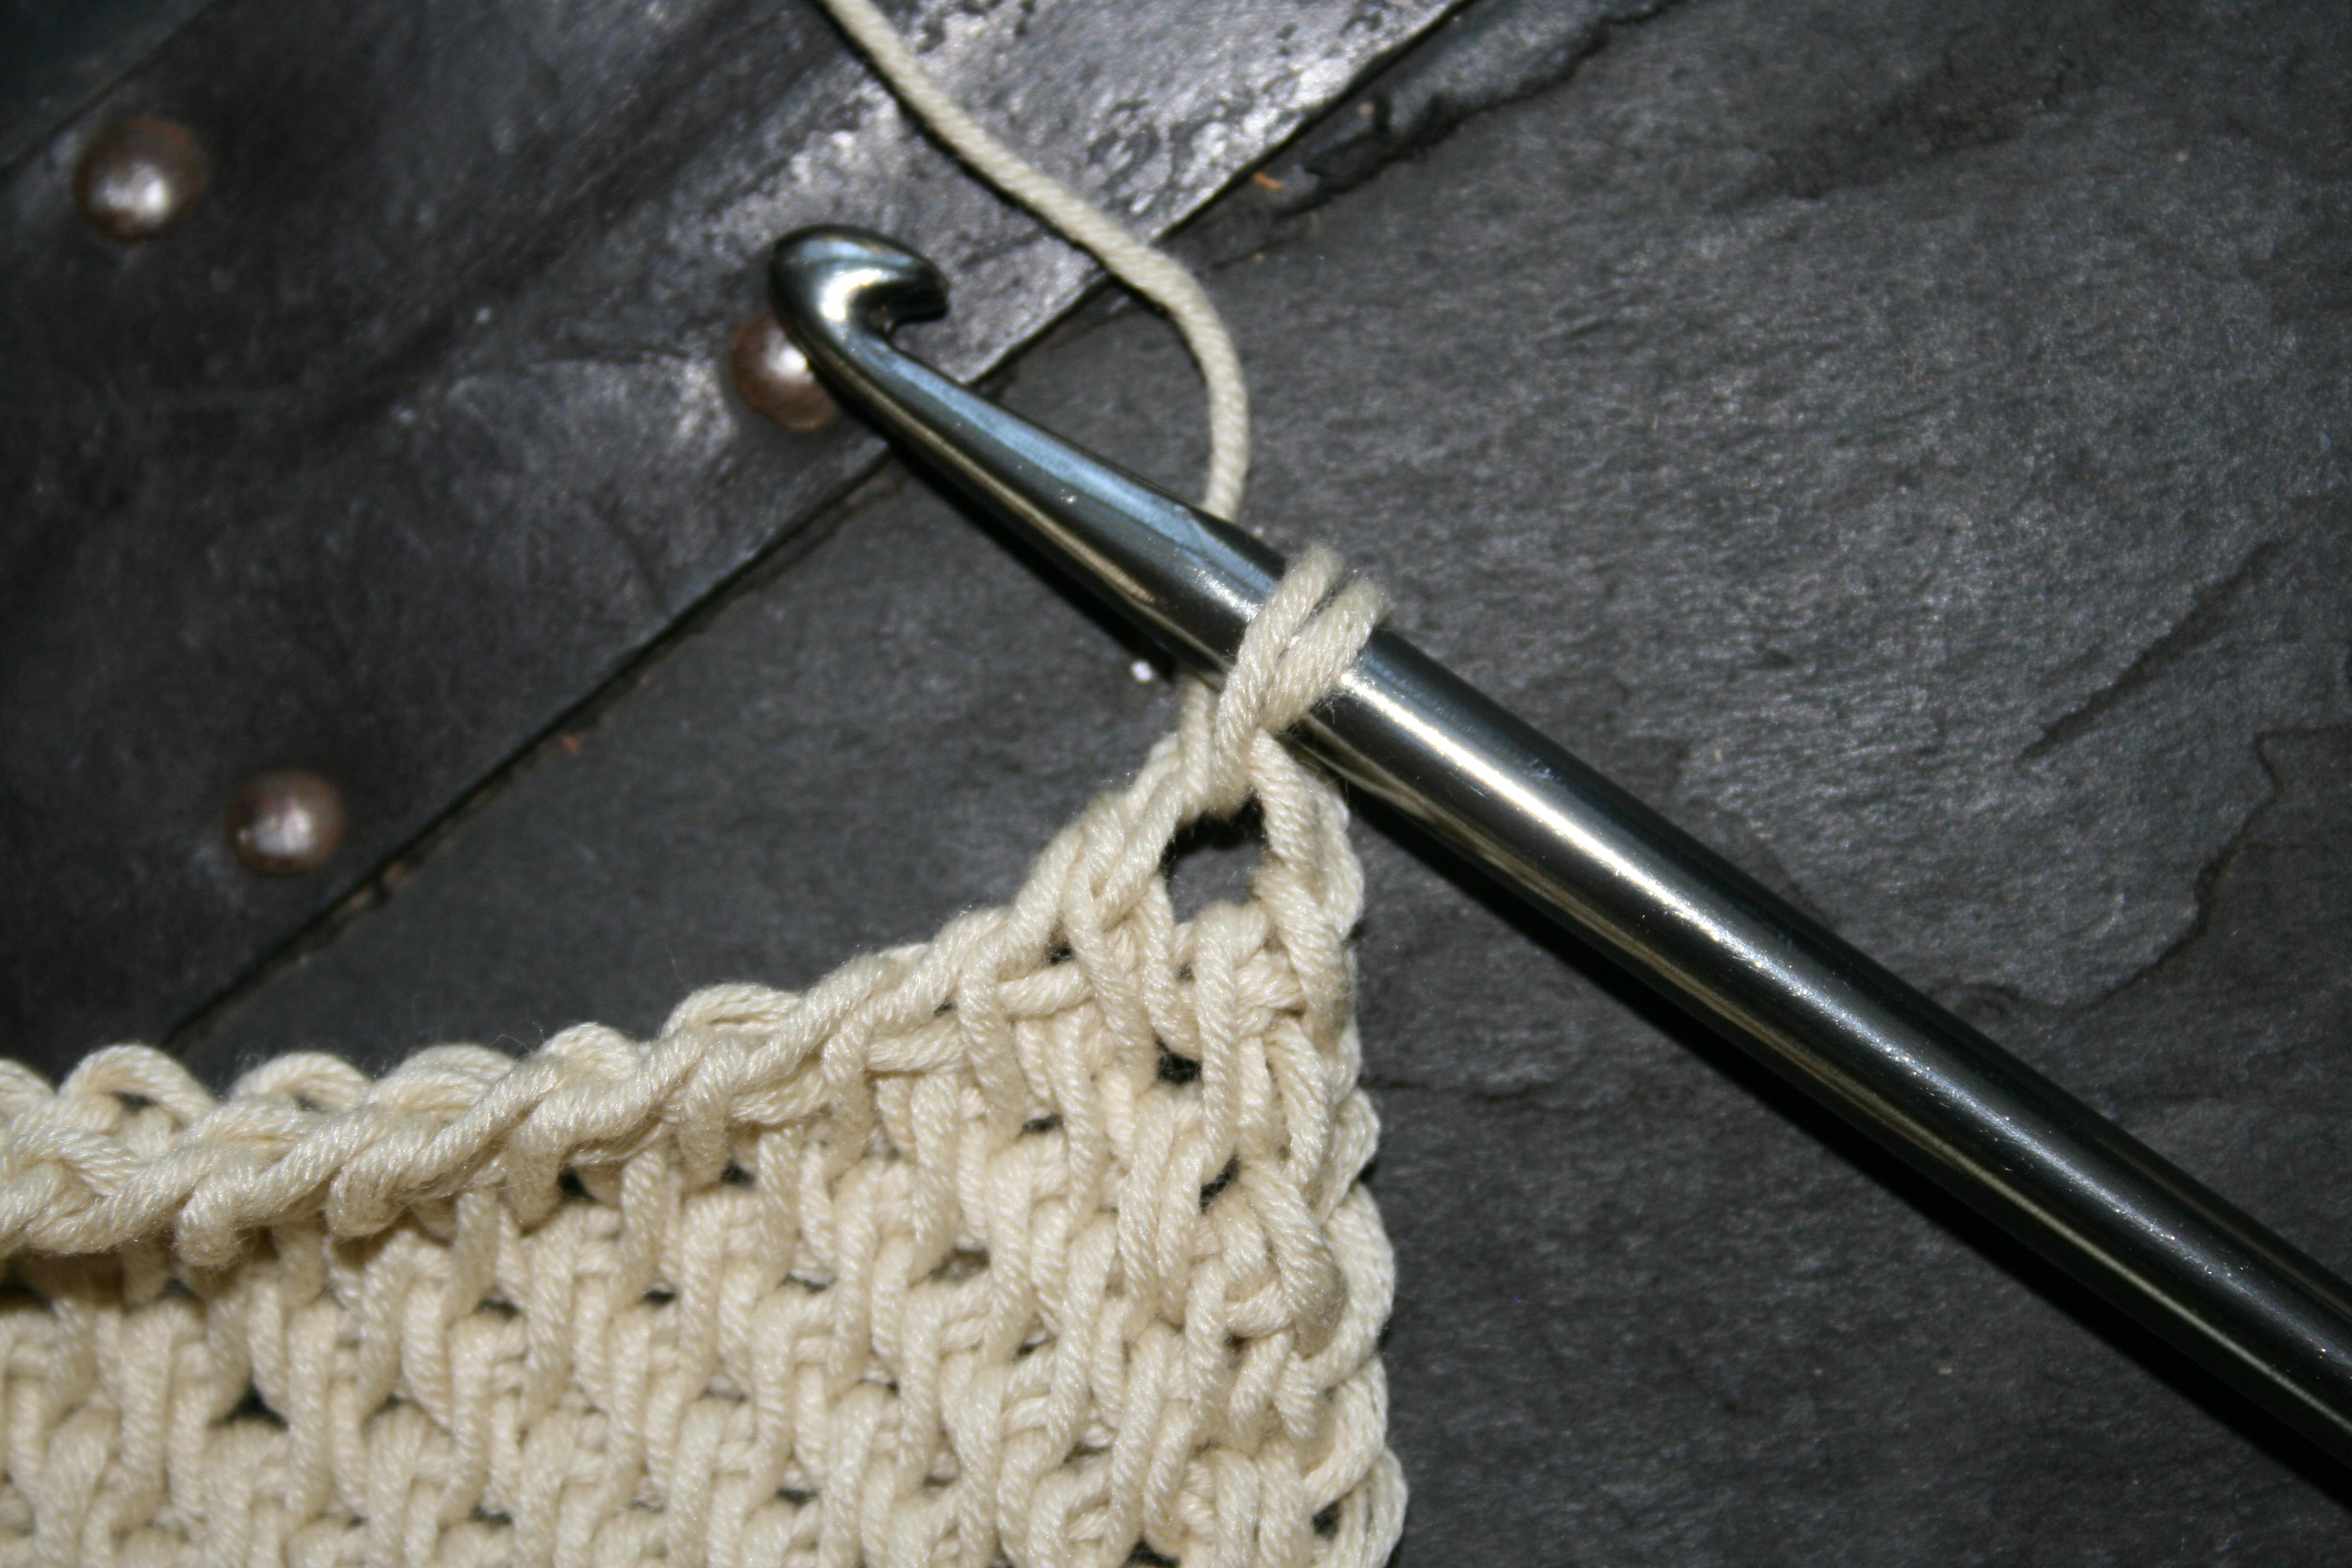
As with most things with crochet the Tunisian Simple Stitch (Tss) is where you place the hook. You do not work in the stitch directly below the loop on your hook, unless otherwise stated as this will cause an increase in the work, working from right to left you insert your hook under the vertical bar of the next stitch, yarn over and pull through a loop, continue inserting your hook under the vertical bar and pull through a loop until you reach the end of the row. Insert your hook into the chain 1 created in the beginning of the Return Pass, this is a little more difficult to work into, and is the last stitch of the row. Now you work the return pass again.

img_5587

Insert hook under vertical bar from right to left (reversed if you are left handed), yarn over, pull up a loop, repeat to “load” the hook.

Continue this process, as you are now creating the Tunisian Simple Stitch.

img_5593-copy-2

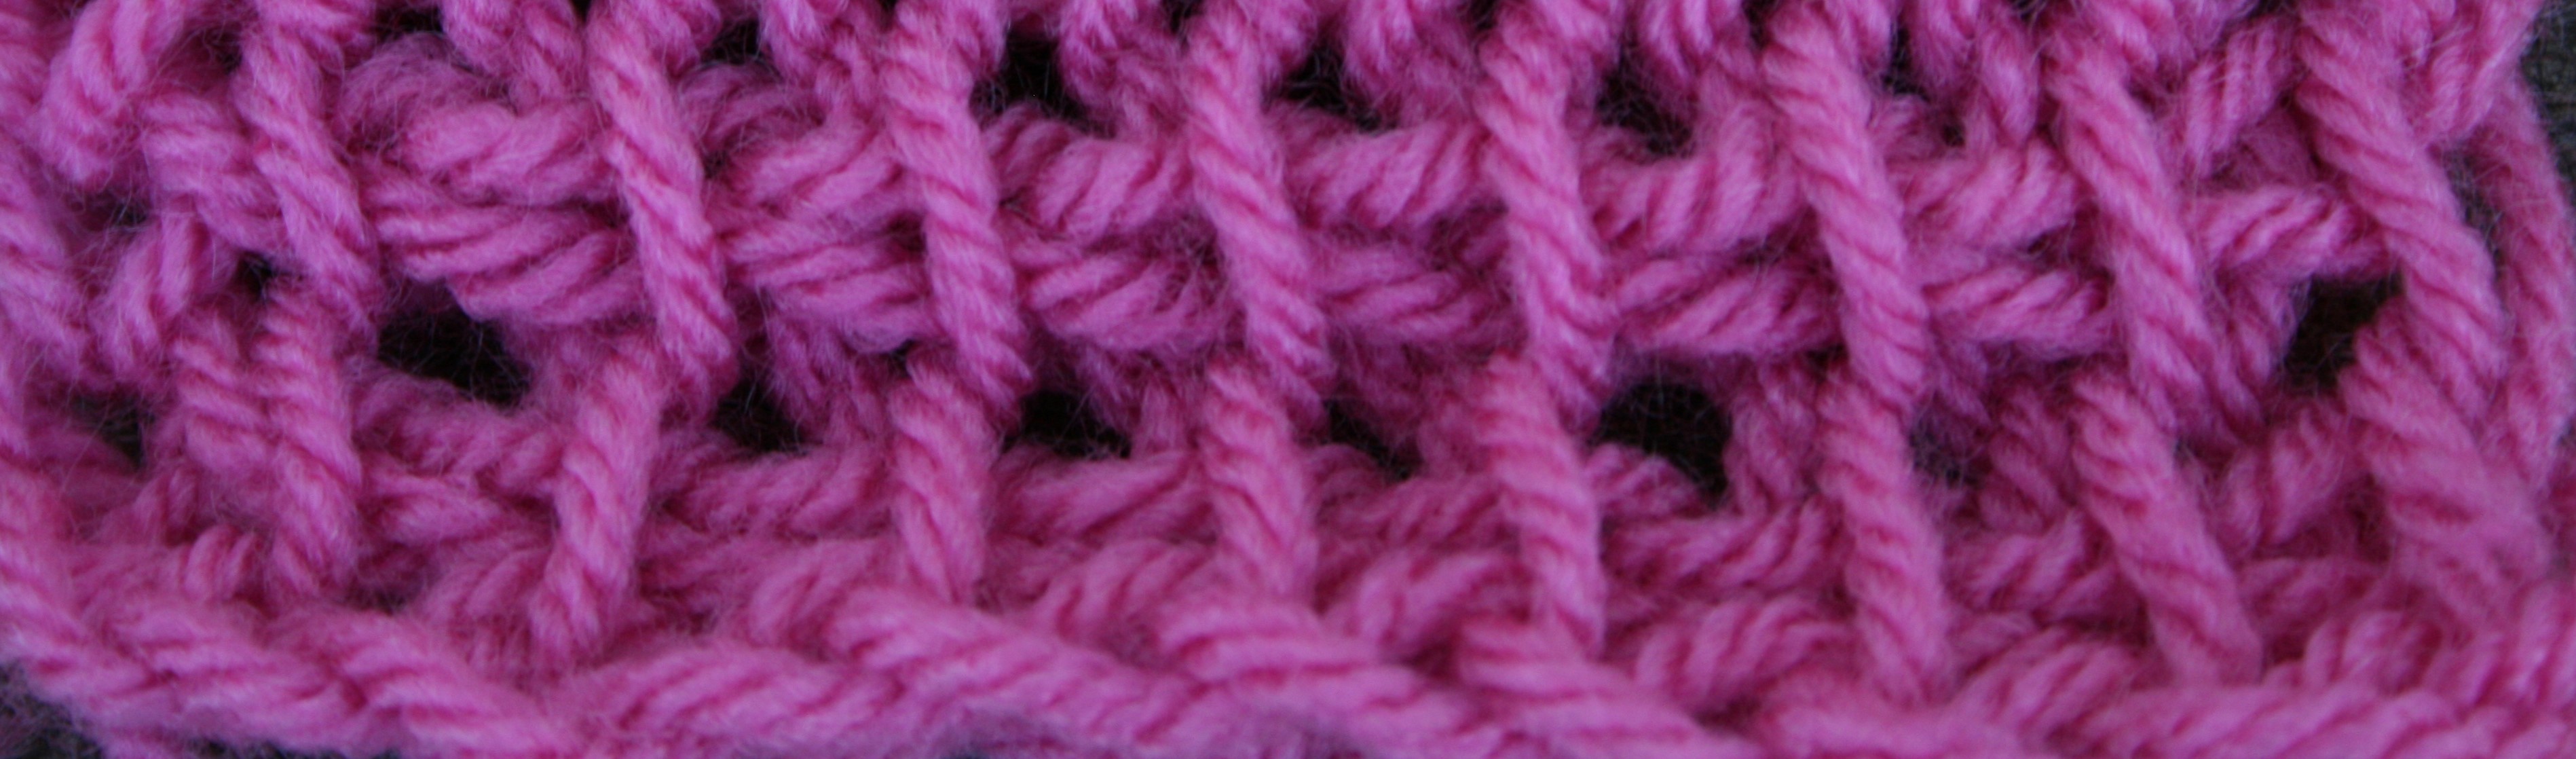
Tunisian Simple Stitch, also known as the Afghan Stitch

Swirling in Tunisian Crochet- Some thoughts

M22159_Tunisian_500_medium

Tunisian Swirl Skirt Photo Courtesy of Annie’s

ScannedImageI have to admit, it is a little overwhelming, in a good way, that I have so many designs out in magazines at the same time. The latest designs out are in the Summer 2015 issue of Crochet! Magazine, and I would like to share some of my thought process of the Tunisian Swirl Skirt with you.

There is actually a lot going on in this skirt. I found myself putting some unusual concepts together for what I feel are nice results. The skirt is worked in Tunisian crochet, utilizing the Full stitch ( I discuss how I work the stitch here). This stitch is worked between the vertical bars, and when worked in flat fabric it has to be staggered in the rows. However in this skirt it is worked in the round.

Working Tunisian in the round has its own unique process, and after playing round with several different options on how to accomplish this, I utilized the Tunisian Loop Return Pass technique, that I discovered from Jennifer Hansen, the Stitch Diva (check out her demonstration here). It offers a join that does not create any open gapping, when worked in Tunisian Simple Stitch it becomes almost invisible, worked in the Tunisian Full Stitch, as in this skirt, you can find the join point, however it is much less obvious then other methods.

Another non-everyday technique that I utilized is the Clone Knot. I learned about Clone Knots from Kathy Earle at a Chain Link Conference (the Knit & Crochet Show), and use them in the lace insert panels that help create the swirl. I like how this stitch is created, I find it fun, but it also offers a nice texture, and allows an open kind of drape to a lace fabric. (I demonstrated how to complete this stitch here).

IMG_20150407_094426

My local newsstand this week, 4 issues that you can find my designs in right now…Spring 2015 Interweave Crochet, Summer 2015 Crochet! Magazine, April 2015 Crochet World, Special Issue Crochet Magazine Quick & Easy Accessories

Some of the other thoughts that went into this skirt may not be as obvious. For one, I do not want a skirt to show my under garments, so I seek out a stitch and hook size that will create a fabric that will allow for modesty, the Tunisian Full Stitch fit this build. With is modesty in mind, I also ensured that the lace panels did not climb into areas that I would like to keep modest as well. So you really should not have to wear an underskirt with this design.

Another thought that went into this design was how to you get a fitted waist. Part of this is created by working top down, and increasing for the hips, as well as allowing for a drawstring closure, so you can have a more custom experience with the fit.

If you wanted to change this skirt up and make it a little more or less lacier or have more or less of a swirl. This can be accomplished by adjusting the width of the solid panels the wider the panels the less lace, the more slender the more lace. Just ensure that the number of stitches in the round before the panels is divisible by the number of panels that you want to ensure that they come out even.

I had fun putting this skirt together and growing in my understanding of crochet while doing it. I hope that you enjoy it as well.

Tunisian Full Stitch….How I Found It for Myself

ScannedImageMany years ago I taught myself to crochet, I remember seeing the “Afghan Stitch” in the book I was using, but I was never interested in doing cross stitch embroidery, so I never looked at it too long. Then several years later I was taking a free form class and the teacher mentioned using some Tunisian Simple Stitch in the piece for fun.

IMG_6555.1

Tunisian Full Stitch

Well what I remembered of the stitch, insert you hook, pull up a loop, repeat, and then work them all off, so I proceeded to do just that. What I was not paying attention to was working behind the vertical bar; instead I worked between the vertical bars, you know that space that somewhat reminds me of chain space, and pulled a loop up. Later I realized my error, but I was sure that I was just doing a different stitch, however when I began looking around for the name, I couldn’t quite find it.

I searched on-line and through various books, and found some different names for it. Some called it “net stitch”, others “Basic Stitch”, and as Tunisian Crochet is becoming more mainstream and the terms more universal I have finally found it; the “Tunisian Full Stitch”.

IMG_6558.1

Working in the space Immediately next to the current loop on the hook

As I stated earlier there the stitch is worked between the vertical bars, but there are a couple of things to keep in mind. Since the stitch staggers on either side of the stitches below, you need to make adjustments at one side or the other of the fabric, or you will be making a piece that is not square. To make this adjustment on the beginning of one row you work a stitch immediately in front of the loop already on your hook, and end that row pulling up a loop in the last space between vertical bars. Then work the usual Return Pass (Chain 1, *YO, pull through 2 loops; rep from * across, until 1 loop remains). On the next row, you skip the space immediately next to the loop on the hook, and work in the rest of the spaces between vertical bars to the end of the row, insert hook in the chain-1 of the Return Pass below, YO and pull up a loop, then work the Return Pass again. Alternate these rows throughout the fabric. You will notice that the side that the Return Pass is begun, the edge will not be perfectly straight and this is normal, as you are adjusting a stitch to the last stitches every other row.

IMG_6560.1

Working the last stitch in the last space between vertical bars. This is the row ending to working the first loop in the space immediately next to the hook.

I personally really like this Tunisian Stitch, I am not sure if it is because it is the stitch I stumbled upon early on, or if it is because it does not give you a set straight line appearance but pulls the eye diagonally instead. The fabric does have a lot of stretch with this stitch and I find that useful in many designs, not to mention it is a fairly forgiving technique.