The Visual Pattern or Paint by Numbers

ScannedImage
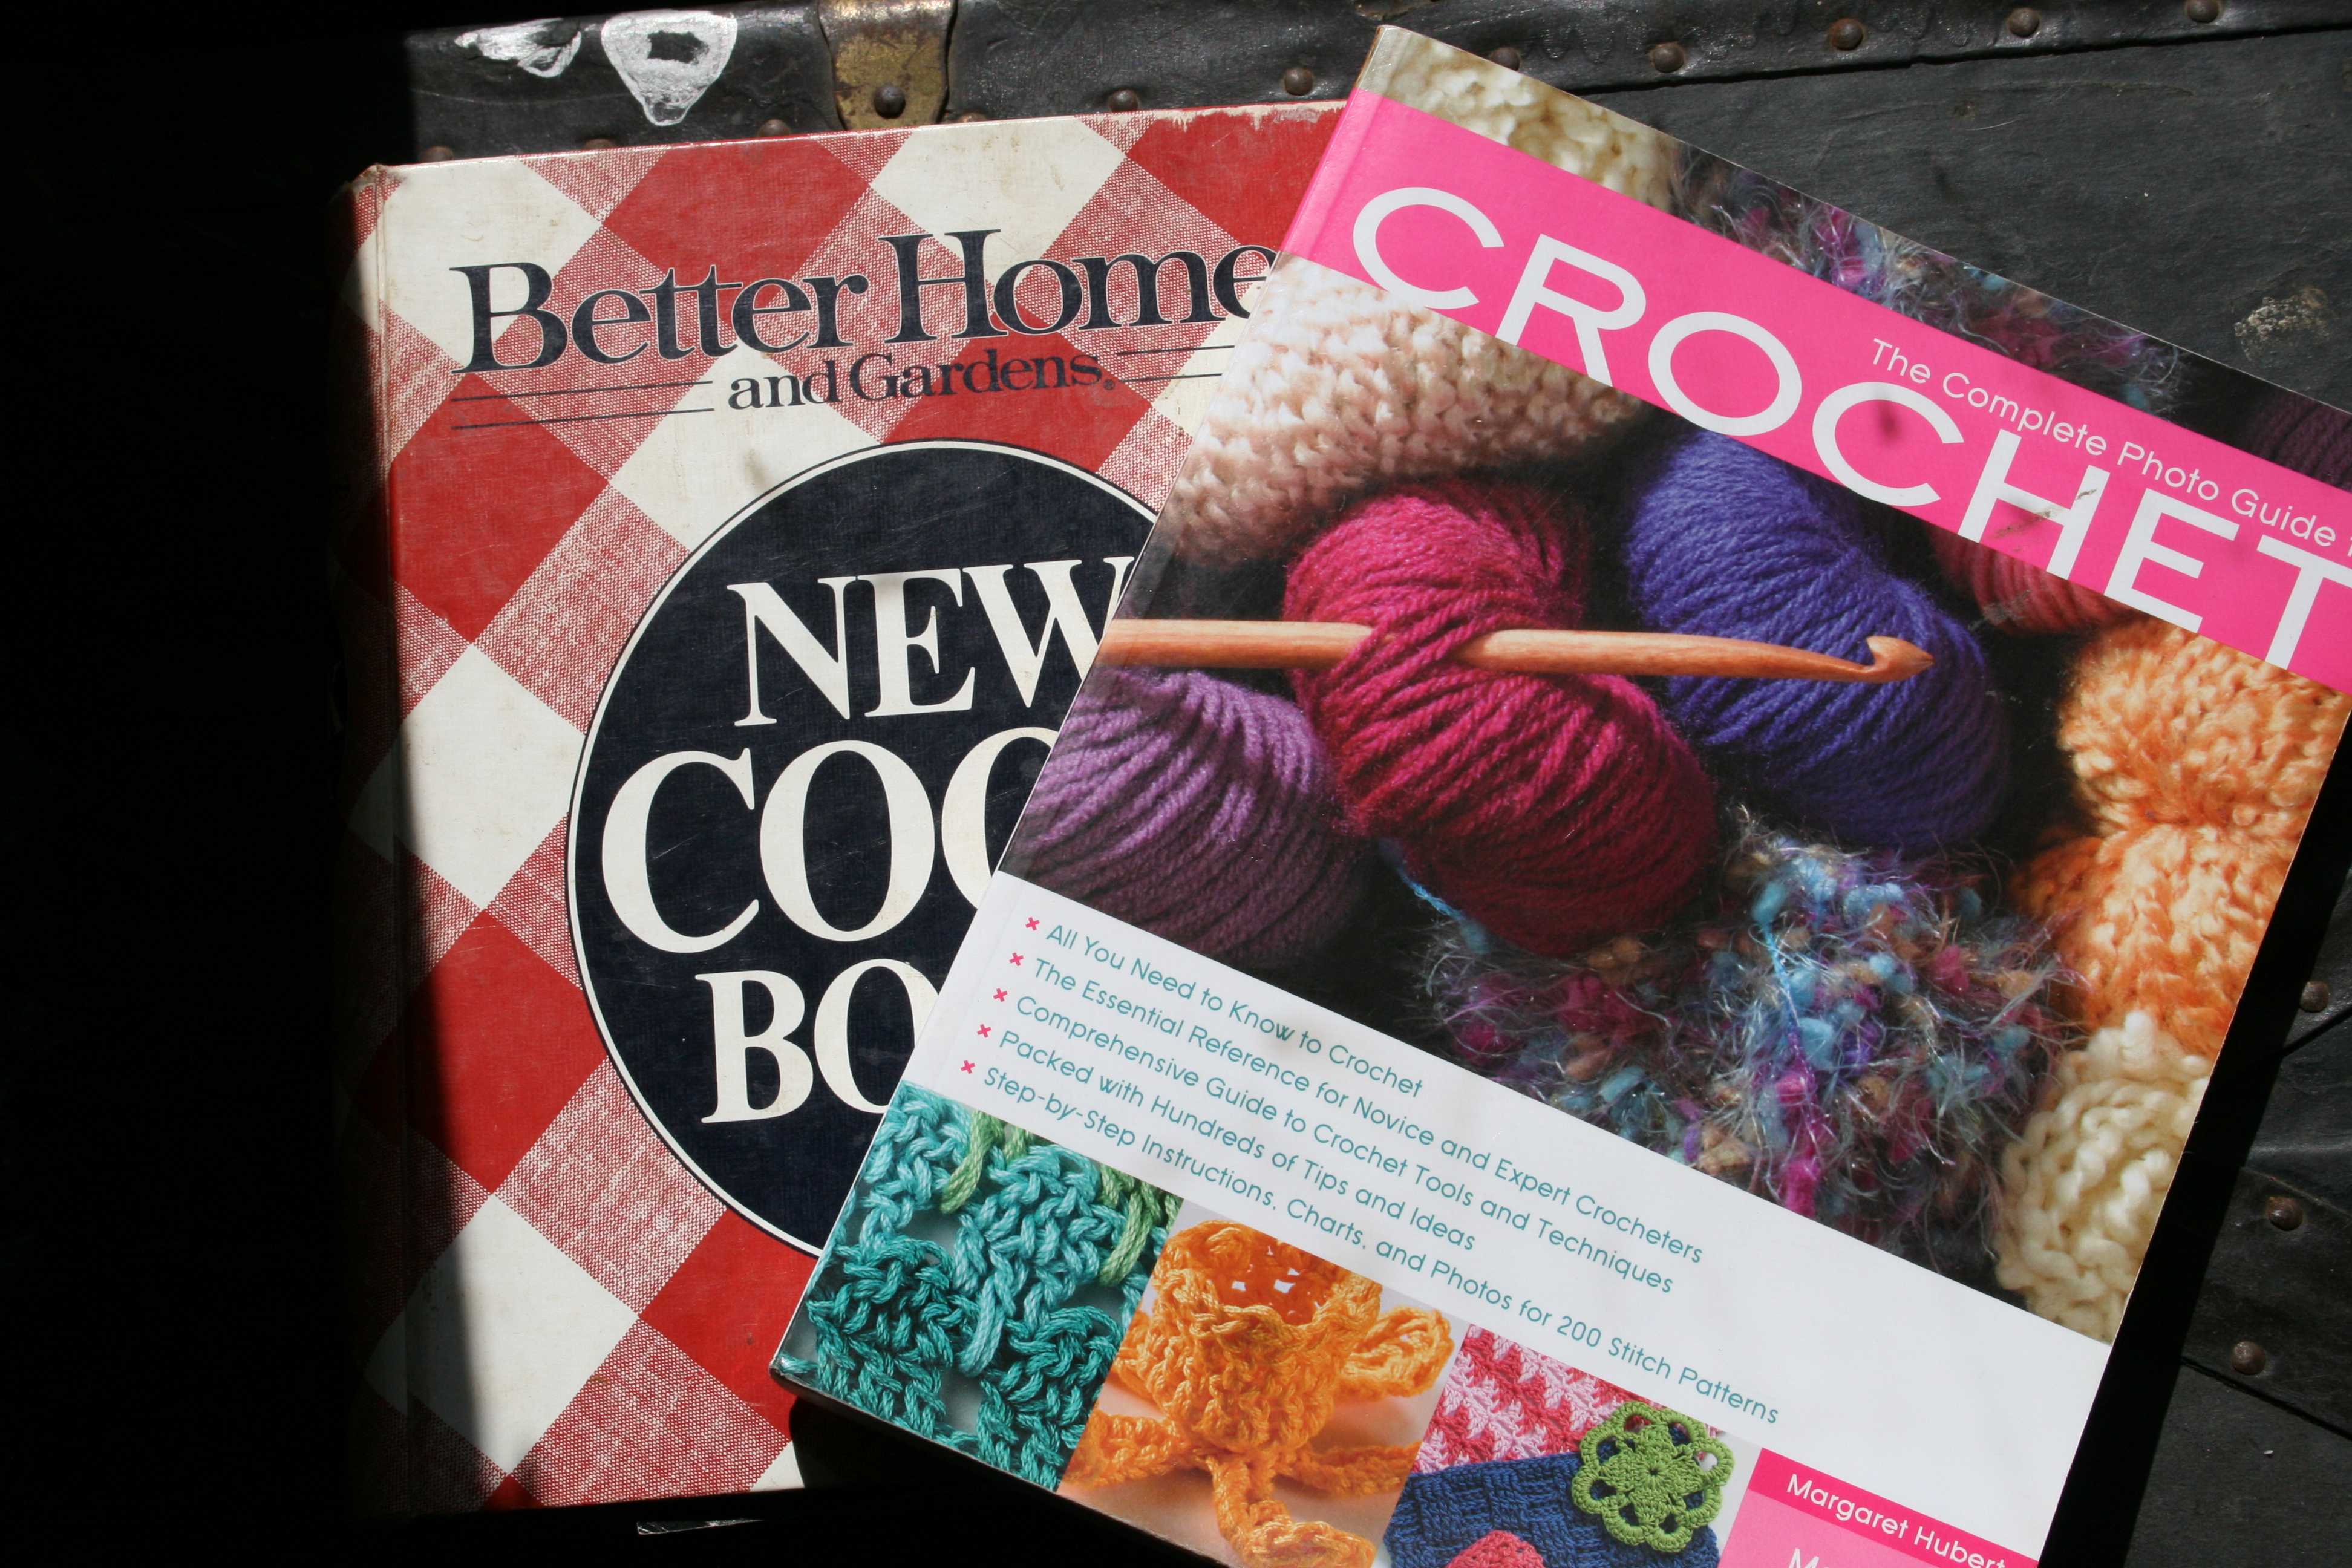
As you probably already know we all have different ways of learning. That is very apparent in the next form of pattern writing I’d like to talk about, called Crochet Charts or Symbols depended upon who you ask. This form of writing will cause you to basically do one of two things either you will scratch you head and feel like you need lessons, or the light will go off and the whole world will make sense (granted you can have a little bit of both too.) The charts make it easy to see what the next step is and how the stitches go together, visually; almost like looking at a close up photo of the item you are crocheting. To me it kind of reminds me of “Paint by Numbers”, except that you methodically work each cell directly to the side of the one you are on, instead of filling in all the “twos”. But you recognize the picture you are painting, and simply following the steps, instead of a written pattern that sometime requires you to work a couple of rows before the pattern repeat makes sense.

This pattern reading option is not always as available as the written versions (as I am writing in North America), but it is gaining in popularity and opening up options for crocheters to use foreign patterns as well, since the charts are pretty much universal. The new found availability of these charts is also reflective of the use of illustration software by designers and publishers, as drawing the symbols by hand can often be more labor intensive then writing six pages of pattern. On the other hand, one graphic can show six pages of pattern in one that small space.

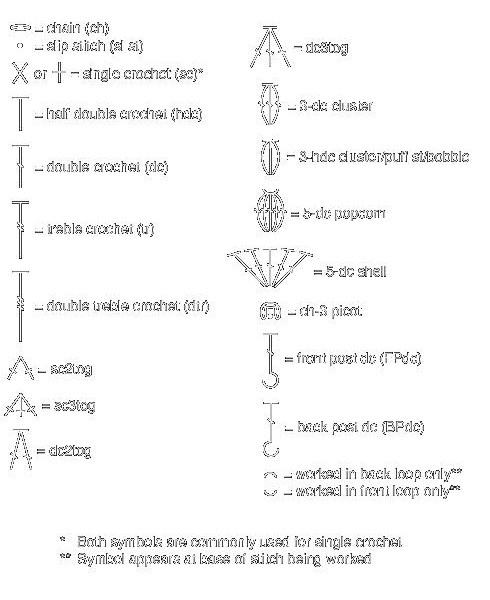
Like traditional written patterns you need to understand the abbreviations. This simply is knowing what the symbol represents. Samples of the most common symbols are below, as found on the Craft Yarn Council website:

Charts

The chart will usually indicate the starting point, and many change colors for the rows, making the pattern even more recognizable (and in some instances a piece of art unto itself). A small sample of what a piece might look like is this:

T=dc, x=sc, 0=chain, .=beginning

0 T T  x x x x T T T

0x x x  T T T T x x x

.0 0 0 0 0 0 0 0 0 0 0

This is read from the bottom left (at the period) across to the right, (as I don’t have any fancy software, bear with me here), traditionally you would see three ovals stacked on top of each other to the beginning of the second row (so imaging one between the two already there), and works across to the left. If you are left handed, you simply flip the graphic in the mirror direction and every row will work in the direction you are working.

If this was written out it would appear as:

Row 1: Ch 11, sc in second ch from hook, sc in next 2 ch, dc in next 4 ch, sc in next 3 ch, turn,

Ro w2 Ch 3, dc in next two sc sts, sc in next 4 dc sts, dc in next 3 sc sts.

To keep you place in a pattern like this, you may want a highlighter, or marker of some sort, to physically mark the pattern, or get creative with some office supplies and see what might work for you. Another thing to note about this pattern method is that often the entire pattern is not there; meaning that you are given the graph for the main portion of the repeat of the pattern and not the entire thing. This is one reason that it is most commonly used of motifs, since it is usually a few rows and you can see the entire square, where as is it was a pattern for a sweater it would be more involved with many rows of repeat for only subtle changes at shaping points (not to mention it would be difficult to write multiple sizes into one chart). But charting can be seen as an edging, and it will show you the repeat of the pattern. To successfully complete this you need to do only a little math, and that is only for the number of times that you need to repeat the pattern charted before you to fit desired area.

This is a very favorable pattern to read if you are very visual, to see some beautiful charts simply enter “crochet charts” in any search engine on the internet and find charts that you might even want to frame. It is also another form of pattern writing that you can easily master and might even enjoy if you give it the opportunity. However if this style still doesn’t suit your taste there is yet another method to discuss, more about that next time.


Read the Pattern or Recipes and Patterns One in the Same

ScannedImageOne of the statements I find many crocheters stating is that they do not know how to read a pattern. This isn’t surprising, nor is it uncommon. Many of us learned the stitches and techniques from friends or family members (and honestly, descriptions of crocheting can be difficult to write). It is a visual skill; those that are self taught probably used photos and maybe even videos; describing where to place a hook into a stitch without a visual cue could be quite daunting.

I’m hoping to add a little clarity in the world of reading patterns over the next couple of posts, beginning today with the most common; standard written.

IMG_5623

The similarities are uncanny.

Standard written patterns are similar to cookbook recipes; the ingredients are listed out and then there is a paragraph giving you step by step directions on how to complete the dish. Patterns give you the materials needed and step by step directions to complete the project. Major difference, you probably learned to cook at the hip of someone else so you learned all the abbreviations and basic skills like sauté and chop while they showed you how to do it. Crochet is a little slower process and no one is probably how to decease then chain and skip a stitch while you were in the process of completing a pattern.

So where to start. First don’t expect that just because you know all the stitches that reading a pattern should come easy, it is like knowing all the basic cooking skills and now reading a pattern to make a soufflé; take baby steps. First we need to understand the abbreviations, almost every crochet magazine and book and even good patterns will have a list of all the abbreviations and what they mean (note: this will also include special stitches and techniques), and many will even have a tutorial or photo to demonstrate the stitch to assist you further. The most common abbreviations are:

ch- chain

dc- double crochet

rep- repeat

sc- single crochet

sk- skip

sl st- slip stitch

st(s)- stitch(es)

yo- yarn over hook

Note: This post is written in American crochet, short hand for other countries may (and often does) differ.

IMG_5622

I sometimes use a wooden ruler to keep my place, but a nice sticky note works well too!

So now it is a step by step process of going line by line over the directions. This can seem daunting and slow, especially since if you’re like me crochet is something to relax you, but typically you can see the pattern in the stitches in the first couple of rows and you then use the pattern as a reference when you get to places that have some change. To make it a little less overwhelming (and assist in keeping your place), I have met several people that use highlighters when they complete a row, or place a check mark by the row, or others that use a sticky note just below the row they are on and move it down as they progress in the pattern.

Even if this doesn’t aide in your approach to patterns, not to fret, there are other ways to address reading patterns and we’ll get into some more of that next time……

“Wrong” Crochet?

ScannedImageThe other day I was talking to a lady, which put me back on a soap box. She told me that she crocheted “wrong”. When I asked her what she meant by “wrong” she told me that she had she doesn’t do it like her friends do, so it was wrong.

Wrong is all relative. It really depends on what you are trying to do. Would you ever tell your child that they painted “wrong”, just because they may not do it like the other kids? The answer is probably not, because your kids are enjoying themselves. The same is true with crochet. Granted if you want to make an exact duplicate of a pattern sample, then you will have to follow the directions put forth by the designer, but I know plenty of people that simply cannot follow patterns, and they crochet beautifully. They get inspiration from the pattern, and look at the schematics, and closely examine the photos to see if they can figure out the stitches, and have fun creating their own version.

Crochet, like other art mediums, is a process, there are standard ways in which you complete a stitch, but if you make a mistake, and continue to make the same mistake, it is called a stitch pattern. As long as you are enjoying what you are doing, you are doing it correctly. I think that even if you can execute every stitch with exact precision, no errors and perfect tension, if you hate doing it, you are doing it “wrong”, and need to being that which brings you joy.

You can always improve your skill and technique with practice, talking to others, taking classes, or finding a good book or video, but if it doesn’t bring you joy, why bother. Remember what was “wrong” yesterday, is fashionable today.

Differing Yarn Weights…what are they really…

ScannedImageI was asked a question the other day, of something I kind of take for granted; yarn weights. You hear a lot about different yarn weights, and as a crocheter I have always had a grasp of the traditional worsted (medium) weight acrylic yarns, but when you hear phrases like “I need to get some DK”, or “ I really enjoy this fingering”, there is a smile and a nod, but not a full appreciation of the statement.

So I will address my perspective of yarn weights (note; this is not about threads, that is a whole different discussion, but the same conclusion applies). The Craft Yarn Council of America has been attempting to help standardize many things in the yarn industry for consumers, including yarn weights. But that doesn’t mean that all worsted weights are created equal.

You have probably noticed numbers listed on the skeins of many commercial yarns, these are on a gradient scale with 0 being thinnest and 6 (or greater) being thickest.

So for the 0, listing this is categorized as Lace weight yarn, but has gone by other names such as Fingering, and 10 count crochet thread. While 1 is categorized as Super Fine, and has gone by the name of Sock, Fingering, and Baby. Not to be confused with 2, known as Fine, also called Sport or Baby. Confused yet? Basically the name terms have a more loose interpretation of what they really are. The number scale is devised of by using yarns with hooks that given an even drape and measuring the number of double crochet stitches over 4 inches (just like a swatch, that we are suppose to do before every project…and sometimes realize later that this is good advise). The greater the number of stitches, the finer the yarn (You can find the complete table and all the hooks used, and stitch range used for each category here).

IMG_5620

Yarn weights, 0 to 5- lace to chunky

This may work great when shopping at larger box stores, but not always helpful when buying yarn at some smaller local yarn shops or at larger events such as Stitches, or other venues that small distributors, yarn dyers, and personal yarn spinners. As they may not use the numbering standards and instead using the other terms; Fingering, Sock, Baby, Sport, DK, Light Worsted, Worsted, Afghan, Chunky, Craft, and Bulky (At these large events I don’t usually see a lot of the heavier weights, often it is hard to find what I would consider a worsted weight yarn), or simply give you a number of stitches per inch on certain size knitting needles (not really helpful to someone that doesn’t knit). Often they are using another unit of measure to determine the classification they are using such as the number of twists per inch in a length of yarn (the higher the number of twists the finer the yarn), or the numbers of yards in a pound (meter in a gram) (the more yards per pound the finer the yarn), so don’t feel intimidated to ask. I know you may feel like you will get slighted as a crocheter by knitters for asking, but if the booth wants to really sell yarn they will treat you like the valued customer you are.

A good mental note to use is to close your eyes and gently rub the strand between your fingers, let your instincts guide you. If you were to pick up a hook just now and crochet what hook would you pick up? The other thing to remember, if you like it, you’ll find a way to make it work. The classification only really matters if you want to substitute exactly, but let’s be honest, how often do we follow the patterns to a tee? (Okay I am not suggesting that you can substitute a lace weight yarn for a chunky and not have some difficulties, but reasonably close and you can make it work). We know how to make it our own, even if we don’t feel confident in explaining this. Everyone crochets differently, no two are the same, and we always make adjustments for this, yarn weight is no different.

If you have not left your comfort zone and have not attempted some finer weight yarns, what are you waiting for? There are many beautiful yarns that are finer weight that you can have fun with, remember ultimately you set the rules.

The Tentacle Stitch and the Sideways Skirt

Untitled

Crochet! Magazine Summer 2013- photo thanks of Annie’s

ScannedImageAmazing how time can come and go so fast. It seems like only last month that I was writing up my article on the Tentacle stitch that is featured in the current issue of Crochet! Magazine.


I know the name might sound funny, but to me it was reminiscent of an octopus arm reaching out to the rows not yet created. Some might

Tentacle Stitch Spa Cloths

Tentacle Stitch Spa Cloths, photo courtesy of Annie’s


wonder how I ever can up with this idea, well ideas come in the most unusual ways. This one came to me while looking at the color patterns on cow hides ( okay, I am a country girl), nature very rarely has color in straight lines, they often curve and bend, and I was envisioning ways that I could create these bends, and thus the tentacle stitch was created, you never know what you find when you play. By working the color over rows already created, like in Mosaic crochet styles I didn’t like the thickness, and working in same rows color change like intarsia or tapestry crochet I didn’t feel free enough to play since I had to plan the stitches by grid, so by free-forming I came up with this technique (and had some fun with it too).

Sideways Skirt_2

Sideways Skirt, photo courtesy of Annie’s


In this issue I also have a Sideways Skirt. This skirt looks straight forward, until you realized that is worked entirely on the diagonal. The reason for this….I really liked the way it fit. When looking at construction I have began to wonder why are all the seams for everything in the same places? Crochet lends itself well to designs that do not need to be seamed or at least only minimally. I felt that placing seams on the sides of this skirt would cause it not to drape as softly over the hip (nothing like an addition of a seam allowance to cause a pucker that makes my hips look bigger then they are), I like a nice smooth feel when I where a skirt, it feels womanly to me. So I designed this skirt completely on the diagonal so that the one seam runs across the body and blends in better. Also the shaping is done by changing hook sizes ( I know it can seem a little tedious to change hook sizes in a row, but it allows for a smaller waist and a flared hem, with very little effort).

Anyway, there are some thoughts on the latest designs I have out in the world, and I hope you are inspired to play a little too.