There essentially are 3 ways to begin a circle in crochet,
and in most cases they can be used interchangeably. Each has its pros and cons,
and everyone has a method they prefer.
Creating A Ring Method
In this method you create a chain, usually I find that many chain 4, and then you slip stitch to the first change created to form a ring. Then all the stitches of the first round are worked into this newly created ring, working over the chain.
This method is pretty straight forward, creating a stable
base for the stitches to be worked. Yet, it can leave a pretty striking hole in
the center of the fabric. It can be tightened up a bit when the ends are woven
in, but it adds a bit of bulk, even more then the chain being worked over.
Forming a ring by slip stitching to the beginning of a length of chain.
Working in the Beginning Chain
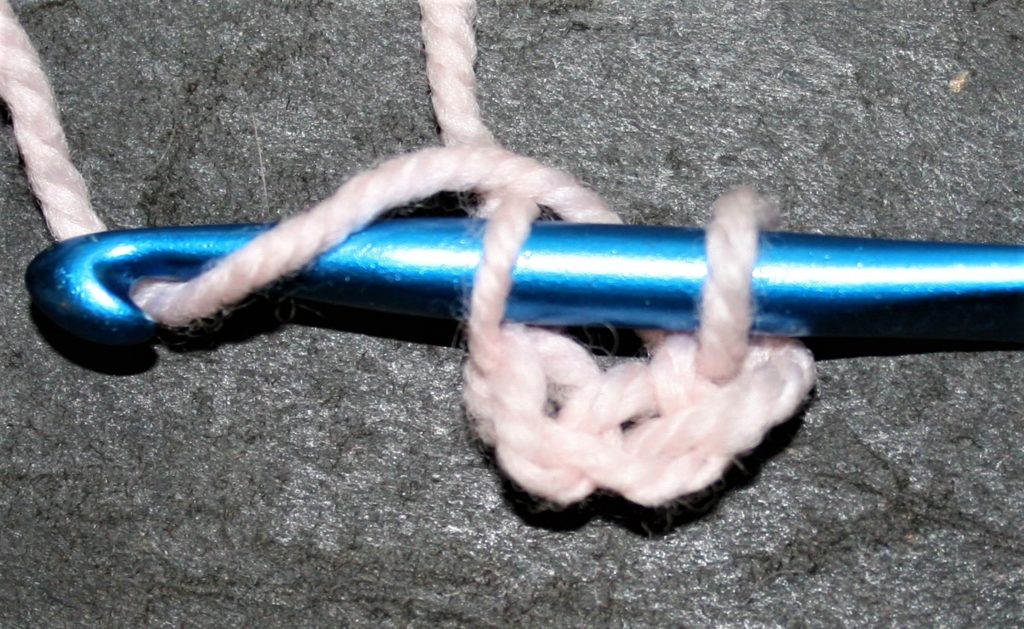
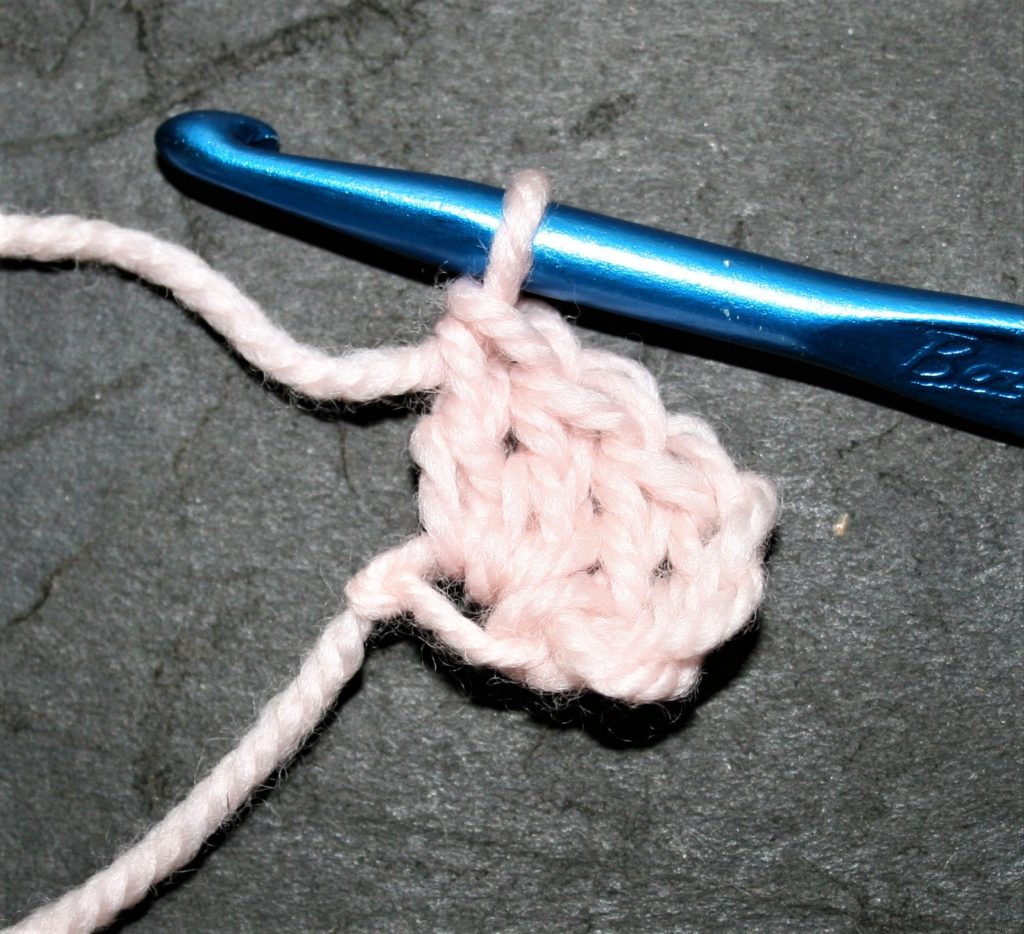
I admit this is my usual go to method. To begin this method you determine what the first stitch of the first round is, in most cases it is double crochets (UK-treble crochet). You then chain the number that is typically used when turning rows with this stitch, in double crochet’s case that is a chain 3. Then you add 1 more chain, now all the stitches are worked in the first chain created.
I find this method pretty easy and fast, with a minimal hole in the center, but in reality the base for the stitches is not as stable, because I am placing a lot of stitches into just one chain. It places a lot of pressure on the yarn that creates this one chain.
Work all the stitches of Round 1 in the first chain.
Magic Ring, Magic Circle, Magic Loop…Method
There tends to be many names to describe this technique that
creates a very tight closure. The best way to describe this approach to someone
new to it is “fiddly”. Granted it creates a very nice join point that does not
have, really any, hole at all in the center, but it takes a bit of practice to
feel comfortable with it.
To work this method there are couple of different approaches, yet the outcome is the same, you work over a loop of yarn. All stitches in the first round are worked over this loop of yarn, and then the end of the loop is pulled to close the loop bringing all the stitches to a tight closure.
Make the Loop
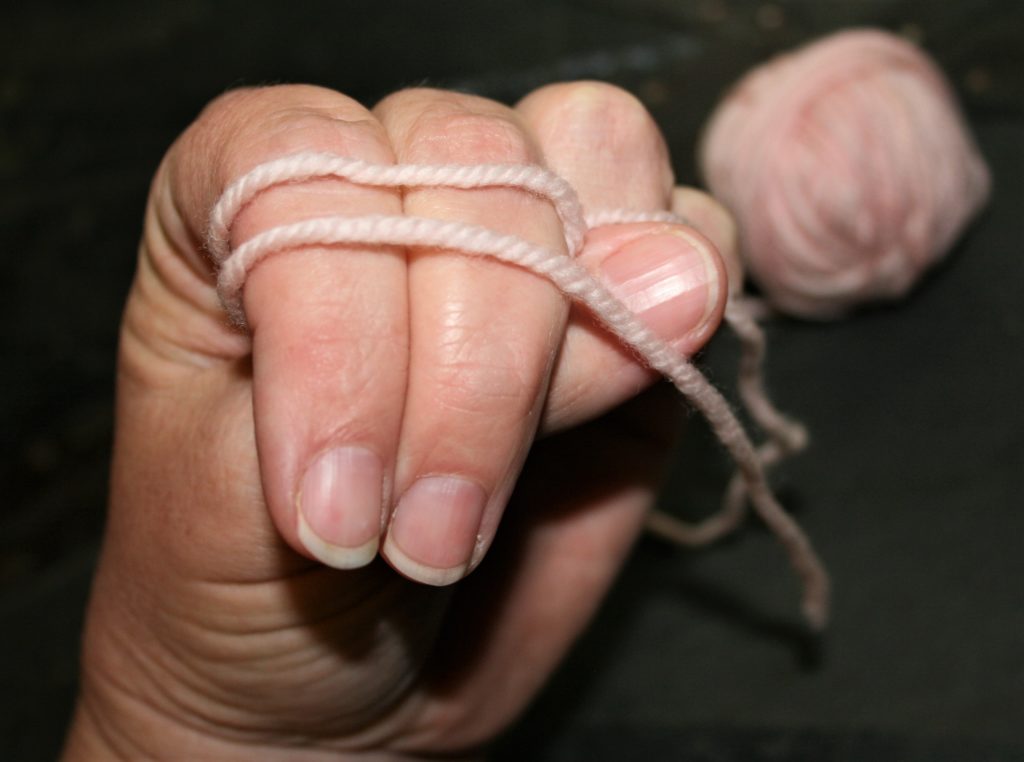
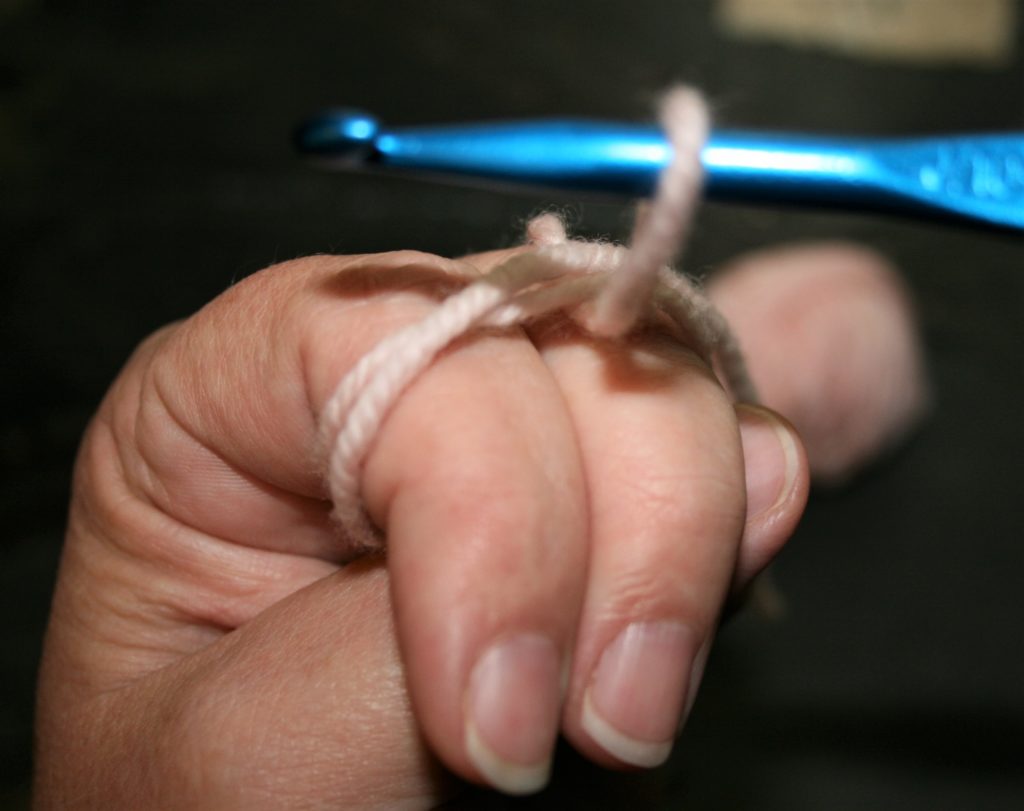
The approach that I find to be the easiest to do for this
method is to wrap yarn around my pointer and middle finger of my yarn tension
hand. When wrapping I ensure that the end of the yarn nearest the skein is
nearest my palm, with the tail of the yarn nearest my nails. I wrap at least
twice around my fingers.
Wrap yarn around fingers twice, with tail of yarn closest to the nails.
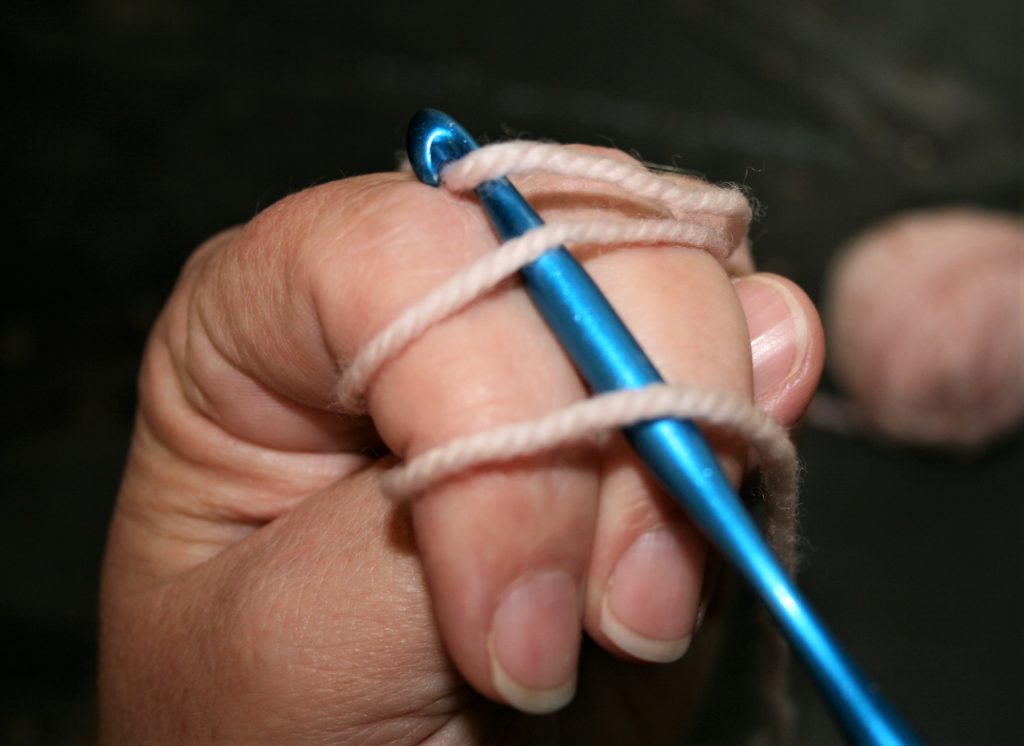
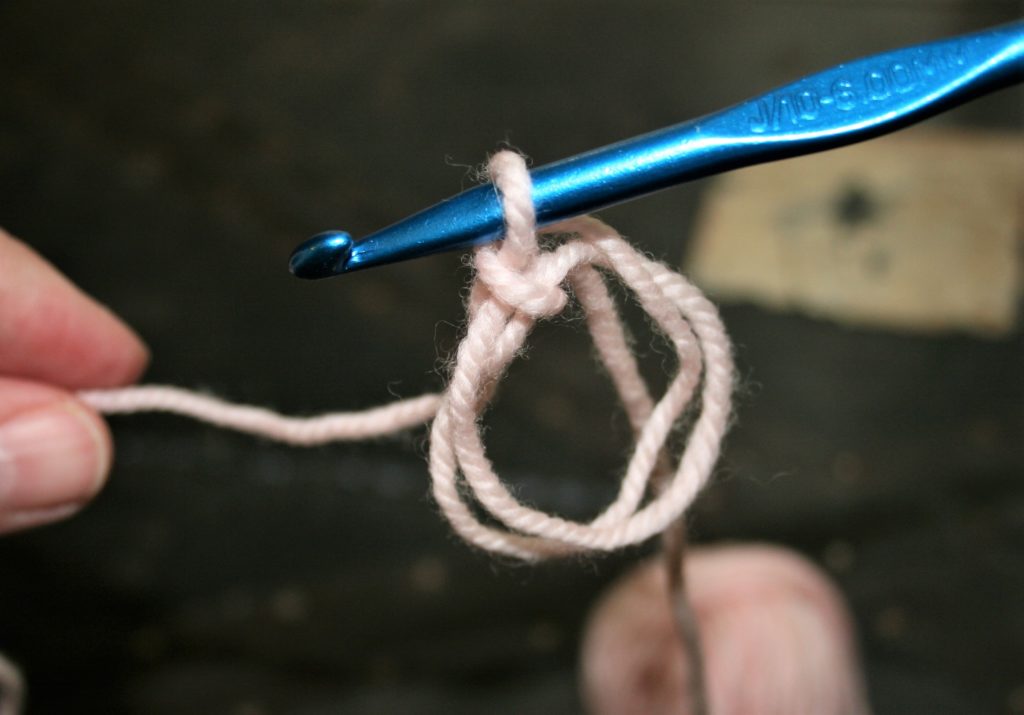
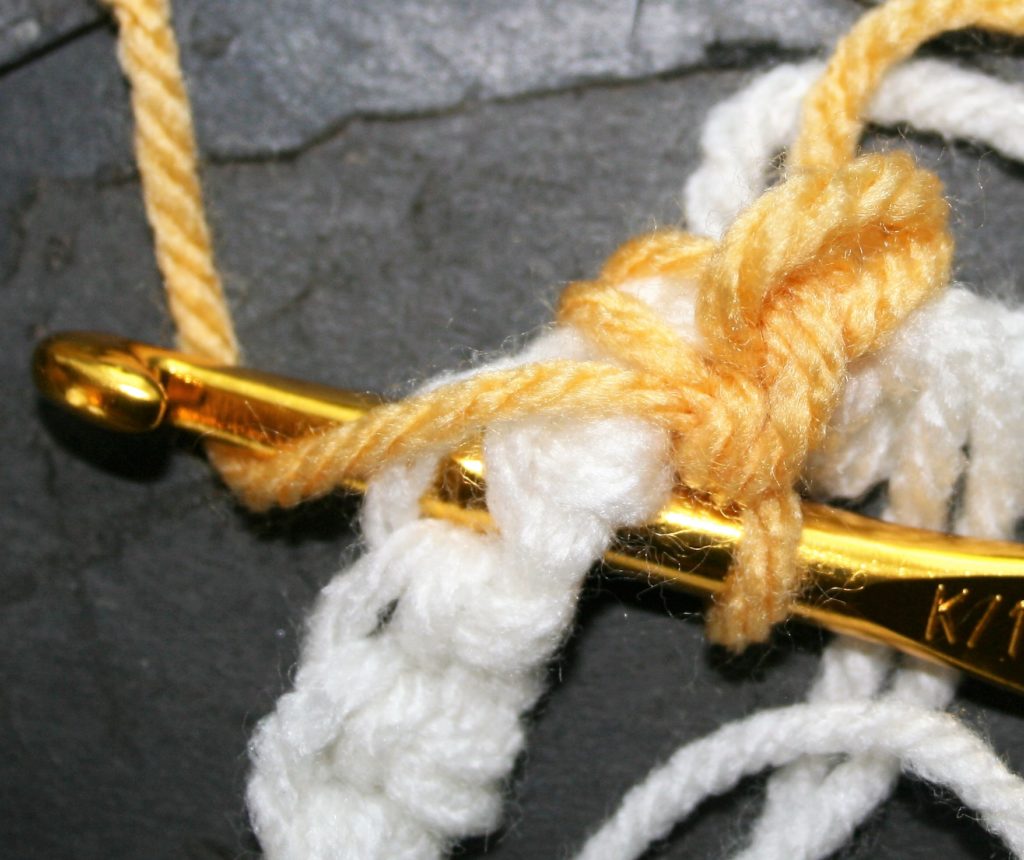
Work the Loop
Then I insert the hook over my fingers and under the yarn, yarn over the yarn from the skein and pull through the yarn on the fingers. At this point I usually remove my fingers, keeping the loop of yarn in at loop state, then chain 1. The chain secures the loop, so now you chain to the height of the stitches being worked in round one, and work all the stitches over loops of yarn.
Insert the hook, yarn over.Pull through a loopRemove from fingers and chain 1 to secure the loops
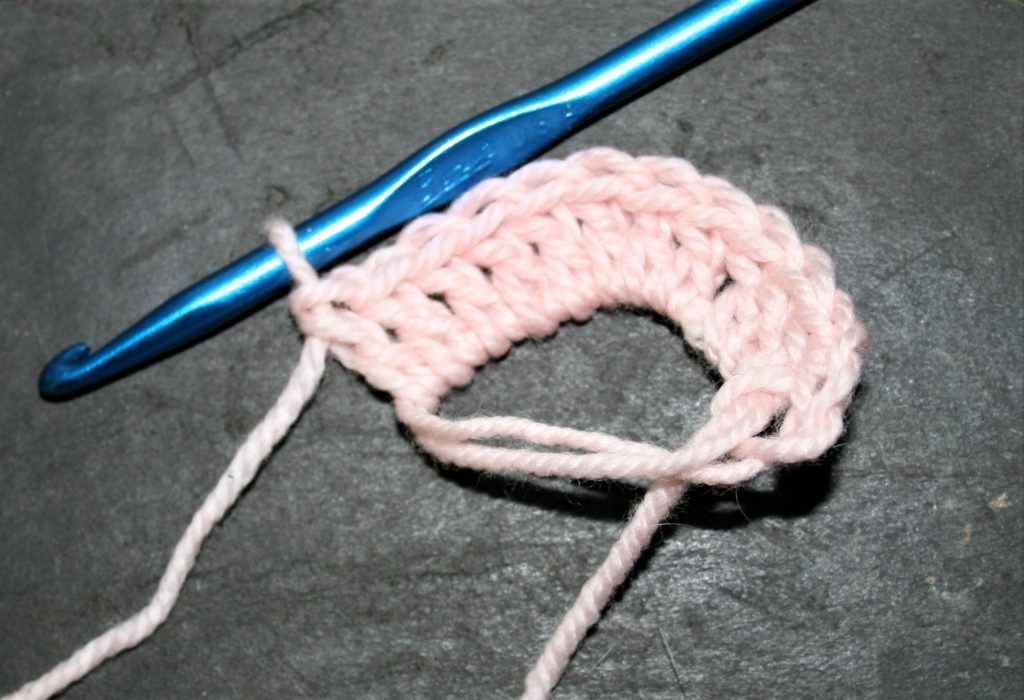
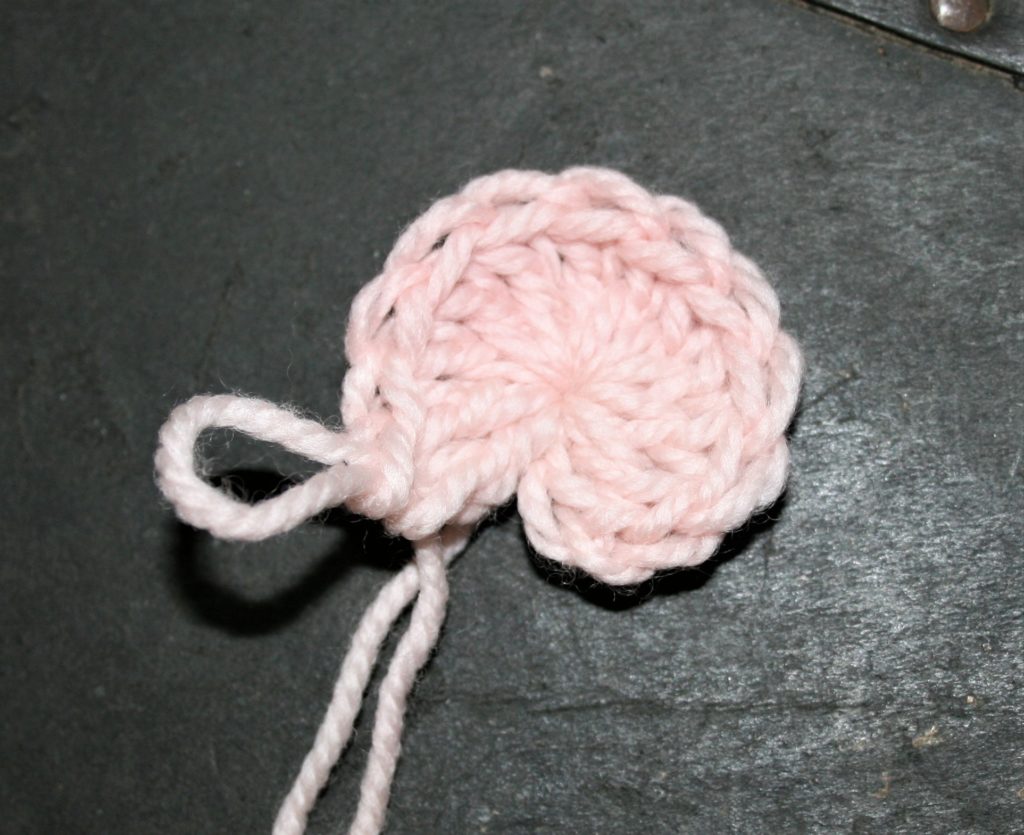
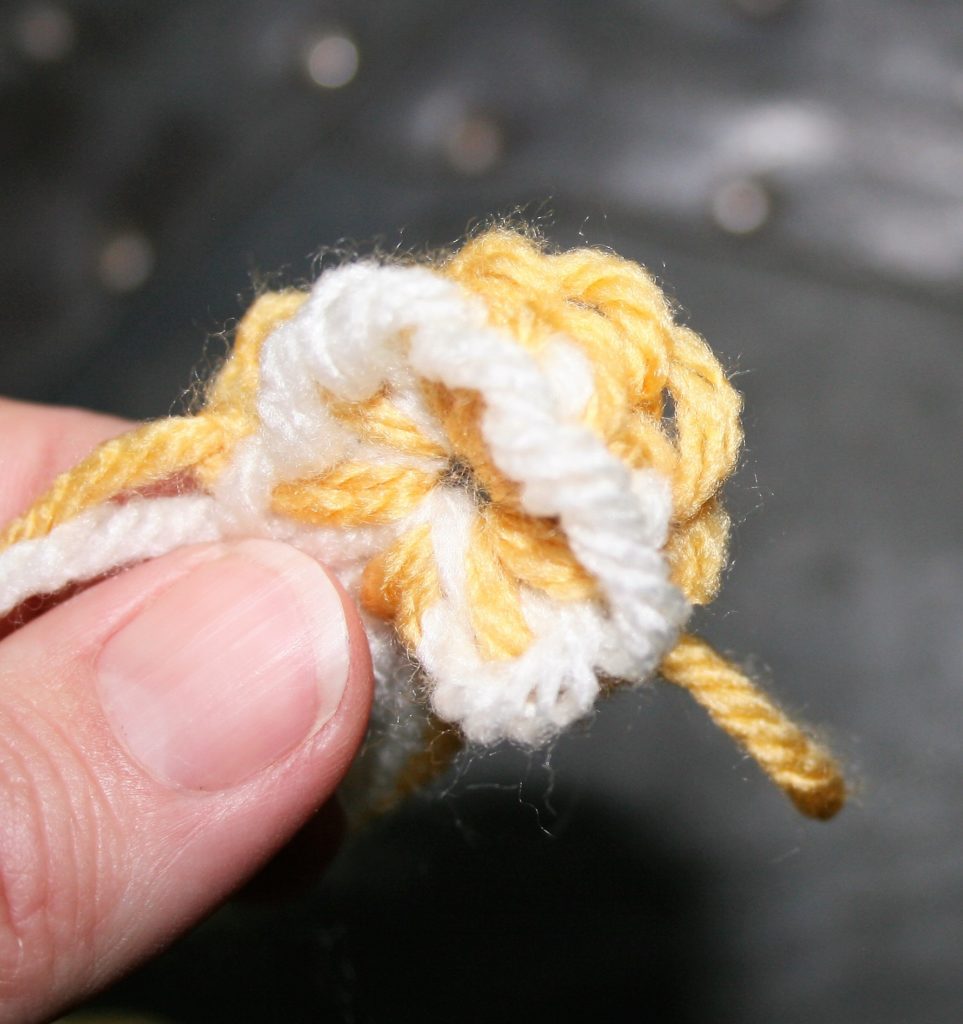
Close the Loop
When all the stitches of the round are worked, I then pull the tail of the yarn. Since I work over more than one loop, when pulling the tail it might leave a loop hanging out of the stitches. To remove this loop is simple, I simply begin pulling the hanging loop to tight. It is a bit of juggling to pull the yarn tight when it is wrapped more than once, but I find it gives a bit more of a secure base for the stitches to rest on. Since really, no one wants this loop to become unworked.
Work stitches around loops.Pull the tail of the yarn to close the loop
Check out some of my free patterns that begin in the round and practice using these techniques.
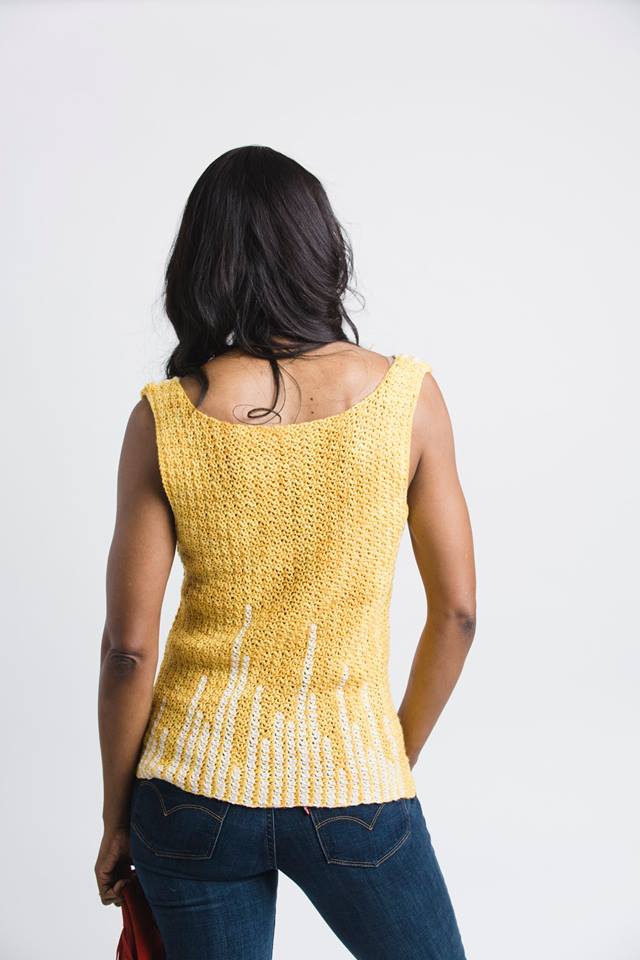
I have heard this design explained as, “Eye catching with a total style, this tank offers flattering
partial stripes that demands attention”. I cannot say that I disagree, but I
should add that it works up quicker than you might expect.
Soleil Stripes Tank, Photo courtesy of Prime Publishing
Since it is worked vertically this
tank is worked with yarn carries, so there are few ends to weave and simple
success is easy to achieve. In addition the stripes are only located at the
front edge of the neck and the lower edge of the back, so it is not
overwhelming with various points to keep straight.
The stitch pattern is a simple
combination of single and double crochets, so that the focus really is the
color changes.
Soleil Stripes Tank, photo courtesy of Prime Publishing
I was inspired to create this design
from the simple image that rested in my mind during some travel. I was walking
down a busy city street and the way that the light was playing off the windows
and reflecting the adjacent buildings. It created this staggered uneven stripes
that stuck in my mind.
So when I was playing with Anzula yarns I was drawn to place this image into a fabric, and hence this tank was created.
I am pretty happy with the results, I
hope you are too.
I pick up this stitch again recently and begun playing with
it in the round. This stitch is typically worked at only half the row height
increase of the single crochet stitch, working in both its on row stitch and
the one adjacent. As a result of this one, stitch stacked upon one stitch approach
it takes a bit of thinking to work the flat circular increases.
The first hurdle is to actually begin the round. You really
need to work 2 rows of fabric in the same beginning stitches to ensure an even
fabric consistency throughout. I have found two approaches to this in the
round.
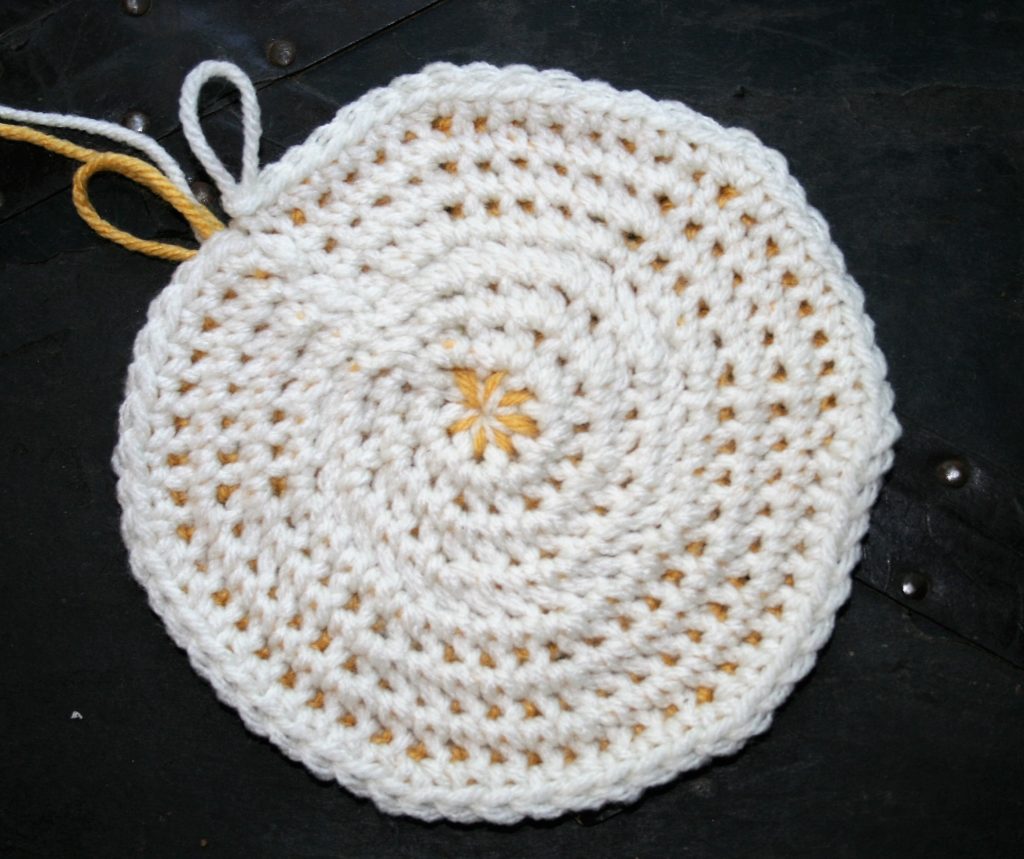
Please note that I worked this fabric as a different color
on each side, as it really helped me to keep the process understandable. In
doing such I would drop the color, leaving the working loop for the color live
and pick up the new color, switching like this between every Round. In addition,
I worked the entire fabric in a spiral method, meaning I did not join the
rounds when completed, I simply began the next stitches in the next round. This
was also so ease of keeping track of my location in the work. I have to play a
bit more with the end of the Rounds, as even working in a spiral they appear to
easily as the stitches become a bit clustered and dense, but it does allow for
the thermal stitch to be created.
Beginning:
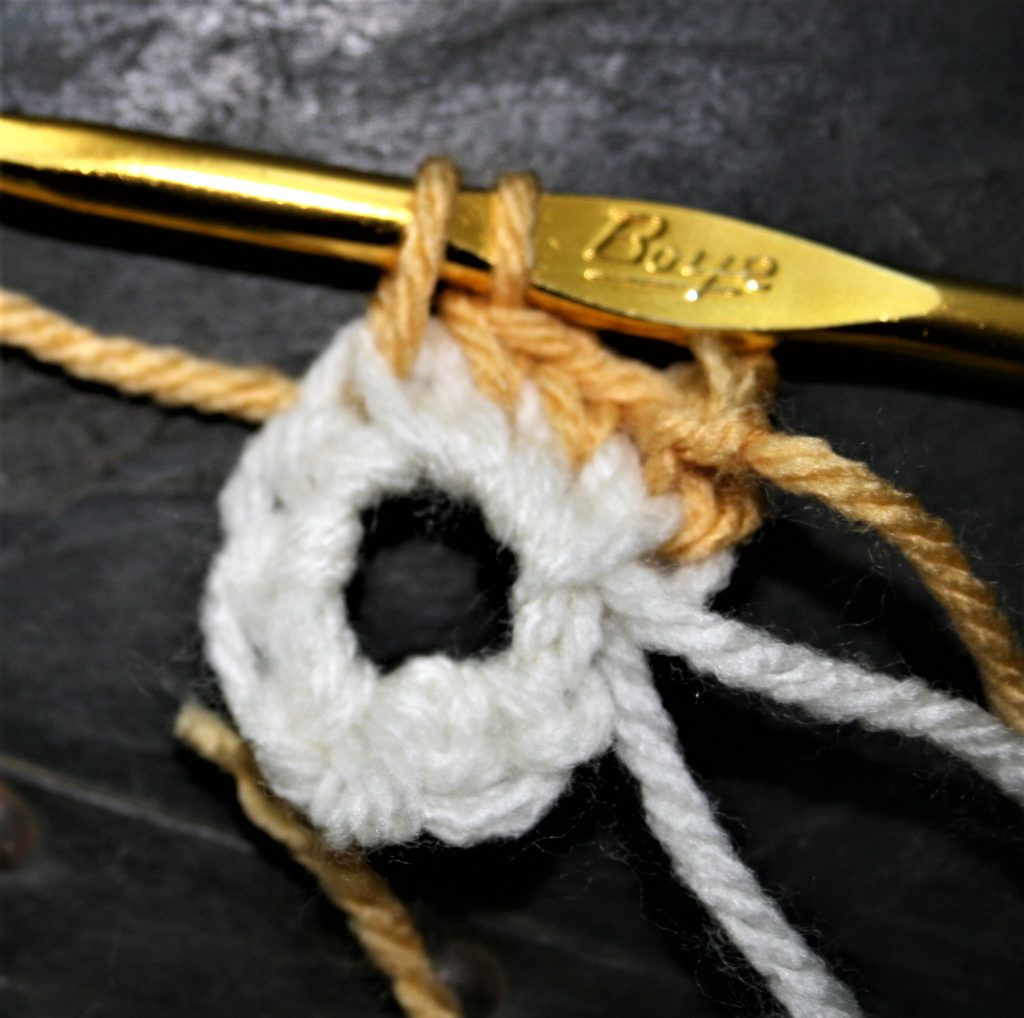
Method one: The magic loop/ring/circle. Essentially this technique involves making a loop of yarn and crocheting in this loop, like when crocheting over item (like the demonstration here making holiday wreaths).
Round 1: Work 8 single crochets into the loop (color cream),
turn.
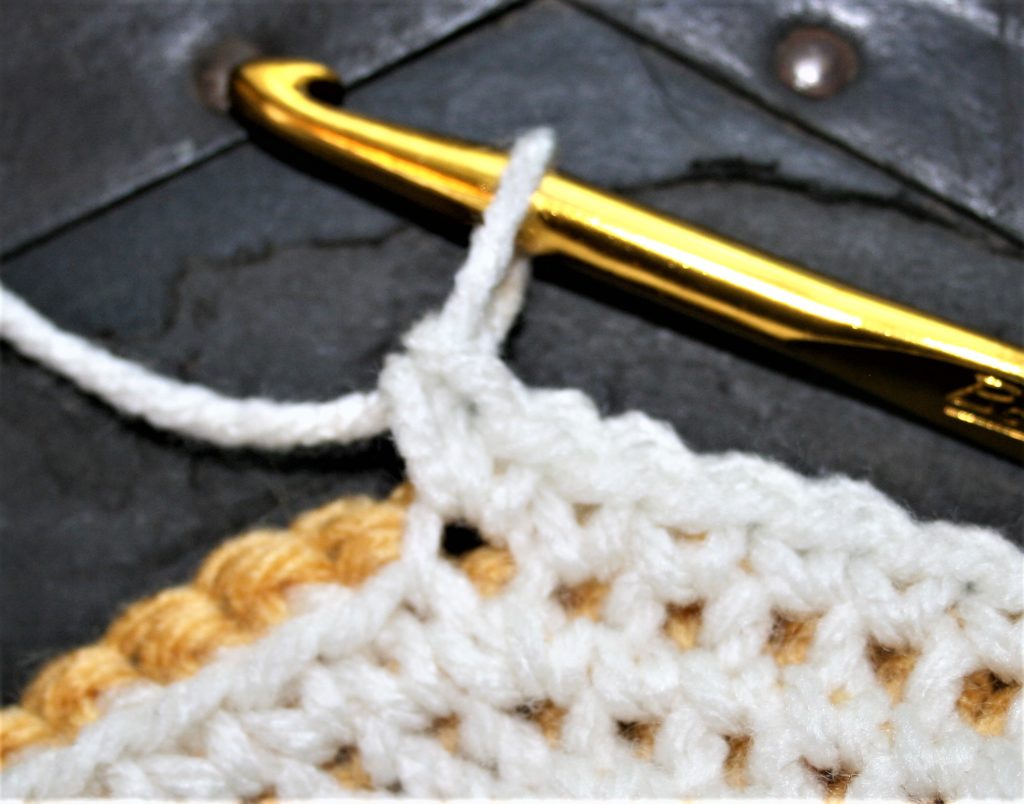
Round 2: Drop color
from round one, join new color (color yellow). Working between stitches in between
the stitches of Round 1, [insert your from behind the magic ring, and through
the top loop closest to you in Round 1….this feels a bit awkward, but
essentially what you are doing is inserting your hook into the bottom ring and
the loop of the stitch in round 1, yo, pull through a loop, yo, pull through 2
loops] repeat 8 times, turn. -8 sts
Pull ring closed.
Working Round 2 of Magic Circle method, inserting hook behind ring and through top loop closest to you,Working Round 2 of Magic Circle Method as viewed from the Wrong SideThermal in the Round, Completed Round 1 & 2
Method two: Working into a ring. Chain 4, and slip stitching to the first chain to form a ring.
Round 1: Ch 1, 8 sc in ring (color white), turn. -8 sts
Round 2: Drop color from Round 1, join new color (color
yellow) to one “leg” of the single crochet stitch, insert hook through same
point as join and the top loop closes to you of Round 1, yo, pull through a
loop, yo, pull through 2 loops, [insert hook into one “leg” of next single crochet
and the top loop of next stitch, yo, pull through a loop, yo, pull through 2
loops] 7 times, turn. -8 sts
Thermal in the Round, Round 2 working in the “through the stitch leg” method. Insert hook through one “leg” of the stitch and the top loop closest to you.
All Subsequent Rounds….Working the Increases
Increases need to happen in each Round, but you are
essentially working the same increase for 2 rounds. Meaning that the stitch
count for Rounds 3 and 4 will be in same, the same number of stitches are
worked in the white, the same number in the yellow….like working two separate fabrics
at once. However the increases are slightly different in approach.
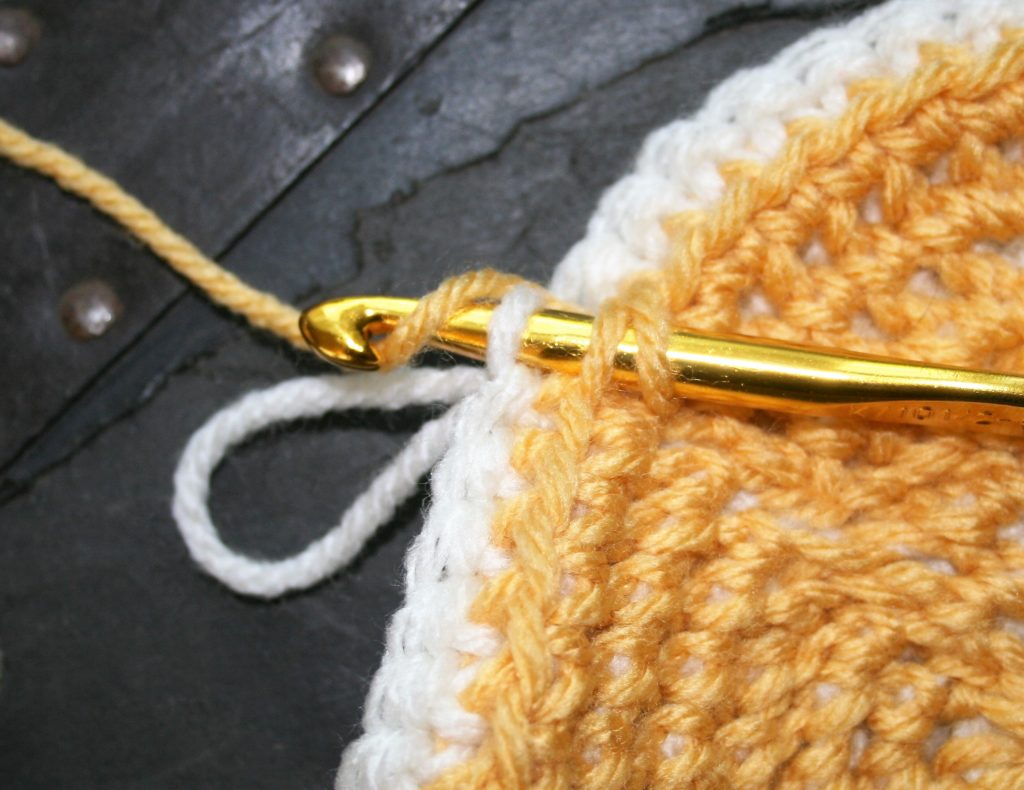
Round 3: Dropping yellow and picking up white, insert hook
through the front loop of Round 1, and the top loop closest to you in Round 2, yo,
pull through, yo, pull through 2 loops, insert hook into same location as
stitch just made and rework stitch, this is your increase. Work 2 thermal
stitches in each stitch around, turn. -16 sts
Thermal in the Round, Odd Round increase
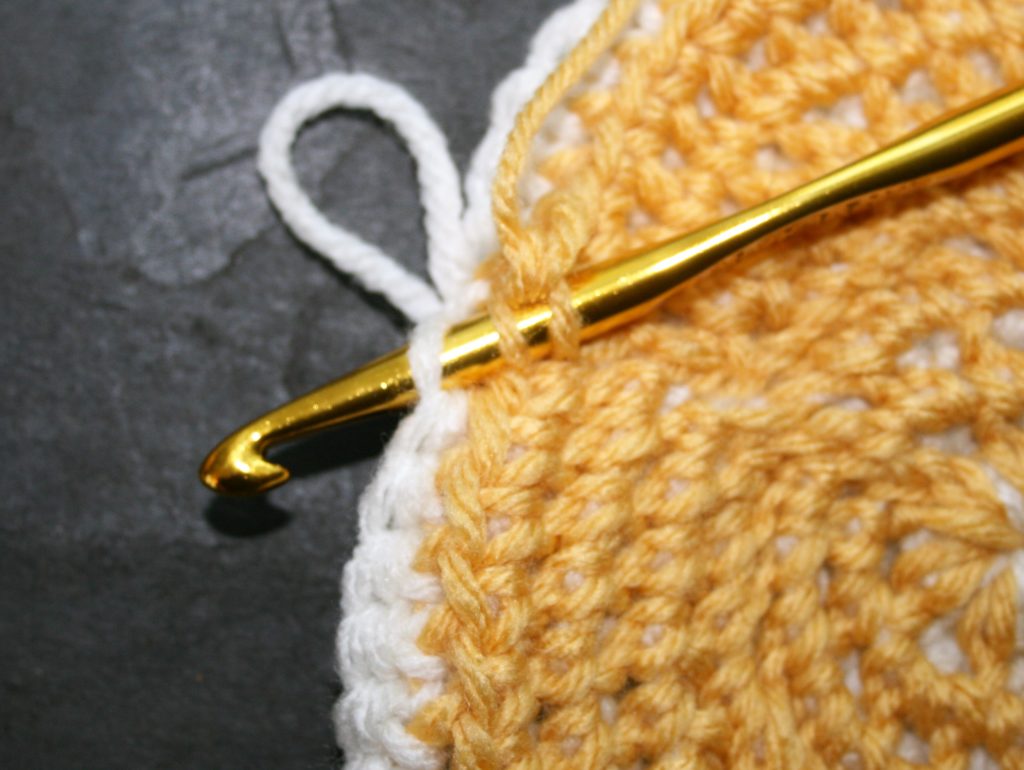
Round 4: Dropping white and picking up yellow, [insert hook
through the front loop of Round 2 and the top loop closest to you in Round 3,
yo, pull through, yo, pull through 2 loops, insert hook into the same front
loop of Round 2, and next top loop closest to you in Round 3 (note there are
already twice as many stitches in Round 3 as there are in Round 2…so there are
less front loops to work into then there are completed stitches, as a result
you need to increase Round 4 by working 2 stiches in the same Front loop, but
do not in the top loop closest to you)] repeat 7 times, turn. -16 sts
Thermal in the Round, Even Round Increase, first stitchThermal in the Round, Even Round Increase, second stitch
You work the same formula for a flat circle (you can find that here), in all the rounds going forward. I tend to think of the rounds in sets, a pair of one odd round and one even round (Round 1 & 2, Round 3 & 4, Round 5 & 6, etc.) Working all increases in Odd number rounds by working into the same front loop and the same top loop closest to you. Working all Even Round increases as the same front loop but different top loop closest to you. All non-increase stitches are worked as traditional Thermal Stitch (see tutorial for basic stitch)
This subtle difference in the increases between the rounds
is one reason the different colors helped me. I could remember that every time
I used the yellow yarn I was doing an even number Round increase.
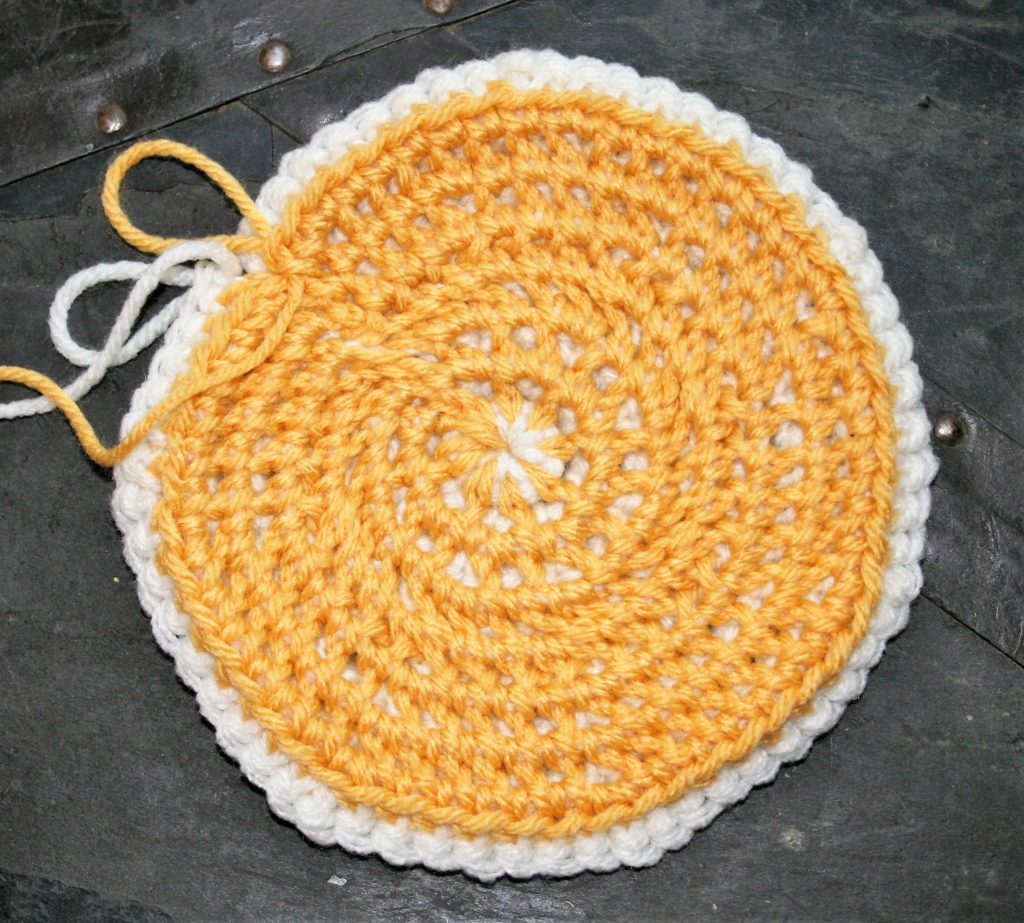
Thermal in the Round view from Odd Rounds
This process takes a bit of practice, but the resulting
fabric has a nice textured look, and the dense nature lends itself nicely to
pot holders, trivets, wash scrubby, I could even see a nice warm hat in the
future.
For some reason I am finding it difficult to write this
post.
The last couple of weeks has reminded me of something quite
fundamental within the fiber arts. When you find those that share your hobby,
you find your tribe. I have witnessed several examples of how this tribe is a force
of good in the world.
The first example was while I was at the DFW Fiber Fest.
Just as the vendor market was about to open the rumor had spread that one
vendor had not been able to set up. Apparently, the trailer that carried all of
their yarns, their samples, their entire booth set up was stolen from a hotel
parking lot.
Most vendors are small businesses, the entire family participates
in the entire experience. This is the livelihood, and obviously a loss like this
is huge set back.
So, what happened next was a true feeling of the tribe. All
the other vendors donated items for a raffle drawing, while attendees began
taking up donations. After 24 hours all organization came together for one
central raffle drawing fundraising event. In just two and a half short days
over $12,000 was raised to help offset the losses to this family.
To add to the story, apparently the thieves took approximately
a third of the yarn they had stolen and donated it to a Habitat for Humanity store.
A crochet loving volunteer thought that this donation looked odd, did a bit of
research and was able to return some of the vendors stock to them. The vendor
was able to have a small booth to sell these found yarns, in which they had a
steady show of support.
This was occurring as a fellow crochet was losing her battle
with cancer. By now in life I have been down this path before, it does not become
any easier. However there was a bit of a difference with this passing. I know
this crocheter from the Crochet Guild of America, I have spent time with her at
the annual conference, and followed her life on-line via Facebook.
After her passing, her only living relative, her brother,
reached out to her crochet community to inform them of just how much we all meant
to her. This tribe was her family, and the simple act of sharing our love for
crochet had created an environment in her life that was the world to her. Her
tribe was important to her enough that they become a part of her everyday life.
There is a void in the crochet community.
There are other instances that have come together this week
to remind me that there is so much more we have in common than we have
different. Crochet just happens to be one of those tribes that we can easily
recognize, we know that if someone plays with yarn we can find a common ground.
I still do not understand why I have had such difficulty
putting any of this to words, maybe it is because my tribe is too close to my
heart.
When I first created this design, I was planning on celebrating crochet during the National Crochet Month (every March), but now it has grown into a much longer celebration time….If you are visiting this site from the Yarnover Truck as part of the San Diego Yarn Crawl…Thank you! Please enjoy “my crochet story” and your free pattern.
I met Underground Crafter through the Crochet Guild of
America, actually I have my career in crochet because of CGOA. I never thought
that crochet could take me to the places it has.
I will admit that when I first learned about CGOA I didn’t
really know what to expect. I found an ad for it in a magazine, and figured I
would give membership a try.
I soon learned of the Masters program, then completed the Advanced Stitches &Techniques Program, which consists of 48 swatches and 13 question. Some of the swatches were things I had never heard of before, like foundation single crochet, so I learned some new skills and have my work reviewed. I remember that I was nervous, excited and a bit terrified to have my work reviewed. Fortunately, and eventually, I passed the program.
Later that year I was invited to the CGOA annual conference
to be recognized for my accomplishment. I was a bit reluctant….after all it was
a crochet conference….so people just sat around and crocheted?…But with
encouragement from family and friends I went, and I was hooked!
Where this one event took me
I met so many incredible people from so many walks of life.
It was an experience that changed my life, seriously. It was at this conference
that I sold my first design, and began my career as a crochet designer, that
lead to more teaching, that lead to volunteer work in crochet…that lead to
being a reviewer and a writer for the Masters Program, that lead to a seat on
the Board of Directors, and finally my title as President. It is hard to
believe that my career started only 7 years ago, from a membership that I took
a chance on a decade ago.
Even if I never took the chance at conference and started a
new path in my life, I was hooked as a supporter of CGOA for the simple fact
that it is the only organization that solely supports crochet. It is a unified
voice of crocheters in the craft industry, a central point for the history of
all things crochet, a source that encourages and expands the skills and
knowledge of crochet. It does all of this numerous volunteers coordinating over
twenty committees. I am constantly impressed with the ideas and energy of those
that love crochet.
I would continue to support CGOA simply because it supports
crochet.
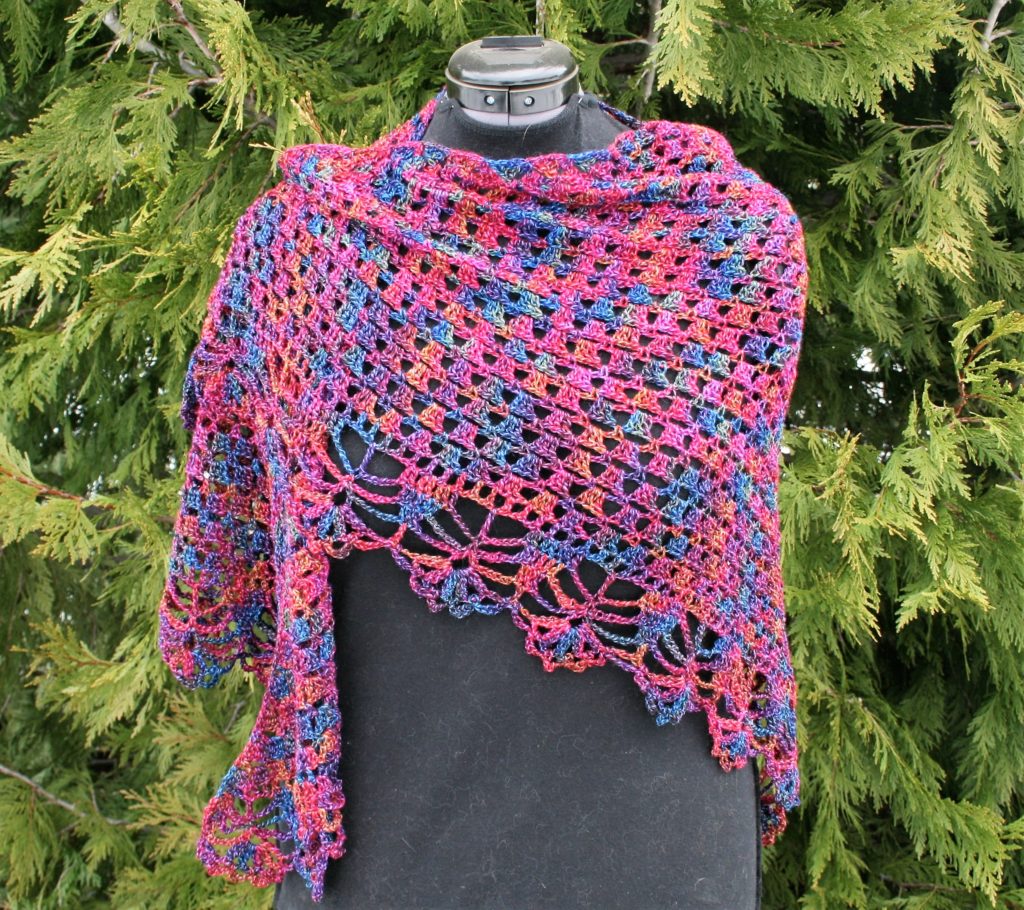
In addition, please enjoy my free pattern, Quiet Night Wrap. I designed this pattern by candle light during the winter storms and my journey back to the 1800’s just a few weeks ago (find that story here). I hope you have enjoyed a month long celebration of crochet, personally I think I will try and celebrate it every day.
Quiet Nights Wrap
Quiet Nights Wrapby:
Linda Dean
Created in the dark during a winter storm, this simple 2 row repeat worked from the center back outward, will be a go to favorite for a triangle shawl. The ending edge really makes it a show stopper. This will be the wrap that everyone wants you to make for them.
Treble Crochet Two
Together (tr2tog): YO
twice, insert hook into stitch, YO, pull up a loop, (YO, pull through 2 loops)
twice, YO twice, insert hook into stitch, YO, pull up a loop, (YO, pull through
2 loops) twice, YO, pull through 3 loops.
The Pattern
Row 1: Ch 2, (sc, [ch 3, sc] 3 times) all in 2nd ch from hook, turn. -4 sc, (3) ch-3 sps
Row 2: Ch 4 (counts as dc + 1 ch now and throughout), 3 dc in next ch-3 sp, ch 1, (3 dc, ch 1, 3 dc) in next ch-3 sp (insert removable stitch marker in ch-1 sp to mark center of shawl), ch 1, 3 dc in next ch-3 sp, ch 1, dc in last sc, turn. 14 dc
Row 3: Ch 1,(sc, ch 3, sc) in same st, ch 3, sk ch-1 sp, sk 3dc, sc in next ch-1 sp, [ch 3, sk 3 dc, sc in ch-1 sp] across to center of shawl, ch 3, (sc, ch 3, sc) in center ch-1 sp, [ch 3, sk 3 dc, sc in next ch-1 sp] across to last ch- 1 sp, ch 3, sk 3 dc, sk ch-1 sp, (sc, ch 3, sc) in last dc, turn. -7 ch-3 sps
Row 4: Ch
4, 3 dc in next ch-3 sp, [ch 1, 3 dc in next ch-3 sp] rep across to center of
shawl, ch 1, (3 dc, ch 1, 3 dc) in center ch-3 sp, [ch 1, 3 dc in next ch-3 sp]
across, ch 1, dc in last sc, turn. -26 dc
Row 51: Ch 4, dc in same sp, [ch
1, sk 1, dc in next st] across to center of shawl, ch 1, (dc, ch 1, dc) in
center of shawl, ch 1, dc in next st, [ch 1, sk 1, dc in next st] across to ast
st, ch 1, (dc, ch 1, dc) in last st, turn.
Row 52: Ch 3, dc in next 4 sts, [ch 5, sk 2 ch-1 sps, tr in next ch-1 sp, ch 5, sk next 2 dc, dc in next dc, dc in next 6 sts] 12 times, ch 5, sk 2 ch-1 sps, tr in next ch-1 sp, ch 5, sk next 2 ch-1 sps, 3 dc in next ch-1sp (center of shawl), [ch 5, sk next 2 ch-1 sps, tr in next ch-1 sp, ch 5, sk next 2 dc, dc in next dc, dc in next 6 sts ] 12 times, ch 5, sk next 2 ch-1 sps, tr in next ch-1 sps, ch 5, sk next 2 dc, dc in next dc, dc in last 4 sts, turn.
Row 53: Ch 3, dc in next 3 sts, [ch 7, sc in tr, ch 7, sk ch-sp and next dc, dc in next st, dc in next 4 sts] 12 times, ch 7, sc in tr, ch 7, dc in next dc, (dc, ch 1, dc) in next dc, dc in next dc, [ch 7, sc in tr, ch 7, sk next ch-sp and dc, dc in next dc, dc in next 4 sts] 12 times, ch 7, sc in tr, ch 7, sk ch-sp and next dc, dc in next dc, dc in last 3 sts, turn.
Row 54: Ch 3, dc in next 2 sts, [ch 7 (sc, ch 5, sc) in sc, ch 7, sk ch-sp and next dc, dc in next 3 sts] 12 times, ch 7, (sc, ch 5, sc) in sc, ch 7, sk ch-sp, dc in next 2 sts, (dc, ch 1, dc) in ch-1 sp, dc in next 2 sts, [ch 7, (sc, ch 5, sc) in sc, ch 7, sk ch-sp and next dc, dc in next 3 dc sts] 12 times, ch 7, (sc, ch 5, sc) in sc, ch 7, sk ch-sp and next dc, dc in last 3 sts, turn.
Almost done….
Row 55: Ch 3, dc in next st, [ch 3
(tr2tog, ch 3) 4 times in ch-5 sp, tr2tog in same sp, ch 3, sk ch-sp and next
dc, dc in next st] 12 times, ch 3 (tr2tog, ch 3) 4 times in ch-5 sp, tr2tog in
same sp, ch 3, sk ch-sp, dc in next 3 dc, (dc, ch 1, dc) in ch-1 sp, dc in next
3 dc, [ch 3, ch 3 (tr2tog, ch 3) 4 times in ch-5 sp, tr2tog in same sp, ch 3,
sk ch-sp and next dc, dc in next st] 12 times, ch 3 (tr2tog, ch 3) 4 times in
ch-5 sp, tr2tog in same sp, ch 3, sk ch-sp and next dc, dc in last 2 sts, turn.
Row 56: Ch 1, sc in same st, ch 3,
sc in next st, {[ch 5, sc in next ch-3 sp] 5 times, sc in next ch-3 sp} 12
times, [ch5, sc in next ch-3 sp] 5 times, ch 5, (sc, ch 5, sc) in ch-1 sp, ch
5, sc in ch-5 sp, {[ch 5, sc in next ch-3 sp] 5 times, sc in next ch-3 sp} 12
times, [ch 5, sc in next ch-3 sp] 5 times, ch 5, sc in next dc, ch 3, sc in
next dc. Fasten off.
Weave in ends, block.
A Bonus
Thank you for participating in the San Diego Yarn Crawl…as an added bonus, you can download a PDF of this pattern here.