Mélange Blanket CAL- Yesteryear Rose

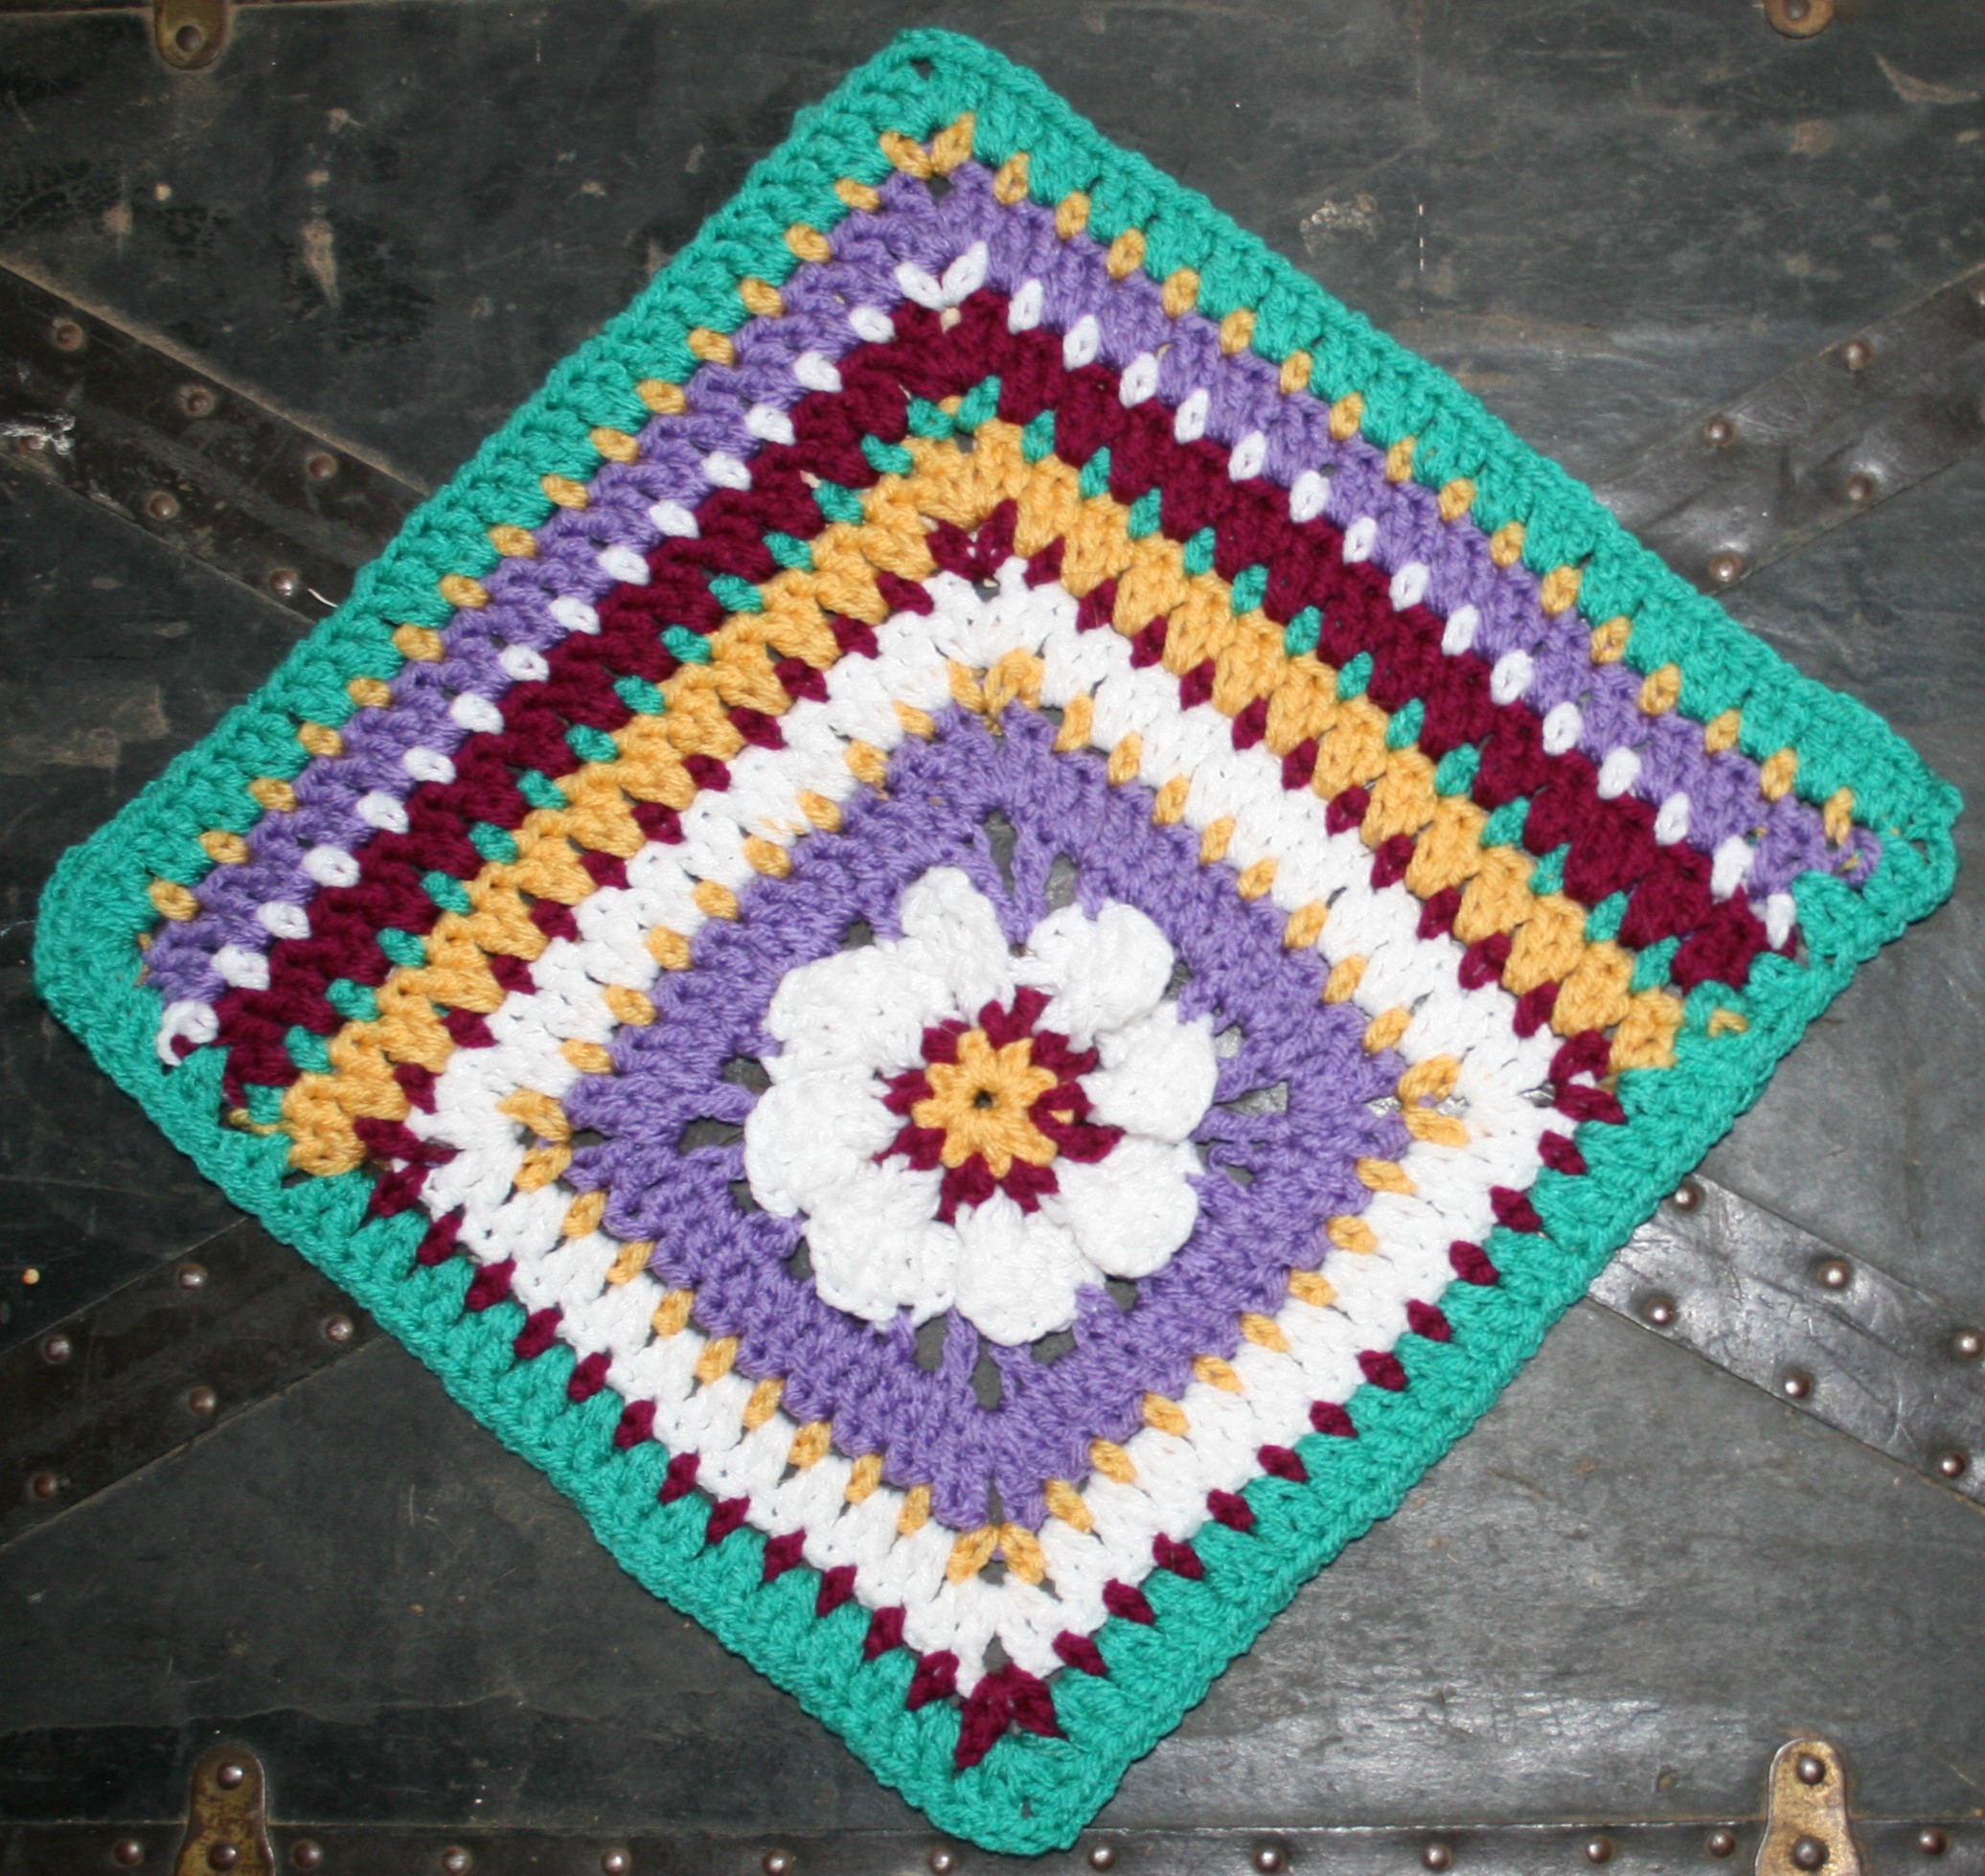
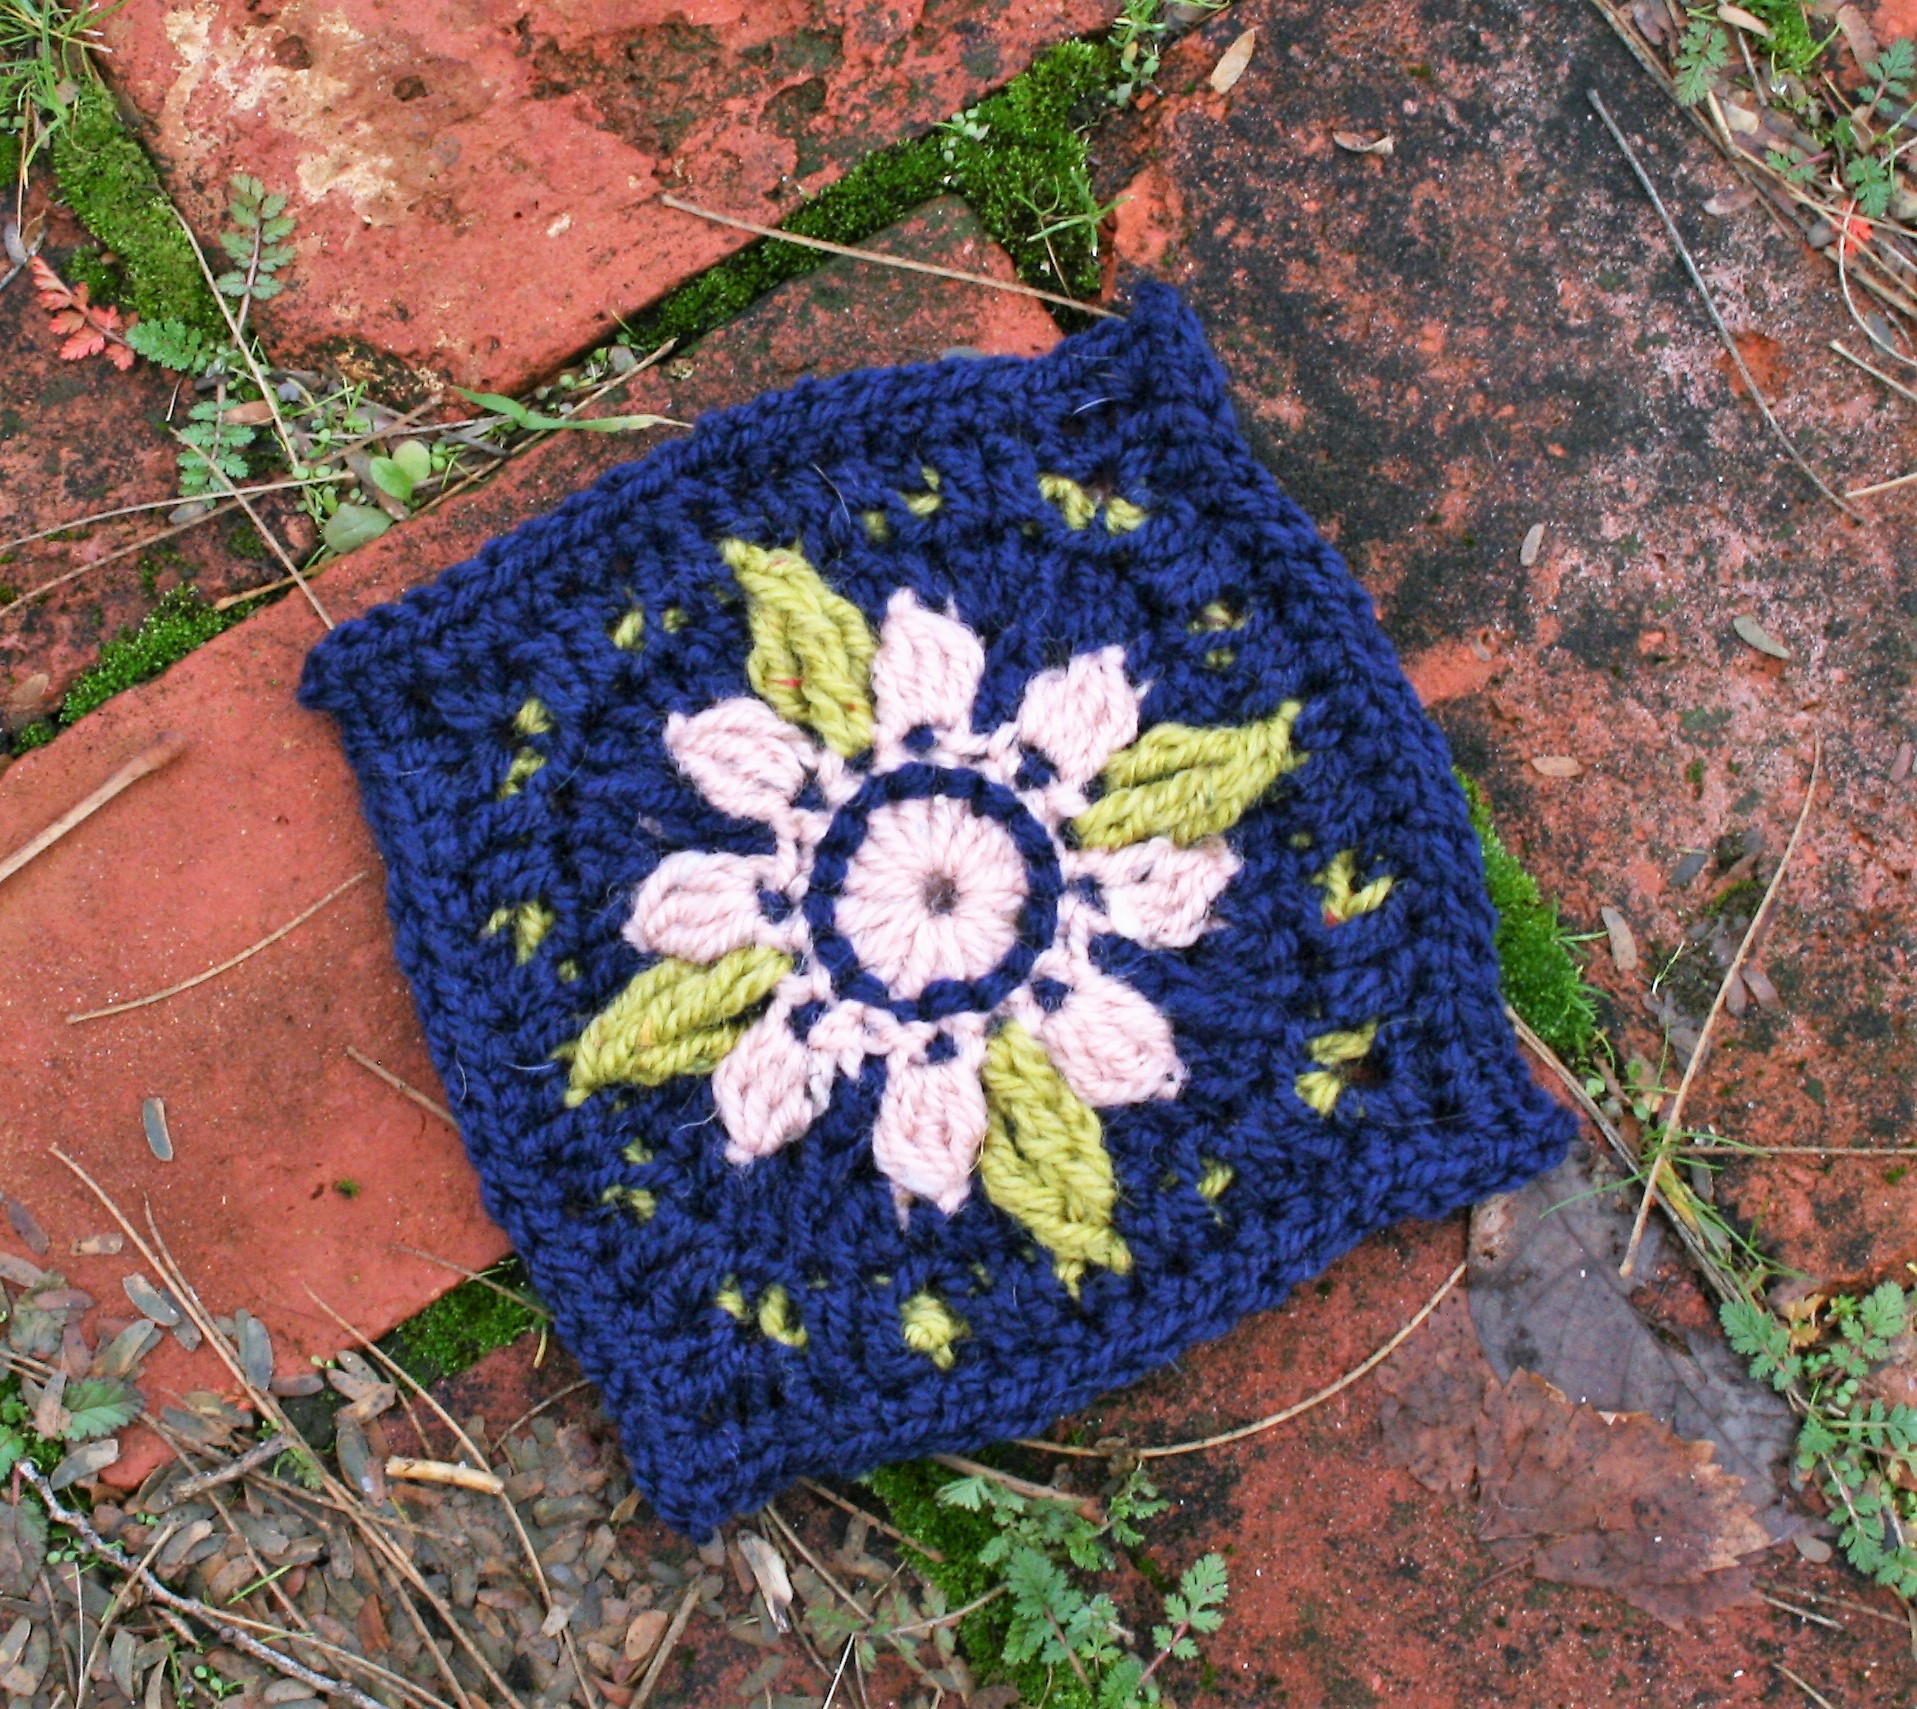
I am so excited to start the year featuring my square design, Yesteryear Rose, for the Mélange Blanket and Underground Crafter Mystery Crochet-A-Long! It is always fun to join a Blanket CAL!

The Mélange Blanket Mystery Crochet Along is a great project to learn new skills and check out the work of 48 different designers…while being able to win prizes. There is a new 6″ block releases every week, and our host, Underground Crafter keeps everything flowing smoothly. Check out all the details here: Underground Crafter

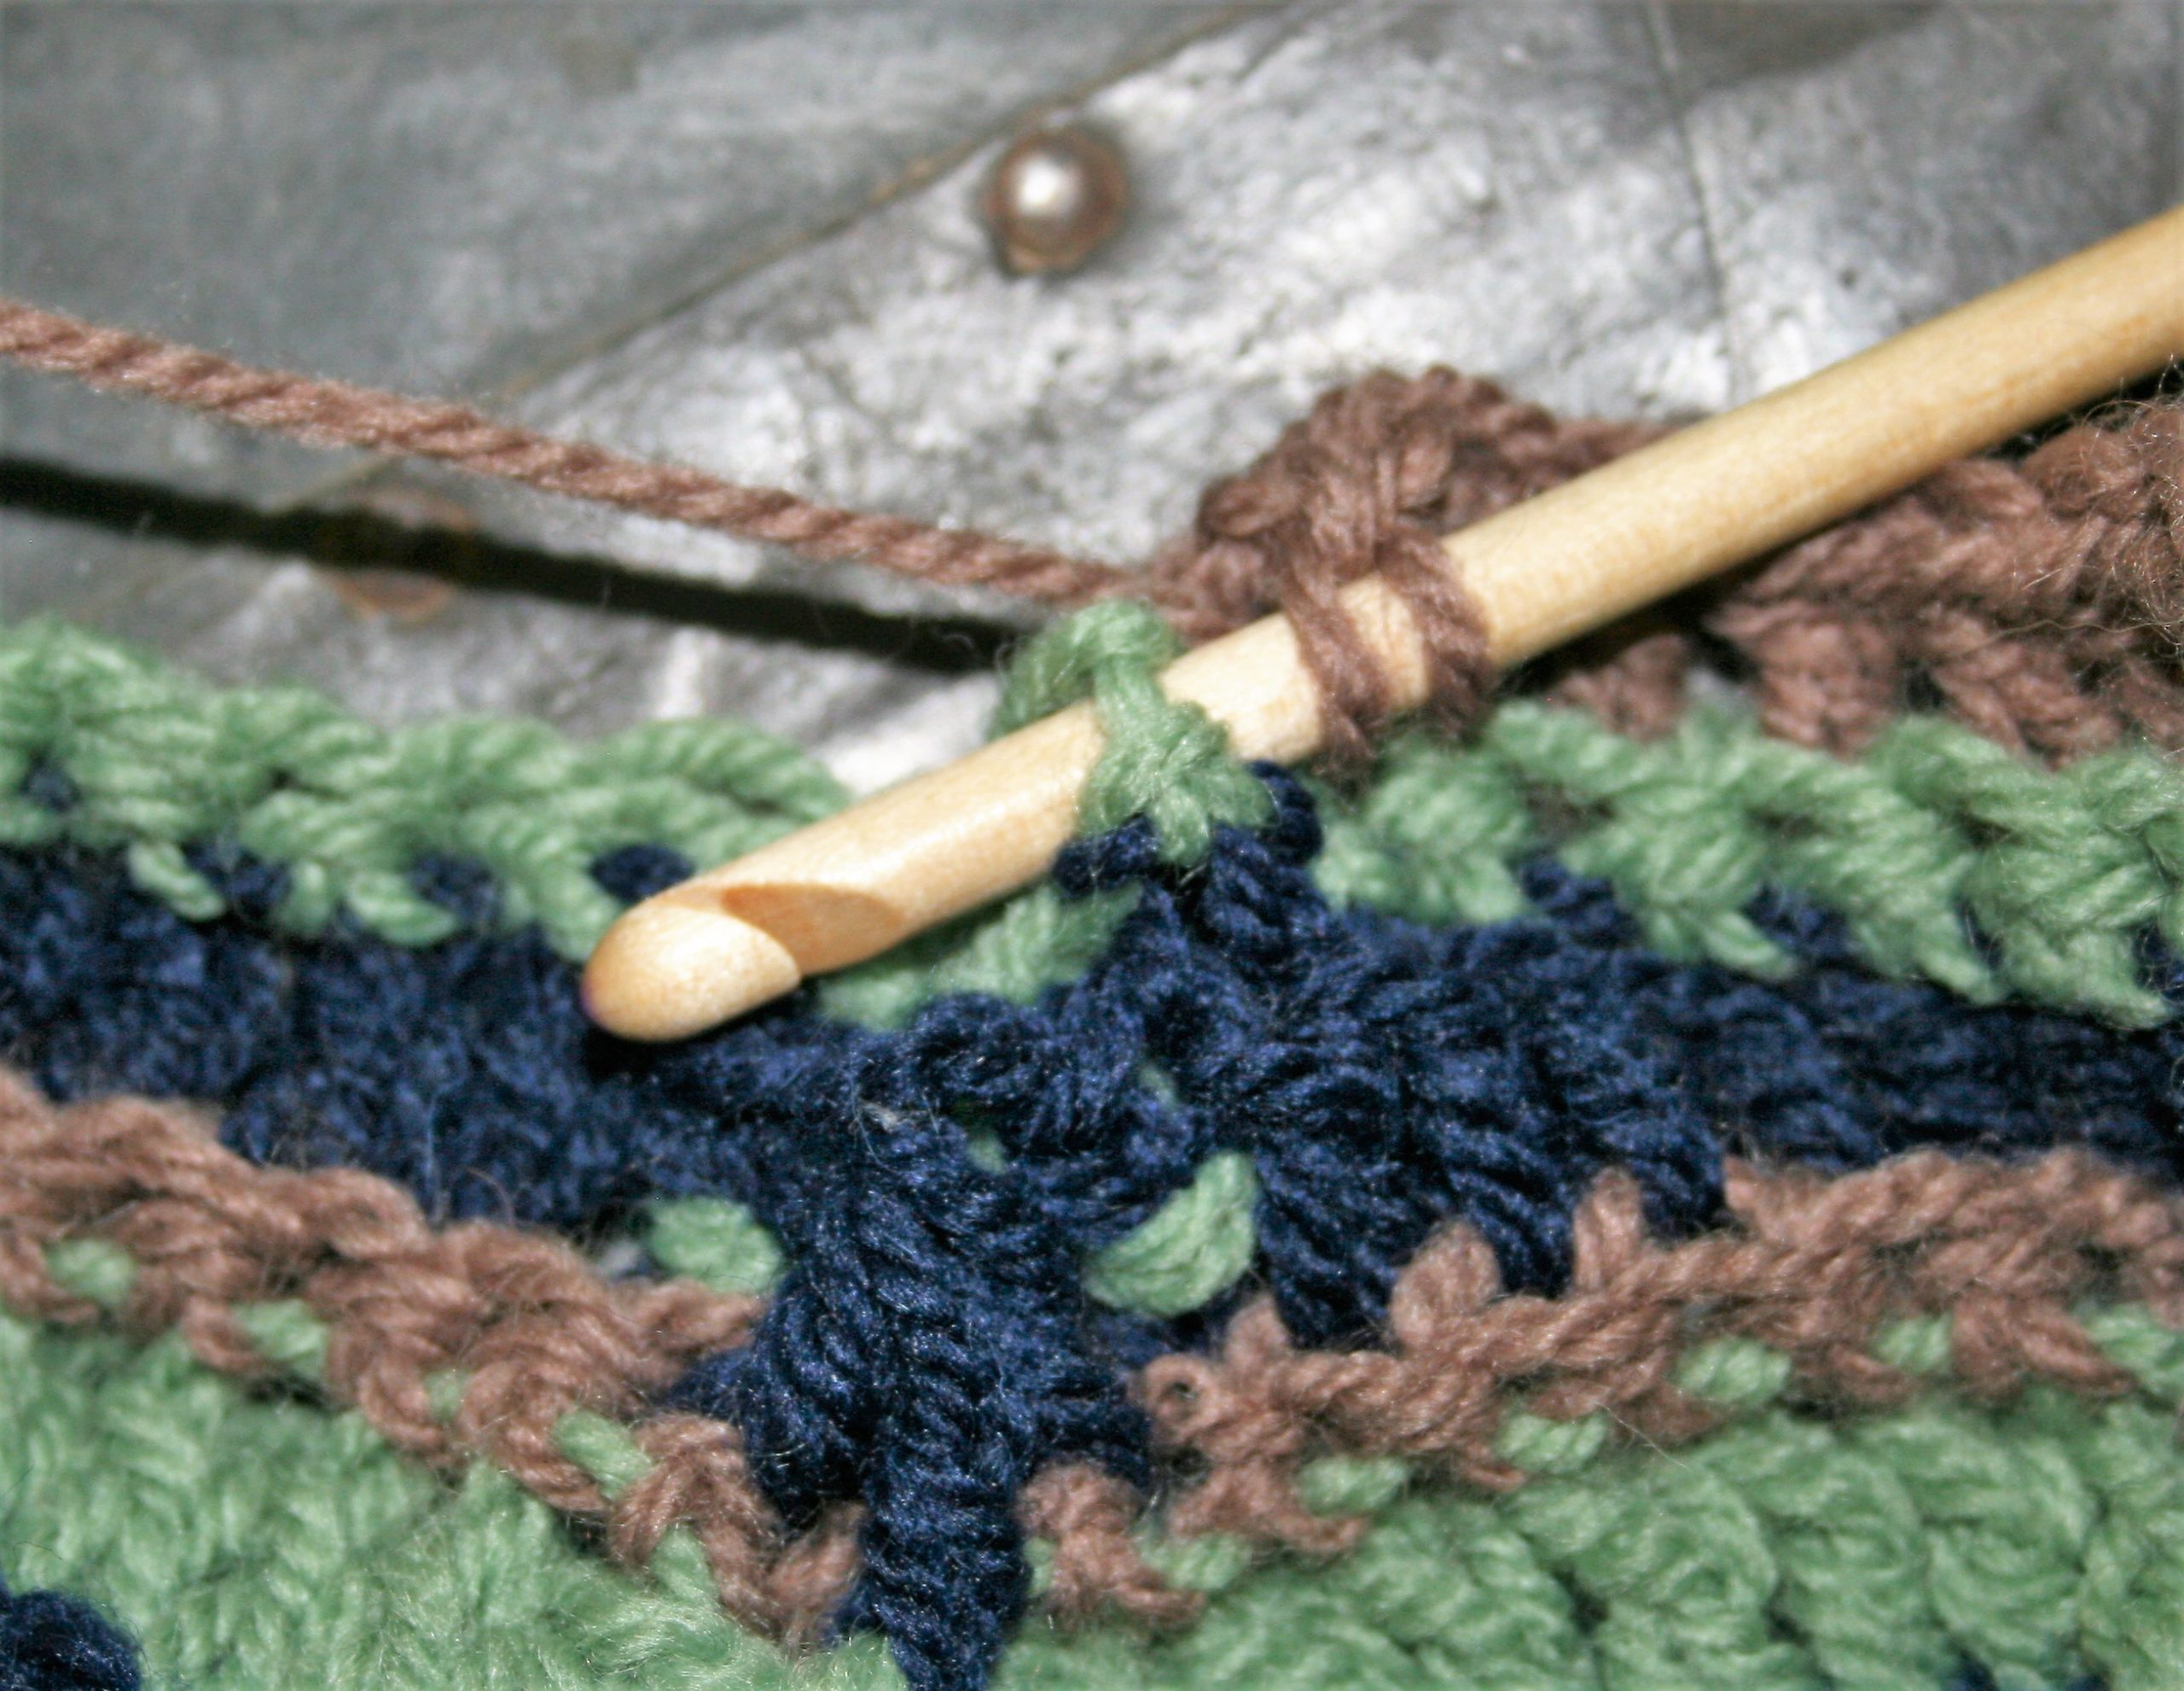
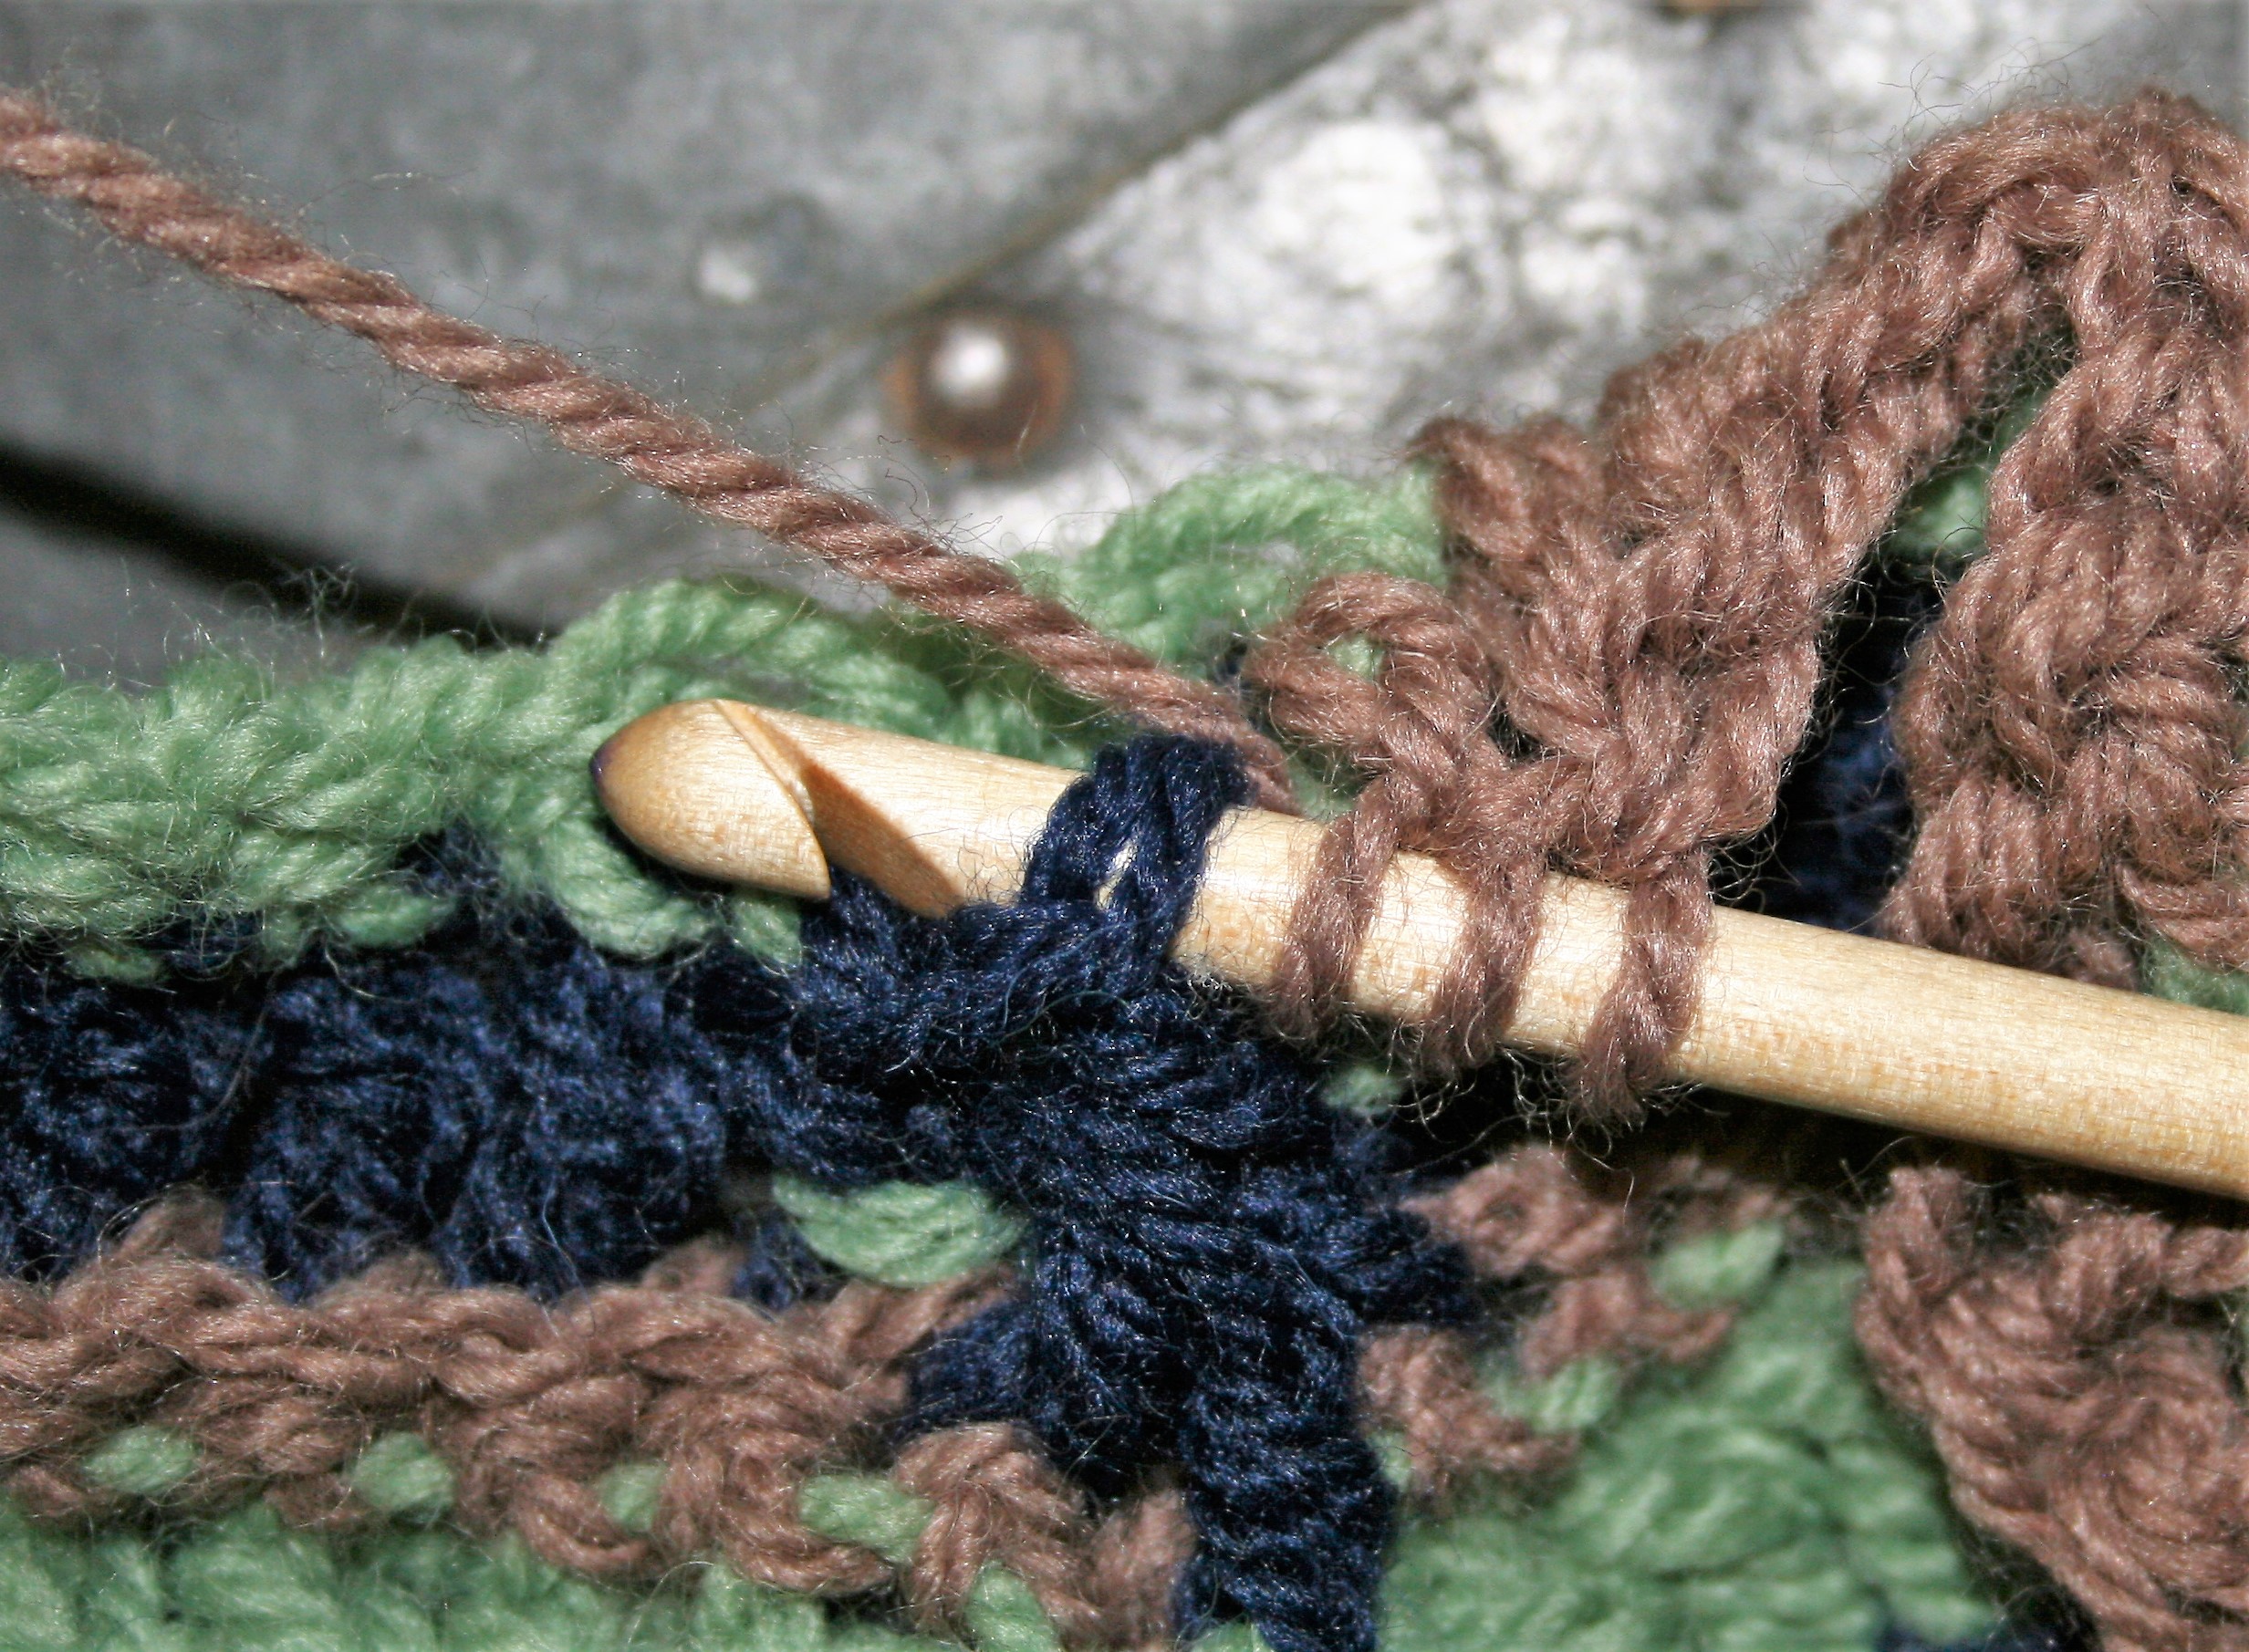
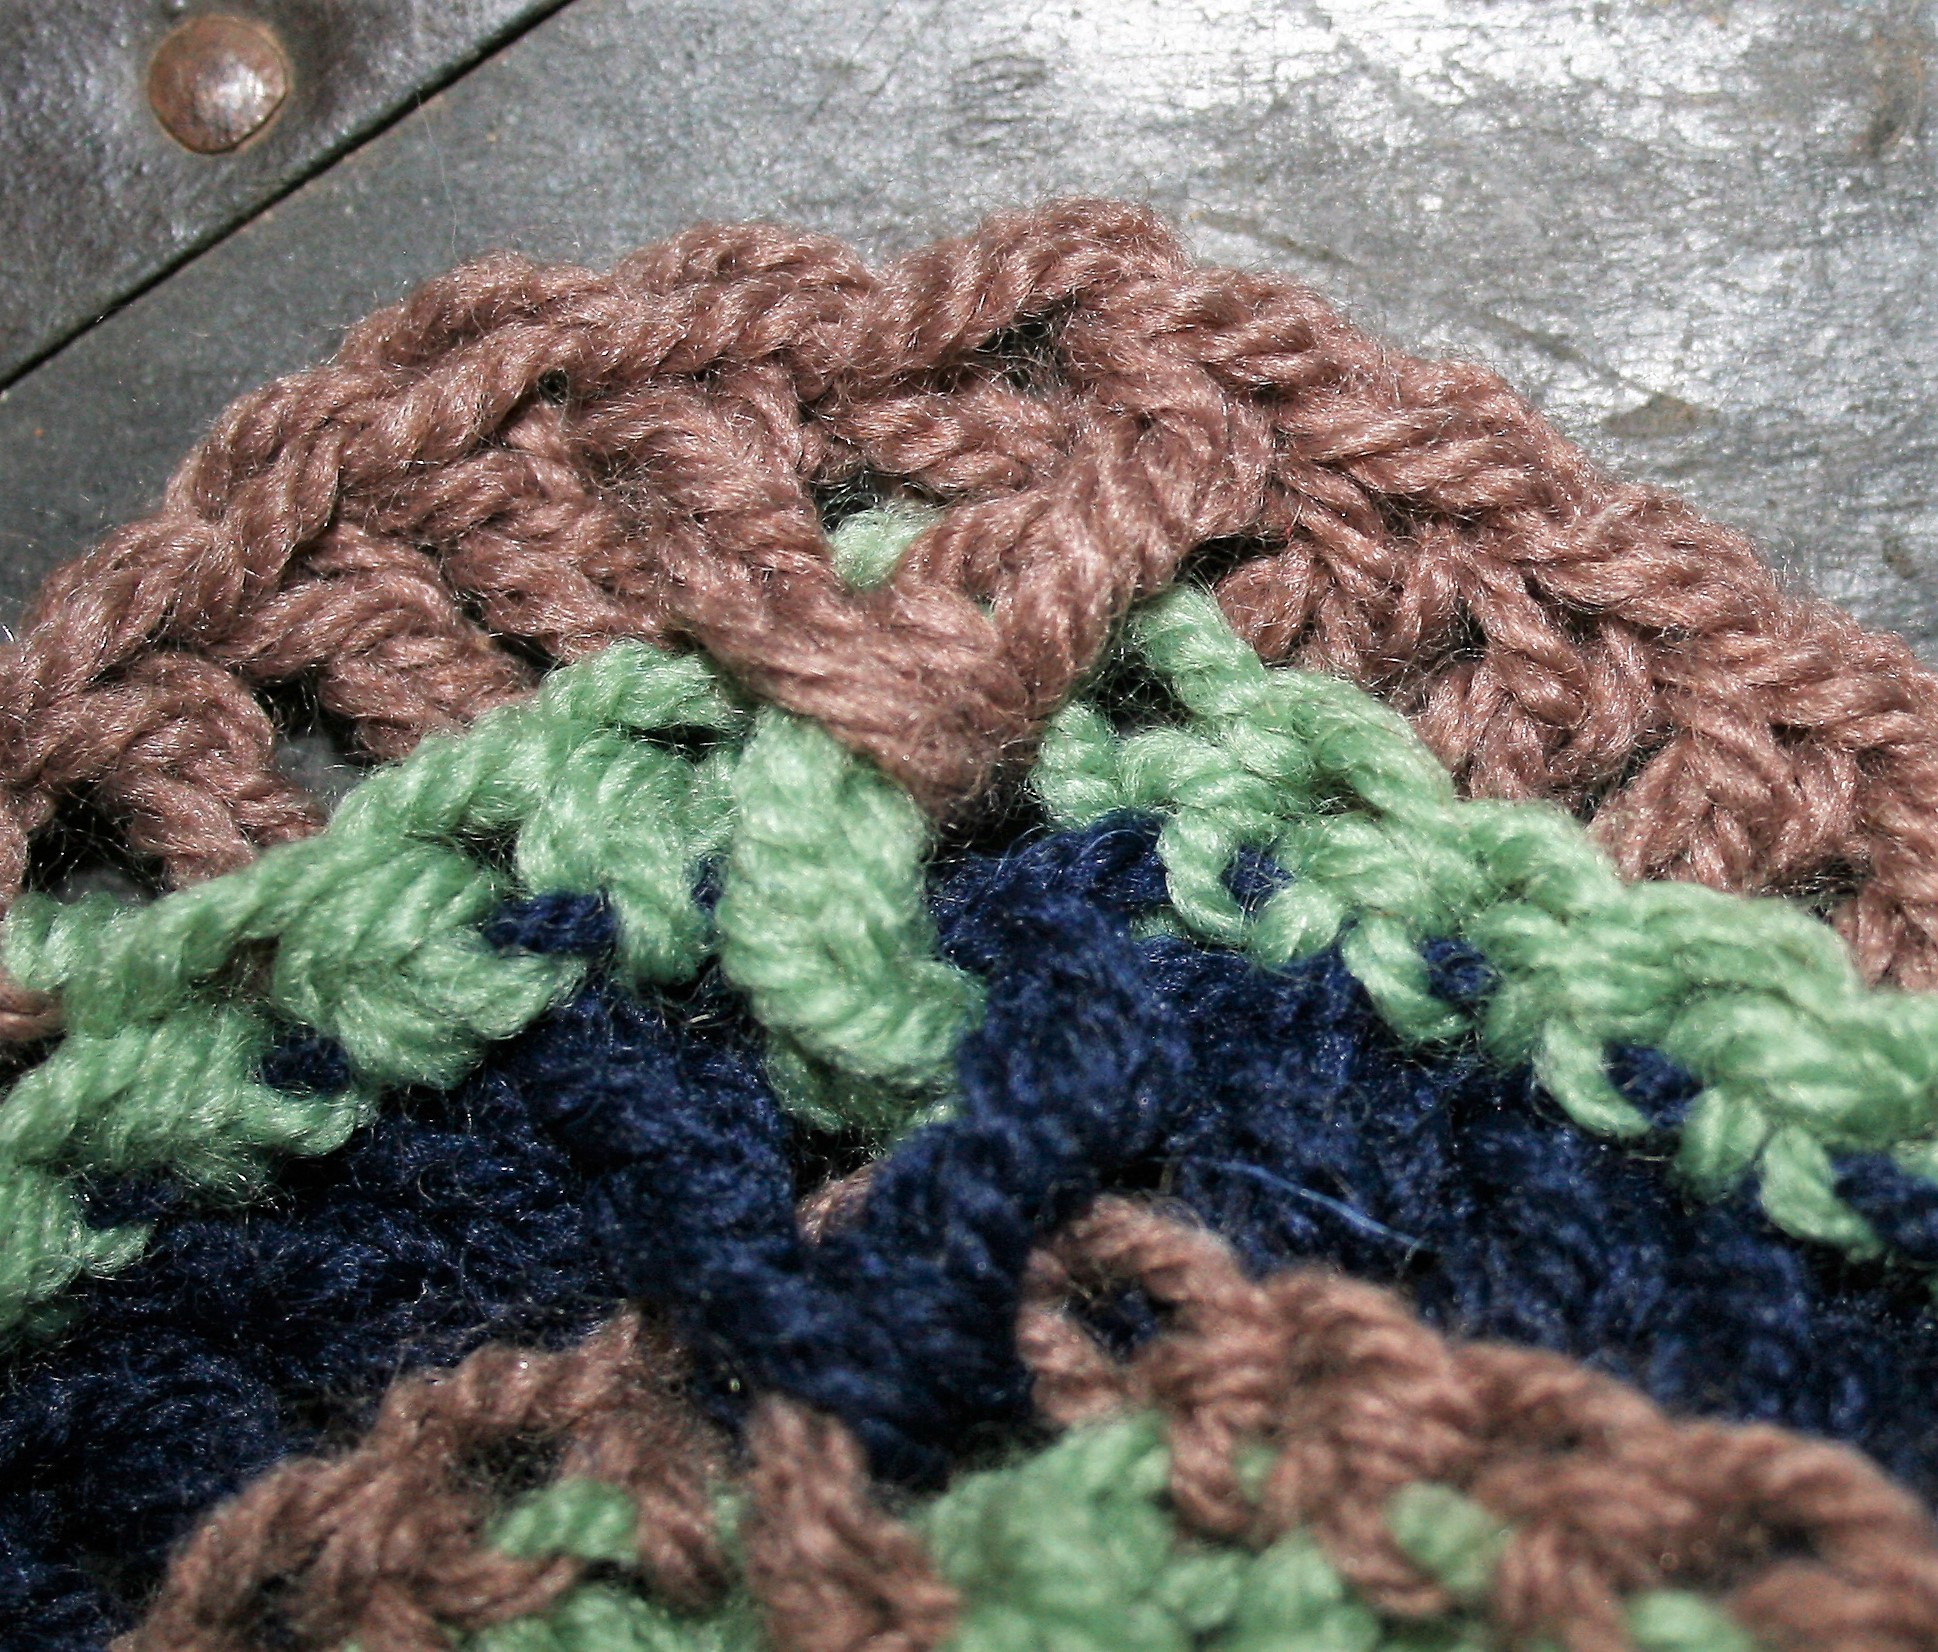
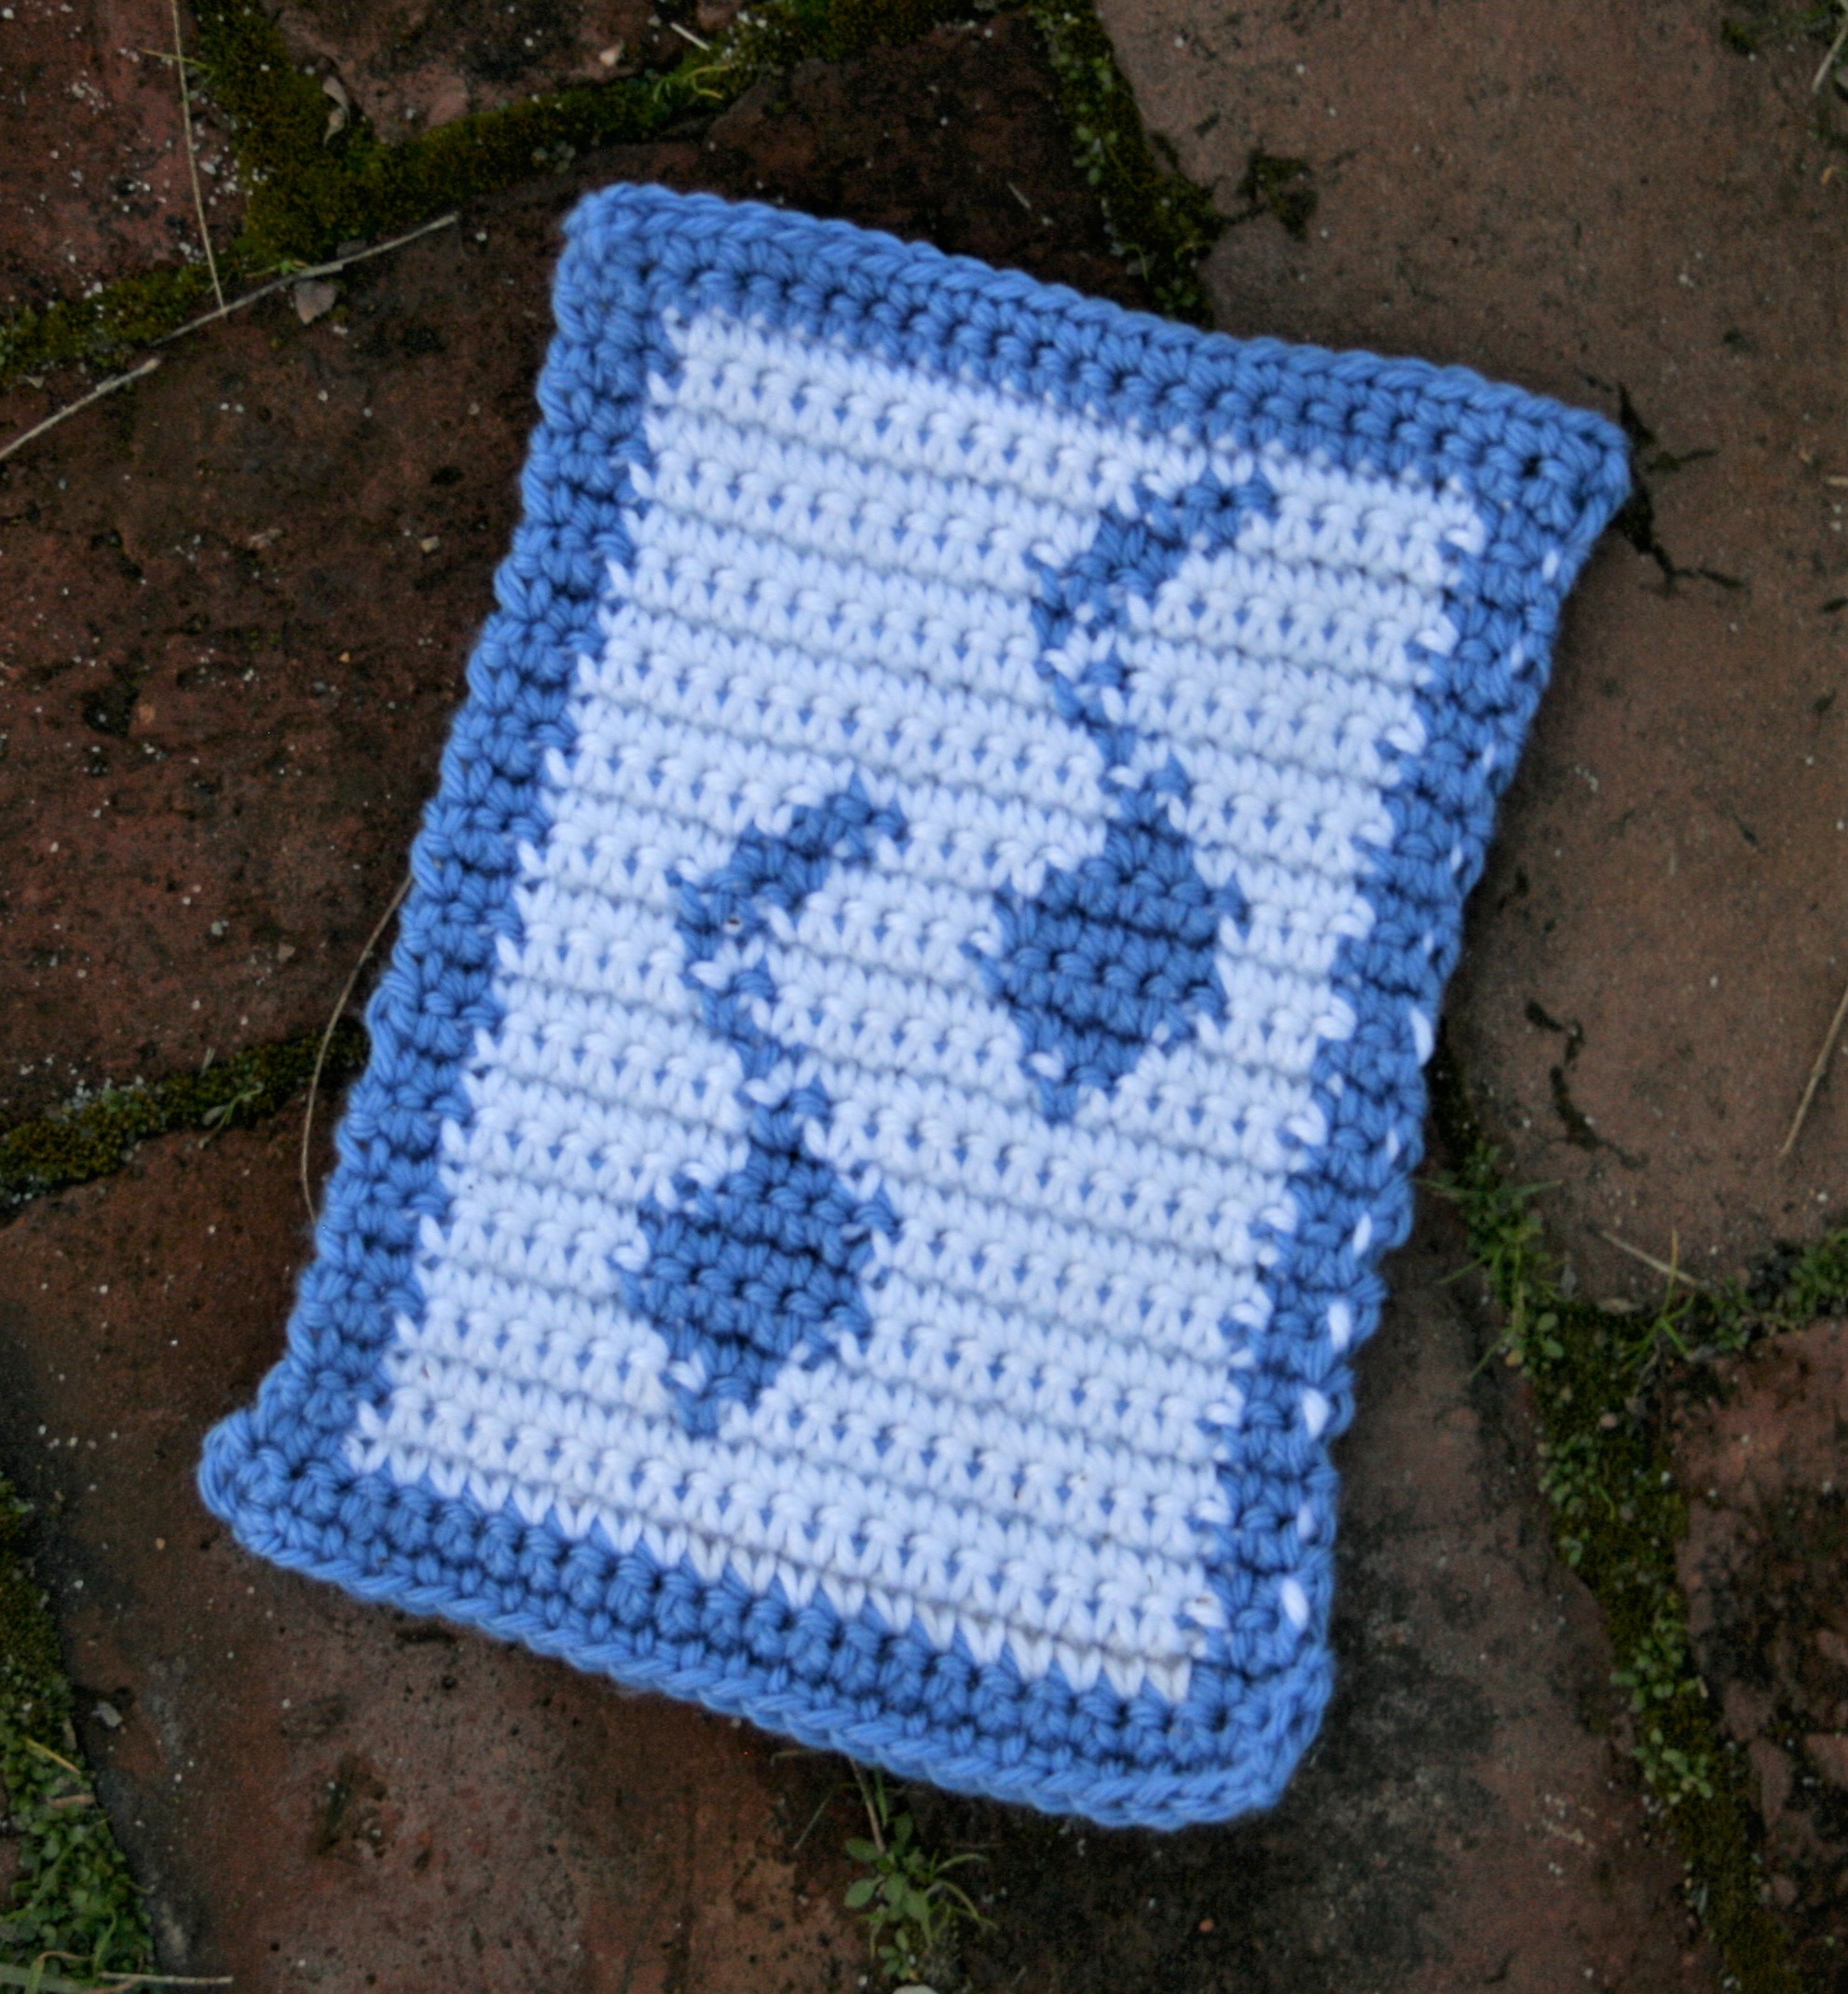
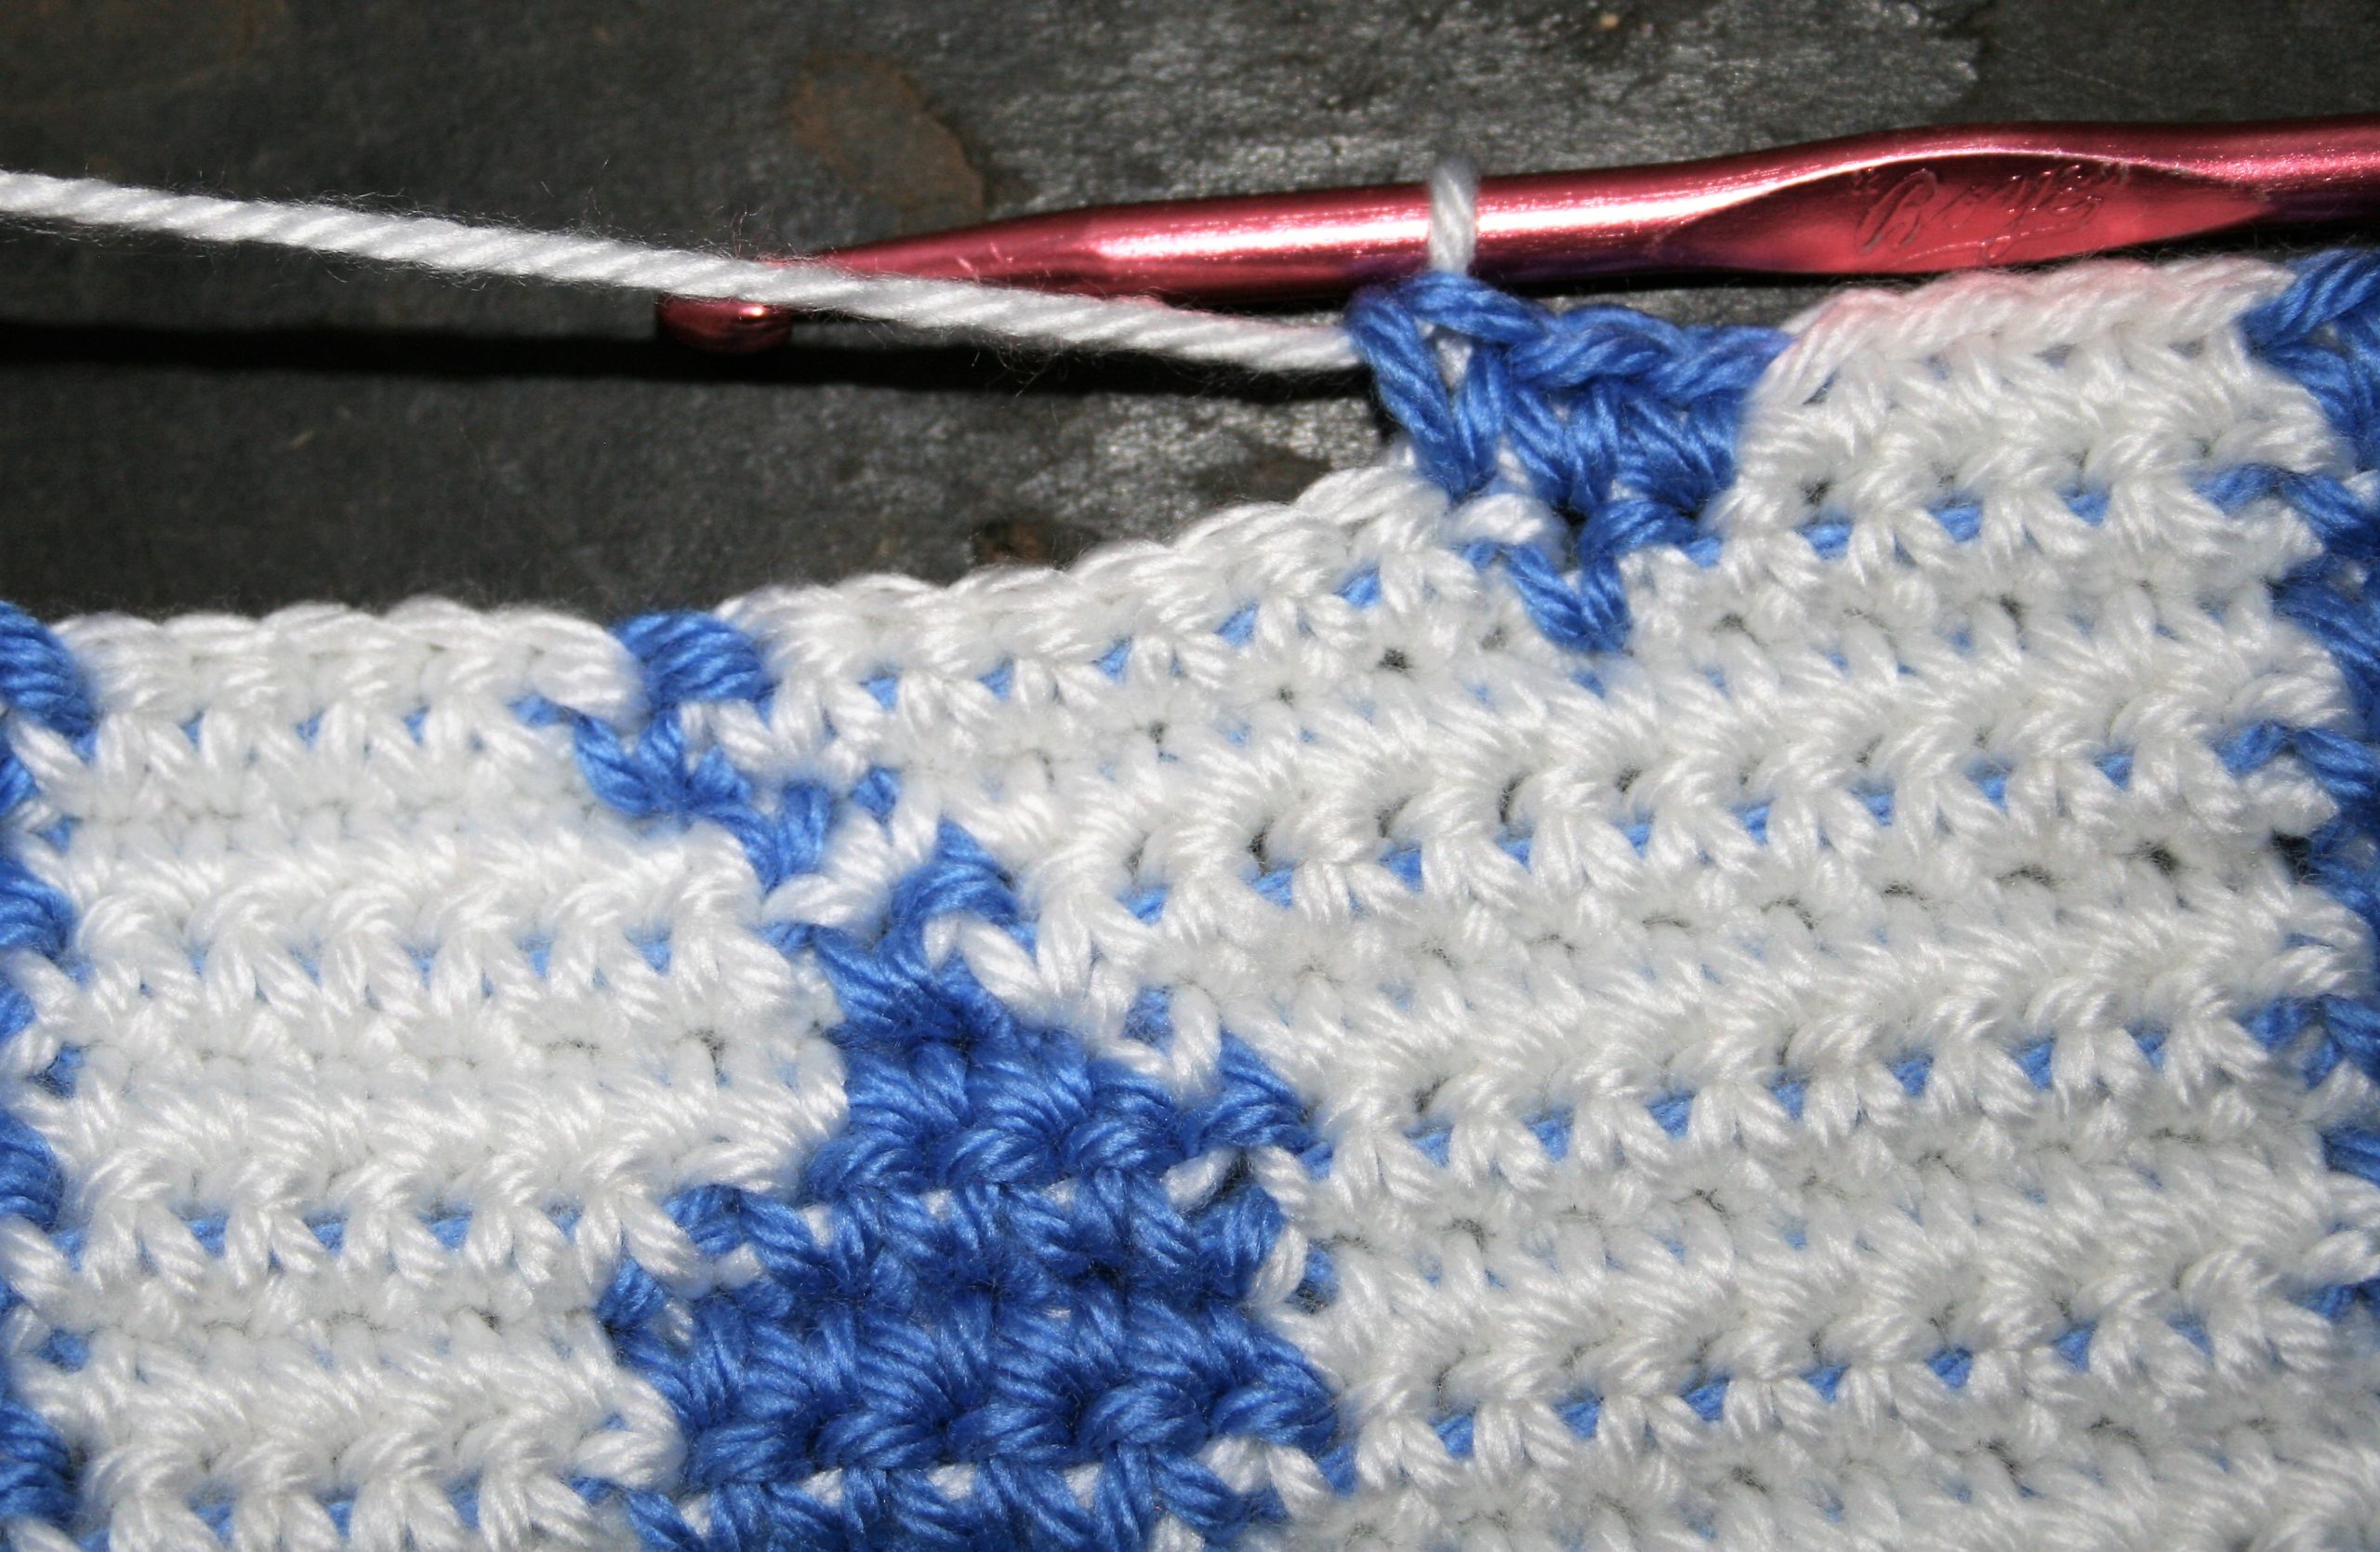
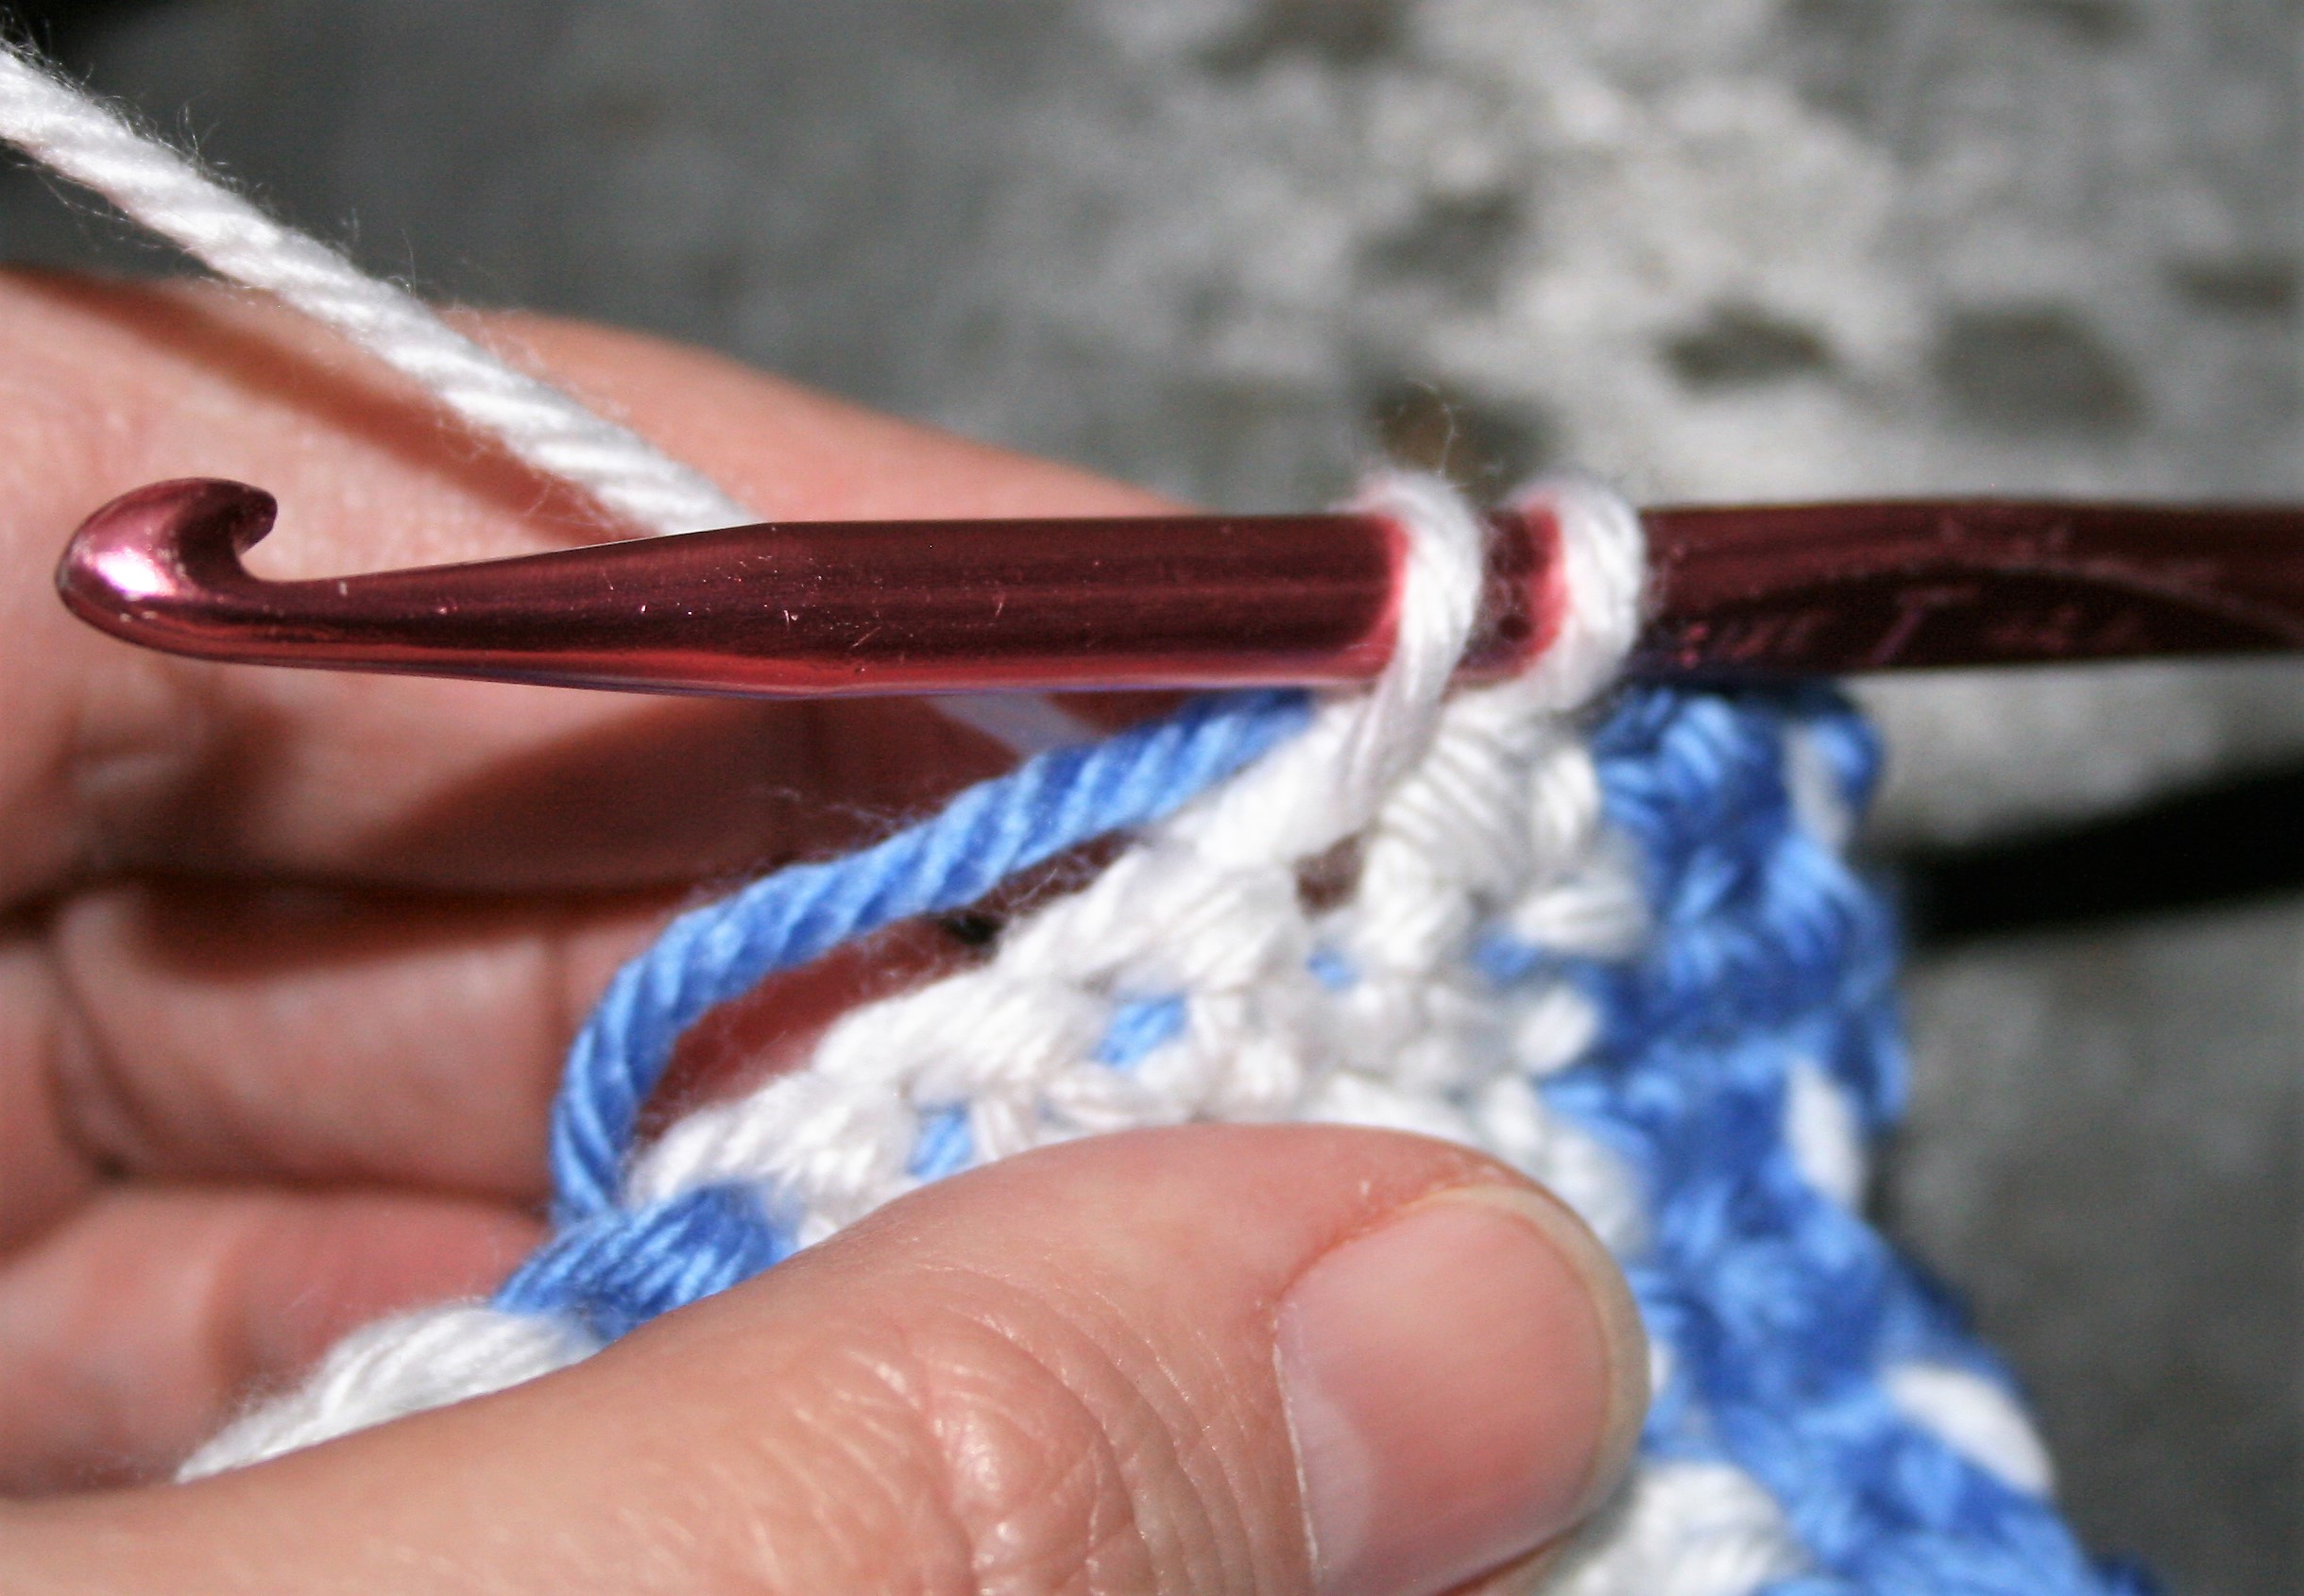
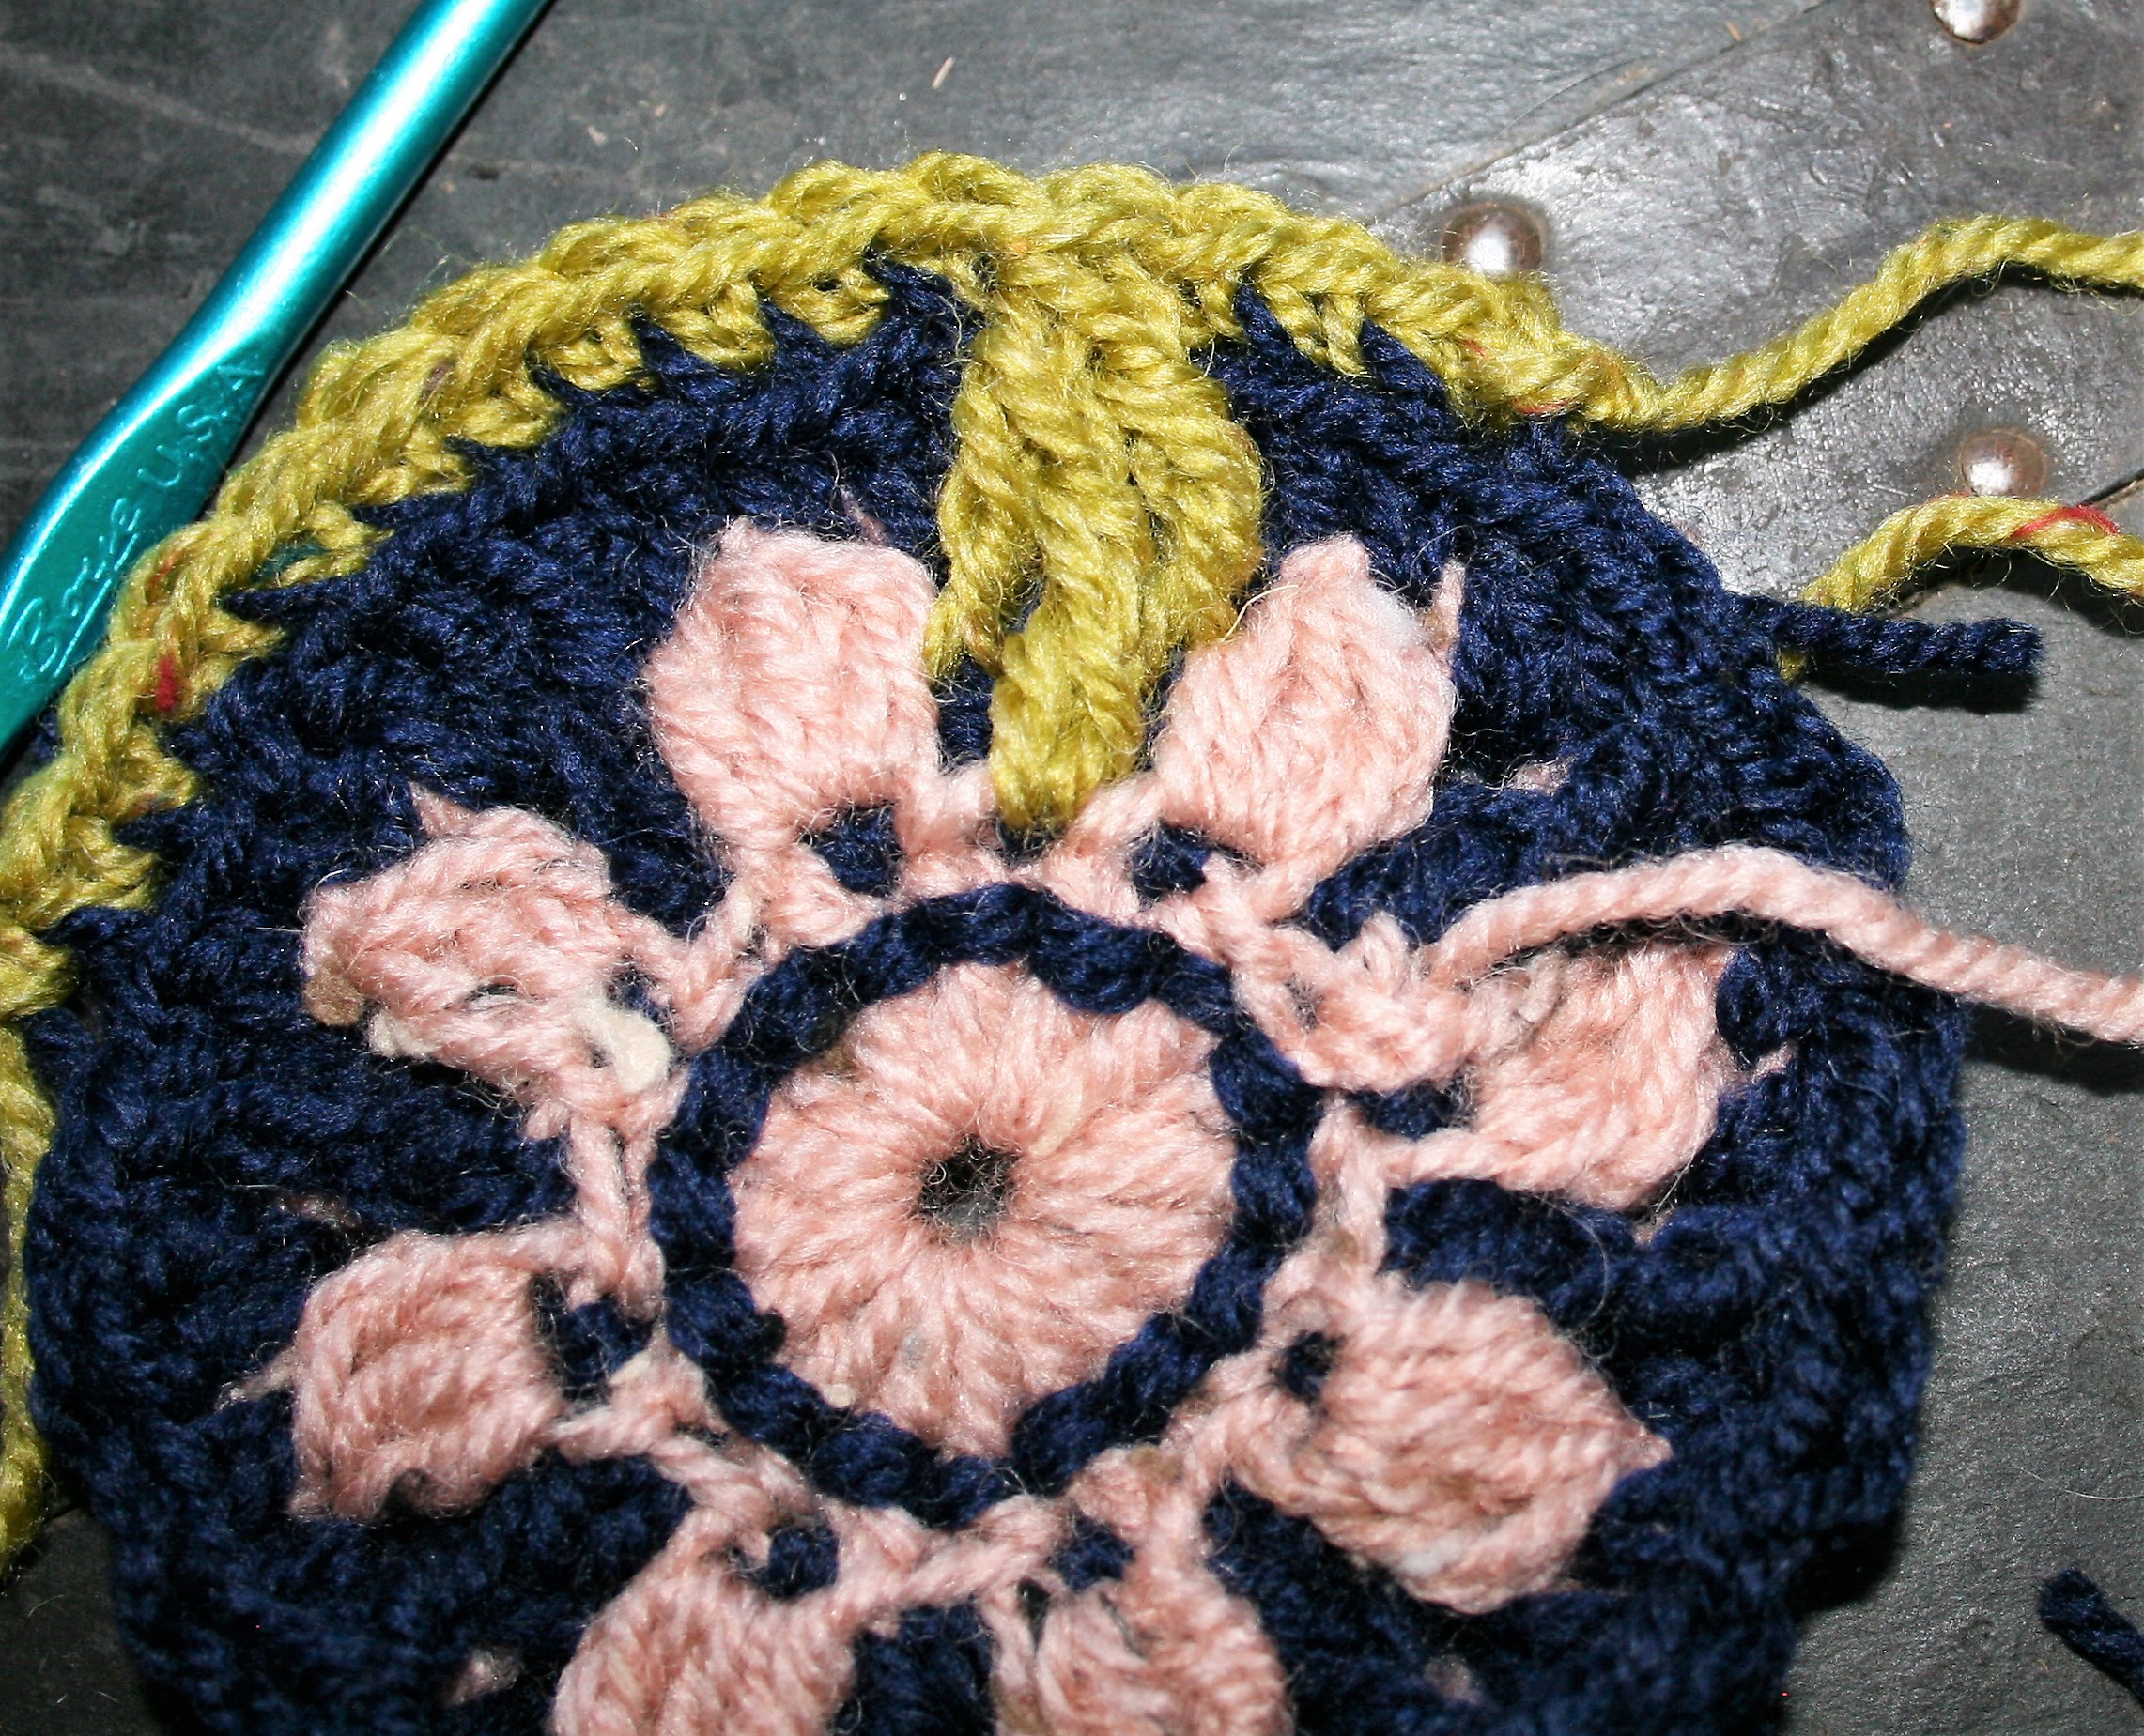
My contributing 6″ block came along this year due to a textured project I was working on this fall. I was to create a textured design in the round. This led to playing with post stitches, and marrying in some techniques from overlay crochet. By working in the back loops, and leaving the front loops unworked gave new ways to explore playing with colors. So some clusters and tall stitches help me to make up this floral design.

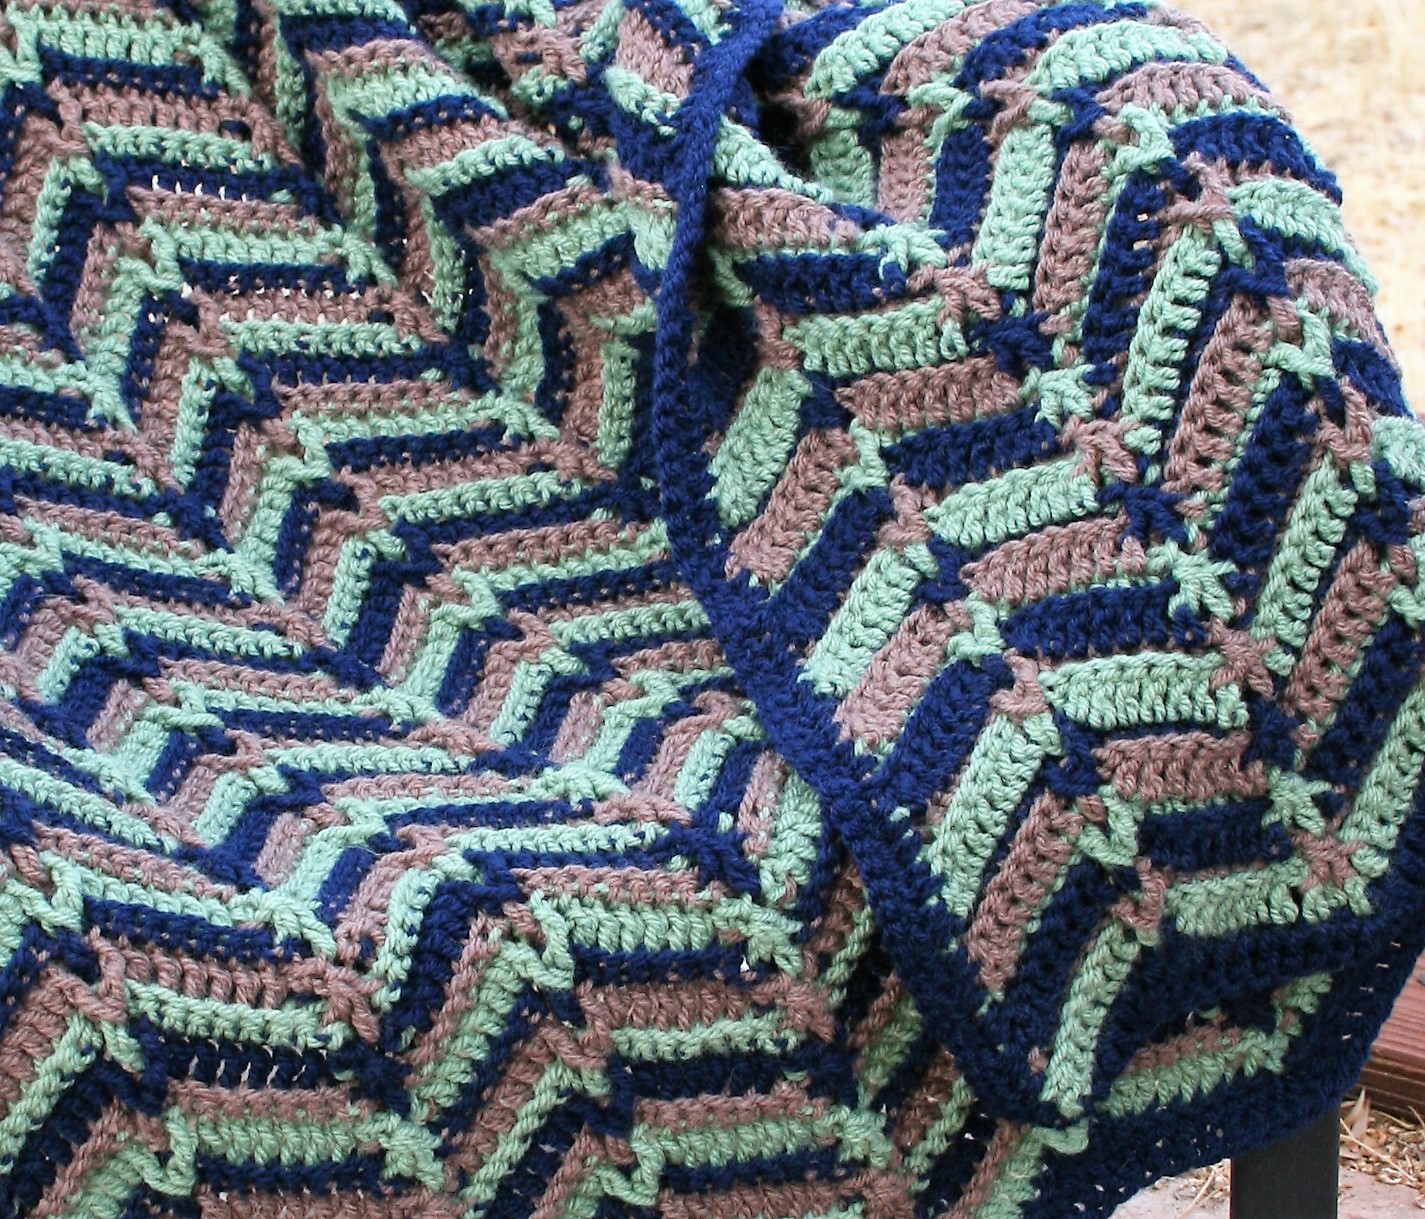
Honestly, I love how this block came out. It reminds me of older wallpaper or fabric prints. I have been playing with putting different colors in the A, B, C positions, and any working a small throw up for myself. Something I don’t do all that often.

I hope you enjoy it!

Yesteryear Rose Block

Yesteryear Rose Block

Materials

  • King Cole Aran Fashion medium weight 70% acrylic, 30% wool yarn (219 yrds/200m/3.6oz/100g) 1 skien each color: (A) #3509 Rose Gold, (B) #3508 Navy Blue, (C) #3510 Olive
  • J/10/6mm crochet hook

Abbreviations/Special Stitches

  • Bldc– Back Loop Double Crochet
  • Bpdc– Back Post Double Crochet
  • Dc3Cluster: [Yo, insert hook in indicated st, yo, pull up a loop, yo, pull through 2] 3 times, yo, pull through all 4 loops.
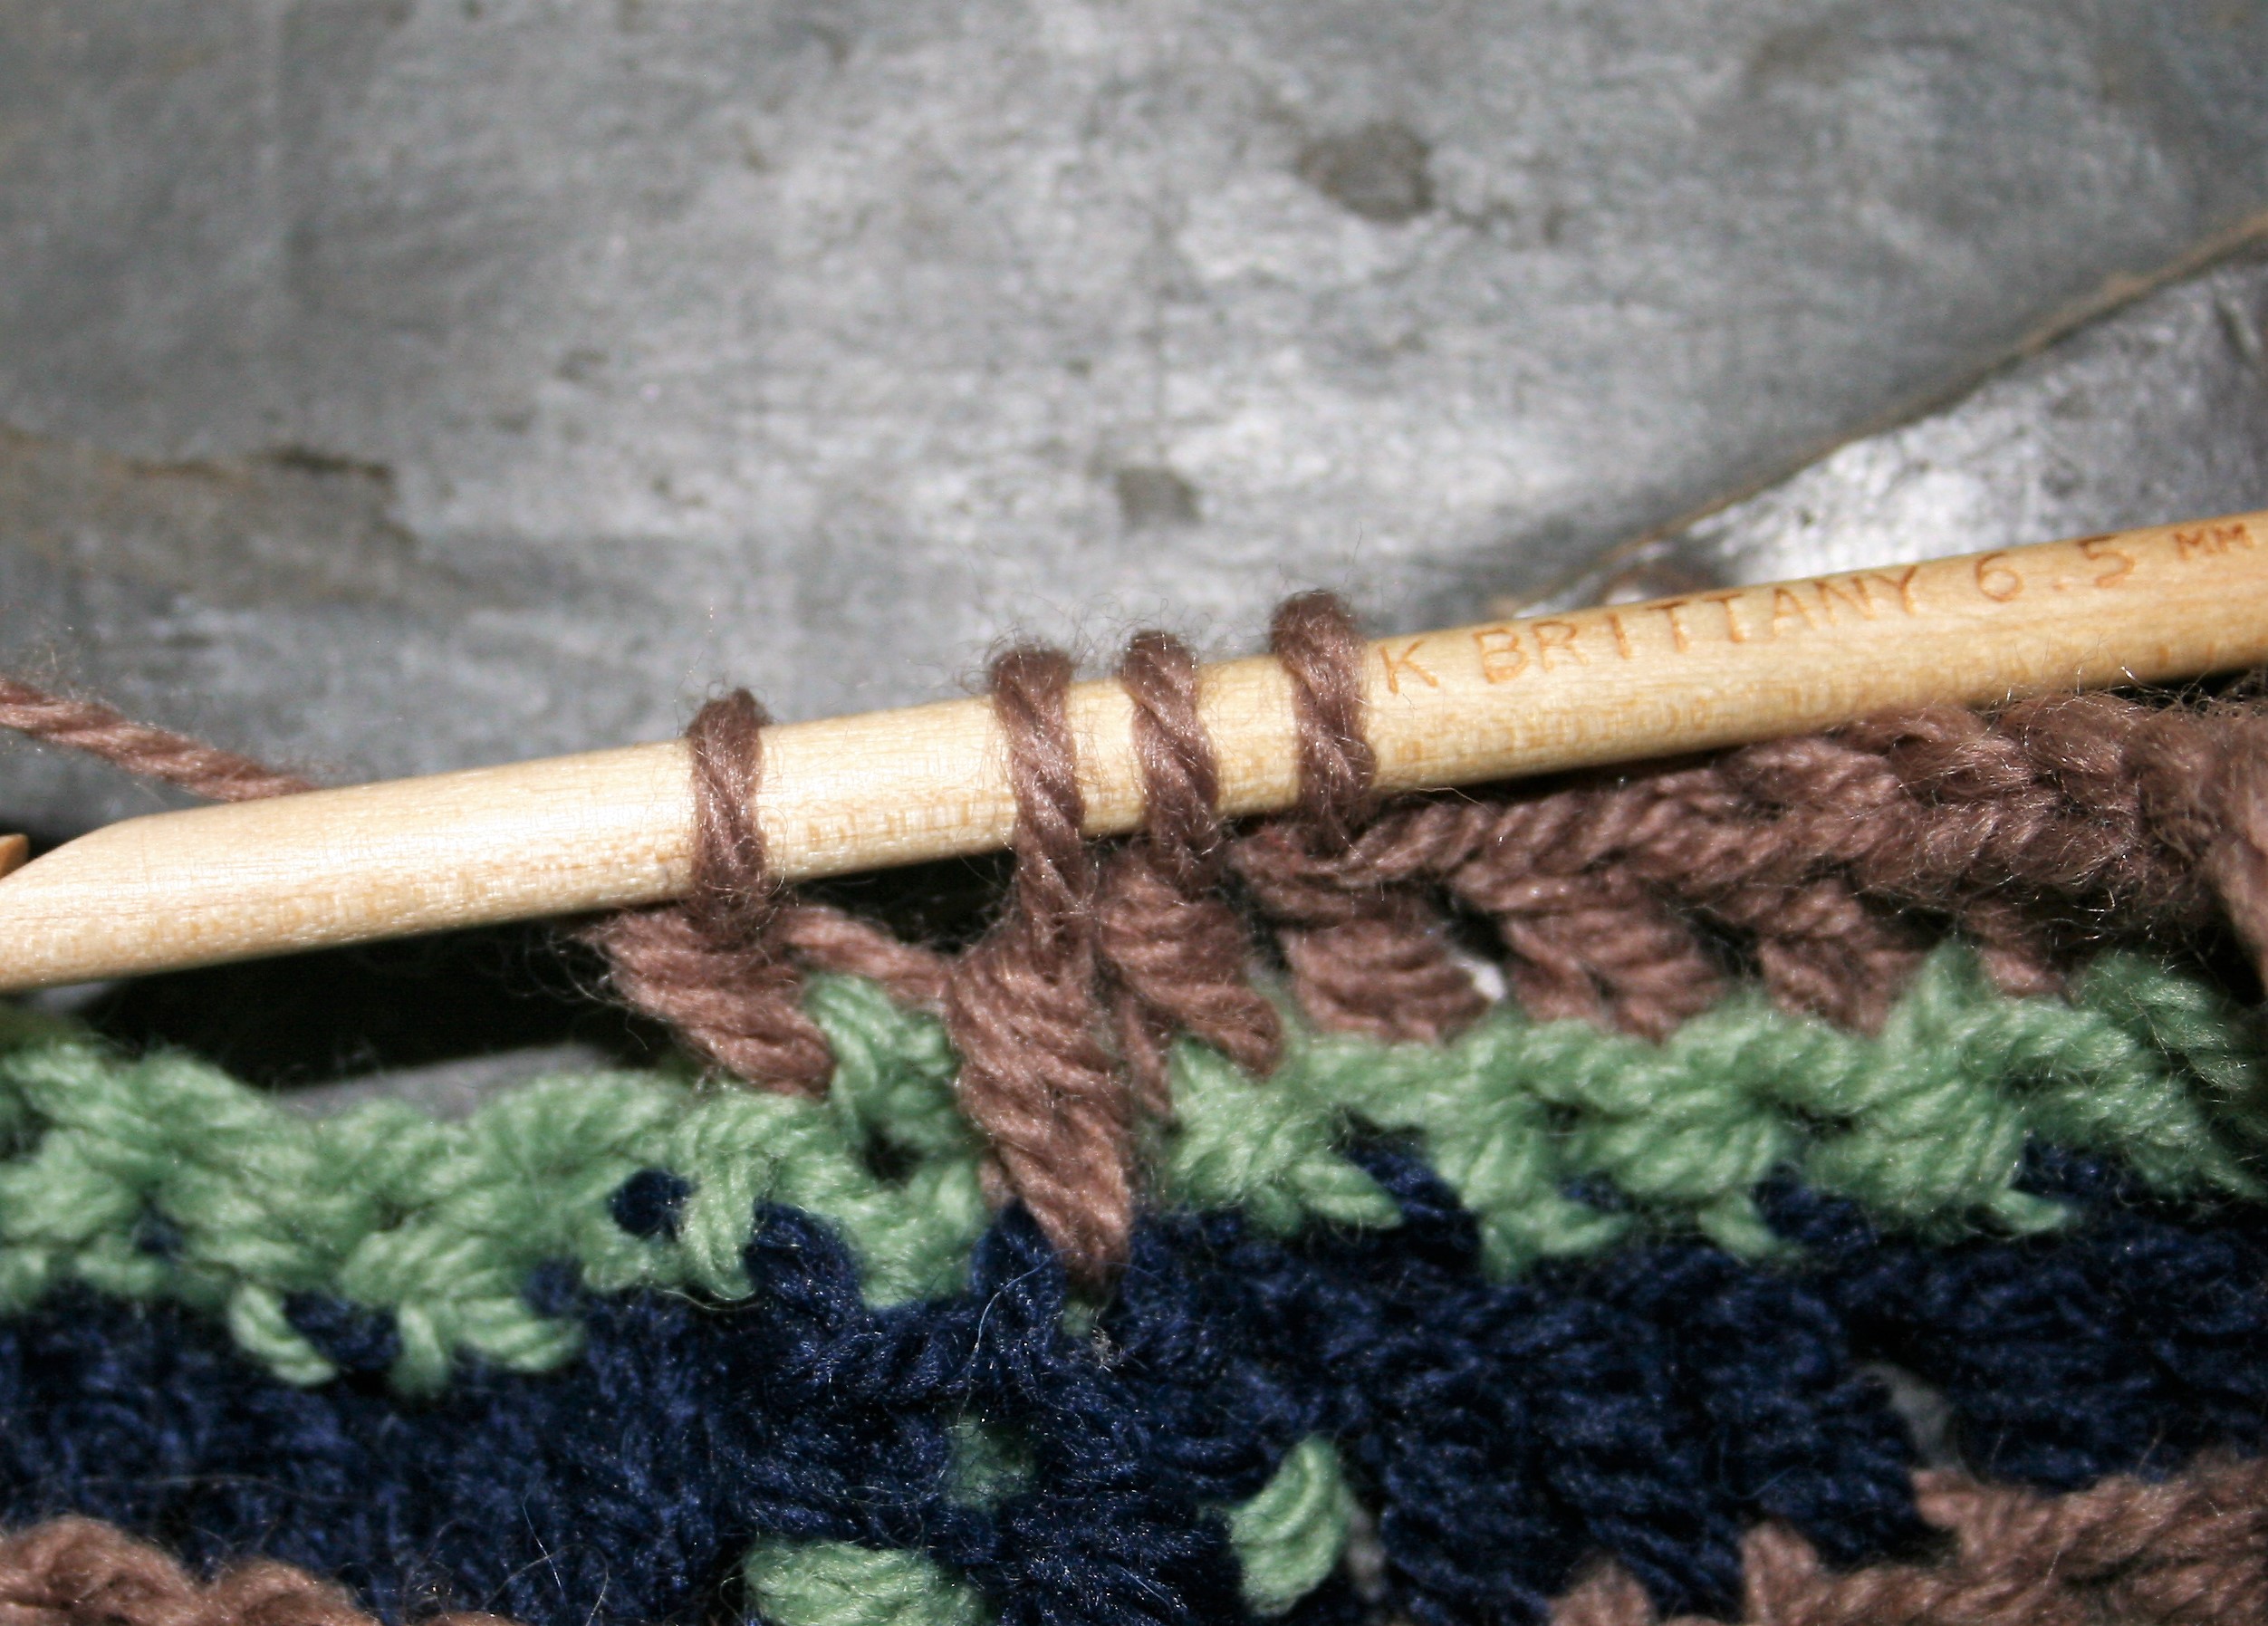
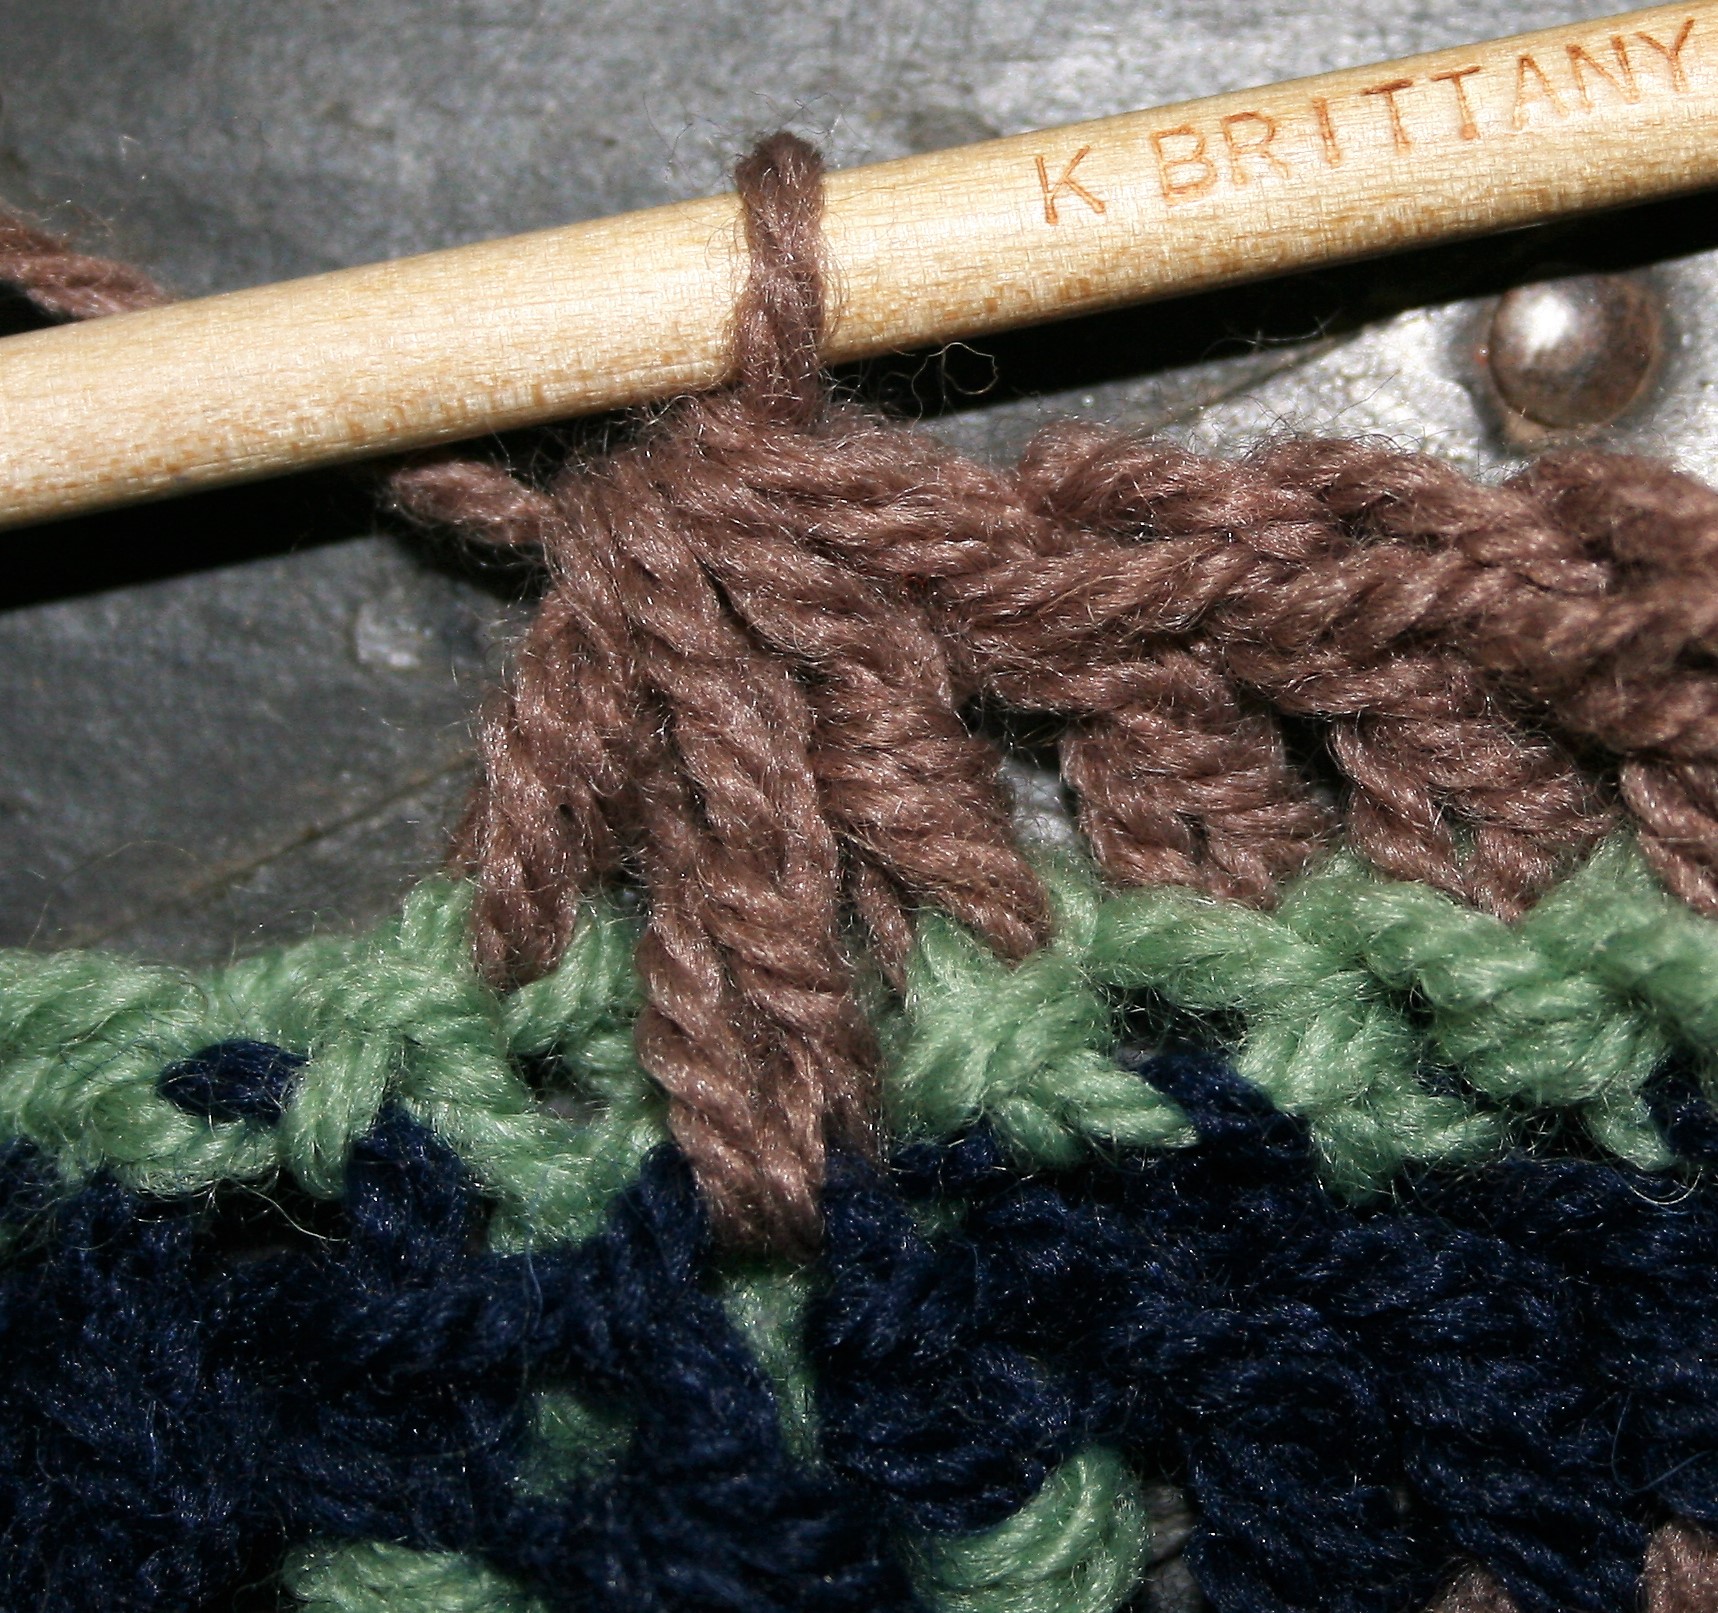
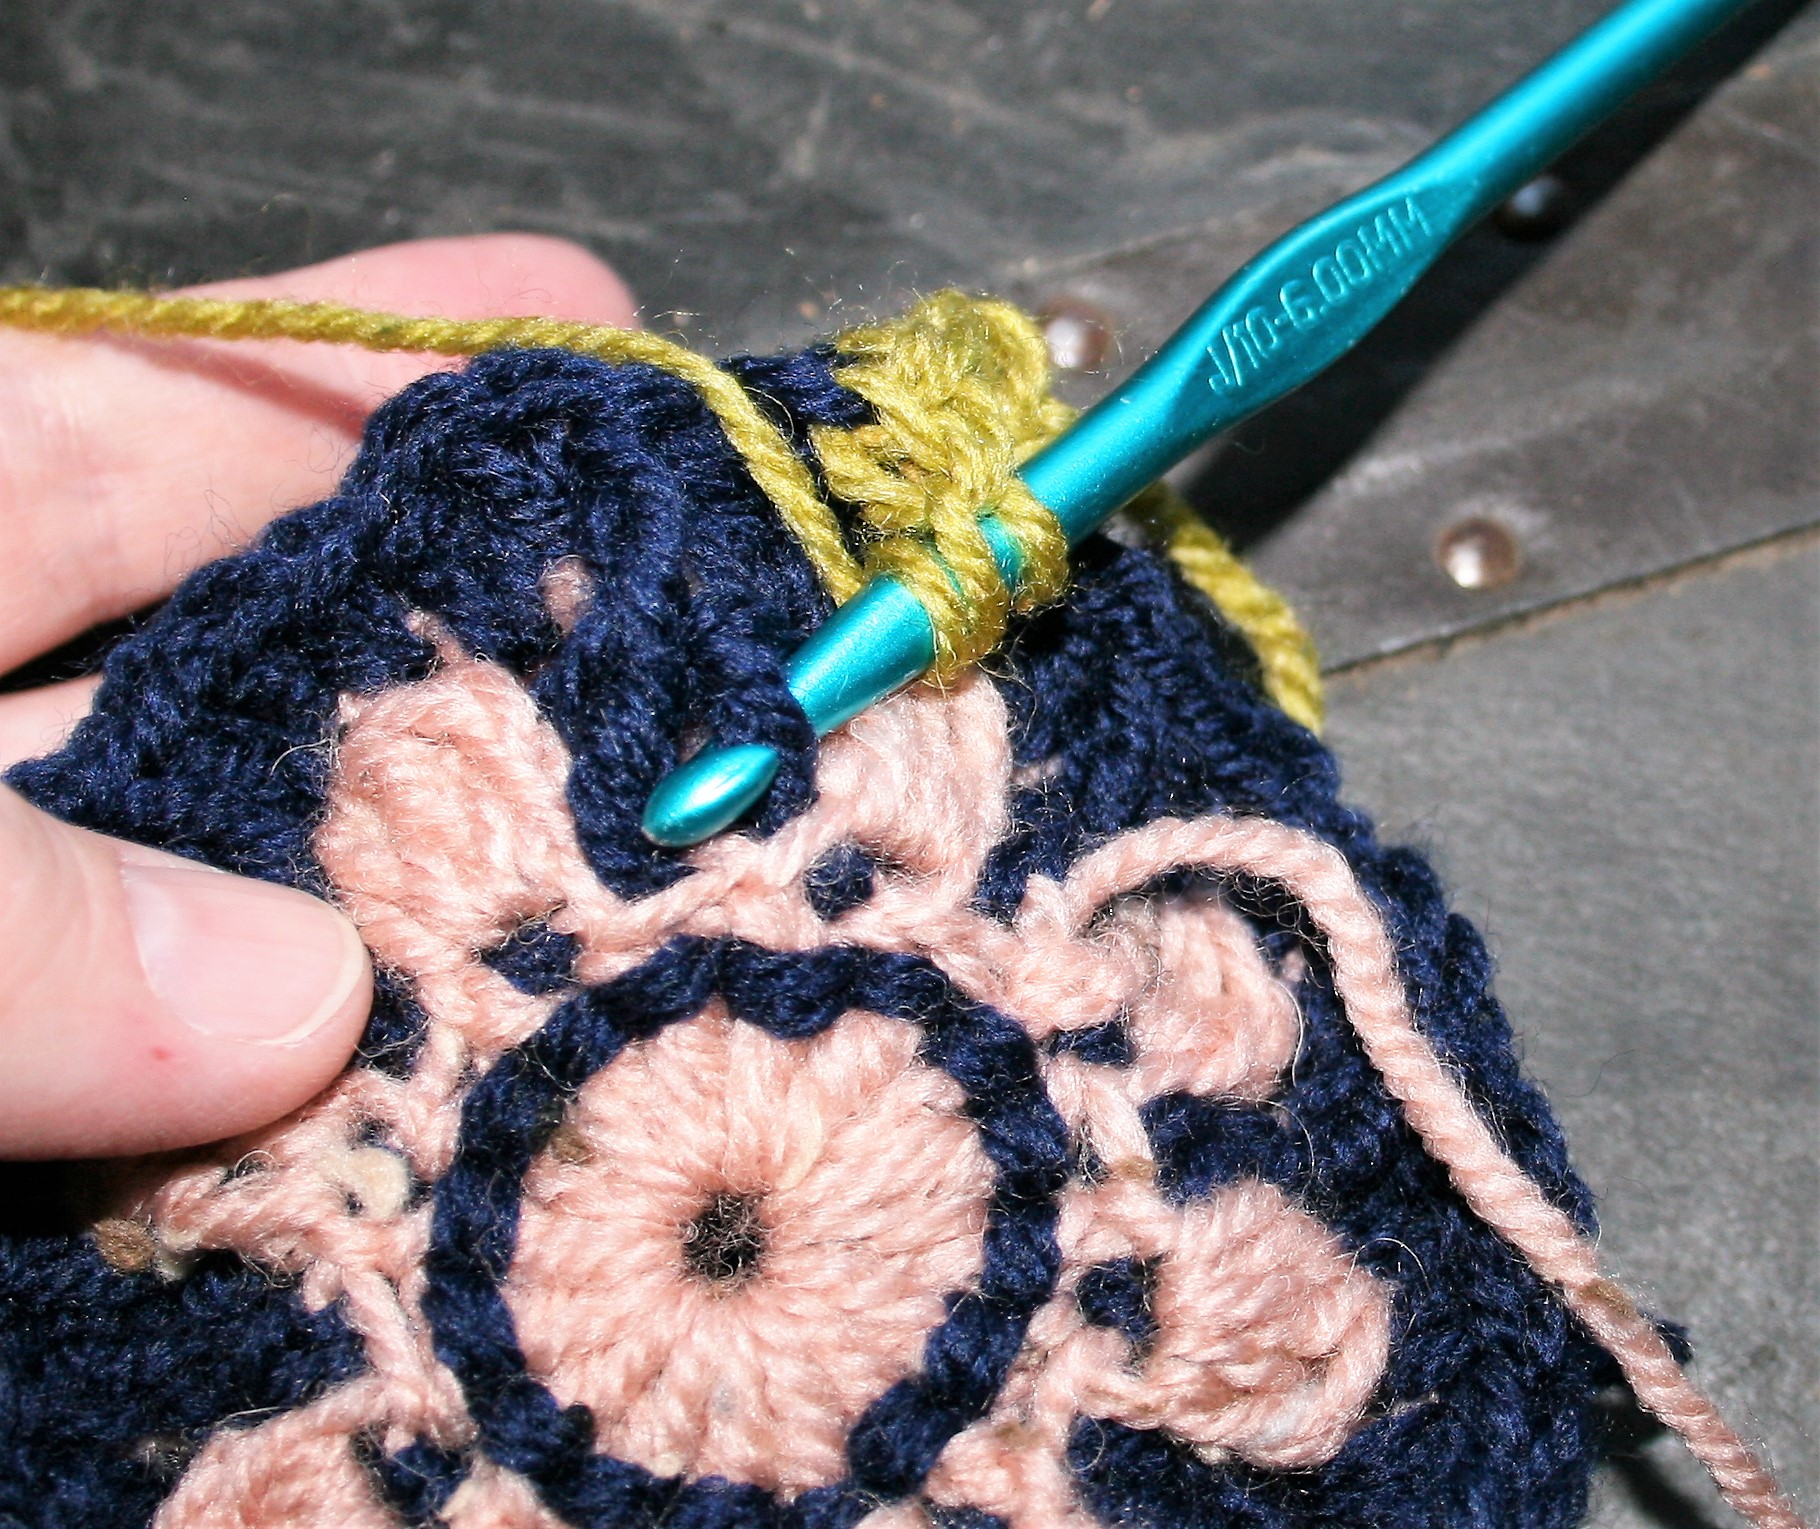
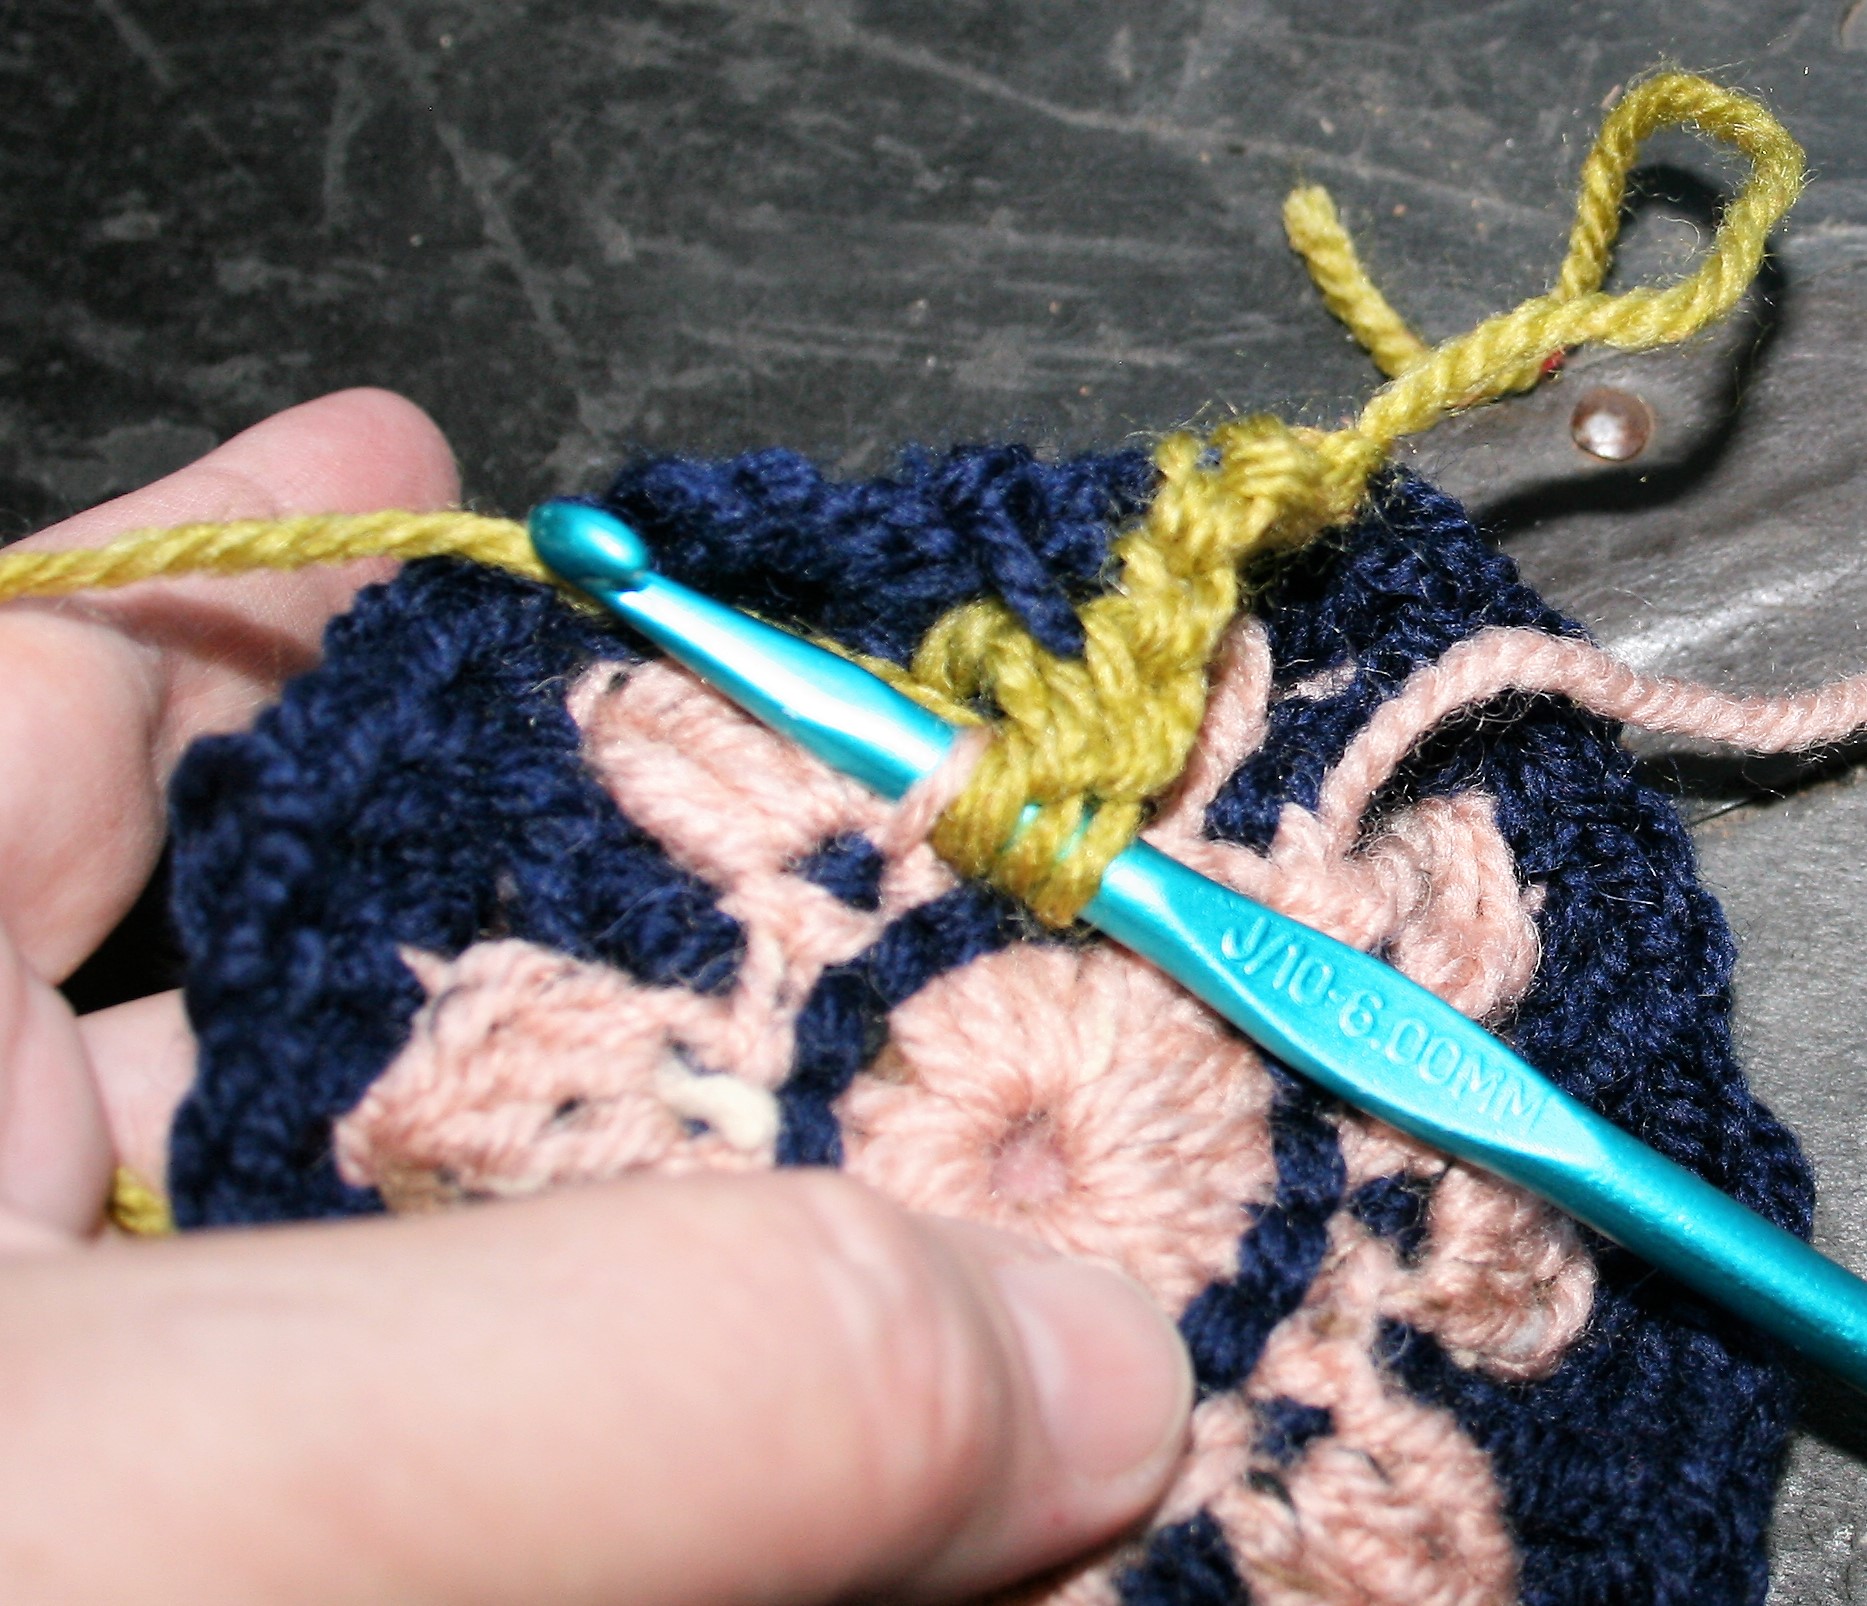
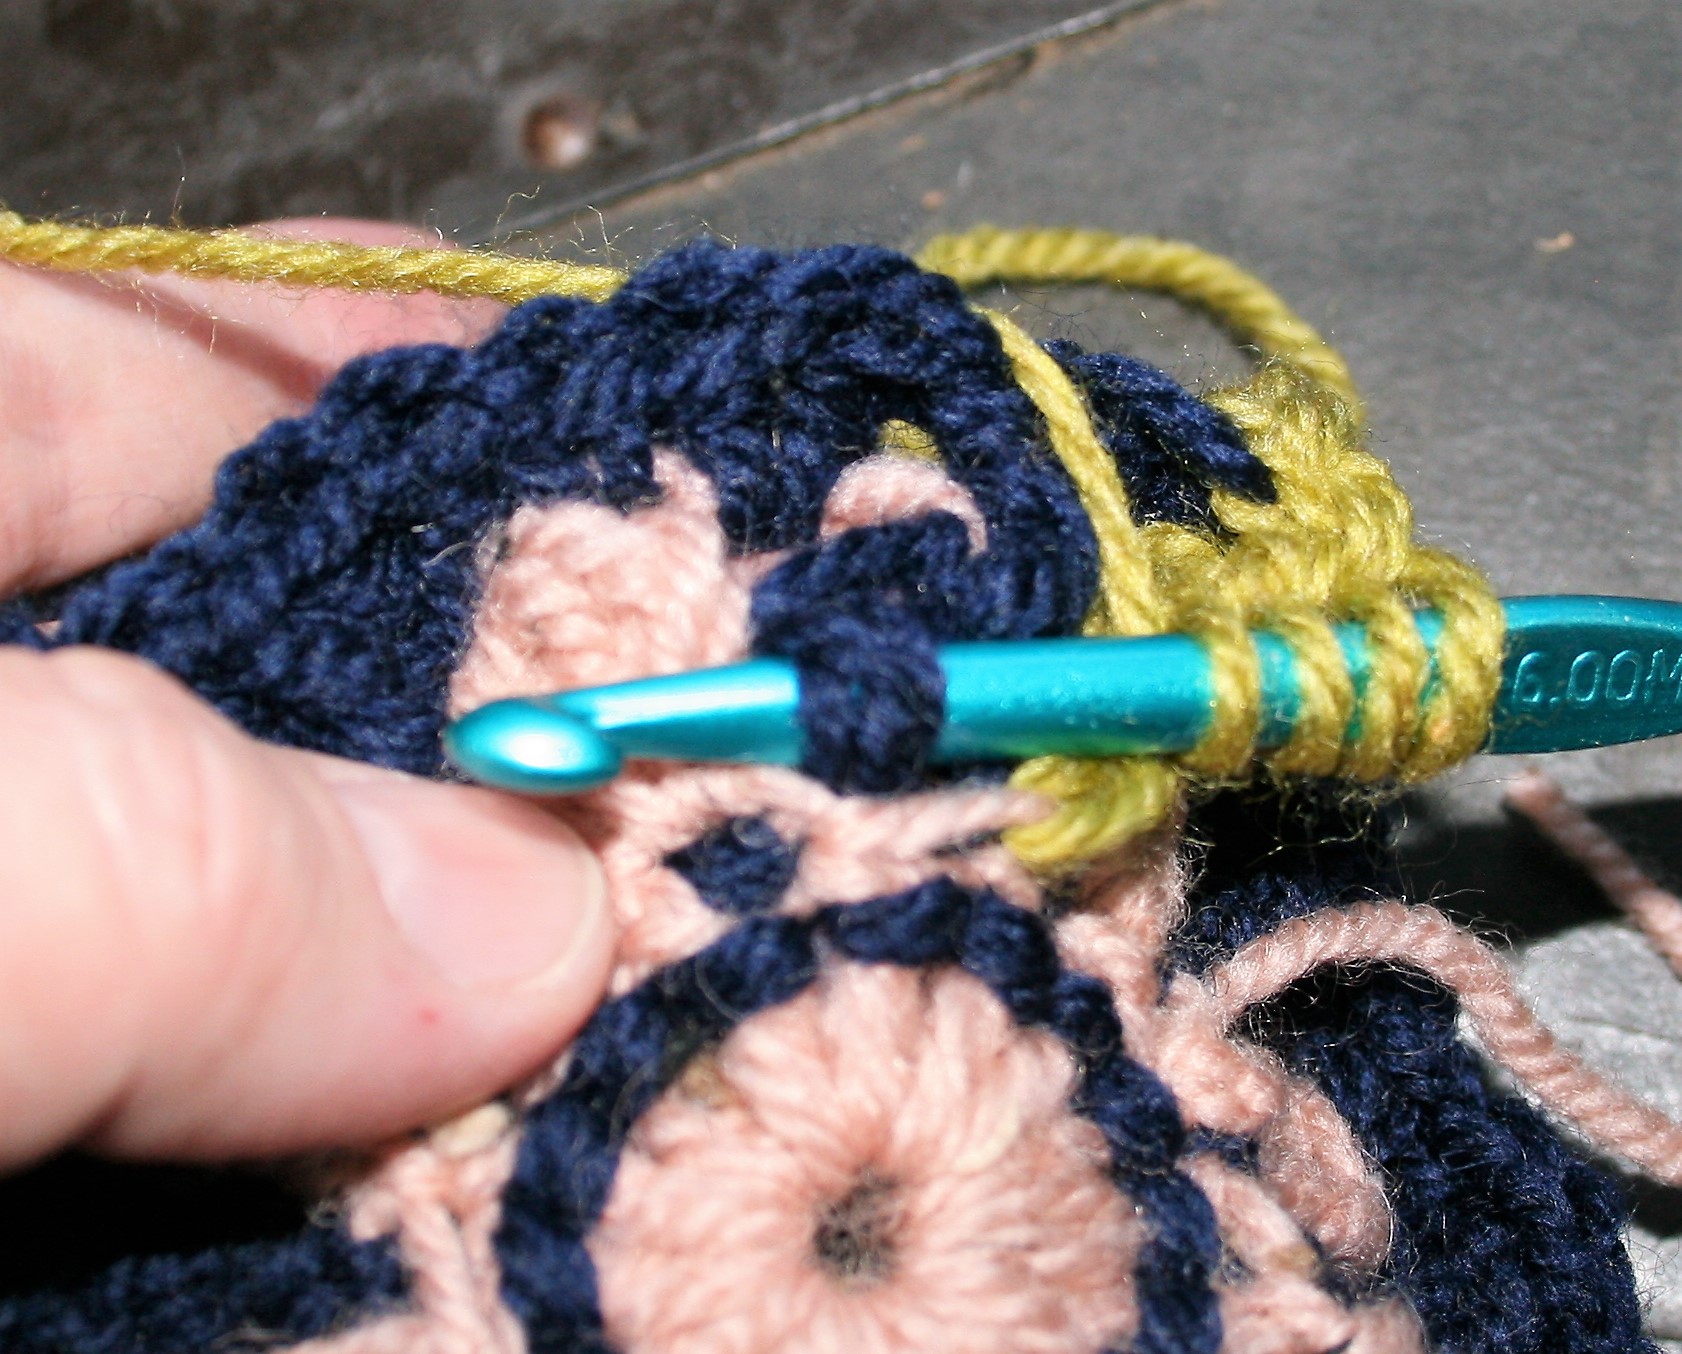
  • TrLeaf: Yo 2 times, insert hook as if front post st around bpdc stitch 3 rnds below (Row 2) that is immediately below working st, yo, pull through, [yo, pull through 2] twice, yo 2 times, insert hook into unused front loop of next stitch in Rnd 1, yo, pull through, [yo, pull through 2] twice, yo 2 times, insert hook as if front post around next bpdc stitch 3 rnds below (Rnd2), yo, pull throu, [yo, pull through 2] twice, yo pull through 4
  • Gauge – 6″x6″ block
TrLeaf -The first hook insertion point
TrLeaf- The second insertion point
TrLeaf- The third insertion point

Pattern

Rnd 1: Start with A, ch 4, 15 dc in 4th ch from hook, sl st to join, fasten off. -16 sts

Rnd 2: With B join to back loop of any st, ch 3, bpdc around same st, (bldc, bpdc) in each st around. Sl st to join, fasten off. -16 dc, 16 bpdc

Yesteryear Rose- Round 2

Making Petals

Rnd 3: Join with A, to any bldc, ch 1, sc in same st, ch 1, sk 1 st, working in the front loop of Rnd 1,dc3Cluster in front loop 2 rnds below, ch 1, sk 1 sts, [sc in next bldc , ch 1, sk 1 st, working in the front loop of Rnd 1,dc3Cluster in front loop 2 rnds below, ch 1, sk 1 sts} round, sl st to join, fasten off. -8 Dc3Clusters

Working in the Front Loop of Round 1 (2 Rounds Below)
Yesteryear Rose Block- Round 3

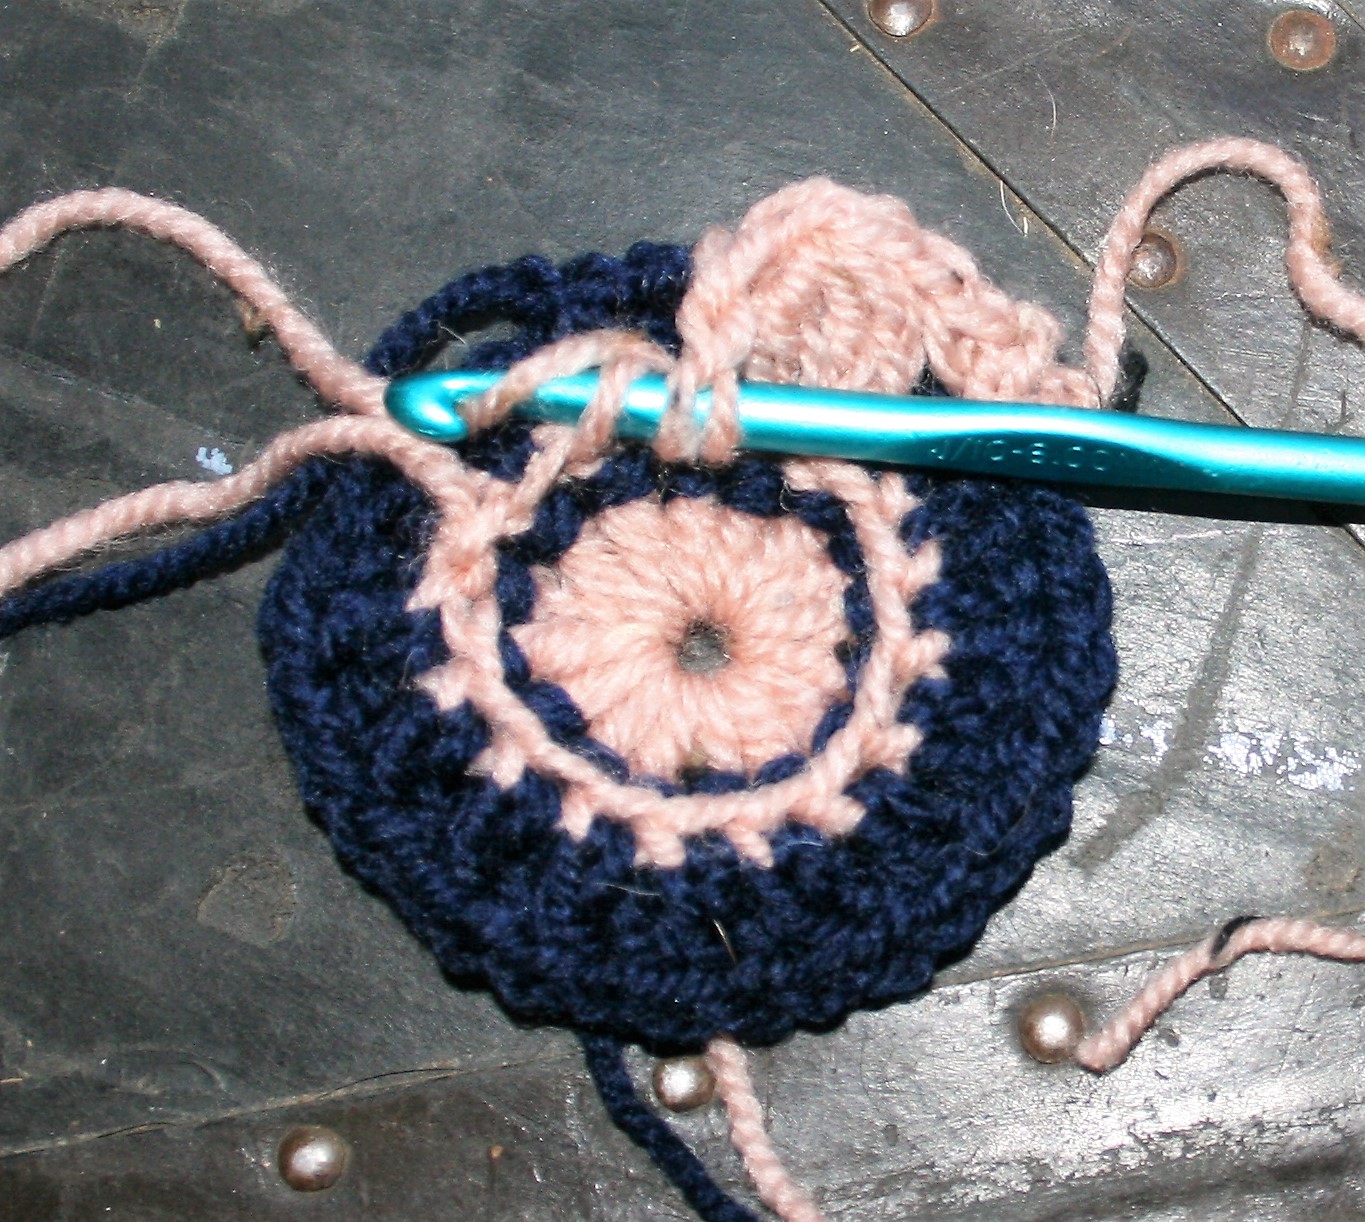
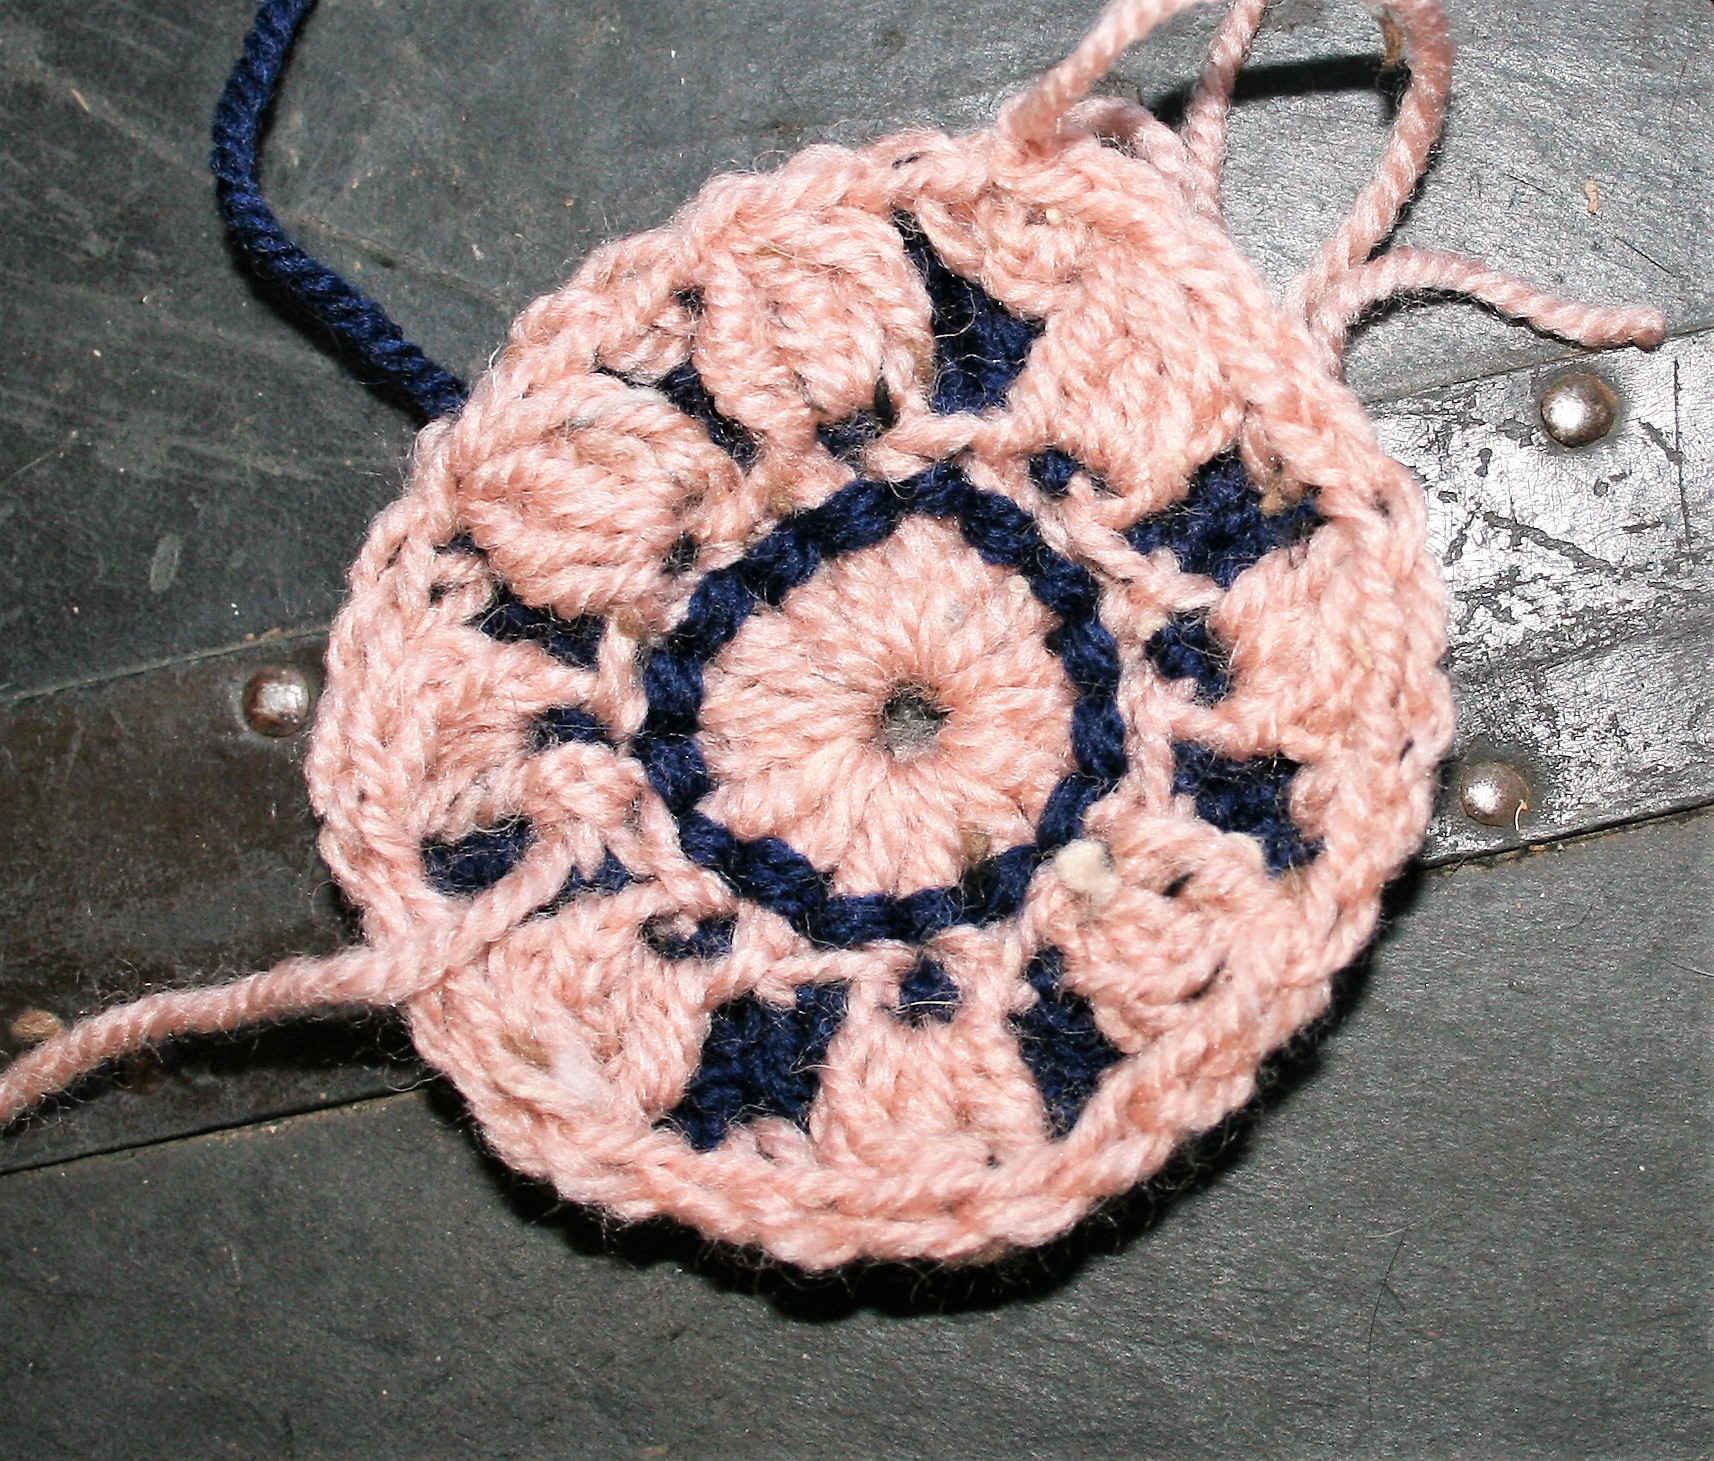
Rnd 4: With B, join to any Dc3Cluster, ch 1, sc in same st, 2 dc in ch-1 sp, fpdc around next st 2 rows below (Row 2), 2 dc in ch-1 sp,[ sc in next Dc3Cluster, 2 dc in ch-1 sp, fpdc around next st 3 rows below, 2 dc in ch-1 sp] around, sl st to join, fasten off. 8 fpdc 2 rows below

Working Round 4

Making Leaves

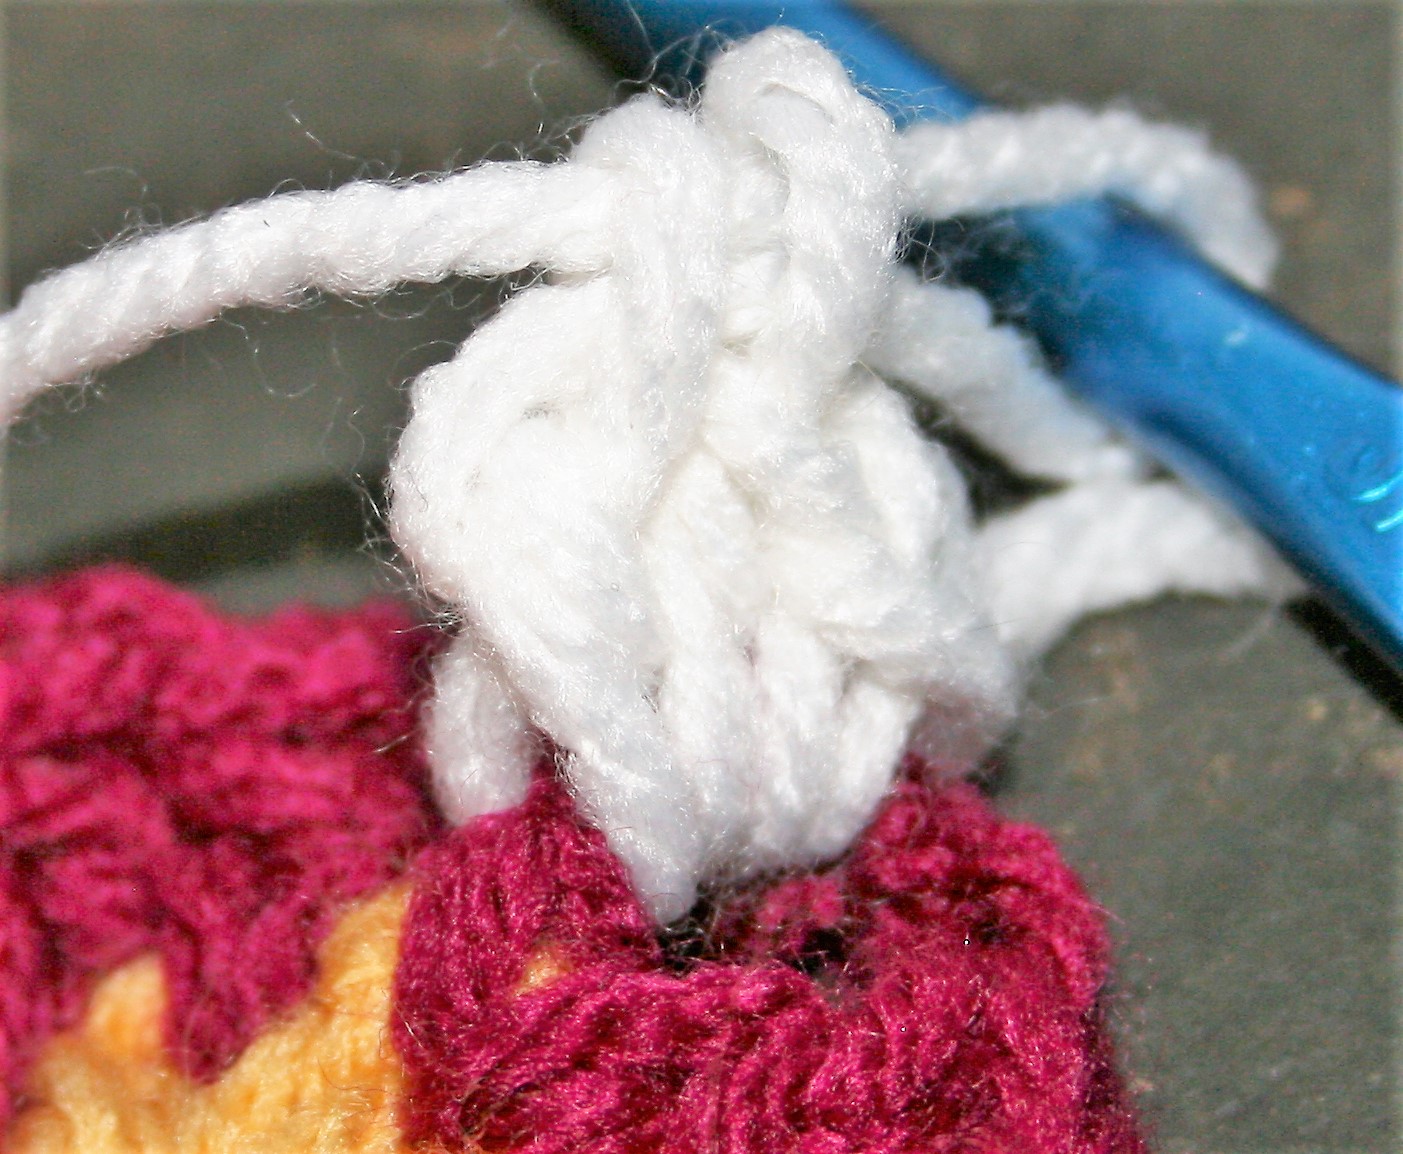
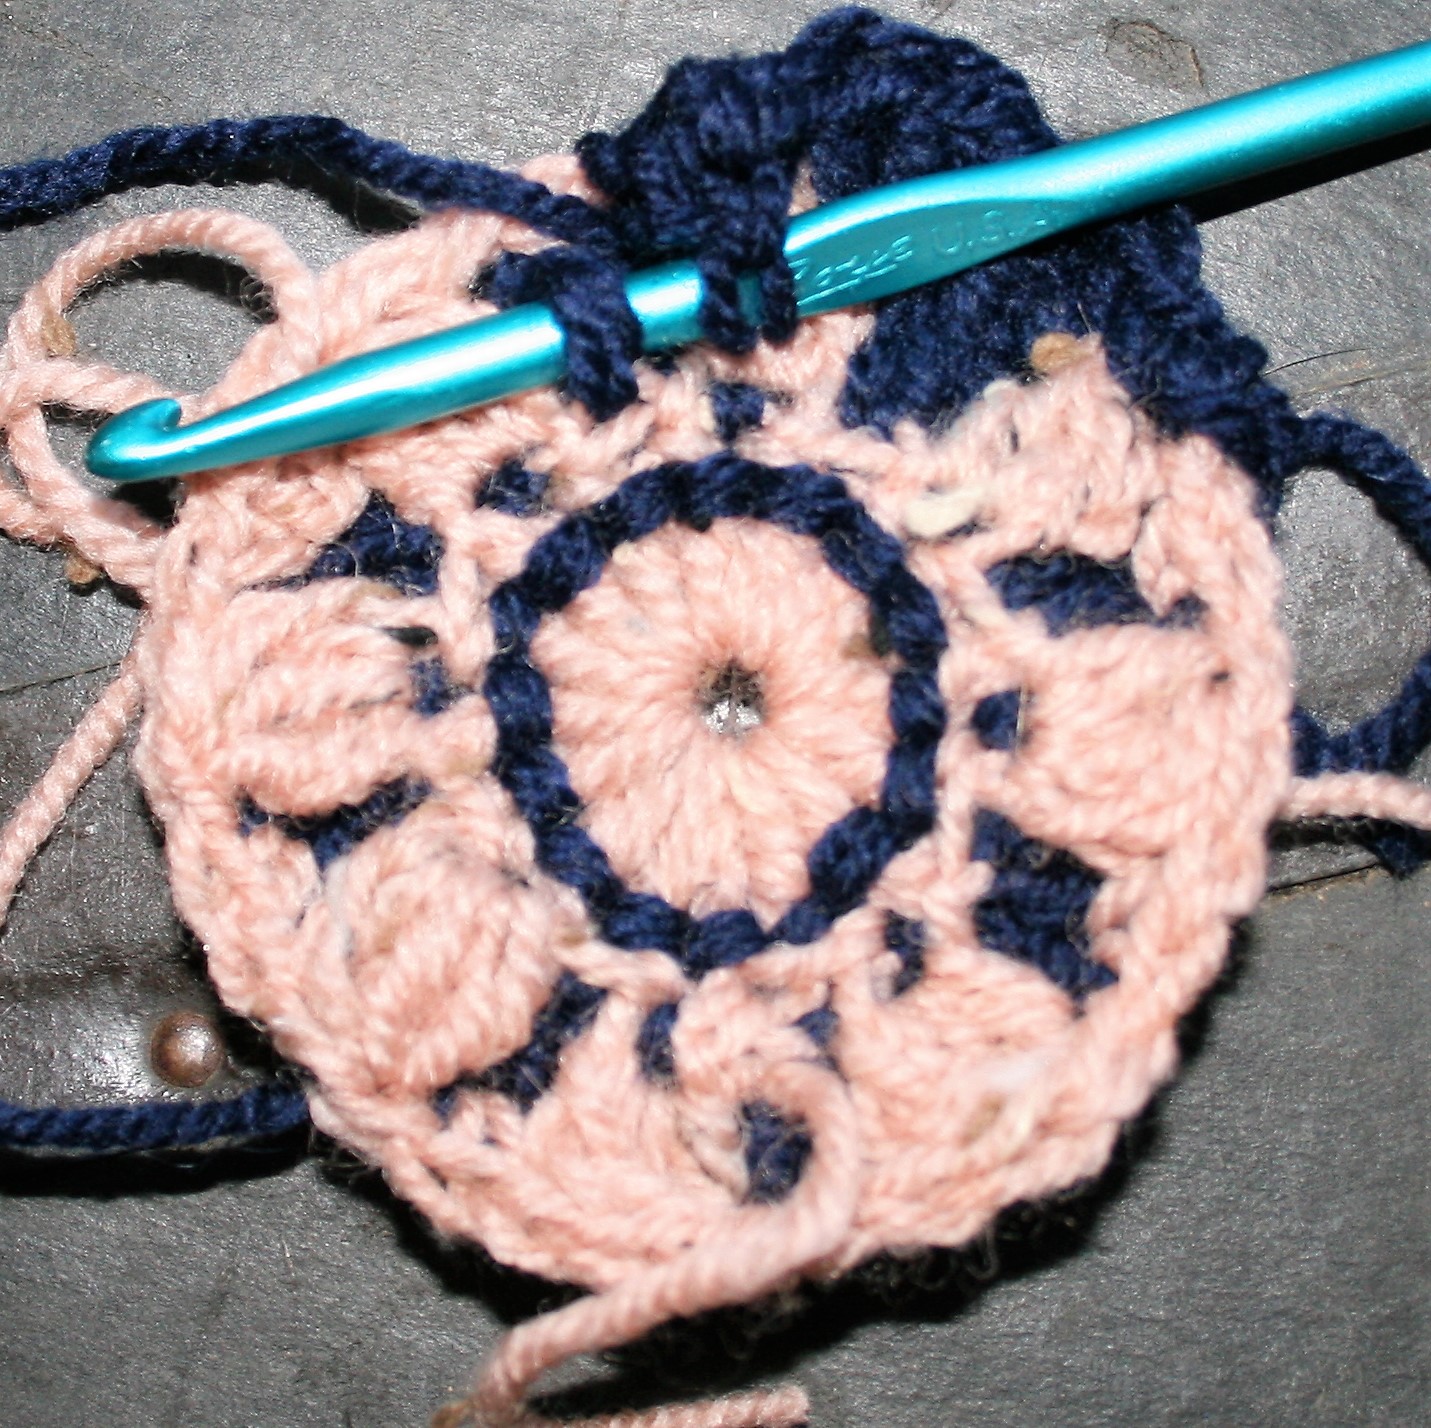
Round 5: With C, join to the back loop of any sc, ch 1, sc in same st, blsc in next 2 sts, [TrLeaf, blsc in next 11 sts] 3 times, TrLeaf, blsc in next 8 sts, sl st to join, fasten off.

Working Round 5 -Yesteryear Rose

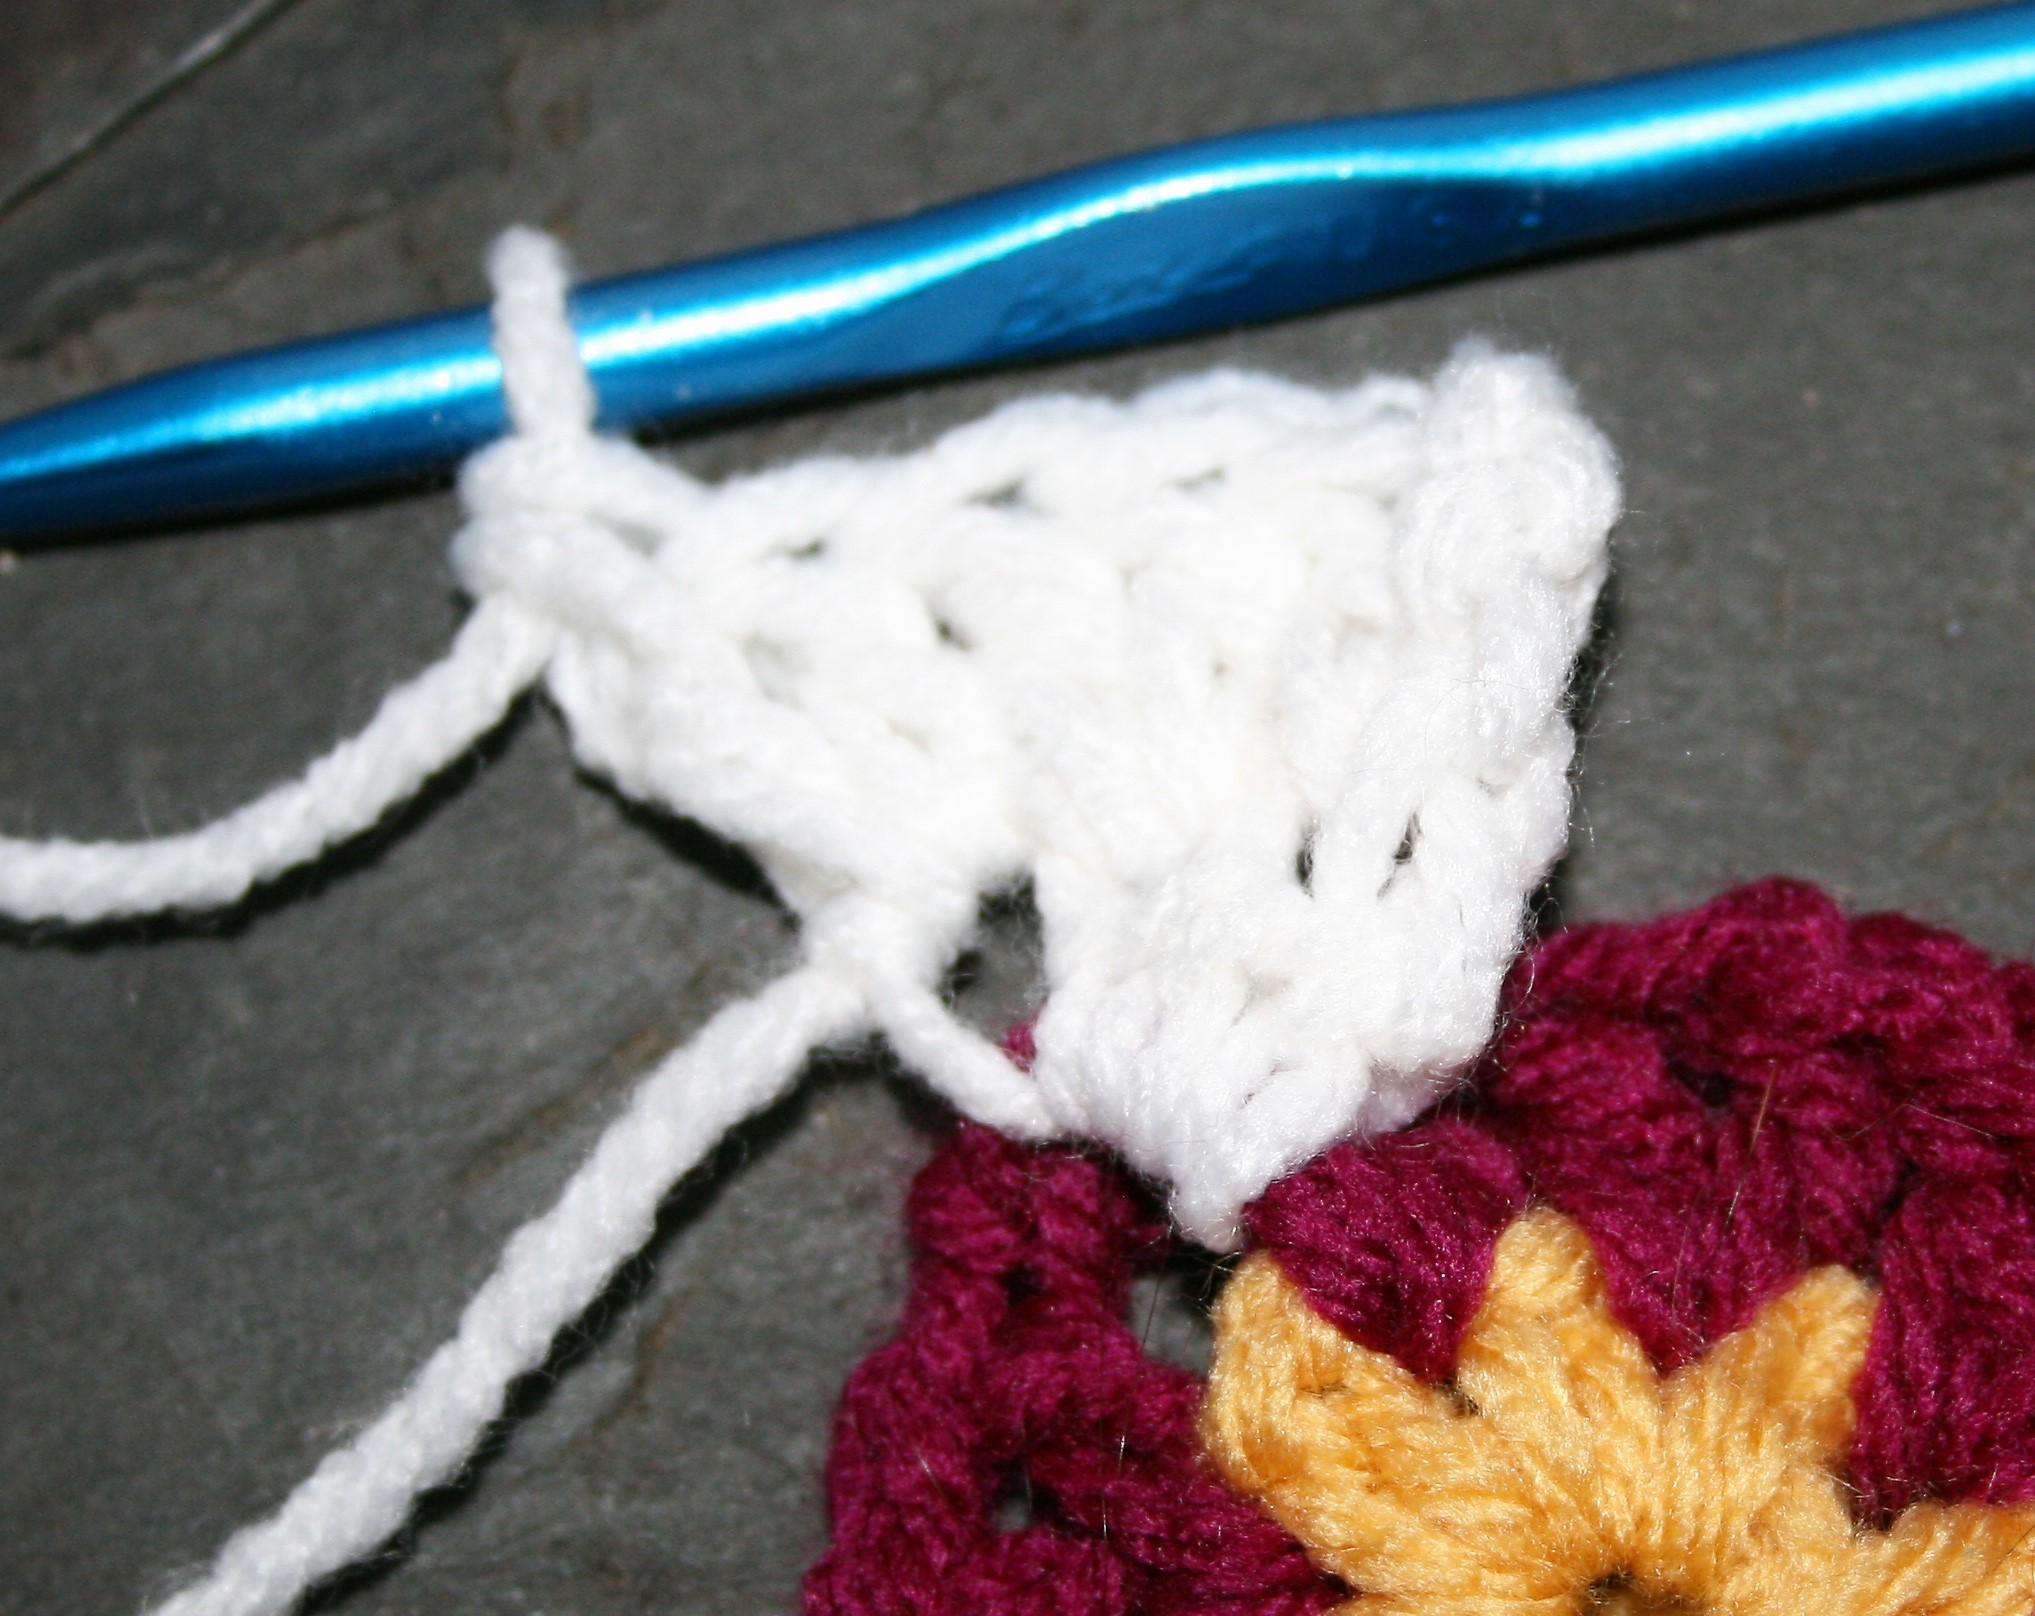
Rnd 6: Join with B to any TrLeaf, ch 1, sc in same st, hdc in the next 2 unused front loops of sts 2 rnds below, blsc in next st, dc in next 2 unused loops of sts 2 rnd below, (2sc, ch 2, 2sc) in next st corner made, [dc in next 2 unused loops of sts 2 rnds below, blsc in sc, hdc in the next 2 unused front loops of sts 2 rnds below, sc in TrLeaf, hdc in next 2 unused front loops of sts 2 rnds belwo, blsc in next st, dc in next 2 unused loops of sts 2 rnd below, (2sc, ch 2, 2sc) in next st corner made] 3 times, dc in next 2 unused loops of sts 2 rnd below, blsc, hdc in the next 2 unused front loops of sts 2 rnds below, sl st to join.

Round 7: Ch 1, sc in same st, [sc in each st across to ch-2 sp, (2sc, ch2, 2sc) in ch-2 sp] rep 4 times, sc in each st across, sl st to join.

Darla’s Daisy Square- Moogly CAL 2022

I feel really honored to be joining the Moogly CAL again this year, and I have decided to crochet my Darla’s Daisy Square! This adventure is a great way to learn new skills and make an afghan over the year. Check out all the blocks here. (Check out Moogly’s version of this square here)

Darla’s Daisy square was inspired by the fact that I needed a bit of cheeriness before the coming Spring. I find that there is no better way to bring in some cheeriness then a square inspired by flowers and bright colors. Granted, Darla is a friend and student that has studied to become a Master Gardener, so I am sure that I can find a few more flowers to brighten up my day.

If you like what you see, please consider signing up for my monthly newsletter and following by crochet journey.

Darla’s Daisy Square

Materials

  • Red Heart With Love, Medium weight 100% acrylic yarn
    • #1207 Cornsilk (A)
    • #1907 Boysenberry (B)
    • #1001 White (C)
    • #1538 Lilac (D)
    • #1562 Jadeite (E)
  • Hook J/10/6.00mm

Gauge: 12”x 12” square (30.5 x 30.5cm)

Notes

The squares starts in the round, then works only 2 sides of the square as rows.

The petals in Round 3 are created by working stitches around a double crochet post, then working a second row of stitches atop those just created, before repeating on a new post stitch.

Pattern

Rnd 1: With A, ch 4, sl st to first ch to form ring (like to start a circle another way? check out interchangeable options), ch 1, (sc, ch 1) eight times in ring, sl st to join, fasten off. -8sc, 8 ch-1 sps

Rnd 2: With B, join to any ch-1 sp (check out joining with a standing double crochet instead), ch 4 (counts as dc +ch 1), dc in same sp, (dc, ch 1, dc) in each ch-1 sp around, sl st to join, fasten off. -16 dc, 8 ch-1 sps

Watch for the back and forth of the petals- crochet the daisy!

Rnd 3: With C, join around the post of any dc, ch 1 (check out joining with a standing single crochet instead), fpsc around post of dc st, (fphdc, fpdc) around same post of dc, ch 3, turn, dc in same st, 2 dc in the next 2 sts, (petal made), turn, [sk 1 dc post, (sc, hdc, dc) around next dc post, ch 3, turn, dc in same st, 2 dc in next 2 sts, (petal made), turn] 7 times, sl st to join, fasten off. – 8 petals (consisting of 2 rows each, first row has 1 sc, 1 hdc, 1 dc, second row has 6 dc)

Completed “1st Row” of petal, stitches worked around a double crochet post.
Completed “2nd row” of petal…work has been turned.
Start the next petal….

Now we set up some corners on the crochet daisy square

Rnd 4: With D, join to the final st of any petal, ch 6 (counts as dc, and ch-3 sp), dc in same sp (corner made), ch 2, sc in 4th st of 2nd row of petal, ch 2, sk 1 dc, dc in final st of petal, ch 2, sc in 4th st of 2nd row of petal, ch 2, (dc, ch 3, dc) in final st of petal (corner made), [ch 2, sc in 4th st of 2nd row of petal, ch 2, sk 1 dc, dc in final st of petal, ch 2, sc in 4th st of 2nd row of petal, ch 2, (dc, ch 3, dc) in final st of petal (corner made)] 2 times, ch 2, sc in 4th st of 2nd row of petal, ch 2, sk 1 dc, dc in final st of petal, ch 2, sc in 4th st of 2nd row of petal, ch 2, sl st to join. – 4 corners, 8 sc, 16 ch-2 sps, 4 dc on sides (1 dc on each side)

Rnd 5: Ch 3, [(2dc, ch 1, 2 dc) in ch-3 sp of corner, dc in each st and 2 dc in each ch-2 sps across to ch-3 corner sp] 4 times, sl st to join, fasten off. -68 dc, 4 ch-1 sps 

Rnd 6: With A, join to any ch-1 sp, ch 1, (sc, ch 3, sc) in same sp, {[ch 1, sk 1 st, sc in next st] 8 times, ch 1, (sc, ch 3, sc) in ch-1 sp, [ch 1, sk 1 st, sc in next st] 8 times, ch 1} three times, sl st to join, fasten off. -40 sc, 36 ch-1 sps

Rnd 7: With C, join to to any ch-3 sp, ch 3, dc in same sp, ch 1, 2 dc in same sp, 2 dc in each ch-1 sp across to ch-3 sp corner, (2dc, ch 1, 2dc) in ch-3 sp, 2 dc in each ch-1 sp across to ch-3 sp corner, [(2dc, ch 1, 2dc) in ch-3 sp, 2 dc in each ch-1 sp across to ch-3 sp corner] 2 times, sl st to join, fasten off. -88 dc, 4 ch1 sps

Rnd 8: With B, join to any ch-1 sp, ch 1, (sc, ch 3, sc) in same sp, [ch 1, sk 1 st, sc in next st] 11 times, ch 1, {(sc, ch 3, sc) in ch-1 sp, [ch 1, sk 1 st, sc in next st] 11 times, ch 1} 3 stimes, sl st to join, fasten off. -52 sc, 48 ch-1 sps, 4 ch-3 sps

Only working 2 sides of the crochet daisy square as part of the Moogly CAL

Row 9: With A, join to any ch-3 sp, ch 3, dc in same sp, 2 dc in each ch-1 sp across to ch-3 sp, (2dc, ch 1, 2dc) in ch-3 sp, 2 dc in each ch-1 sp across to ch-3 sp, 2 dc in next ch-3 sp, fasten off. – 56 dc, 1 ch-1 sp

Row 10: With E, join first st of Row 9, ch 1, sc in same st, [ch 1, sk 1, sc in next st] 13 times, ch 1, (sc, ch 3, sc) in ch-1 sp, [ch 1, sk 1, sc in next st] 14 times, fasten off. -30 sc, 28 ch-1 sps, 1 ch 3 sp

Row 11: With B, join to the first ch-1 sp of Row 10, ch 3, dc in same sp, 2 dc in each ch-1 sp across to ch-3 sp, (2dc, ch 1, 2dc) in ch-3 sp, 2 dc in each ch-1 sp across, fasten off. -60 dc

Row 12: With C, join to the first st of Row 11, ch 1, sc in same st, [ch 1, sk 1, sc in next st] 14 times, ch 1, (sc, ch 3, sc) in ch-1 sp, [ch 1, sk 1, sc in next st] 15 times, fasten off. -32 sc, 30 ch-1 sps, 1 ch 3 sp

Row 13: With D, join to the first ch-1 sp of Row 12, ch 3, dc in same sp, 2 dc in each ch-1 sp across to ch-3 sp, (2dc, ch 1, 2dc) in ch-3 sp, 2 dc in each ch-1 sp across, fasten off. -64 dc

Row 14: With A, join to the first st of Row 13, ch 1, sc in same st, [ch 1, sk 1, sc in next st] 15 times, ch 1, (sc, ch 3, sc) in ch-1 sp, [ch 1, sk 1, sc in next st] 16 times, fasten off. -34 sc, 32 ch-1 sps, 1 ch 3 sp

All the way around again- Crochet the Daisy Square for the Moogly CAL

Rnd 15: With E, join to the first ch-1 sp of Row 14, ch 3, dc in same sp, 2 dc in each ch-1 sp across to ch-3 sp, (2dc, ch 1, 2dc) in ch-3 sp, 2 dc in each ch-1 sp across, (2dc, ch 1, 2dc) in next st, working down the end rows 9-14, evenly work 6 dc (to keep a visual pattern work 3 groups of 2 dc), 2 dc in the ch 3 sp of Rnd 8 (this sp will have the end of Row 9 worked in it), 2 dc in each of the ch-1 sps across to ch-3 corner sp, (2dc, ch 1, 2dc) in ch-3 corner sp, 2 dc in each of the ch-1 sps across including the ch-3 sp or round 8 (this sp will also have the first stitches of Row 9), evenly work 6 dc over end of rows 9-14, 2 dc in the same stitch as the join (beginning of Rnd 15), ch 1, join, fasten off. -144 dc, 4 ch-1 sps

Crochet Unspoken Words The Free Pattern

Crochet Unspoken Words, the free pattern. Often I find that crochet can speak emotions when I cannot, and it really does speak from the heart. At times when I am overwhelmed emotionally I can easily find my fingers and hands nimbly moving a hook with yarn to work through my feeling and sharing them with others.

I know that I am not alone in this feeling. Many use crochet for charity and gift giving, however I recently found myself crocheting due to natural disaster.

When I learned my friend lost her home during the Northern California Caldor fire this last August I felt at a loss. My heart was heavy for the undertaking she was facing, so I created an afghan to wrap an eternal hug.

Unspoken Words Throw

Just some pattern insight

I know that many find themselves in similar situations, so I thought I would share the pattern. It is a 2 row repeat just changing the straight edge stitches from single to double crochet, while having the same stitches used at the “valleys” and “peaks” of this ripple pattern. The colors are alternated between three colors, there is no need to cut the yarn, just carry it up the side (learn how here).

Unspoken Words Throw

Finished size: approximately 55”x55”

Materials

  • K/10 1/2 /6.5mm crochet hook
  • Medium Weight yarn in 3 colors, 600 yrds of each color. (Sample created in Plymouth Encore 75% acrylic, 25% wool (100g/3.5oz/200yd) yarn, 3 skeins each of color #848, 1204, 1232)

Special Stitches

Back Loop 3 double crochet together over center (blodc3togcenter)– yo, insert hook into back loop of next st, yo, pull up a loop, yo pull through 2 loops, yo insert hook into top of decrease worked 2 rows below, yo pull up a loop, yo pull through 2, yo, insert hook into back loop of next st, yo, pull up a loop, yo, pull up 2 loop, yo, pull through all 4 loops on hook.

Step One: yarn over, insert hook into first back loop
Yarn over, insert hook into top of decrease 2 rows below
Yarn over, insert hook in last back loop
Completed Back Loop 3 double crochet together over center stitch

Abbreviations

  • ch(s)=chain(s)
  • sc= single crochet
  • blodc= back loop double crochet
  • blosc= back loop single crochet
  • blsc2tog= back loop 2 single crochet together
  • bpdc= back post double crochet
  • fpdc= front post double crochet
  • sk= skip
  • st(s)= stitch(es)
  • rep=repeat

Crochet Unspoken Words -the Free Pattern

Row 1: Ch 160, sc in 2nd ch from hook, sc in next 6 chs, 3 dc in next ch, sc in next 7 chs, [sk 3 chs, sc in 7 sts, 3 dc in next ch, sc in next 7 sts] rep 8 times, change color, turn.

The (fpdc, bpdc, fpdc) around the next stitch….

The Repeat Begins

Row 2: Ch 2, working back loops, blodc in next st, blodc in next 6 sts, (fpdc, bpdc, fpdc) around next st, blodc in next 7 sts, [blodc3togcenter, blodc in next 7 sts, (fpdc, bpdc, fpdc) around next st, blodc in next 7 sts] rep 8 times, dc2tog, change color, turn.

Row 3: Ch 1, blsc2tog, blosc next 6 sts, (fpdc, bpdc, fpdc) around next st, blsc in next 7 sts, [blodc3togcenter, blosc in next 7, (fpdc, bpdc, fpdc) around next st, blsc in next 7 sts] rep 8 times, sc2tog, change color, turn.

Repeat Rows 2 and 3, changing colors every row, alternating between three colors, until desired length.

Crochet Unspoken Words, the free pattern

Edging for Crochet Unspoken Words free pattern

Worked sc evenly around entire afghan. Fasten off, weave in ends.

Crochet Quilt Blocks- the Half Square Triangle

Crochet quilt blocks lend themselves to unlimited creativity. These can be great for scrap projects or planned out artistic works.

Below I describe how to create your own simple geographic block, as well as some idea suggestions.

Ohio Star Crochet Quilt Block

In the world of quilting the half square triangle, even using just this block, the possibilities are endless. Essentially it is simply a square that is worked with two colors. It is divided on the diagonal, creating a look of two triangles with the long ends together.

Sizes for crochet quilt blocks

Create your own design, just ensure that these blocks are the same size, or equal fractions of each other. Meaning make big and little blocks. The big block might be 10” then the little squares should be 5” so that they can all be put together equally.

Getting started with your crochet quilt blocks

To begin, create a chain the desired length of the diagonal of the square. This chain should be an odd number. Work a single crochet decrease over the 2nd and 3rd chain (need to know how to work a single decrease, check it out here), single crochet in each chain across until 2 chains are left.   Single crochet decrease over the last 2 chains, then chain 1 and turn.

All subsequent rows of this half of the square are worked the same. Work a single crochet decrease over the first two stitches, single crochet in each stitch across until 2 stitches remain, then work a single crochet decrease over the last two stitches. Repeat this until only 2 stitches remain, and then single crochet decrease these tow stitches together.

Half Square Triangle Crochet Quilt Block

The next side

Using another color and the unused loops of the beginning chain. Work the same stitch technique of decreases on each side of the row.

The block is really just that simple. Now for some ideas. I have found plugging the term “half square triangle quilt” into a search engine, and then selecting the images option, that there is a great abundance of uses.

Ideas for Crochet Quit Block -Half Square Triangles

Some of my favorites are the Ohio Star block, Flock of Geese block, and Pinwheel blocks. The half square triangles that are created can be put together to form these larger blocks, then these blocks can be put together to create pillows, blankets, ponchos, the possibilities are only limited by imagination.

Music Tapestry Block for Crochet Celebration

Do you hear the Music? Happy National Crochet Month! I am part of the annual Crochetville Blog tour to celebrate the event. This year the theme is Crochet Concert and features how music can be an inspiration, as my inspiration I have created a Music Tapestry Block to Celebrate crochet.

I Celebrate Crochet with Music

As my contribution to this tour I have created a Music Block. Use this block for various things including as a contribution to Warm Up America.

Music Block

You can donate to Warm Up America as a nationwide organization. Donating locally is encouraged, however donations can be sent to their office to be assembled. Assembled blankets will be donated through the United States.

Tapestry Crochet to Create Music

The Music Block gives you an opportunity to learn Tapestry Crochet. Tapestry Crochet is a technique of color work that has you crocheting over the unused color. This reduces finish work and creates a solid, somewhat dense, fabric.

Tapestry Crochet is worked entirely in single crochet with color changes.

Worked entirely in Singe Crochet (Double Crochet if you are using UK terms). Worked with a chart, where each block is 1 stitch. Just remember to work back and forth in the chart, meaning read right to left for odd number rows and left to right for even number rows. (Needs tips for changing color…check here).

Crochet over the unused color, and carry it across. This reduces finish work while creating a charted design.

Enjoy this technique, and take some time to celebrate crochet this month.

Music Block

Gauge

Gauge: Square measures 7”x 9”

Materials

  • Medium weigh yarn, two colors (A), (B)
  • I/9/5.50 mm crochet hook

With Color B, chain 24, sc in 2nd ch from hook. Follow chart for design.