Help me help local communities by creating blocks for Warm Up America, by making a block for yourself and one for a community project with this free pattern. I will be creating a new block every two weeks and sharing it with you, I just ask that make one for donation.
Warm Up America is a nation wide organization that encourages local donations, but will also except donations to be sent to their office so that blocks can be assembled and then blankets can be donated through the United States.
Even if you do not want to participate with Warm Up America, please consider creating blocks, or blankets for your local community. There are various places in every community that accept donations.
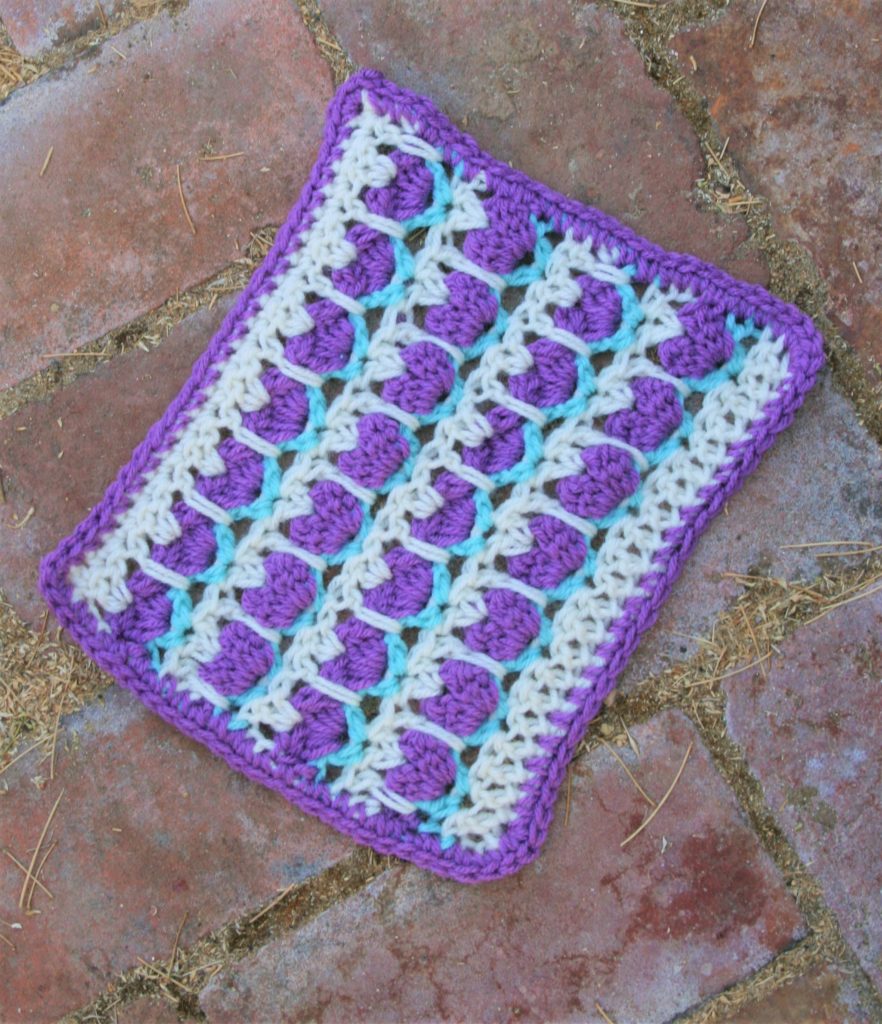
Garden Block
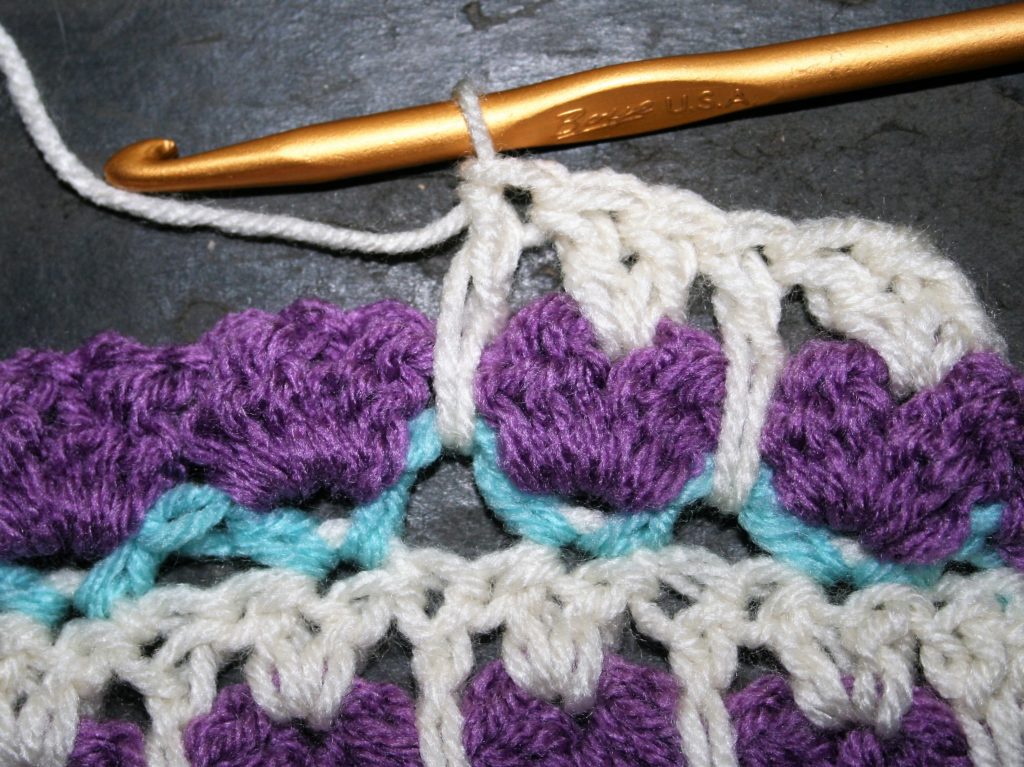
This block features color change, that does not require you to break the yarn. You can carry the yarn up the edge, as the color changes every row, and then finish the sides with edging.
I was inspired to create this block due to my lack of a green thumb. I try, and I think this season will be different. Yet it always ends the same…with a bunch of brown where I was expecting green.
This block lets me enjoy a little row of crocheted flowers.
Learn tips For Carrying Yarn on Edges.
Gauge: Square measures 7”x 9”
Materials
Medium weigh yarn, three colors (A), (B), (C)
K/10 1/2 /6.50mm crochet hook
Special Stitches
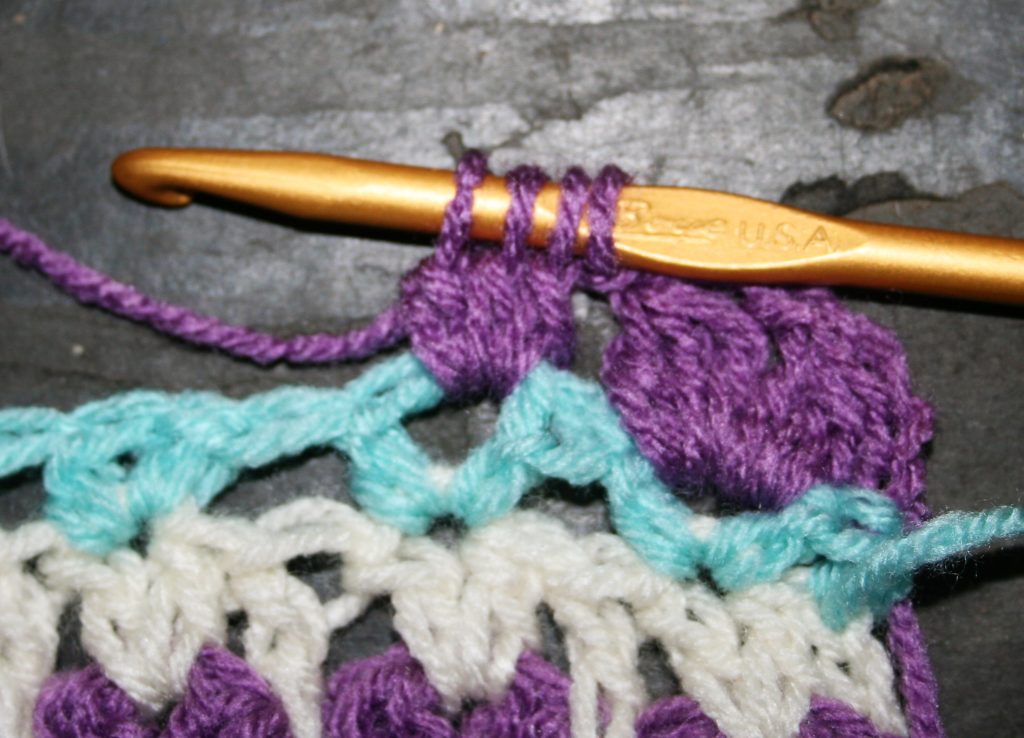
Flower Bobble (FB): [Yo, insert hook in indicated stitch, yo, pull up a loop, yo pull through 2 loops] 3 times, pull through all 4 loops on hook, ch 1, [Yo, insert hook in indicated stitch, yo, pull up a loop, yo pull through 2 loops] 3 times, pull through all 4 loops on hook.
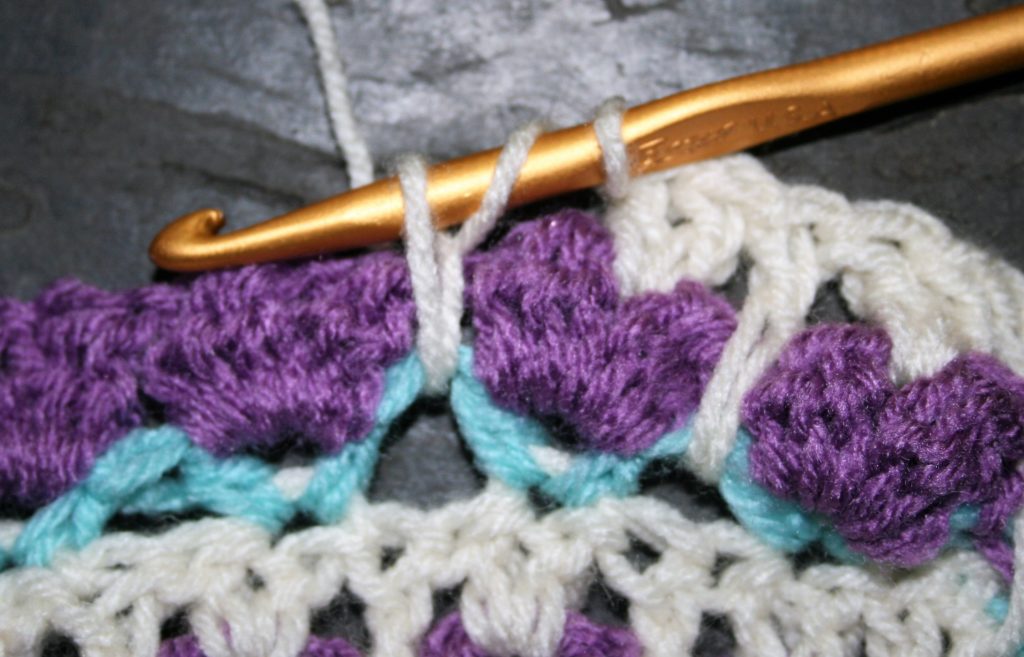
Long Loop Double Crochet (LLdc): Work as a regular double crochet, however the placement if the first Yo and insert hook is worked two rows below working row, Yo, pull loop up to height o working row, and complete double crochet.
Block Pattern
Ch 25
Row 1: With (A), dc in fourth ch from hook, dc in each ch across, change to (B), turn. -23dc
Row 2: Ch 2, sk 1, (hdc, ch 1, hdc) in next st, [sk 2, (hdc, ch 1, hdc) in next st] rep 6 times, sk 1, hdc in last st, change to (C) turn. -7 (hdc, ch 1, hdc)
Row 3: Ch 2, FB in each ch-1 sp across, hdc in last st, change to (A) turn. -7FB
Row 4: Ch 3, [2 dc in ch-1 sp in center of FB, LLdc between hdc stitch 2 rows below] 7 times, dc in last st, change to (B) turn.
Row 5-13: Rep Rows 2-4, do not change color at the end of Row 13.
Row 14: Ch 1, sc in each st across. Fasten off.
Rnd 1: Join with B to any corner, orking around edges of block, sc evenly working 3 sc in each corner. Fasten off. Weave in ends.