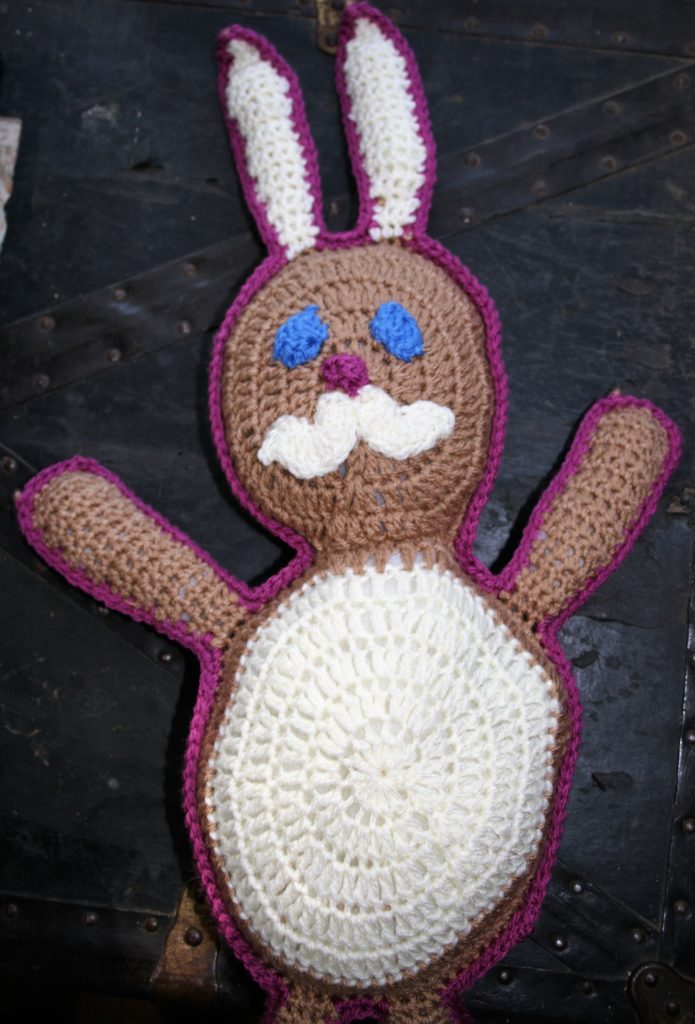
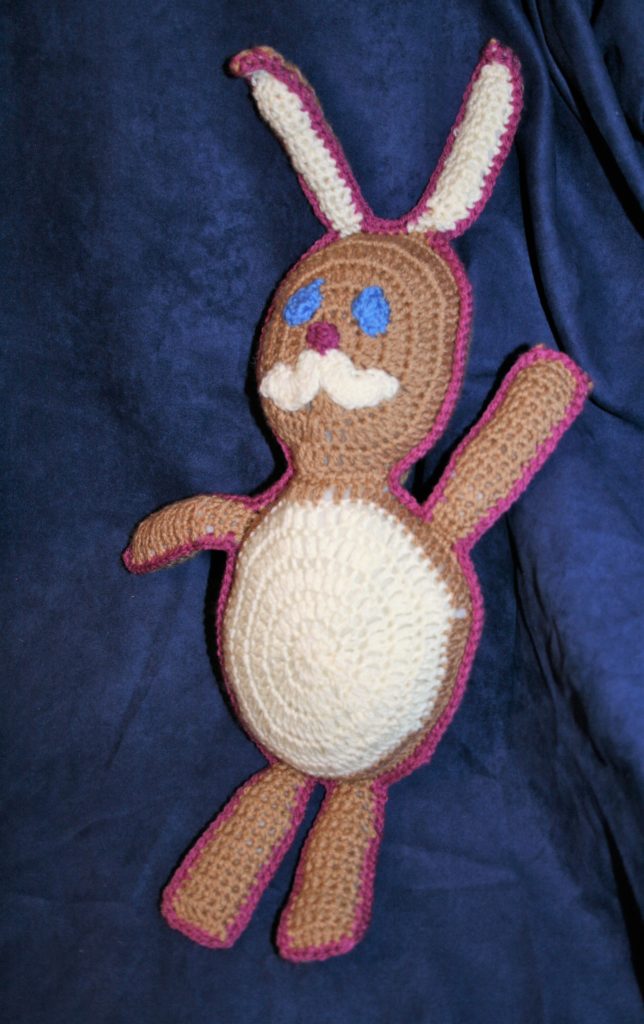
I have always had a soft spot for Rabbits, and as such I have always loved this time of year as it brings out Easter Bunnies everywhere. I have created a simple free pattern for a toy bunny, that might be just perfect for a little one in your life. This is an amigurumi for the beginner, as it has minimal shaping, I like the rustic charm.
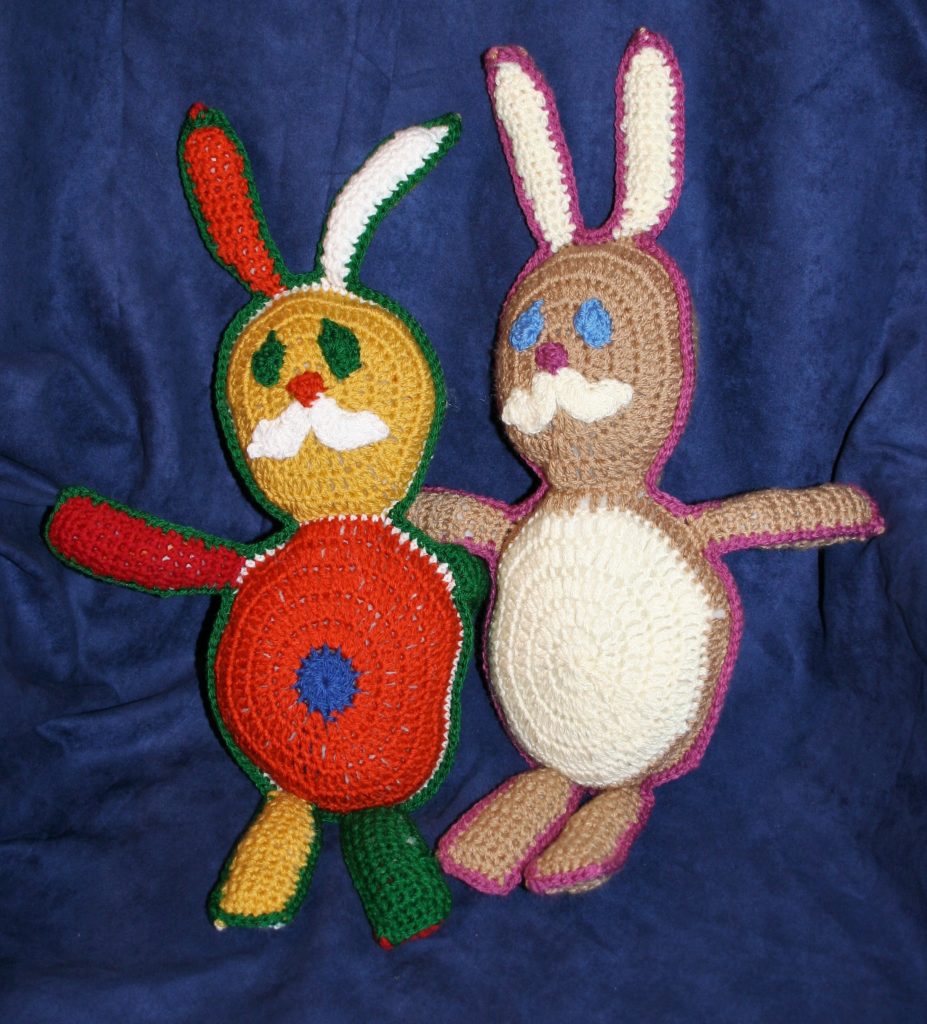
This free pattern is part of the 2020 Softie CAL! There are many great designs to keep you inspired, check all of them out here. Also, don’t miss the giveaways.

Materials
Lion Brand Basic Stitch Premium 100% acrylic medium weight yarn (3.5 oz/100g/219yd/200m) colors: MC-#126 Goldmine, CC1-#98 Cream, CC2-#142 Boysenberry, CC3- #109 Coastal (OR, make a Scrap Jack, by using any medium weight yearn on hand)
Poly-Fils Crafters Choice Dry Polyester Packing Fiber Fill
G/6/4.25mm crochet hook
Note…Save your time weaving in ends. Instead of weaving in ends, simply push the ends to the wrong side of the fabric, when seaming and stuffing ensure that the ends are with the stuffing.
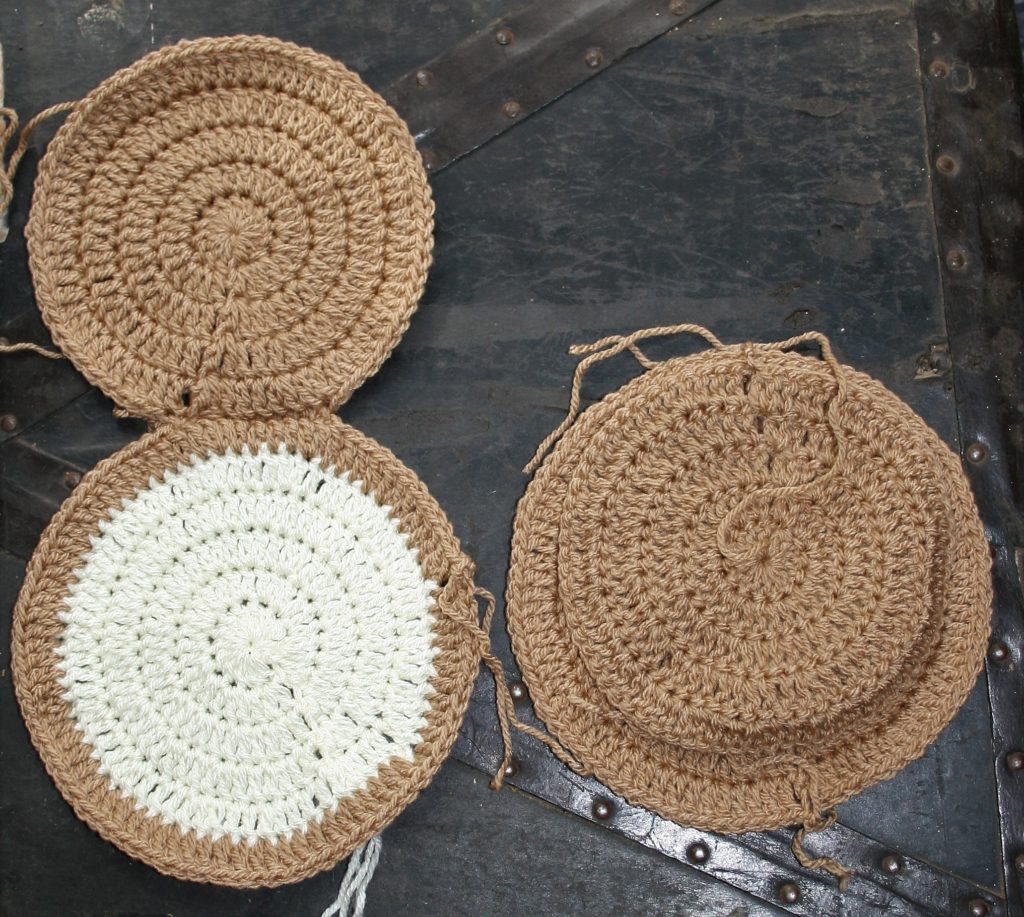
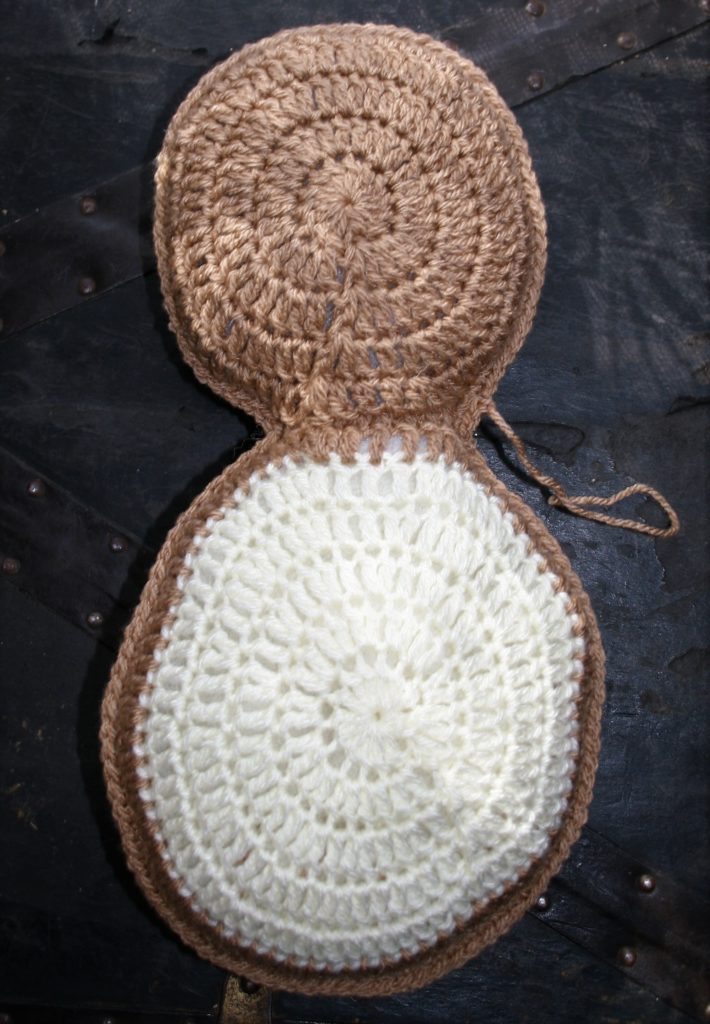
Head (Make 2)
Round 1: With MC, Magic Loop, (tip, learn the Magic Loop or substitute another beginning here)ch 3, 13 dc in loop, pull loop closed, sl st to top of beg ch. -14 dc
Round 2: Ch 3, dc in same st, 2 dc in each st around, sl st to join. -28dc
Round 3: Ch 3, dc in same st, dc in next st, [2 dc in next st, dc in next st] around, sl st to join. -42 dc
Round 4: Ch 3, dc in same st, dc in next 2 sts, [2 dc in next st, dc in next 2 sts] around, sl st to join. -56 dc
Round 5: Ch 3, dc in same st, dc in next 3 sts, [2 dc in next st, dc in next 3 sts] around, sl st to join. Fasten off. -70 dc
Back (Make 1)
Round 1: With MC, Magic Loop, ch 3, 13 dc in loop, pull loop closed, sl st to top of beg ch. -14 dc
Round 2: Ch 3, dc in same st, 2 dc in each st around, sl st to join. -28dc
Round 3: Ch 3, dc in same st, dc in next st, [2 dc in next st, dc in next st] around, sl st to join. -42 dc
Round 4: Ch 3, dc in same st, dc in next 2 sts, [2 dc in next st, dc in next 2 sts] around, sl st to join. -56 dc
Round 5: Ch 3, dc in same st, dc in next 3 sts, [2 dc in next st, dc in next 3 sts] around, sl st to join. -70 dc
Round 6: Ch 3, dc in same st, dc in next 4 sts, [2 dc in next st, dc in next 4 sts] around, sl st to join. Fasten Off. -84 dc
Belly (Make 1)
Round 1: With CC1, Magic Loop, ch 3, 13 dc in loop, pull loop closed, sl st to top of beg ch. -14 dc
Round 2: Ch 3, dc in same st, 2 dc in each st around, sl st to join. -28dc
Round 3: Ch 3, dc in same st, dc in next st, [2 dc in next st, dc in next st] around, sl st to join. -42 dc
Round 4: Ch 3, dc in same st, dc in next 2 sts, [2 dc in next st, dc in next 2 sts] around, sl st to join. -56 dc
Round 5: Ch 3, dc in same st, dc in next 3 sts, [2 dc in next st, dc in next 3 sts] around, sl st to join, change to MC. -70 dc
Round 6: Ch 3, dc in same st, dc in next 4 sts, [2 dc in next st, dc in next 4 sts] around, sl st to join. Fasten Off. -84 dc
Joining Head to Body
With Right sides facing each other, stack 1 Head on the Back, working through stitches of both fabrics, sl st in 10 stitches. Repeat with last Head and Belly.
With Wrong Sides facing each other, stack the 2 sides on top of each other, working through stitches of both fabrics, sc around the entire outer edge of sides, filling with poly-fil before completely finishing. (Tip: Begin joining near neck to ensure that the neck of both sides matchup)
Arms/Legs
Working in the joining round of Head and Body, find your personal placement for 2 legs and 2 arms. You will work a front side and back side of each, and these will be seamed together in the final steps.
Front Side
Row 1: With MC, working in front loop, sc in 4 sts, turn. -4 sc
Row 2 & 3: Ch 1, sc in each st across, turn. -4 sc
Row 4: Ch 1, 2 sc in first st, sc in each st across, turn. -5 sc
Row 5: Ch 1, sc in each st across, turn. -5 sc
Row 6: Ch 1, 2 sc in first st, sc in each st across, turn. -6 sc
Row 7-18: Ch 1, sc in each st across, turn. Fasten off at the end of Row 18.
Back Side
Row 1: With MC, working in back loop, sc in 4 sts, turn. -4 sc
Row 2 & 3: Ch 1, sc in each st across, turn. -4 sc
Row 4: Ch 1, 2 sc in first st, sc in each st across, turn. -5 sc
Row 5: Ch 1, sc in each st across, turn. -5 sc
Row 6: Ch 1, 2 sc in first st, sc in each st across, turn. -6 sc
Row 7-18: Ch 1, sc in each st across, turn. Fasten off at the end of Row 18.
Ears
Working in the joining round of Head find your personal placement for 2 ears. You will work a front side and back side of each, and these will be seamed together in the final steps.
Special Stitches
Single Crochet Two Together (sc3tog): Insert hook into indicated stitch, yo, pull through a loop, insert hook into next stitch, yo, pull through a loop, yo, pull through all 3 loops on hook.
Single Crochet Three Together (sc3tog): Insert hook into indicated stitch, yo, pull through a loop, [insert hook into next stitch, yo, pull through a loop] twice, yo, pull through all 4 loops on hook.
Front Side
Row 1: With CC1, working in front loop, sc in 3 sts, turn. -3 sc
Row 2 & 3: Ch 1, sc in each st across, turn. -3 sc
Row 4: Ch 1, 2 sc in first st, sc in each st across, turn. -4 sc
Row 5: Ch 1, sc in each st across, turn. -4 sc
Row 6: Ch 1, 2 sc in first st, sc in each st across, turn. -5 sc
Row 7-15: Ch 1, sc in each st across, turn. -5 sc
Row 16: Ch 1, sc2tog, sc in next st, sc2tog, turn. – 2 sc2tog, 1 sc
Row 17: Ch 1, sc in each st across, turn. -3 sc
Row 18: Ch 1, sc3tog, turn. -1 sc3tog
Row 19: Ch 1, sc in only st, fasten off.
Back Side
Row 1: With MC, working in back loop, sc in 3 sts, turn. -3 sc
Row 2 & 3: Ch 1, sc in each st across, turn. -3 sc
Row 4: Ch 1, 2 sc in first st, sc in each st across, turn. -4 sc
Row 5: Ch 1, sc in each st across, turn. -4 sc
Row 6: Ch 1, 2 sc in first st, sc in each st across, turn. -5 sc
Row 7-15: Ch 1, sc in each st across, turn. -5 sc
Row 16: Ch 1, sc2tog, sc in next st, sc2tog, turn. – 2 sc2tog, 1 sc
Row 17: Ch 1, sc in each st across, turn. -3 sc
Row 18: Ch 1, sc3tog, turn. -1 sc3tog
Row 19: Ch 1, sc in only st, fasten off.
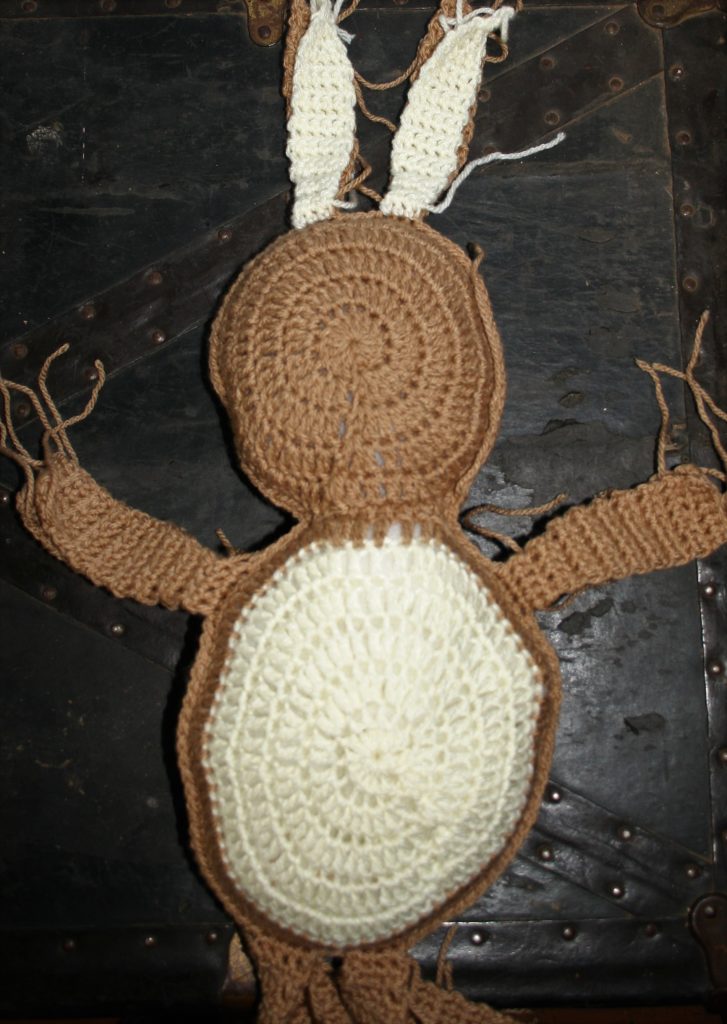
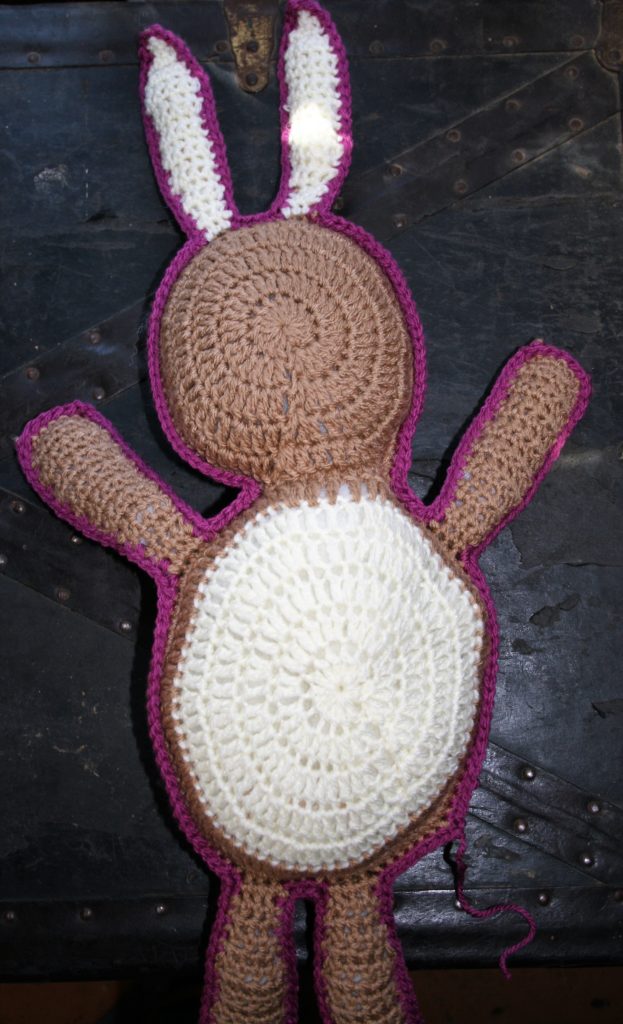
Seaming All Arms/Legs/Ears
With CC2, join to any edge seam of body or head, sc in each st across to next arm/leg/ear, working through both fabrics, evenly sc in ends of rows and stitches, filling with poly-fil before completing seaming, continue all the way around body, sl st to join. Fasten off.
Upper Lip (Mustache)
With CC1 Ch 18, sc in 2nd ch from hook, sk next 3 chs, 9 dc in next ch, sk 3 chs, sl st in next ch, sk 3 chs, 9 dc in next ch, sk next 3 chs, sc in last ch. Fasten off. With Shells facing downward, whip stitch lip to face.
Tail
Round 1: With CC1, Magic loop, ch 3, 8 dc in loop, pull loop closed, sl st to join.
Round 2: Ch 3, dc in same st, dc in next st, [2 dc in next st, dc in next st] around, sl st to join. Fasten off. Whip stitch tail to back of body, filling with poly-fil before completing seaming.
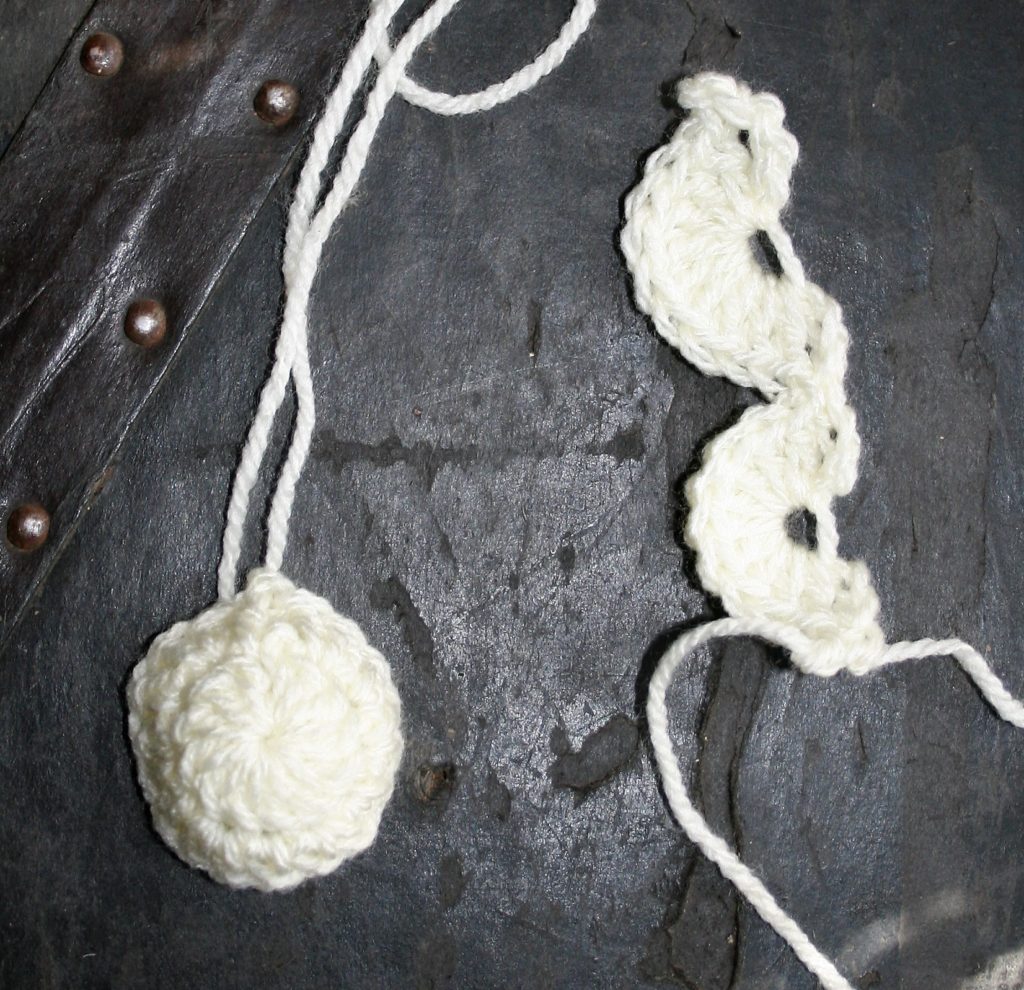
Nose
With CC2, ch 3, 2 dc in 3rd ch from hook, fasten off. Whip stitch at sl st of lip.
Eyes (Make 2)
With CC3, ch 3, 5 dc in 3rd ch from hook, fasten off. Whip stitch to face.