I am excited to see that some of my new designs are out in the wild! I have designs released in the last couple of weeks in I Like Crochet Magazine (December 2019 issue), and with Manos del Uruguay Fall 2019 collection.
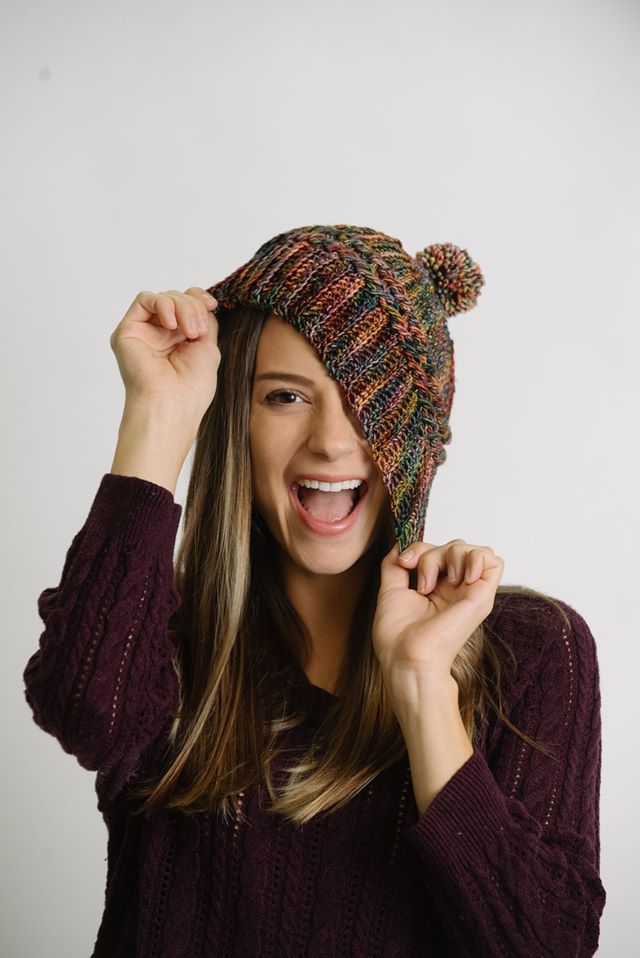
Yuletide Hat- I Like Crochet, December 2019
You can find my Yuletide Hat in the December 2019 issue of I Like Crochet Magazine, it is actually an embellished version of an earlier design. The Homey Fireplace Hat was released in the same publications October 2017 issue. The embellishment adds a little length, some fabulous yarn and a pom-pom. It is a great update that is perfect for a holiday gift.
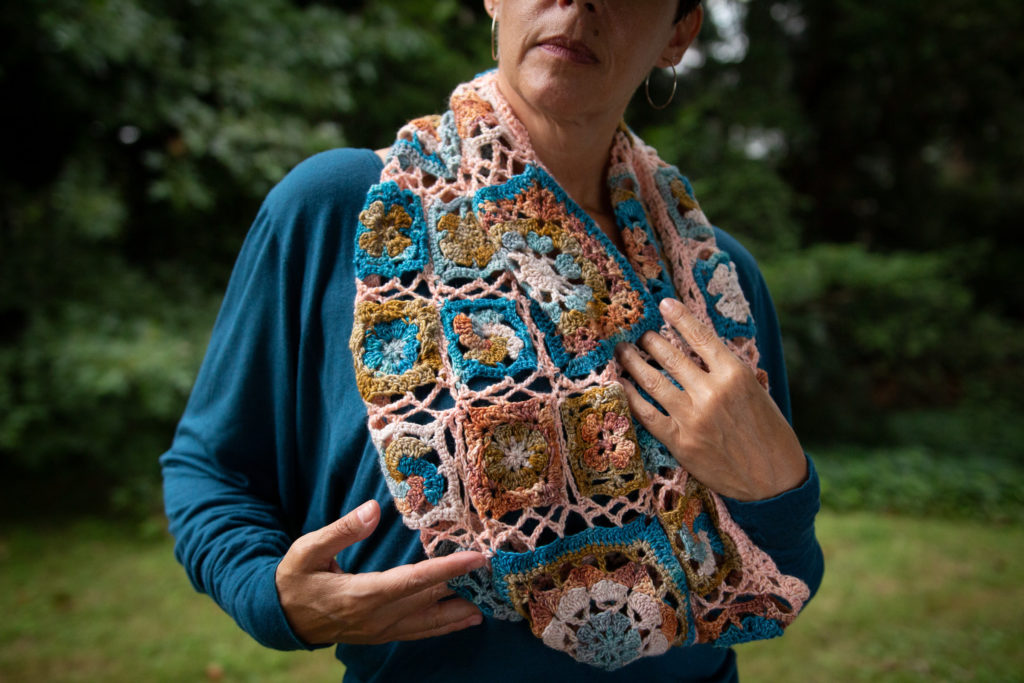
Then there is Muntin, a pattern that can be put together more than a one way to create two great designs. It consist of 6 different motifs in 2 different sizes. This allows for a really dynamic display of color, which has no two motifs that are alike. The motifs always seem a bit floral to me, so I always see a bed of flowers in this design, but you may notice something else.
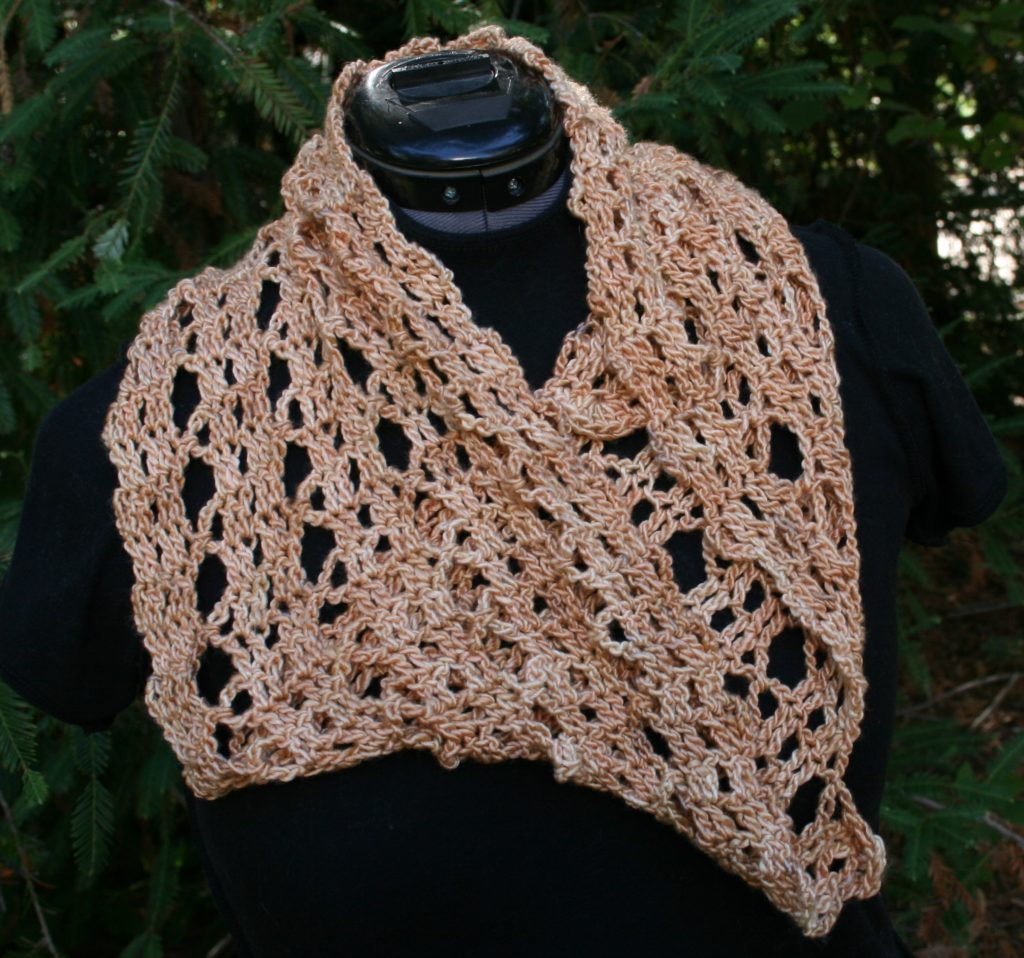
Muntin as a cowl, Manos Del Uruguay Fall 2019 Collection
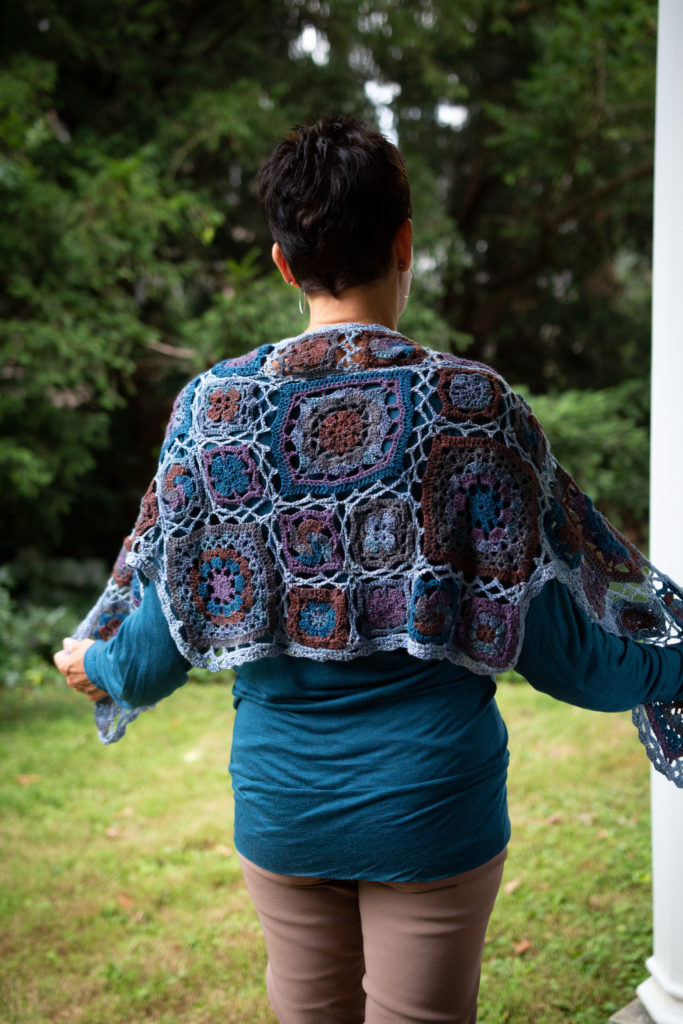
The two designs created with these motifs, have one being a cowl and the other a wrap, using the same amount of yarn and worked as join as you go so no sewing required. You could easily take this motifs and put them together in other ways to let your own imagination run wild.
Muntin as a wrap, Manos del Uruguay Fall 2019 Collection
Help me help local communities by creating blocks for Warm Up America,
by making a block for yourself and one for a community project with this free
pattern. I will be creating a new block every few weeks and sharing it with
you, I just ask that make one for donation.
Warm Up America is a nationwide organization that
encourages local donations, but will also except donations to be sent to their
office so that blocks can be assembled and then blankets can be donated through
the United States.
String of Stars Block
Even if you do not want to participate with Warm Up America,
please consider creating blocks, or blankets for your local community. There
are various places in every community that accept donations.
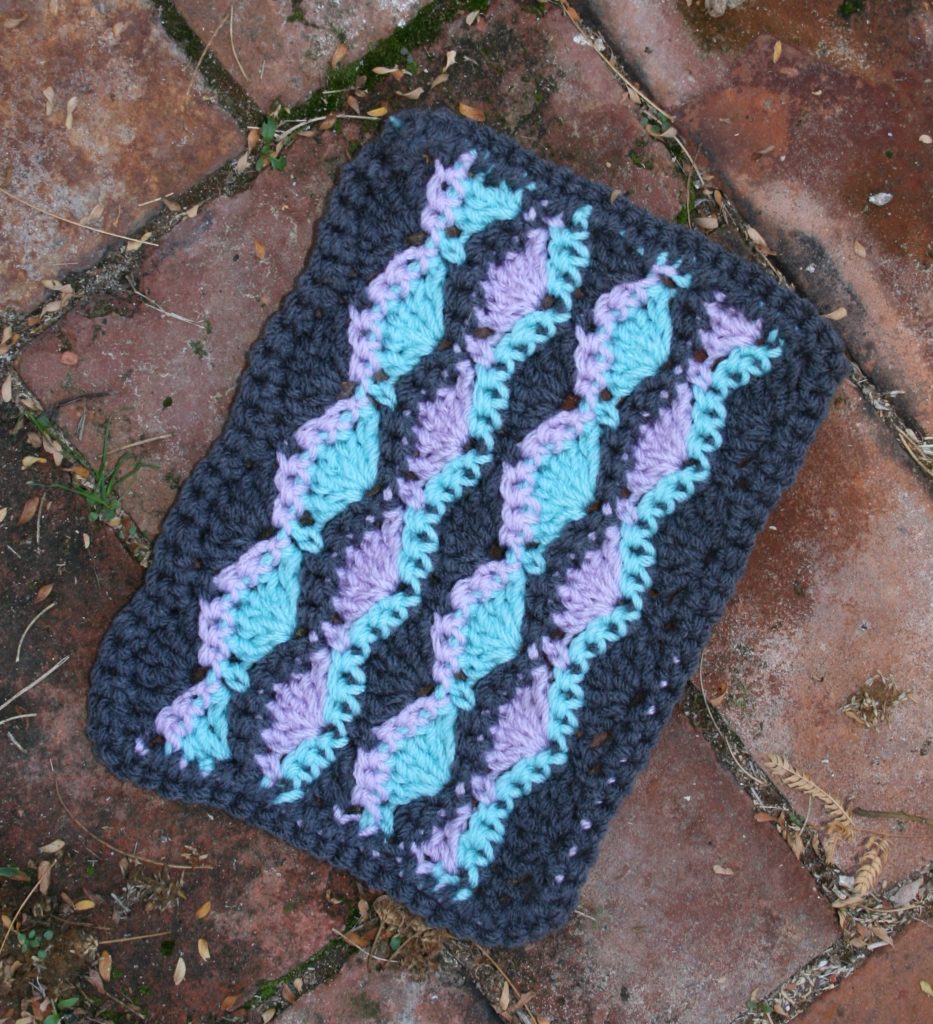
Star Stitches
This block is used working
star stitches. Star stitches are similar to working a decrease over several
stitches, but instead of over several stitches it is over various parts of
adjacent stitches. Pulling up many loops in many places creates this unique
looking stitch, in this block I have you working 2 different types of star
stitches. One star is big and full over yarn overs to create a dynamic
appearance, while the lighter star is does not have yarn over, and few loops,
but creates a great textural effect, and in my opinion looks cute pall stacked
upon one another.
Gauge: 7”x9” rectangle
Materials
Medium weight yarn, in
3 colors MC (main color), CC1, CC2
K/10 ½/ 6.5mm hook
Special Stitches
Beginning Full Star (BFS): Yo, insert hook into 2nd ch from hook, yo, pull through loop, yo insert hook through base (post) of last stain next ch, yo, pull through a loop, yo insert hook into same st as chain, yo, pull through a loop, yo, insert hook in next st, yo, pull up a loop, yo, insert hook into next hook, yo, pull up a loop, yo, pull through all 11 loops on hook.
Full Star (FS): Yo, insert hook into eye last star made, yo, pull through loop, yo insert hook through base (post) of last star, yo, pull through a loop, yo insert hook into same st as last base (post) of last star, yo, pull through a loop, yo, insert hook in next st, yo, pull up a loop, yo, insert hook into next hook, yo, pull up a loop, yo, pull through all 11 loops on hook.
Loop placement for the Full Star Stitch (the placement is the same as the Light Star, but a Yarn over is worked between each inserting of the hook).After pulling through all the loops, you chain 1, this creates an “eye” at the center of the stitch
And the Smaller Star
Beginning Light Star (BLS): Insert hook into 2nd ch from hook, yo, pull through a loop, insert hook in next ch, yo, pull through a loop, insert hook into same st as chain, yo, pull up a loop, insert hook in next st, yo, pull up a loop, yo, pull through all 5 loops.
Light Star (LS): Insert hook into eye of last star made, yo, pull through a loop, insert hook through base (post) of last star, yo, pull through a loop, insert hook into same st as last post of last star, yo, pull up a loop, insert hook in next st, yo, pull up a loop, yo, pull through all 5 loops.
Row 5: Change to MC, ch 1, 2 sc in same st, sc
in each ch-sp across, turn. -27 sc
Only work in the chain space when working the next row on a row of Light Star Stitches
Row 6-13: Rep Rows 2-5 twice.
Edge
Rnd 1: Ch 1, sc in sc in same st, sc in each st
across until 1 st remains, 3 sc in last st, working over row ends evenly sc
across to beg ch, 3 sc in last st, working in unused loops of beg ch, sc in
each chain across, 3 sc in last st, working over row end evenly sc across, 2 sc
in last st, sl st to beg sc, fasten off.
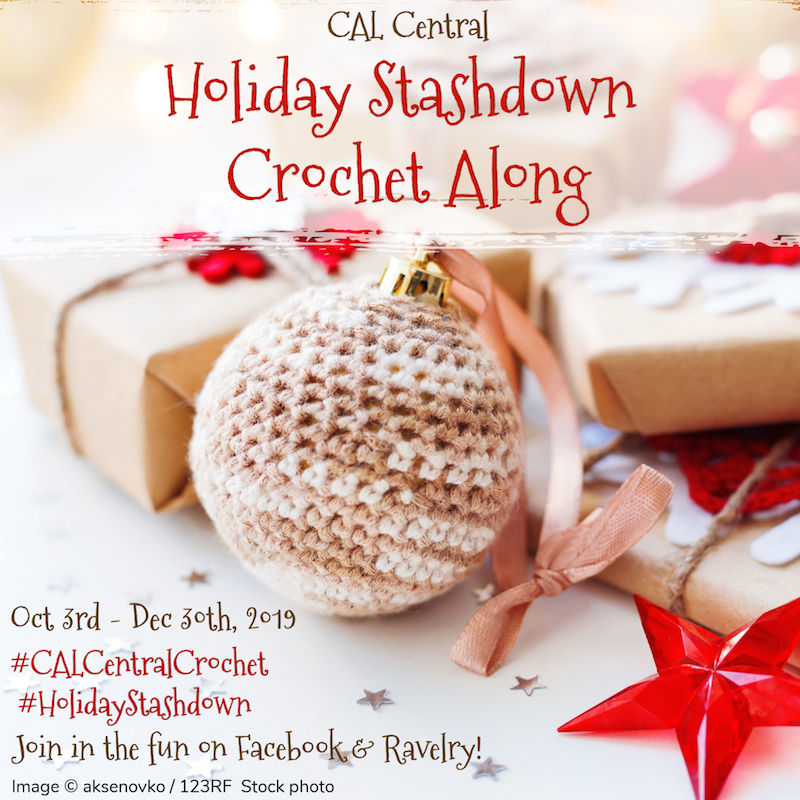
I am really honored to be part of the 2019 Holiday Stashdown. This is the fifth year, that you have weeks worth of pattern to help you work through your stash and get some of your holiday gifts created, and have the opportunity to win prizes.
For my part, I have created a quick cowl, it is worked from the center out with a twist. This makes for only a few rounds, but they are longer than you would expect, since you are almost creating two rounds at once.
Sovereign Cowl
This pattern works up in a medium weight yarn, and in my personal feeling has a bit of a regal feel, maybe it is the picot on the edge, but I know I will be keeping this one myself and wearing it this winter.
Picot: Ch 3, sl
st to the stitch below the ch just created.
Pattern is worked center out, by working on both side of the beginning chain, and add a twist for the mobius.
The Pattern
Ch 103
Rnd 1: Sc in 2nd
ch from hook, sc in each ch across, twist chain, and working in the unused
loops of the beginning chain, sc in the same loops as the first sc of the
round, sc in each unused loop around, join to the first st, turn. -204sc
Rnd 2: Ch 4, [sk
1 st, dc in next st, ch 1] rep around, sl st to join to 3rd ch of
turning ch, turn.
Rnd 3: Sl st to
next ch-1 sp, ch 1, sc in same sp, 3 dc in next ch-1 sp, [sc in next ch-1 sp, 3
dc in next ch-1 sp] rep around, sl st to join to first sc, turn.
Rnd 4: Ch 4, sk 1
dc, sc in next dc, ch 1, [dc in next sc, ch 1, sk 1 dc, sc in next dc, ch 1]
rep around, sl st to join, turn.
Rnd 5-7: Rep Rnds
2-4
Rnd 8: Rep Rnd 2
Rnd 9: Sl st to
next ch-1 sp, ch 1, sc in same sp, (2 dc, picot, dc) in next ch-1 sp, [sc in
next ch-1 sp, (2 dc, picot, dc) in next ch-1 sp] rep around, sl st to join to
first sc, fasten off. Weave in ends, block.
Help me help local communities by creating blocks
for Warm Up America,
by making a block for yourself and one for a community project with this free
pattern. I will be creating a new block every few weeks and sharing it with
you, I just ask that make one for donation.
Warm Up America is
a nationwide organization that encourages local donations, but will also except
donations to be sent to their office so that blocks can be assembled and then
blankets can be donated through the United States.
Even if you do not want to
participate with Warm Up America, please consider creating blocks, or
blankets for your local community. There are various places in every community
that accept donations.
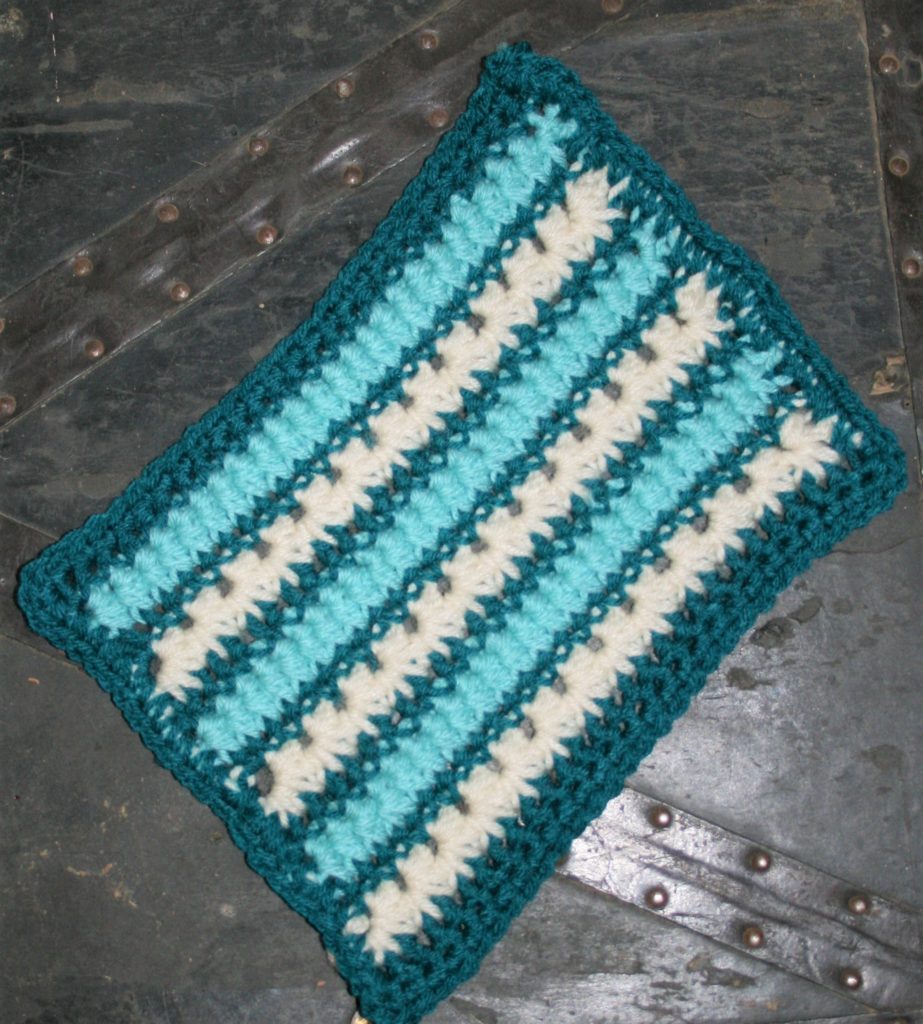
Shells in a Row
These simple 5 double crochet shells are just off-set from one
another, but a simple contrasting row of color gives it a different feel, allowing
the for a real stand out.
Medium weight yarn, in 3 colors MC (main color), CC1, CC2
K/10 ½/ 6.5mm hook
Block Pattern
With MC Ch 26
Row 1: Sc in 2nd ch from hook, [sk
2 chs, 5 dc in next ch, sk 2 chs, sc in next ch] 4 times, turn. -4 (5dc
shells), 5 sc sts
Row 2: Change to CC1, ch
1, sc in same st, sc in each st across, turn. -25 sts
Row 3: Change to CC2, ch
3, 2 dc in same st, sk 2 sts, sc in next st, [sk 2 sts, 5 dc in next st, sk 2,
sc in next st] 3 times, sk 2 sts, 3 dc in last st, turn. -3 (5 dc shells) 4 sc
sts, 2 (3 dc half shells)
Row
4:
Change to MC, ch 1, sc in same st, sc in each st across, turn.
Row
5:
Change to CC1, ch 1, sc in same st, [sk 2, 5 dc in next st, sk 2, sc in next
st] 4 times, turn. -4 (5dc shells), 5 sc sts
Row
6:
Change to CC2, ch 1, sc in same st, sc in each st across, turn.
Row
7:
Change to MC, ch 3, 2 dc in same st, sk 2 sts, sc in next st, [sk 2 sts, 5 dc
in next st, sk 2, sc in next st] 3 times, sk 2 sts, 3 dc in last st, turn. -3
(5 dc shells) 4 sc sts, 2 (3 dc half shells)
Row
8:
Change to CC1, ch 1, sc in same st, sc in each st across, turn.
Row
9:
Change to CC2, ch 1, sc in same st, [sk 2, 5 dc in next st, sk 2, sc in next
st] 4 times, turn. -4 (5dc shells), 5 sc sts
Row
10:
Change to MC, ch 1, sc in same st, sc in each st across, turn.
Row
11:
Change to CC1, ch 3, 2 dc in same st, sk
2 sts, sc in next st, [sk 2 sts, 5 dc in next st, sk 2, sc in next st] 3 times,
sk 2 sts, 3 dc in last st, turn. -3 (5 dc shells) 4 sc sts, 2 (3 dc half
shells)
Row
12:
Change to CC2, ch 1, sc in same st, sc in each st across, turn.
Row
13:
Change to MC, ch 1, sc in same st, [sk 2, 5 dc in next st, sk 2, sc in next st]
4 times, turn, do not fasten off. -4 (5dc shells), 5 sc sts
Edge
Rnd
1: Ch
1, sc in sc in same st, sc in each st across until 1 st remains, 3 sc in last
st, working over row ends evenly sc across to beg ch, 3 sc in last st, working
in unused loops of beg ch, sc in each chain across, 3 sc in last st, working
over row end evenly sc across, 2 sc in last st, sl st to beg sc, fasten off.
I have been hooked on playing with Bruges Lace as of late,
and wanted to share this skill.
Spiral Bruges Cowl
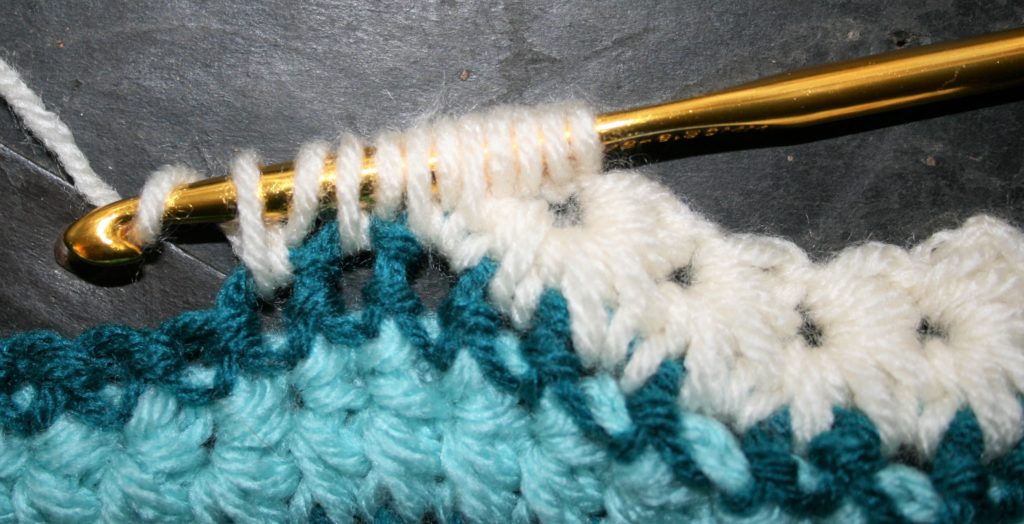
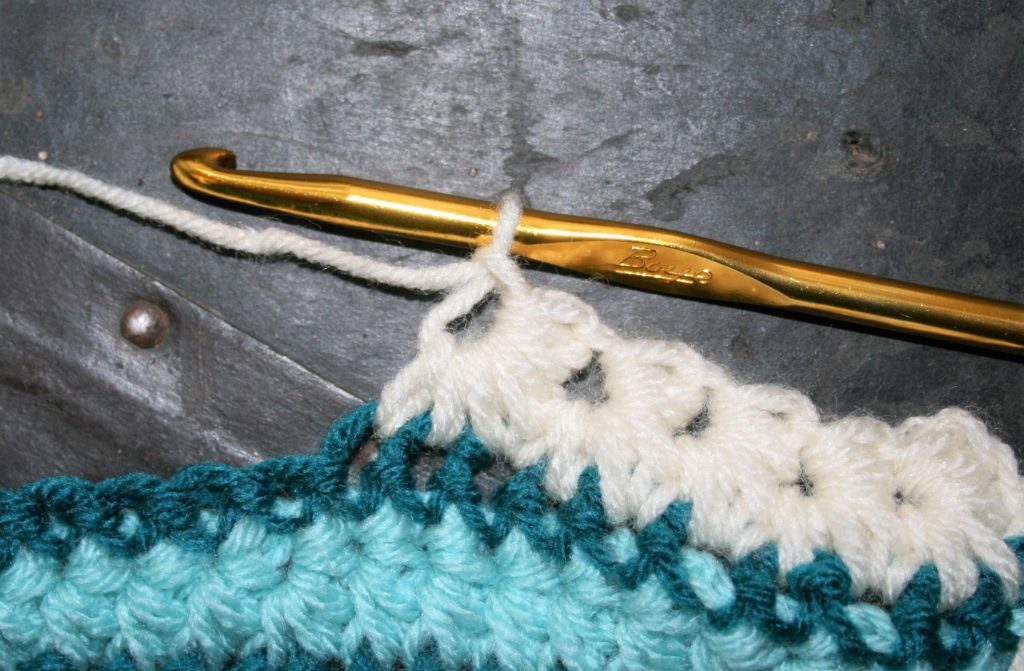
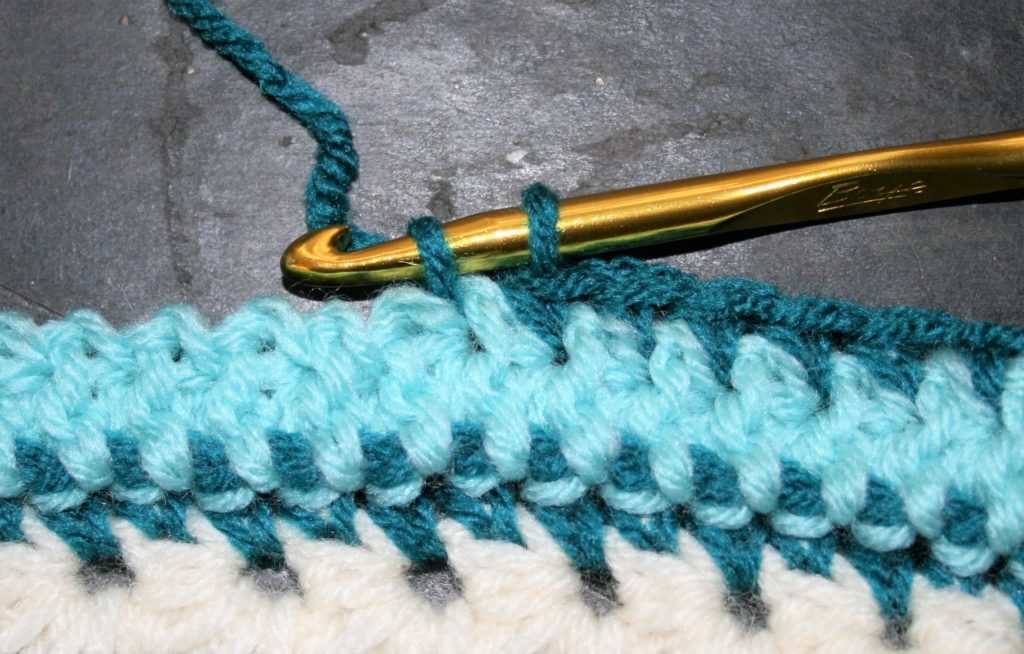
Bruges Lace is a crochet technique that essentially has you
crocheting a ribbon, a narrow strip, and attaching it to itself to create a
simple lace that looks much more involved. The patterns often have a high row
count, but that is because the rows are only a few stitches each, in some cases
only 5 stitches.
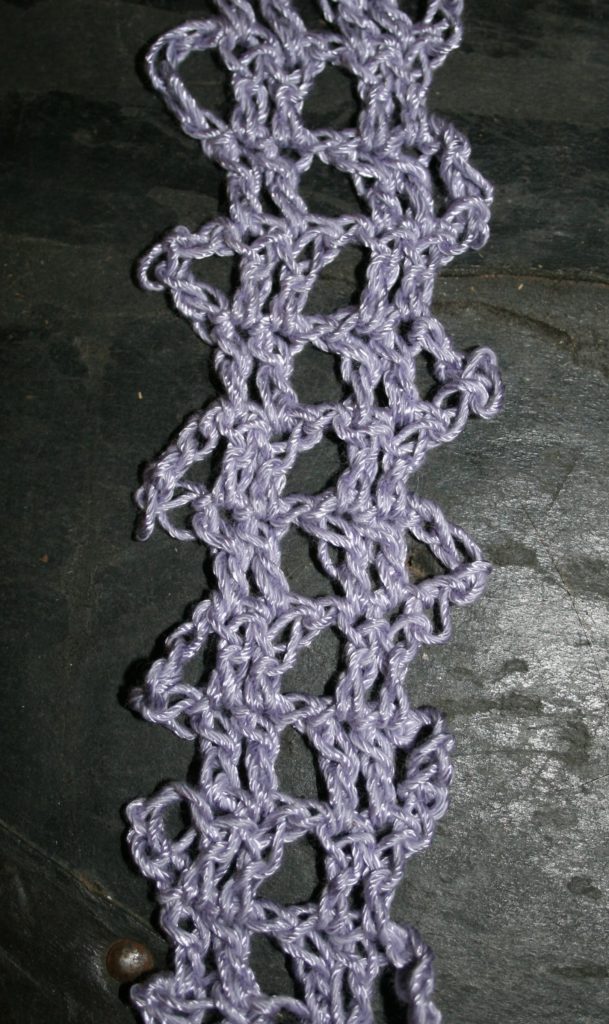
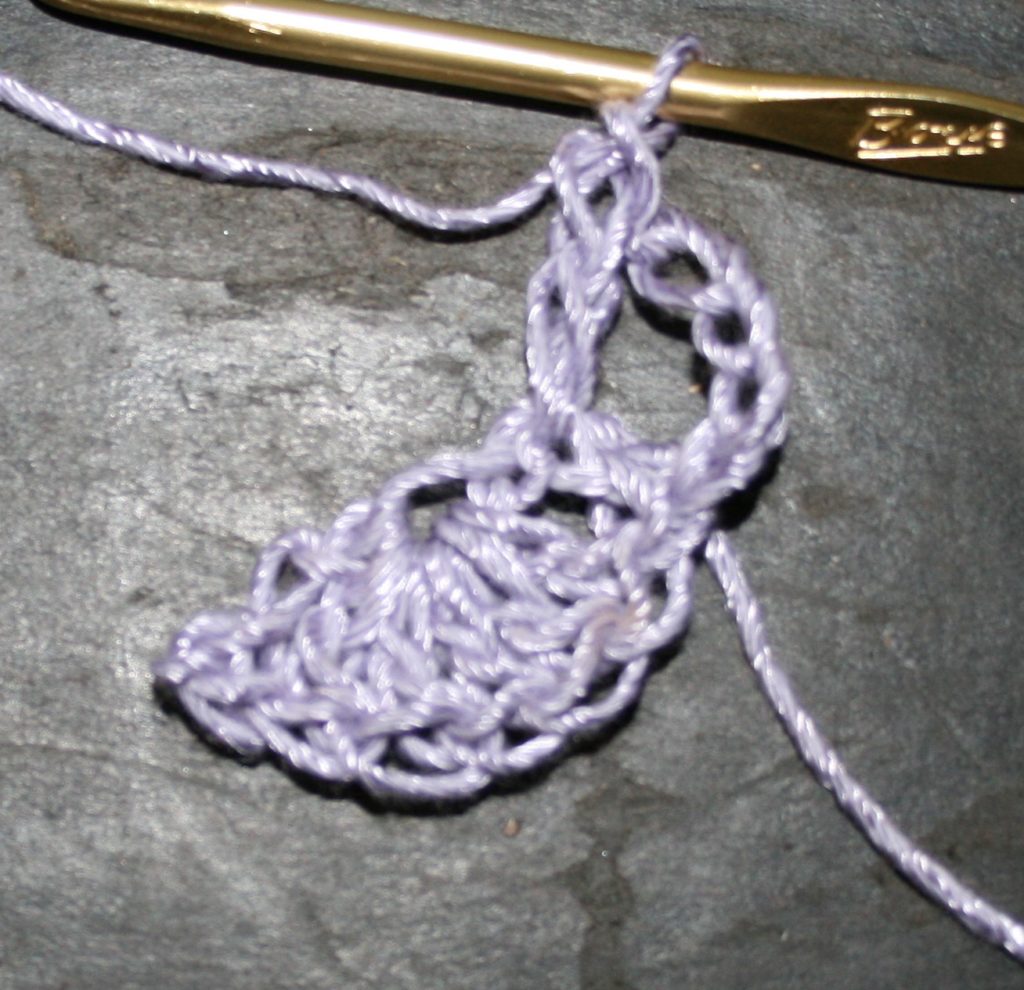
A “ribbon”
As you can see in this photo the “ribbon” is only a few
stitches, and then there is a long turning chain. This long chain is used as a
joining point when working the “ribbon” back on itself. This approach lends
itself to any design that you can draw in a continuous line.
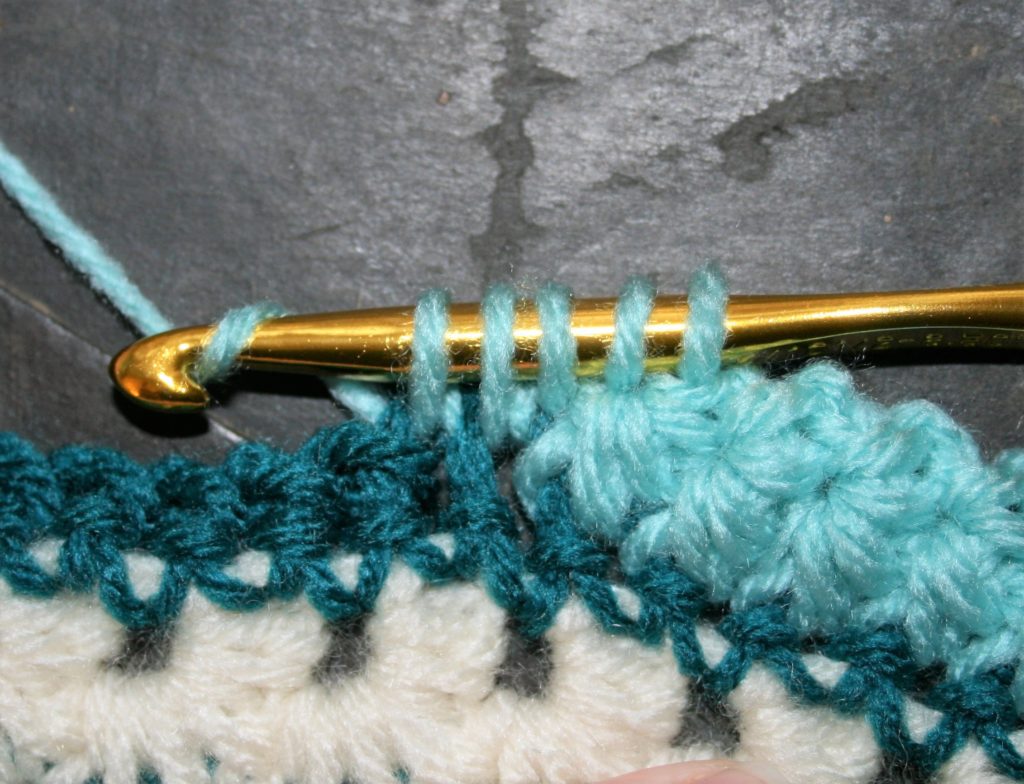
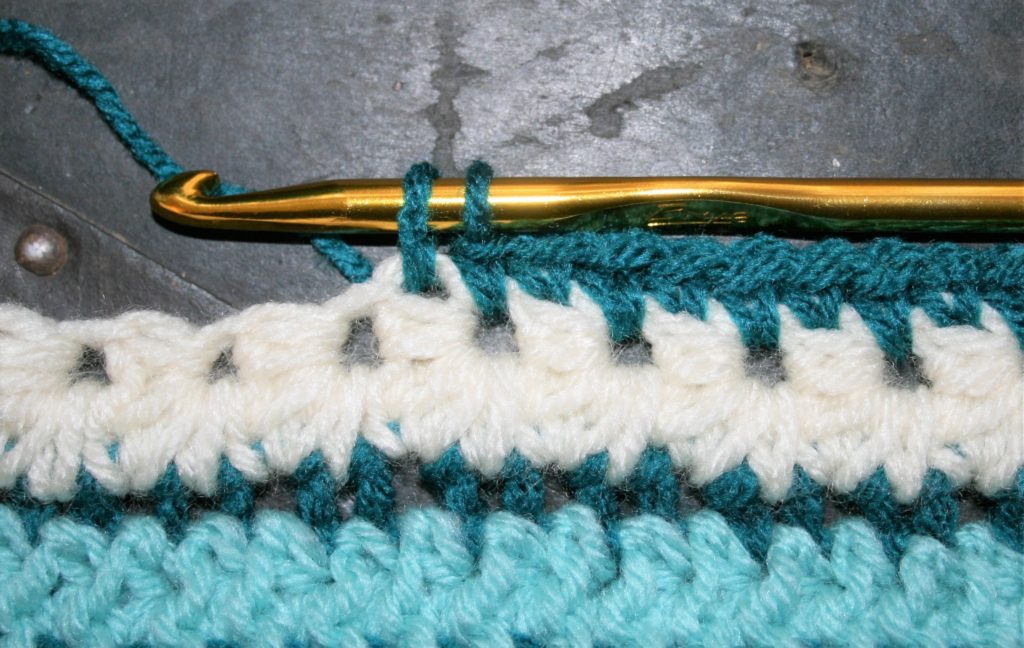
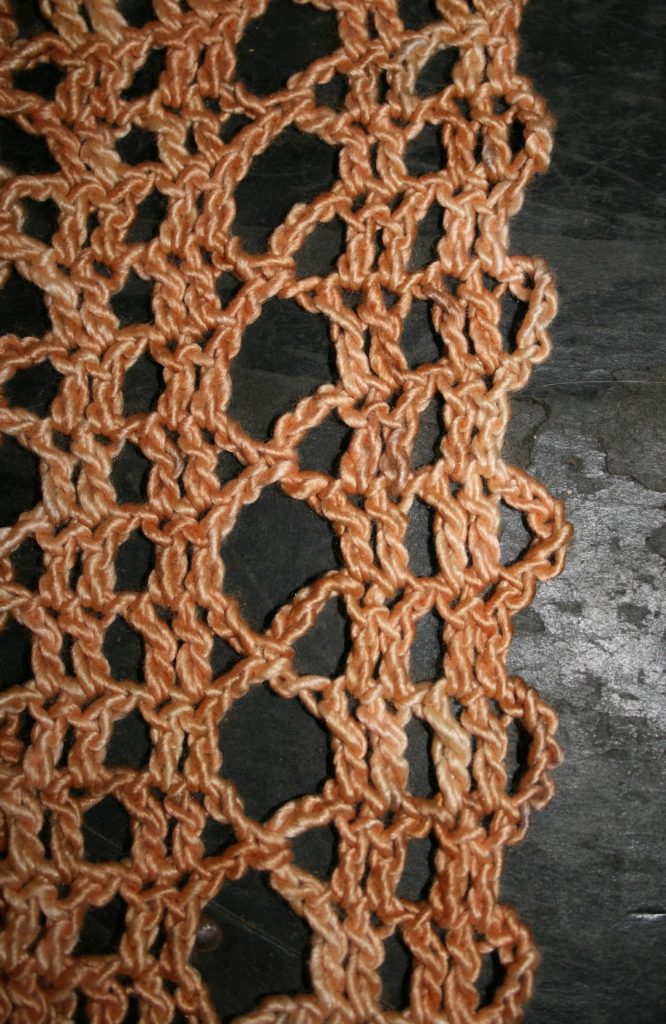
When you have a “turn” in your line you need to work longer
and join multiple long loops together to form a “bend” in the ribbon.
Joining sides of “ribbons”
I encourage you to give it a try, and to get you started I
have a free cowl pattern.
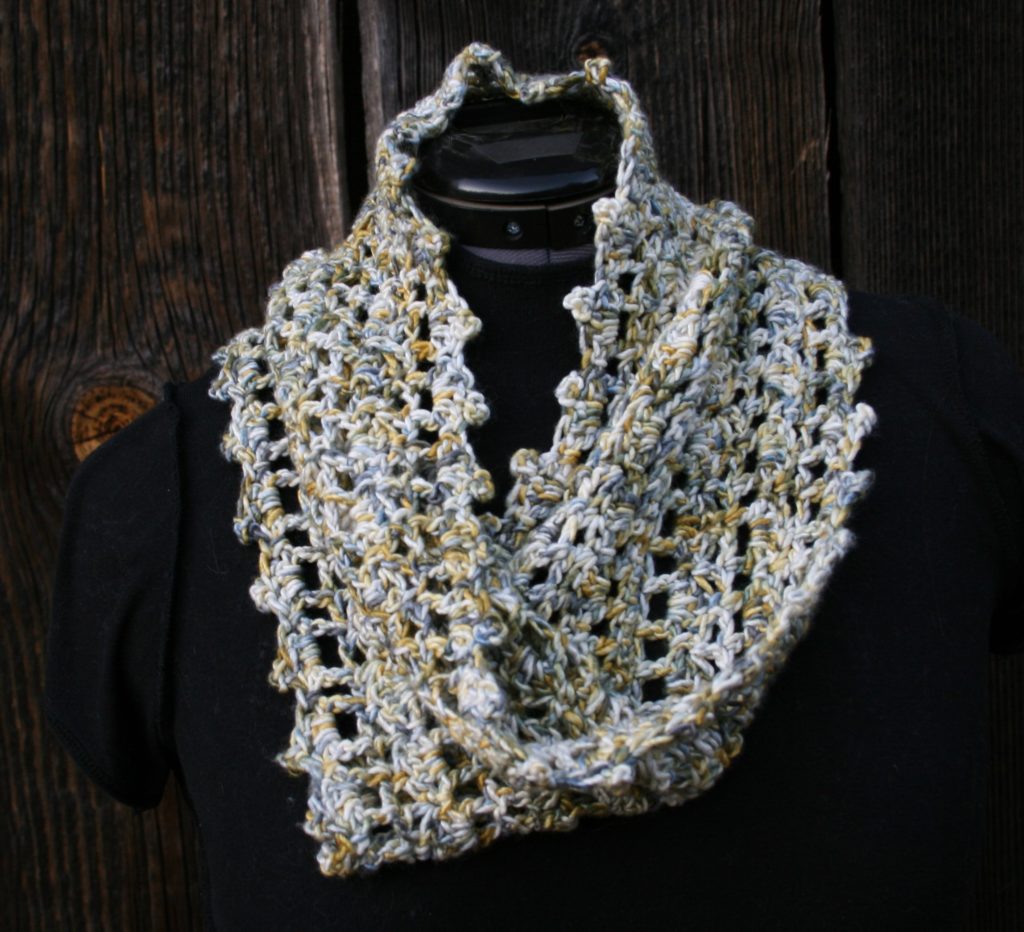
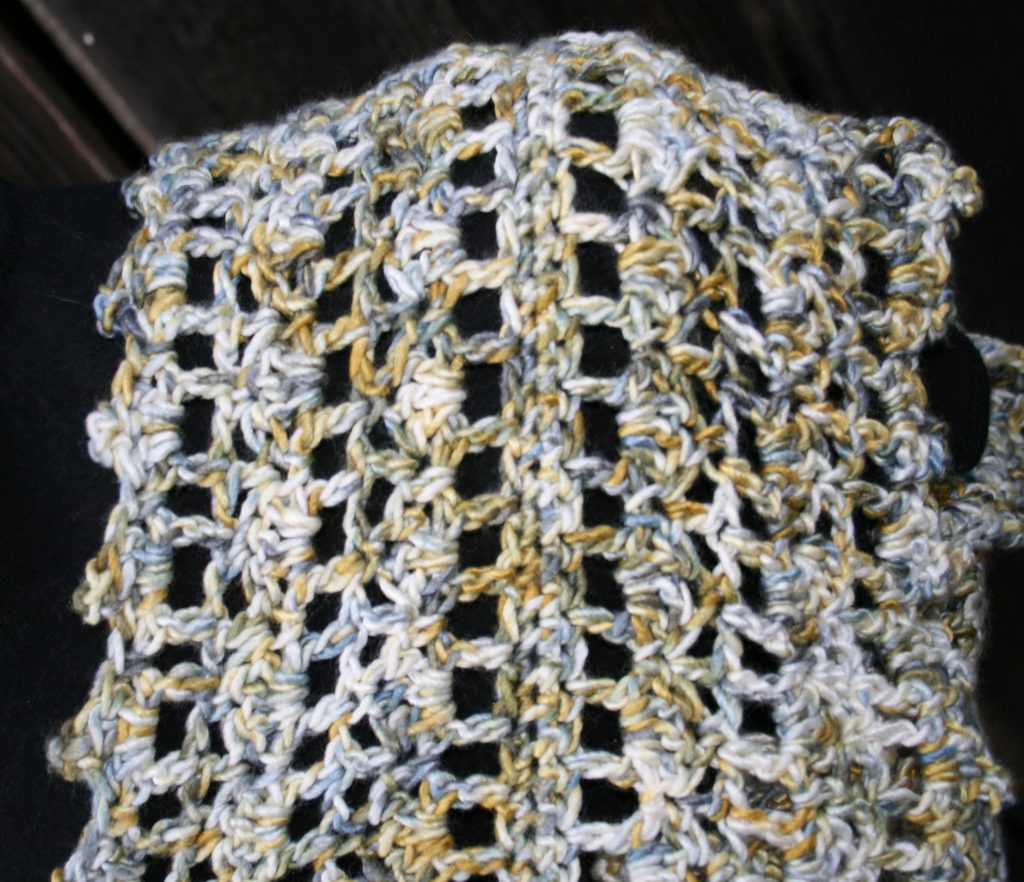
Spiral Bruges Cowl
Work a ribbon, and then join on one side to spiral around and create this fast and eye catching cowl. The ends of the ribbon are highlighted with simple shells to finish this highlight.
Finished Size
31″ circumference, 12″ Tall (79 cm circumference, 9 cm tall)
Gauge
5 sts (the width of ribbon, not counting ch-5 loop)= 1 1/2″ (4cm), 6 rows =4″ (10cm)