Does it matter which way I turn? Do I have to chain first?
These are two common questions that any crochet instructor is asked when
teaching the basics.
My typical answer is, “as long as you are consistent, it
does not matter”, but that is not quite true.
The reason I give my answer above, is because I know that
the student is taking in a lot of information and do not want to overwhelm them
with small details that may discourage, and in the long run it really may not
make a difference in your work.
However, there are some subtle difference to the direction
you turn your fabric and effects of your fabric. I am primarily writing from
the view point of right handed crocheter, but in the parentheses I note the
left handed viewpoint).
Turning Your Fabric
The standard way to turn your fabric it to turn it like the
page of a book (like you have been reading the last page of the book and need to
turn back to the beginning). Turning this direction keeps the working yarn to
the back of the fabric, in the same manner of placement as when you complete
your crochet stitch.
Turning like a page of the book (right handed)
Turning the fabric in the opposite direction the working
yarn is placed in the front of the fabric. While you can still create a stitch
creating a yarn over feels a bit different, maybe even awkward. This placement
also sets up some challenges depending on what stitch is being worked next.
Turning the page backward (right handed)
I have primarily found this with working a back loop single
crochet. By having the working yarn in the front of the work, it can make it difficult
to get the hook placement in the first back loop as it is not readily apparent
and thus this stitch may be skipped.
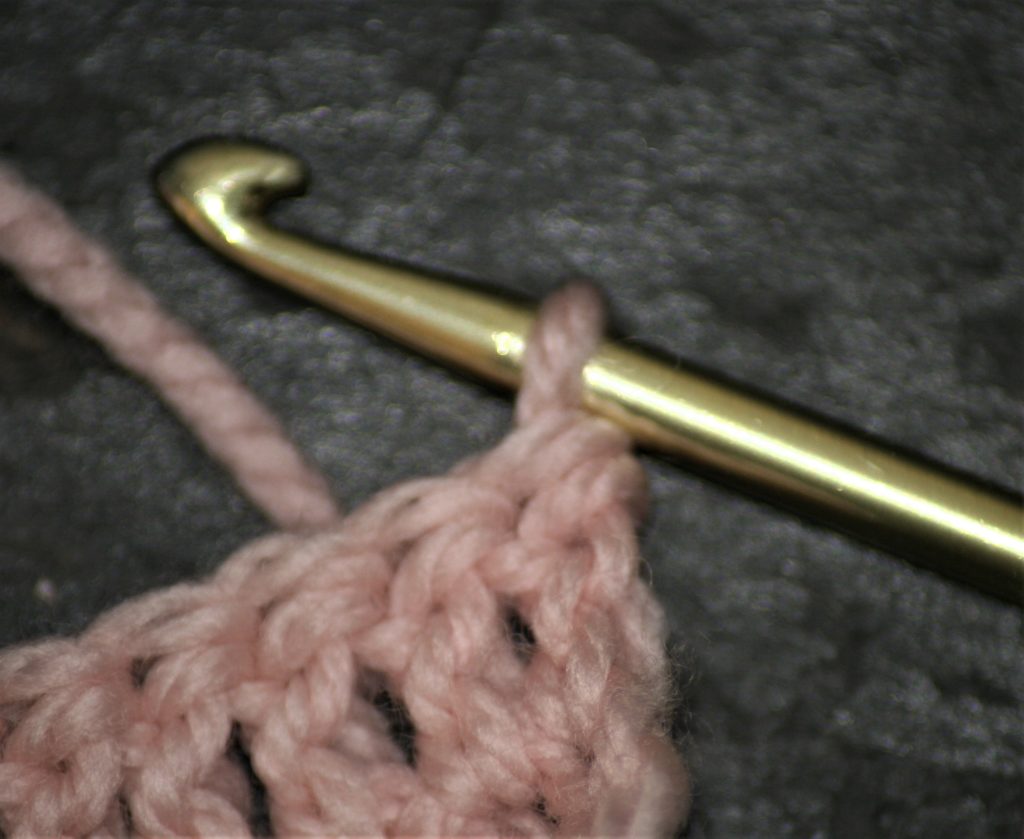
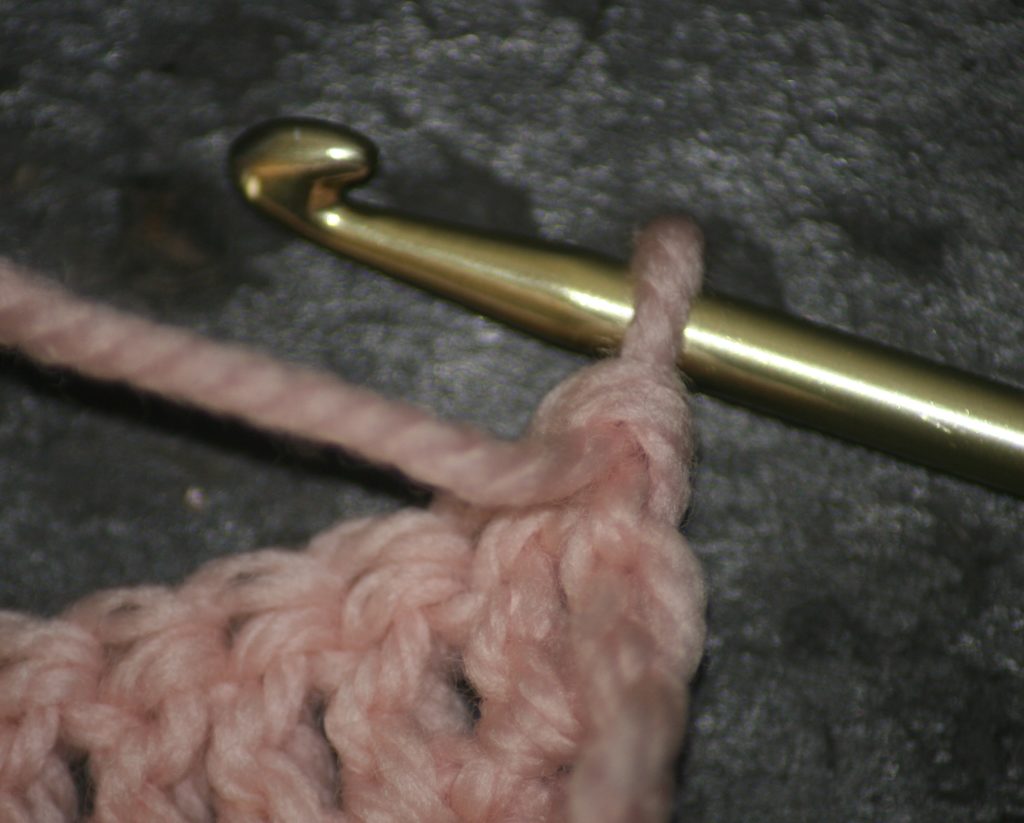
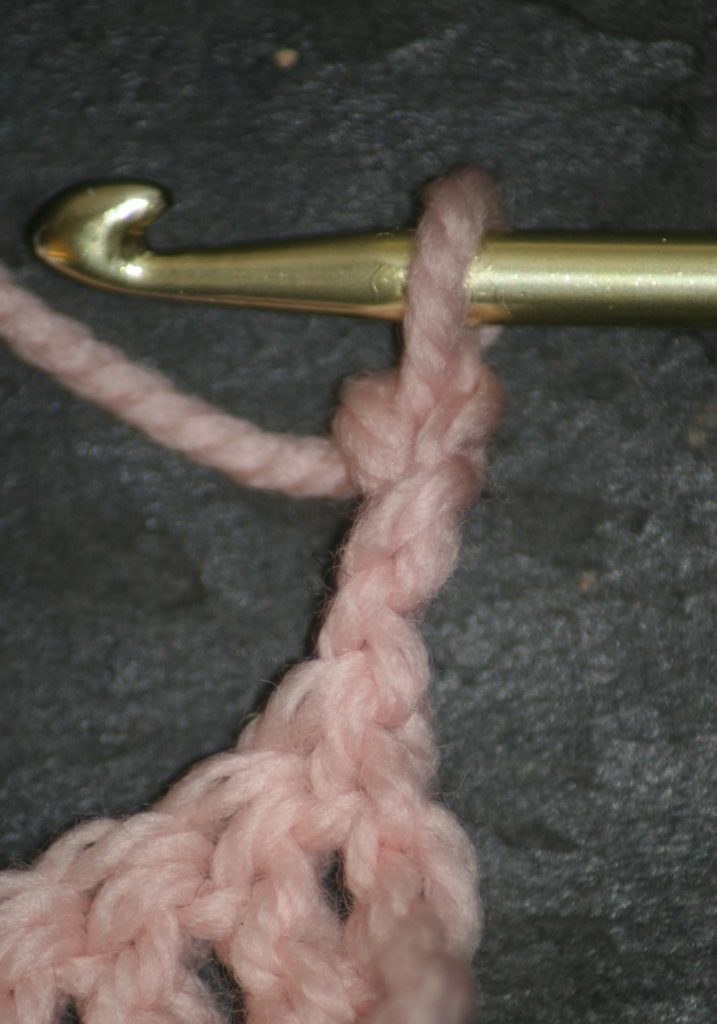
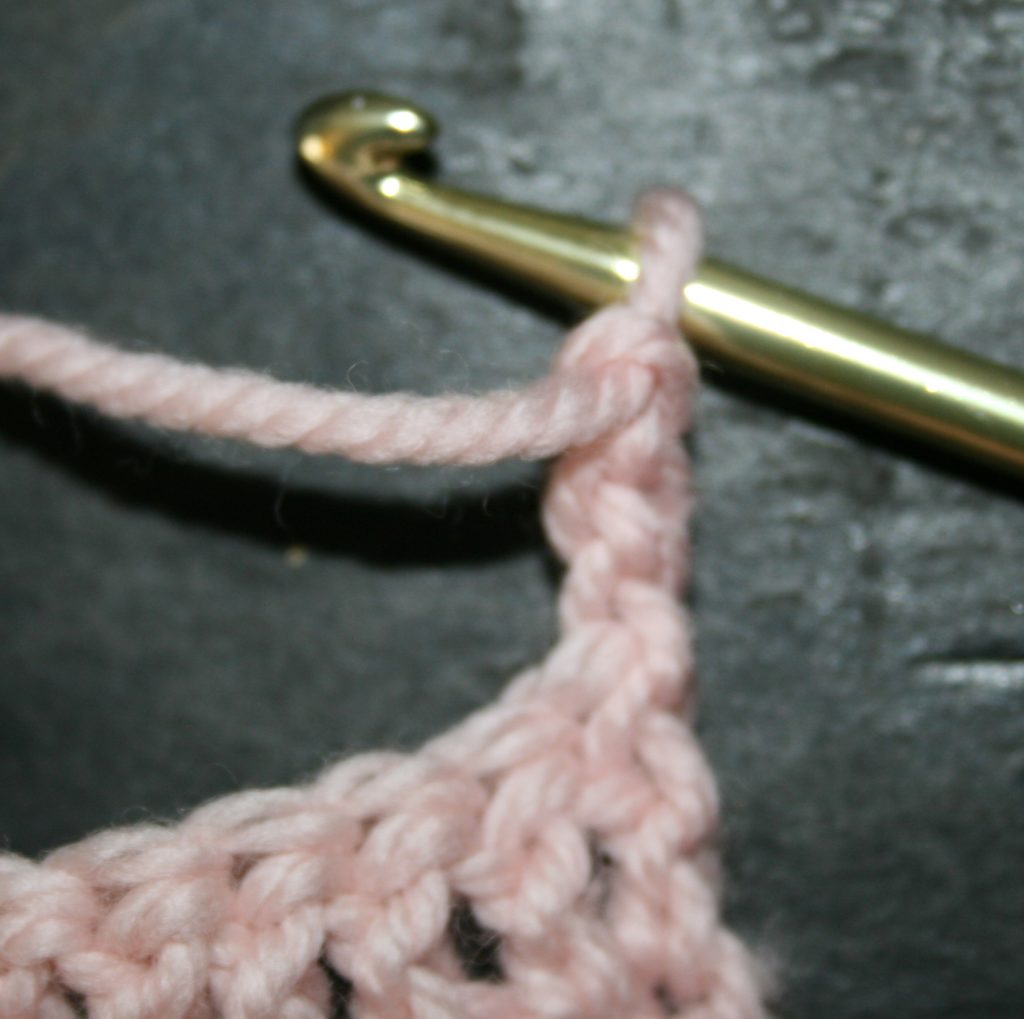
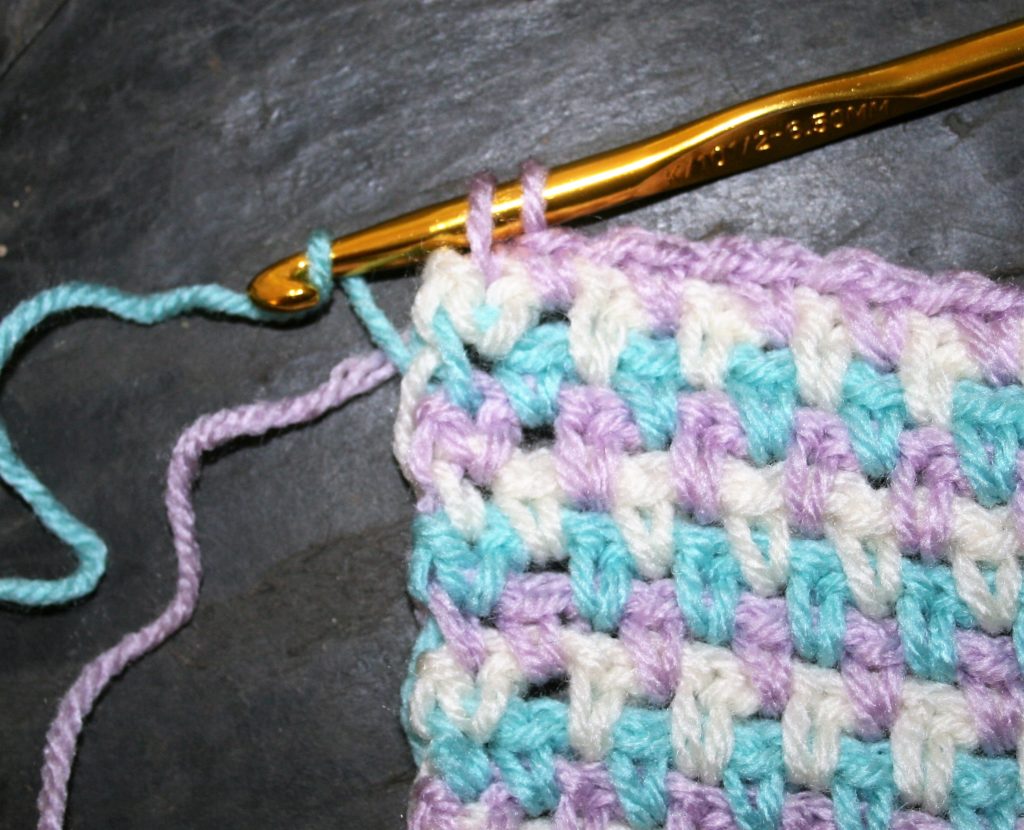
To Chain or Turn
So, then to turn and chain, or chain and then turn? As long
as you are only turning 180° there is no real apparent difference.
In either case, if the chain is created on a fabric that has the yarn to the
front of the work, the back side of the chain is facing forward. If the fabric
is created with the working yarn to the back the chain will appear to have a
slight twist.
The chain created when the fabric is turned like a book (right handed)…notice how the back of the chain (the bumps) are facing the edge and there is a slight twist.The chain created when the fabric is turned in the opposite direction of a page (right handed)- notice how the back of the chain (the bumps) are facing you
So to summarize, if you find that the first stitch of a row
feels a bit different than the other stitches, check the way you are turning
and see if it makes a difference, but do not worry about when and how you
chain, it works the same either way.
Help me help local communities by creating blocks for Warm Up America,
by making a block for yourself and one for a community project with this free
pattern. I will be creating a new block every few weeks and sharing it with
you, I just ask that make one for donation.
Warm Up America is
a nationwide organization that encourages local donations, but will also except
donations to be sent to their office so that blocks can be assembled and then
blankets can be donated through the United States.
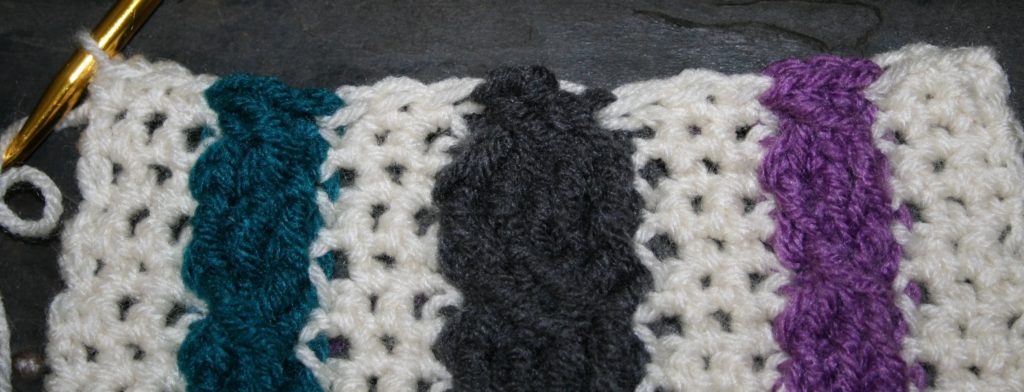
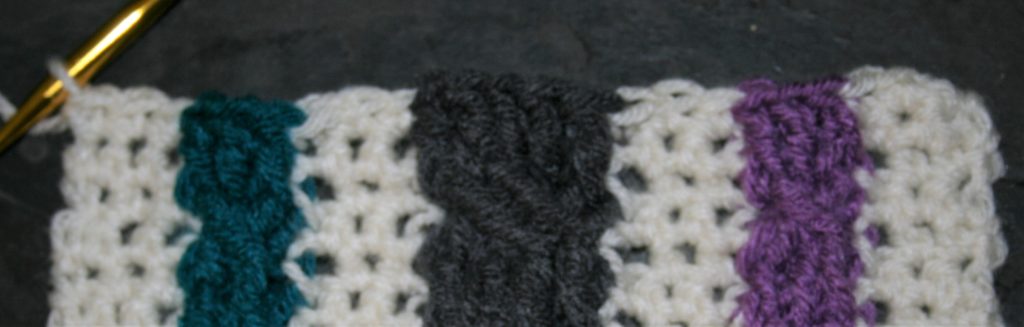
Three Cables Block
Even if you do not want
to participate with Warm Up America, please consider creating blocks, or blankets for your local
community. There are various places in every community that accept donations.
Three Cable Block
Crossing post stitches
make great texture and stunning appearance, and they are not as difficult as
you might think. Essentially you work post stitches 2 rows below your working
row, to cross a cable the first posts worked will be shifted over by skipping
stitches, and the last post stitches will be worked in the skipped stitches,
crossing over the first post stitches created. These twists are highlighted
more by having alternating post stitch rows worked by not crossing the post
stitches, creating a visual gap between the rows of twists.
Gauge: 7”x9” rectangle
Materials
Medium weight yarn, in 4
colors MC (main color), CC1 (first cable), CC2 (large cable in middle), CC3
(last cable)
K/10 ½/ 6.5mm hook
Special Stitches
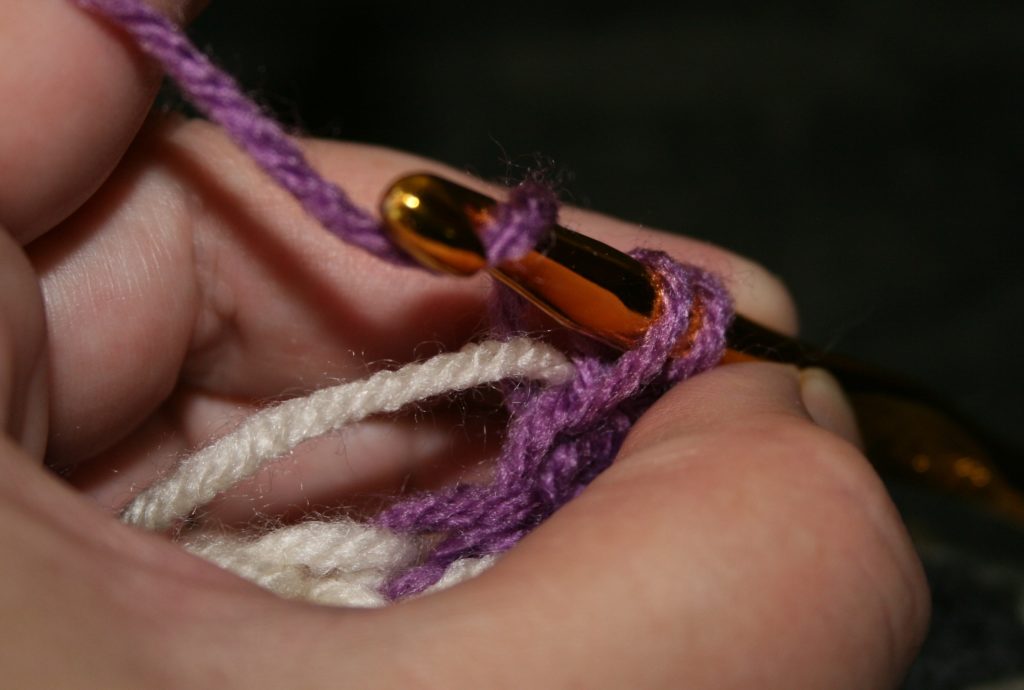
FPdc- Front Post Double Crochet: Yarn over, insert hook from front to back and then to front again around post of stitch, yarn over and draw up loop, [yarn over and draw through 2 loops on hook] twice. (see a visual on how to work the stitch here)
Block Pattern
With MC Ch 24
Row 1: Sc in 2nd ch from hook, sc in each ch across, turn. -23 sc sts
Row 2: Ch 1, sc in same st, sc in each st across, turn.
Row 3: Rep Row 2.
Crossing Cables Row
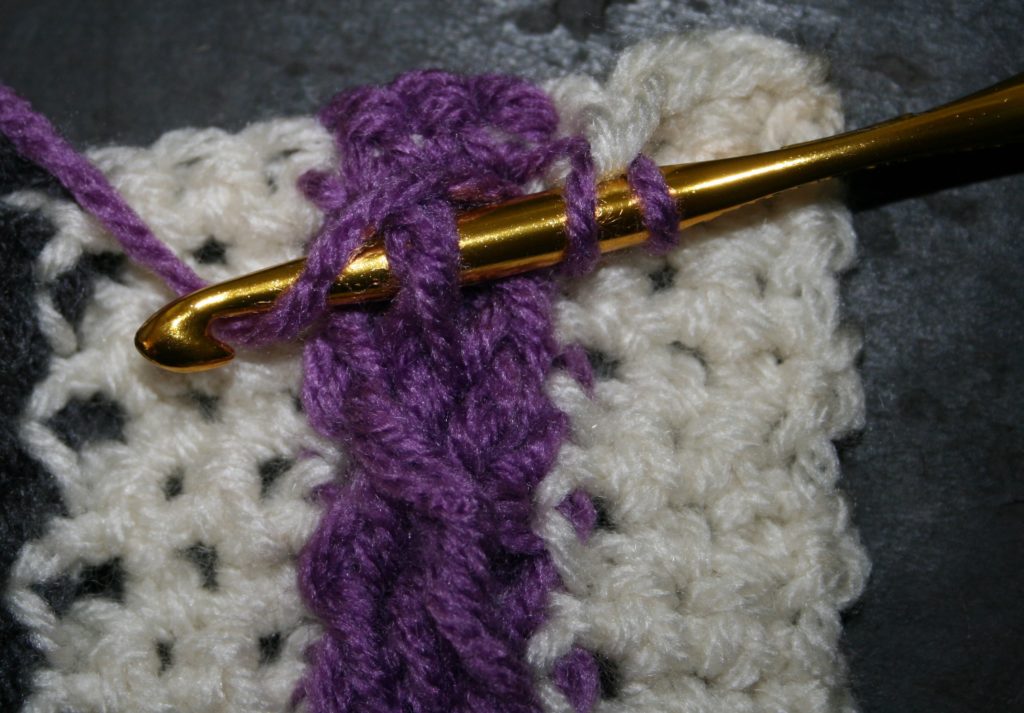
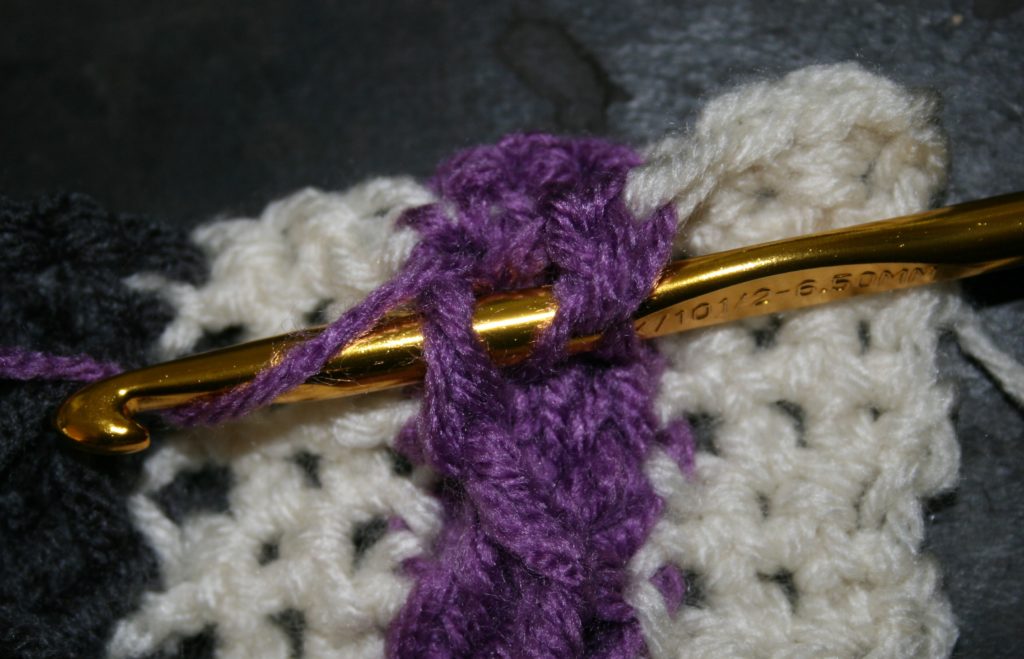
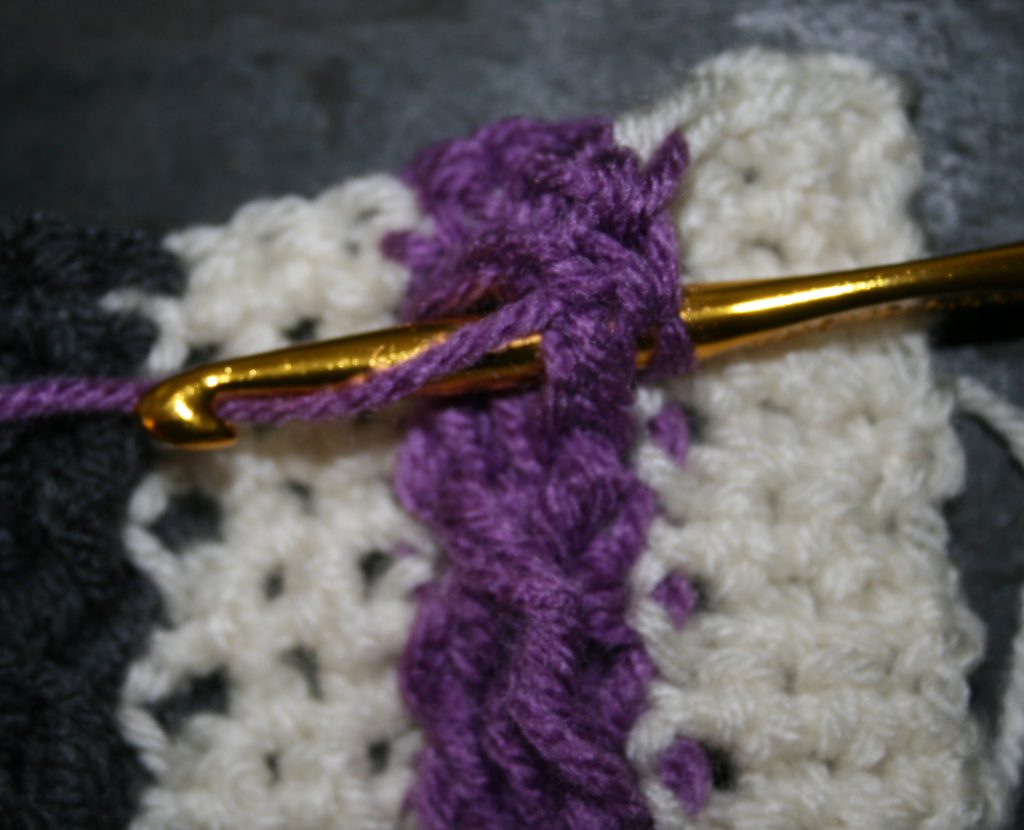
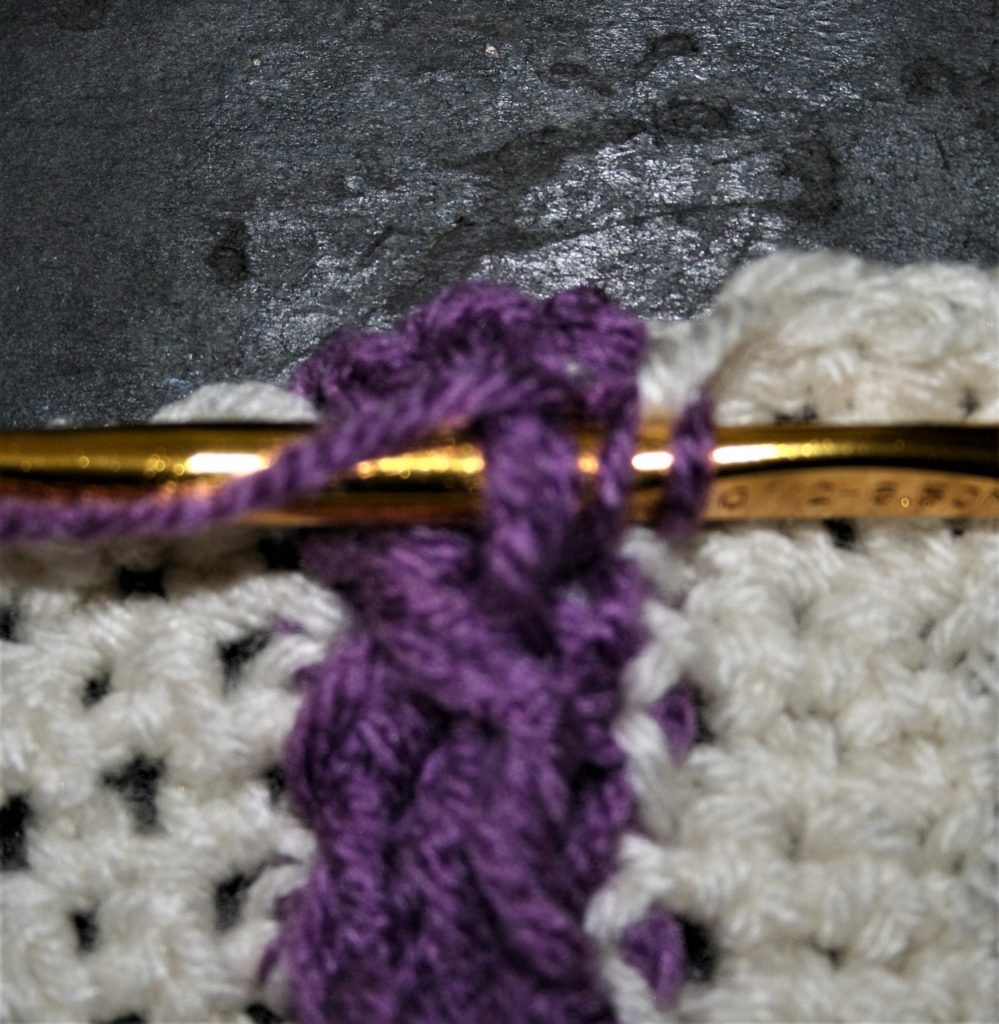
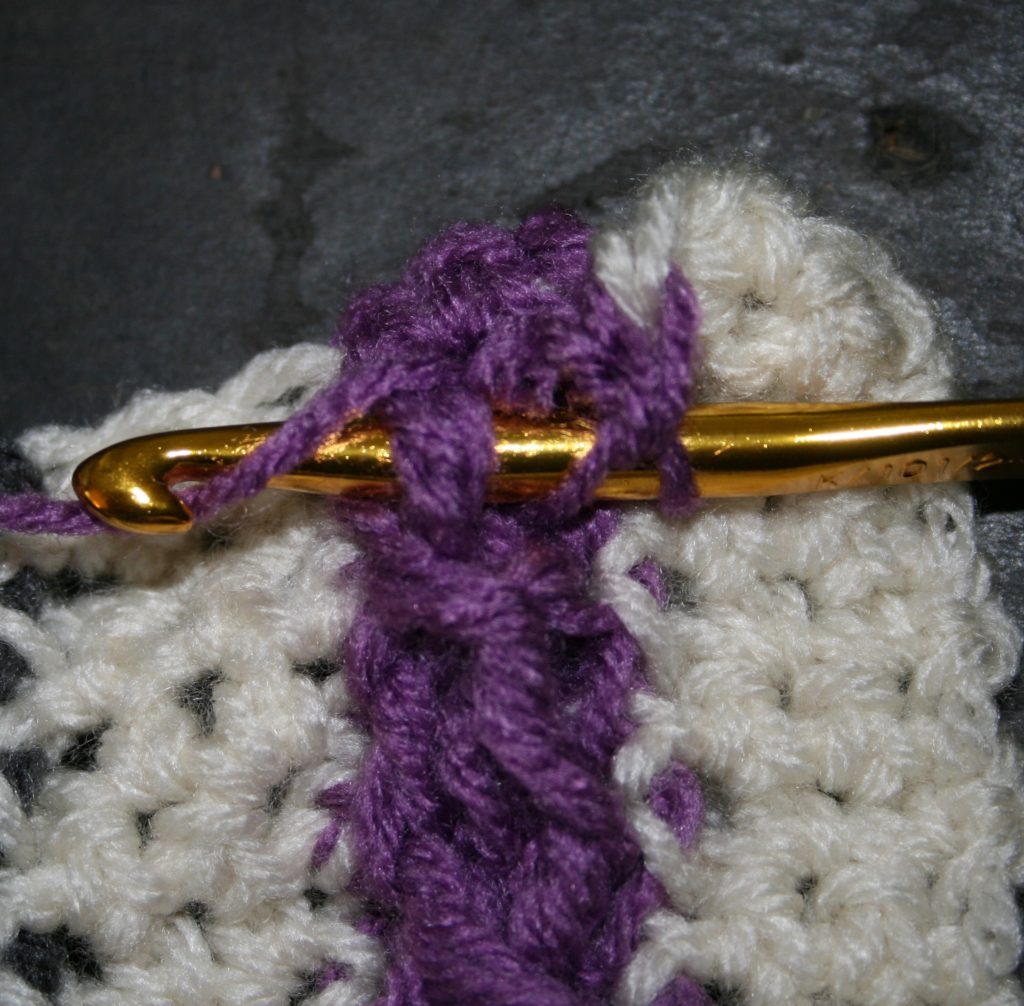
Row 4 (Crossing Cables Row): Ch 1, sc same st, sc in next 2 sts changing to color CC1 in last st (tips for changing colors here), FPdc around stitch 1 skipped from next stitch and 2 rows below, FPdc around next st of row 2 below, FPdc around the 1 skipped stitch before the first FPdc (this is crossing over the last 2 stitches made), changing to MC, sc in the next 3 stitches in Row 4 (note you do not work in the stitches behind the FPdc stitches), change to CC2 in last st, FPdc around stitch 2 skipped from next stitch and 2 rows below, FPdc around next 2 sts of row 2 below, FPdc around the first 1 skipped stitch, FPdc around second skipped stitch (these two stitches cross over the last 3 stitches made), changing to MC, sc in next 3 stitches in Row 4, change to CC3, FPdc around stitch 1 skipped from next stitch and 2 rows below, FPdc around next st of row 2 below, FPdc around the 1 skipped stitch before the first FPdc (this is crossing over the last 2 stitches made), changing to MC, sc in the last 3 stitches in Row 4, turn.
Working First Crossed Cable Front Post Stitch of small cable, Skipping 1 stitch over, and 2 rows belowWorking second FPdc of small cable.Working last FPdc of Small Cable, working in skipped stitch and crossing over FPdc created just before. Working first FPdc of Large Cable, skip 2 stitches and work stitch 2 row s below. Note when working the forth stitch of this cable it will cross over the first three and be worked around the first skipped stitch, this is adjacent to the main color stitches.The top row shows the appearance of all the crossed cables.
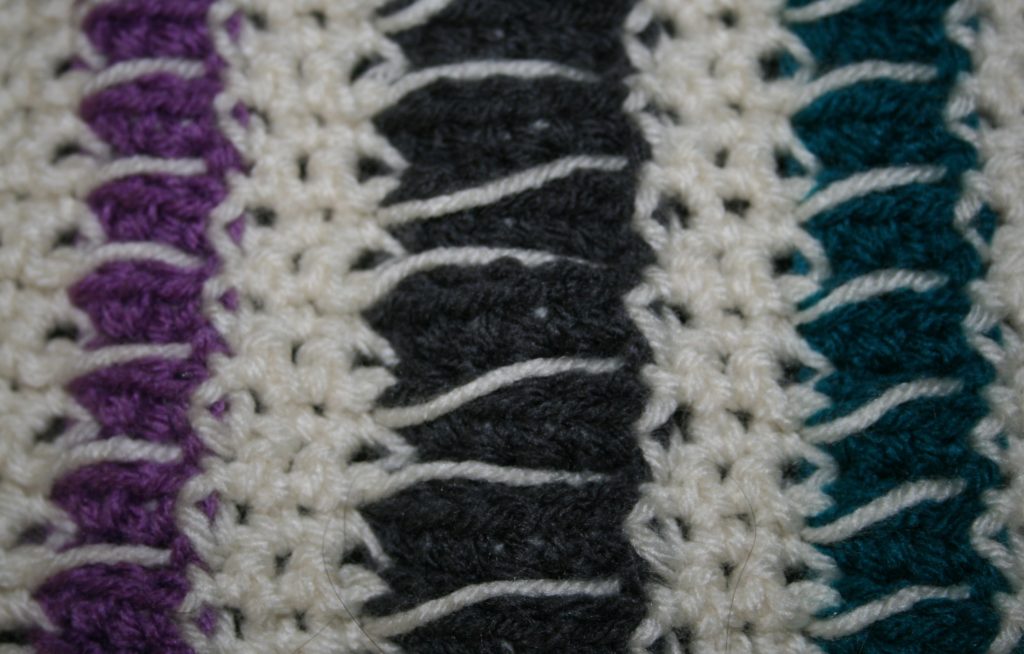
Row 5: Ch 1, sc in next 3 sts changing to CC3 in last st, working over MC yarn sc in next 3 sts (tips for working over yarn here), change to MC, sc in next 3 sts changing to CC2 in last st, working over MC yarn, sc in next 5 sts, change to MC, sc in next 3 sts changing to CC1 in last st, working over MC, sc in next 3 sts, change to MC, sc in last 3 sts, turn.
Crochet over the main color, in odd number rows. The Main color is not worked over in the even number rows, and instead when changing colors it bands across the back of the block.
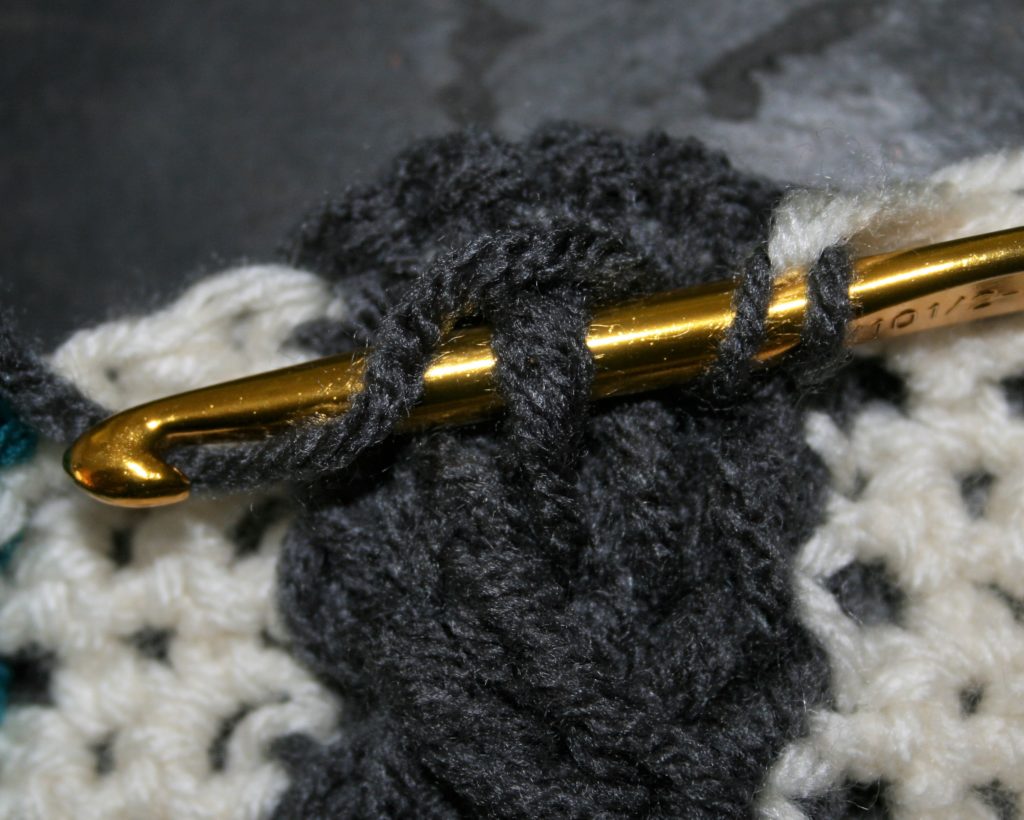
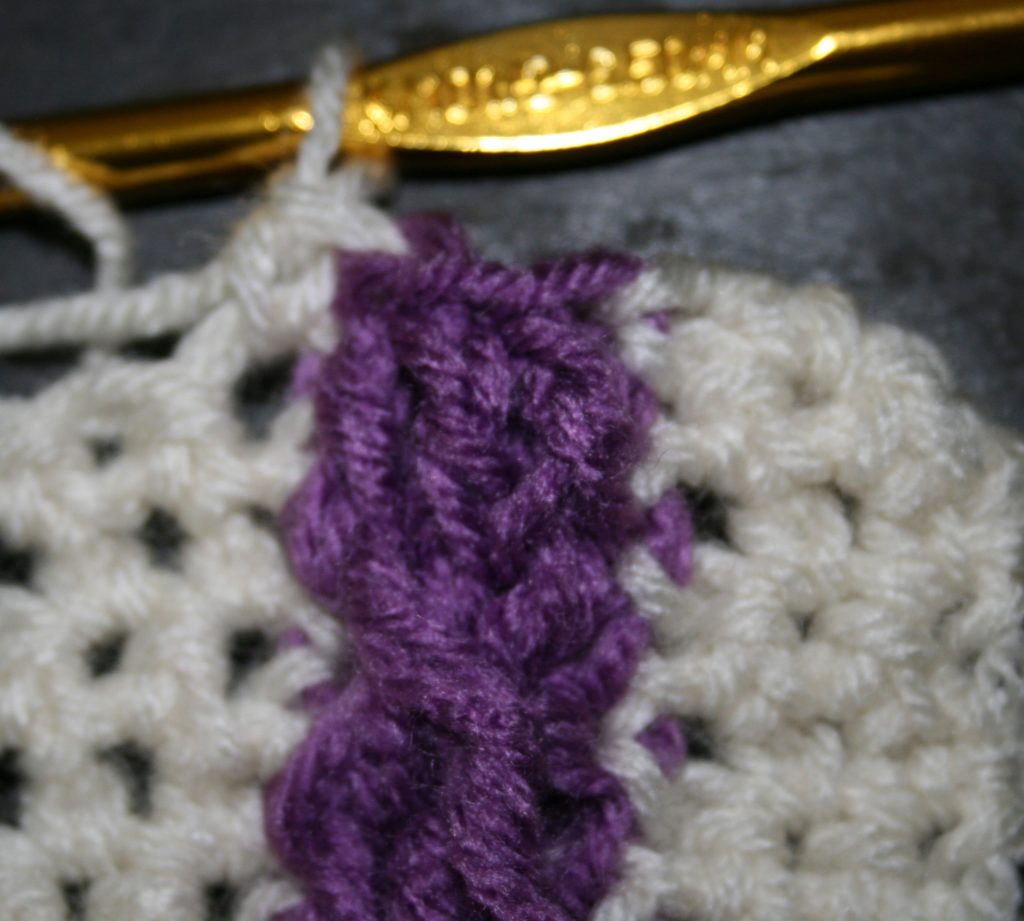
Uncrossed Cable Row
Row 6 (Uncrossed Cable Row): Ch 1, sc in same st, sc in next 2 sts changing to CC1 in last st, FPdc around stitch 2 rows below, FPdc around next 2 stitches 2 rows below, change to MC, sc in next 3 sts changing to CC2 in last st, FPdc around stitch 2 rows below, FPdc around next 4 sts 2 rows below, change to MC, sc in next 3 sts changing to CC3 in last st, FPdc around stitch 2 rows below, FPdc around next 2 stitches 2 rows below, change to MC, sc in last 3 sts, turn.
Working first FPdc of uncrossed cable row, this stitch is directly below next stitch and 2 rows below.Working second FPdc of uncrossed cable row of small cable, this stitch can be difficult to find as it is behind the crossed stitches, and may take a bit of practice to ensure that you find them Appearance of uncrossed cable row on small cable.All Uncrossed Cable Rows are shown across the top.
Row 7: Rep Row 5.
Row 8-23: Rep Rows 4-7 four times.
Row 24: Rep Row 4.
Row 25: Ch 1, sc in same st, sc in each st across.
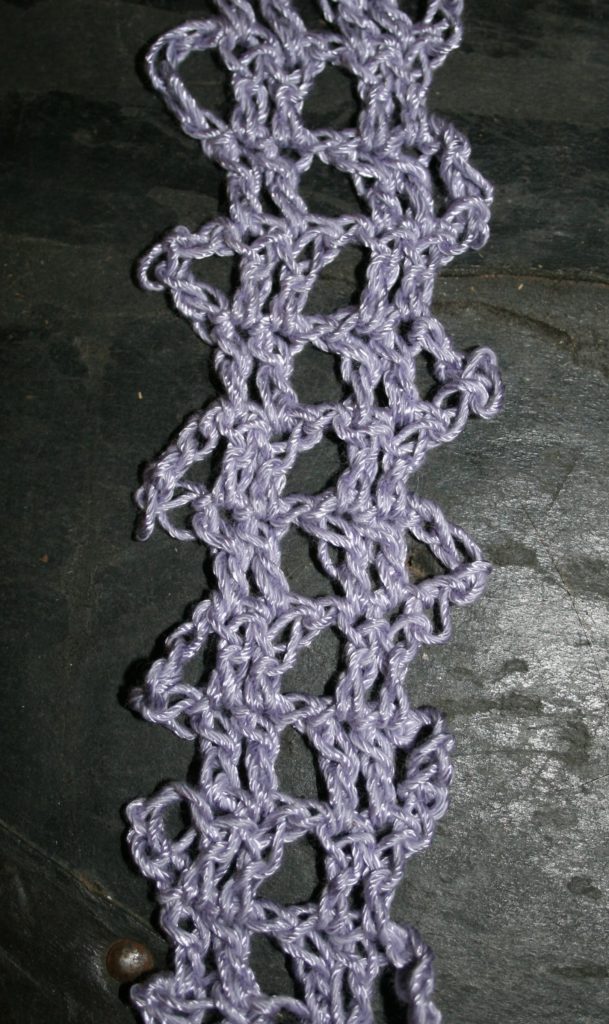
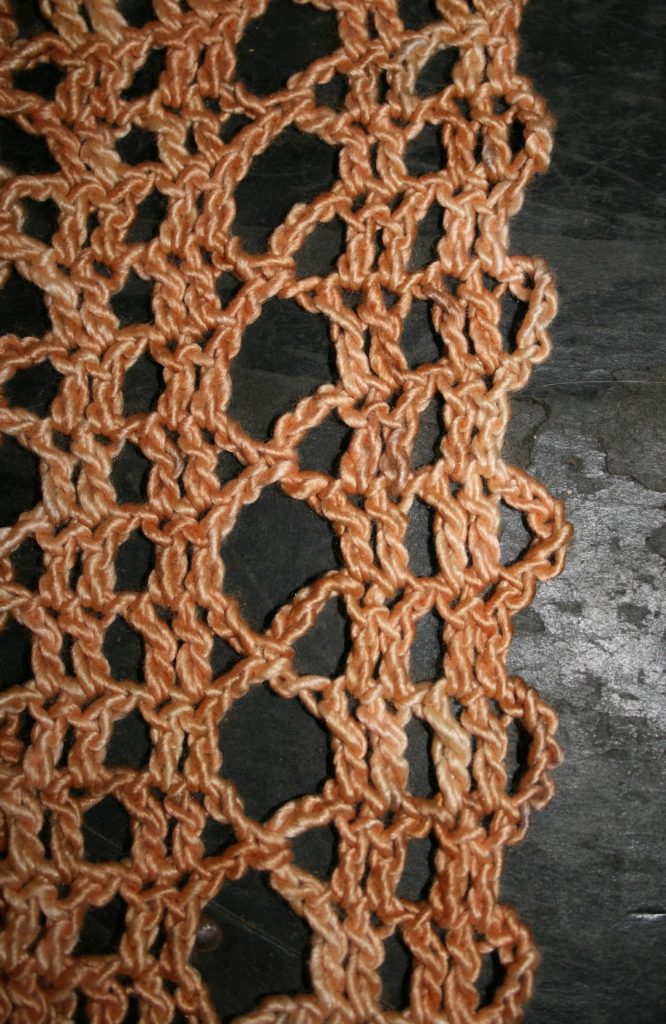
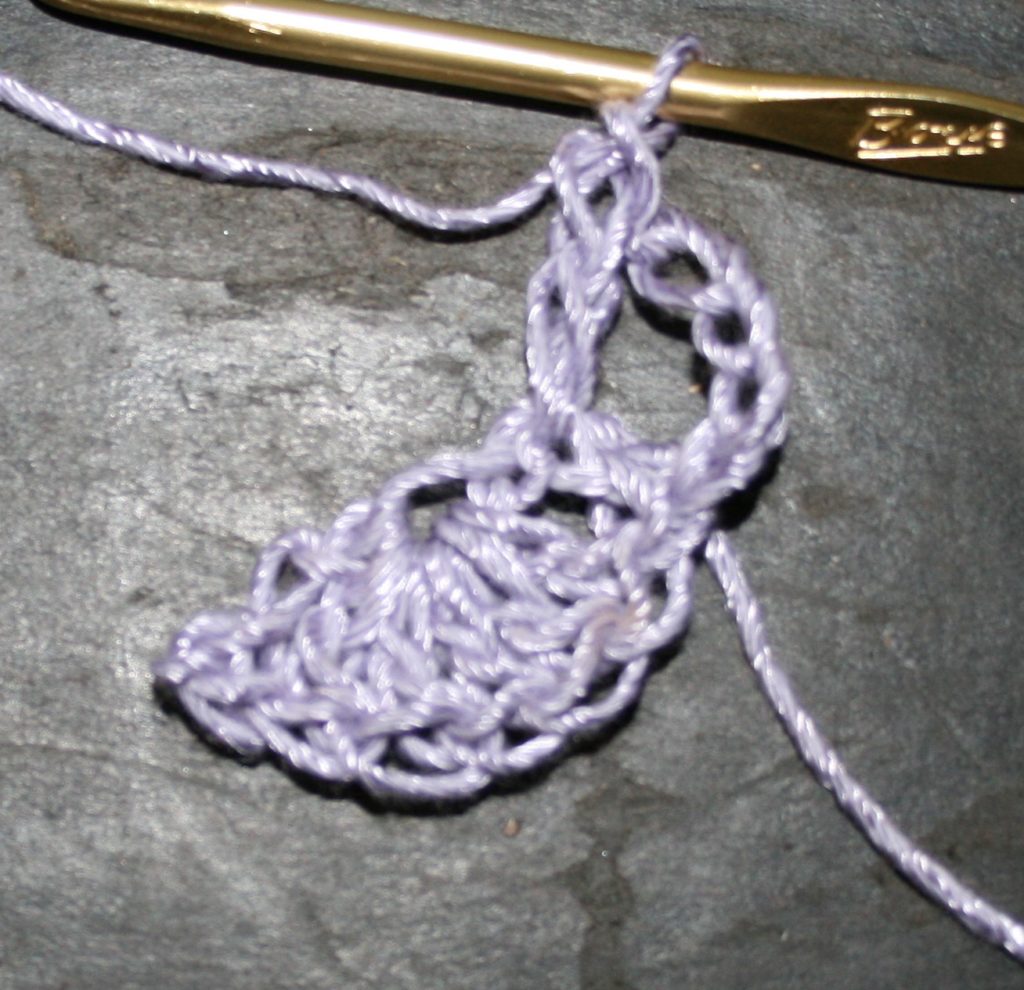
I have been hooked on playing with Bruges Lace as of late,
and wanted to share this skill.
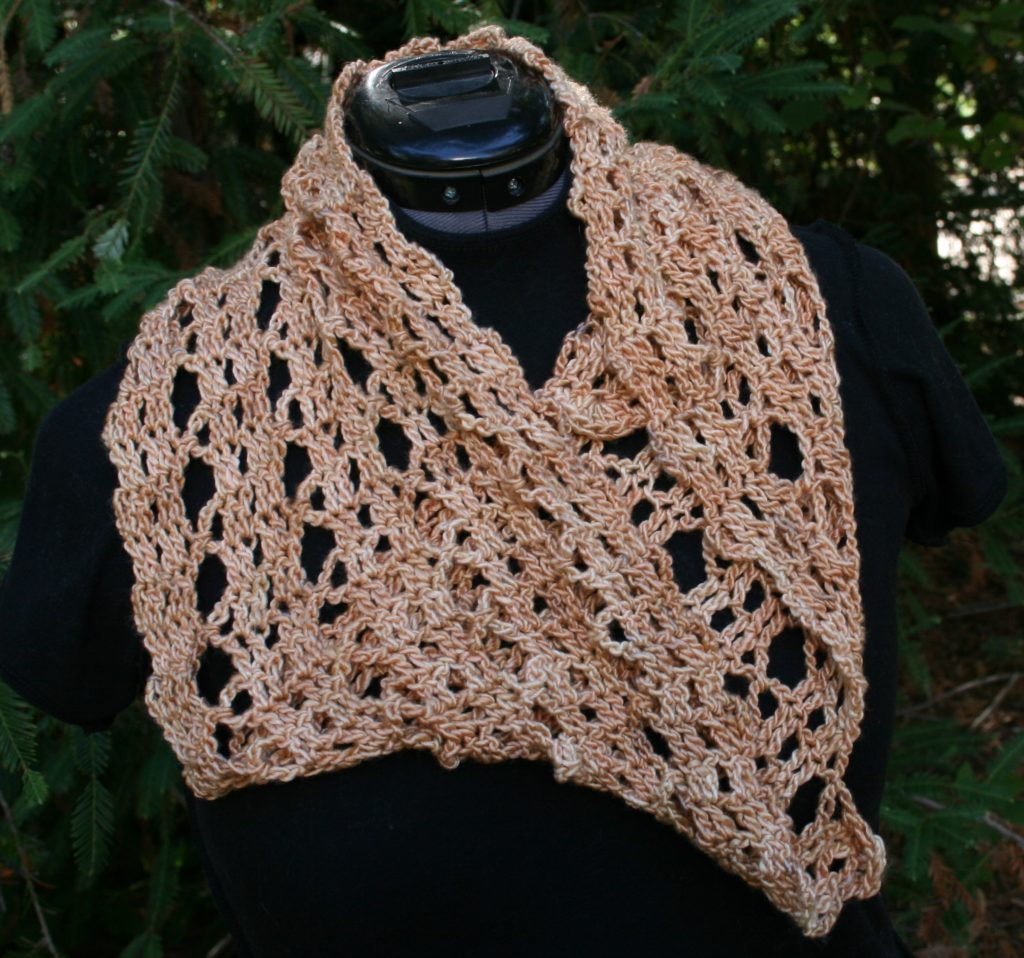
Spiral Bruges Cowl
Bruges Lace is a crochet technique that essentially has you
crocheting a ribbon, a narrow strip, and attaching it to itself to create a
simple lace that looks much more involved. The patterns often have a high row
count, but that is because the rows are only a few stitches each, in some cases
only 5 stitches.
A “ribbon”
As you can see in this photo the “ribbon” is only a few
stitches, and then there is a long turning chain. This long chain is used as a
joining point when working the “ribbon” back on itself. This approach lends
itself to any design that you can draw in a continuous line.
When you have a “turn” in your line you need to work longer
and join multiple long loops together to form a “bend” in the ribbon.
Joining sides of “ribbons”
I encourage you to give it a try, and to get you started I
have a free cowl pattern.
Spiral Bruges Cowl
Work a ribbon, and then join on one side to spiral around and create this fast and eye catching cowl. The ends of the ribbon are highlighted with simple shells to finish this highlight.
Finished Size
31″ circumference, 12″ Tall (79 cm circumference, 9 cm tall)
Gauge
5 sts (the width of ribbon, not counting ch-5 loop)= 1 1/2″ (4cm), 6 rows =4″ (10cm)
Help me help local communities by creating blocks for Warm Up America, by making a block for yourself and one for a community project with this free pattern. I will be creating a new block every two weeks and sharing it with you, I just ask that make one for donation.
Warm Up America is a nation wide organization that encourages local donations, but will also except donations to be sent to their office so that blocks can be assembled and then blankets can be donated through the United States.
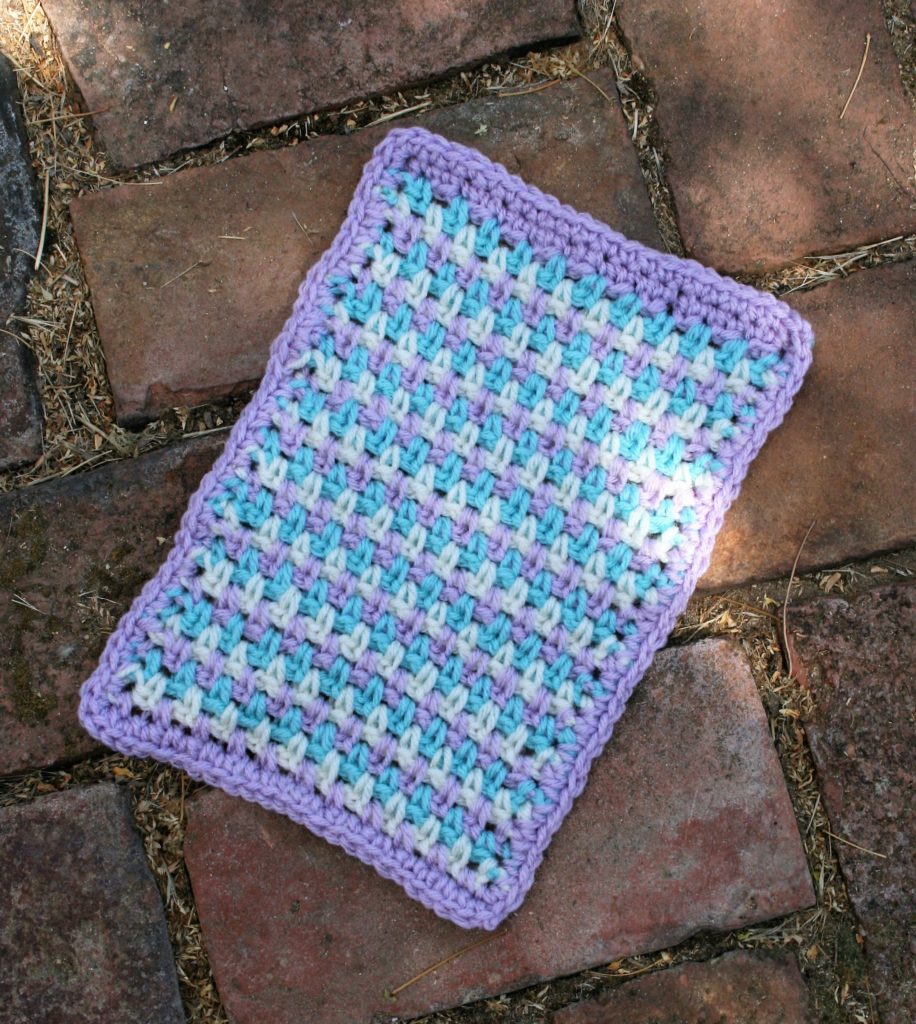
Triple Linen Block
Even is you do not want to participate with Warm Up America, please consider creating blocks, or blankets for your local community. There are various places in every community that accept donations.
Triple Linen Block
This block features color change, that does not require you to break the yarn. You can carry the yarn up the edge, as the color changes every row, and then finish the sides with edging.
Stitch Makers Live 2019 is coming soon and I’m so excited!
What is Stitch Makers Live?
Stitch Makers Live is a 3-day virtual event during which over 10 crochet designers and teachers are going to spend time with you – right on Facebook. 16 crochet sessions LIVE with industry experts!
Each class comes with a BONUS crochet pattern – to help you master those skills.
There’s even a virtual party in the evening after the last day is over!
PLUS, you’ll get full access to the recordings in the group for ONE FULL YEAR!
Our experts are passionate about crochet, and excited to share their knowledge with you. Whether your goal is to improve your skills in hat making, gather the bravery to begin your first sweater, or dive into short rows, our goal is to help you. We have handpicked these teachers and designers to bring you the best instructors on a variety of crochet topics.
This is the only CROCHET ONLY online summit we know about – and we’re excited to launch it with you on board!
From September 19th to September 21st , we’ll be sharing each of these classes. But that’s not all! Early Bird tickets are available until midnight eastern on Monday, September 2nd. After that tickets will go up to full price!