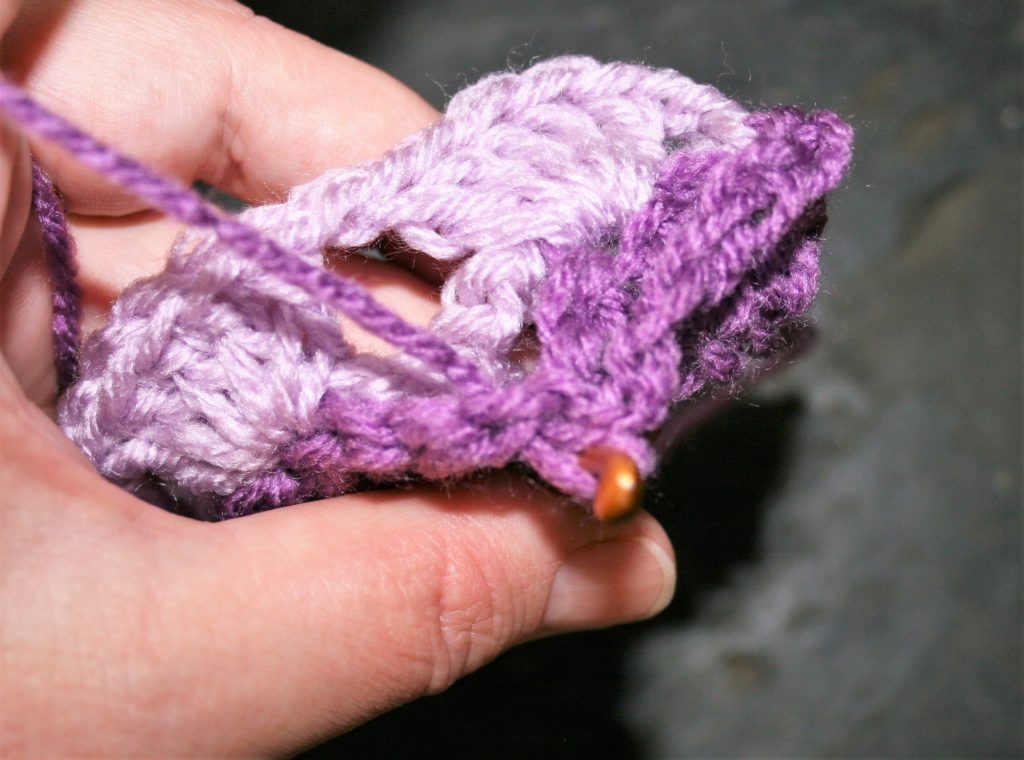
Creating swirls of color in crochet are easier than it seems. I love using this technique to create hats and have even used it to create a large circular blanket.
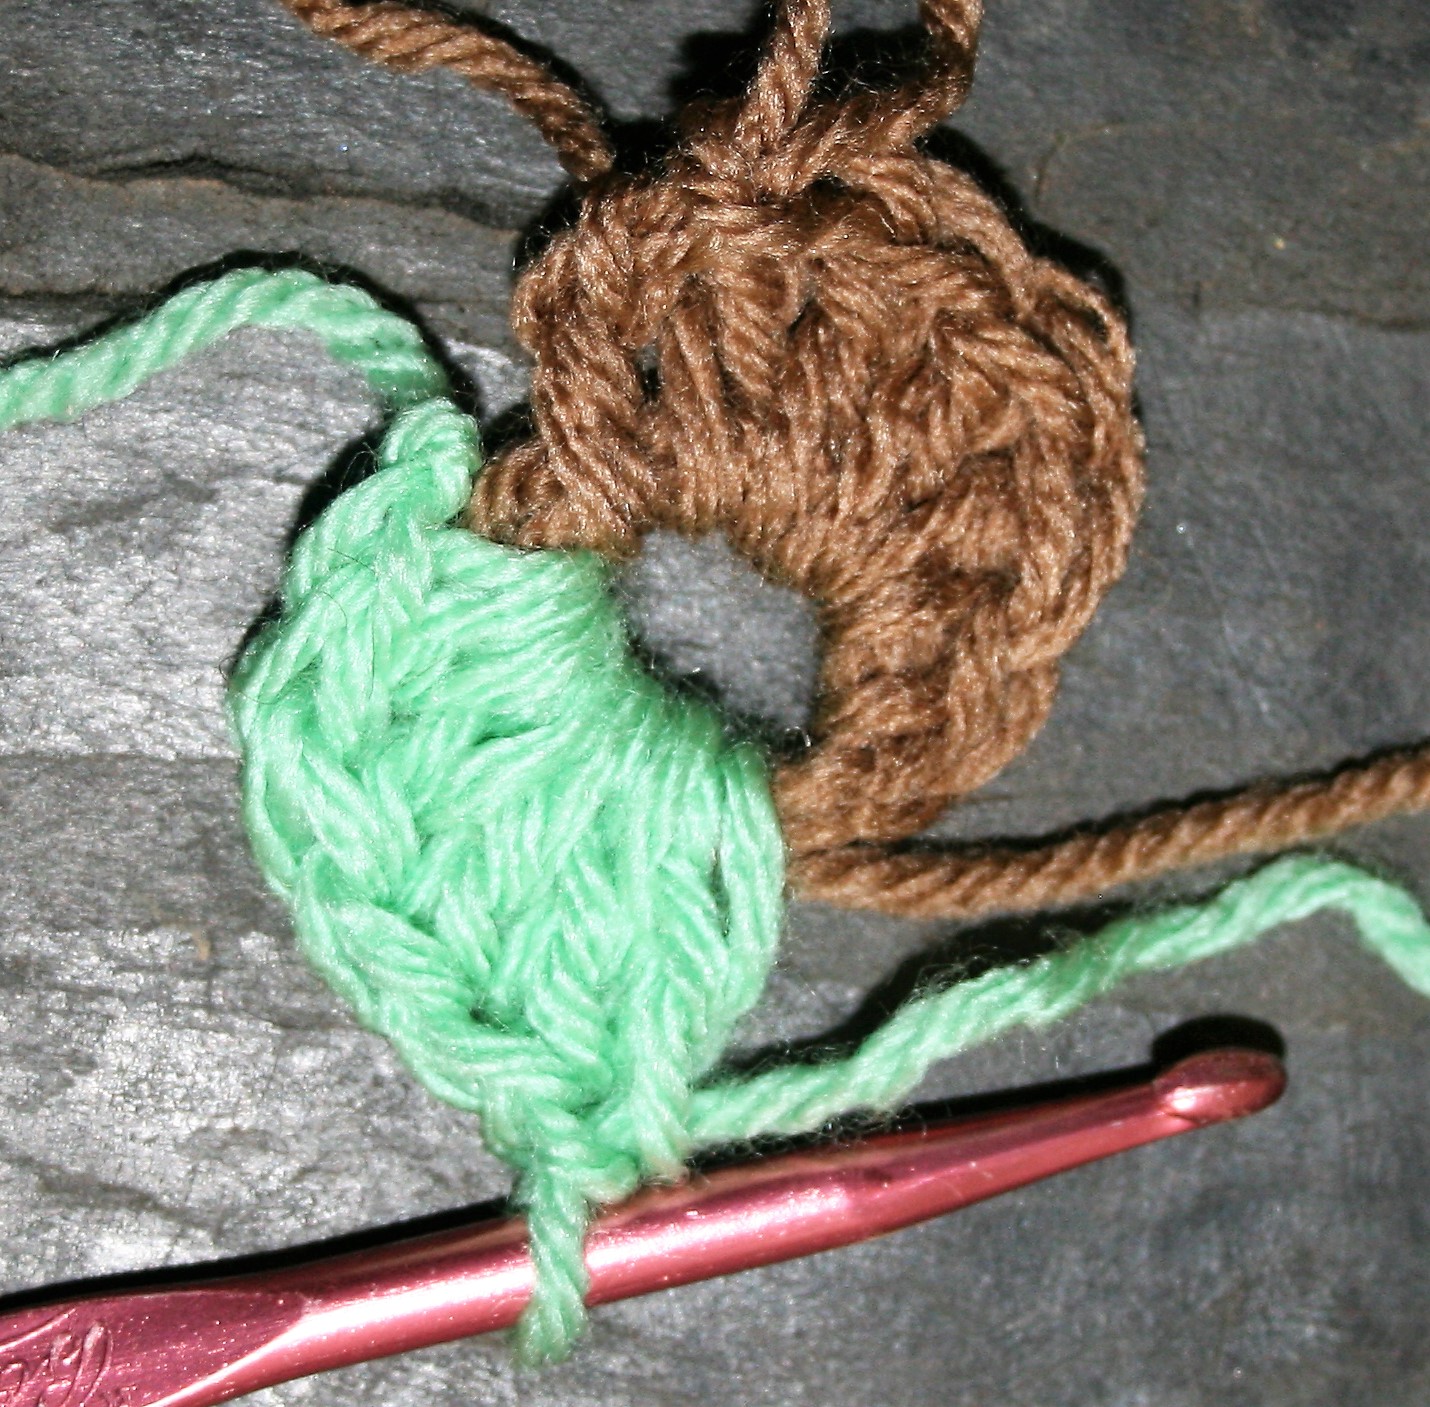
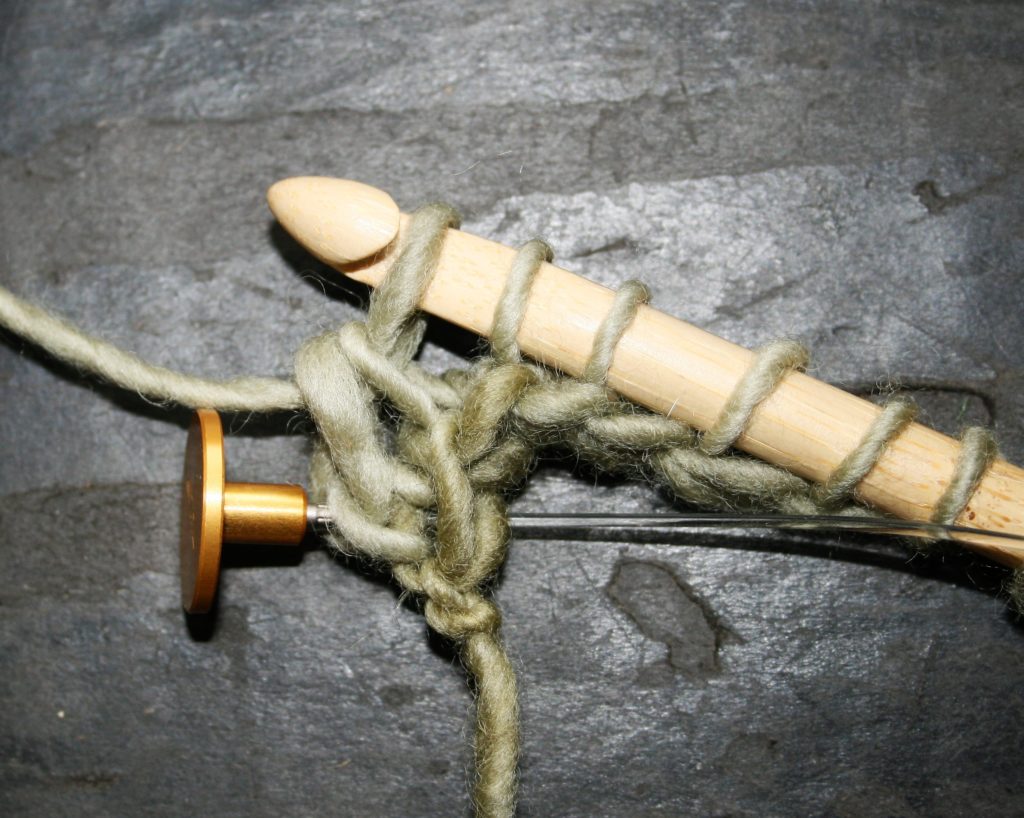
To create a swirl start with any method you like to begin a circle (check out the three most popular). Determine the number of stitches for the first round. In this sample I used 12 double crochet stitches.
Divide the number of stitches in the first round by the number of colors to be used. In this case I am using 2 colors, so that is 6 stitches in each color.
Getting started
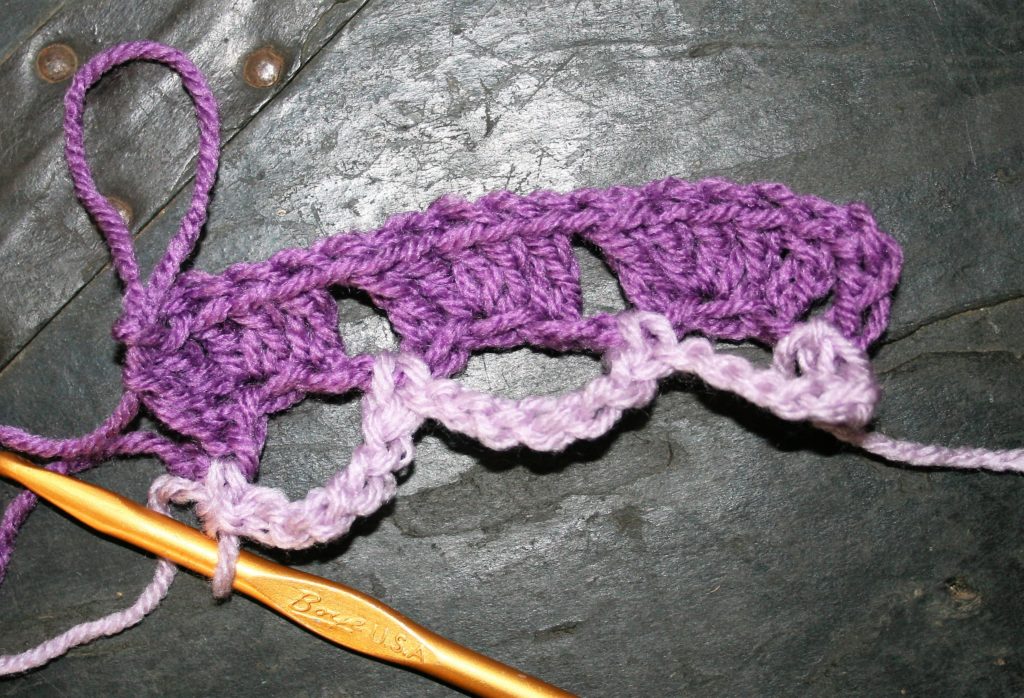
Work the first stitch as a shorter stitch, for instance a single crochet. Then work the next 5 stitches as a double crochet.
Add the second color by joining directly after the last stitch made. Either slip stitch and chain or use a standing stitch join (learn that trick here). Work another short stitch, a single crochet, and another 5 double crochets. This completes the first round.
Crochet Swirls end of Round 1
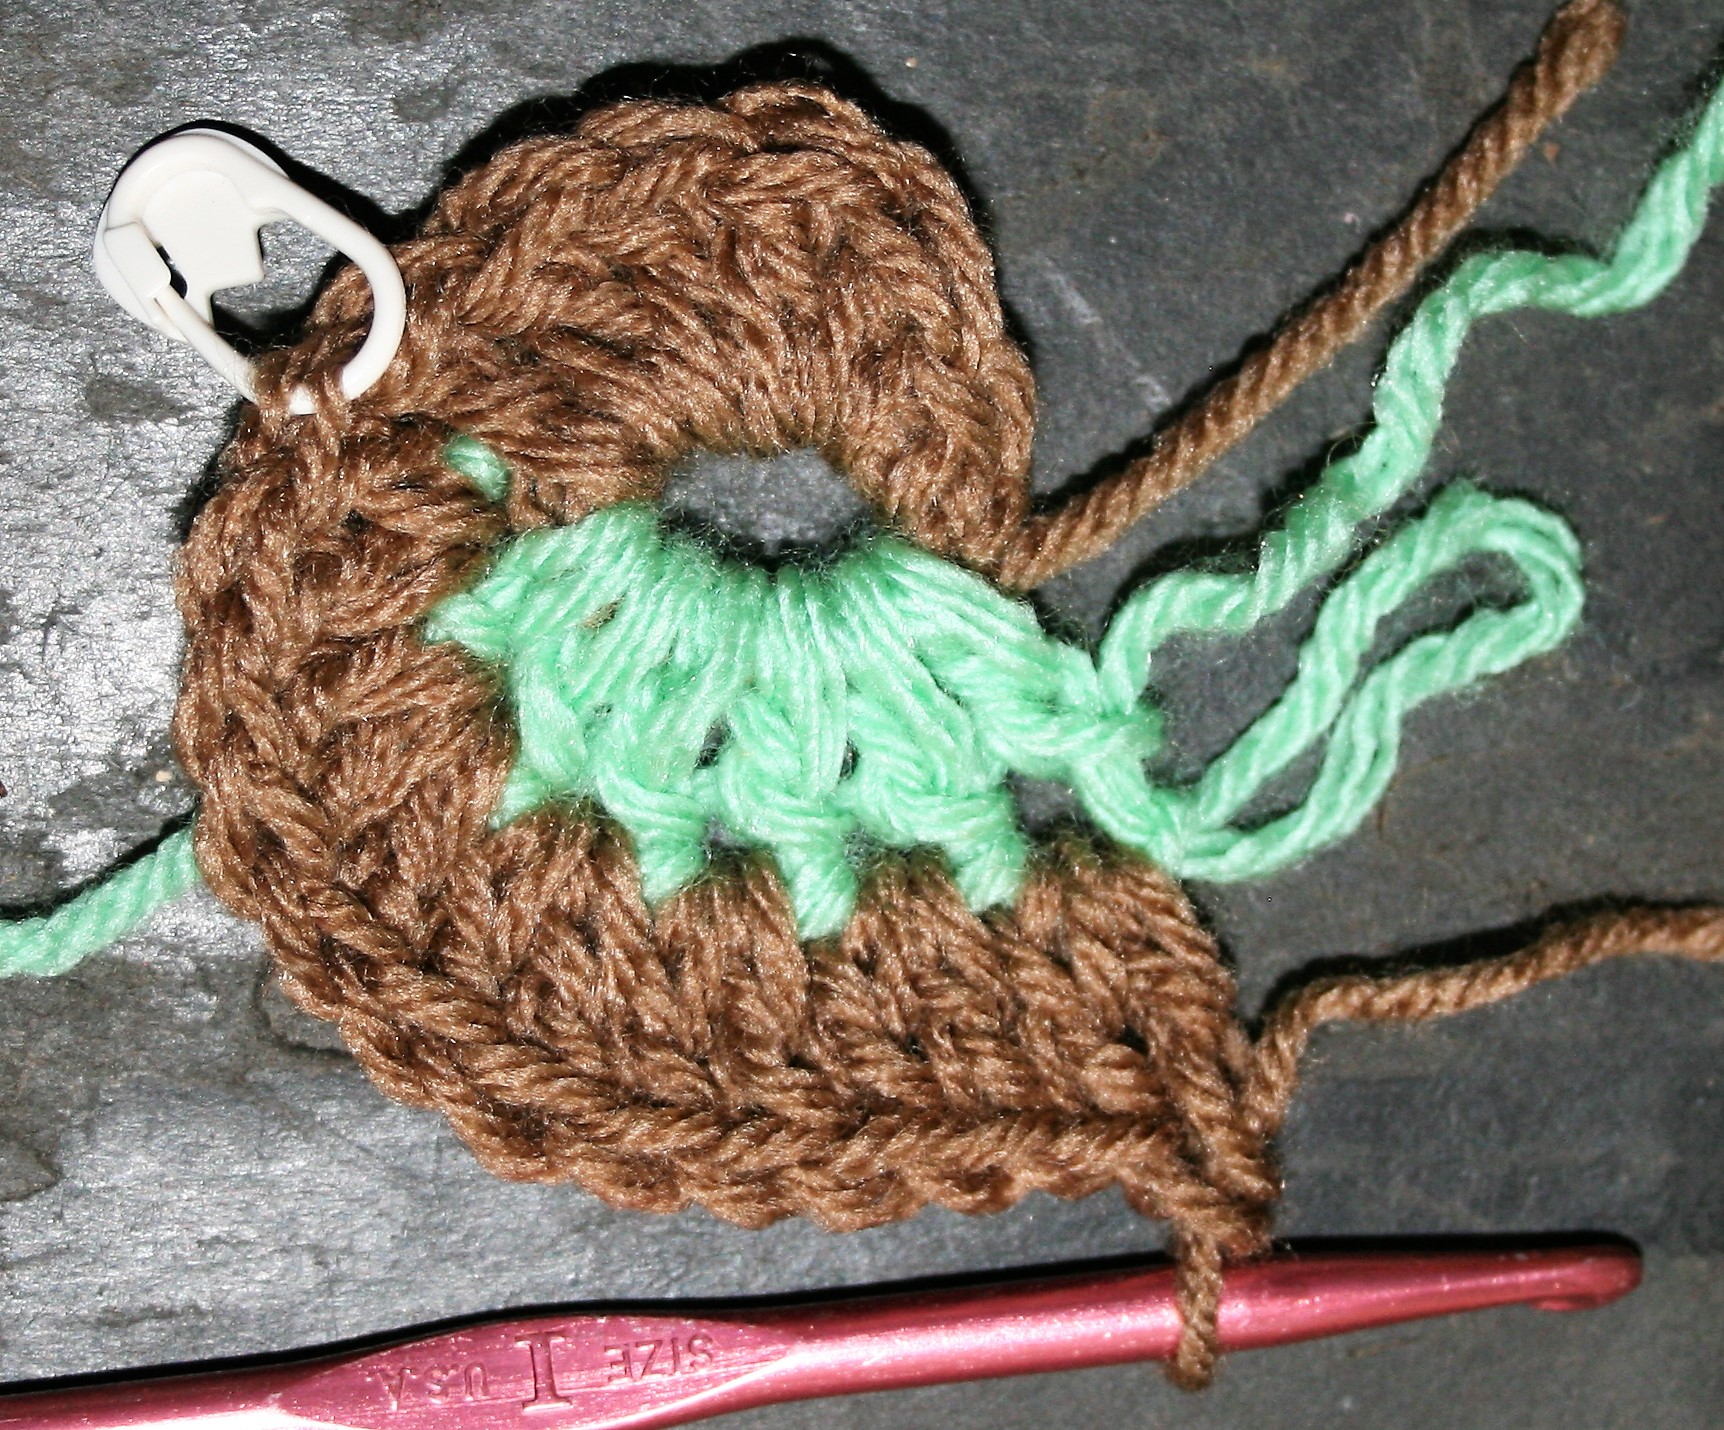
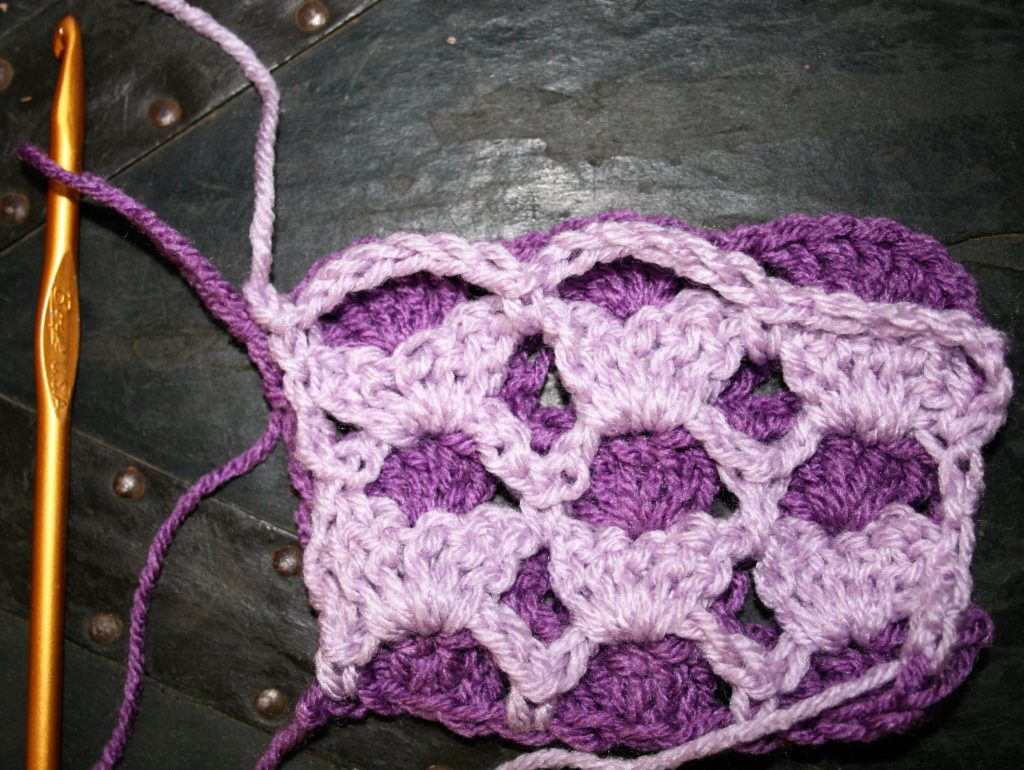
Crochet Color Swirls Round 2
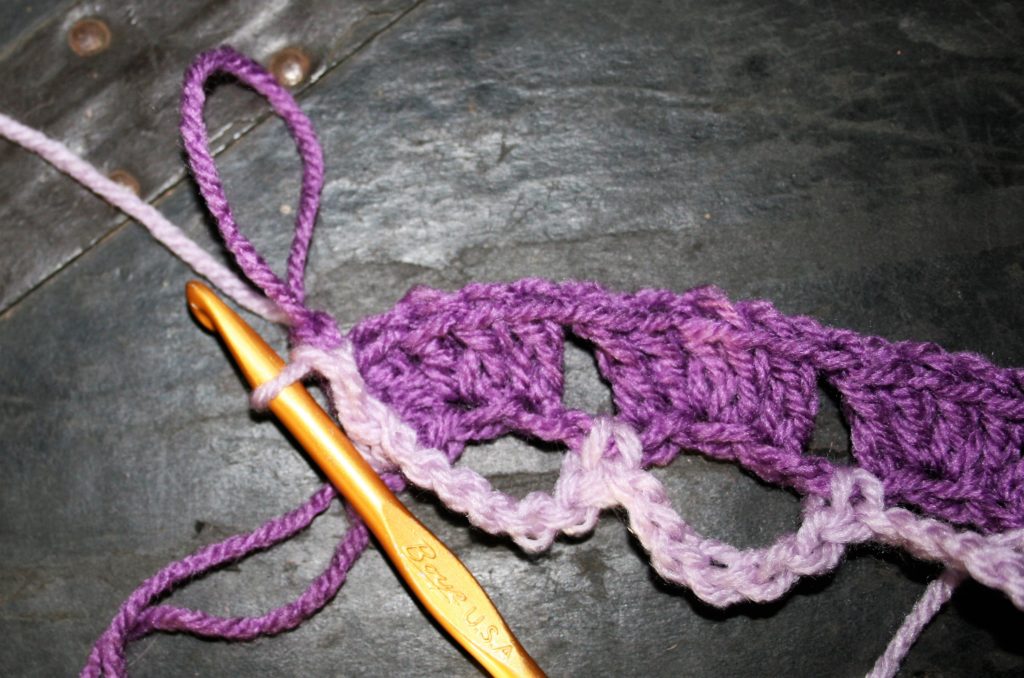
Insert the hook back into the loop of the first color (insert a stitch marker in this stitch), working over the second color work 2 double crochets in each stitch.
The first color of round 2.
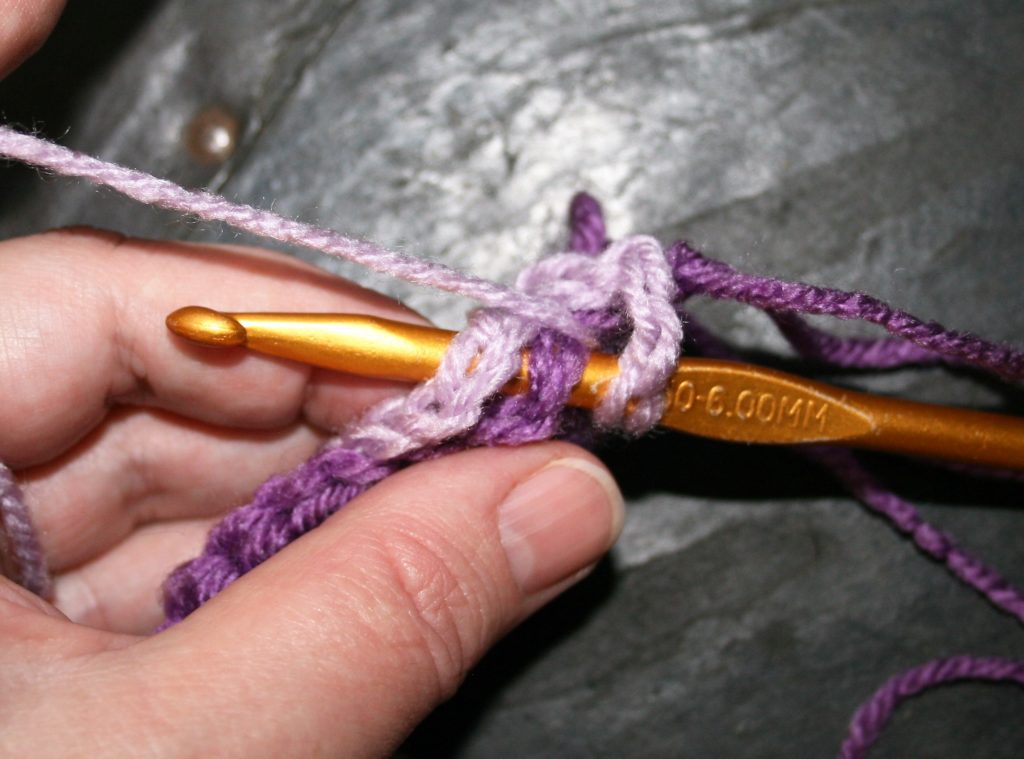
Pick up the second color and work 2 double crochets in each stitch until the stitch marker. This will complete Round 2. Move marker to the last stitch worked in the first color. Notice how it the stitch increases were worked just as a non-color changing round (see my crochet hat formula for how to create a flat circle).
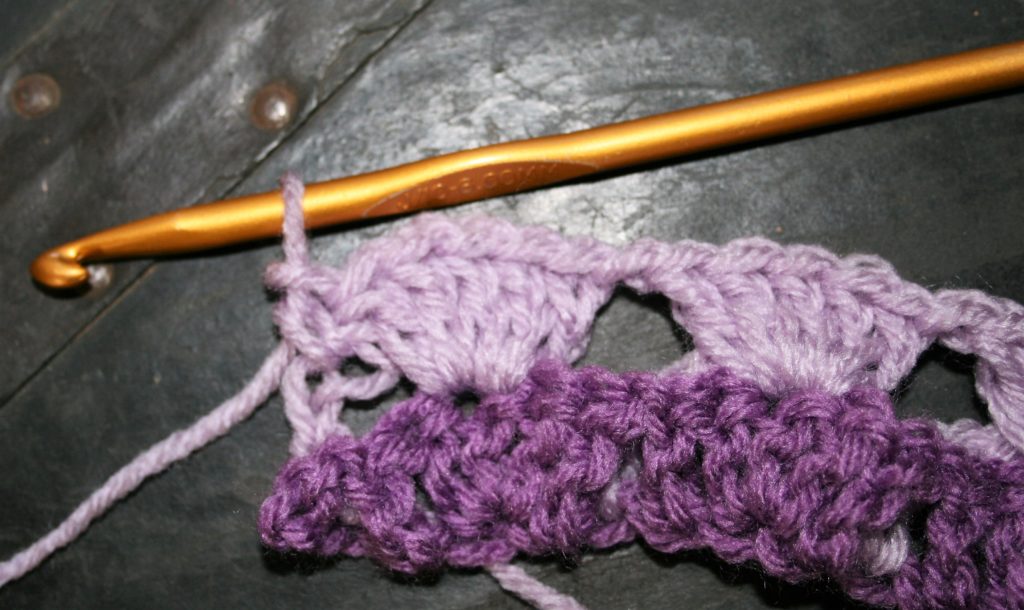
Completed Round 2
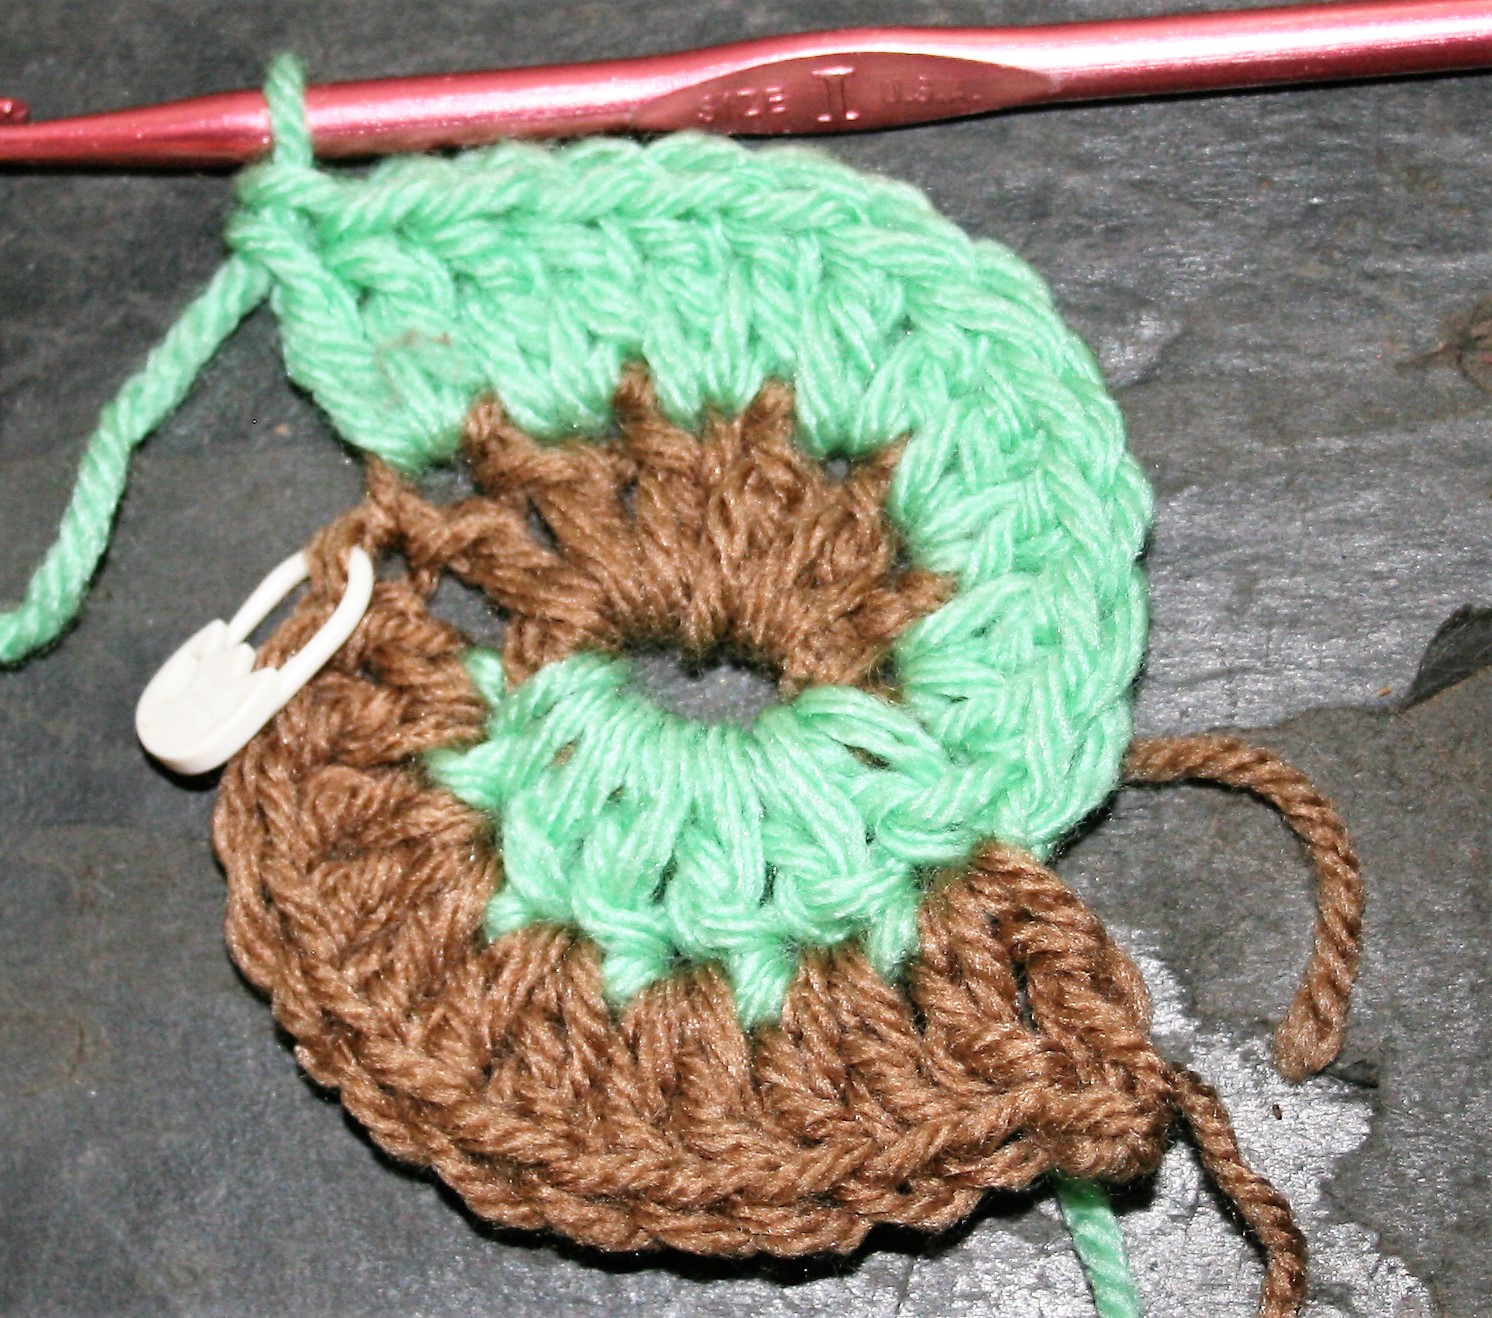
Round 3
Round 3 would be worked with an increase (2 double crochets) and a regular stitch (1 double crochet), so with the 2 colors, pick up the first color work [2 double crochets in the next stitch and then 1 double crochet] to the end of the second color. Pick up the second color and work the same stitch pattern to the stitch marker. This is the end of Round 3.
Completed 3 rounds
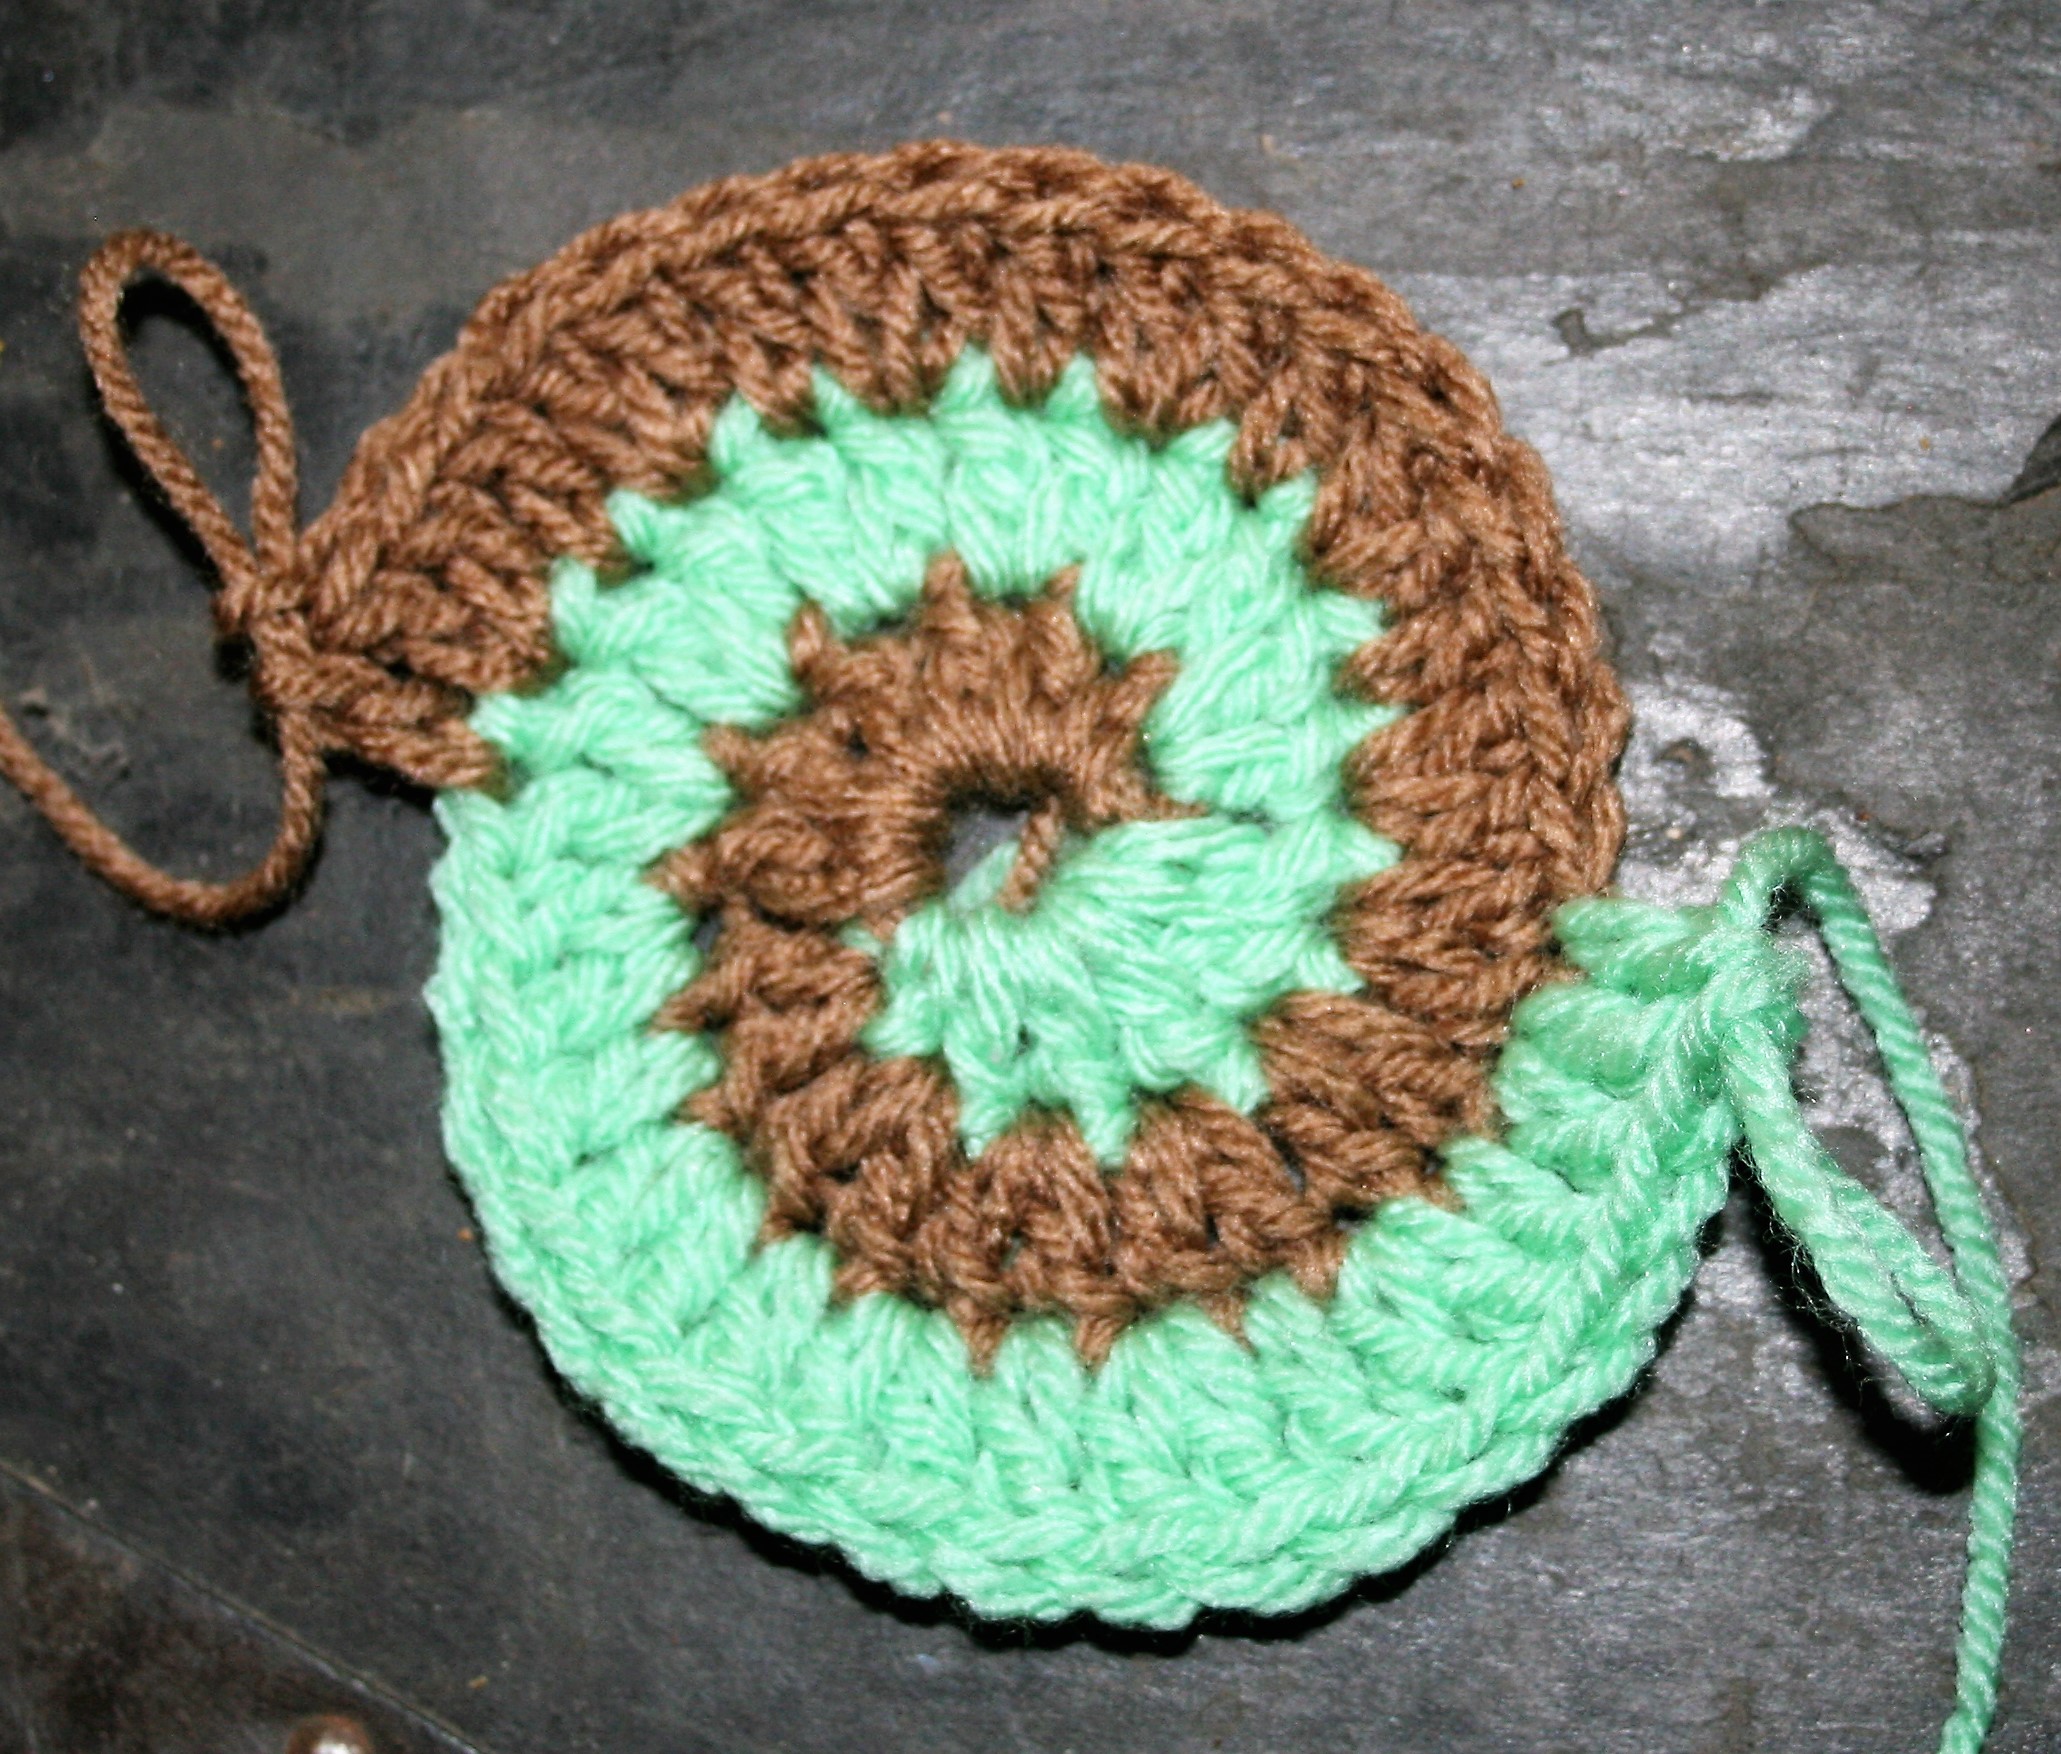
Move the stitch marker to the end of the first color, after the second color reaches it, and continue working the “flat circle formula” until it is the desired size.
To make the edges smooth, finish by working shorter stitches in each color, For example work 1 half double crochet, then 1 single crochet, and finally a slip stitch, and fasten off.
I need crochet bag handles. Crochet bags have one hurdle for me, finishing them with handles. There are many great handles out there, I could easily purchase leather strapping or wooden rings or traditional purse straps. I could even head to the thrift store and find a cheap handbag that I love the handles on, and cut them off for my bag…but there is a common theme in these approaches; I have to go and get something.
This “final step” is my constant hang up. It is bad enough that I have to weave in the ends; just this step can leave an item sitting in a pile for a while. So, finding a handles solution that does not become a “final stage” has been paramount to my actually completing these projects.
I have come up with 3 crochet bag handles that fit my needs very well. Ones I could actually make and attach are the requirements. Added to these requirements are the need that they not be flimsy and don’t stretch too much.
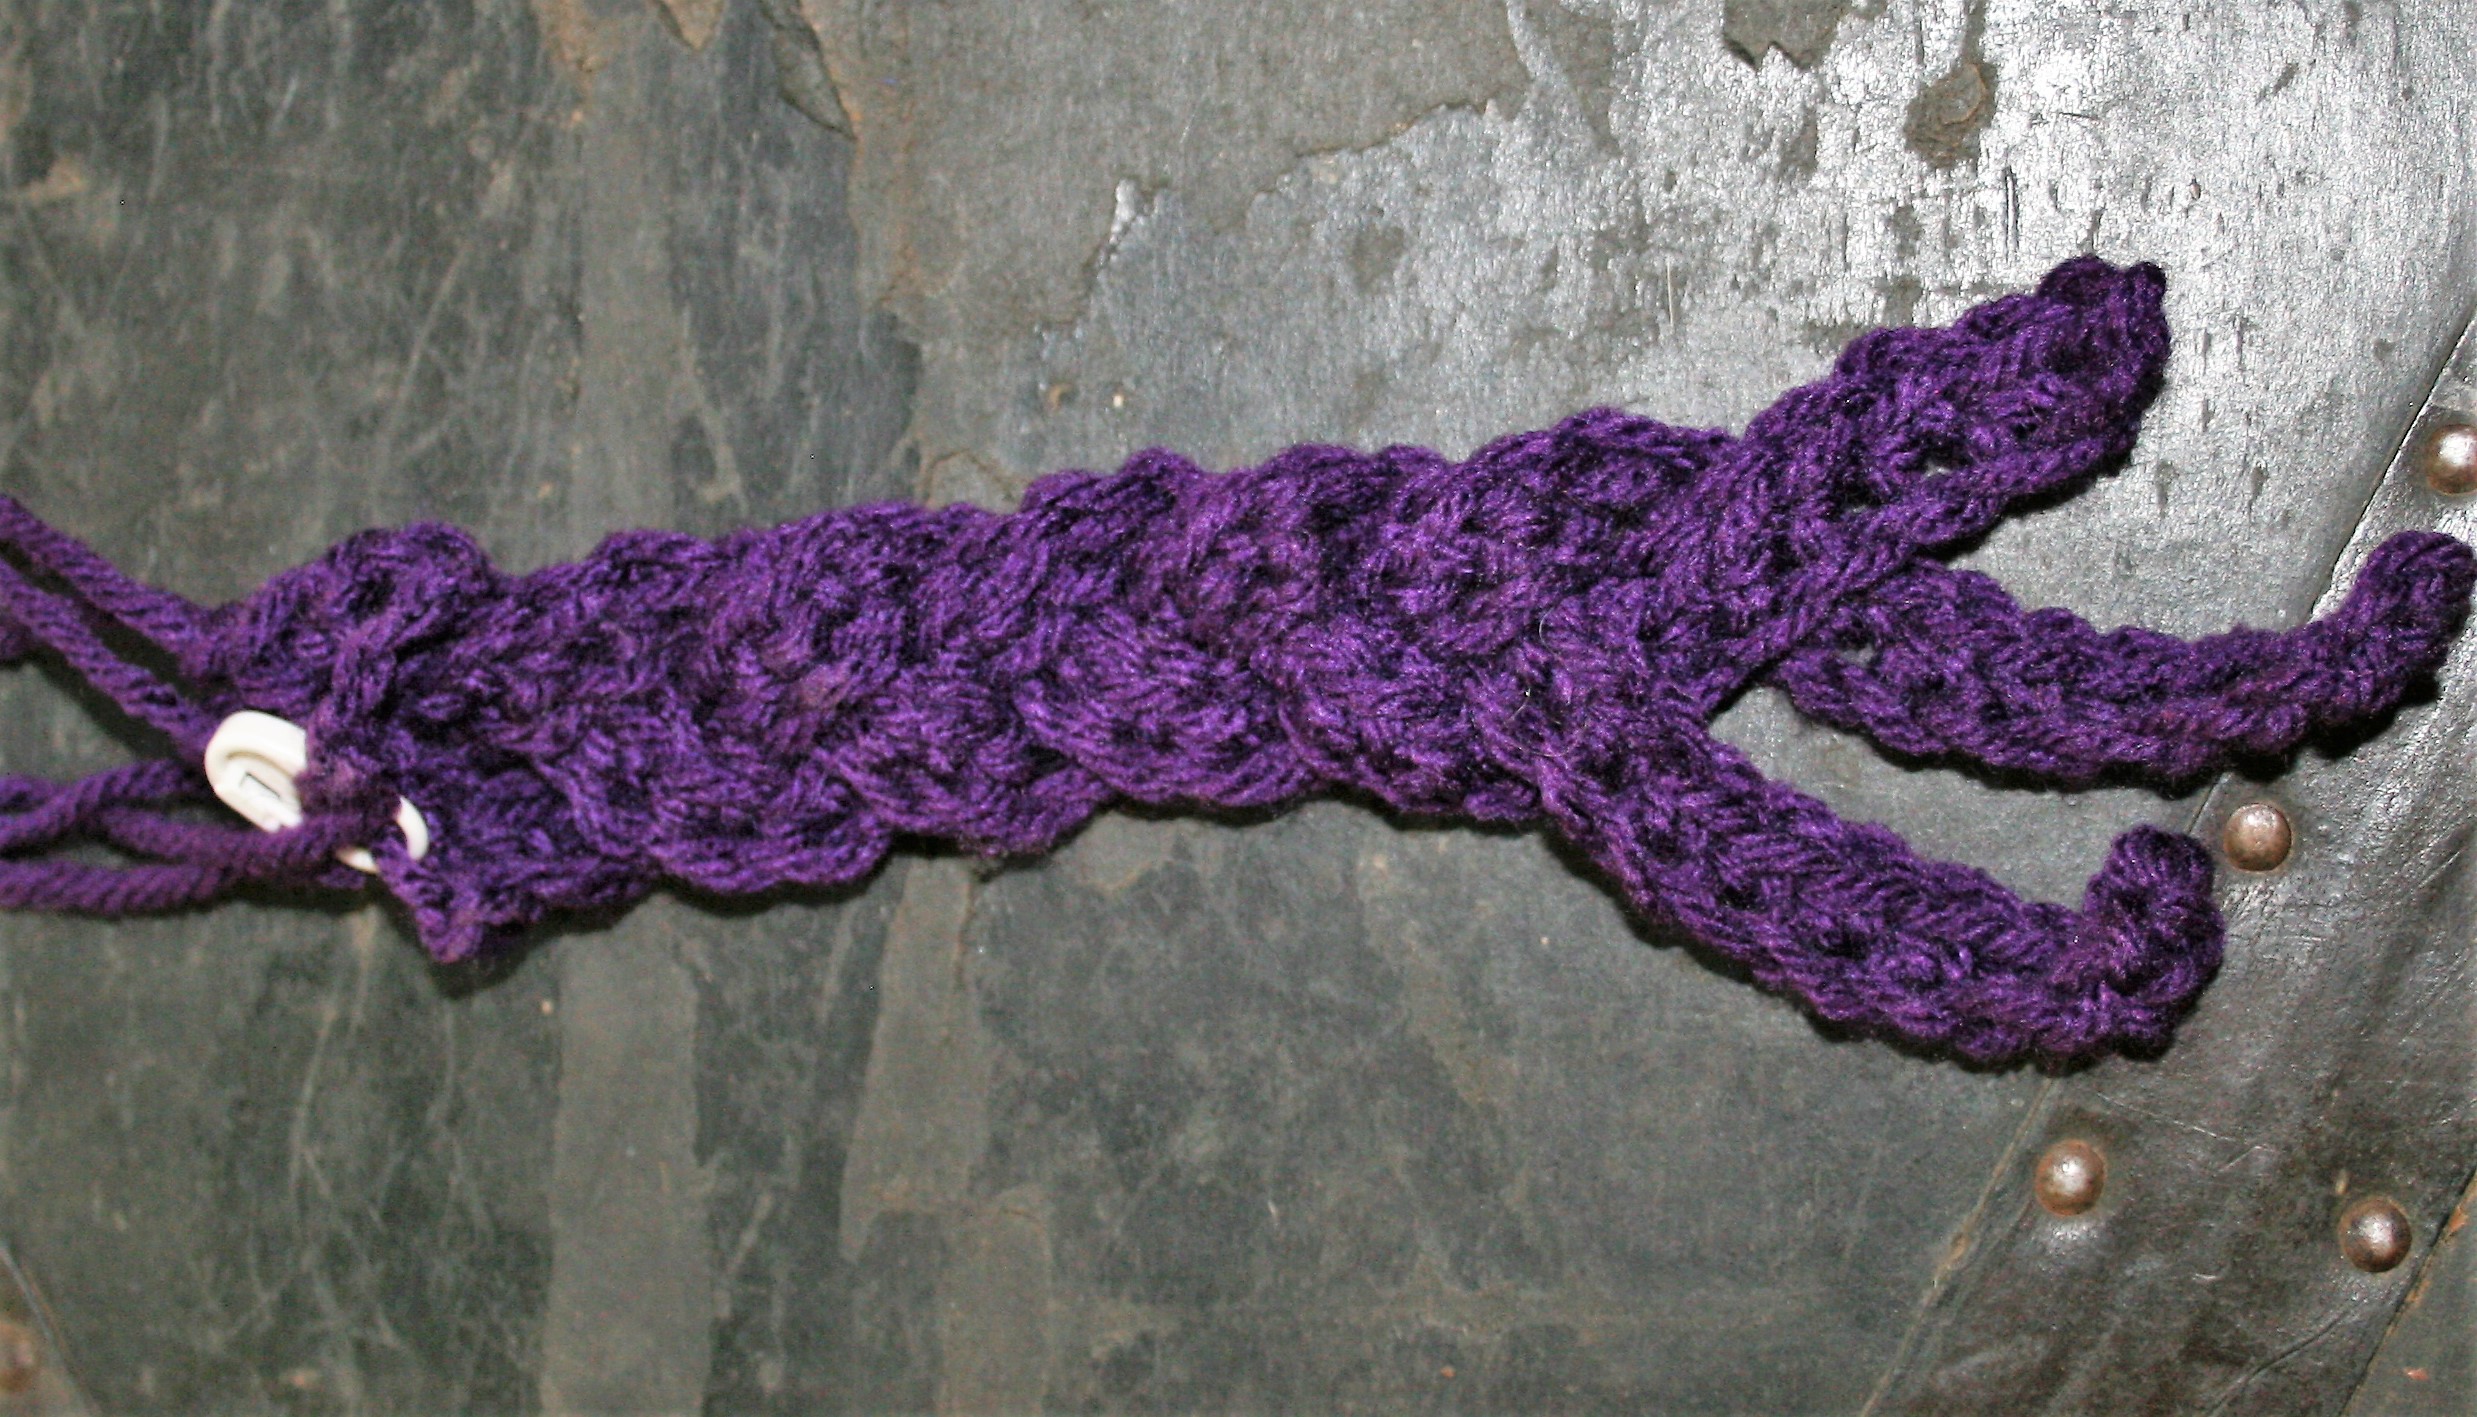
The first is make it a Tunisian crochet bag handle.
Tunisian crochet fabric, under certain conditions curls. I have taken this trait that is often seen as a deterrent and turned it into a benefit. To create this handle, I simply create a chain for the desired length of the handle using a Tunisian hook size that is a bit smaller then I would normally use (this ensures that the fabric curls). Then I work 3-5 rows of Tunisian Simple Stitch. The fabric should be curling up on itself. I then decide to seam the strip together of not. I might even insert a bit of clothes line and let the fabric wrap around it. Attach it to the bag.
The curling of Tunisian fabric to create a handle
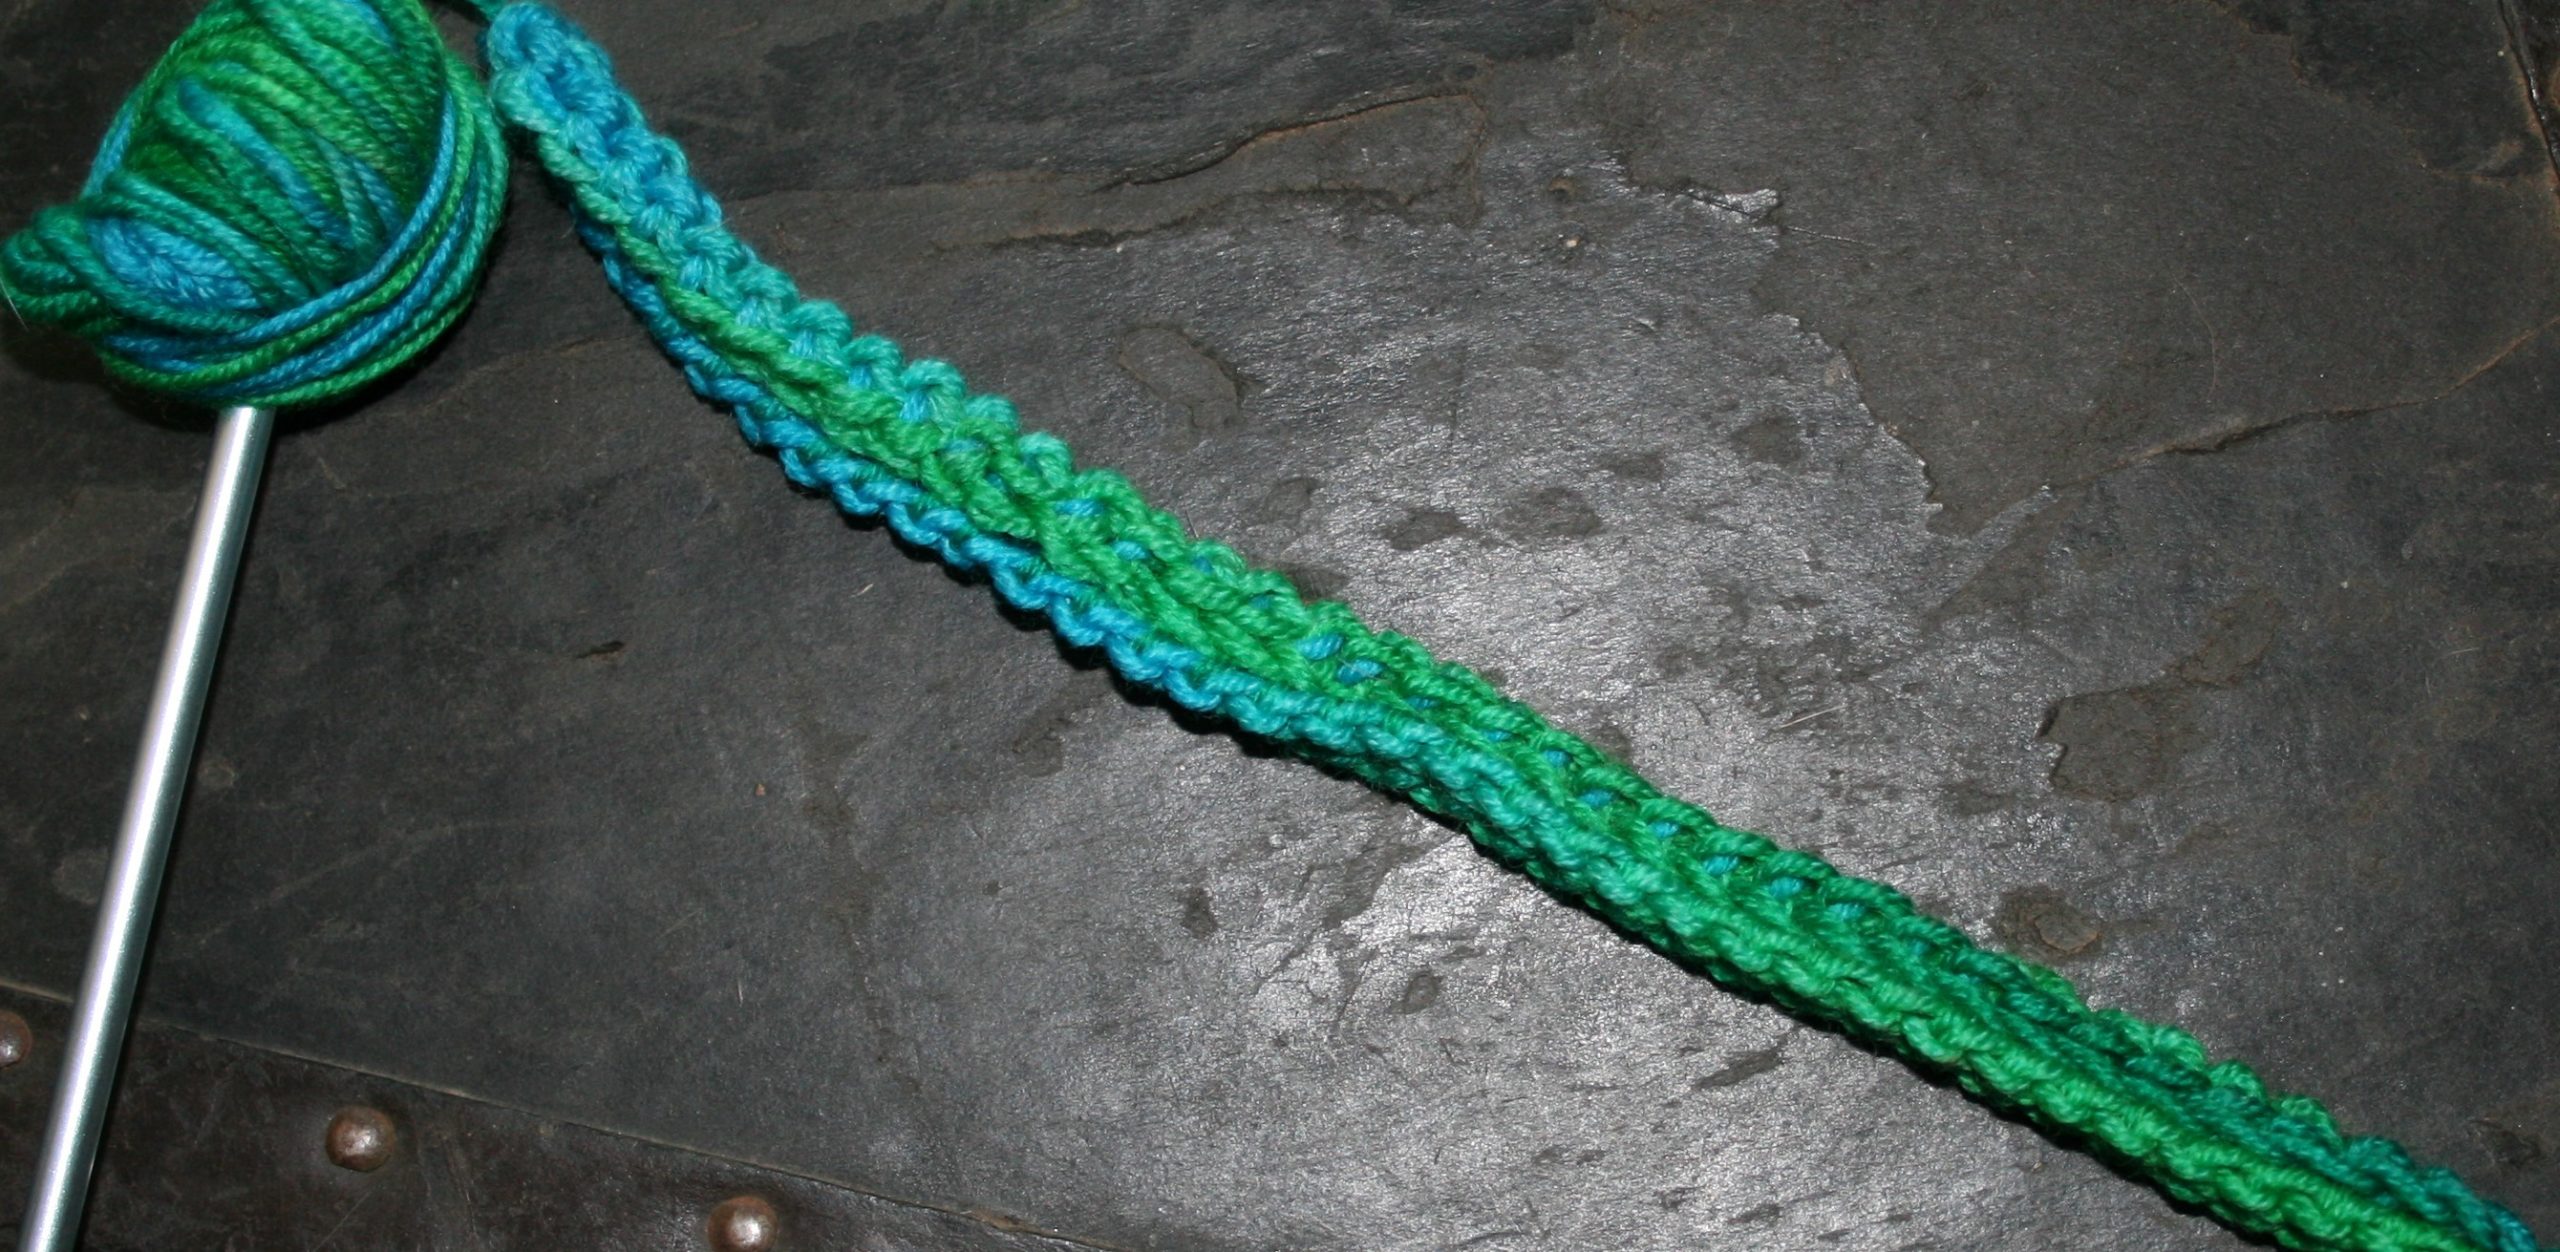
The second is make it a braid crochet bag handle.
For this approach I create a chain that are about 3 inches longer then I would like the handle and work a single crochet in each chain. Make 3 of these single crochet strips. Pin the 3 strips together and braid them together, placing a pin at the finished end. Then attached this handle to the bag.
Braiding 3 single crochet strands together to create a handle
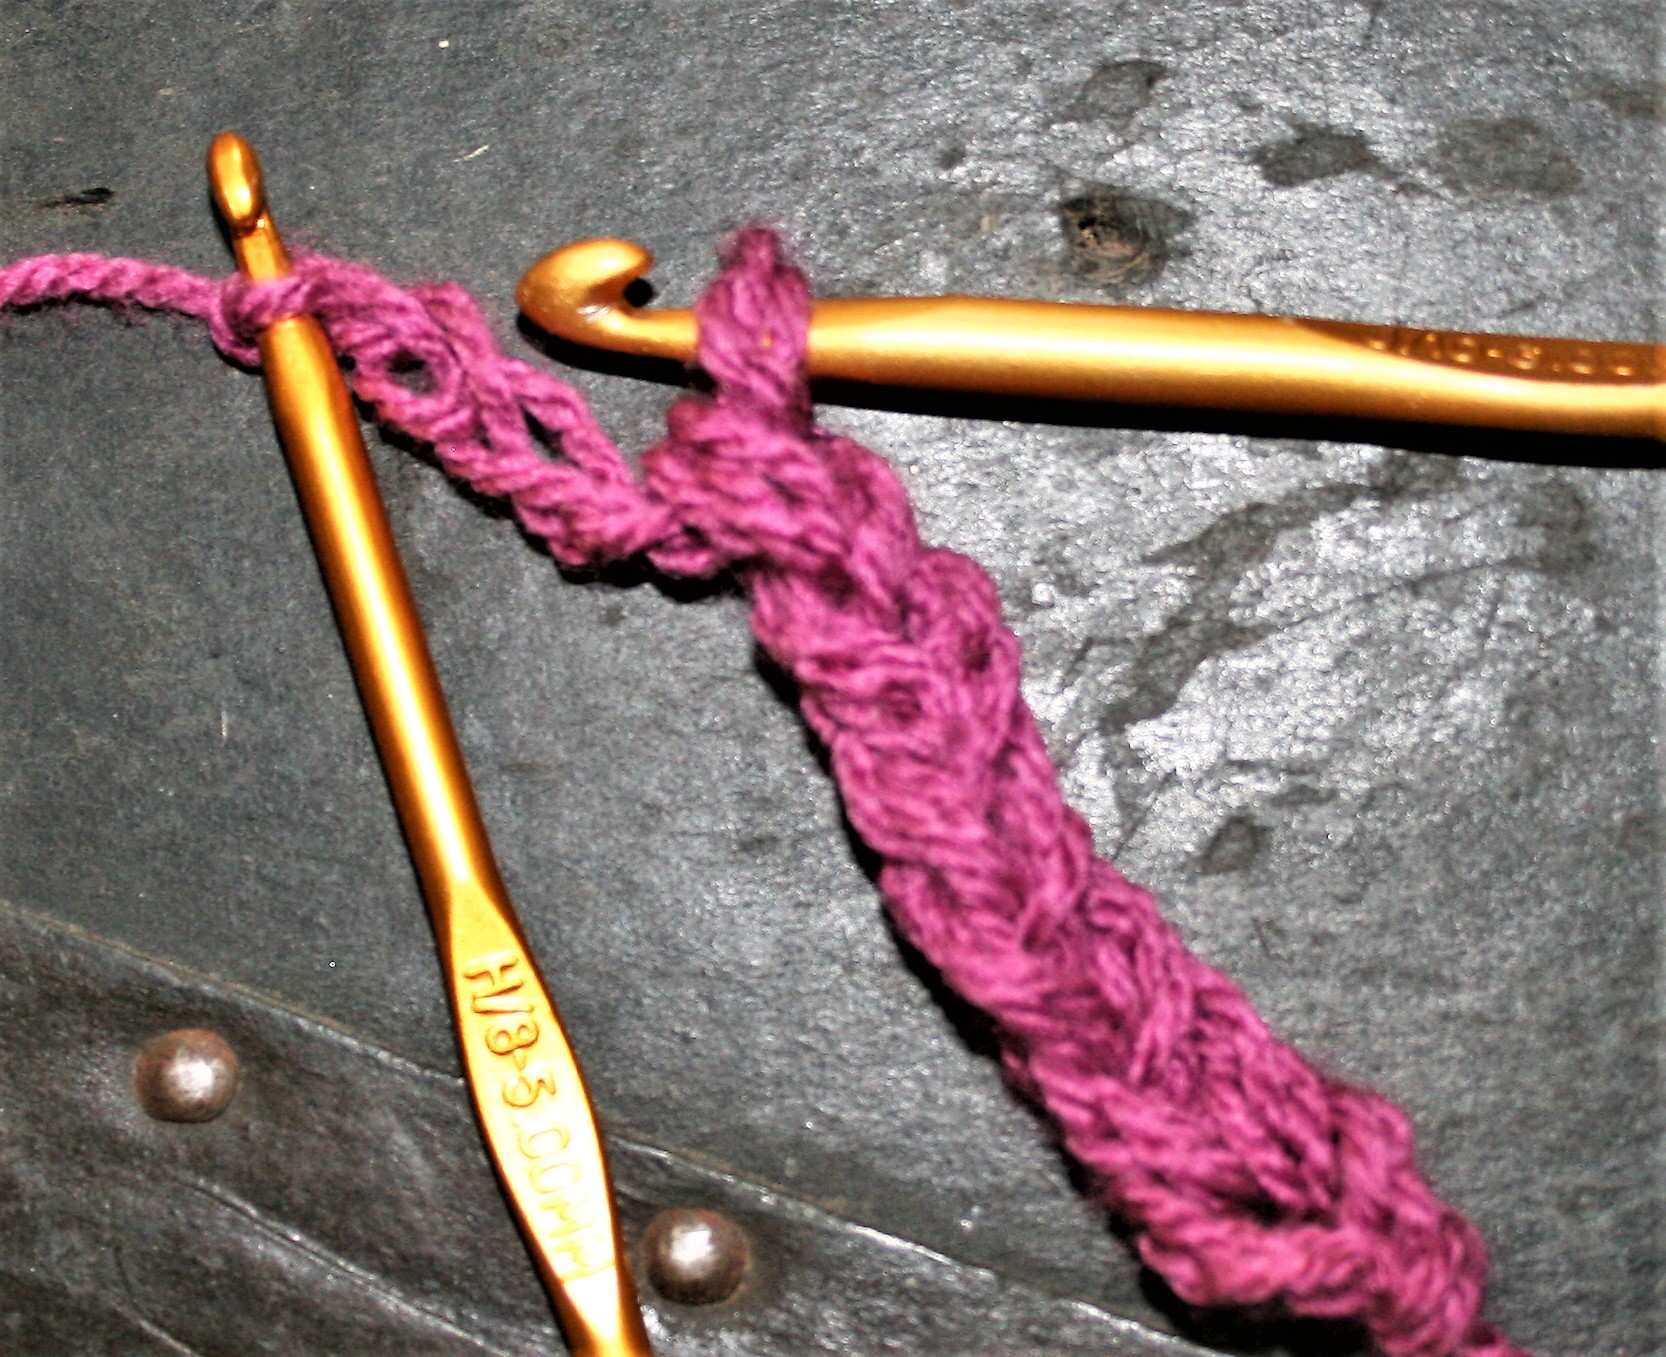
The third is make a chained chain crochet bag handle.
In this process you create a chain three times longer than you would like the handle. I don’t fasten off this chain as I may want to add to it to lengthen the handle as I work. Take a larger hook and then use the newly created chain as a “yarn” and create a chain with it. This creates a heavier rope appearance handle. Attach it to the bag.
Chain a Chain, or Double Chain to create a handle
These three types of handles have helped me finish up projects, then I only have to weave in the ends.
There are days I need to get into a rhythm with my crochet and the continuous granny square helps me do that.
It does not require counting. It does not require joining, it just keeps going in a spiral. This is prefect for creating scrap squares, of entire scrap blankets.
What I like most is that I do not have to think about the motion of my hands. Anytime I reach a corner, I put in a corner, any time I find a side, I work a side. It really is that simple.
Where I found this technique
I learned about this square judging a “Fastest Hook” competition at a CGOA conference. The continuous granny square was worked by all participants, as it really does lend itself to speed.
A Continuous Granny Square
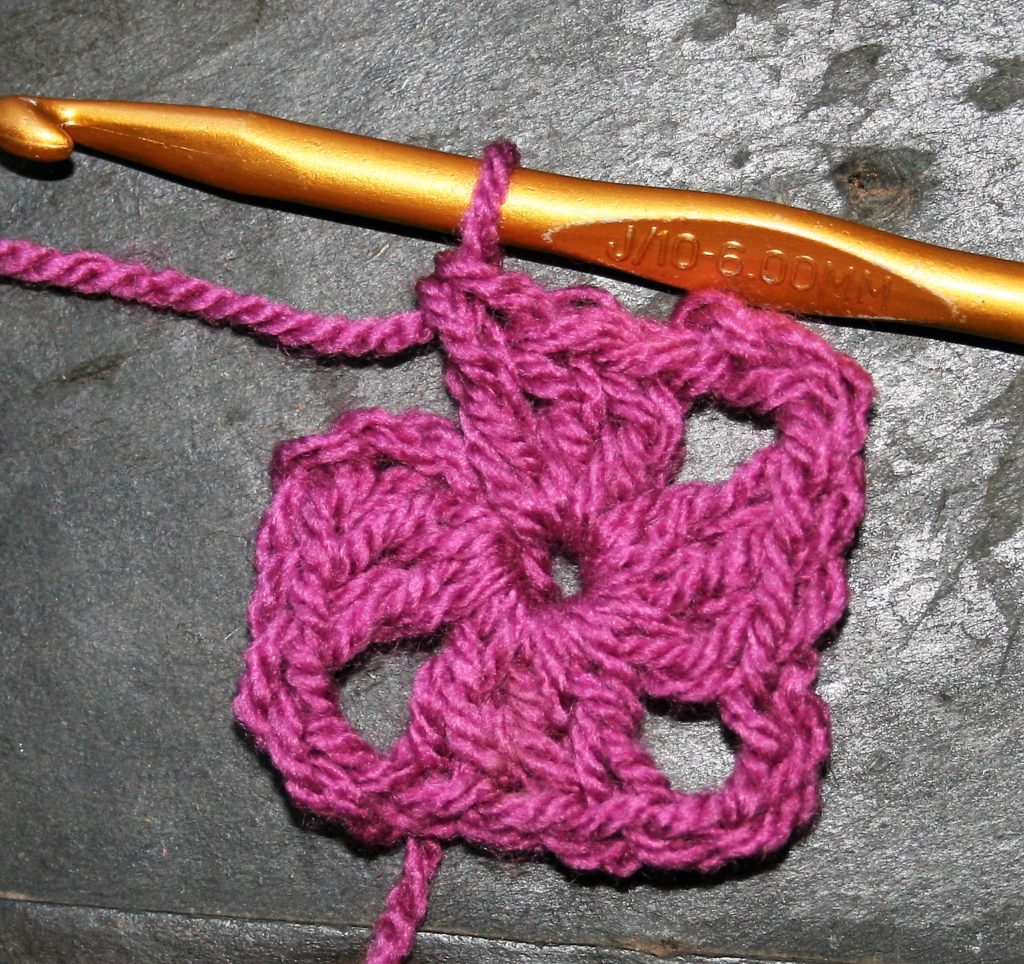
To make it all you have to do is start the beginning of a circle just like you always would. The first round of a granny squares as 4 sides made up of 3dc each, and 4 corners. The last corner is worked differently creating the spiral.
Lets get started
Round 1: Ch 4, 2 dc in 4th ch from hook, [ch 3, 3 dc in same ch] 3 times, ch 6. DO NOT JOIN ROUND
The four side of Round 1 Chain 6 and skip the join, work into the next corner
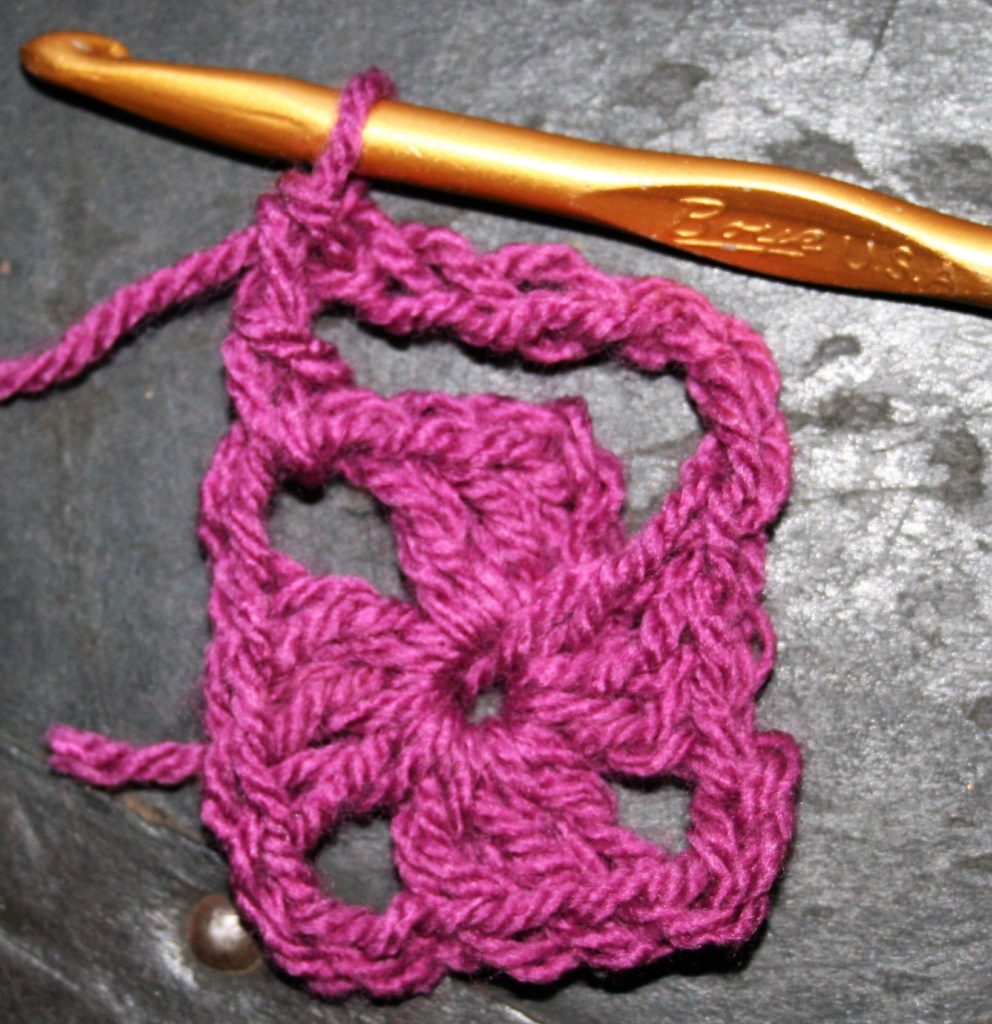
Round 2: Skip over the next 3 dc, and [(3dc, ch 3, 3dc) in next ch-3 sp (corner made), ch 3] rep 3 times, (3dc, ch 3, 3dc) in ch-6 sp, ch 3. DO NOT JOIN ROUND
Worked with scrap yarn…worked a corner into the ch-6 sp, to finish Round 2.
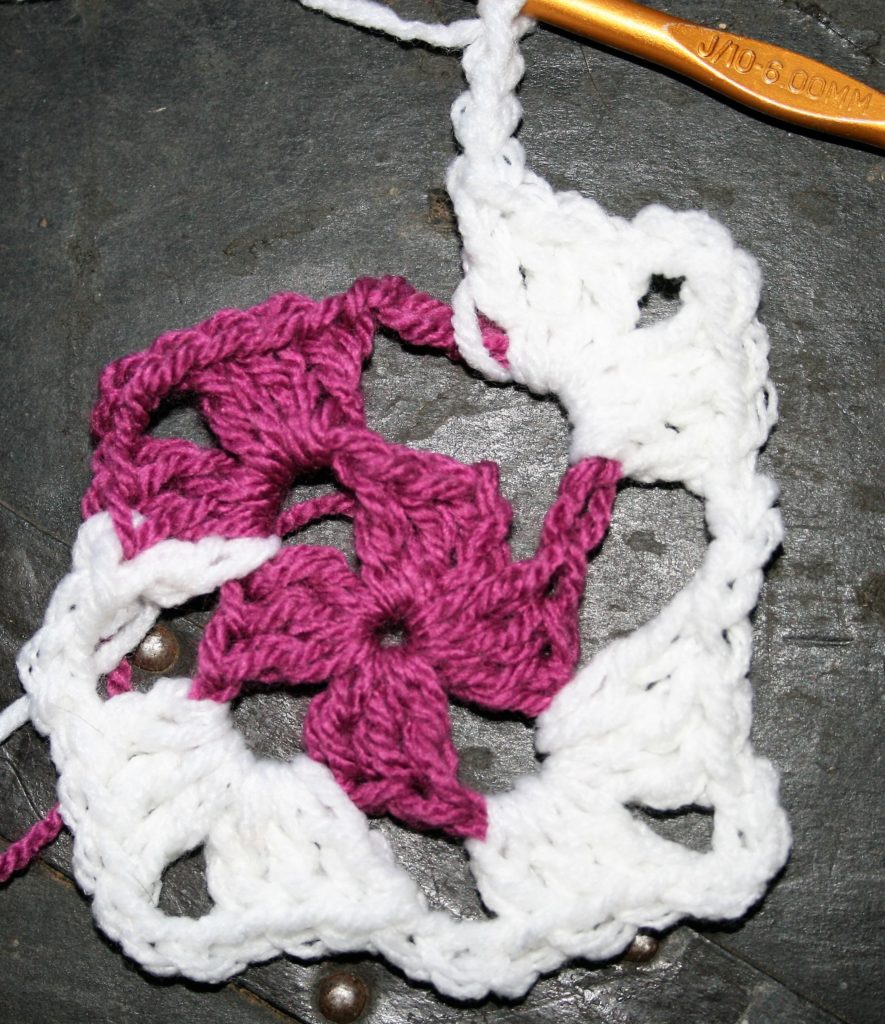
To work all subsequent rounds, work a corner (3dc, ch 3, 3dc) in a corner, work 3 dc a side in ch-3 sp, and make sure that you ch 3 between all blocks. It is that easy.
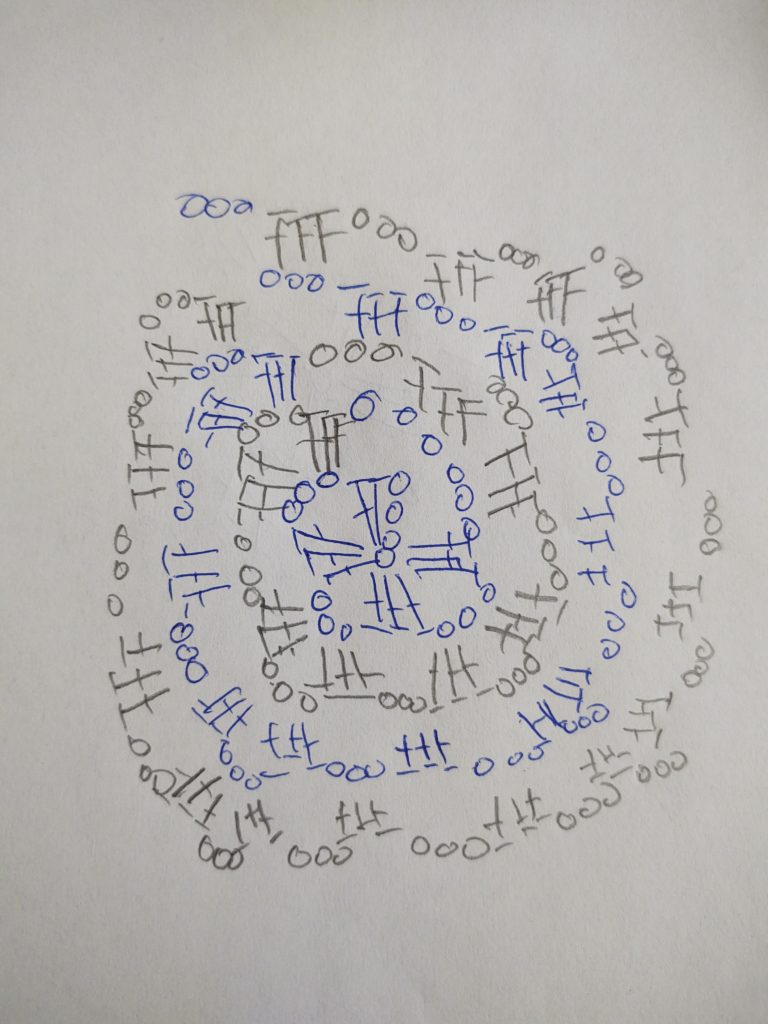
For a visual chart reference….
To help ensure that you end with an actual square, I mark the ch-6 sp, as this is the same corner of the square that I would end at to have even sides.
At finishing, I will work the beginning tail up the side of a dc at the ch-6 sp and make a connection between the 2 un-joined sides in Round 1. This ties it all together and makes it look like traditional granny squares.
Creating unique reversible crochet fabric is a really fun thing to do. The Reversible Shell stitch is a great technique that can create a memorable blanket, scarf, hat, or really just about anything.
It looks more intimidating than it really is. This technique is worked as a 4 row repeat, working 2 rows in each color.
One of the things that can be a bit trying about this stitch is that after working 2 rows of one color, you remove the hook from the working loop and pick up the loop of the other color and work 2 more rows.
Lets Get Started
Start with a beginning chain of a multiple of 4. The first row has a little different stitch pattern in order to keep the project looking symmetrical.
To work the first row, put a stitch marker in the 4th chain from the hook (this is to help find the location to join the second color), dc in 5th ch from hook, 3 dc in next ch, dc in next ch, [ch 1, sk 1, dc in next ch, 3 dc in next ch, dc in next ch] repeat across, leave last ch unworked. Do not turn.
Reversible Shells, Row 1
A Little Unnerving Way to Start A New Row
Now for the unnerving part, pull your working loop up kind of long and remove your hook. With the second color join with a sc in the marked chain (to work a standing sc, check it out here), now ch 6, sc in the skipped chain of the beginning, (ch 6, sc in next ch) across, working last sc in the unworked last chain. Chain 1, and slip stitch to the last stitch worked in the other color making sure to keep the long loop and the working yarn of the other skein out of the way. Now you turn the fabric.
Reversible Shells- drop the working loop and join the new color with a standing single crochetReversible Shells- Work chain 6 and single crochet across, working a single crochet in the unused beginning chain.Reversible Shell- Slip Stitch in last stitch of the other color, make sure to keep the long loop and working yarn out of the way.
Join the Fabrics
This row essentially joins the two colors. When working the shell the hook is inserted through the indicated double crochet and chain 6 loop of the same color that is being worked. Ch2, sk 1 dc, Shell (5 dc in next dc and ch-6 loop), [ch 1, sk 4 dc, Shell in next dc and ch-6 loop (this is the center dc and the chain loop)] repeat across, sc in turning chain. Pull up the working loop to a long loop and remove hook. Do not turn.
Reversible Shell- Insert hook through both the indicated stitch and the chain 6 loop that is the same color as the working yarn.Reversible Shell- Single crochet in the last stitch or turning chain
Back to Working Only the Same Color
This row works through the same color. Start by inserting the hook in the other color loop, and resize the loop to fit the hook. [Ch 6 and sc in the ch-1 sp (between the 5 dc stitches)] repeat across. Turn and work the Row of joining the two colors.
Reversible Shells- Chain 6, single crochet in the chain 1 space between double crochets of the same color
And Repeat
Repeat the stitch pattern rows or working ch-6 loops, turning and working a joining shell. Then you drop the working yarn, pick up the other color and work the same stitch repeat.
Reversible Shells- Work the pattern until the desired length.
Work this until you have the desired length.
I like to finish my work so that it has a little visual balance, so I work a row of the ch-6 loops, and fasten off that color. I then turn and pick up the other color loop. Chain 4 and [sc in the same location I would work a shell, picking up the ch-6 loop, ch 3] repeat across, sc in 2nd ch of ch-6 loop. Then fasten off.
I have found that it works nicely with a wide range of colors and yarn types. Lending itself to endless possibilities.
To help you celebrate National Crochet Month, I am sharing a technique to help advance your crochet skills, and including a free pattern. Today I am sharing how to work Tunisian Crochet in the Round.
First, I would like to thank Crochetville for including me in they blog tour for this month long celebration. Everyday you are introduced to a new designer, or hobbyist or teacher, to help inspire a new desire of crochet within you. Don’t miss a day, check out the participants here.
What Makes this Special
Tunisian crochet is an interesting technique that produces a
fabric that can look woven, or even knitted. It is worked with in a two-step
process. The first step is to load up the hook with loops (Forward Pass), like
casting on in knitting, the second step is working all the loops off until only
one remains (Return Pass).
Here is One Option
This back and for of the two-steps, actually can make it a
bit challenging to work the fabric in the round, so often it is worked flat and
then seamed. However, there are a couple of different approaches to working in
the round. One is to work with a double ended crochet hook, so you can load
from one end and work off the loops with the other. This process works the
piece in a spiral and two strands of yarn, it looks nice, but finding double
ended hooks is not exactly an easy task.
The Option I like
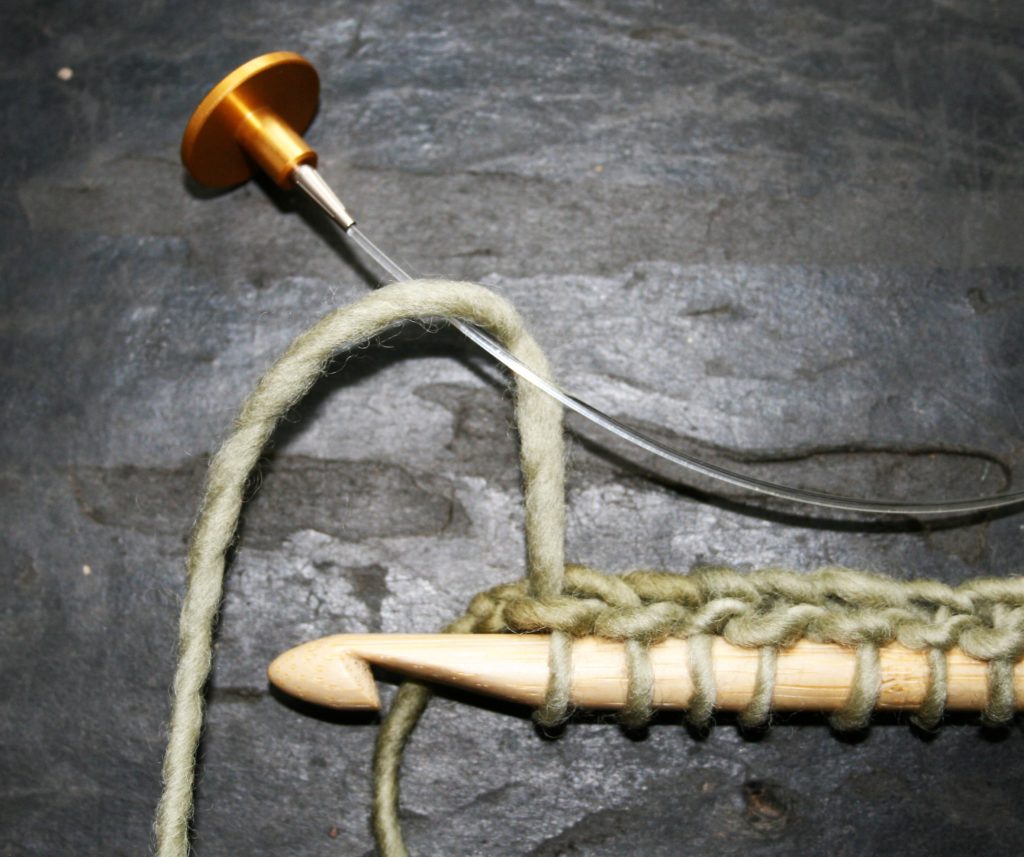
The method I employ more is one that I discovered from Jennifer Hanson, the Stitch Diva. It is a Tunisian Loop Return Pass. It involves using a cabled Tunisian hook, and adding joining loops to the fabric while working the Return Pass. I have tweaked it a bit from what Jennifer has in her video, as it works for me. So let me share my tweaked version.
How to Make it Work
After you have completed the Forward Pass of a Round, fold the
cable of the hook so that the end is next to the hook, the next step for a return
pass is to now yarn over and pull through a loop, you will still do this step
but you wrap the yarn around the cable as you are yarning over. Basically I
have the cable laying adjacent to the hook so that when I yarn over, the yarn
is coming over the cable as well, and then I pull through 1 loop.
Include the cable in the yarn over.Yarn over and pull through 1 loop on hook.
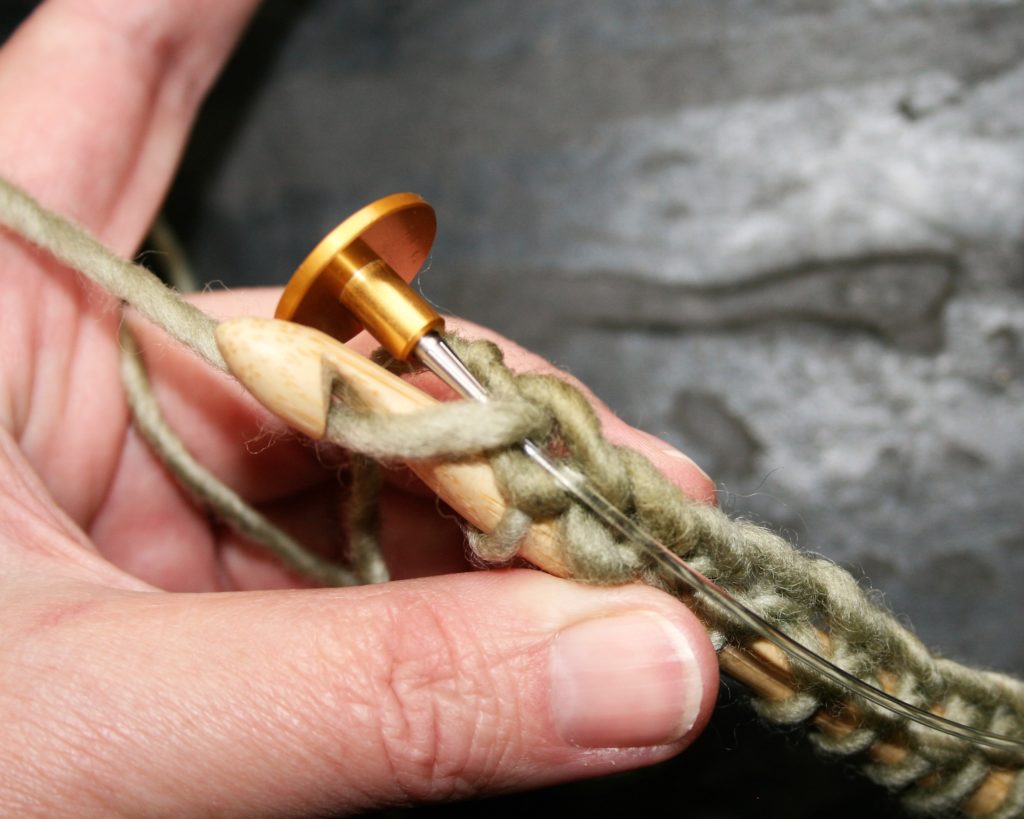
Keeping the cable laying adjacent to the hook still, I now yarn over and pull through 2 loops. At this point I have just added 2 loops to the end of the cable.
Yarn over the cable and hook again, then pull through 2 loops on the hook. After working the 2 added joining loops to the cable, now work the standard process for a Return Pass of Yo, pull through 2 loops, across until 2 loops from the forward pass, and the 2 added joining loops remain.
Finishing the Join
I now continue the Return Pass, by yarning over and pulling through 2 loops without working over the cable until 2 loop from the Forward Pass and the 2 added loops remain, (this will be 4 loops on the hook). Yarn over and pull through the last 4 loops.
2 loops of the Return Pass, and the 2 added joining loopsPush the added joining loops up the cable and onto the hook. Yarn over and pull through all loops. First Round is joined.
Work all subsequent round this way, and the fabric with be
joined.
Yarn over cable and hook before beginning the Return Pass of every round.
In some of the Tunisian stitches there may be some gapping at the join. I have found this with the Tunisian Full Stitch for example, but overall it is satisfactory to me. In addition as the fabric is joined in the Return Pass, during the very first Round the beginning chain is not joined, so when I weave in the ends, I use this opportunity to close this gap.
The look of the seam after a few rounds.
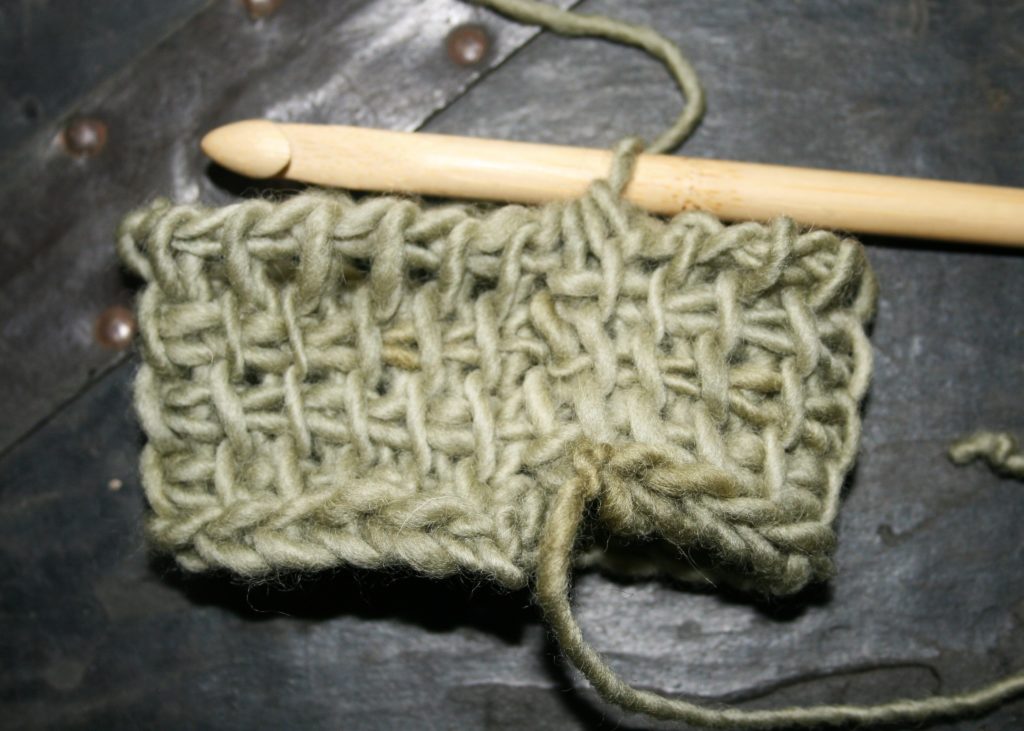
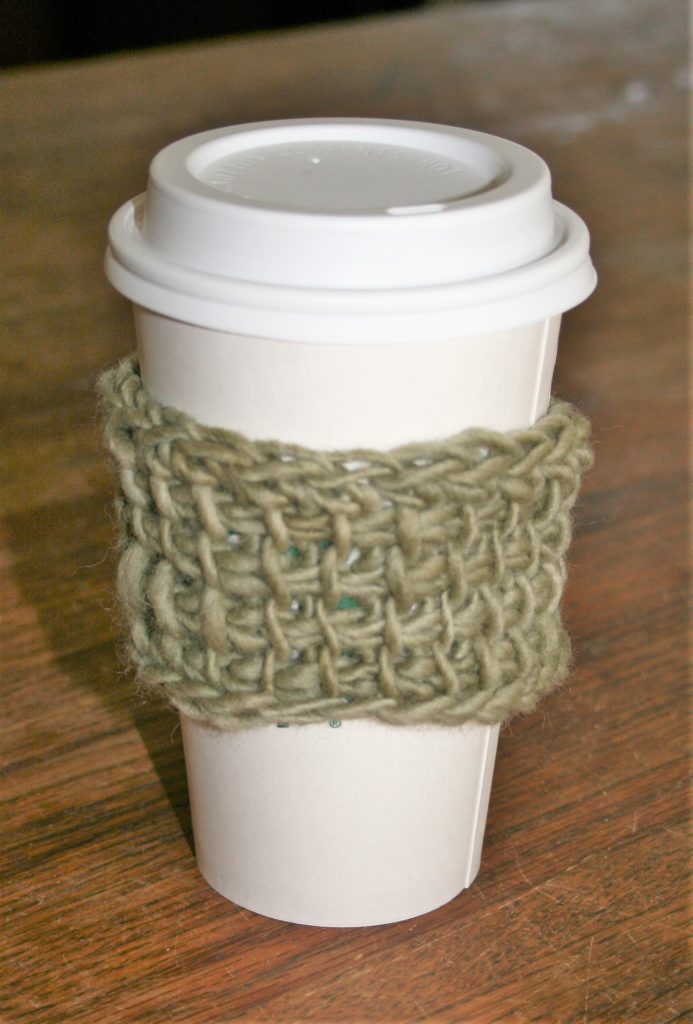
Tunisian Cup Cozy Pattern
Tunisian Cup Cozy
Materials
Any medium weight yarn
M/N (9 mm) Tunisian cabled crochet hook
Special Stitches
Tunisian
Loop Return Pass (TLRP)–
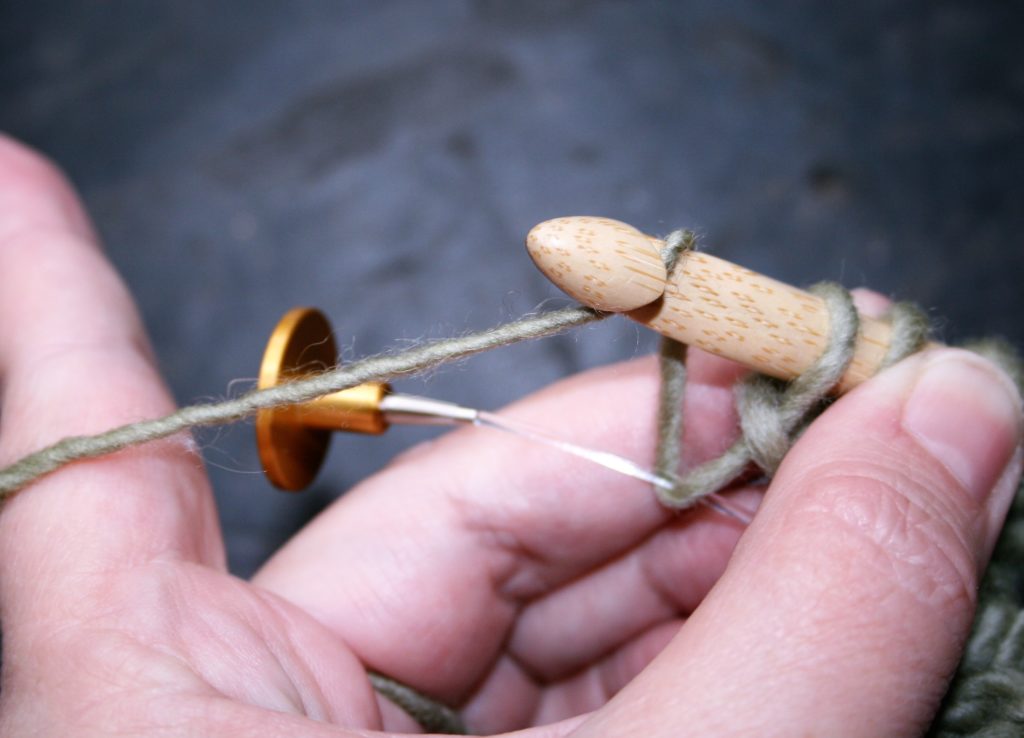
*Bring end of cable to working end of hook, bring working yarn to bottom
of hook and in front of cable, loop working yarn under cable to top of hook,**
YO, pull through a loop; Rep from * to ** once, YO, pull through 2 loops (2
loops added at end of row); (Yo, pull through 2 loops) until 4 loops remain on
hook, YO, pull through 4 loops.
Tunisian Simple Stitch (Tss)—Working from right to left, hold working yarn behind work, insert hook under next vertical bar, yarn over and draw up a loop.
Getting Started
Rnd 1: Ch 23, load hook by inserting hook in next ch, YO, pull up a loop across. TLRP. -23 sts
Rnd 2 & 3: Tss in each stitch. TLRP.
Rnd 4: Sc in each st across. Fasten off. Weave in ends.