My Color Change

ScannedImageSometimes what makes the biggest difference with the appearance of your work, are the things that it is assumed you know. For crochet this means those little things in a pattern that state; “weave in ends”, “change color”, “finish off”, “yarn over”, and the unwritten beginning slip knot.

These are areas that I have taken a little time and explored, to see what feels most comfortable to me. I have some past posts talking about weaving in ends and yarning over, so today I thought I would take a look at color changing.

DSCF0554

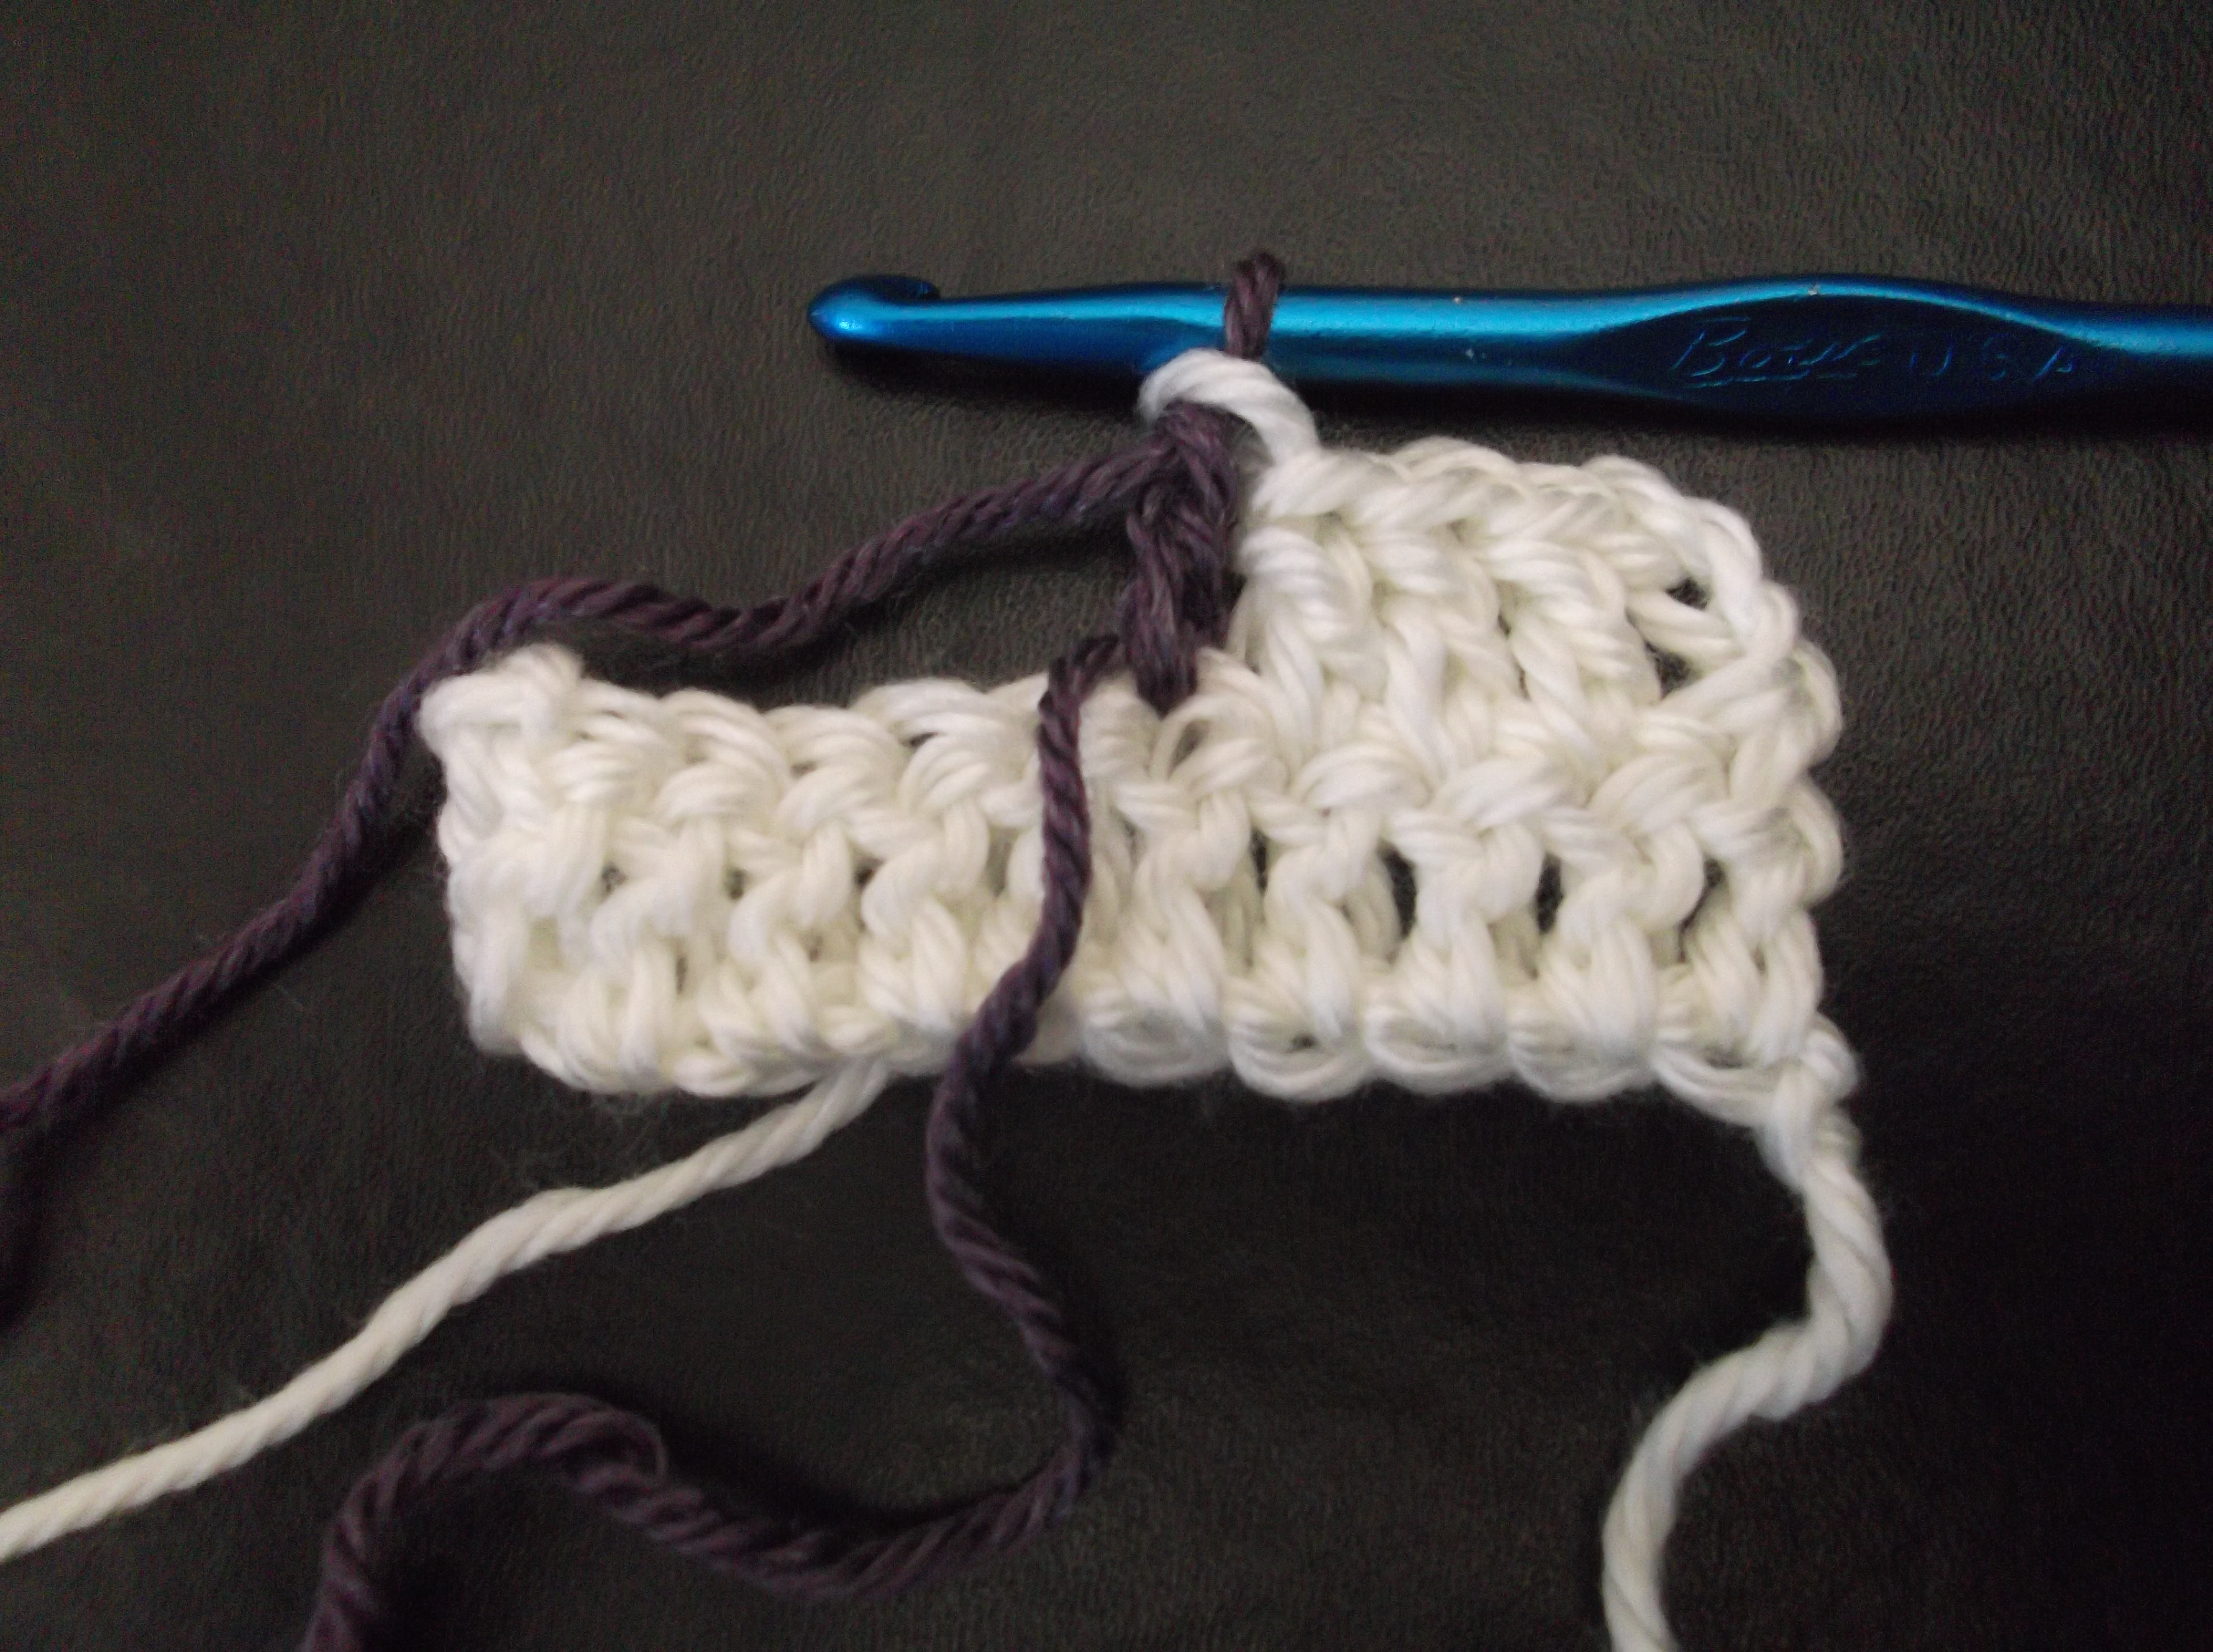
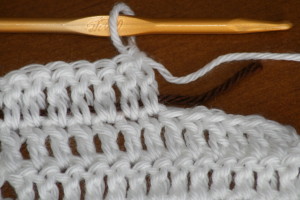
Completing a stitch and working the next stitch in a new color

I have played with a couple different approaches to changing color since I started crocheting oh, so many years ago. I think in the beginning I just tied the colors together, sometimes at the end of my last stitch and started the next stitch with the new color, having a little knot at the top of the stitch. I mean I would cut the working yarn and tie the new color to it, and just keep crocheting away, so it was just one long piece of yarn in my experience. It is not exactly perfect, always a little unsure of exactly where the color will change at, and then there is the little knot, so it adds a slightly different texture.

DSCF0556

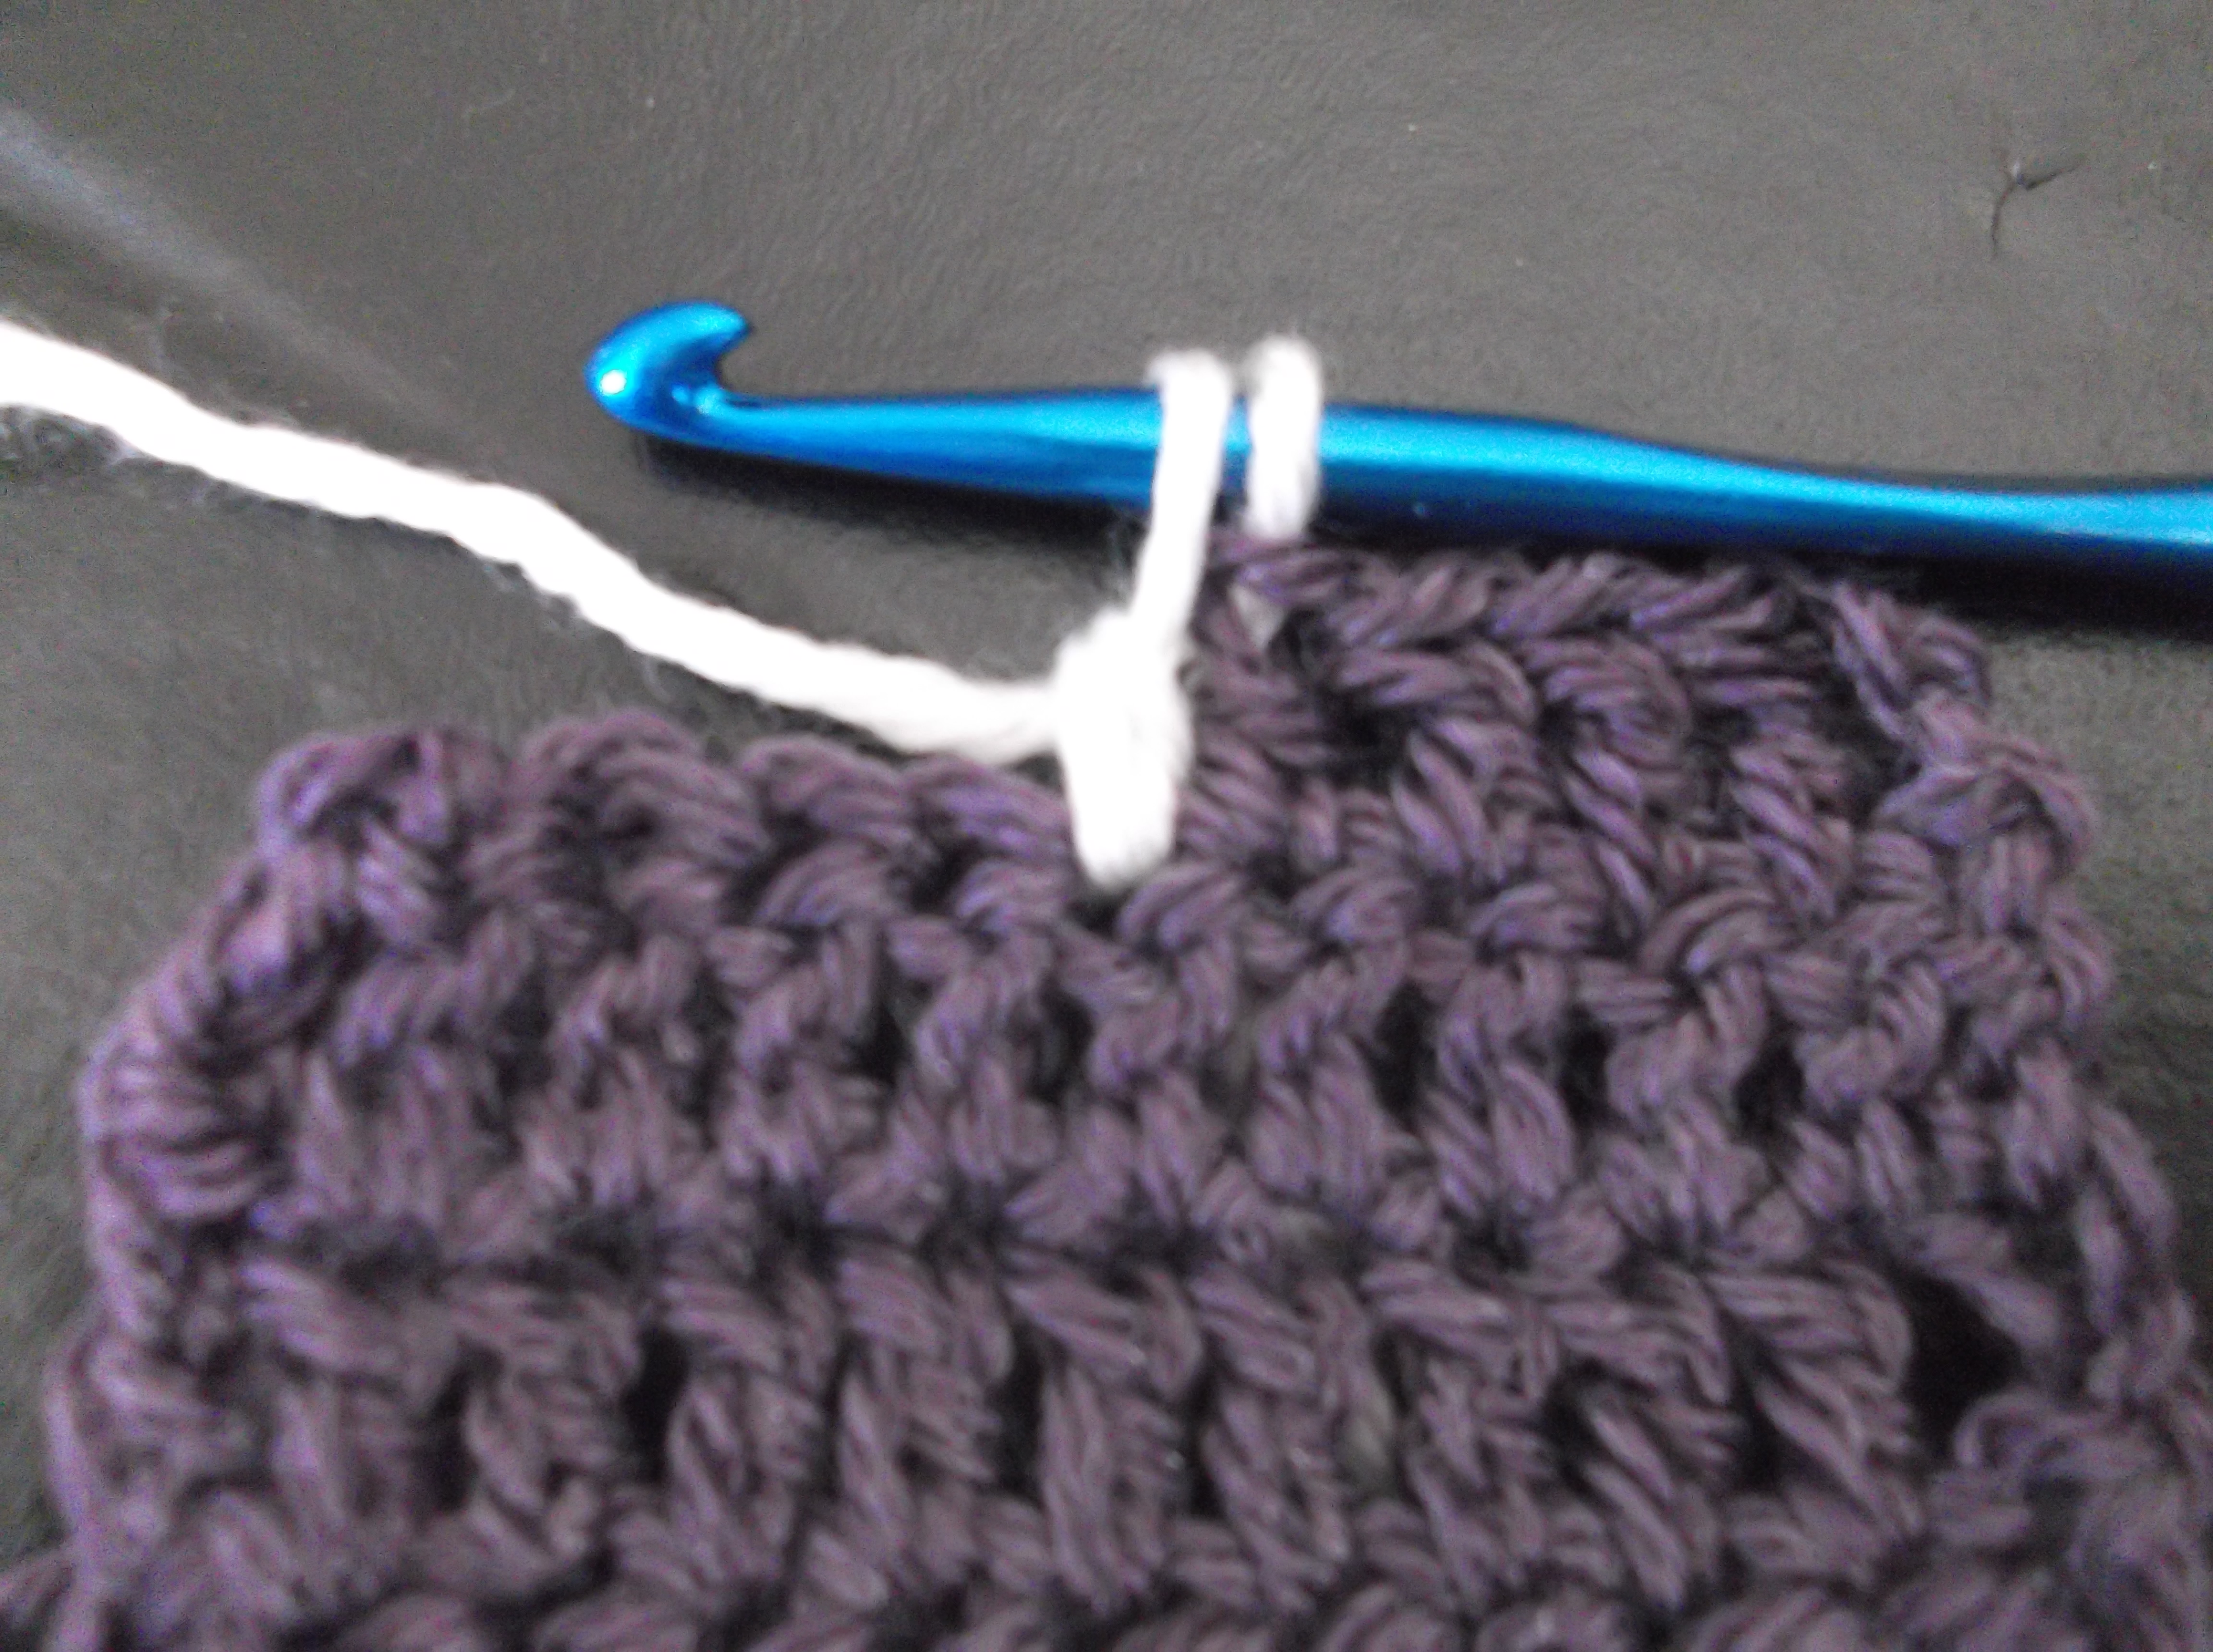
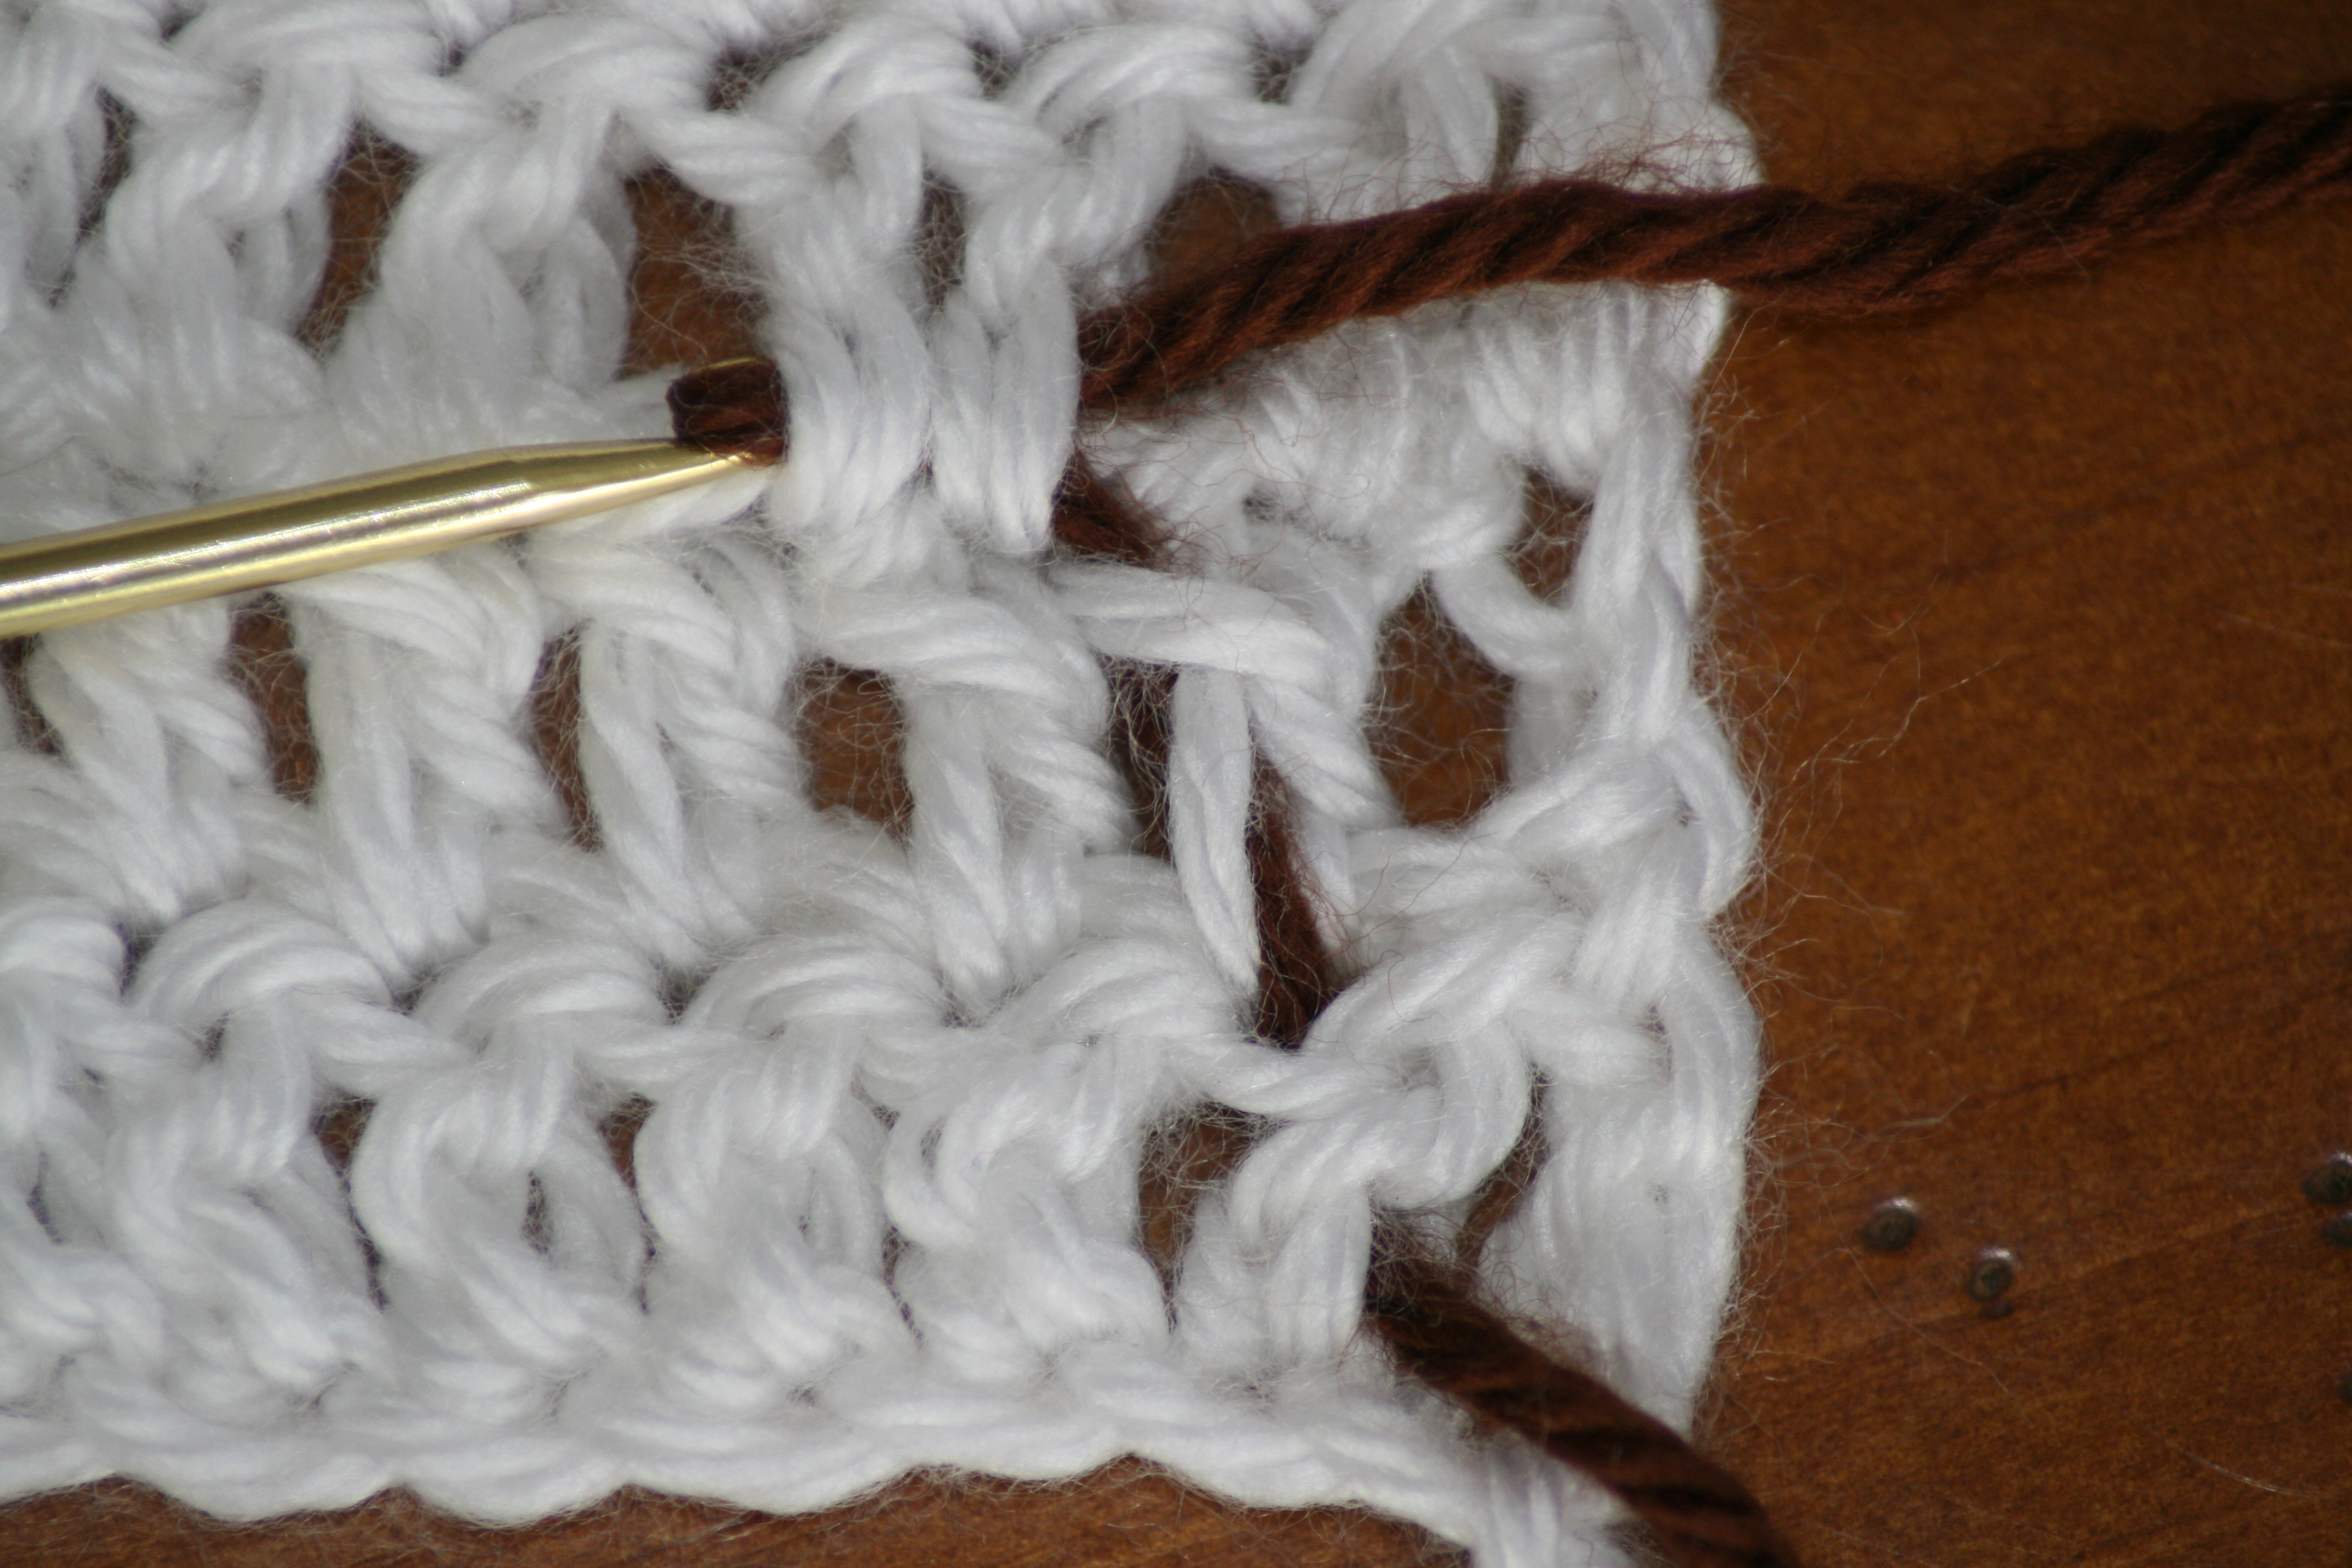
Changing color at the last yarn over of the adjacent stitch

DSCF0555

Smooth transition of color, see how the last loop of the purple stitch actually rests on top of the next stitch shown in the previous photo, creating a straight white line

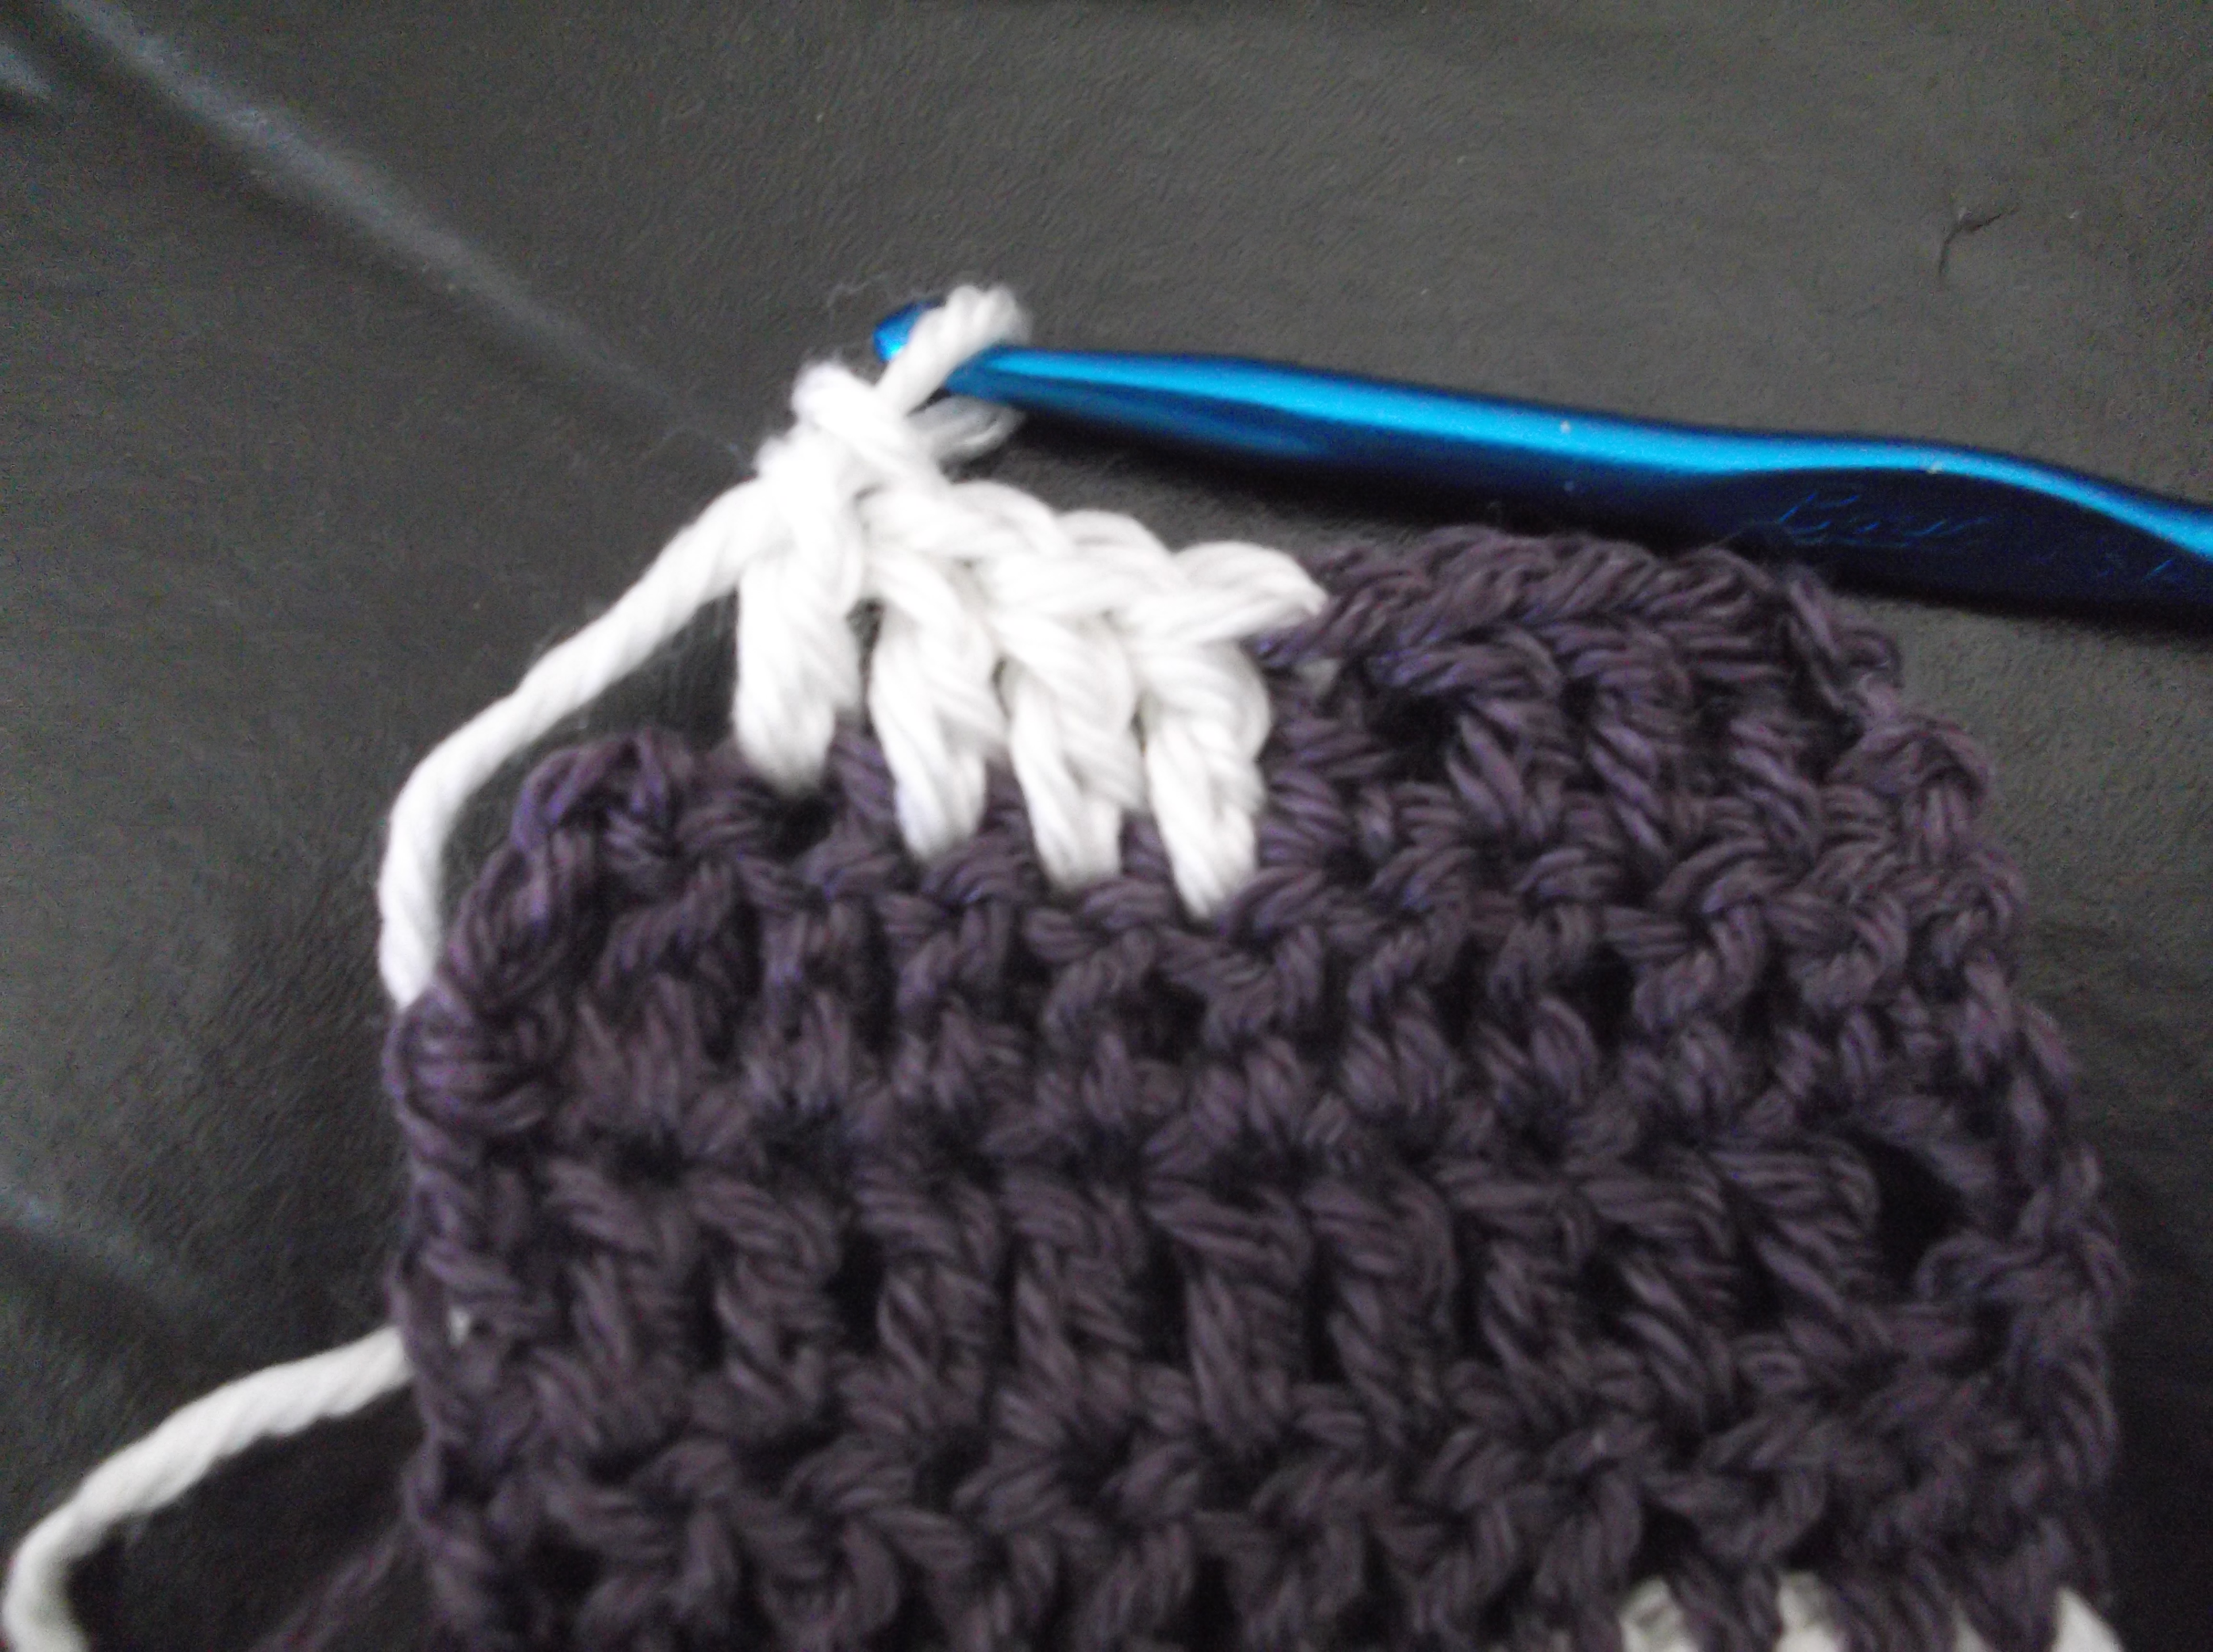
Then I graduated to the point of changing the color after completing a stitch, and begin the new color with the next stitch. It was similar to the cut and tie method I did in the beginning, but I did not necessarily create a knot. I would cross the yarns over each other so that the last loop of the first color would get to loose. But if you look at this approach, it does not leave a smooth “straight” line of the color change, there is a little color overlap in the newly created stitch. The reason for this is due to the stitch construction for crochet stitches. The last yarn over and pull through of a stitch, actually creates the top of the next stitch adjacent.

So then I realized that I needed to change color at the last yarn over and pull through of the point of the color change. This gives me a cleaner color change, and a secure transition of yarns. It allows my work to have an appearance that looks a little more skilled. Granted I have ends to weave in, but this simple technique has taken my work to new level.

My Hooks of Fall

ScannedImageThe calendar and the weather finally are coming into sync; it is fall. The leaves are changing color, the evenings have a chill, the final harvest is being collected, and the kids do not need to be told to wear shoes. Some find this to be “crochet weather”, but to me it is quite the opposite. I have a harder time picking up my hooks and getting my craft completed.

Maybe it is because my fingers don’t want to move, but I think it is more likely that I look around and realize the year is almost over, and I did not get accomplished everything I was hoping to over the warm months of summer. Once again I took that time for granted. I did not get that patio put in that I have had planned for a couple of years now, I haven’t gotten all the closets cleaned out, I haven’t even gotten the boxes of holiday decorations from last year put away yet (but, at least I am ahead of the season this year for having them out!). So instead of playing with yarn, I finish painting windows, I pick walnuts, grapes, and apples, I make jams and jelly, I am finding recipes for squash, I am lighting fires, and pulling out the jackets.MP900384696

My mind races with ideas of what to create with my hooks, but my hands are busy elsewhere. These last 8 weeks of the year tend to just go by in a blink, and there is so much to pack into them. Not just because of the gift giving and holiday meals, but because for me this is my time of reflection. Where have I been this year and where do I want to go in the next. I do have some crazy ideas (I will keep you posted), and hopefully I don’t take the warm months ahead for granted and I put my ideas into motion.

A Tail of Ends

ScannedImageWeave in all ends. Simple statement written at the end of almost every pattern, yet if you get a group of crocheters together you often find many different answers to how this is done. I have been on a personal mission to see if there is any consensus on this topic, and on my journey have found many opinions, thoughts and rationale for various approaches. Here are a few with their pros and cons, so that you can undertake a personal reflection and see what works best for your style of crochet.

First I need to have a long enough end. I admit yarn is precious so I don’t want to waste too much that I will just be weaving in, or cutting to throw away.  So yes, I have had short ends in some of my earlier work. I look at those pieces now and shake my head; the ends never stay hidden, regardless of which technique I try, the only thing that I can do to fix them is to pull out a needle and sewing thread and attempt to sew them down. I’m not a seamstress, sewing is not the reason I crochet, so I have learned my lesson, I leave an end of at least six inches in length, anything less is just asking for trouble.

IMG_5523.1

Crocheting over the ends

Personally I have hated weaving in ends, so I have crocheted over ends whenever possible, this is quick and easy, but not exactly un-obvious. It does create a small ridge in the stitches that are crocheting over the end, and it is not very secure. If you give the fabric a good tug the end slides, and sometimes works itself out. Not to mention that the end is noticeable on the wrong side of the row, especially if it is a color change. Okay, so maybe this is not the best approach.

So maybe I should attempt weaving in, but I don’t want to get a tapestry needle. I take my hook and insert it through some stitches and pull the tail through. I don’t have to get up and find my needles and I am weaving in the ends not crocheting over them, but this is a little time consuming and the end looks obvious in some places as it sometimes is on the surface of the fabric entering into the side of a stitch. So unless I’m in a pinch on a personal item (that I don’t care about its appearance) I should probably stay away from this approach as well.

IMG_5526.1

Weaving in ends over and through stitches

I guess I have to get the tapestry needle, now what. I can go straight across the rows, through the stitches but this gets me similar results to crocheting over them, if I give the fabric a tug it pulls out. So I ask around. I find people (even knitters) that have used some approach similar to those that I have attempted above, but then I find out some interesting tricks…work the weaving vertically through the stitches instead of horizontally, they are hidden better. But you can’t just stop there, you work the end in one direction for half the length on the end and then turn around and go back the other way, this will stop it from sliding out when the fabric is tugged. Genius! Why have I not found this before? Probably because crochet is as diverse as the people who love to do it. There is more than one right answer, so you have to find what works for you. I am sure that I have not found out all the tricks, more will be discovered, but at least for now I can hide an end and not have it slip out, since any good finishing should not be noticeable and should stay where it is put.

(To see a more in depth article, it is available in the CGOA Autumn newsletter)

Thoughts on Points of Diamonds

Crochet!Winter2013

Crochet World Winter 2013- Photo courtesy of Annie’s

ScannedImageI usually like to find ways to avoid straight lines. I enjoy curves and blending of colors. That is one of the reasons I came to design Points of Diamond Beret, available in the Winter 2013 issue of Crochet! Magazine.

The colors of the yarn (Noro Silk Garden) lent itself so well to the blending of colors. The art has such a diverse array of colors in one skein that it looks like you were painting with a brush, it is really fun.

Points of Diamonds Beret

Photo courtesy of Annie’s

This Beret came into being, once again, from my daughter. She always enjoys asking me to create new things for her (even if she only wears them once and puts them aside). She wanted a circular hat, and I loved the thought of placing a straight line design within the circle, hence the diamond points were introduced.

Once I had it designed for a child, I loved it enough that I wanted one too, so it grew into an adult size as well. I hope you enjoy the ways the colors come together and the texture that the stitches create as much as I do.

Taking Pictures….Having Images

ScannedImageI realized I am bad at taking photos. Not that I take bad pictures, I just do not take photos as often as everyone else, and often forget about doing it at all. For example last week I was in Concord, North Carolina at the Fall Knit and Crochet Show, I had a wonderful time, but do I have any photos to show for it? Not really, I was too busy doing to think about recording. I met so many wonderful people, visited with new and old friends, learned lots and became so engrossed in crochet and yarn that I forgot about my camera.

MP900305796There were so many events to get to meet people that I was completely engaged for long periods of time (for those that have met me, you understand that I do tend to talk a bit).

I enjoyed helping with Professional Development Day. I had excellent instructors throughout the event, that I highly recommend, (Vashti Braha, Mary Beth Temple and Dora Ohrenstein), I enjoyed the banquet dinner and playing in the fashion show, I had a blast at the Fun Night (I even won the speed crochet competition and went head to head with Lily Chin, the renowned fastest crocheter, I didn’t dethrone her but had a lot of fun). Even the simple things like meeting new people over breakfast or appetizers were great highlights, but I have not a photo to show for it.

IMG_20131004_141726-1

Photo at my pattern signing

I did manage to pull out my camera on the show room floor, but only to take a couple of shots of design competition winners (I had some friends that couldn’t make the event, that placed in various categories), and I got a shot of me at my pattern signing. But really the memories I have are well secured in the stories that I lived, I may not be able to show you, but they are there in my heart and mind. I cannot wait to go back again and immerse myself in the experiences again, maybe next time I’ll think about the camera.

If you would like to check out pictures of the design contest entrants I highly recommend checking out Doris Chan’s blog post, she highlights all the winners (that is mine at the top of the page), as well as a slide show of all the entrants (there was so many great designs, I feel blessed to have placed at all, I am really I did not have to be a judge).

Photos may help share memories, but mine are quite vivid for me.