Crochet Picots- 4 Ways

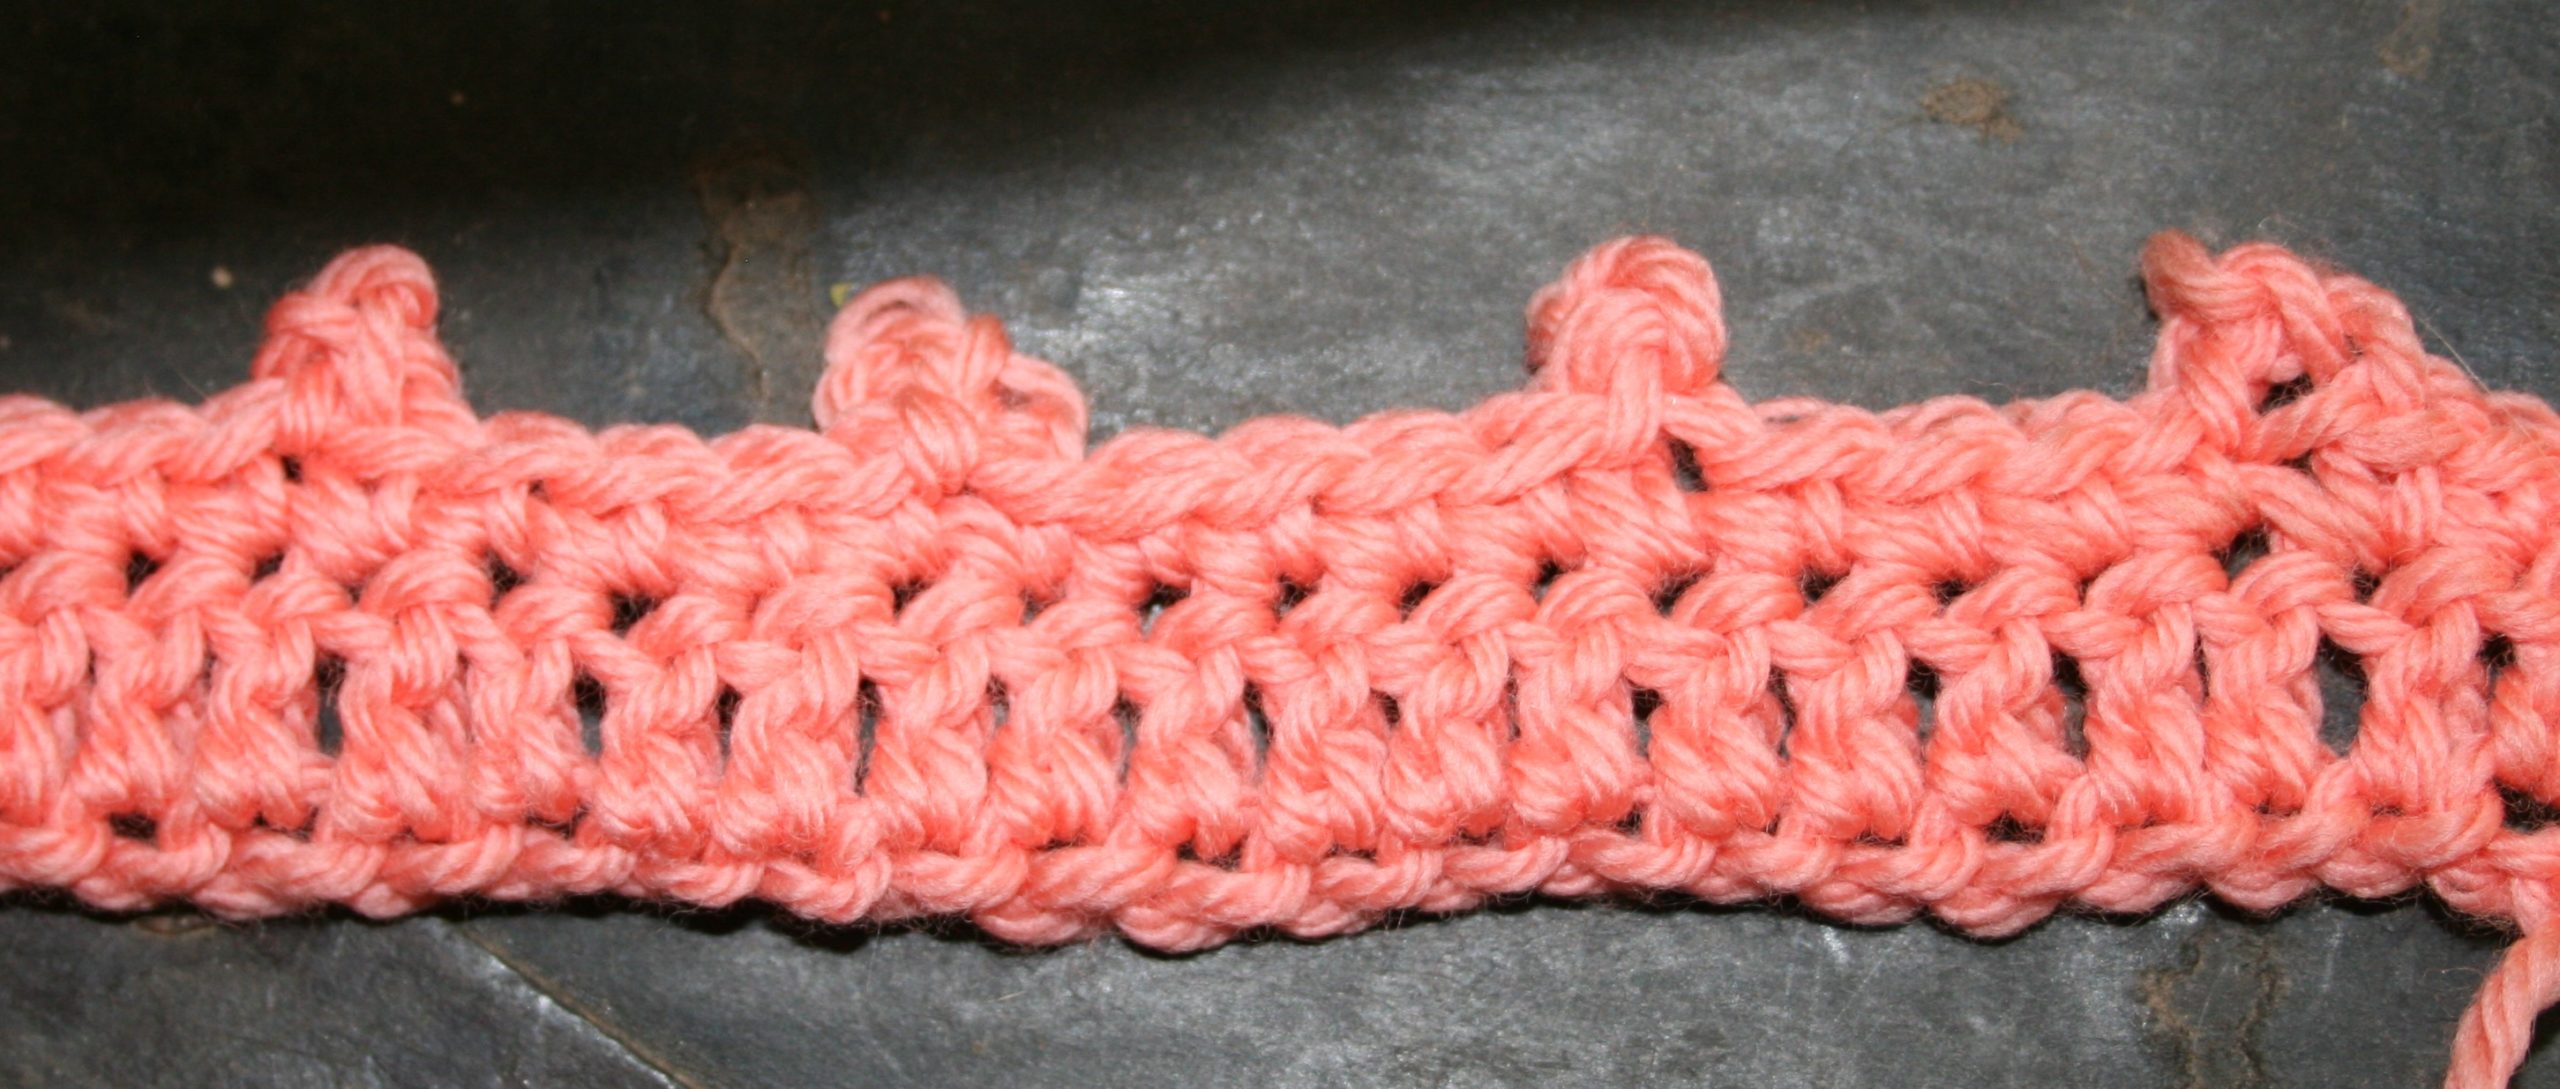
Crochet picots can add a finished style to any fabric, and can be created 4 ways. Four different approaches can result in four different effects.

The Picot stitch is a little “bump” or “nub” that is created to embellish edges of fabrics. I have on occasion used a picot in the middle of a pattern. I have done this as a place to work stitches in subsequent rows. It really helps to center up the stitch location, while creating a very tight point in the design.

Four ways to make a picot L-R: Slip Stitch in front loop and side leg, slip stitch back to front atop stitch, slip stitch front to back atop stitch, slip stitch in first chain

The way that you create chain stitches can actually effect the outcome of the overall picot. I do not go into much detail about Yarn Over and Yarn Under in this post. You can learn more about it here. One of the primary differences is that Yarn Under the chain lays differently. This can cause the stitch to not stand out, resulting in a definite need for blocking.

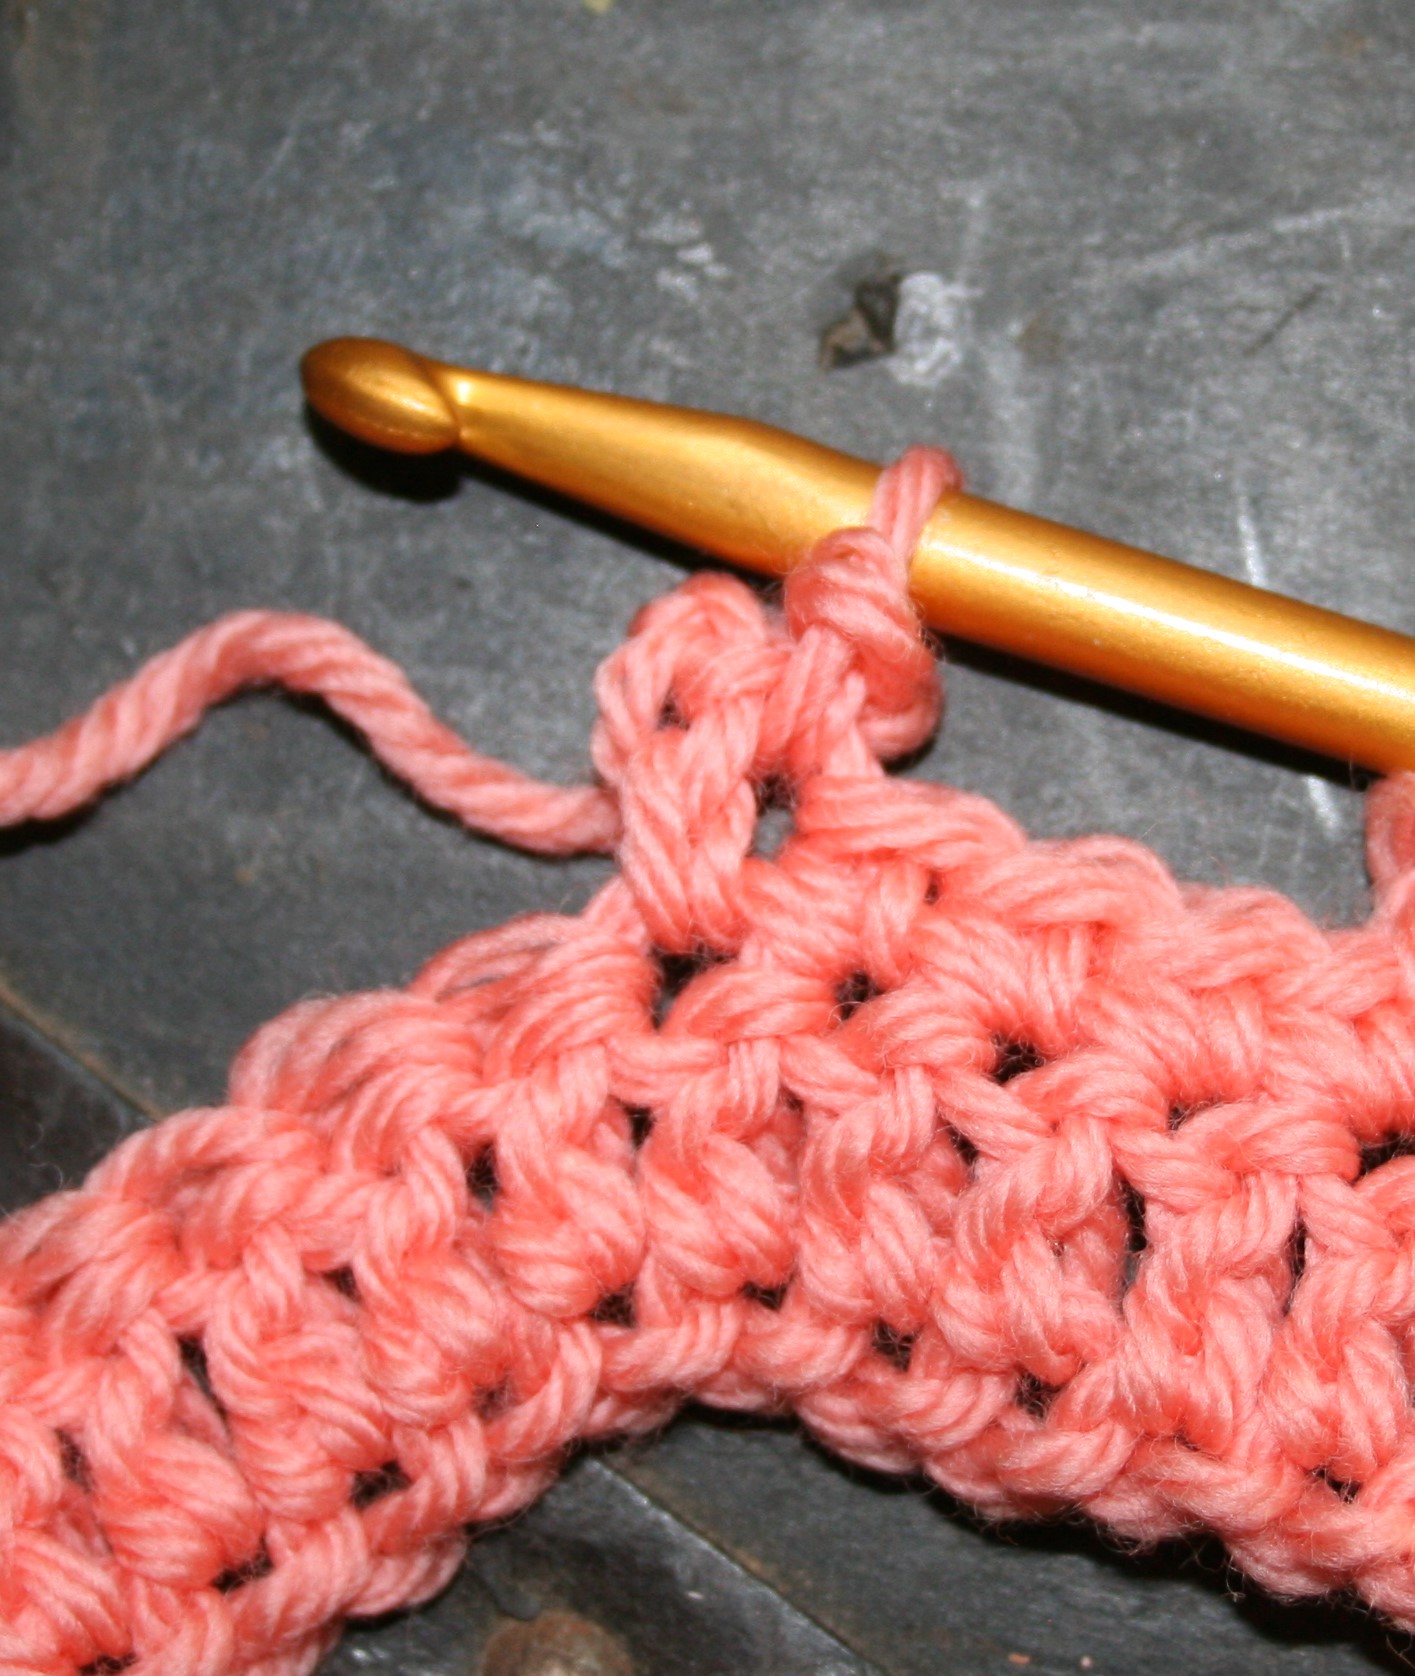
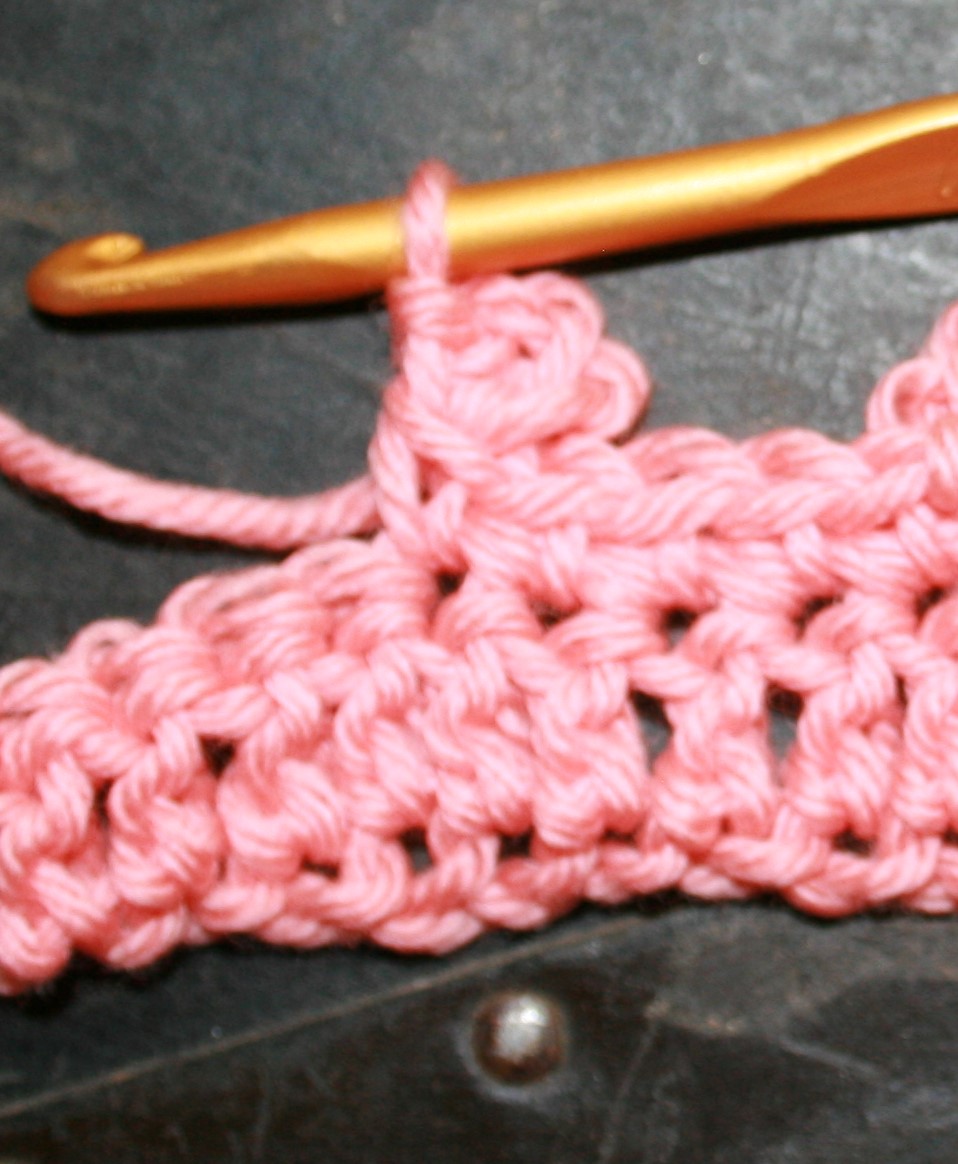
Crochet Picot- Slip Stitch First Chain

There are many patterns that describe a picot by creating 3 chains and slip stitching in the first chain created. This creates a picot that is more flimsy, in the respect that is moves freer in all directions, than the other approaches. I feel that it is more likely to create a space between the stitch it is worked atop of and the next stitch worked.

Chain 3, slip stitch to first chain created
Picot created by slip stitch in first chain created

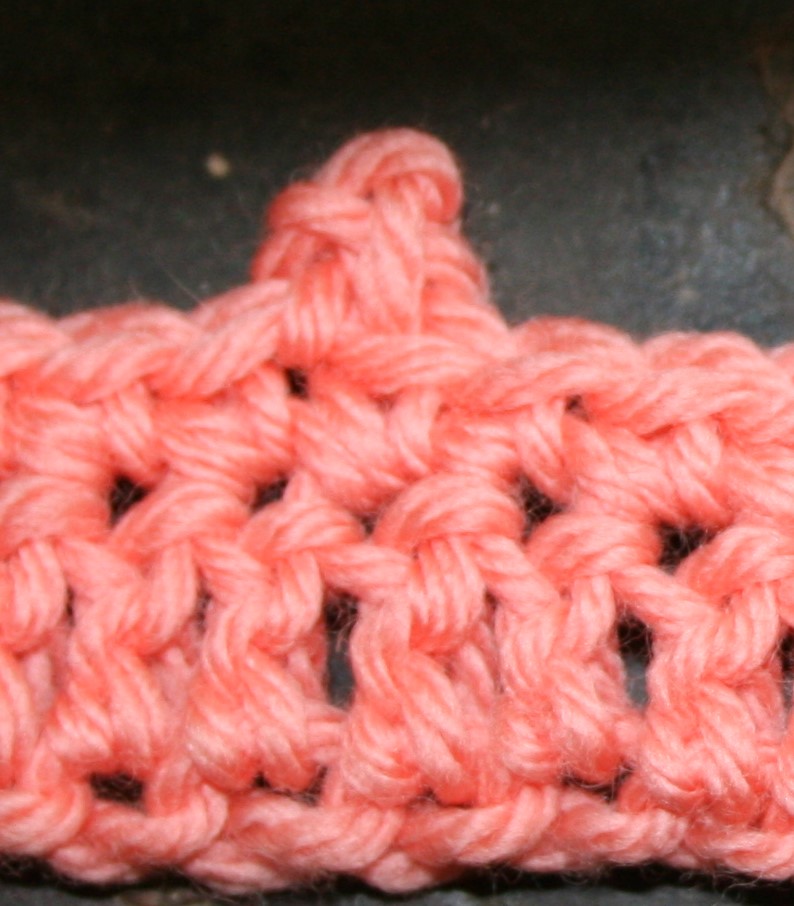
Crochet Picot- Slip Stitch Atop Stitch

Some patterns describe a picot as: “chain 3, slip stitch on top of the stitch the chain is worked atop”. I find that by working the slip stitch either from the front or the back can create a bit of a difference. Working a slip stitch from the front of the stitch to the back of the stitch, as is most readily done, twist for me. This doesn’t cause any problems, however I find that working the slip stitch from the back of the stitch to the front (in a completely different method than is traditional) creates a picot that sits more flat and dominate for me.

Chain 3, slip stitch atop stitch below chain (front to back)
Picot created with slip stitch atop stitch (front to back)
Chain 3, slip stitch atop stitch below chain (back to front)
Picot created by slip stitch atop (back to front)

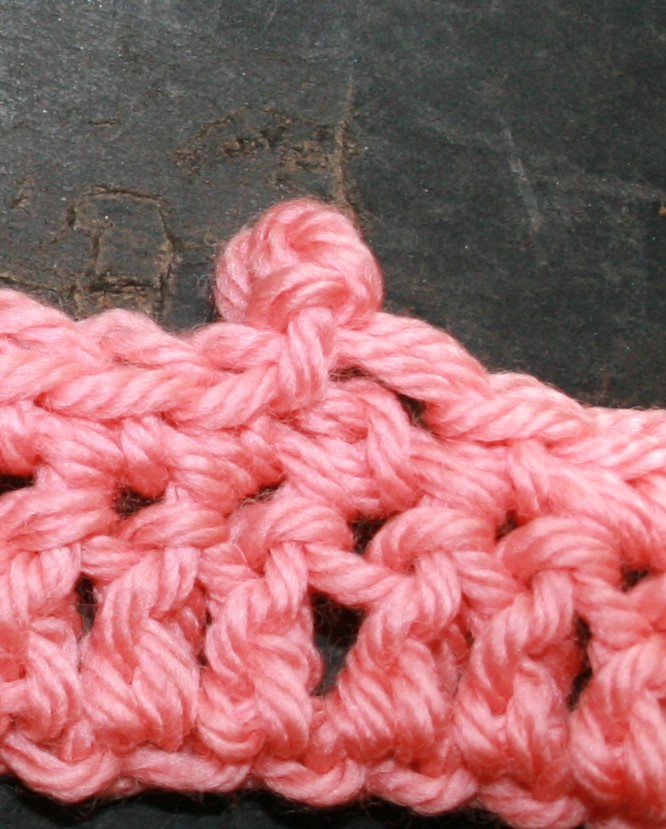
Both of the “slip stitch to the top of the stitch” methods create a sturdy picot that stays in place. I also find that mine tend to recess to one side of the fabric.

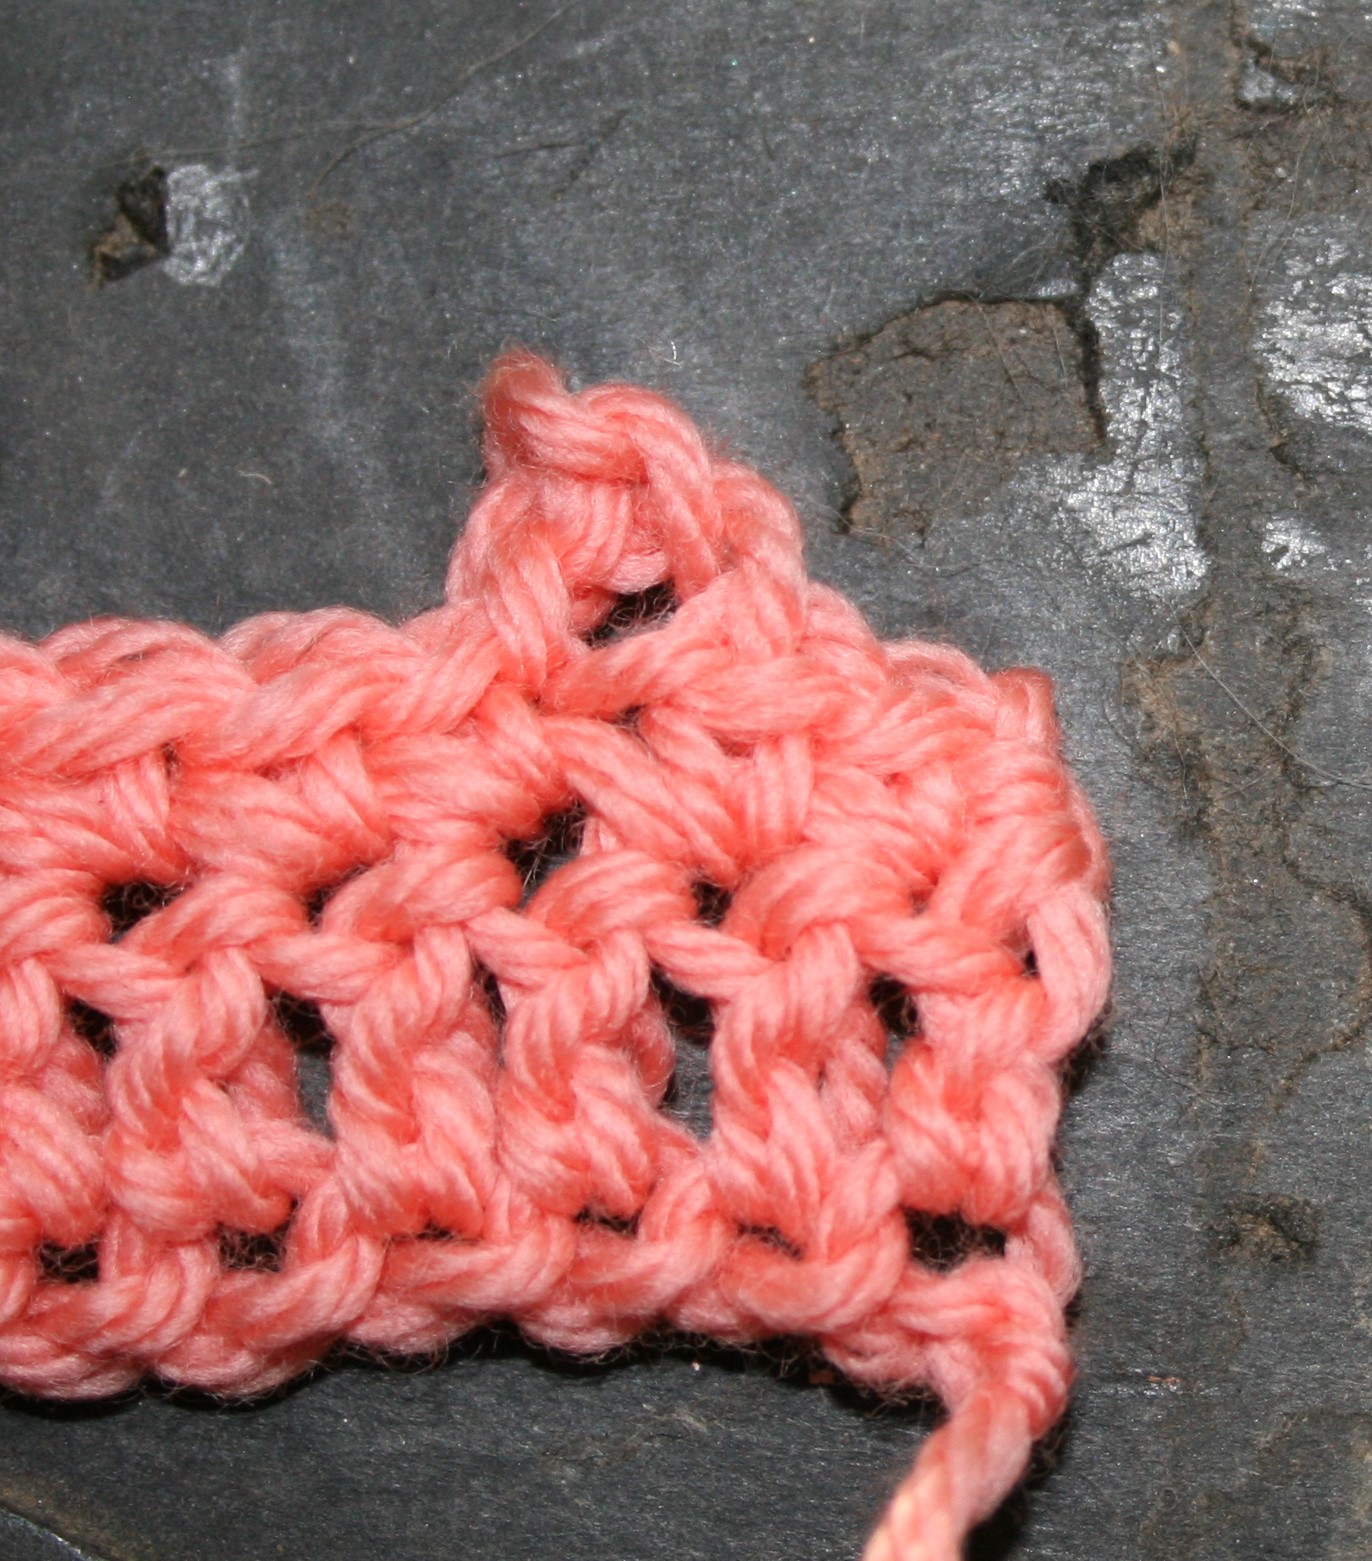
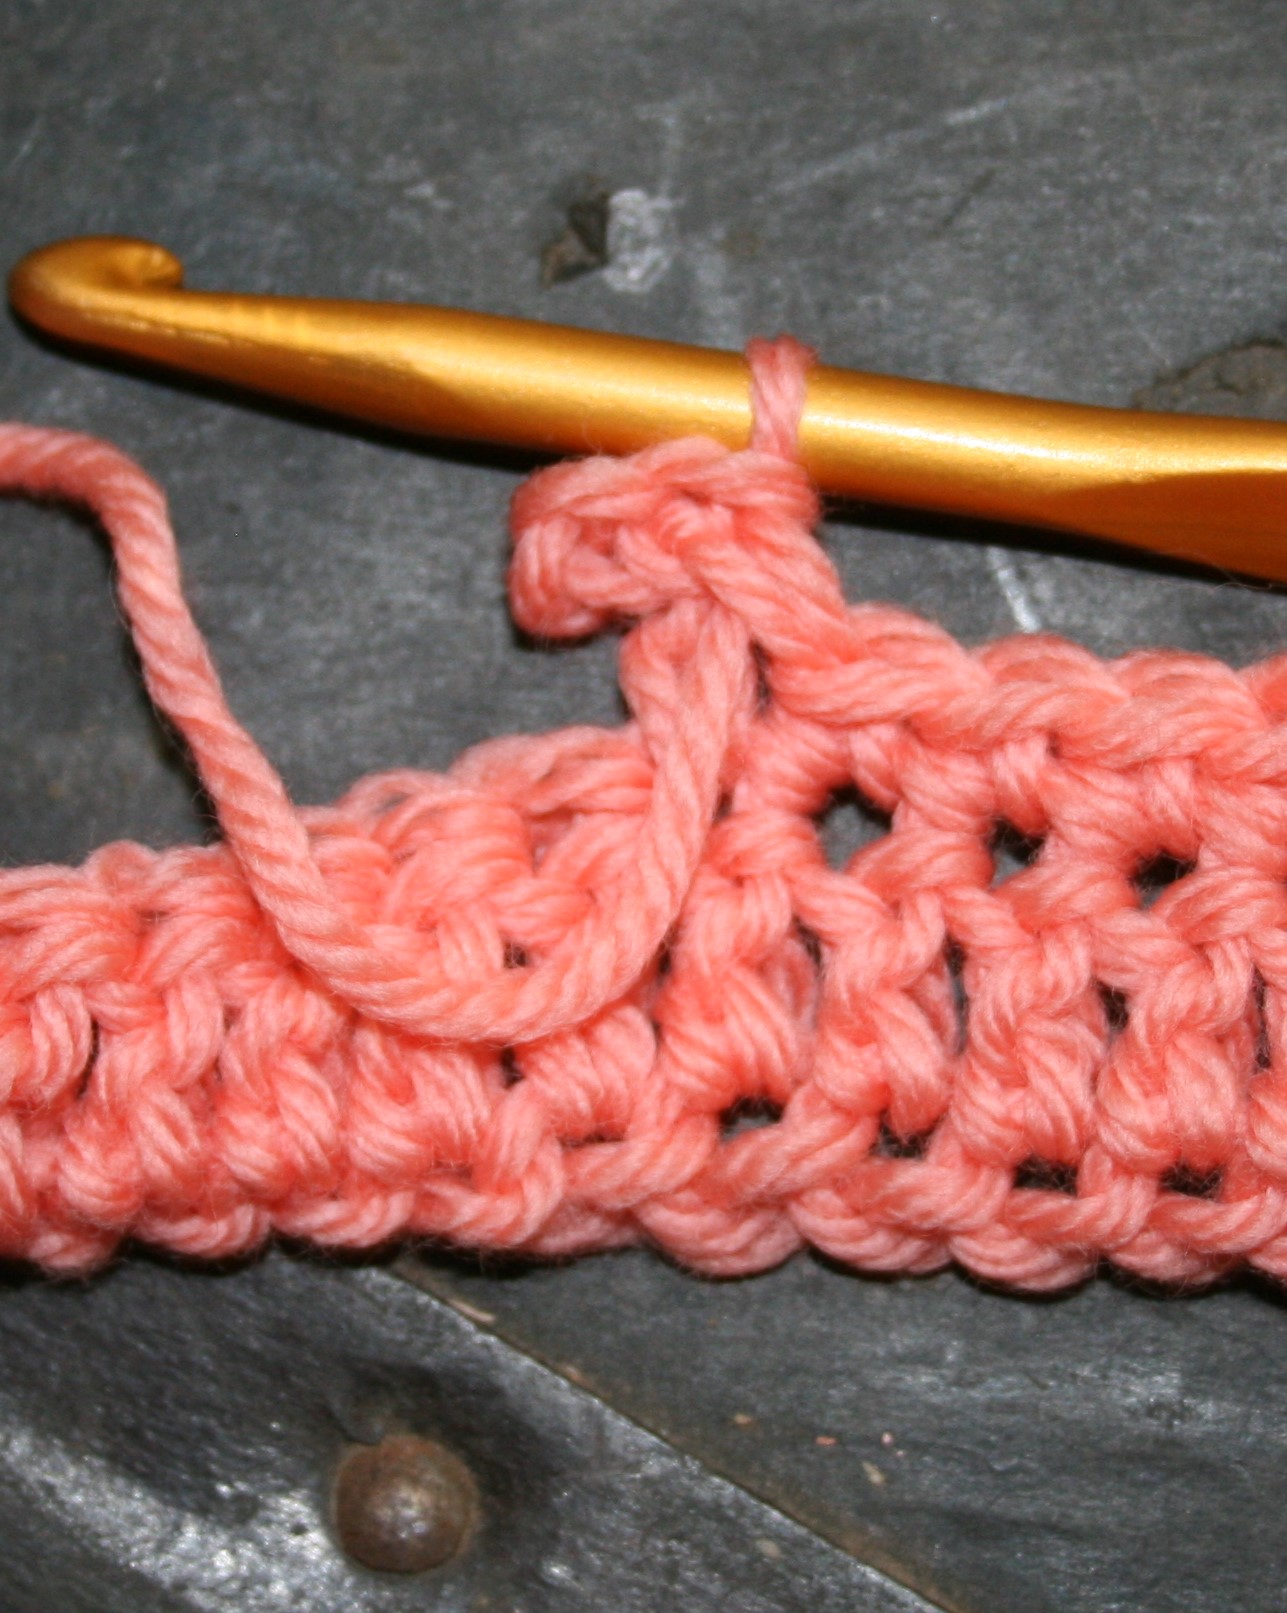
Crochet Picot- Front Loop and Side Leg

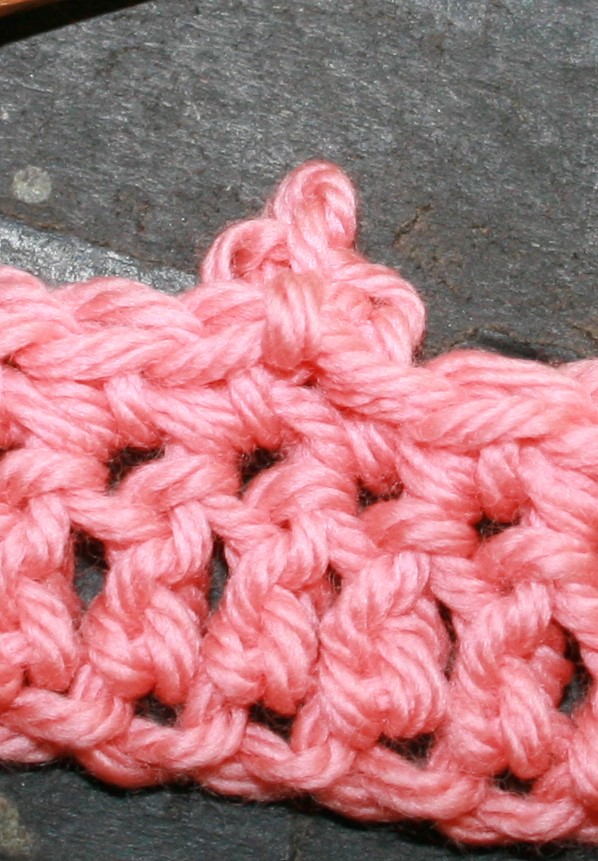
The last approach to a picot is the method worked in the Crochet Guild of America’s Master Program. It results in a stable and readily repeatable picot that does not lead to any stitch distortion. This approach is uses a chain 3 and a slip stitch, inserting the hook through the front loop of the stitch that the chain is worked atop as well as the side of the “leg” of the stitch. I find the movement of creating this stitch to be a downward motion as I pick up the front loop, and a slight angle to catch the side of the leg that is away from all other stitches.

Chain 3, slip stitch through front loop and side leg of stitch below chain
Picot created through front loop and side leg

I find this approach to sit more in line with the fabric, from all angles, while being study.

Honestly, this last approach is often my go to, yet it can be more confusing written in patterns, so the picot stitch is often described as “in the first chain” or “atop the same stitch”. Just know that there is usually no reason that you cannot substitute the approaches to the picot stitch with one that you prefer instead. Give each approach a try and see what works best for you.

Masters Day Teaching….Learning Too!

ScannedImageI have been meaning to write a post about my experience at the Crochet Guild of America’s annual conference last month in Charleston, SC, but I keep putting it off. I finally have realized that it is because it was too overwhelming, so I have decided to break it down into more “bite size” posts.

IMG_20160713_064736569

Masters Day, Charleston, SC 2016

There really is really just so much going on at this conference that I could not participate in everything, and feel like I hardly saw anyone, as I was running from event to event. And another confession, I was horrible at getting photos of, well anything…

So I left a month ago for Charleston, SC, and have new found respect for air conditioning. Living in California I live through days of hot temperature, but the humidity is something that I do not experience. Deplaning at 1:30am and finding that it was 85° F and 55% humidity outside, was a completely new experience for me. California nights cool off while we drink water, not breath it. Even though the hotel and conference center were only a couple of blocks from dining options, I did not venture out, physically I never really adjusted to the climate.

IMG_20160713_064906271

Masters Day, Charleston, SC 2016

However I arrived a day early to ensure that I would be up for my new adventure of teaching at this national venue. I was officially teaching 4 classes; Re-Invented Broomstick Lace, What the Pattern Doesn’t Tell You, Yarn Overload, and Beads Three Ways, yet in addition I also help teach all day at the Master’s Day. These all over the course of 4 days are a bit of mental gymnastics, I become completely submerged in all things crochet, even more then the everyday.

The Master’s Day was the first event. I helped facilitate this all day event with other reviewers of the Master’s Program offered by CGOA. The Program consists of 48 swatches and 13 questions that is completed via correspondence, I successfully completed the Masters of Advanced Stitches and Techniques in the summer of 2010. Essentially it was this program that began my career in crochet design, and teaching, but that is another story. Since completing the program I have been a reviewer critiquing the work of others, as well as help organize and teach the Masters Day at the annual conference, with the one in Charleston being our third such event. In addition, I am currently combining the work of many talented teachers and writing a new Master’s program, so in a sense I am completely immersed in all things Masters.

I believe the event was successful, and I even came away learning things myself. The students began applying the various techniques that were taught; linked stitches, foundation stitches, gauge, finishing work, reviewing your work and such, while they were coming up with new ways to approach all of these techniques I had an eye opening moment of how Tunisian Crochet is really just linked stitches combined with Foundation stitches. It is amazing how much of crochet is built upon other skills that are really just other versions of the same other basic techniques.

The other highlight of this day was getting to catch up with some of the other reviewers that I only get correspond with via email. They really are a great group of women that have a great passion for crochet, and I always find time spend with them to be rewarding.