The weather is changing and I want to crochet with cotton,
but not all cotton is created equally.
When going through the craft store aisle of yarn, finding a cotton yarn for you project can be a bit challenging. The mainstream market seems to only have room for cotton crochet thread and a medium weight cotton that is often associated with dish towels. (Need to know more about yarn weight? Here is some info)
As I venture into my small local yarn store I do find a
finer weight yarn of cotton, but it states “Mercerized”. It has a nice sheen,
but is this what I need for my project?
Knowing a bit about cotton, can really help you to avoid any
mistakes with projects in the future.
What is Cotton?
Cotton is a plant based fiber, well it is actually a cellulous
based fiber that protects a plants seeds in what is referred to as a boll. The
fiber has a short staple, meaning a short length. Due to the short nature of
the fiber it is spun together more times than might be necessary for a wool
yarn. This is strictly due to its length.
When long fibers are twisted together they have more points
of contact when lying next to each other, so just a few twists can hold them
together. With cotton being short, however, the fibers do not have as many
points of contact, and thus have to be twisted together more times to ensure that
they stay twisted together.
It is this high amount of twist that can cause cotton to shrink
on its first wash. When water finally makes contact with the spun cotton, the cotton
actually relaxes and while it softens up, it also can be less stretched and
thus “shrink”. Unlike wool this reaction will only occur once, and for any use
forward the cotton will remain completely stable.
What is Mercerized?
Many like to use cotton yarns for dish clothes, however this
is where you need to understand the term “mercerized”. Cotton when spun can
have a soft, fuzzy, halo around it. You find this in most medium weight cotton
yarns available on the market today. The term mercerized is a process in which
the cotton yarn is essentially singed and the fuzzy halo is removed, leaving in
its place a sleek shiny yarn.
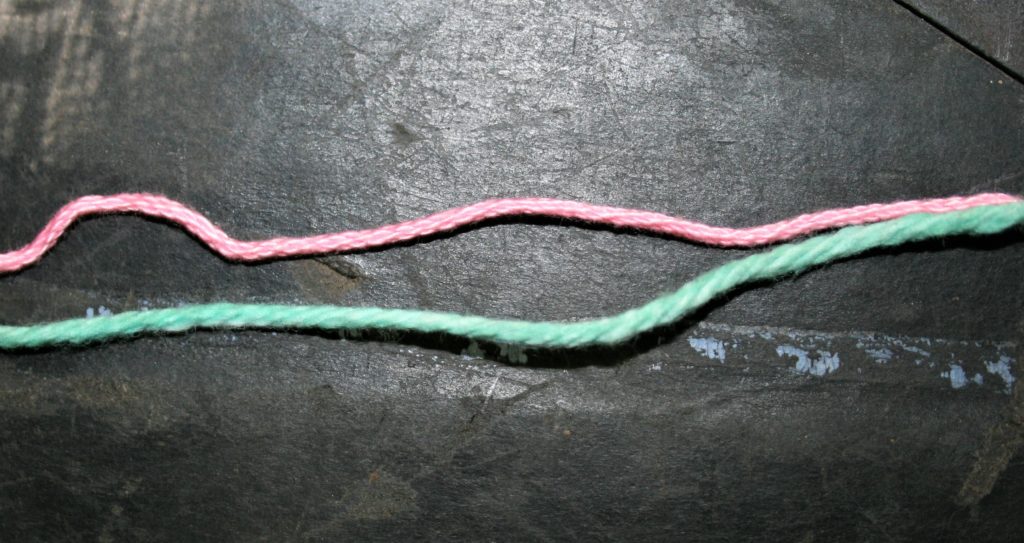
Note the top yarn (pink) has a shine, this yarn is mercerized. The bottom yarn (green) has a softer, slightly fuzzy look, it is not mercerized.
So why is it important to know about mercerized? Well, for
started mercerized cotton does not absorb water like un-mercerized yarn. Meaning
if you wanted to make a dish towel mercerized cotton will not behave in a
manner that you desire. This is a pretty important distinction, and one worth
repeating. If you want to make household items that will absorb liquids, do not
use mercerized cotton.
Mercerized cotton I find to be lovely in garments and
shawls. It has a nice sheen and feels like cotton, but unlike my T-shirt, if
you hit me with a water balloon it will not pull dramatically down with the
weight as it will not be absorbing the water.
Where Can I Find Cotton Yarn?
You might have to do a bit of looking to find cotton yarns for you project, but it is worth the trouble. Here are a few suggestions:
I pick up this stitch again recently and begun playing with
it in the round. This stitch is typically worked at only half the row height
increase of the single crochet stitch, working in both its on row stitch and
the one adjacent. As a result of this one, stitch stacked upon one stitch approach
it takes a bit of thinking to work the flat circular increases.
The first hurdle is to actually begin the round. You really
need to work 2 rows of fabric in the same beginning stitches to ensure an even
fabric consistency throughout. I have found two approaches to this in the
round.
Please note that I worked this fabric as a different color
on each side, as it really helped me to keep the process understandable. In
doing such I would drop the color, leaving the working loop for the color live
and pick up the new color, switching like this between every Round. In addition,
I worked the entire fabric in a spiral method, meaning I did not join the
rounds when completed, I simply began the next stitches in the next round. This
was also so ease of keeping track of my location in the work. I have to play a
bit more with the end of the Rounds, as even working in a spiral they appear to
easily as the stitches become a bit clustered and dense, but it does allow for
the thermal stitch to be created.
Beginning:
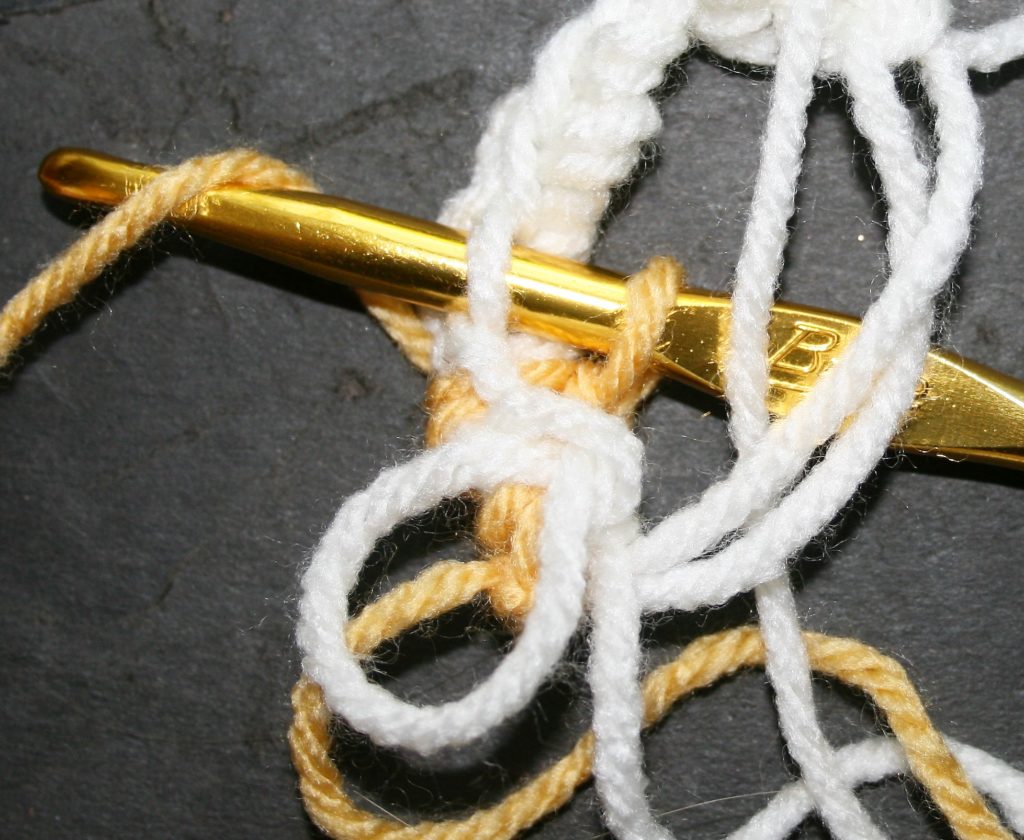
Method one: The magic loop/ring/circle. Essentially this technique involves making a loop of yarn and crocheting in this loop, like when crocheting over item (like the demonstration here making holiday wreaths).
Round 1: Work 8 single crochets into the loop (color cream),
turn.
Round 2: Drop color
from round one, join new color (color yellow). Working between stitches in between
the stitches of Round 1, [insert your from behind the magic ring, and through
the top loop closest to you in Round 1….this feels a bit awkward, but
essentially what you are doing is inserting your hook into the bottom ring and
the loop of the stitch in round 1, yo, pull through a loop, yo, pull through 2
loops] repeat 8 times, turn. -8 sts
Pull ring closed.
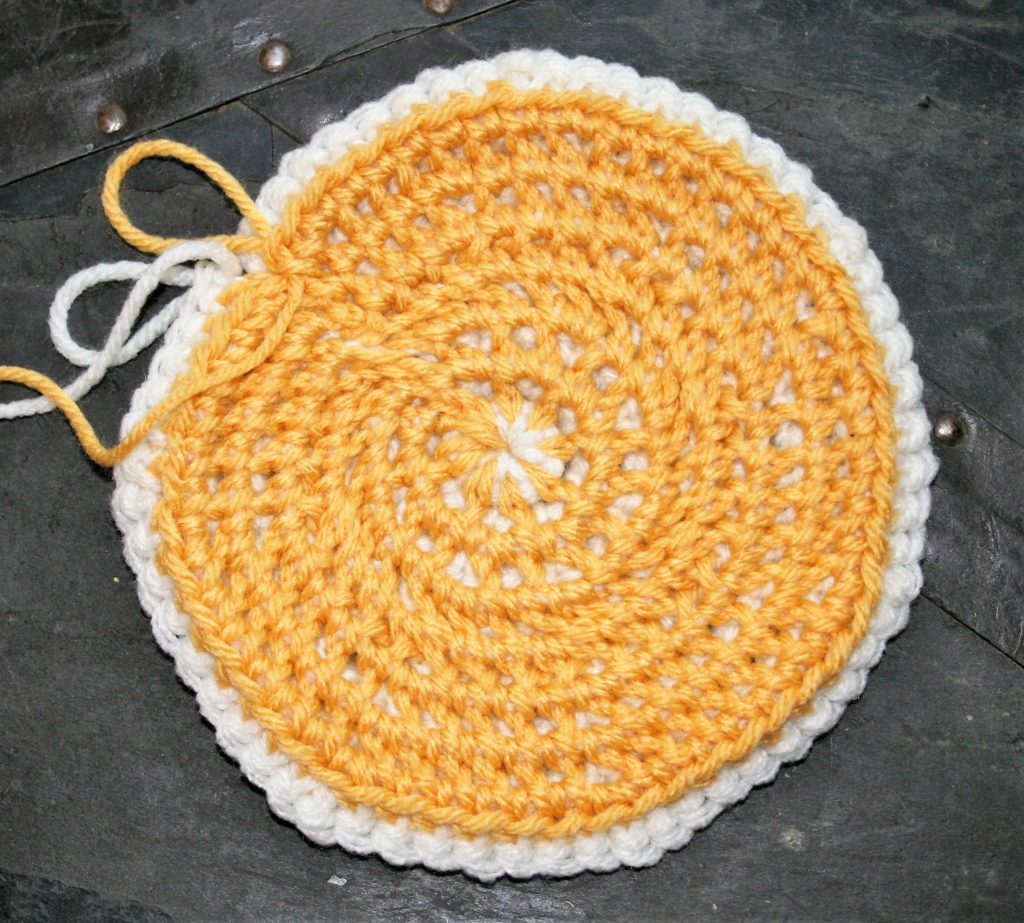
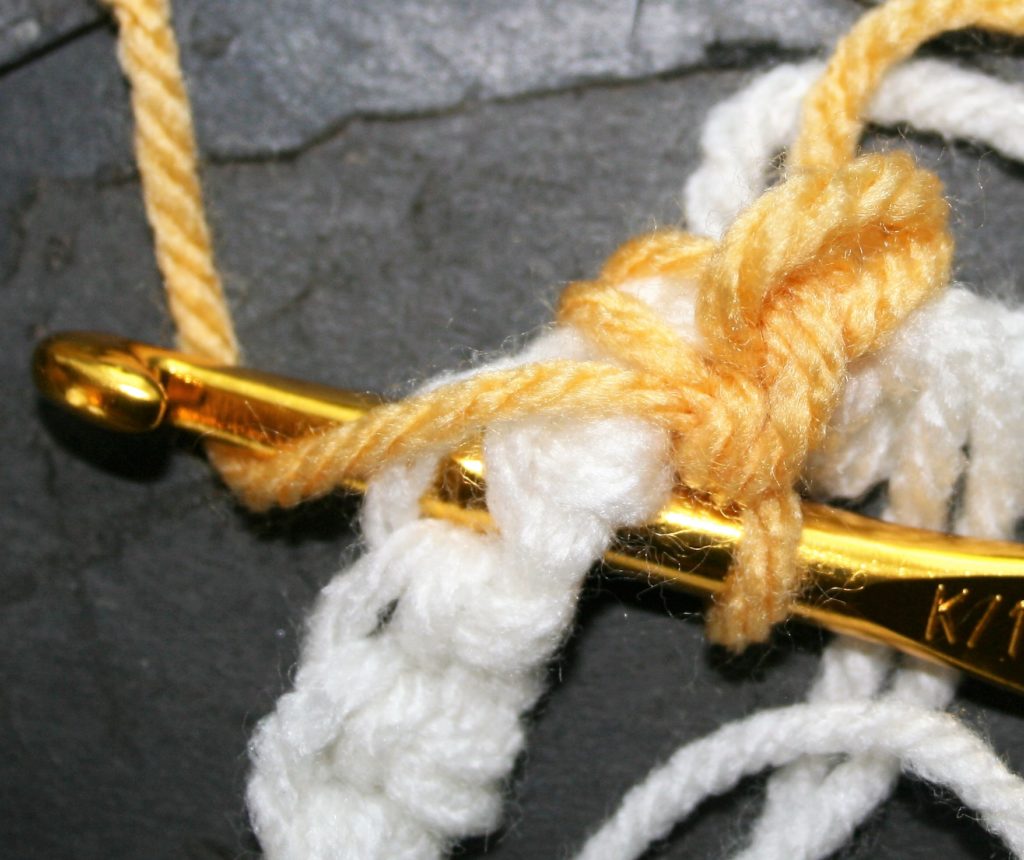
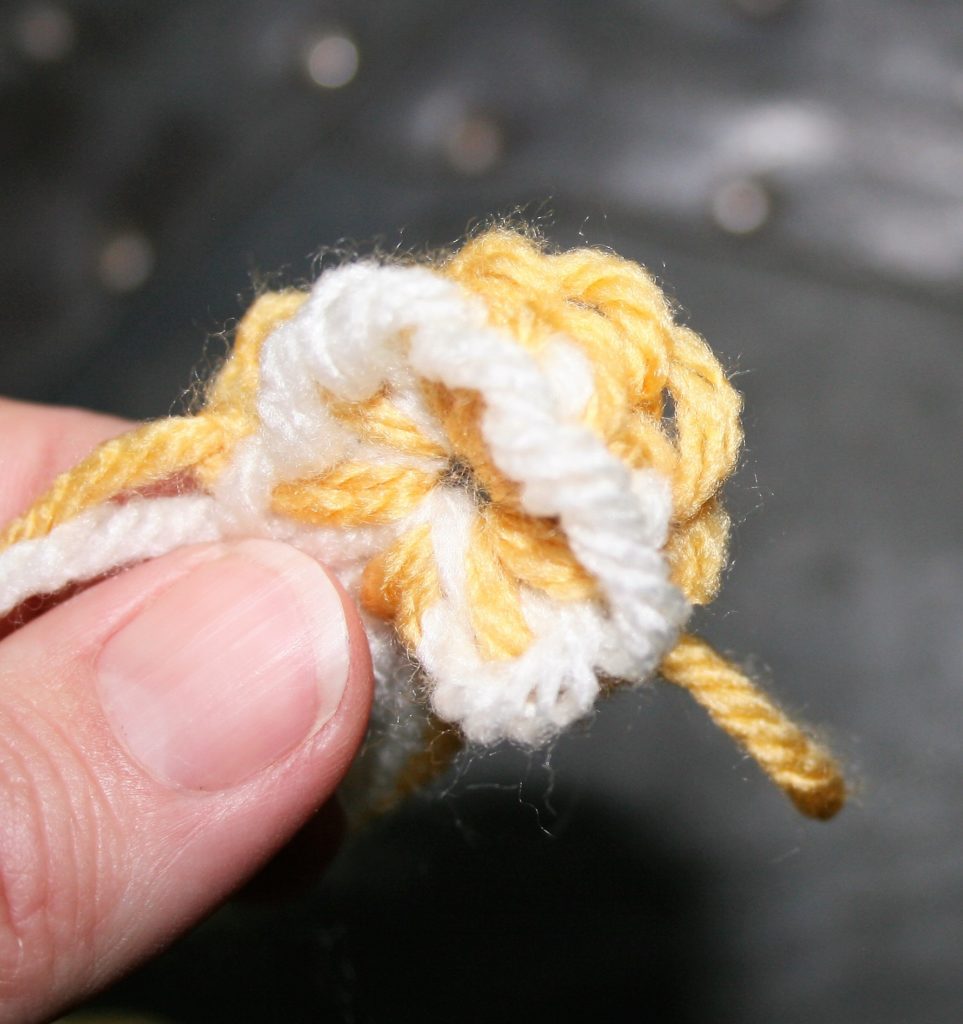
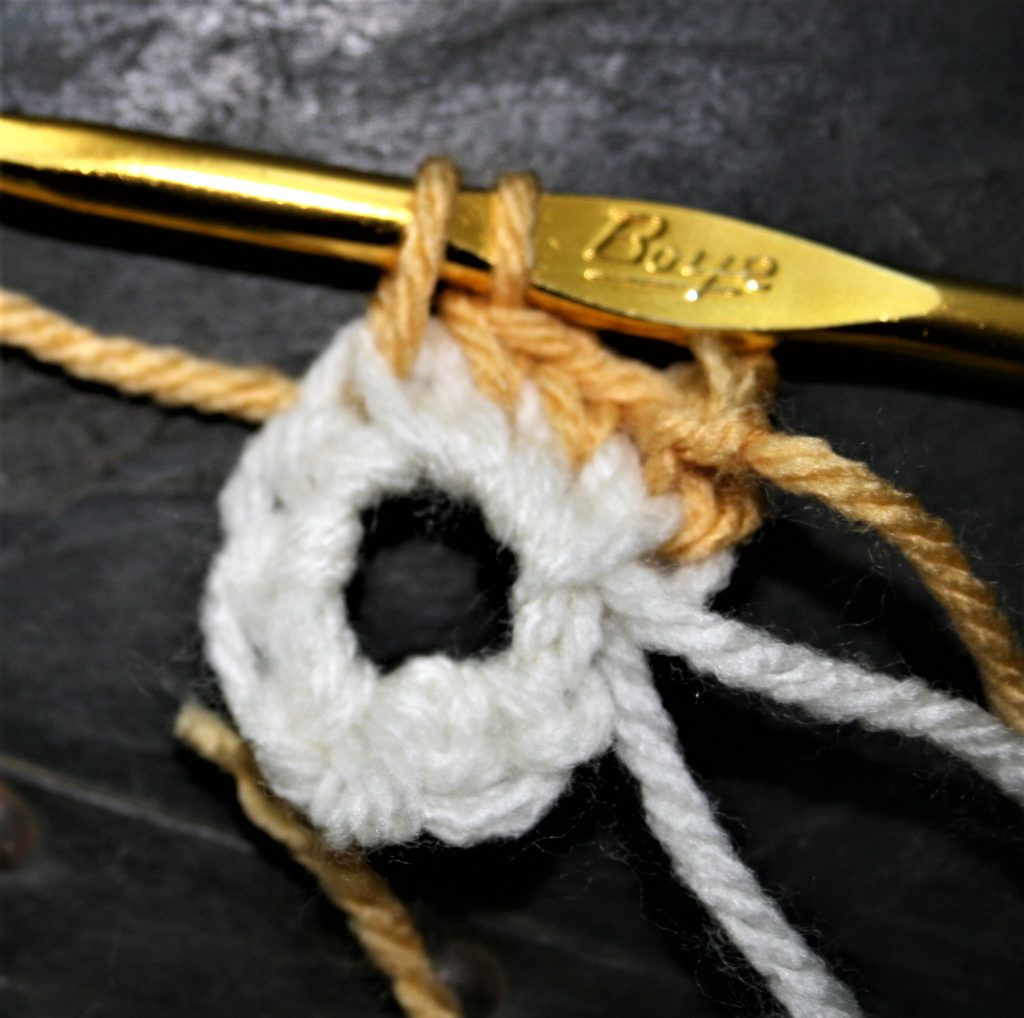
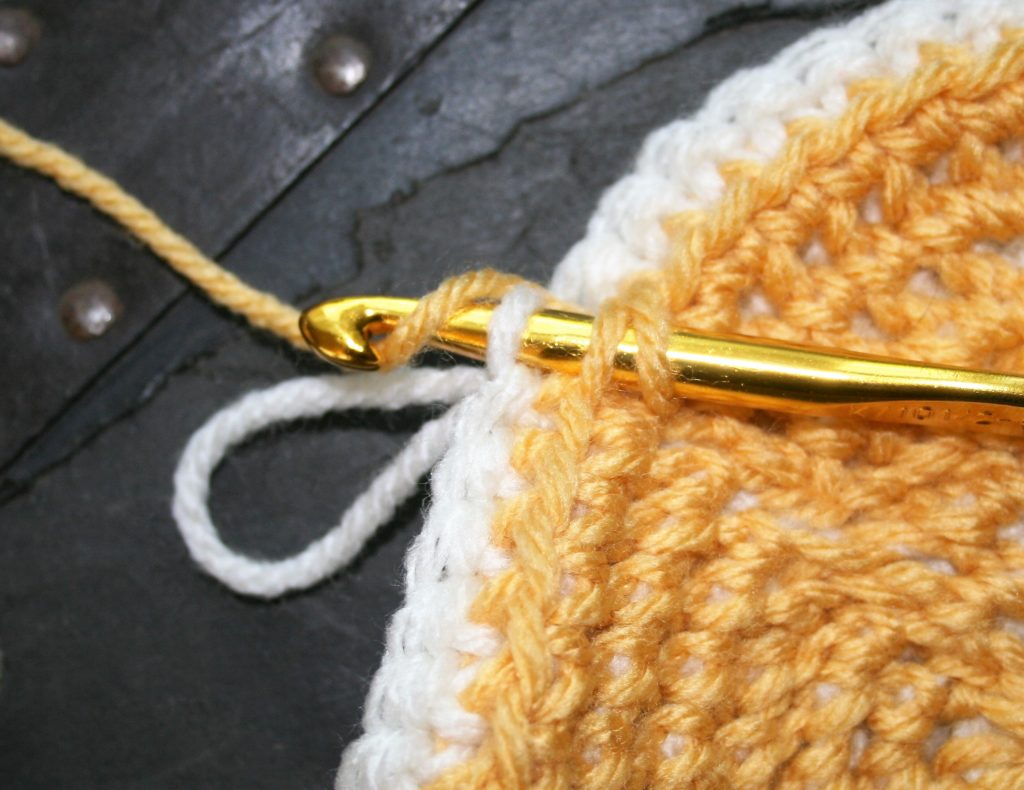
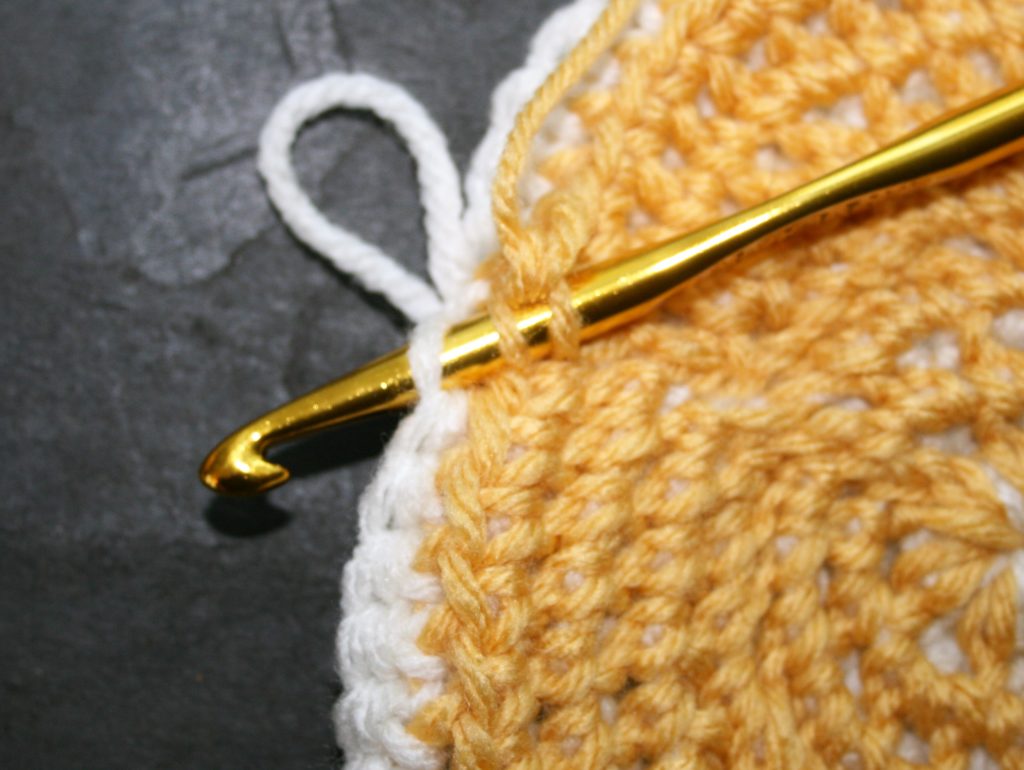
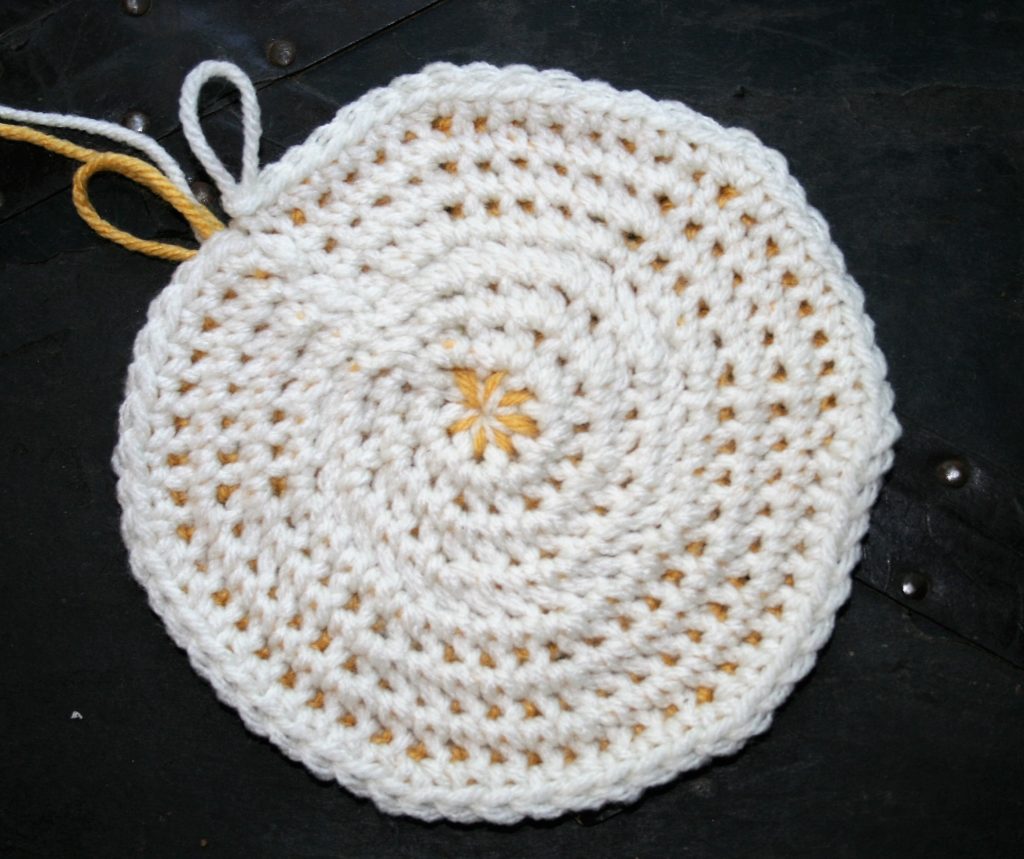
Working Round 2 of Magic Circle method, inserting hook behind ring and through top loop closest to you,Working Round 2 of Magic Circle Method as viewed from the Wrong SideThermal in the Round, Completed Round 1 & 2
Method two: Working into a ring. Chain 4, and slip stitching to the first chain to form a ring.
Round 1: Ch 1, 8 sc in ring (color white), turn. -8 sts
Round 2: Drop color from Round 1, join new color (color
yellow) to one “leg” of the single crochet stitch, insert hook through same
point as join and the top loop closes to you of Round 1, yo, pull through a
loop, yo, pull through 2 loops, [insert hook into one “leg” of next single crochet
and the top loop of next stitch, yo, pull through a loop, yo, pull through 2
loops] 7 times, turn. -8 sts
Thermal in the Round, Round 2 working in the “through the stitch leg” method. Insert hook through one “leg” of the stitch and the top loop closest to you.
All Subsequent Rounds….Working the Increases
Increases need to happen in each Round, but you are
essentially working the same increase for 2 rounds. Meaning that the stitch
count for Rounds 3 and 4 will be in same, the same number of stitches are
worked in the white, the same number in the yellow….like working two separate fabrics
at once. However the increases are slightly different in approach.
Round 3: Dropping yellow and picking up white, insert hook
through the front loop of Round 1, and the top loop closest to you in Round 2, yo,
pull through, yo, pull through 2 loops, insert hook into same location as
stitch just made and rework stitch, this is your increase. Work 2 thermal
stitches in each stitch around, turn. -16 sts
Thermal in the Round, Odd Round increase
Round 4: Dropping white and picking up yellow, [insert hook
through the front loop of Round 2 and the top loop closest to you in Round 3,
yo, pull through, yo, pull through 2 loops, insert hook into the same front
loop of Round 2, and next top loop closest to you in Round 3 (note there are
already twice as many stitches in Round 3 as there are in Round 2…so there are
less front loops to work into then there are completed stitches, as a result
you need to increase Round 4 by working 2 stiches in the same Front loop, but
do not in the top loop closest to you)] repeat 7 times, turn. -16 sts
Thermal in the Round, Even Round Increase, first stitchThermal in the Round, Even Round Increase, second stitch
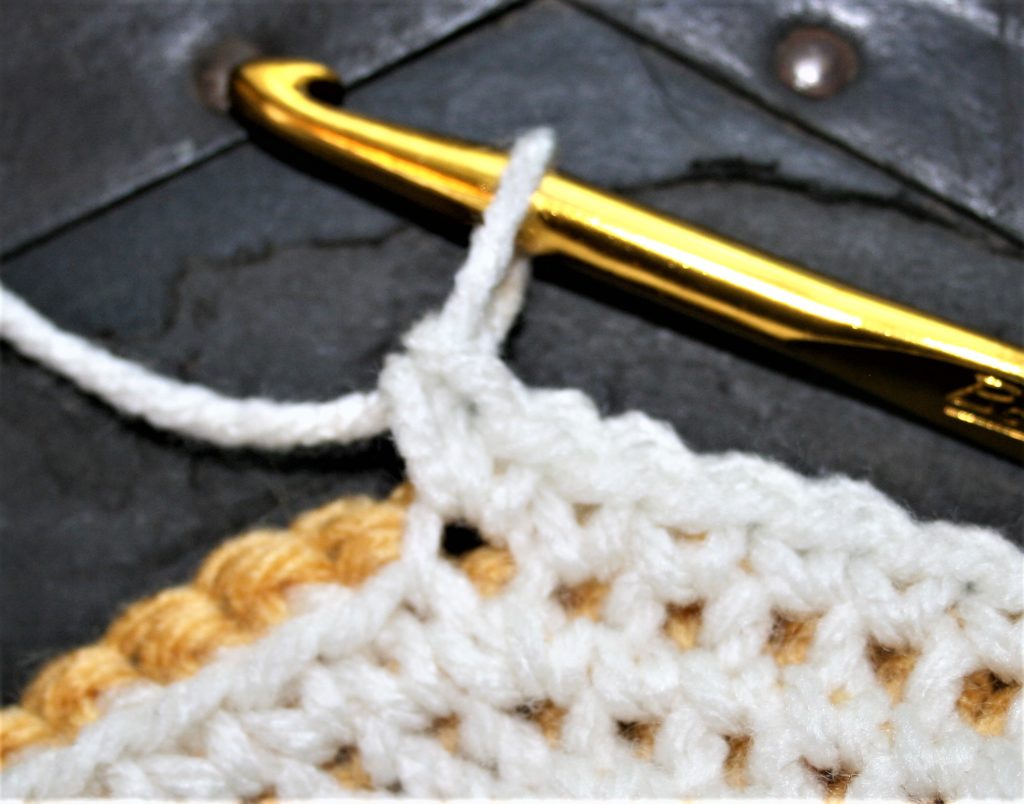
You work the same formula for a flat circle (you can find that here), in all the rounds going forward. I tend to think of the rounds in sets, a pair of one odd round and one even round (Round 1 & 2, Round 3 & 4, Round 5 & 6, etc.) Working all increases in Odd number rounds by working into the same front loop and the same top loop closest to you. Working all Even Round increases as the same front loop but different top loop closest to you. All non-increase stitches are worked as traditional Thermal Stitch (see tutorial for basic stitch)
This subtle difference in the increases between the rounds
is one reason the different colors helped me. I could remember that every time
I used the yellow yarn I was doing an even number Round increase.
Thermal in the Round view from Odd Rounds
This process takes a bit of practice, but the resulting
fabric has a nice textured look, and the dense nature lends itself nicely to
pot holders, trivets, wash scrubby, I could even see a nice warm hat in the
future.
Some color changes are a bit different than others. The way to change the color in a stitch is the same, I discuss that here. However, there times when a couple of other little tricks can make the color change smoother, and your fabric much more eye catching.
One of these times is when the color change may occur within
the rows with a shift of the stitches, like a line of color moving diagonally. The
color change is not exactly in the same location as the row below, so to have a
really clean look you may have to start a new yarn each time or end up with a
color strand laying awkwardly across different color stitches.
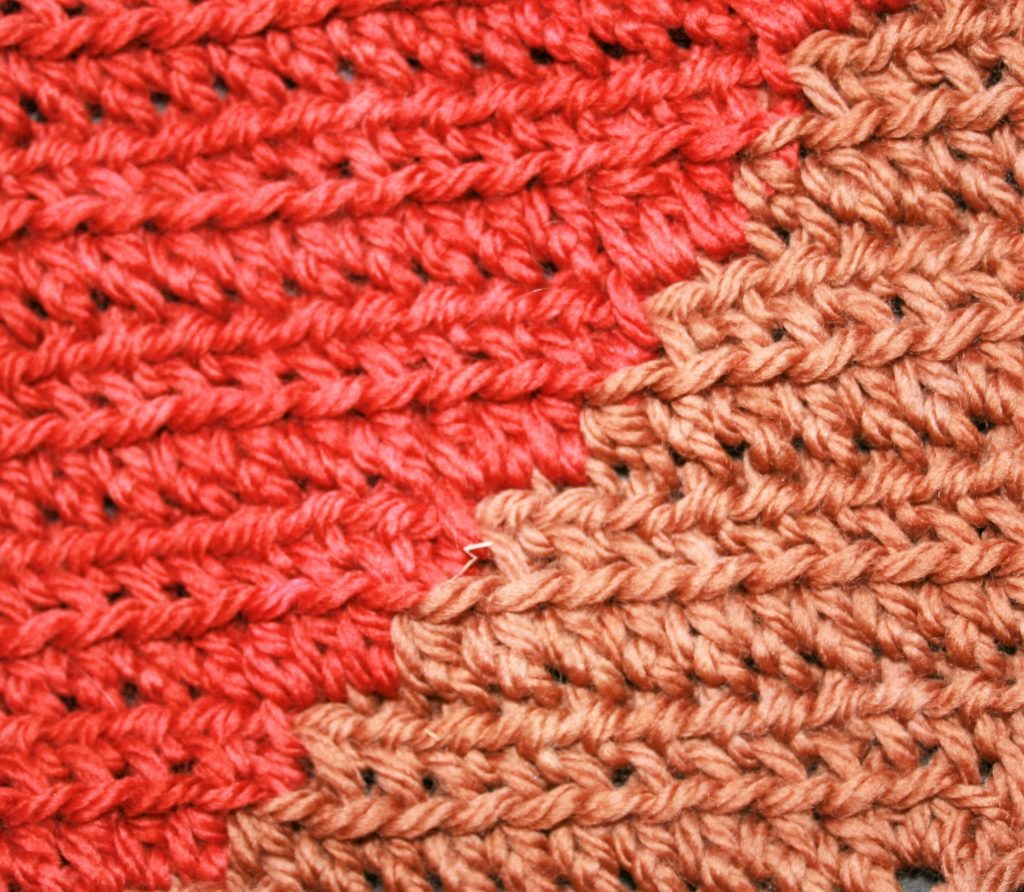
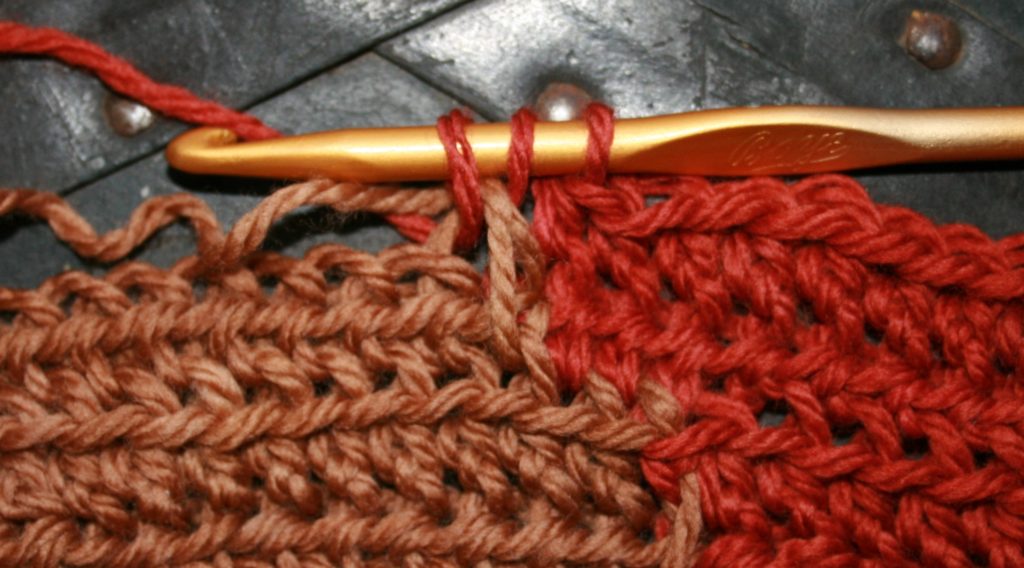
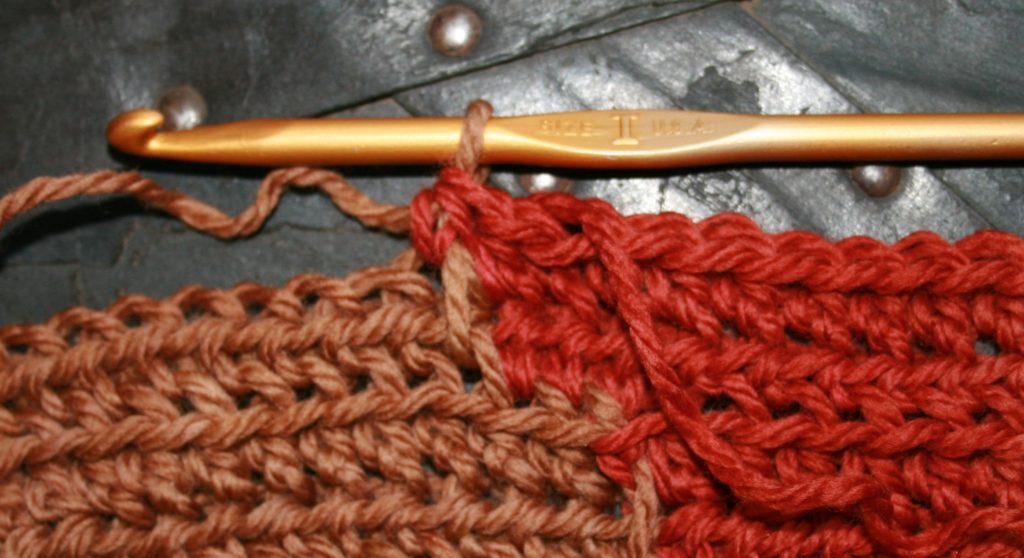
A diagonal color change, without ends to weave in, and a visually consistent look.
I for one really do not want to weave in as many ends as it
would require to shift a color change every row, so there are a couple
techniques I use to reduce the ends while keeping a smooth color edge.
For starters, when I change the color I toss the “old” color
stand over the fabric, so that it is on top of the stitches. After completing
the row of stitches and returning to the color change point, if I am changing
the color before the last stitch of the color I change the color but leave a
slightly loose tension in the new yarn. I then crochet over this yarn until I reach
the same color, and crochet the next stitch over the loose tension strand in
the same color stitch.
When the color change happens after the last time it was changed. The loop brown strand, is the pulling up of the color a row below, then it is worked over until the color is changed.The color change is completed, and the “old” yarn is then tossed to the opposite side of the fabric, over the fabric. This helps assure that the yarn is in the correct location for working on the returning row.
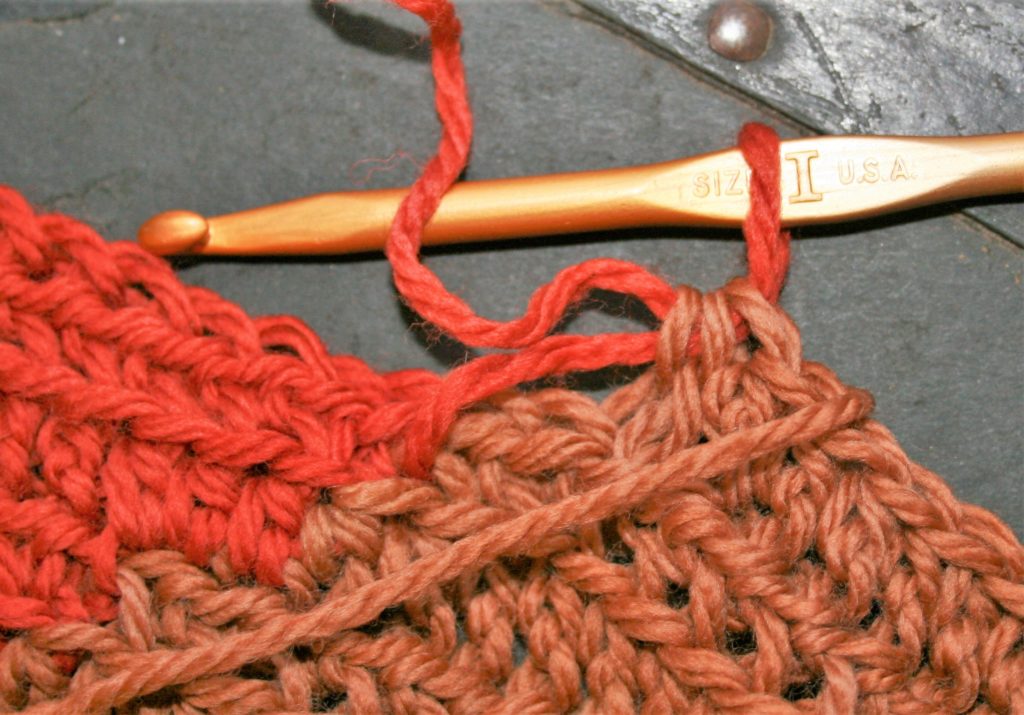
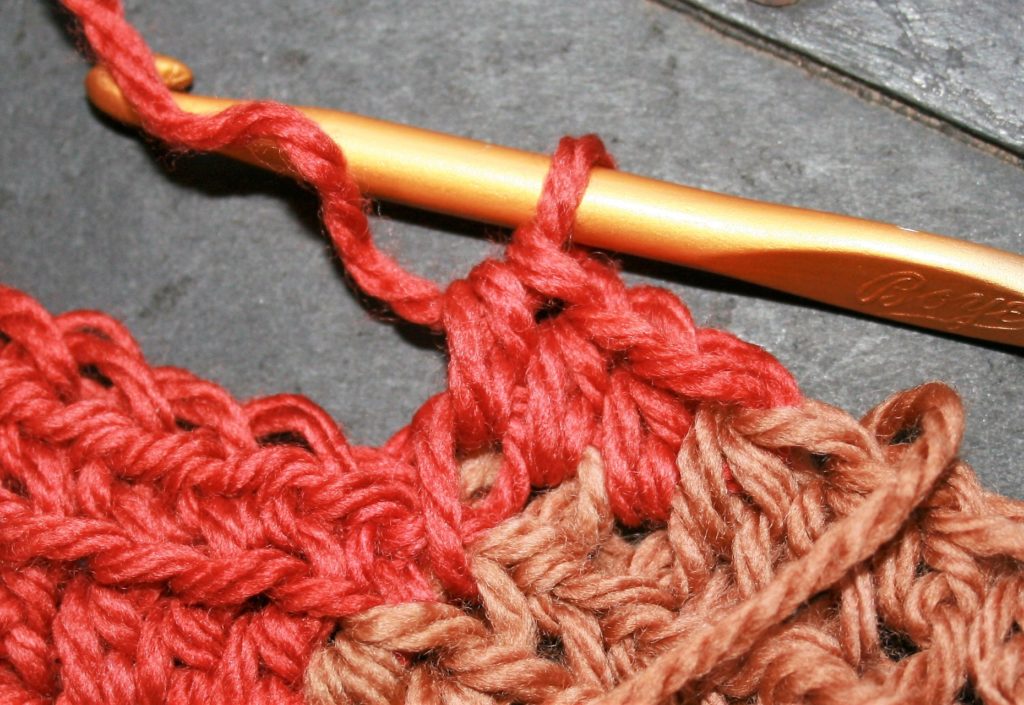
If the color change occurs after the last stitch of the
color, I pull the yarn that will be changed up and crochet over it until the
stitch it needs to be changed in.
When the color change happens before the last time it was changed. Leave a little slack in the yarn when it changes color.Crochet over this “slacked” yarn, until at least into the same color below.
Essentially I am working over the color change yarn until it
is needed. This helps me keep a smoother look while actually being able to stay
sane while working up and finishing the fabric.
Yarn makes such a difference in your crochet. Often when we
think of yarn color, or weight, maybe even fiber, but we often do not think
about the ply. The ply however can really make a difference in our project.
So, what is ply? Well it helps to understand some basic yarn
construction. Yarn is comprised of fibers that are spun together in one
direction, this direction can be either clockwise or counterclockwise, the most
import think is that all the fibers are spun in the same direction. These spun
fibers are now what is referred to as a single, meaning a single strand of
yarn.
Singles can be used as a yarn all by its self with no need
for plying, but this yarn tends to be a little less stable, and honestly if you
have to rip back your work it is not very forgiving. It also has a tendency to pill
more in the final project, so something that is getting a lot of use may look
aged quickly. However there is a benefit to this yarn, it is evenly round, its “tube”
is an even circle.
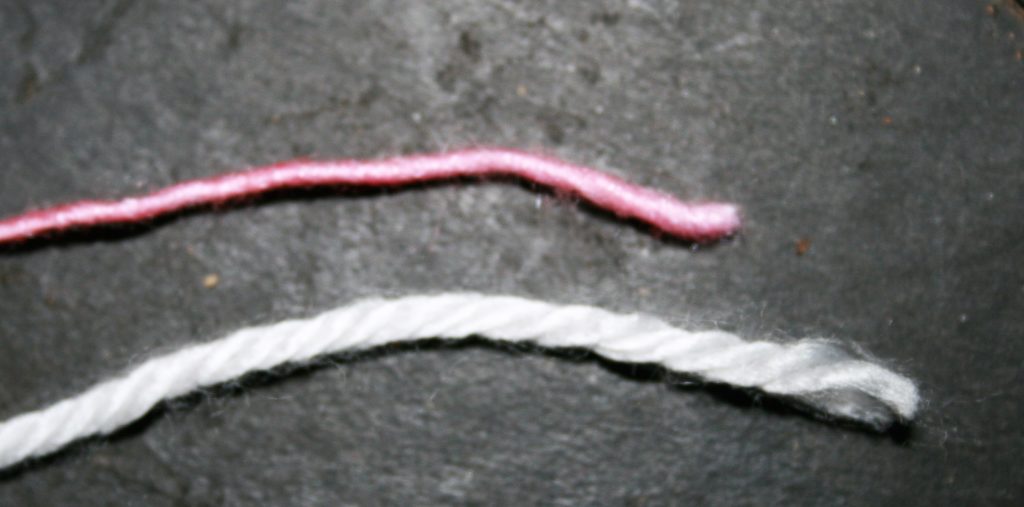
The top yarn is a single, meaning it is not plied. The bottom yarn is a 4 ply yarn, meaning that 4 singles are spun together in an opposite direction from the spin of the singles.
Plied yarns, take multiple singles and spin them together in
the opposite direction from the original twist. Meaning that if the single was
spun clockwise then the singles would be plied counterclockwise. This tension
between the different directions of the spinning help create a stable yarn that
holds up well.
So now how can your plies make a difference in your crochet
if it is a stable yarn? Well it comes down to how “round” the “tube” is. If you
ply two singles together you then have 2 round tubes spin together, the result
is not a final “tube” that is really round, it is more flat of oval at best. There
is nothing wrong with this, but the rounder the yarn the more stitch definition
you have. This can be important when working textural stiches, as a cable
stitch may not “pop” as much with a 2 ply yarn, verses a single.
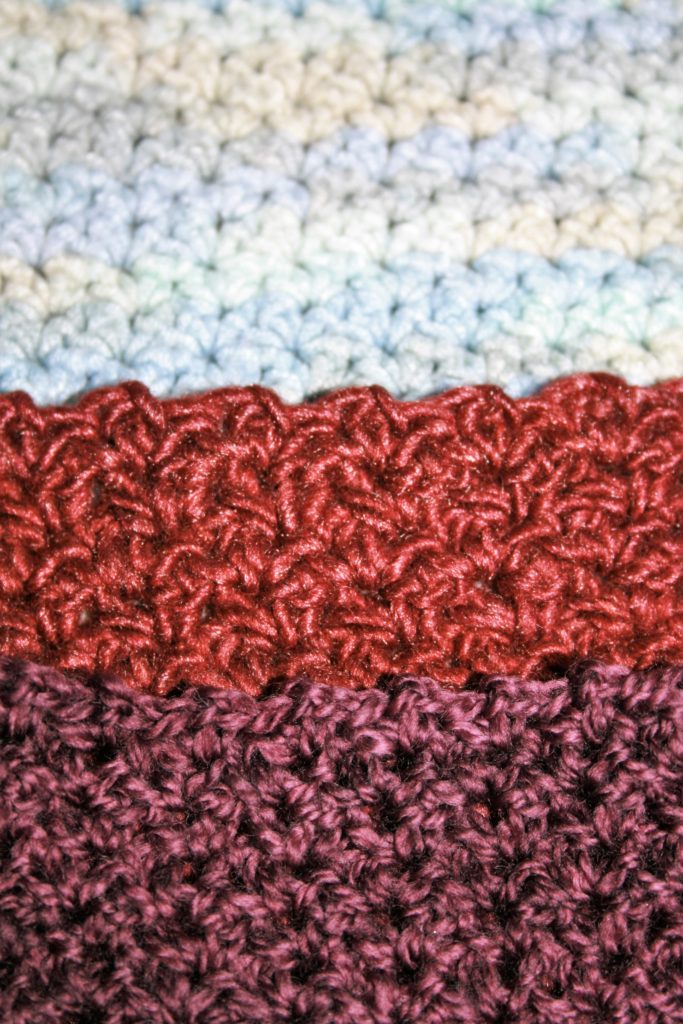
Three swatches, using the same stitch, but the yarn changes the look. The top swatch is a 6 ply yarn. The middle swatch is a single. The bottom swatch is a two ply yarn.
The more plies a yarn have typically the closer to “round”
it becomes, while staying more stable. So yarns with a greater number of plies
does allow textural stitches to shine more.
In some projects this may not be noticeable, but it is good
to know, to ensure your project comes out the way you intend.
There are many things that I have taken for granted in my
world of crochet over many years. One such things is the hook I use.
I have also found that it is one of the things that very few
people consider when evaluating their crochet work, people consider the
pattern, the yarn, even their ability before considering the tool that was used
to make it. However there are differences between hook, aside from how it feels
in your hand that can affect how you stitches looks.
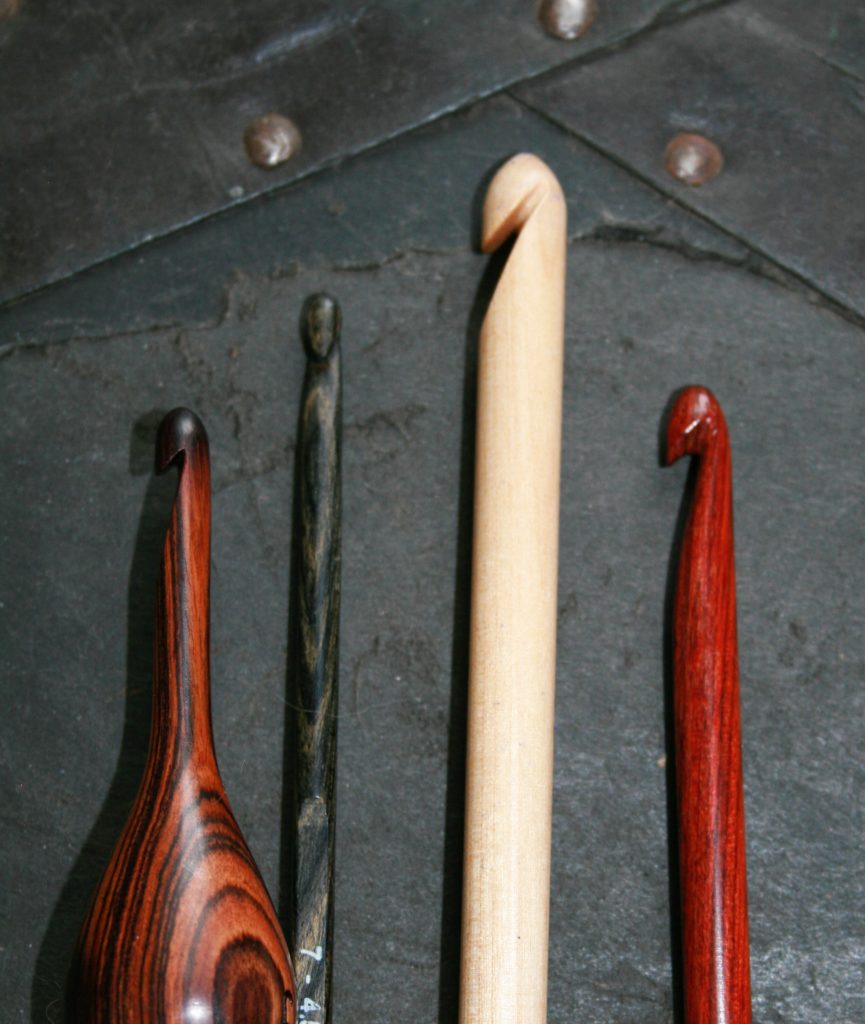
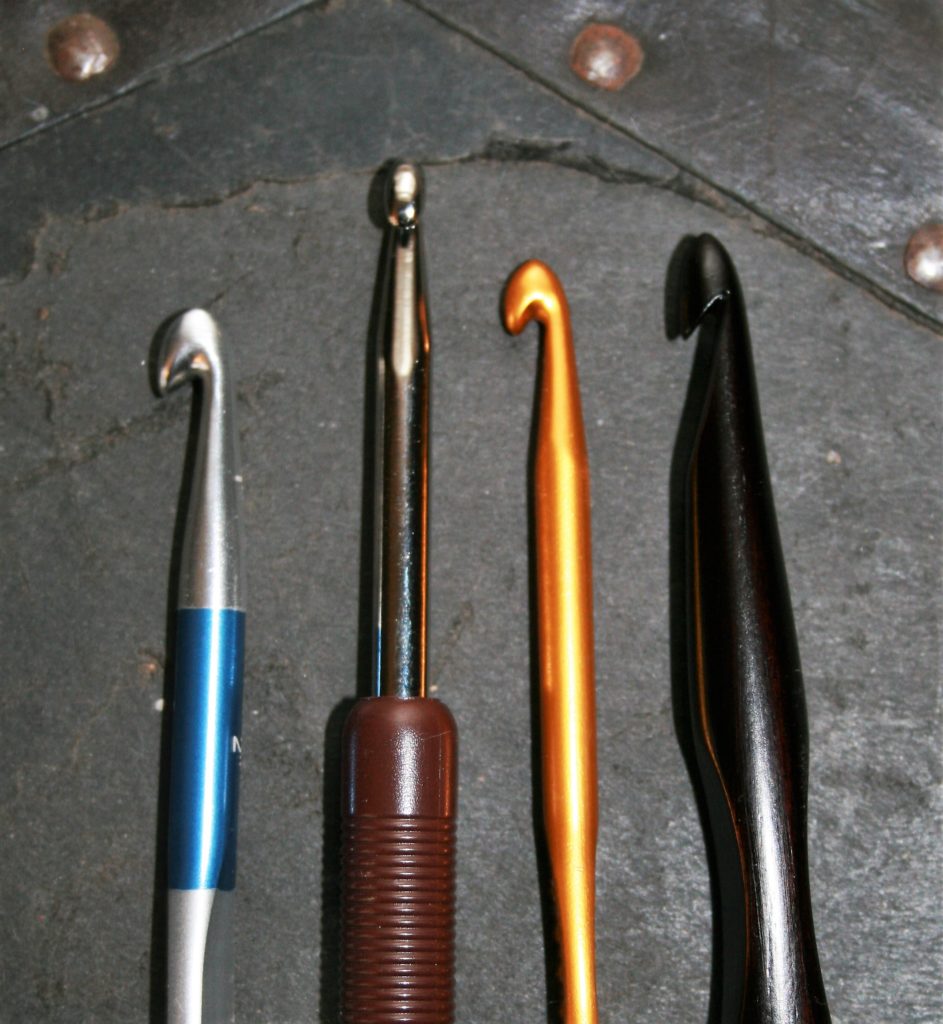
The main parts of a hook, are well first of the hook. Is it
an in-line or a taper hook? An in-line is essentially a tube, nice and smooth
that has a slit cut into it, while a taper has a shaft that gets smaller as it
approaches the hook, then gets larger again at the head of the hook. The most
common hooks on the market that reflect this are the Susan Bates- inline, and
Boye- taper.
In-line Hooks
The biggest difference I have found with these hooks and my
stitches come into play when working stitches that have several yarn overs or
“loops” to pull through, such as a bullion stitch. (A bullion stitch can have a
several yarn overs, in some cases 10, before pulling through all the loops on
the hook). For me the taper makes it difficult to keep these loops even when
pulling through, and I have a tendency to fit it a bit to get all the loops
off, while an in-line hook seems a bit easier.
Yet the gentle increase of a taper hook in general helps me
to enlarge loops that might be getting to tight to pull through, simply by
sliding the hook up the shaft. It gives me a bit more flexibility when transitioning
between various stitch techniques, especially where stitches can inadvertently
be pulled tighter. Whereas an in-line does not give me as much variety and
option in this area.
Taper Hooks
However, if the taper is too great, giving a large finger
support that creates a larger increase in the taper I find that my loops become
a bit more inconsistent when working decreases or clusters. Where I have to keep loops from other
stitches on the hook to be worked off together, the large taper prevents the
loop from being easily adjusted on the hook, and instead makes one of the loops
tight while the other end are a bit loose.
So just this one difference in hooks, the simple shaft,
either in-line or taper, can affect my work and my look. There are other
factors, but this is just one that relates to my current projects. Never be
afraid to try a different style hook, you might learn some subtle differences
for yourself too.