Easter Egg Dyes Yarns

ScannedImageEaster is right around the corner, and one of the things I look forward to is the egg dye. No, not necessarily dying eggs, but the dye for the eggs. I have enjoyed using this in the past to dye fibers. I thought I’d give you my process so you could attempt it for yourself, and if you have already colored eggs in your home, not to worry, Monday you’ll find coloring kits discounted at stores.

IMG_5553

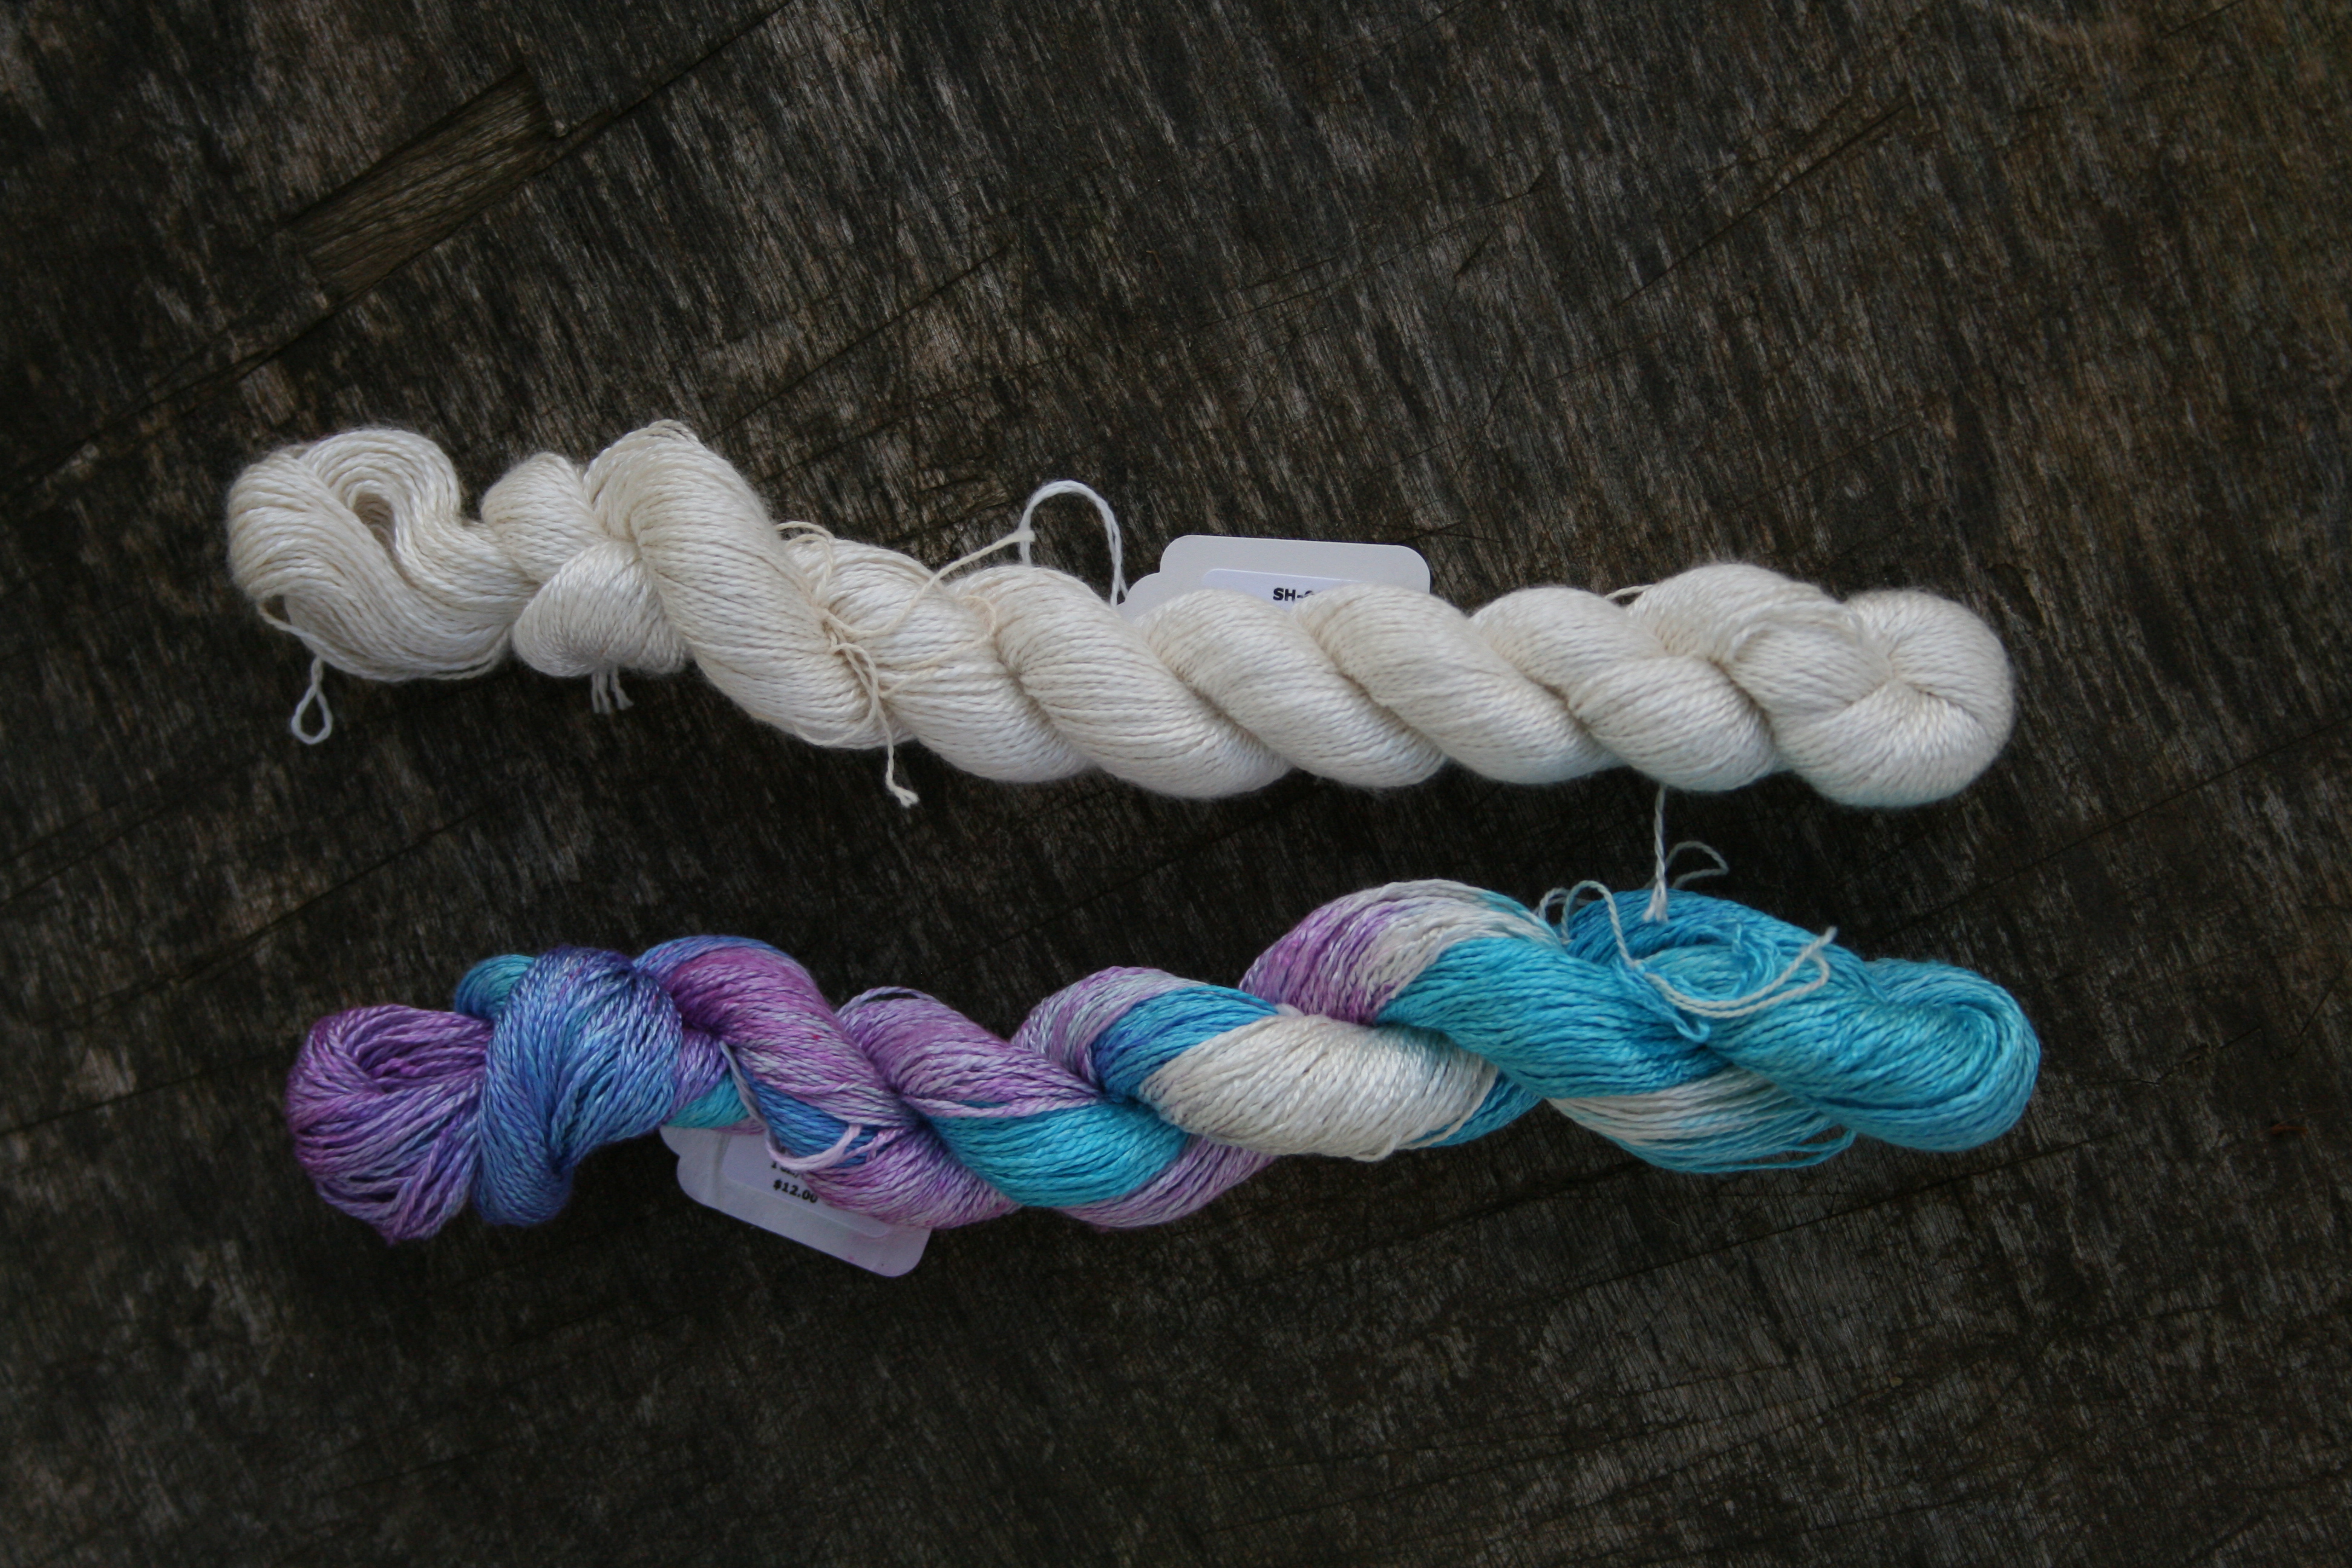
Skeins before and after dying

I prep an area just I am planning a bunch of kindergarteners to be dying eggs, I usually work outside, It is fun to do some dying but I don’t really care for stains all over the house.

First you have to have an item to dye. This could be yarn, and finished crocheted/knitted item, or un-spun wool, the only catch; it has to be a protein based fiber/material. Basically yarns are made out of 3 main fibers: protein, cellulose, and mineral….animal, plant, and other (think acrylic). This process only works for fibers that are from animals, such as wool, silk, alpaca, etc. You need to get this fiber wet, and soak it in a mixture of 1 Tablespoon 56% citric acid crystals and 1 quart warm water. (56% citric acid crystals sounds more impressive then it is, this is an edible ingredient that with help the dyes adhere to the fiber and be permanent, it can be found on-line at places like www.nuts.com, (or just search for citric acid crystals) or at compounding pharmacies, in a pinch you can even use Kool-Aid powder, just remember Kool-Aid has a dye already in it, and this will set to the fiber as well). The fiber will float on top of the water; you can gently coax it down and give it a squeeze to work our air bubbles.

Next, you make up the dye as directed on the package (color eggs if you want; there is still plenty of dye left over). Dip your item into the dyes, or use a brush and paint the dyes onto your item (I’ve even had fun attempting tie dye). Consider “over dying” by placing a dyed spot in another dye, or using a fiber that isn’t white…browns and grays can dye up in really pretty ways. Once you have the color where you want it, let it sit for a minute or two (this gives you time to clean up some of the mess), then go ahead and rinse out the item until the water runs clear. Let it dry and enjoy. I have found this a personal way to play with color, allowing myself to have the ultimate control over my creation in a way that has no surprises except for what my imagination can create.

IMG_5544

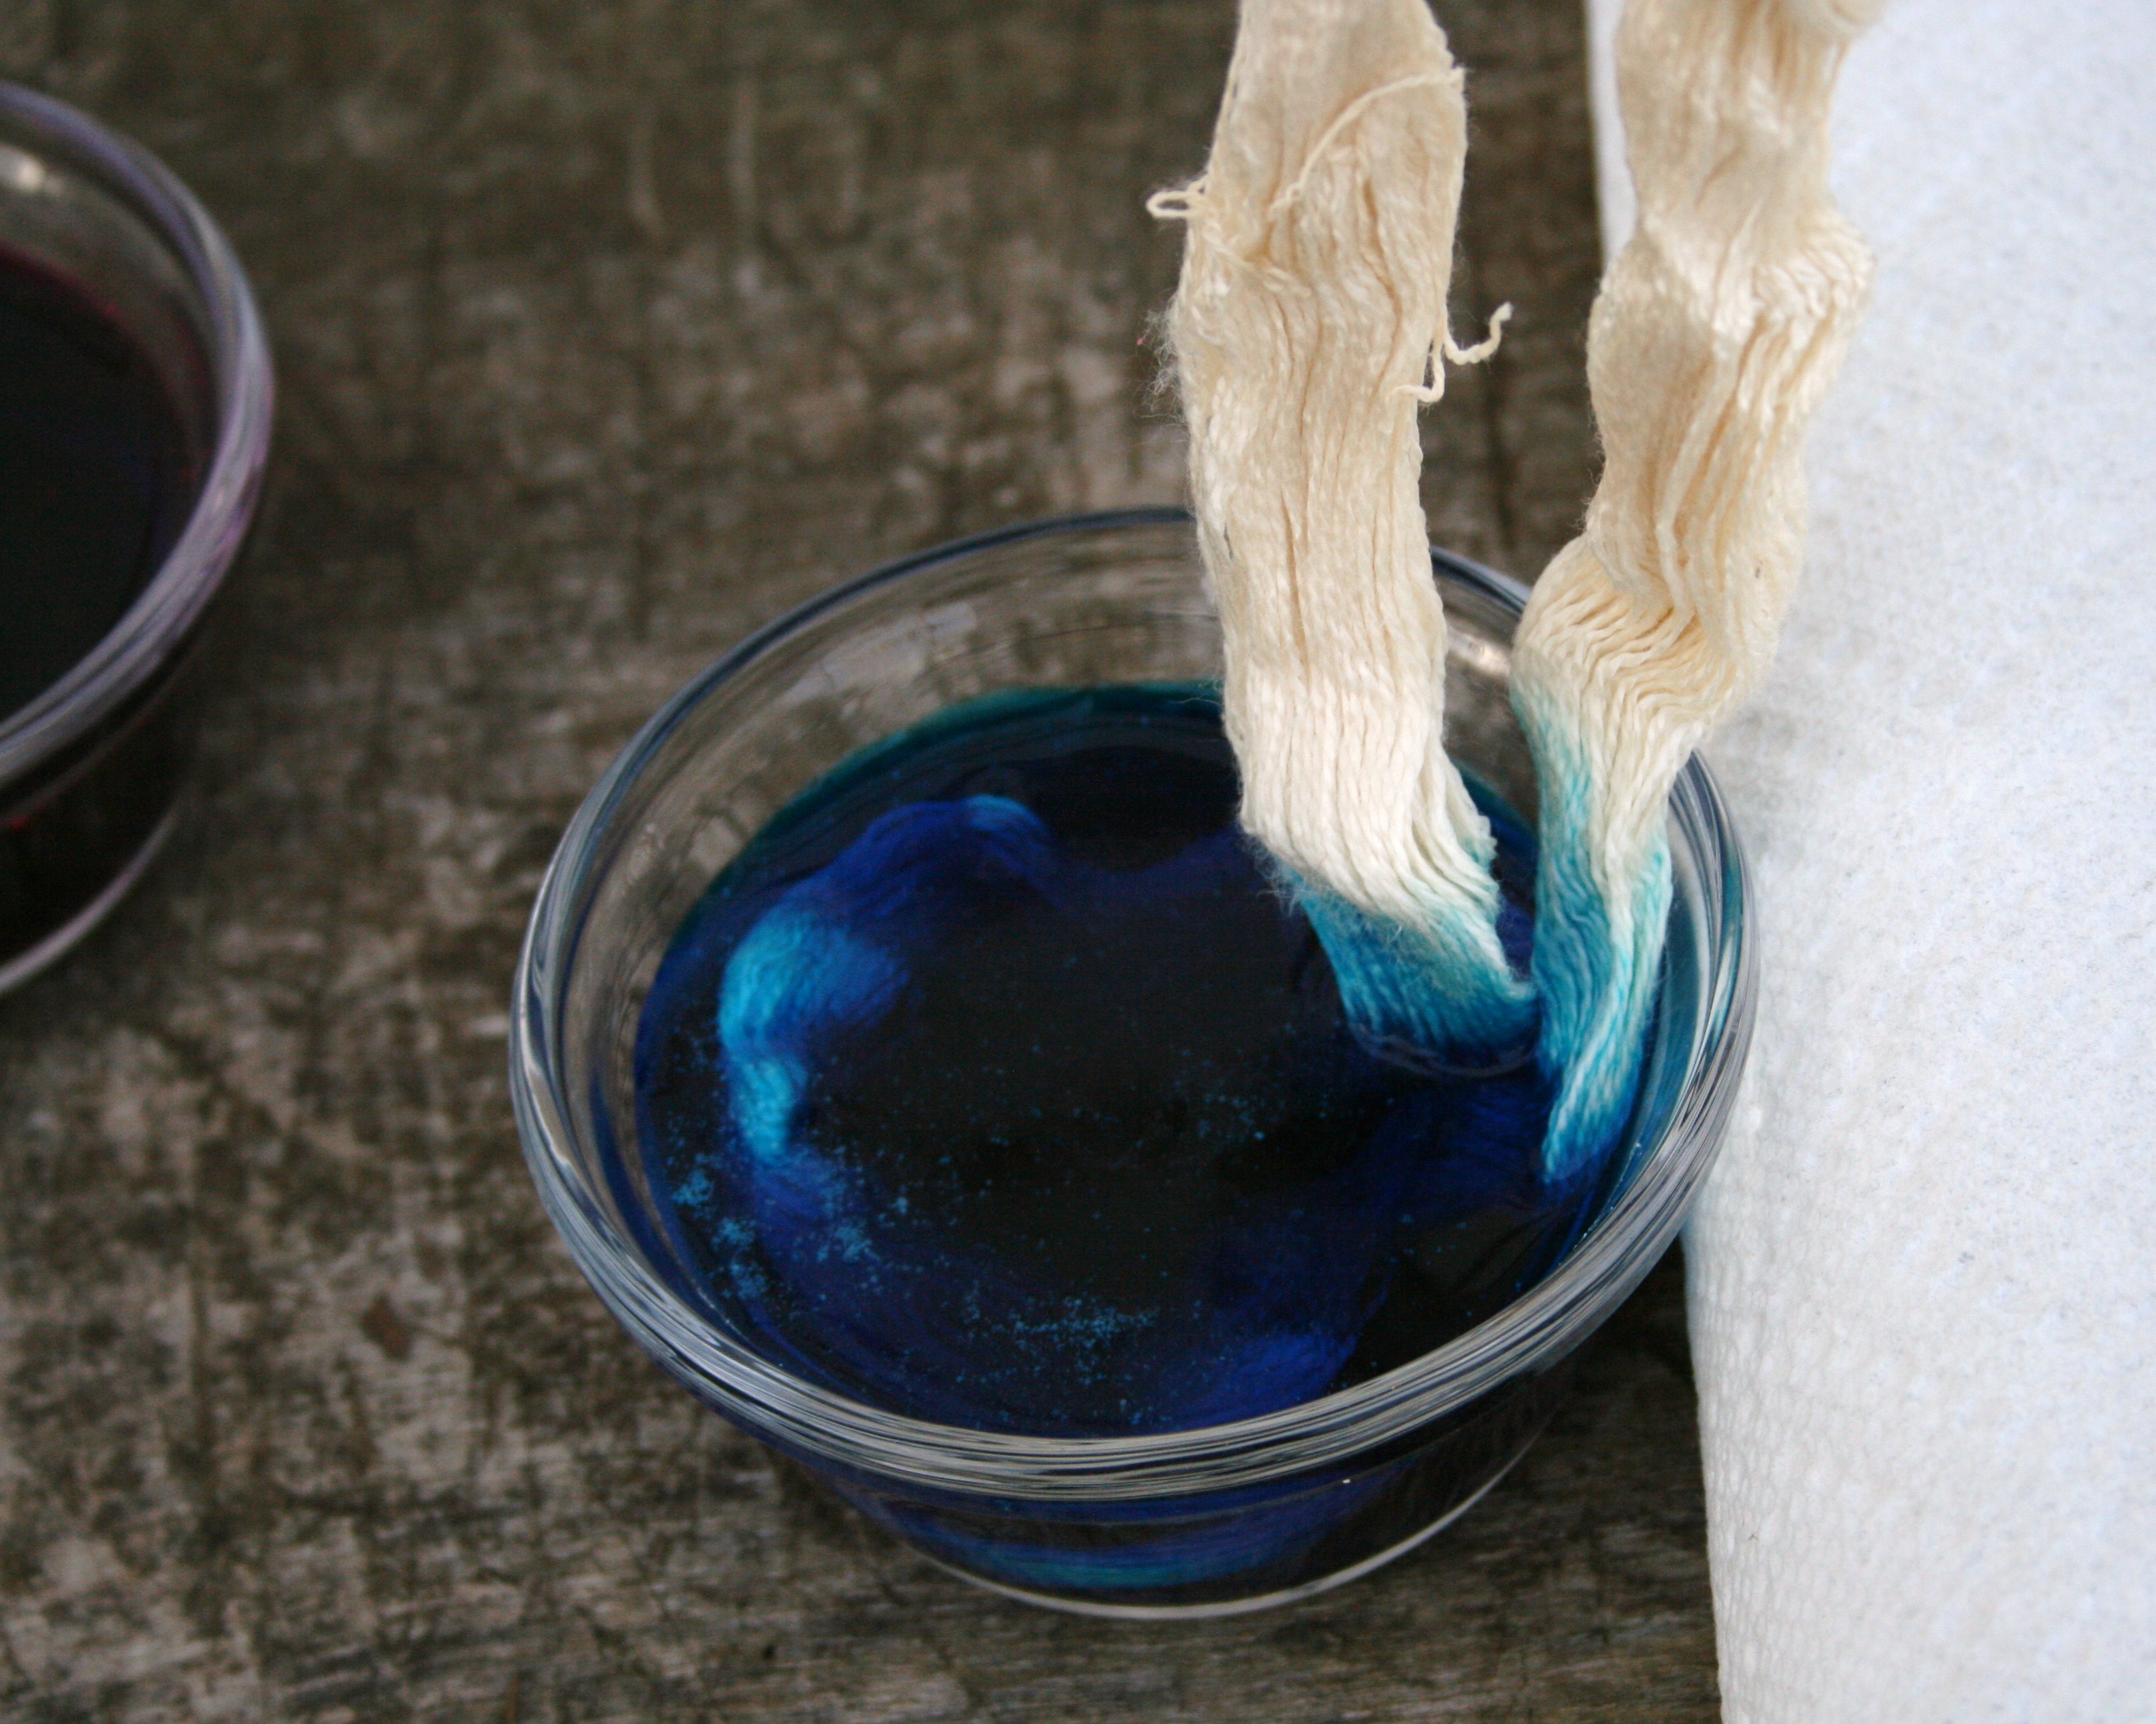
Dipping treated silk skein in Easter egg dye

IMG_5551

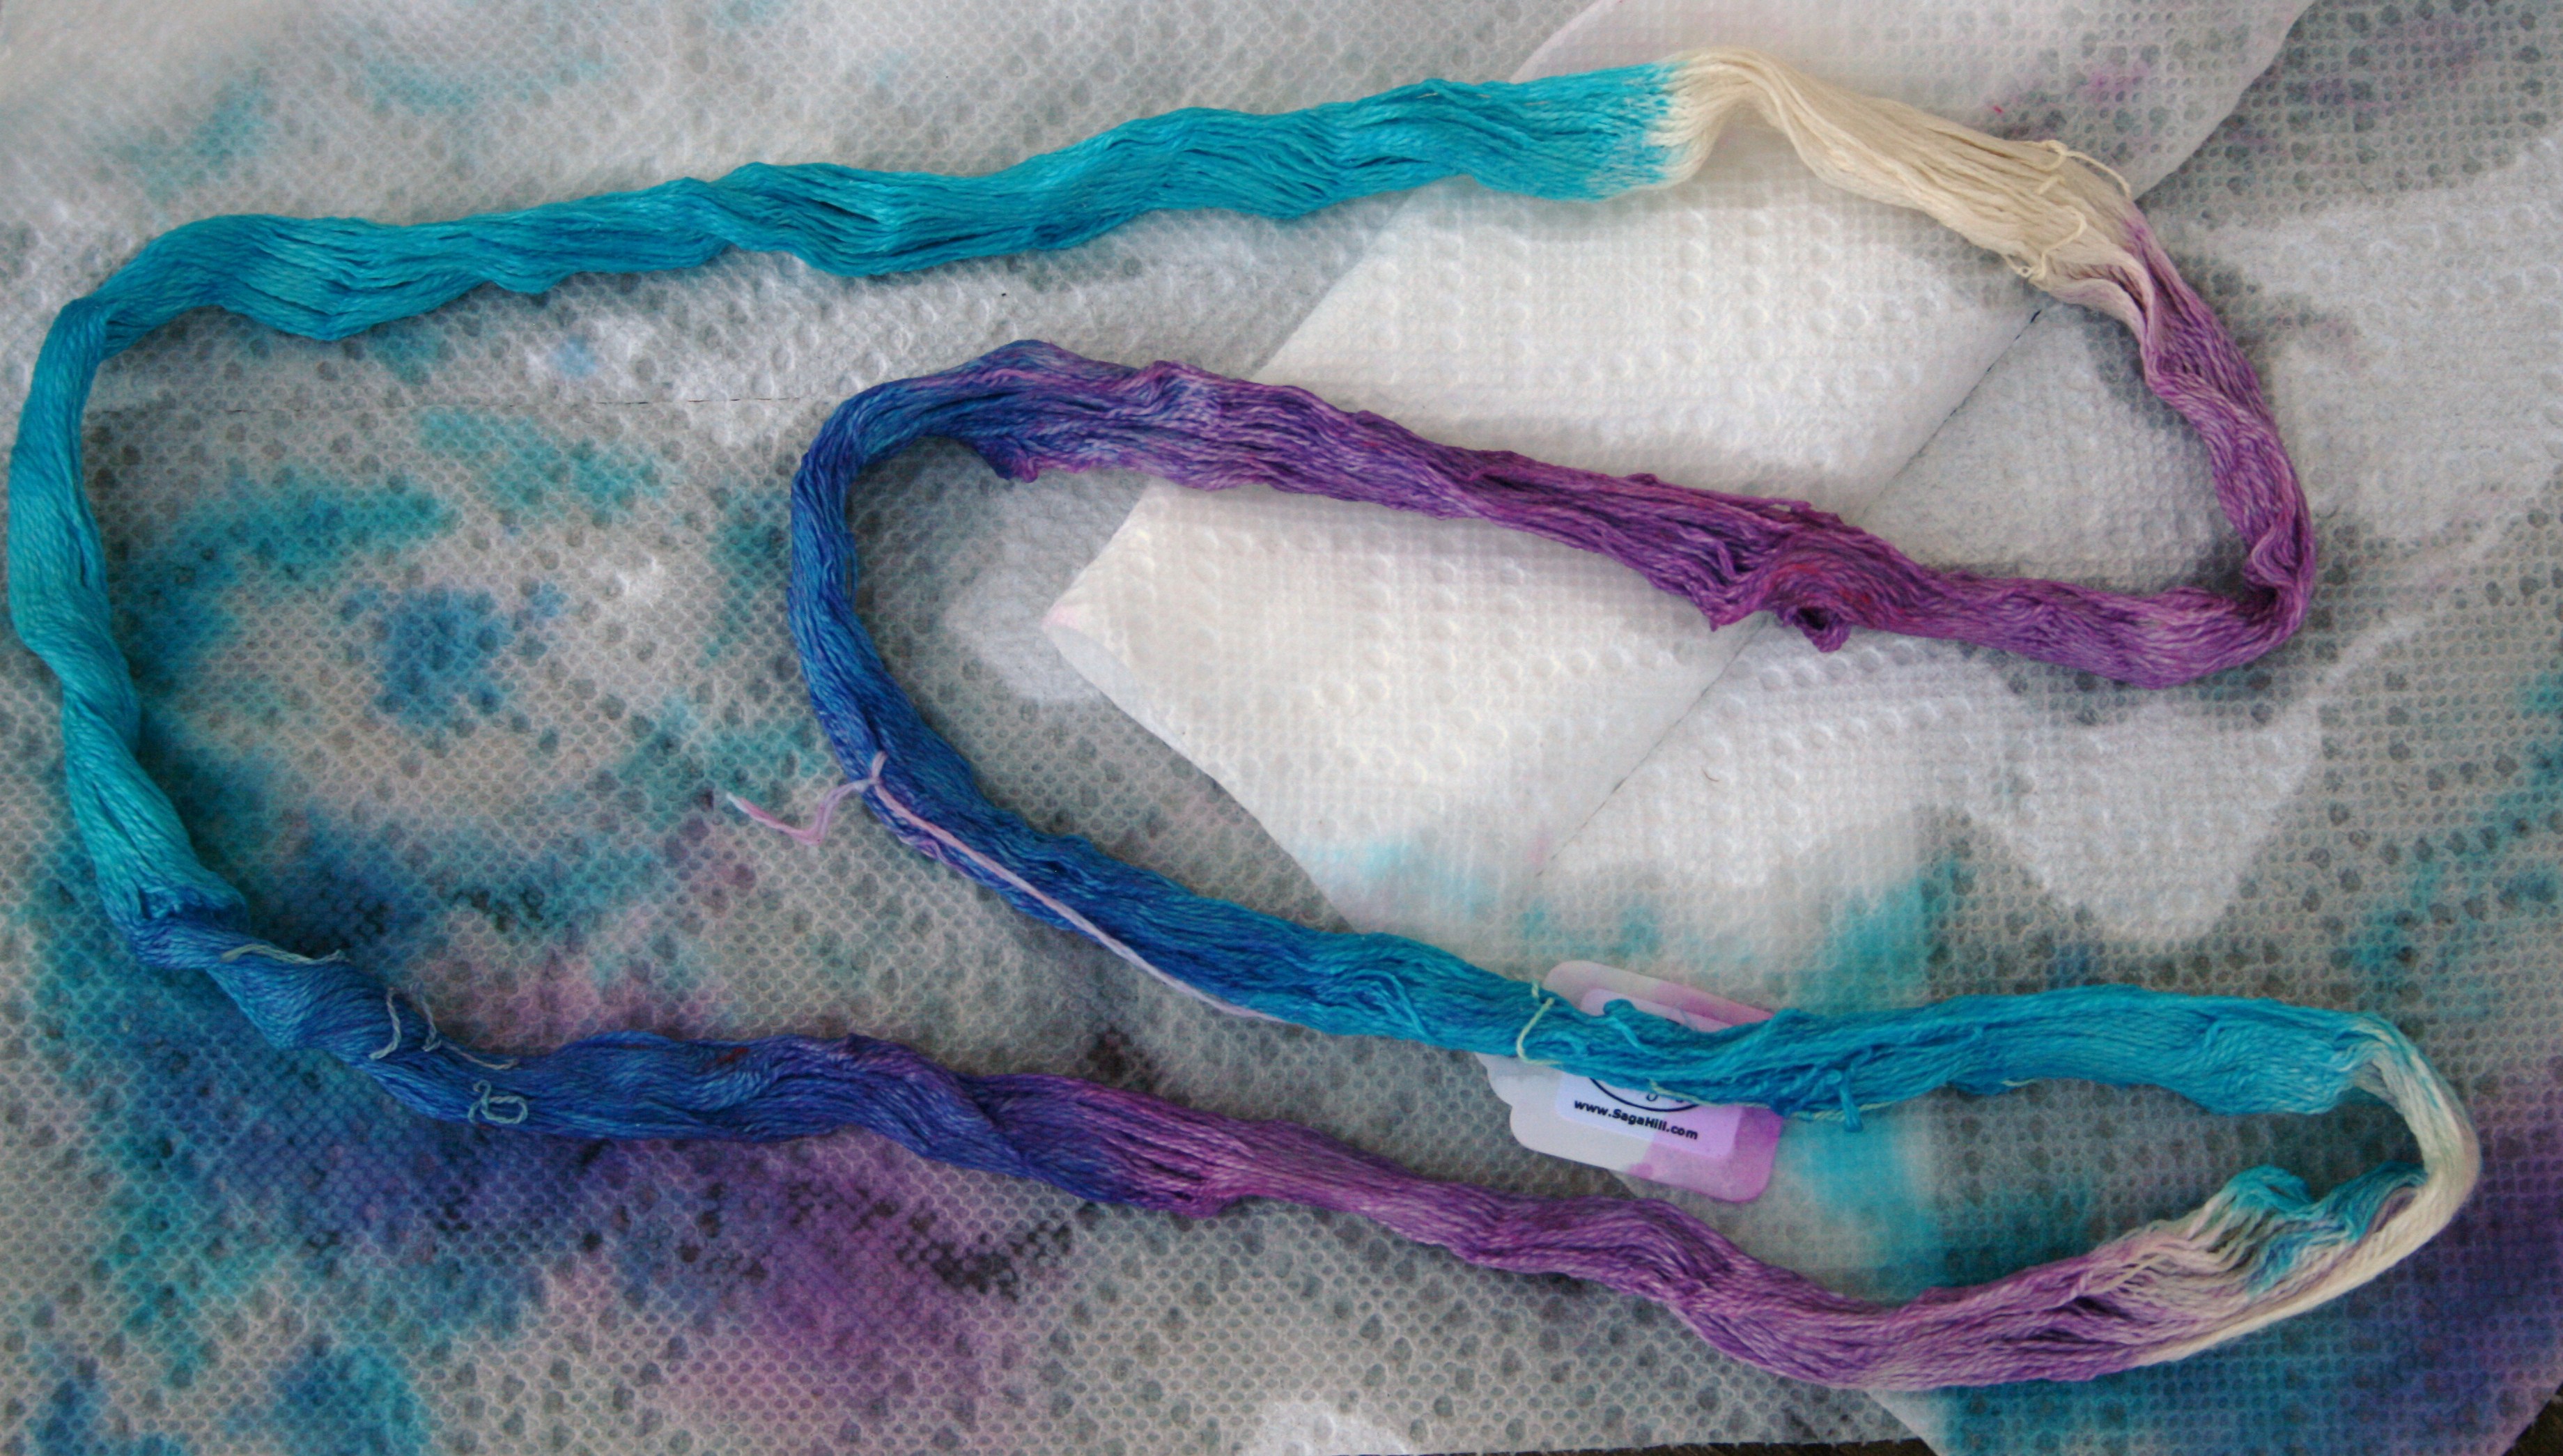
Skein waiting for a rinse after being dipped into dyes

My New Pattern Line!

ScannedImage I just had some fun adding my own personal patterns for sale on Crochetville.com (you can find them right here on this site at the pattern tab above, with links to their selling site). They are all made using the wonderful yarn from Lisa Souza Knitwear and Dyeworks, and the model is always happy to get in front of the camera.

IMG_5511

Simply Girl Summer Top

IMG_4598

Seasons Change Hooded Vest


IMG_5485

Precious Blossom Shrug


A Class of Crochet

ScannedImageI am a self taught crocheter; I learned from a long out of print book when I was about 10. However only recently I have learned the benefit of actually taking a crochet class.

My first class was at a Crochet Guild of America (CGOA) Chain Link Conference (aka Knit and Crochet Show) in July 2011, with Karen Ratto-Whooley on Savvy Singles, learning new approaches to single crochet stitches. (This conference changed my life, but that is a story for another day)Usually I read through class listings and think “I have seen that in a book, what else they can be showing me”, but after taking this class I realized that there are more than the words in a pattern or book that created my hobby. Being in a room of fellow crocheters getting more detailed instruction then I thought was possible was an eye opening moment.

The designer doesn’t talk about the inspiration or thought process behind a pattern in any book that I’ve found, but in the class I was hearing the “background” of how the stitches work and the dynamics of how they work with the pros and cons of each stitch.  The fellow students offered more then I would have thought by bringing up questions I would have not considered. Even after crocheting for nearly 30 years, this old dog was learning new tricks.

IMG_20121023_165749

5 Peaks Shawl class by Vashti Braha at Fall 2012 Chain Link, Reno


This experience has encouraged me to take a handful of classes every year, and the new ideas and concepts that have opened up new worlds to me. (The 5 Peaks Shawl by Vashti Braha gave me a whole new outlook on Tunisian Crochet) Just because I knew the stitches, could read a pattern and complete the fabrics I desired, I didn’t realize there was another world within the one I knew. How often this happens in life; there is more depths in that we love than ever imagined.

Crochet! Spring 2013

I have some new designs out in the latest issue of Crochet! Magazine.

Cover Crochet! Magazine Spring 2013 Photo courtesy of Annie's

Cover Crochet! Magazine Spring 2013 Photo courtesy of Annie’s

The Vineyard at Dawn Shawl was my winning design in the 2012 Crochet Guild of America Design Competition.

Vineyard at Dawn Shawl (front), Crochet! Magazine Spring 2013 Photo courtesy of Annie's

Vineyard at Dawn Shawl (front), Crochet! Magazine Spring 2013
Photo courtesy of Annie’s

Vineyard at Dawn Shawl (back), Crochet! Magazine Spring 2013 Photo courtesy of Annie's

Vineyard at Dawn Shawl (back), Crochet! Magazine Spring 2013
Photo courtesy of Annie’s


And the Cuffs are part of an article I have in the issue about translating Filet crochet charts into Tapestry crochet.

Love Wrist Cuff, Crochet! Magazine, Spring 2013 Photo courtesy of Annie's

Love Wrist Cuff, Crochet! Magazine, Spring 2013
Photo courtesy of Annie’s

Love Arm Cuff, Crochet Magazine, Spring 2013 Photo courtesy of Annie's

Love Arm Cuff, Crochet Magazine, Spring 2013
Photo courtesy of Annie’s


Gauge…sometimes referred to as a four letter word. But can open your world.

There is a dirty little secret that I believe more people practice then care to admit…that we don’t make a gauge swatch. I’ll be honest, I didn’t make any gauge swatches for years, I always skipped that part of the pattern, treating it as a page break at best. Yarn is precious, why would I waste any on a little scrap that has no purpose but measuring? Okay so there is my confession, but I’m sure I’m not alone. However none of us bring it up in public, because you do get the looks like “you’re crazy” (usually from knitters that have realized the importance years earlier).

So really what is gauge? Well the simple definition is that it is the number of stitches by number of rows to fit a desired measurement (like, 16 dc /6 rows=4”). Sounds simple, so why avoid it?…crochet is my relaxation, gauge sounds like work. In some respects it is, but in reality, I don’t think gauge is really important in a lot of crochet projects. Granted checking gauge on a couple of afghans in the past might have meant that I wouldn’t have over/under purchased enough yarn, but overall it has been pretty negligible.

I can see where in some fitted garments that it can make a difference, being an inch or so too big or too small in the bust could make or break a sweater. This becomes especially true when substituting a different yarn then the one the pattern was written for. Worsted weight is not the same in every yarn, granted they maybe ball park, but not exact (same is true for all the over weights as well) and the makeup of the yarn makes a difference. An acrylic yarn and a wool yarn of the same weight can behave differently in their appearance and effect the gauge as well. Not to mention everyone has a different hand in crocheting and no one does it the same as you.

Own your gauge, by understanding how it relates to you pattern you can determine if you really want to worry about it, if my scarf is a little wider then indented it isn’t going to be the end of the world, but I would want to know if that coat that I’m making for my 6 year old would come out fitting my 9 year old instead.

If you don’t want to do a gauge swatch, but want to make that sweater, start with a sleeve and when you get a little ways into it, stop and measure (Note: for a more true measurement don’t measure from edge to edge, but from a stitch to a stitch, or row to a row, in a larger worked piece, the turns of the edges can distort the measurement).

Measure in the body of the work and in the middle of the tape measure for more accuracy

Measure in the body of the work and in the middle of the tape measure for more accuracy


Since I am bearing my sole in this confession of a dirty little secret, I should admit, I will check gauge as I am working along on a garment to make sure it will fit in the end. So I don’t make with gauge swatch, but I check in my work before I finish (I’d rather rip out 2 days worth of work then make and measure a gauge swatch over  20 minutes…it is a pride thing), at least I know what I should do. Don’t let it intimidate you, it is a challenge that you can overcome and master. It is amazing how once we attempt and feel comfortable with a new skill/trait/challenge that the world opens up a little, and more things are possible.

If you want to understand more of the math behind the gauge, check out my tutorial, under the tab above.