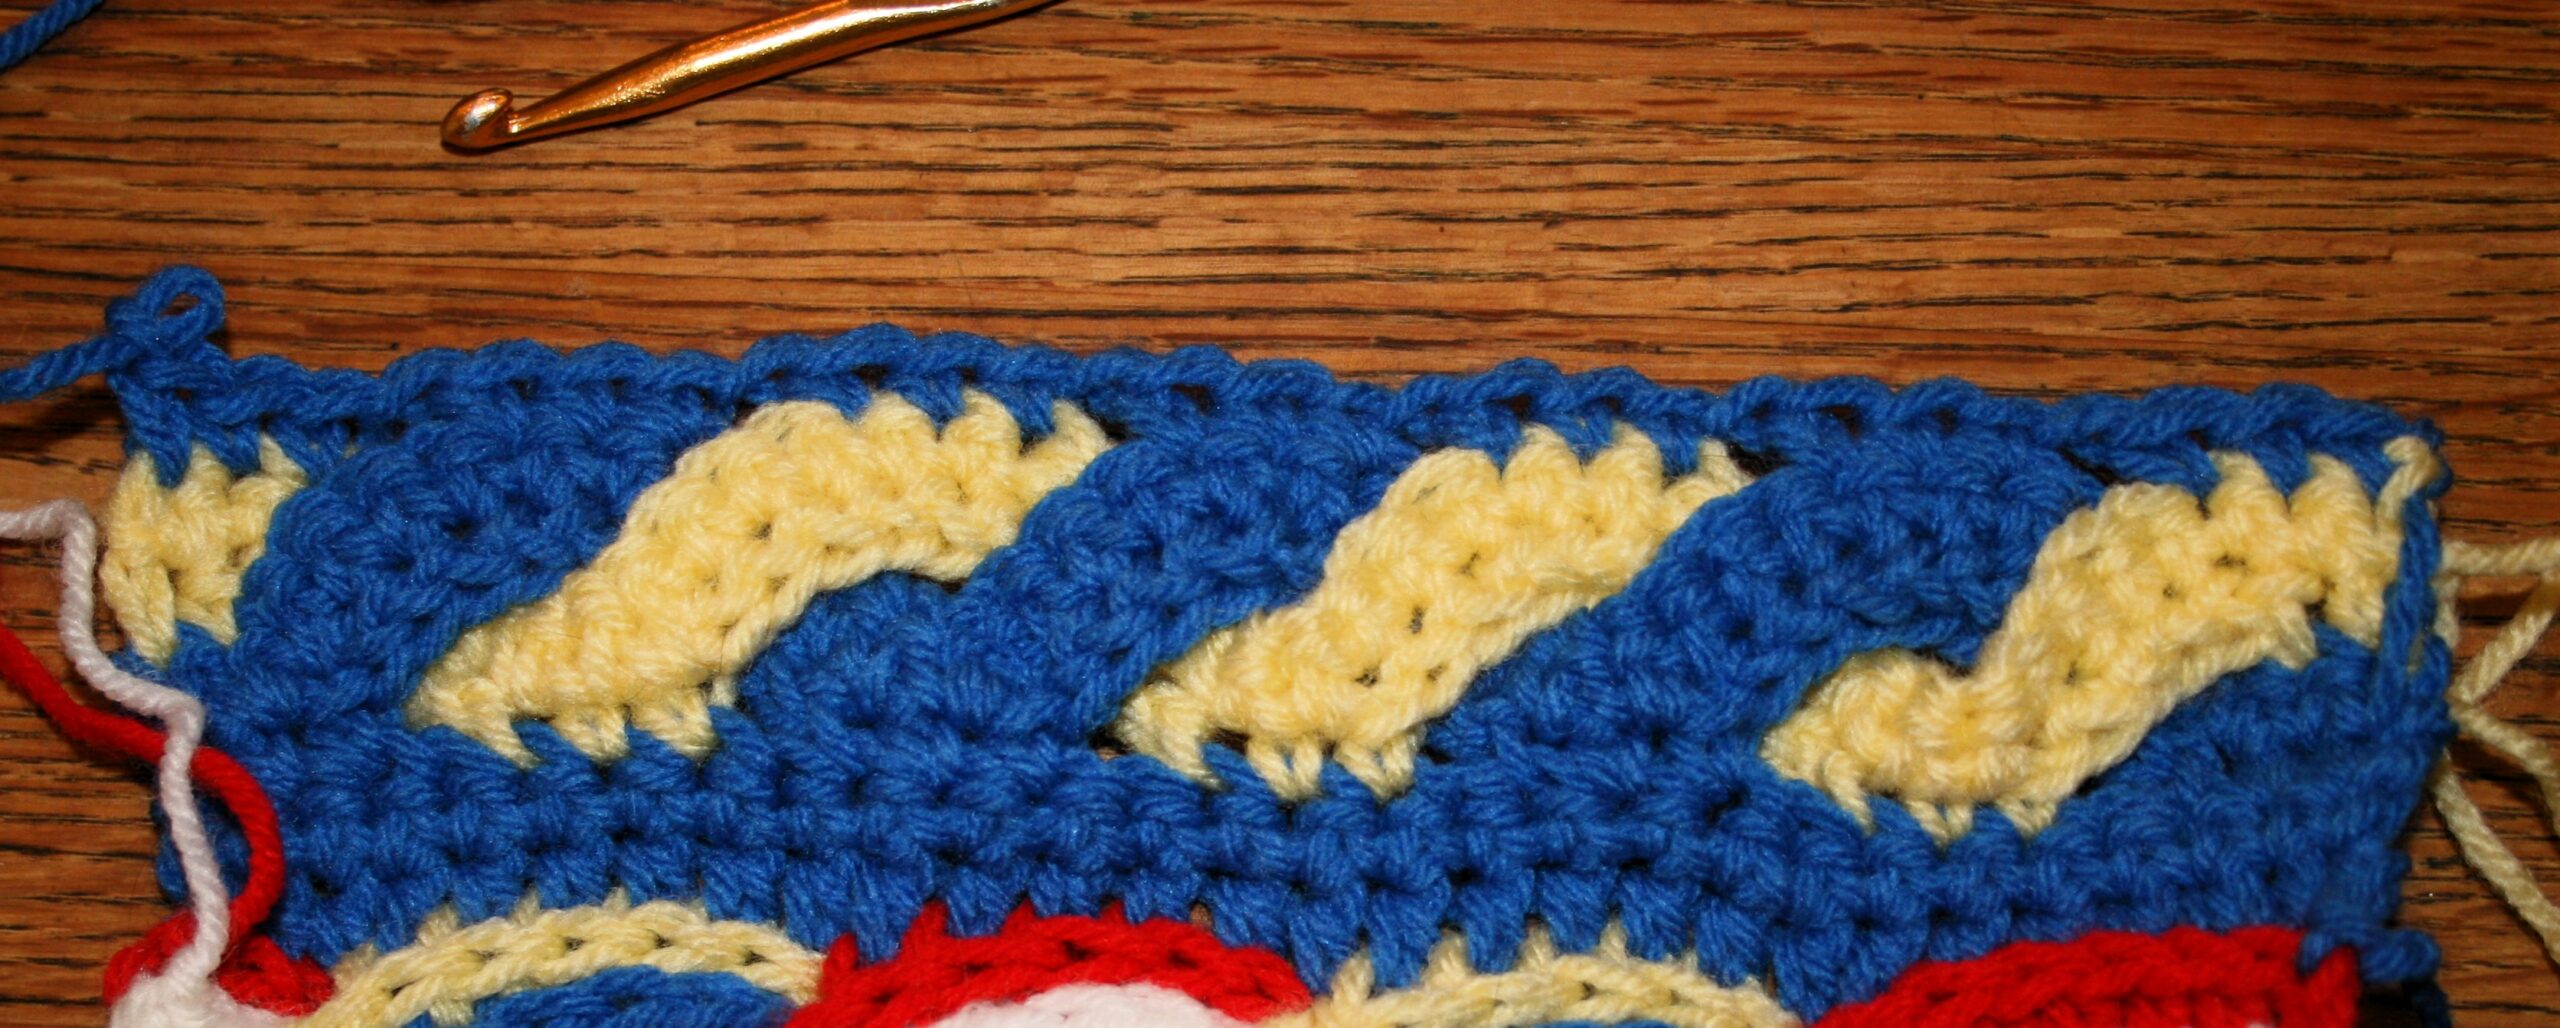
Braided Horizontal Cables are pretty straight forward to create if you have a couple of stitches in your tool box.
This type of cable is created by making arches, and “weaving” a subsequent arches through the original. The arches are created using Foundation stitches. The sample I am giving below will utilized Foundation Single Crochet Stitches, but after you understand the concept, you can utilize other foundation stitches. Just make sure the arch is large enough to fit the “woven” strand through.
Create a base fabric to start.
Ch 27, sc in the 2nd ch from hook, sc in each ch across, turn. -27 sc
“Wave/Arch”
Special Stitches
Foundation Single Crochet (fsc): Chain 2, insert hook in the second chain from hook, yarn over, pull through a loop, chain 1 (note this chain, pinch it, as this is where subsequent stitches are worked), yarn over, and pull through both loops on the hook. Insert hook into the pinched chain, yarn over, pull through a loop, chain 1 (pinch this one as it is the place the next subsequent stitch will be worked), yarn over, pull through both loops on hook. (For some nice videos checkout Moogly or One Dog Woof)
Extended Single Crochet (esc): Insert hook in indicated stitch, yarn over, pull up a loop, chain 1, yarn over, pull through both loops on hook.
Joined Single Crochet (Jsc): Insert hook into the chain of the last Foundation stitch created, yarn over, pull up a loop, insert hook into the next stitch of the row, yarn over, pull up a loop, yarn over, pull through 3 loops on hook.
Let’s Start!
Row 1: Ch 1, sc in same st, sc in next st, [esc in next st, 9 fsc, skip 5 sts, Jsc in next st, sc in next st] three times, sc in last st, turn. -3 “arches” made
Row 2: Ch 1, sc in each st across, change color, turn.
Notice how the second row basically just follows the row above.
Weave the second arch through the first. You want to be mindful of where the working yarn is located before working the joining single crochet. Do not “trap” the working yarn under the foundation stitches just created.
Pay Attention Here
Row 3: Ch 1, sc in same st, esc in next st, 4 fsc, working in front of “arch”,
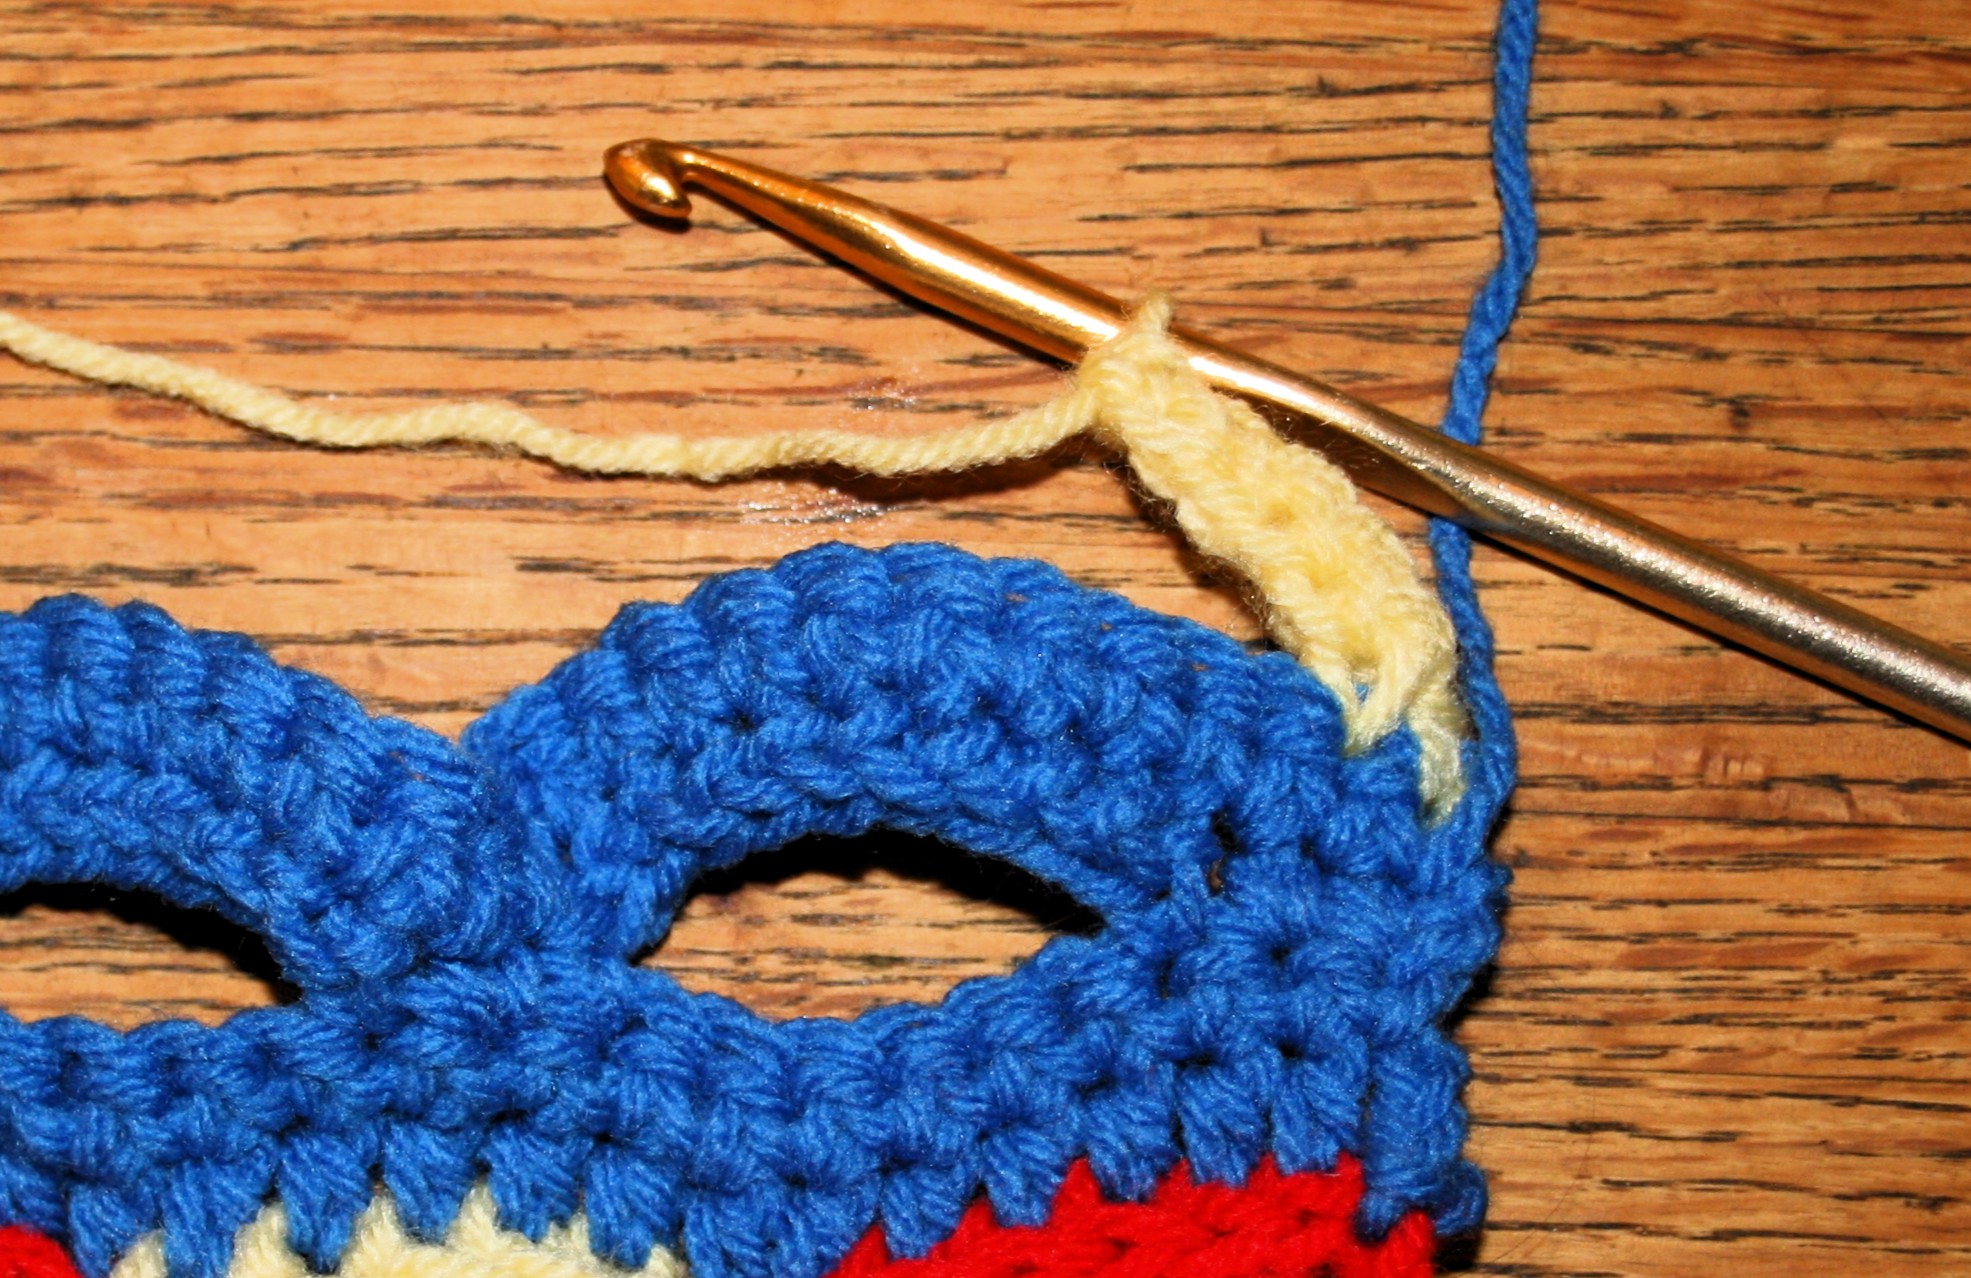
skip 1 st on join row, Jsc in next st, sc in next st, esc in next st,
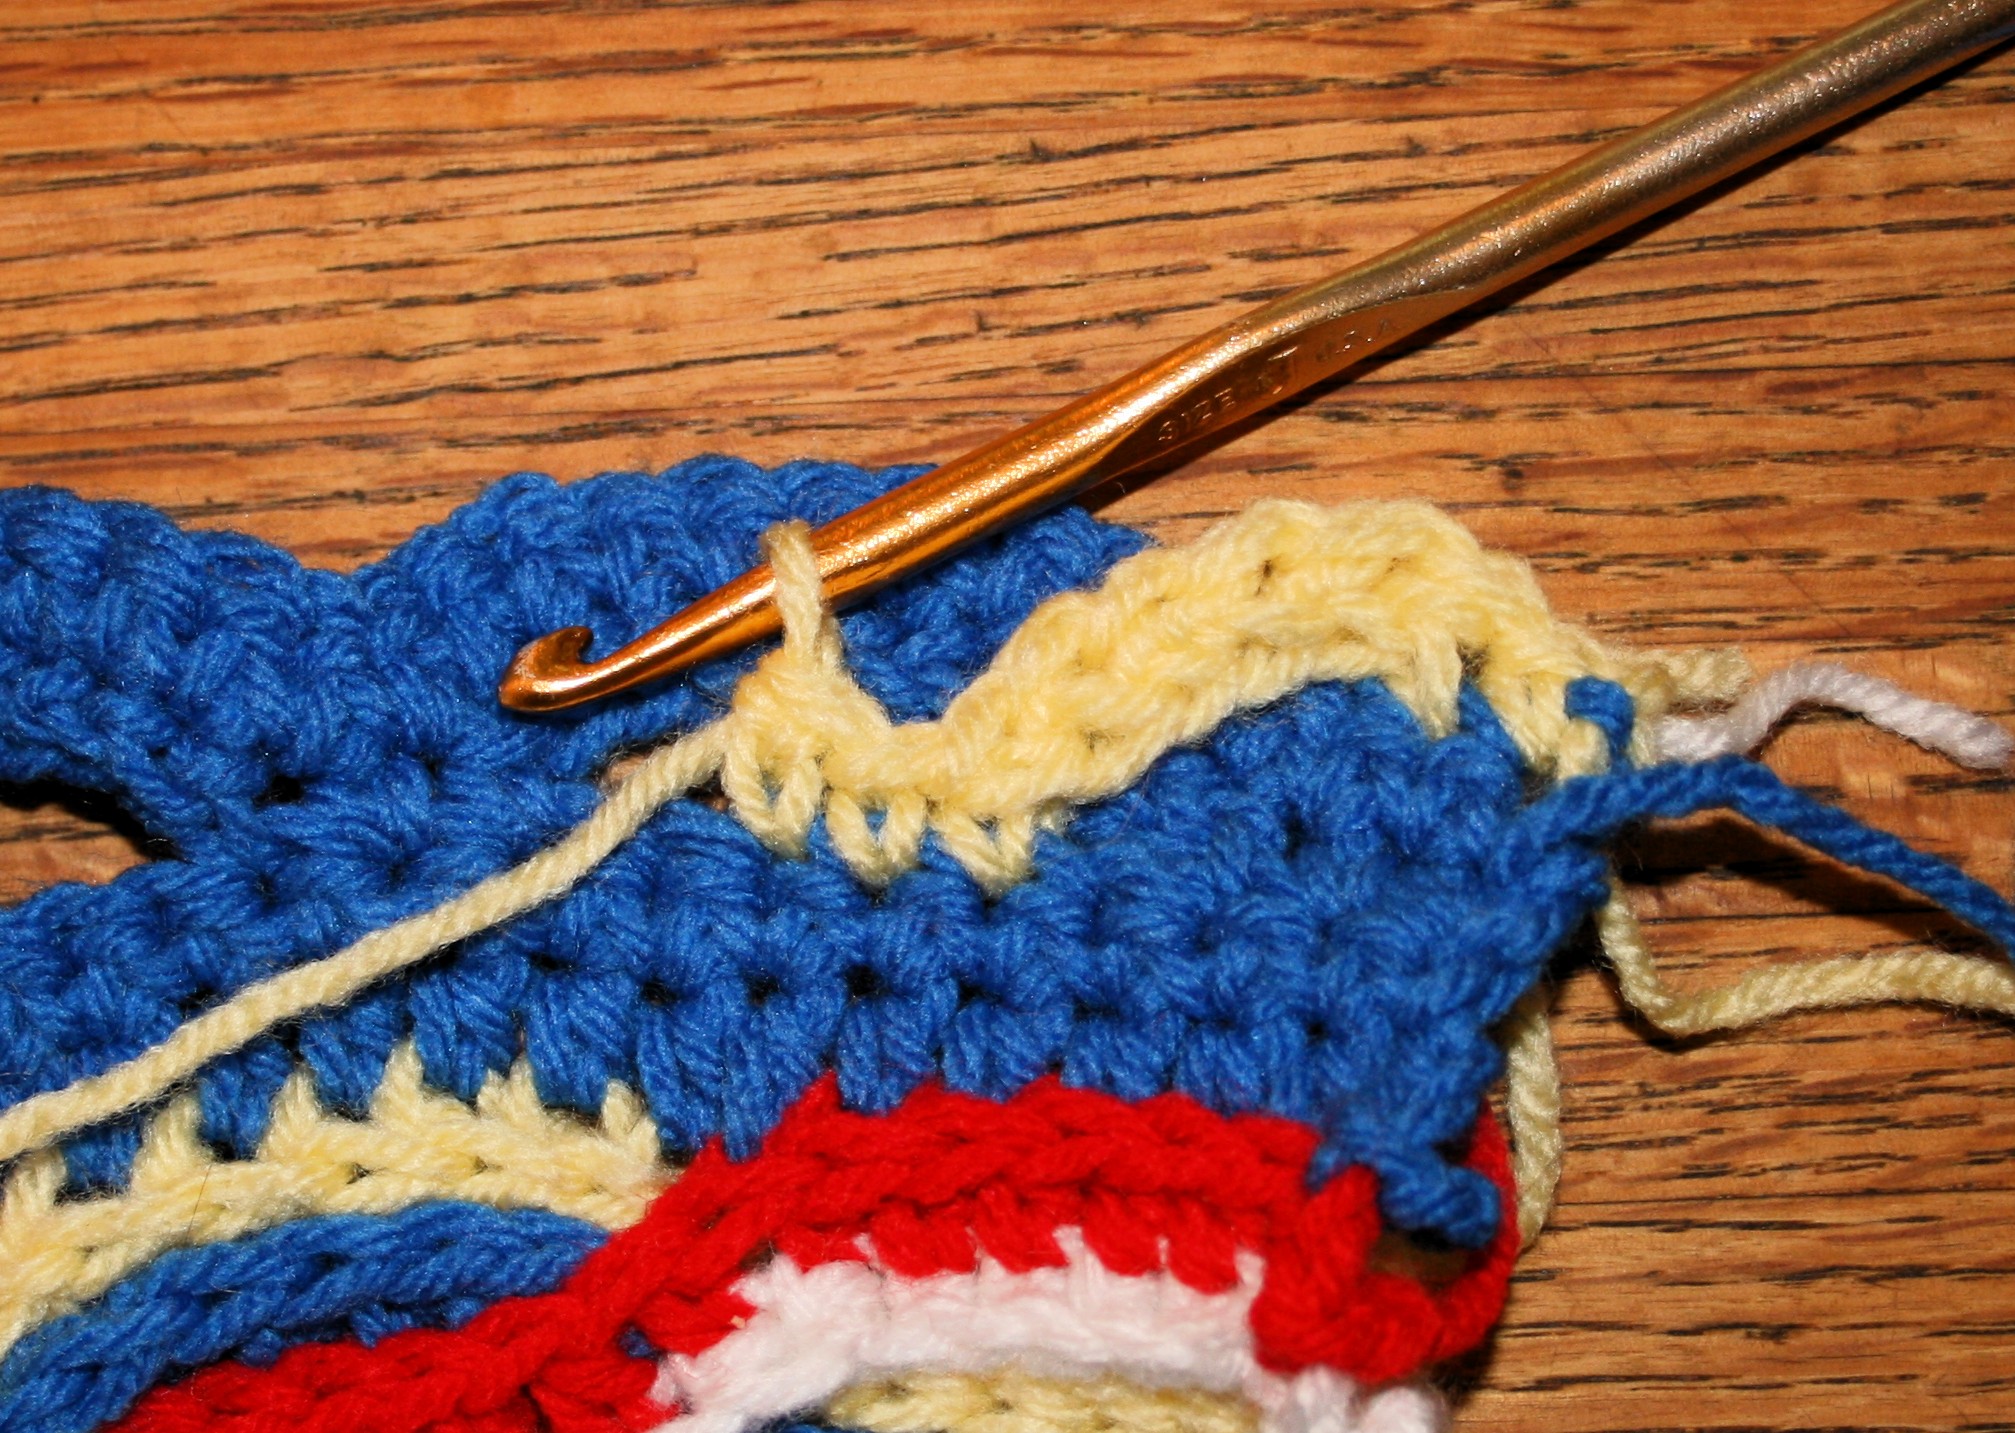
[9 fsc, push fsc under arch, working in front of “arch”: NOTE: ensure that working yarn is not “trapped” under the fsc stitches when working the Jsc,
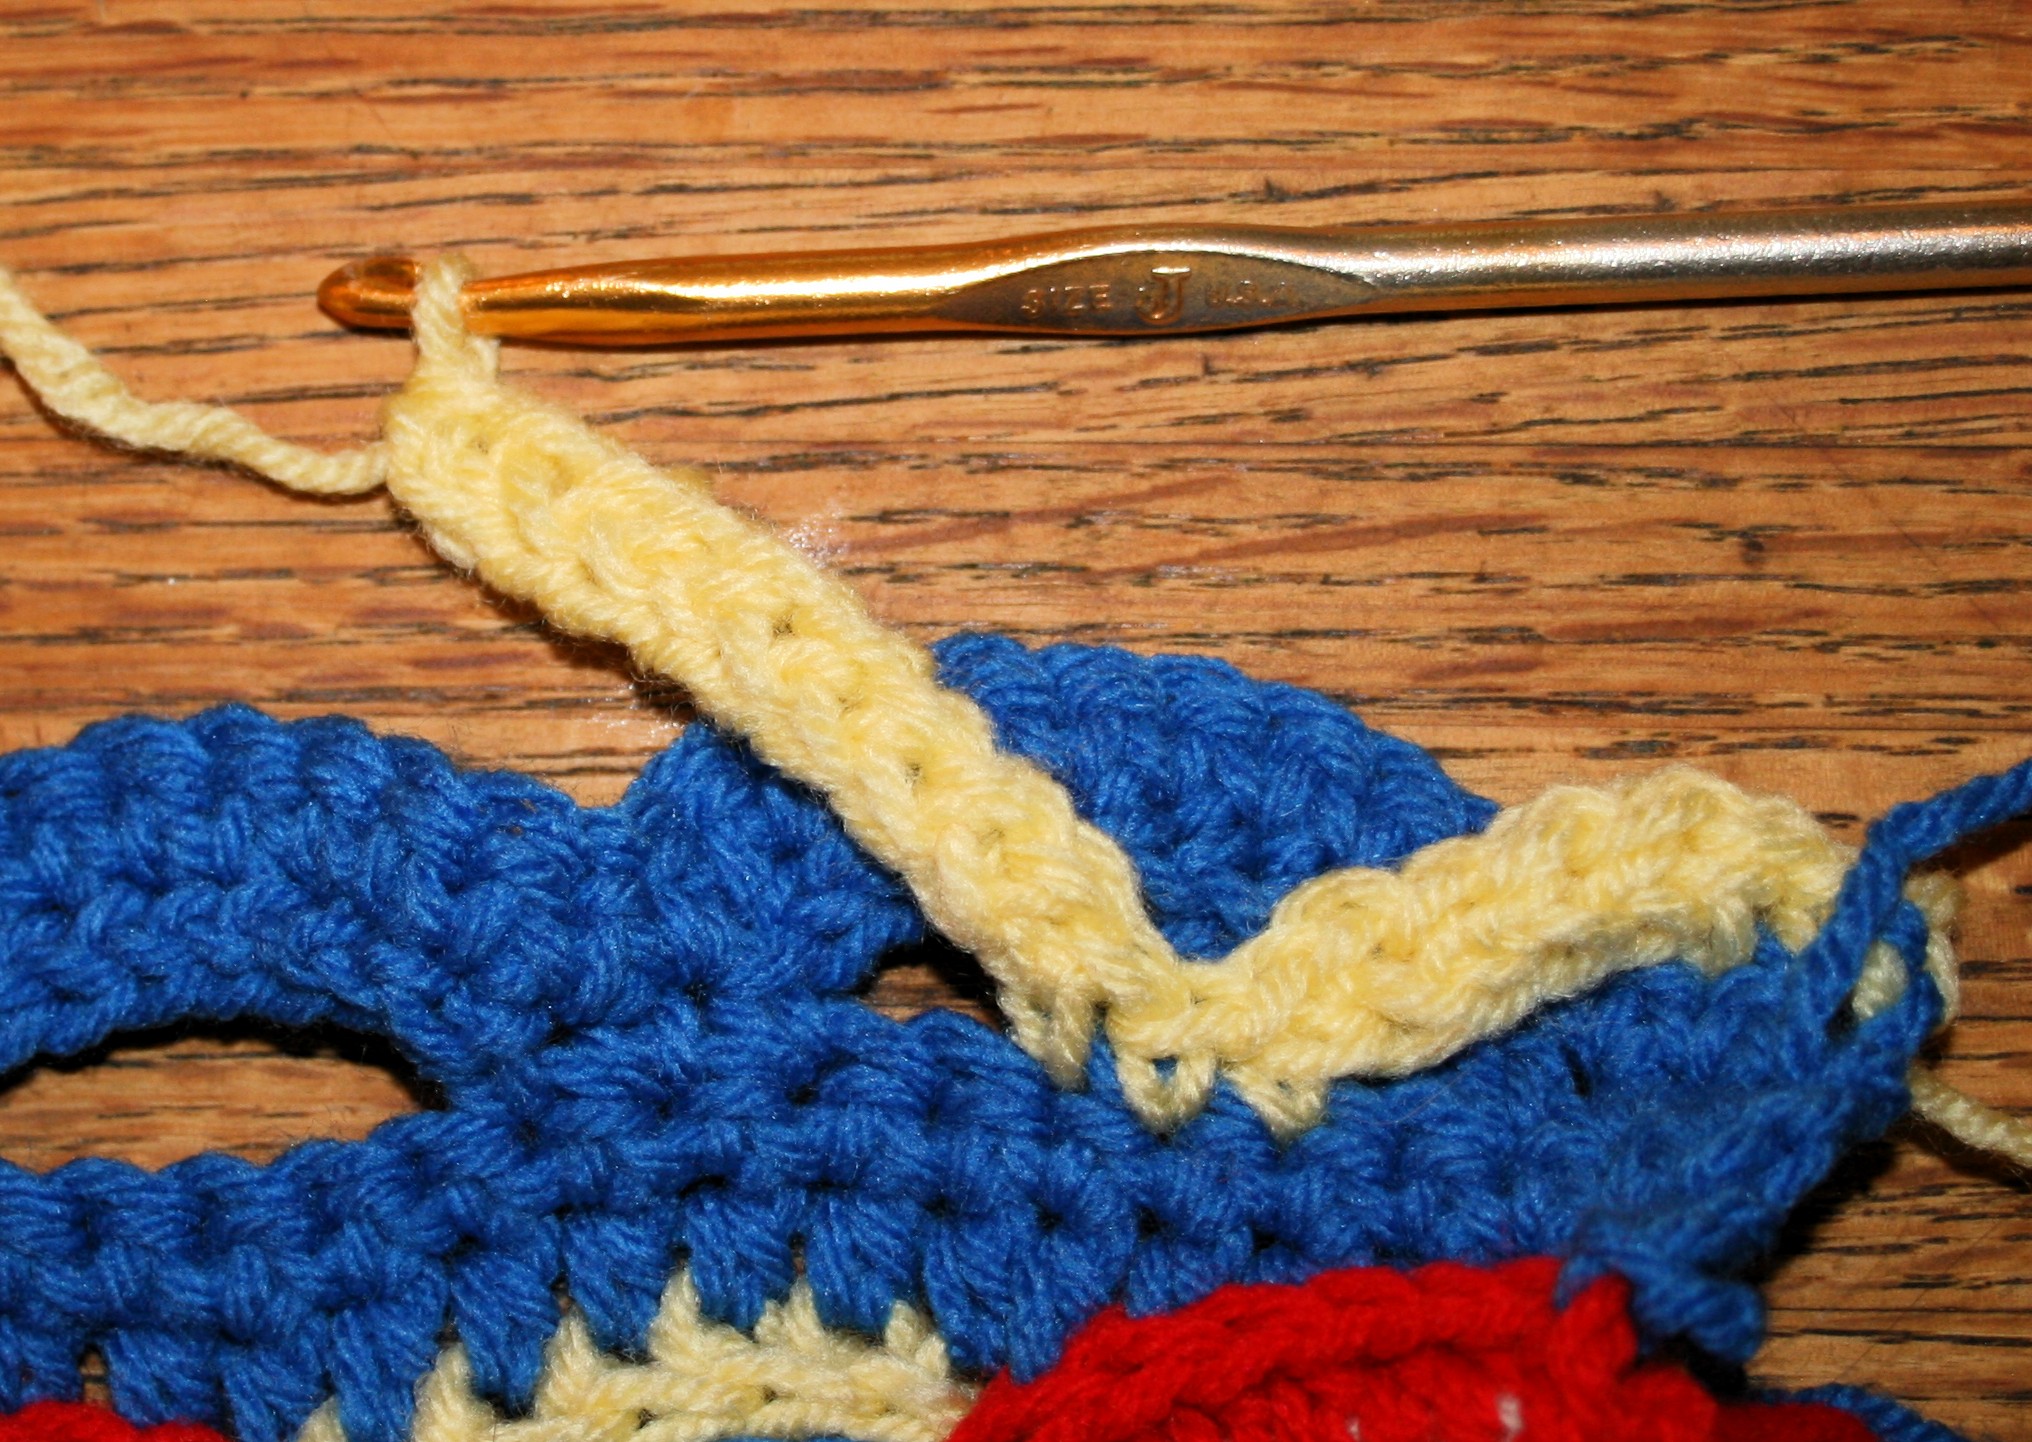
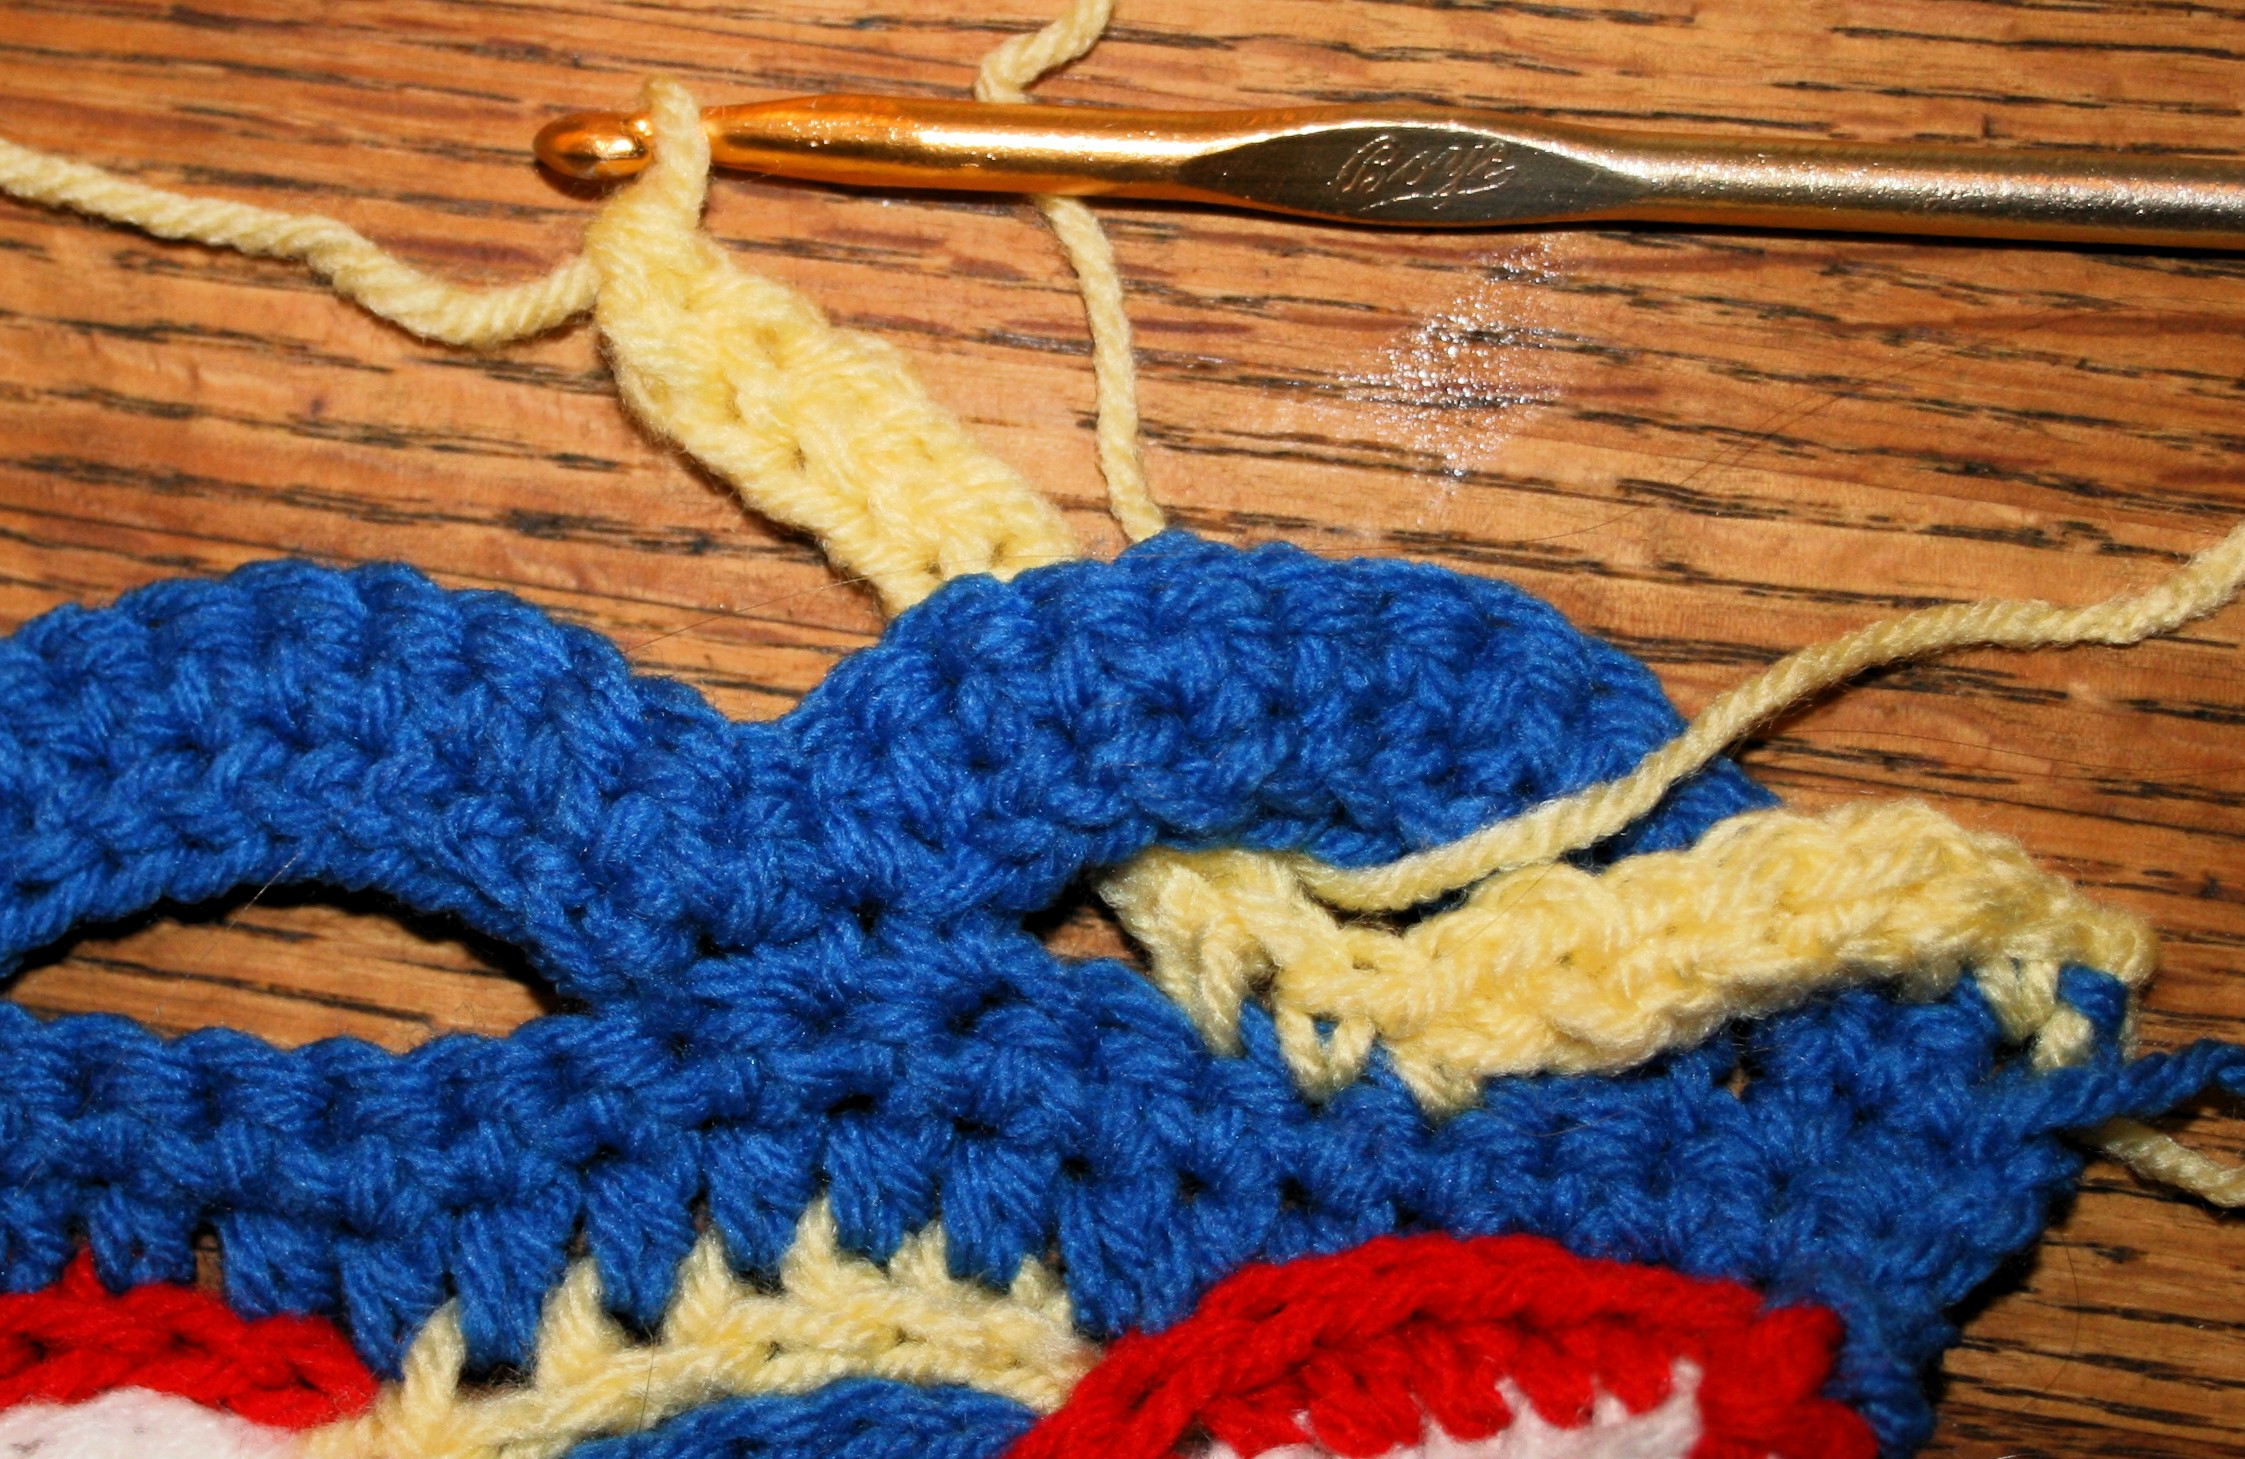
skip 1 st on join row, Jsc in next st, sc in next st, esc in next st] 2 times,
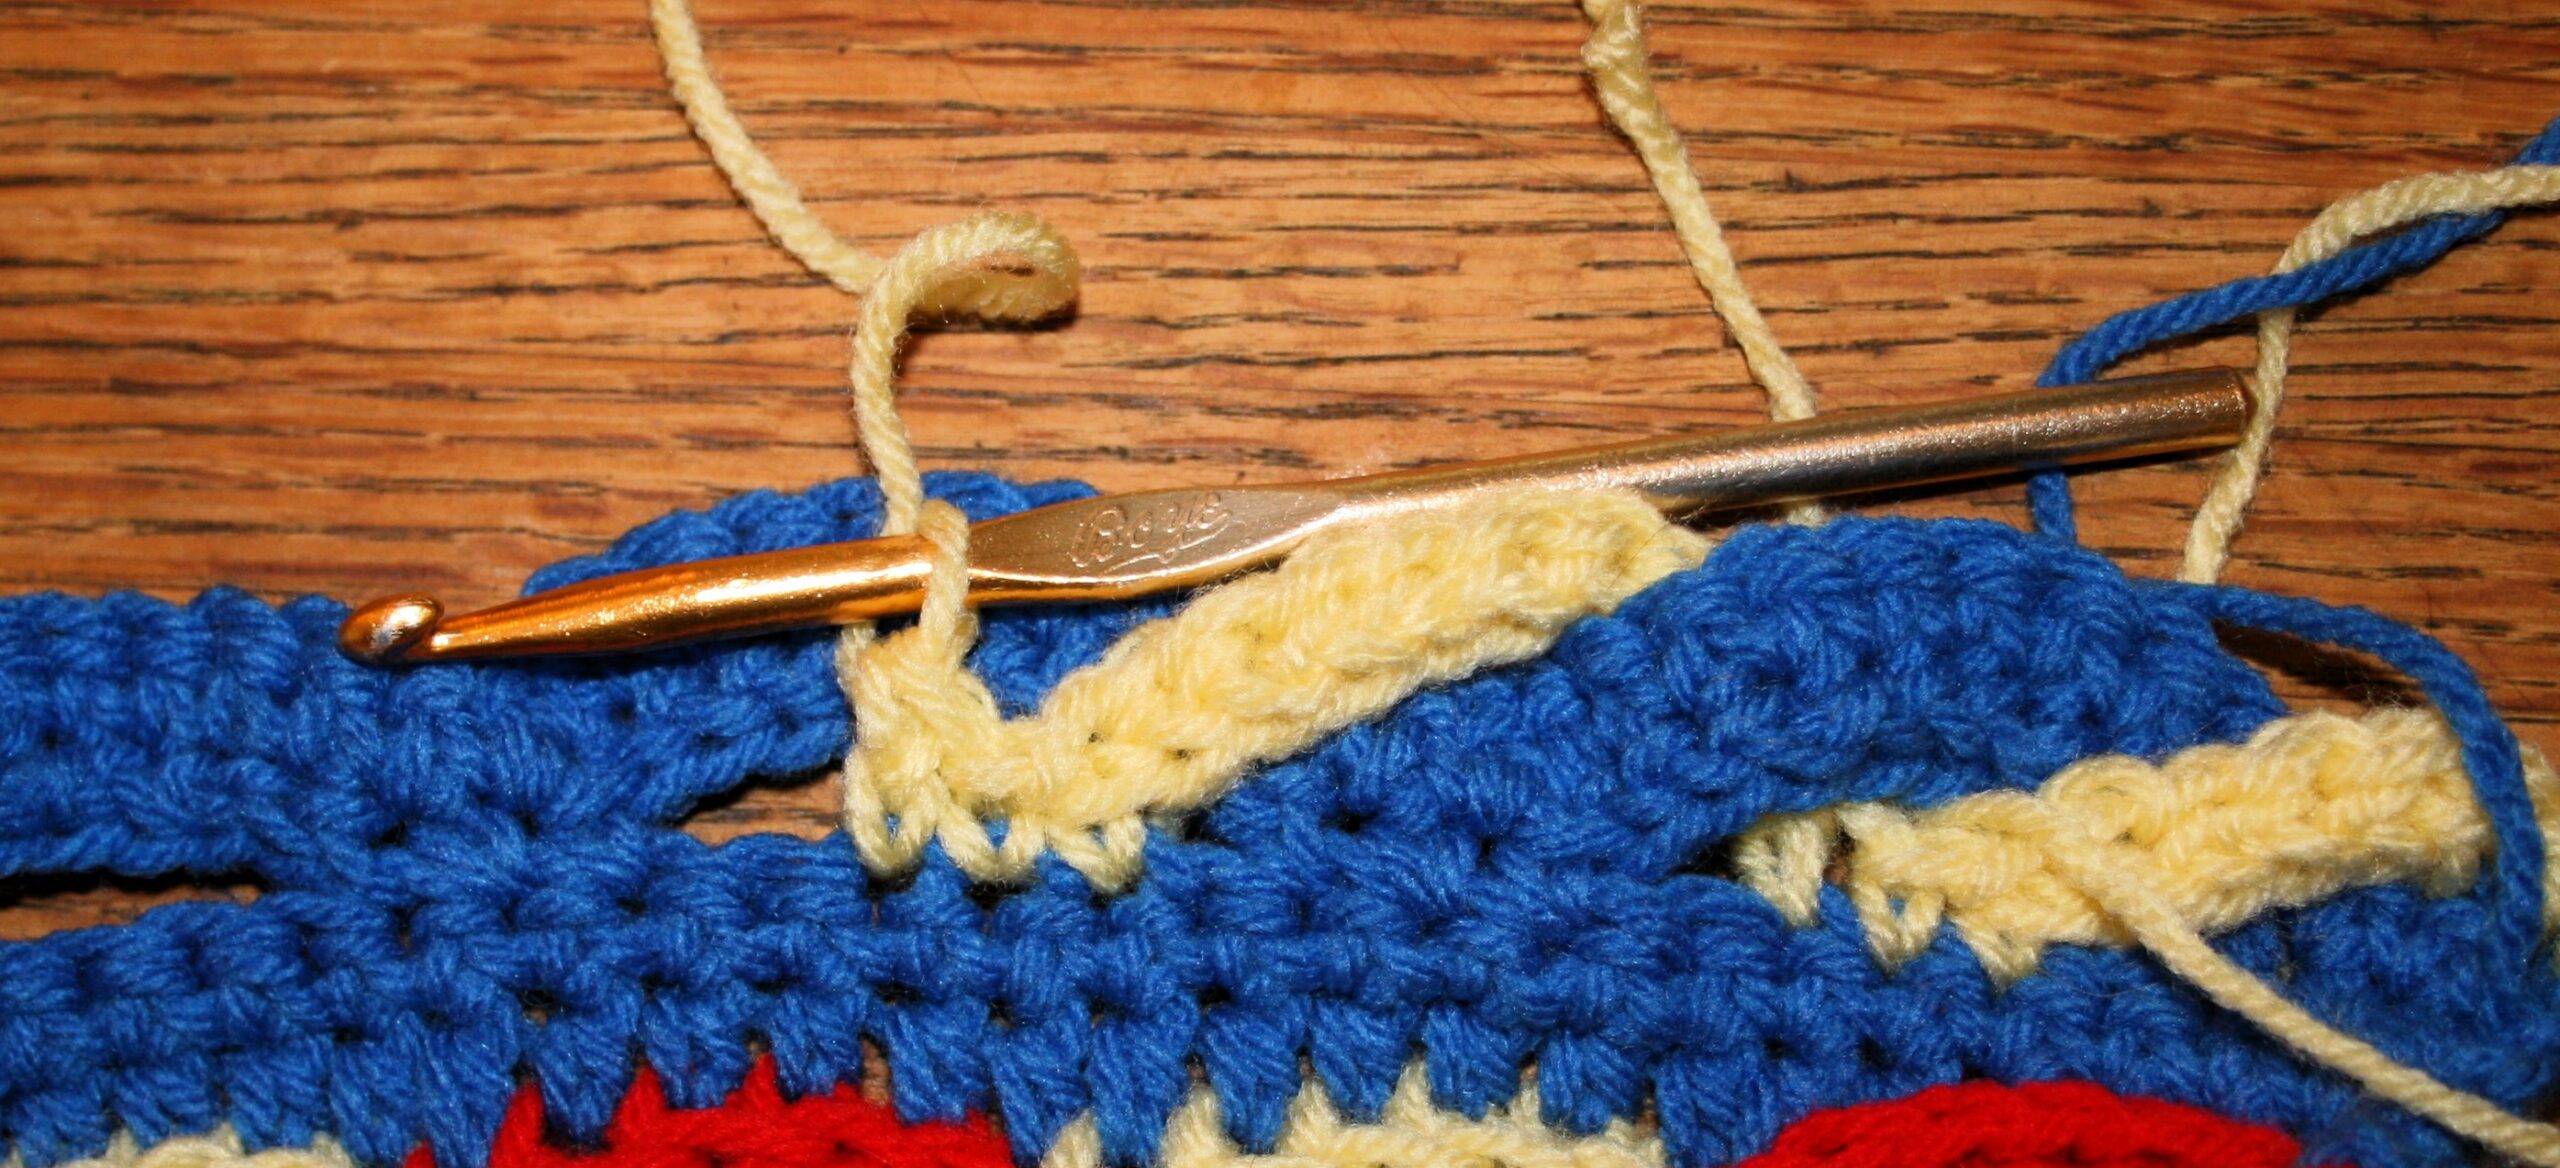
4 fsc, push fsc under arch, working in last 2 sts atop last row, Jsc in next st, sc in last st, turn.
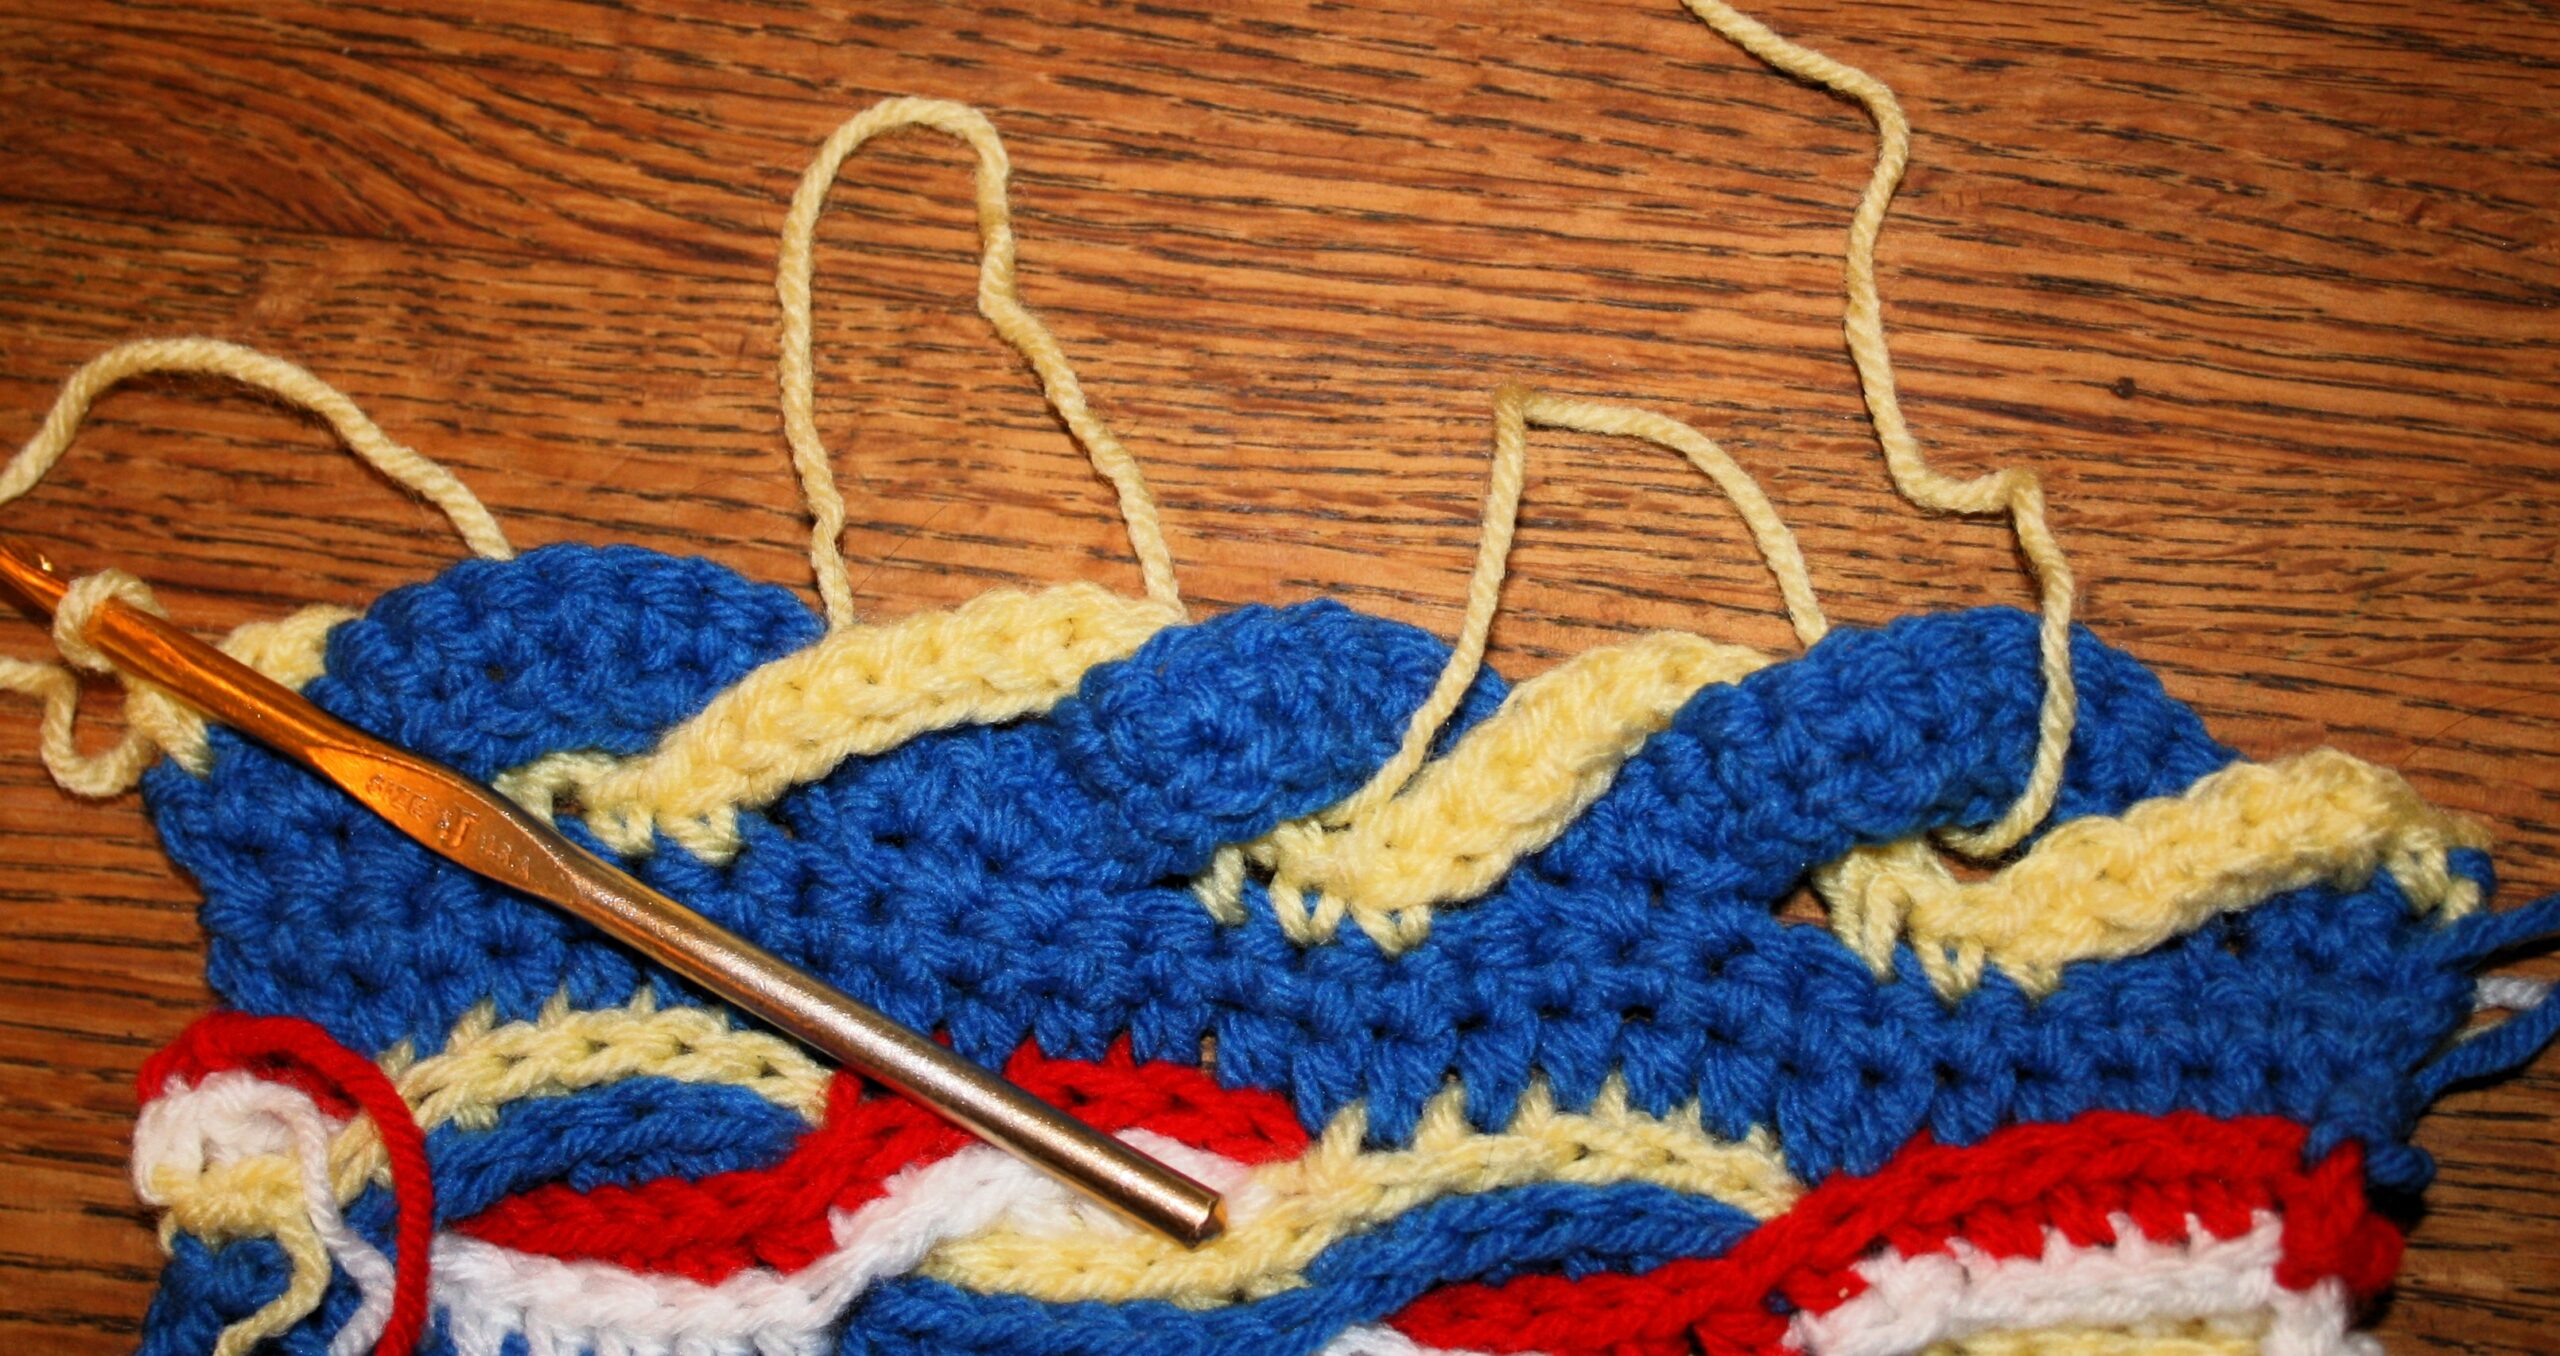
“Push” or “pull” the foundation stitches through the opposite arch to change the cable direction.
Row 4: Ch 1, sc in each st across, change color, turn.
Once again, the row above just follows the previous row.
Make it an edging or an entire fabric. Just add a joining row to add more.
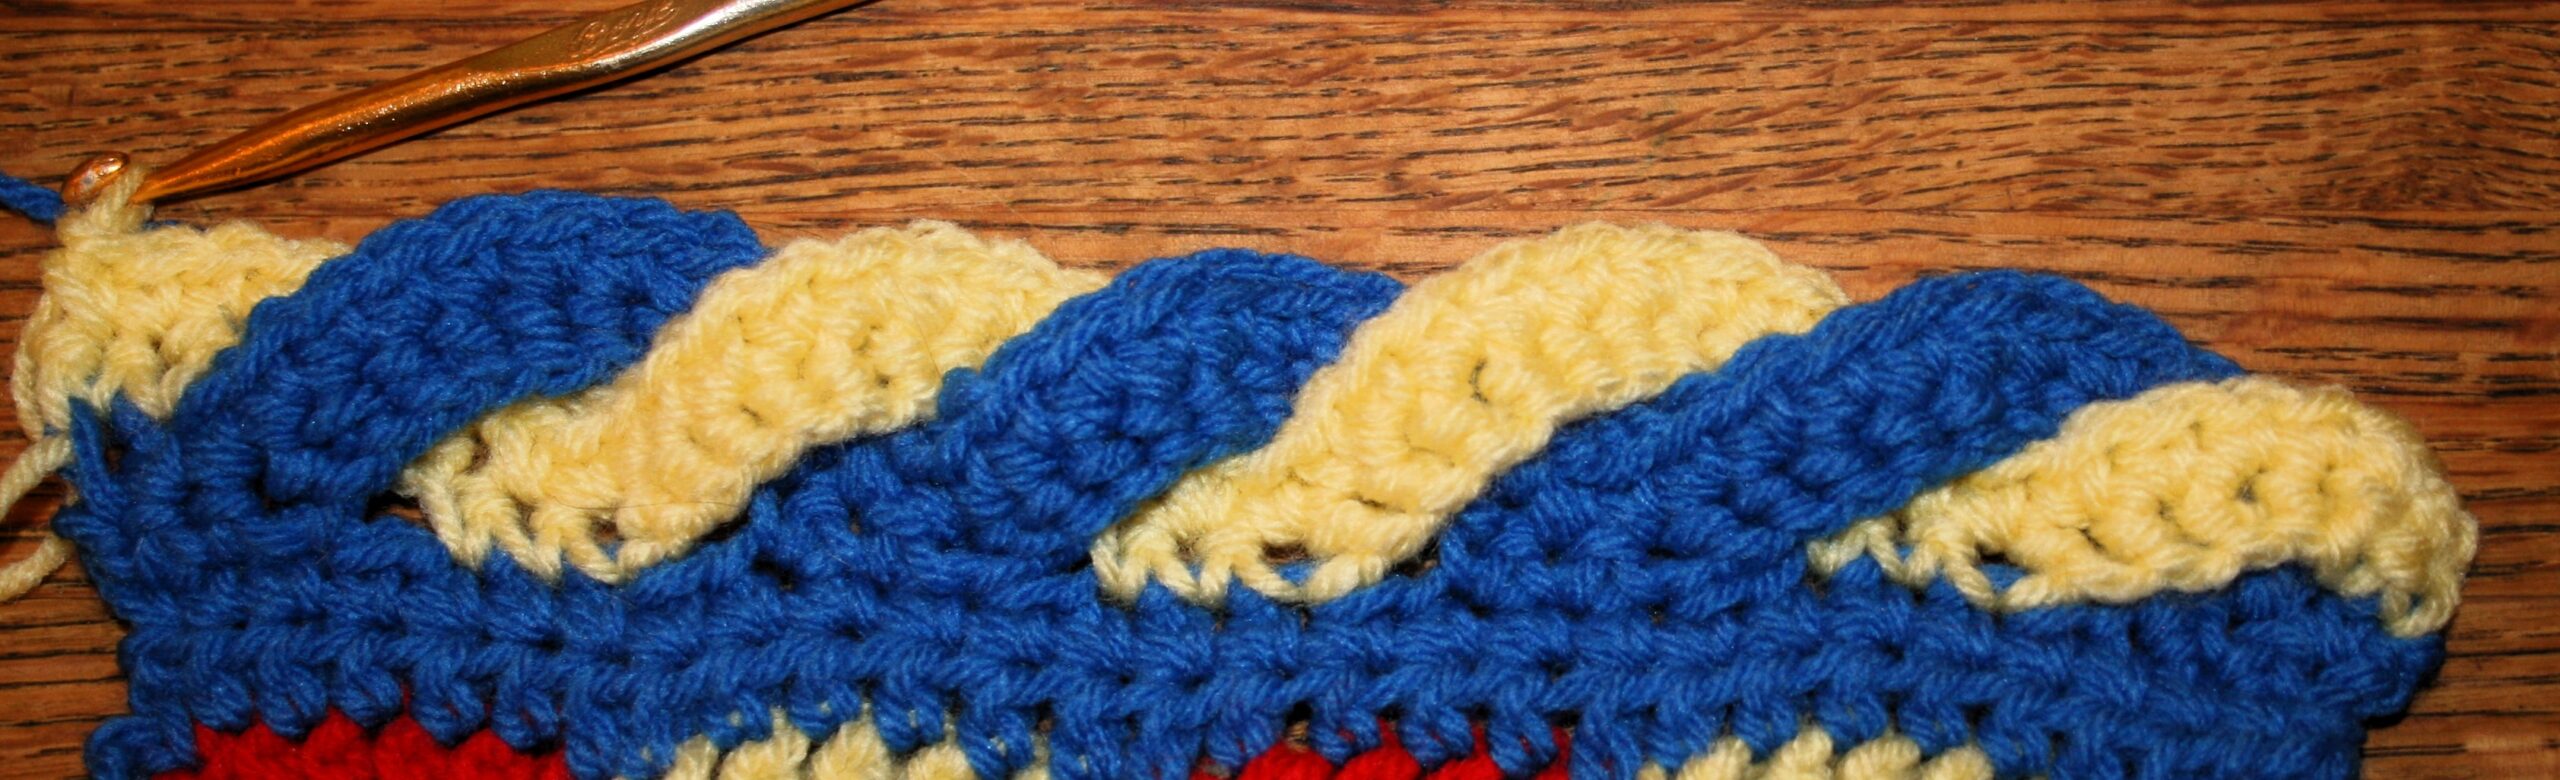
Row 5: Joining row: Ch 1, sc in same st, sc in next 2 sts, ch 1, [skip next 4 sts of next “arch”, sc in next 3 sts, ch 1] 5 times, skip next 4 sts of next “arch”, sc in next 3 sts, turn. : NOTE: the precise number of stitches skipped is not critical, as long as the fabric lays flat and the “arches” lay even.