Yarn Optical Illusions

Sometimes you need to have a couple of yarn tricks to ensure that your project turns out the best it possibly can. One of these tips or tricks is understanding dye lots.

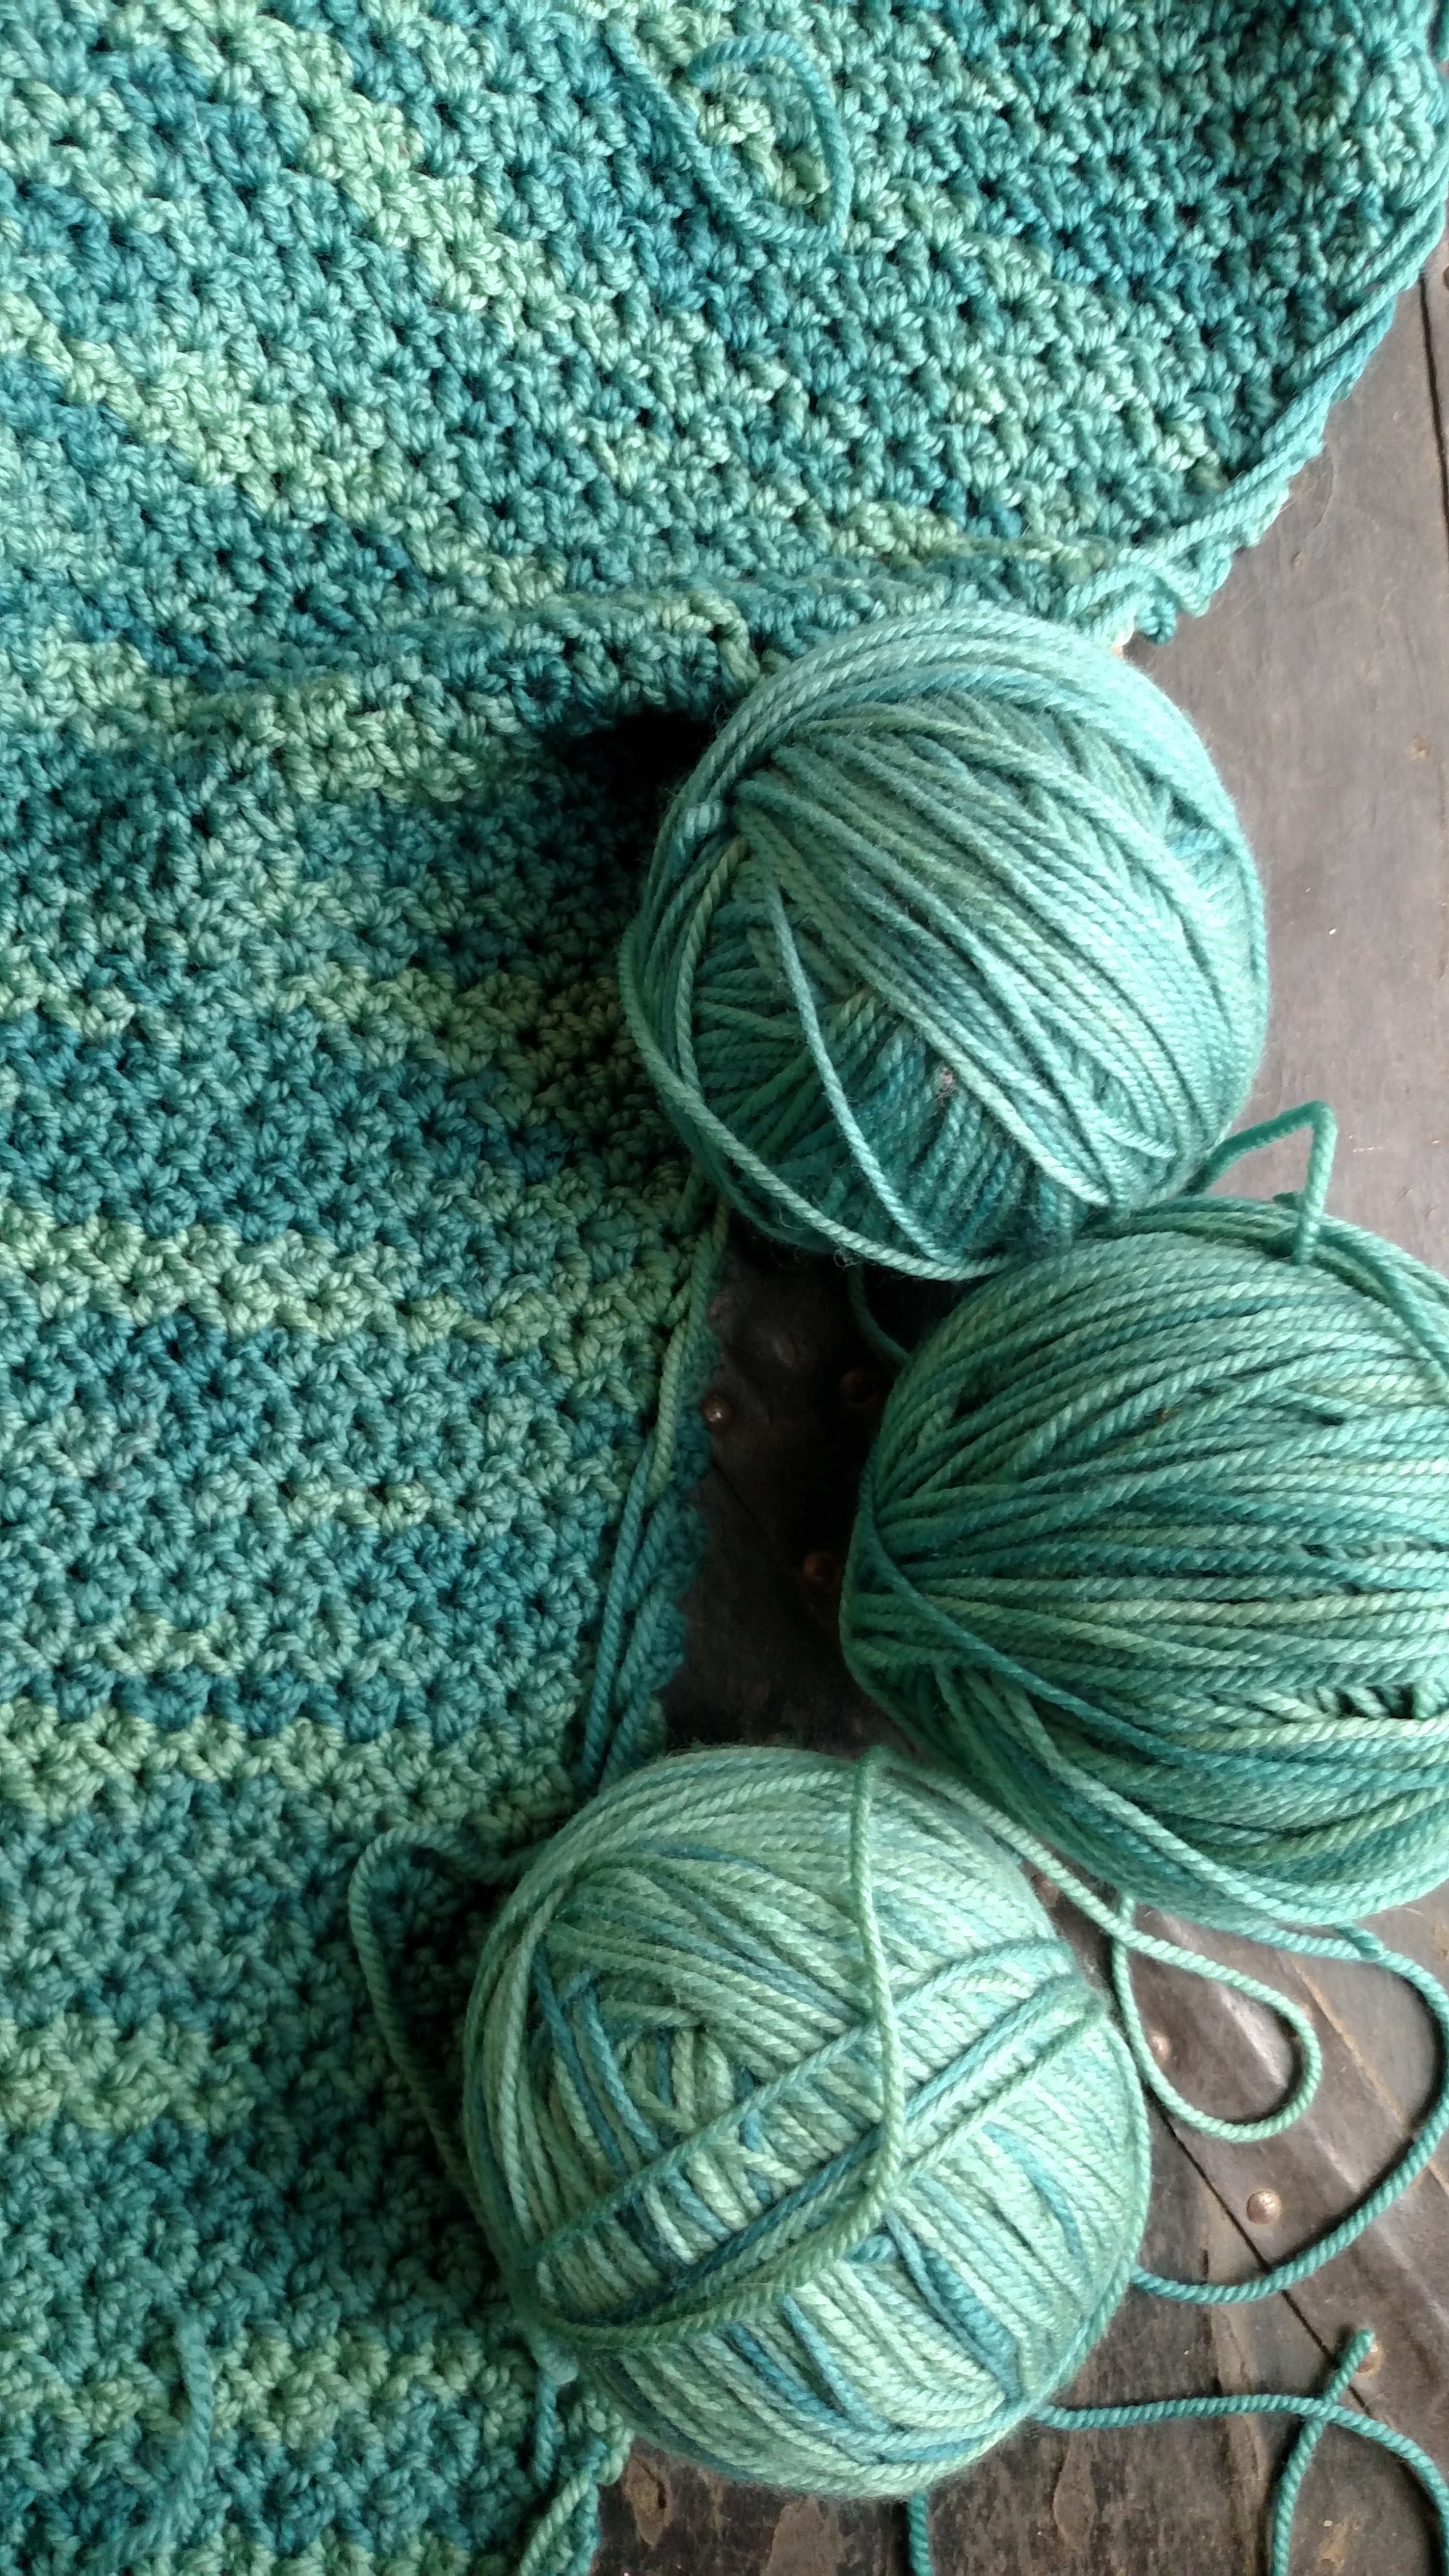
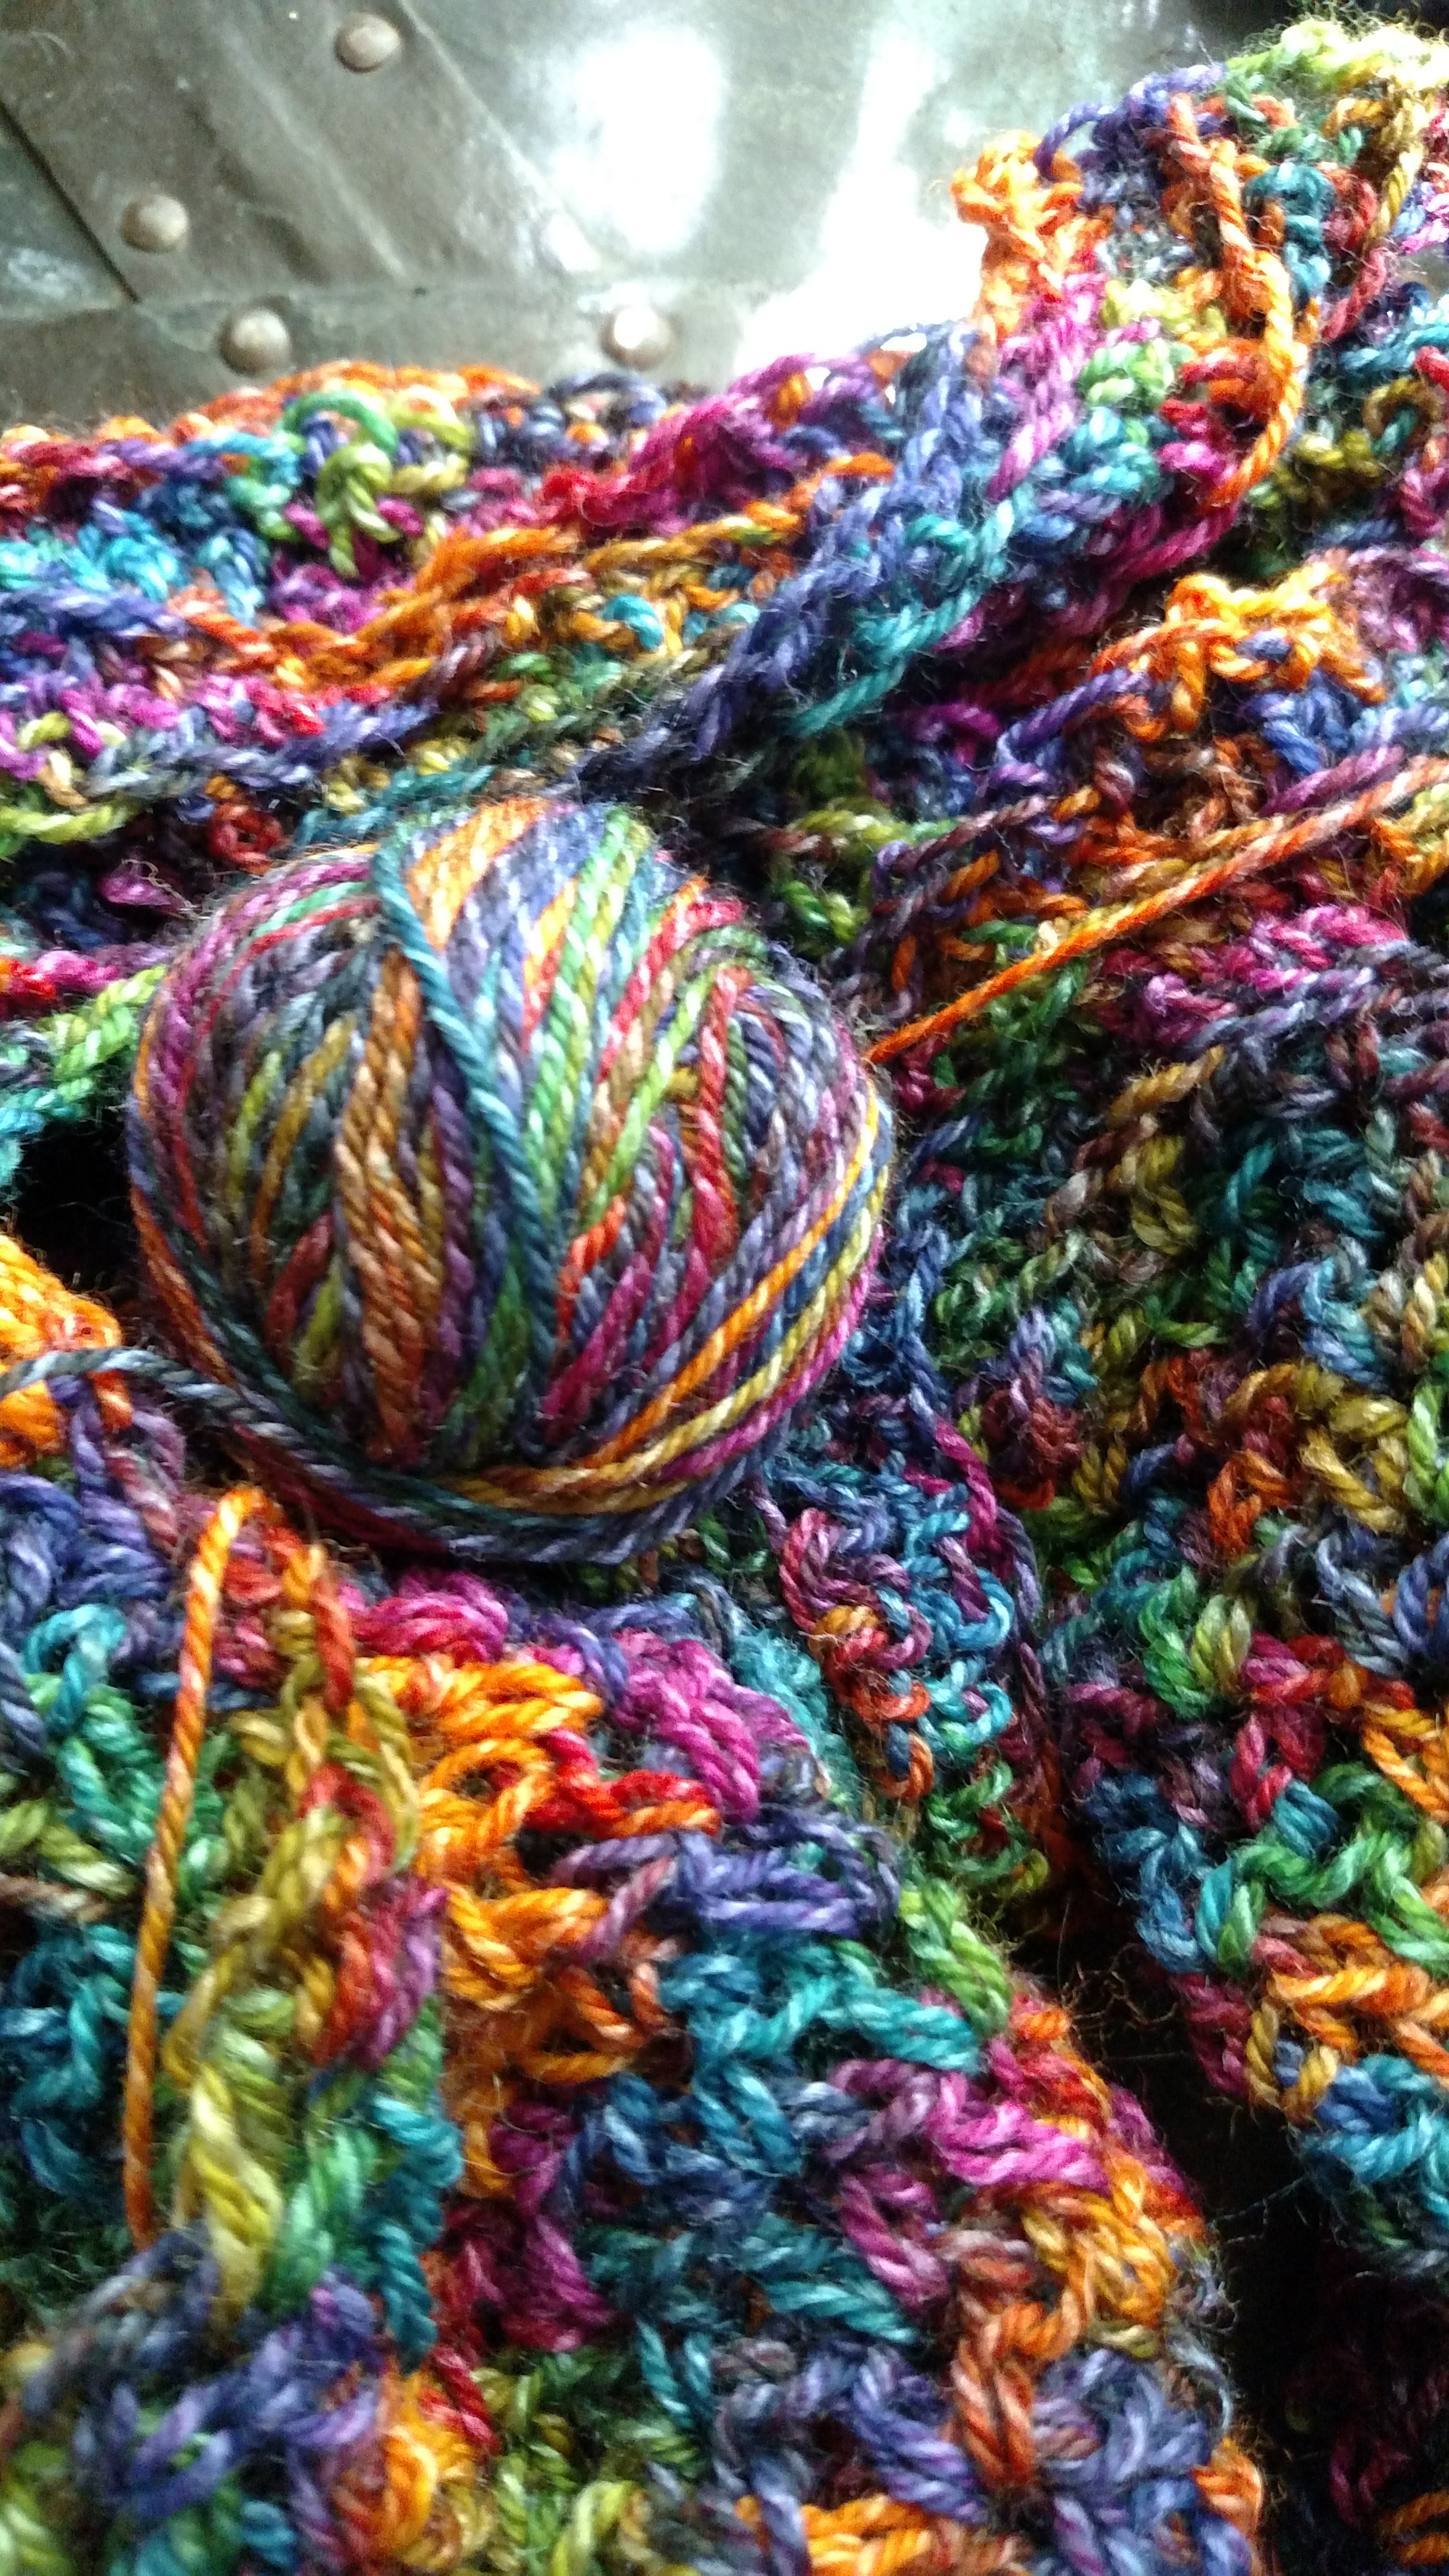
These 3 balls are the same color, but the dye lot has some slight shifts, so this fabric uses a different ball every 2 rows.

Dye lots are the critical factor for several, but not all yarns, and essentially it is telling you a specific time period that a yarn was created. This can be important to ensure that the colors from one skein matches that of another. If you want to ensure that your project has the same consistent color then you have to ensure the dye lots of the yarns match. Well, that is the given rule, but I have found that not even this is consistent.

So then what do you do if the color between the yarn skeins happen to be just a couple of shades off? I have had this happen, even within the same dye lots. It is uncommon in most commercial yarns, but it can become apparent in hand dyed or hand painted yarns, and how to fix it is to trick the eye.

The best practice is to work a couple of rows from one skein, and then a couple of rows from another and switch between at least 2 different skeins; sometimes I might even switch every couple of rows between 3 skeins. By making these changes in a consistent manner it creates an optical illusion to the eye and the subtle color differences will blend together when you look at it. This is much more beneficial than having a visually obvious line of exactly where your yarn changed in your project.

I would suggest that even if you suspect that there is a difference in the color shades that you use this alternating skeins in rows technique simply for the fact that when you are so close to your work the subtle details are not visible. When you step away and look at your work from afar and can see a visual line in your work, it feels like a punch in the gut, and unintended mistake. Some people find a way to live with it, others rip it all back. So, I error on the side of caution.

Yes, this will lead to more ends being woven in (I have some tips here). No one is really ever thrilled about that, however if I am going to spend the time to use a beautiful and unique yarn, I might was well take a couple of extra steps to ensure that my final project is the best that it can be.

The Classic Basics- Granny Square

The classics are classics for a reason. Crochet has some classic patterns and designs that always seem to draw people into wanting to learn the skill. A classic that I have had multiple students want to learn recently is the Granny Square.

The Granny Square is really a motif, and there are times when motifs in general are called Granny Square. At this discussion I am simply referring to the classic look of Double Crochet (treble crochet in UK terms) groups worked into chain spaces. This makes what almost appears to be checker board of “closed” and “open” squares.

The classic version has a different color on every round, and when the last round is worked entirely in single crochet (double crochet in UK terms) is worked in black. This is the way I was introduced to this classic, however today it is interesting to see it worked in all one color or worked extremely large.

To work your own Classic Granny Square (in US crochet terms)…

Chain 4, slip stitch to the first chain to form a ring.

Round 1: Chain 3 (counts as a double crochet now and throughout), working in ring, 2 double crochets, chain 3, [3 double crochets, chain 3] 3 times, slip stitch to the top of the beginning chain-3, finish off. -4 (3) double crochet groups, 4 chain-spaces

Round 2: With new color, slip stitch to any chain-3 space, chain 3, 2 double crochets in same space, chain 3, 3 double crochets in same space, chain 2, [3 double crochets in next chain-space, chain 3, 3 double crochets in same chain-space, chain 2] 3 times, slip stitch to the top of the beginning chain-3, finish off. -8 (3) double crochet groups, 4 chain-3 space, 4 chain-2 spaces

Round 3: With new color, slip stitch to any chain-3 space, chain 3, 2 double crochets in same space, chain 3, 3 double crochets in same space, chain 2, [3 double crochets in chain-2 space, chain 2, 3 double crochets in chain-3 space, chain 3, 3 double crochets in same chain-3 space, chain 2] 3 times, slip stitch to the top of the beginning chain-3 finish off. -12 (3) double crochet groups, 4 chain-3 spaces, 8 chain-2 space

Round 4: With black color, slip stitch to any chain-3 space, chain 1, 3 single crochets in same space, *[single crochet in each double crochet across to chain-2 space, 1 single crochet in chain 2 space] repeat across to chain-3 space, 3 single crochets in chain-3 space ; rep from * around, slip stitch to beginning single crochet, finish off. Weave in ends.

At this point the Granny Squares can be joined together to create any number of things.

To update this Classic pattern, it is relatively easy after you learn the basics of this design. Essentially the chain-3 spaces are the corners of the square, each time you come to a corner you work a group of 3 double crochets, chain 3, and another group of 3 double crochets in the chain-3 space. You then chain 2 to work along the “sides” of the square, this chain-2 is always worked over a group of 3 double crochets, creating an open space or square. In every chain-2 space 1 group of 3 double crochets are worked. So to bullet point it:

  • Work (3 dc, ch 3, 3 dc) in every ch-3 sp
  • Work ch 2 over groups of double crochets
  • Work 3 dc in every ch-2 sp

Following these simple rules you can create a Granny square of any size. Then for the classic edge you work a round of single crochets, with 3 single crochets in each ch-3 sp, a single crochet in each double crochet stitch, and 1 single crochet in each ch-2 sp.

If you do not want to change colors every round, then after joining, slip stitch in each double crochet across to the next chain-3 space, slip stitch in the chain- 3 space and begin the next round.

Check this classic out for yourself.


A Vacation from Crochet

I thought it would feel different, not crocheting for 2 weeks, but surprisingly it was a bit liberating.

I did not start out planning to put my hook and yarn aside through the entire holiday season, but that is what happened. My family and I took a holiday vacation, a true first for us. We were gone for 2 weeks taking a whirlwind guided tour of Europe, from London to Rome. It really has been a lifelong dream to actually have a passport stamps of travel, and the end of 2017 the stars aligned and the dream became reality. We visited Stonehenge, and the Eiffel Tower. We took in a show at the Moulin Rouge, and checked out the views from Mount Pilatus. We enjoyed dinner on the Grand Canal, and visited Michelangelo’s David. We were awestruck with the Sistine Chapel and the Colosseum. It was a lifetime of dreams wrapped into an adventure, an adventure we would love to do again.

I packed a couple of crochet projects and added them to my backpack. There is down time in travel, like the direct flights of over 10 hours, and the coach rides across the French country side, or the moments before sleep in the hotel. However, I was captivated by the dream, engaged in conversations with my new traveling companions, and spending quality time with my family.

When I got home again, and dug those projects out of my backpack, they felt fresh and new. It was like my whole body, all of my ideas and inspirations were able to be rejuvenated and see my stitches with fresh eyes. I cannot remember when I last felt that way about my hand craft, it has to have been at least several years, and I do not know that just putting it down at home without the adventure would have yielded the same result. My hooks feel lighter, my ideas crisper, I hope this side effect has some staying power, but if it doesn’t at least I have an idea of how to recapture it again.

Crochet Ups & Downs

How is it that WIPs (Works In Progress) can multiply and haunt you? How is it I can love to crochet yet not have the desire to do one more stitch on the afghan? Why is it that time can stand still with some projects?

I think we have all had these questions, I know I find them popping up in projects that are not even crochet related. In the beginning I have a plan, I am completely excited…the something happens. I don’t know what it is exactly, maybe I get bored, or I hit a snag in my plan. Maybe the next project just looks so much more exciting.

Yes, this is a challenge, even as I crochet for a living. In some cases if it wasn’t for a deadline some designs may not get completed. Not that they are not good designs or that I don’t love them but they sometimes fall into a rut and have to get put into time out.

Sometimes I think I am a bit manic in my crochet, I will crochet for non-stop for hours finishing project after project…then I hit a spell where I cannot even pick up a hook. My yarn and hook just stare at me, causing me guilt…I should be working on that project…I want to complete that idea…but I am stalled. I really do set goals every morning about what project needs to get done, and how far I need to get, but some days work a bit better than others.

I shouldn’t beat myself up too much, this is not the only area in my life this can appear nor am I the only one afflicted. There are always some home improvement projects around the house that haven’t quite been finished. There are always some art or craft projects that are half done; the garden seems to get partially started every year but never really finished. Some of it is that plans change part way through, others that the skill might exceed the ability.

Fortunately the slump always passes and the projects always get finished. Fortunately somehow everything balances out. So I will try and be a little nicer to myself when I just cannot pick up a hook. It is not a reflection of my love of craft it is just finding balance.

Inspiring Book & Give Away! Quick Crochet for the Home

I do not often do reviews. This has been a personal issue for me, as I don’t want to feel like I am just “hocking” items and adding an endorsement to everything in the hopes of gaining more followers or the like. I want to actually mean what I say and have those that read my work realize that I am taking caution in sharing my views. I know I could share negative thoughts in a review, but really I would prefer if I couldn’t say something nice, that I not say anything at all. So I am selective.

When I was asked if I would be interested in reviewing the first book written by Tamara Kelly, aka Mooglyblog.com, I was flattered, but a bit apprehensive. I consider Tamara a friend, so it doubly feels like I cannot say anything negative, especially about her first book. Fortunately, after reading through it I can easily stay to my “moral high ground” of endorsements, as the book is really very nice and well done.

The book, Quick Crochet for Home, honestly would not have been the first book I would have considered for my bookshelf. This is because I have done so many home décor projects over the years that I thought I couldn’t find any that would inspire me anymore, I was wrong. Tamara applies some techniques in ways that I had not considered before and helped me to look at home décor with fresh eyes.

When checking out the Around the Table Trivet I was surprised that there was no cording listed in the materials, as looking at the photo images it appeared that the rounds were well padded, then I noticed that there was not spiral effect of the rounds. The genius of the pattern has one round worked over the adjacent round! So there is not obvious join, and it creates its own padding…genius! It is one of those, why didn’t I think of that moments.

Then her Chevron Cuddles Blanket takes the challenge of the increase and decrease stitches out of the famous crochet design of zig zags, and worked the design side to side carrying different colors instead of working each color as a separate row. This has some definite benefits, such as being easier of newer crocheters, and allowing you to really envision how the colors come together well before you have finished the project. You only have to know how to double crochet, and change colors…it is that simple, yet looks much more challenging.

I also found that the book was well presented, layout well, offered well written patterns and charts. Another bonus, it has photography that actually helped you understand the project, not just look really pretty.

I found inspiration in several of the other designs as well, but I am pleasantly surprised at how much I enjoyed going through this book. There is a little something for everyone, there are patterns that you will easily work over and over again, as well as others that might only wait for the perfect moment. Tamara shares several different original ideas in her approach to her designs, and I am sure that you will find something that you will create.

As an added bonus, I have the opportunity to GIVE AWAY a FREE copy of Quick Crochet for the Home by Tamara Kelly, to one lucky reader! Simply leave a comment telling me what your favorite item is to crochet…whether it be home décor or something else, by midnight Friday, September 1, 2017. The following day one comment will be selected at random to choose the winner.